Single Sign-on (SSO)
UpdatedOrganizations that need enhanced security requirements can configure their Customer.io account to use Single Sign-on (SSO).
To enable/disable SSO for your account, you must be an Account Admin.
How to set up SSO
The process for configuring SSO will depend on your specific identity provider (IdP). Customer.io has dedicated integrations with the following providers and protocols:
- SSO with Google for organizations
- SSO with Google for consumers
- SSO with Okta—see SSO with SAML 2.0 for another option
- SSO with Microsoft Entra
- SSO with OpenID SSO—works with a variety of providers
- SSO with SAML 2.0—works with Okta, Cloudflare, and JumpCloud
We only support Service Provider (SP)-initiated SSO
Frequently Asked Questions
What is OpenID Connect and how does it differ from SAML?
OpenID Connect is a security standard for logging into applications, built on the OAuth 2.0 protocol. It uses an additional JSON Web Token (JWT), called an ID token, to standardize areas that OAuth 2.0 leaves up to choice, such as scopes and endpoint discovery. It is specifically focused on user authentication and is widely used to enable user logins on consumer websites and mobile apps. Learn more about OpenID Connect.
Security Assertion Markup Language - SAML - is also a widely used authentication protocol for logging into apps but built on the SAML 2.0 specification.
Unlike OpenID Connect, SAML allows you to include various attributes in the SAML statement sent to the SaaS application based on the mapping of attributes in your Identity Provider (IdP).
How do I require 2FA with SSO?
When you use SSO with Customer.io, you must enable 2FA within your identity provider. (Before you can enable SSO in Customer.io, you must disable Customer.io’s 2FA feature.)
I’m able to log in with Google. Is that the same as Google SSO?
No, it is not. “Log in with Google” is an option on the Customer.io sign-in page to quickly and securely log in, but team members can still use their email and password during sign-in. To block team members from signing in with an email/password, you must enable Google SSO on the Account Security page.
Manage team members
How do I add a new team member to my account after enabling SSO?
For most integrations, you’ll need to add/remove team members from your IdP and add/remove them from Customer.io. Your team members must have matching email addresses across Customer.io and your IdP.
However, when you set up a SAML integration and enable SCIM, team members you add or remove from your IdP will automatically be added or removed from Customer.io. You can only manage roles and permissions within Customer.io.
In either case, a new team member will receive an email prompting them to log in. They won’t need to set a password, just enter their email into the Customer.io login page.
Is there any sync between my Identity Provider (IdP) and the team member list in Customer.io?
By default, no. You have to maintain access in both your IdP and Customer.io. However, if you enabled SCIM 2.0 on a SAML integration, your team member list will update based on those added and removed from your IdP automatically.
Keep in mind, you can only manage roles and permissions within Customer.io. Make sure your team members have the right access.
Can I manage team member roles through my Identify Provider (IdP)?
It’s not possible to define a user’s permissions via your IdP. You can only manage a user’s permissions in Customer.io. Manage team permissions
Reach out to support at win@customer.io if you’re still experiencing issues with enabling SSO.
I have two (or more) Customer.io accounts. Can I link both to my Identity Provider (IdP) account?
Yes, you can, by adding two Customer.io applications within your IdP account. Repeat the steps that apply to your provider for each Customer.io account. Make sure the usernames in each app in your IdP match the corresponding usernames in Customer.io: Account Settings > Team Members.
How do I force an account to log out?
To invalidate someone’s active sessions in your Customer.io account, delete the team member from Account settings > Team Members.
Do you support SLO?
We do not support Single Logout (SLO) - the ability for someone to log out of one application which triggers a log out from all applications using the same credentials. For instance, your team member can’t log out of Customer.io and then trigger a log out of Salesforce.
SSO with Google
You can either set up organization-level SSO or consumer-level SSO with Google. If your company uses Google Workspace to manage your employees’ identities, you can set up SSO with Google for organizations. If you use consumer-level Google accounts, like gmail addresses, check out SSO with Google for consumers.
Learn more about Google identity management.
SSO with Google for organizations
If you’re using Google Workspace (formerly G Suite) to manage your employees’ identities, then you can enable organization-level SSO for teammates who use Customer.io. If you have a consumer-level Google account (like a gmail address), go to SSO with Google for consumers.
To get started, you must:
- Have a Google Workspace account
- Be an Account Admin in Customer.io
- Disable 2FA for logging into Customer.io
Ensure your team members have Google Workspace identities
After you enable Google SSO, only team members in both your Google Workspace account and Customer.io will be able to log in. Any team members with an external email address won’t be able to log in until they are given an identity (email address) in Google Workspace and updated accordingly in Customer.io.
To enable SSO with Google Workspace:
- Make sure your team members have email addresses that match those in your Google Workspace account.
- Go to Account Settings > Security > Enable Single Sign-On and click Google SSO.
- At the bottom of the page, click Sign in with your Google account. This will open a Google authorization window asking you to choose the account you’d like to use with Customer.io. Make sure to choose the Google email account used by you and your team to log in—anyone with a different email domain will not be able to log in.
After your complete setup, our system logs out all team members in Customer.io. They must sign in with Google moving forward; they can no longer sign in with username/password.
SSO with Google for consumers
If you don’t have organization-level Google SSO, you can sign in with a consumer account. If you own a gmail address like alice@gmail.com, then your gmail account is a consumer account. Similarly, if you use the Create account link on the Google Sign-In page and during signup you provide a custom email address that you own, such as alice@example.com, then the resulting account is also a consumer account.
You can sign up to Customer.io using this method. But if you signed up using a username and password, you can link your Google account later.
To enable SSO with Google for your consumer account:
- Go to Settings > Personal Settings and click Link Google Account.
- Enter your password.
For future logins, you won’t be able to sign in with a username/password. Rather, you’ll click Sign in with Google to proceed.
By default, you will have to sign in with two-factor authentication via email. But you can change this to 2FA with an authentication app in settings instead.
SSO with Okta
Requirements
To configure SSO with Okta, you must have:
- an existing Okta account,
- an Account Admin role in Customer.io, and
- Disable “Require 2FA” for your Customer.io account.
Supported Features
This implementation supports User Authentication. After a team member is added to your Customer.io account, they’ll be asked to authenticate with Okta in order to log in.
No other features (like profile sync, provisioning, etc.) are supported at this time.
Okta SSO Configuration Steps
Setting up Okta SSO with Customer.io is a two-step process. You’ll first add the Customer.io Application to your Okta account. Then, you’ll configure your Customer.io security settings to connect to Okta.
After setup is complete, team members will be immediately required to re-login to Customer.io using their Okta credentials. Their current work may be interrupted.
Part 1: Add Customer.io Application to Okta
- Add Customer.io to your Okta account by going to your Applications page, clicking Browse App Catalog and searching for Customer.io.

- On the opened page, click Add to install the Customer.io integration.
- You’ll be asked to provide an Application label (Customer.io) and configure whether the application should display to users or auto-submit with the browser plugin. Select your preference and click Next (these can be changed later).
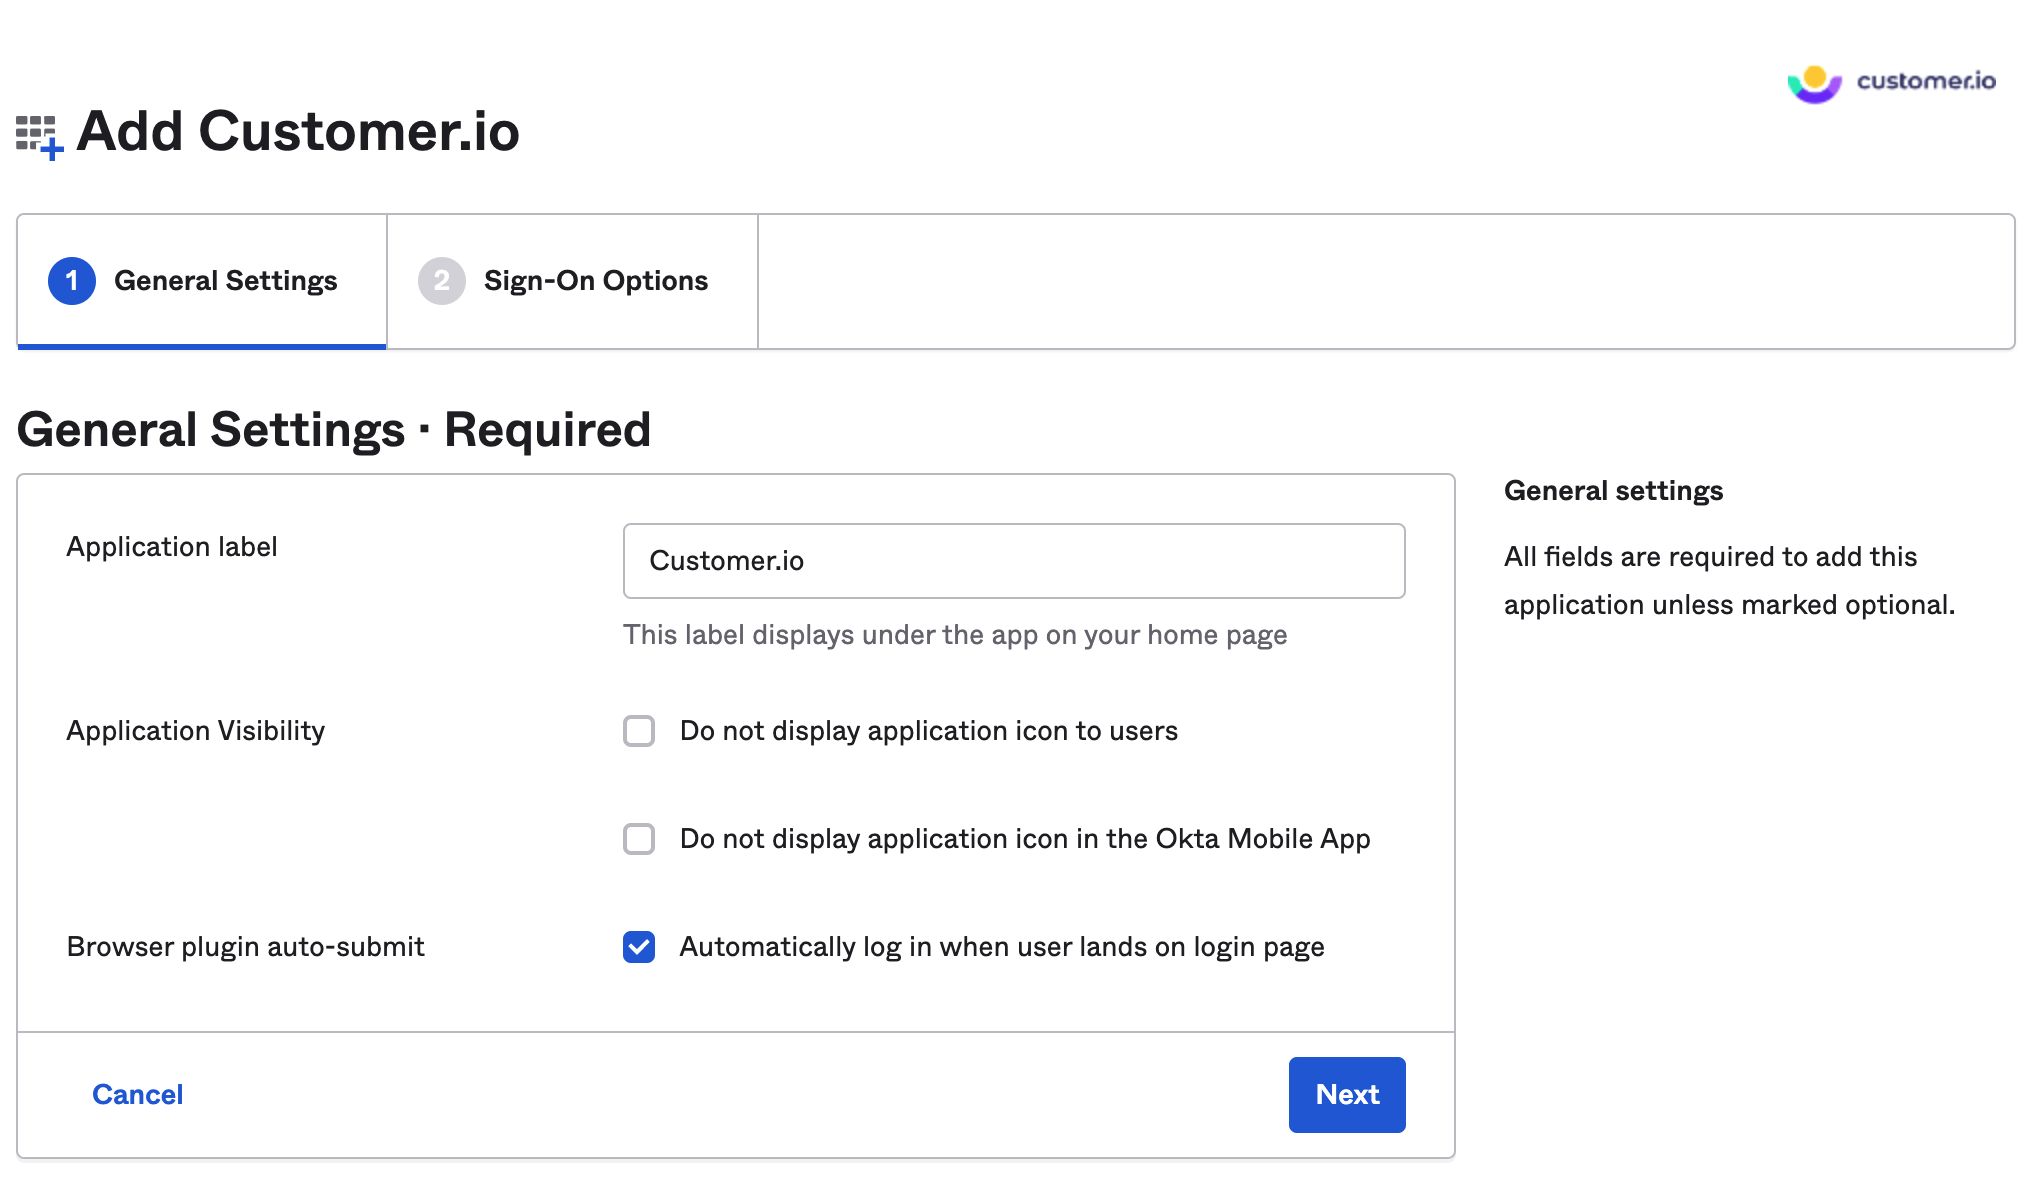
- Next, you’ll see Step 2: Sign-On Options. Select OpenID Connect and click Done.

- After you click Done, the application will be added to your Okta org and is ready to be assigned to your team members. Click Assign to add the team members or groups who will be accessing Customer.io, including yourself!
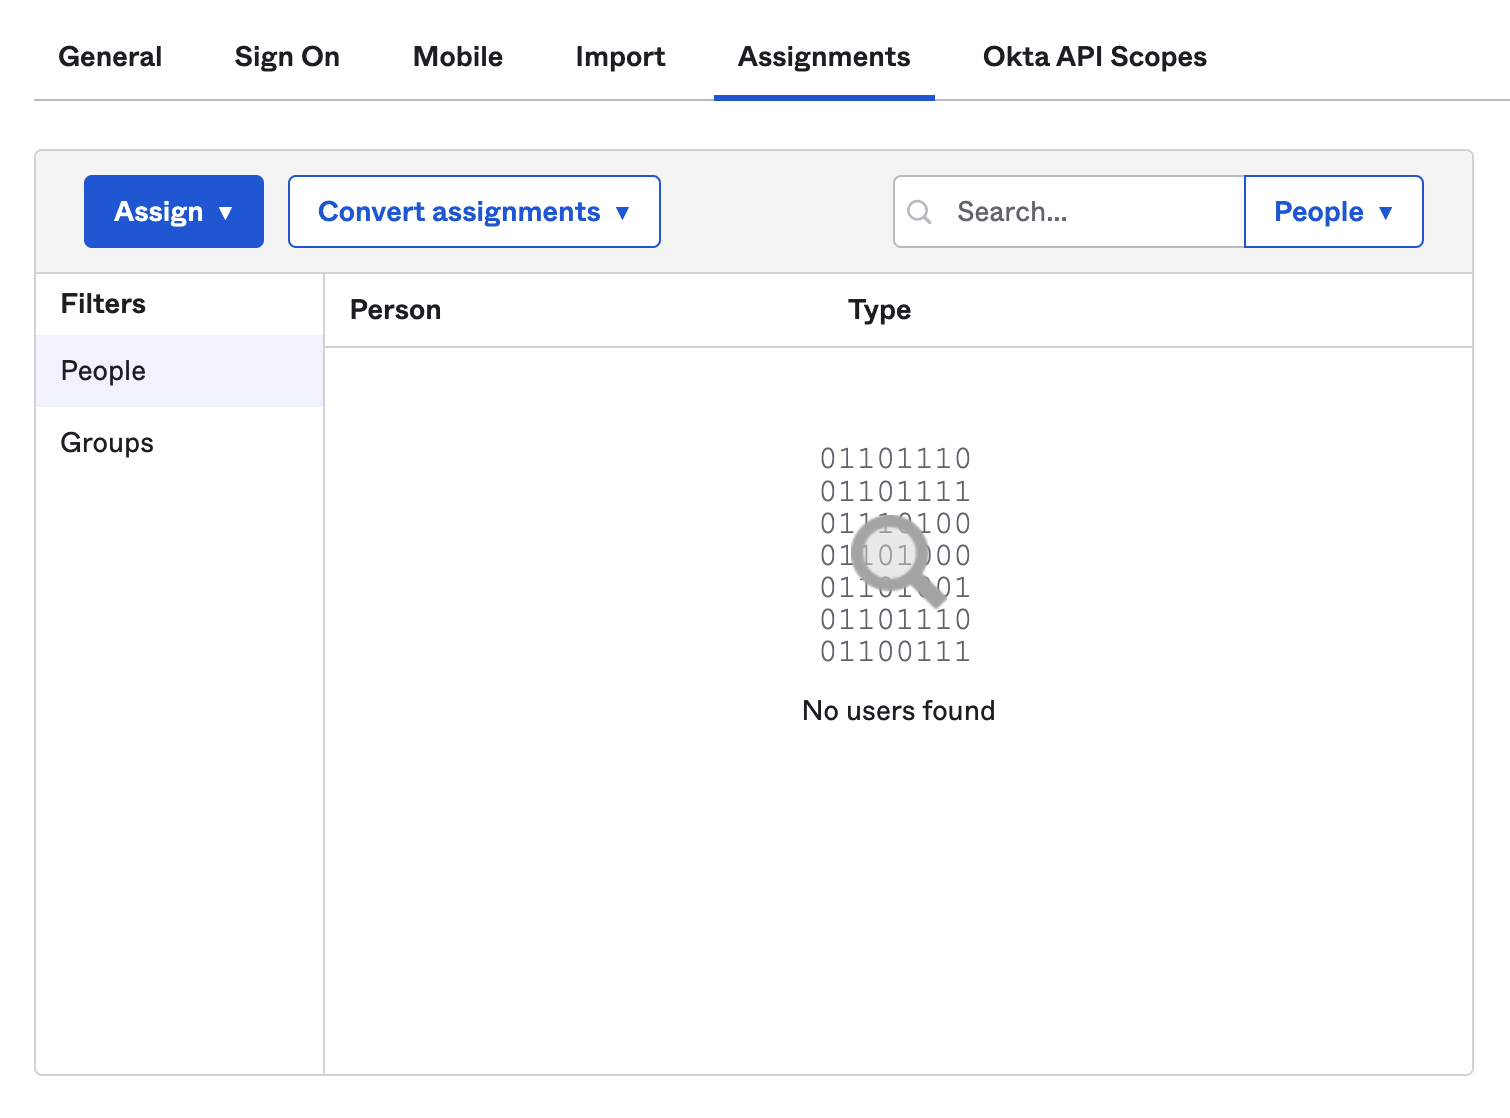
- Once you’ve added People, keep the Okta window open and move to Step 2 below.
Part 2: Configure Okta SSO in Customer.io
- Open a new window and get ready to set up SSO in your Customer.io account. Log in to Customer.io and navigate to the Security page of Account Settings.
- On the Security page, select Configure SSO.
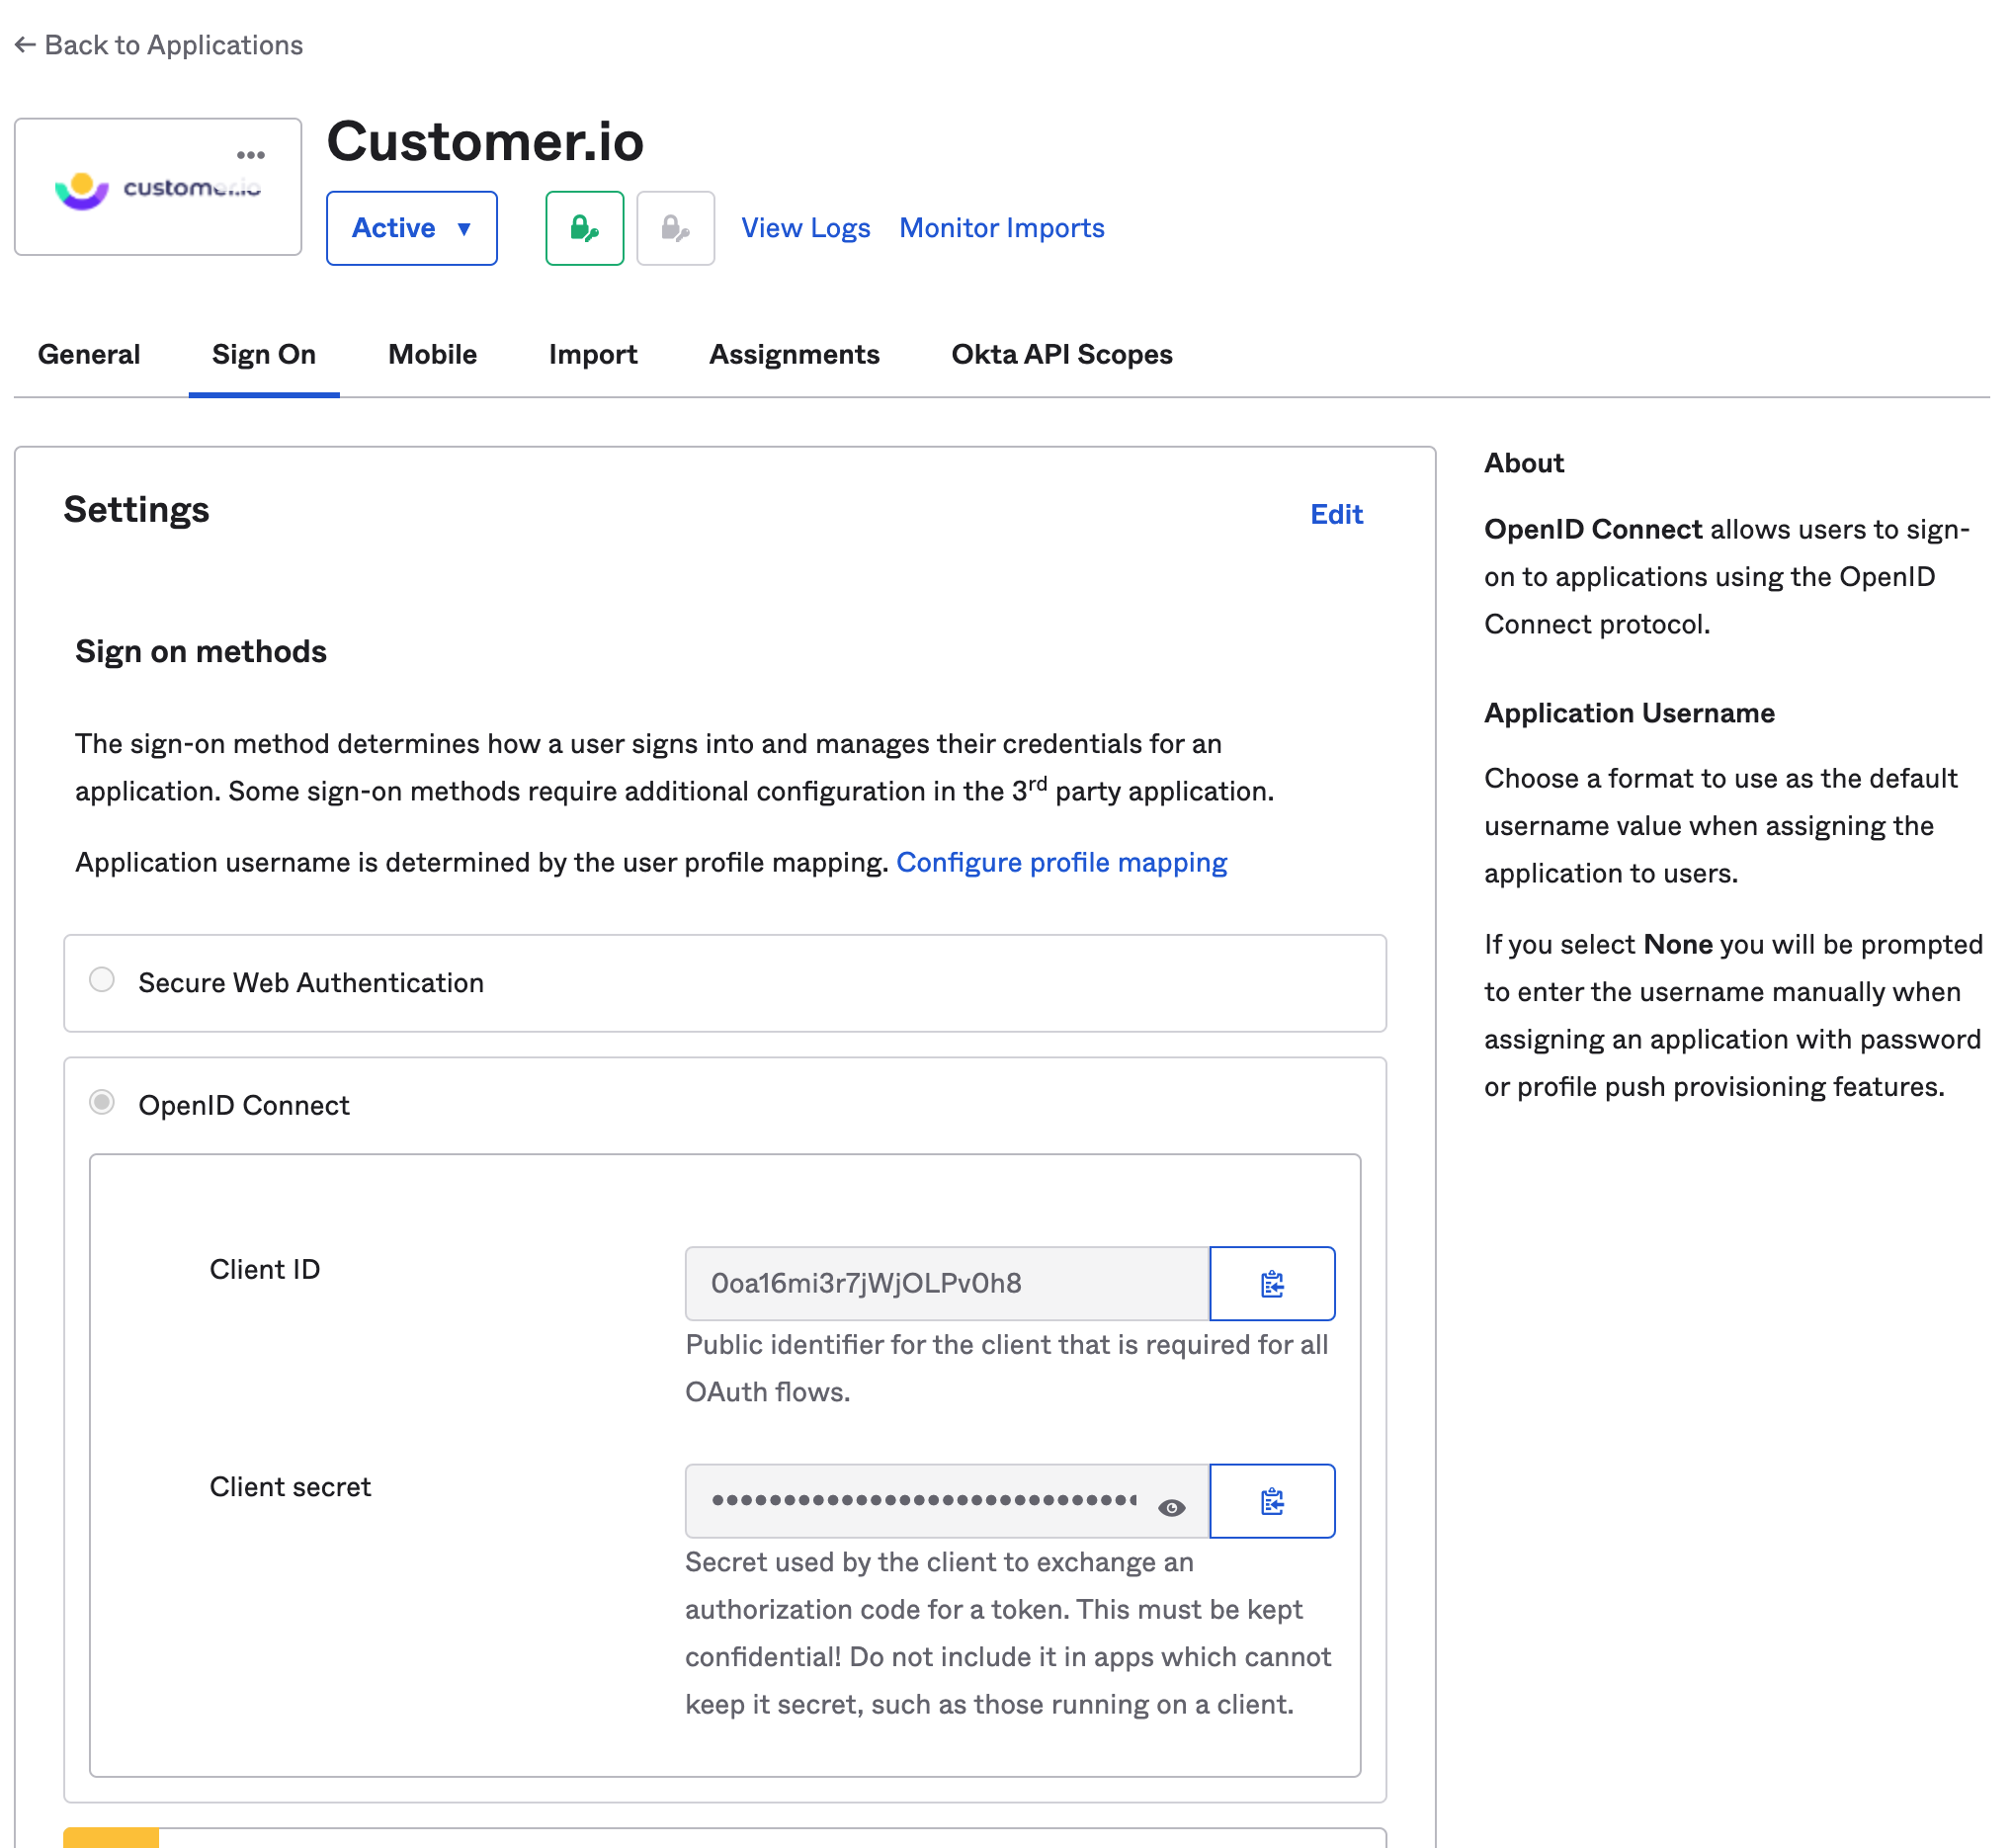
- Select Okta SSO with OpenID Connect to show the configuration settings.
- In the Configuration form, enter the following information:
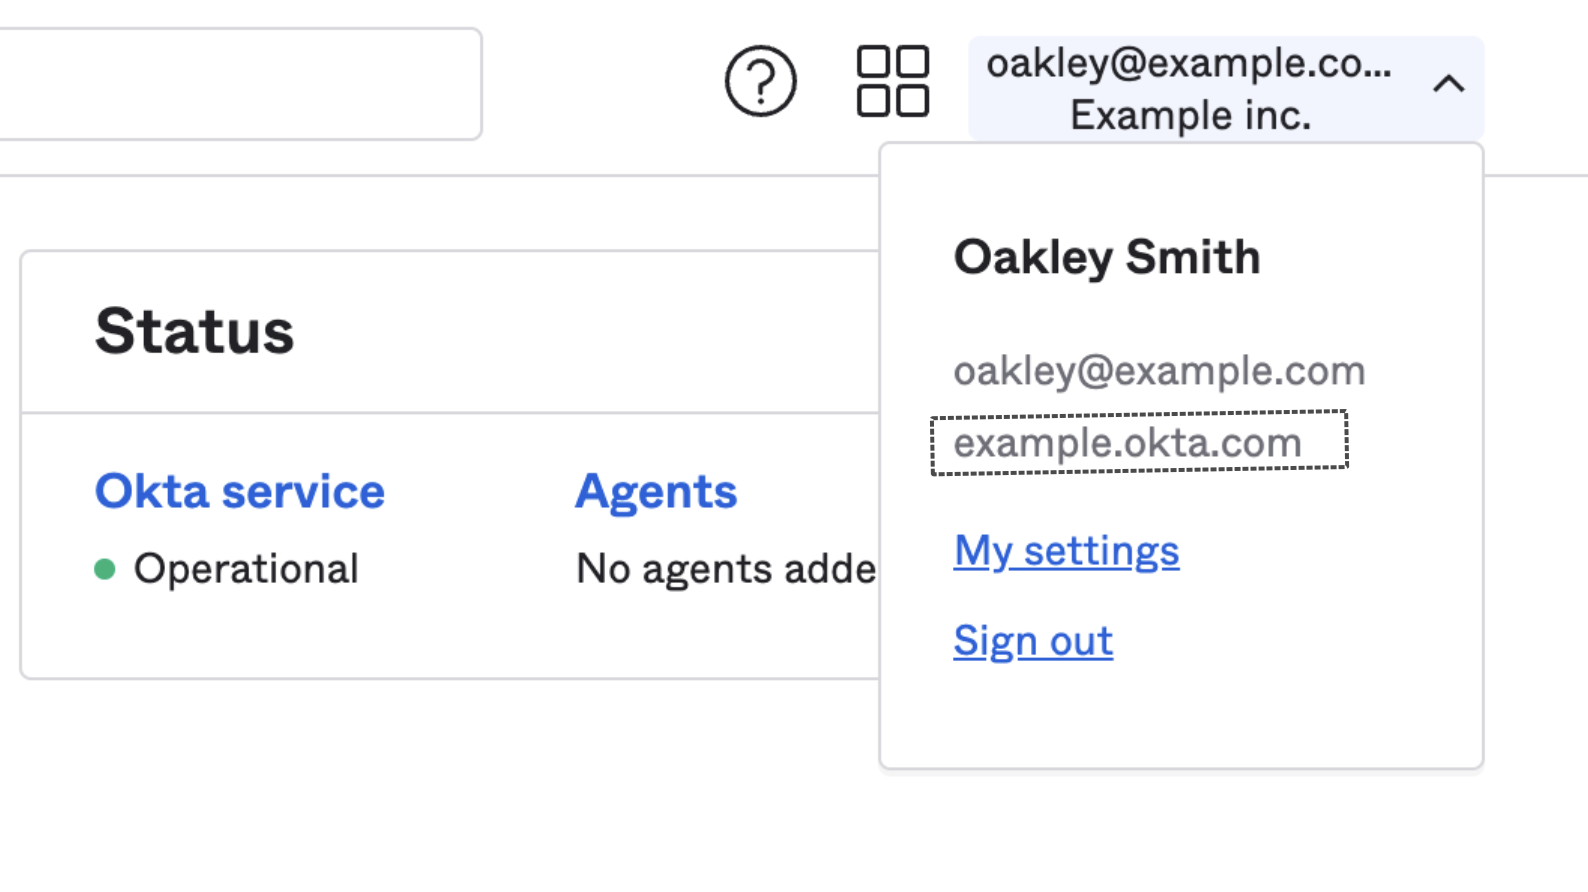
- Okta Organization URL: This can be found in your Okta dashboard header and typically follows the format of https://[companyname].okta.com. Learn more about Okta Org URLs.
- Okta Application Client ID and Client Secret: Go back to your Okta window and look for the Client ID and Client Secret on the Sign On tab of the Customer.io Application.
- Okta Organization URL: This can be found in your Okta dashboard header and typically follows the format of https://[companyname].okta.com. Learn more about Okta Org URLs.
- Click Authenticate your Okta account to confirm the connection and enable SSO.
- Once the connection is authenticated, you’ve successfully enabled SSO for you and your team members.
SSO with Microsoft Entra
Requirements
To configure SSO with Entra ID, you must:
- Have an existing Azure account
- Have an Account Admin role in Customer.io, and
- Disable “Require 2FA” for your Customer.io account
Register a new app
You can find more info on setup in Microsoft Entra’s Quick Start Guide.
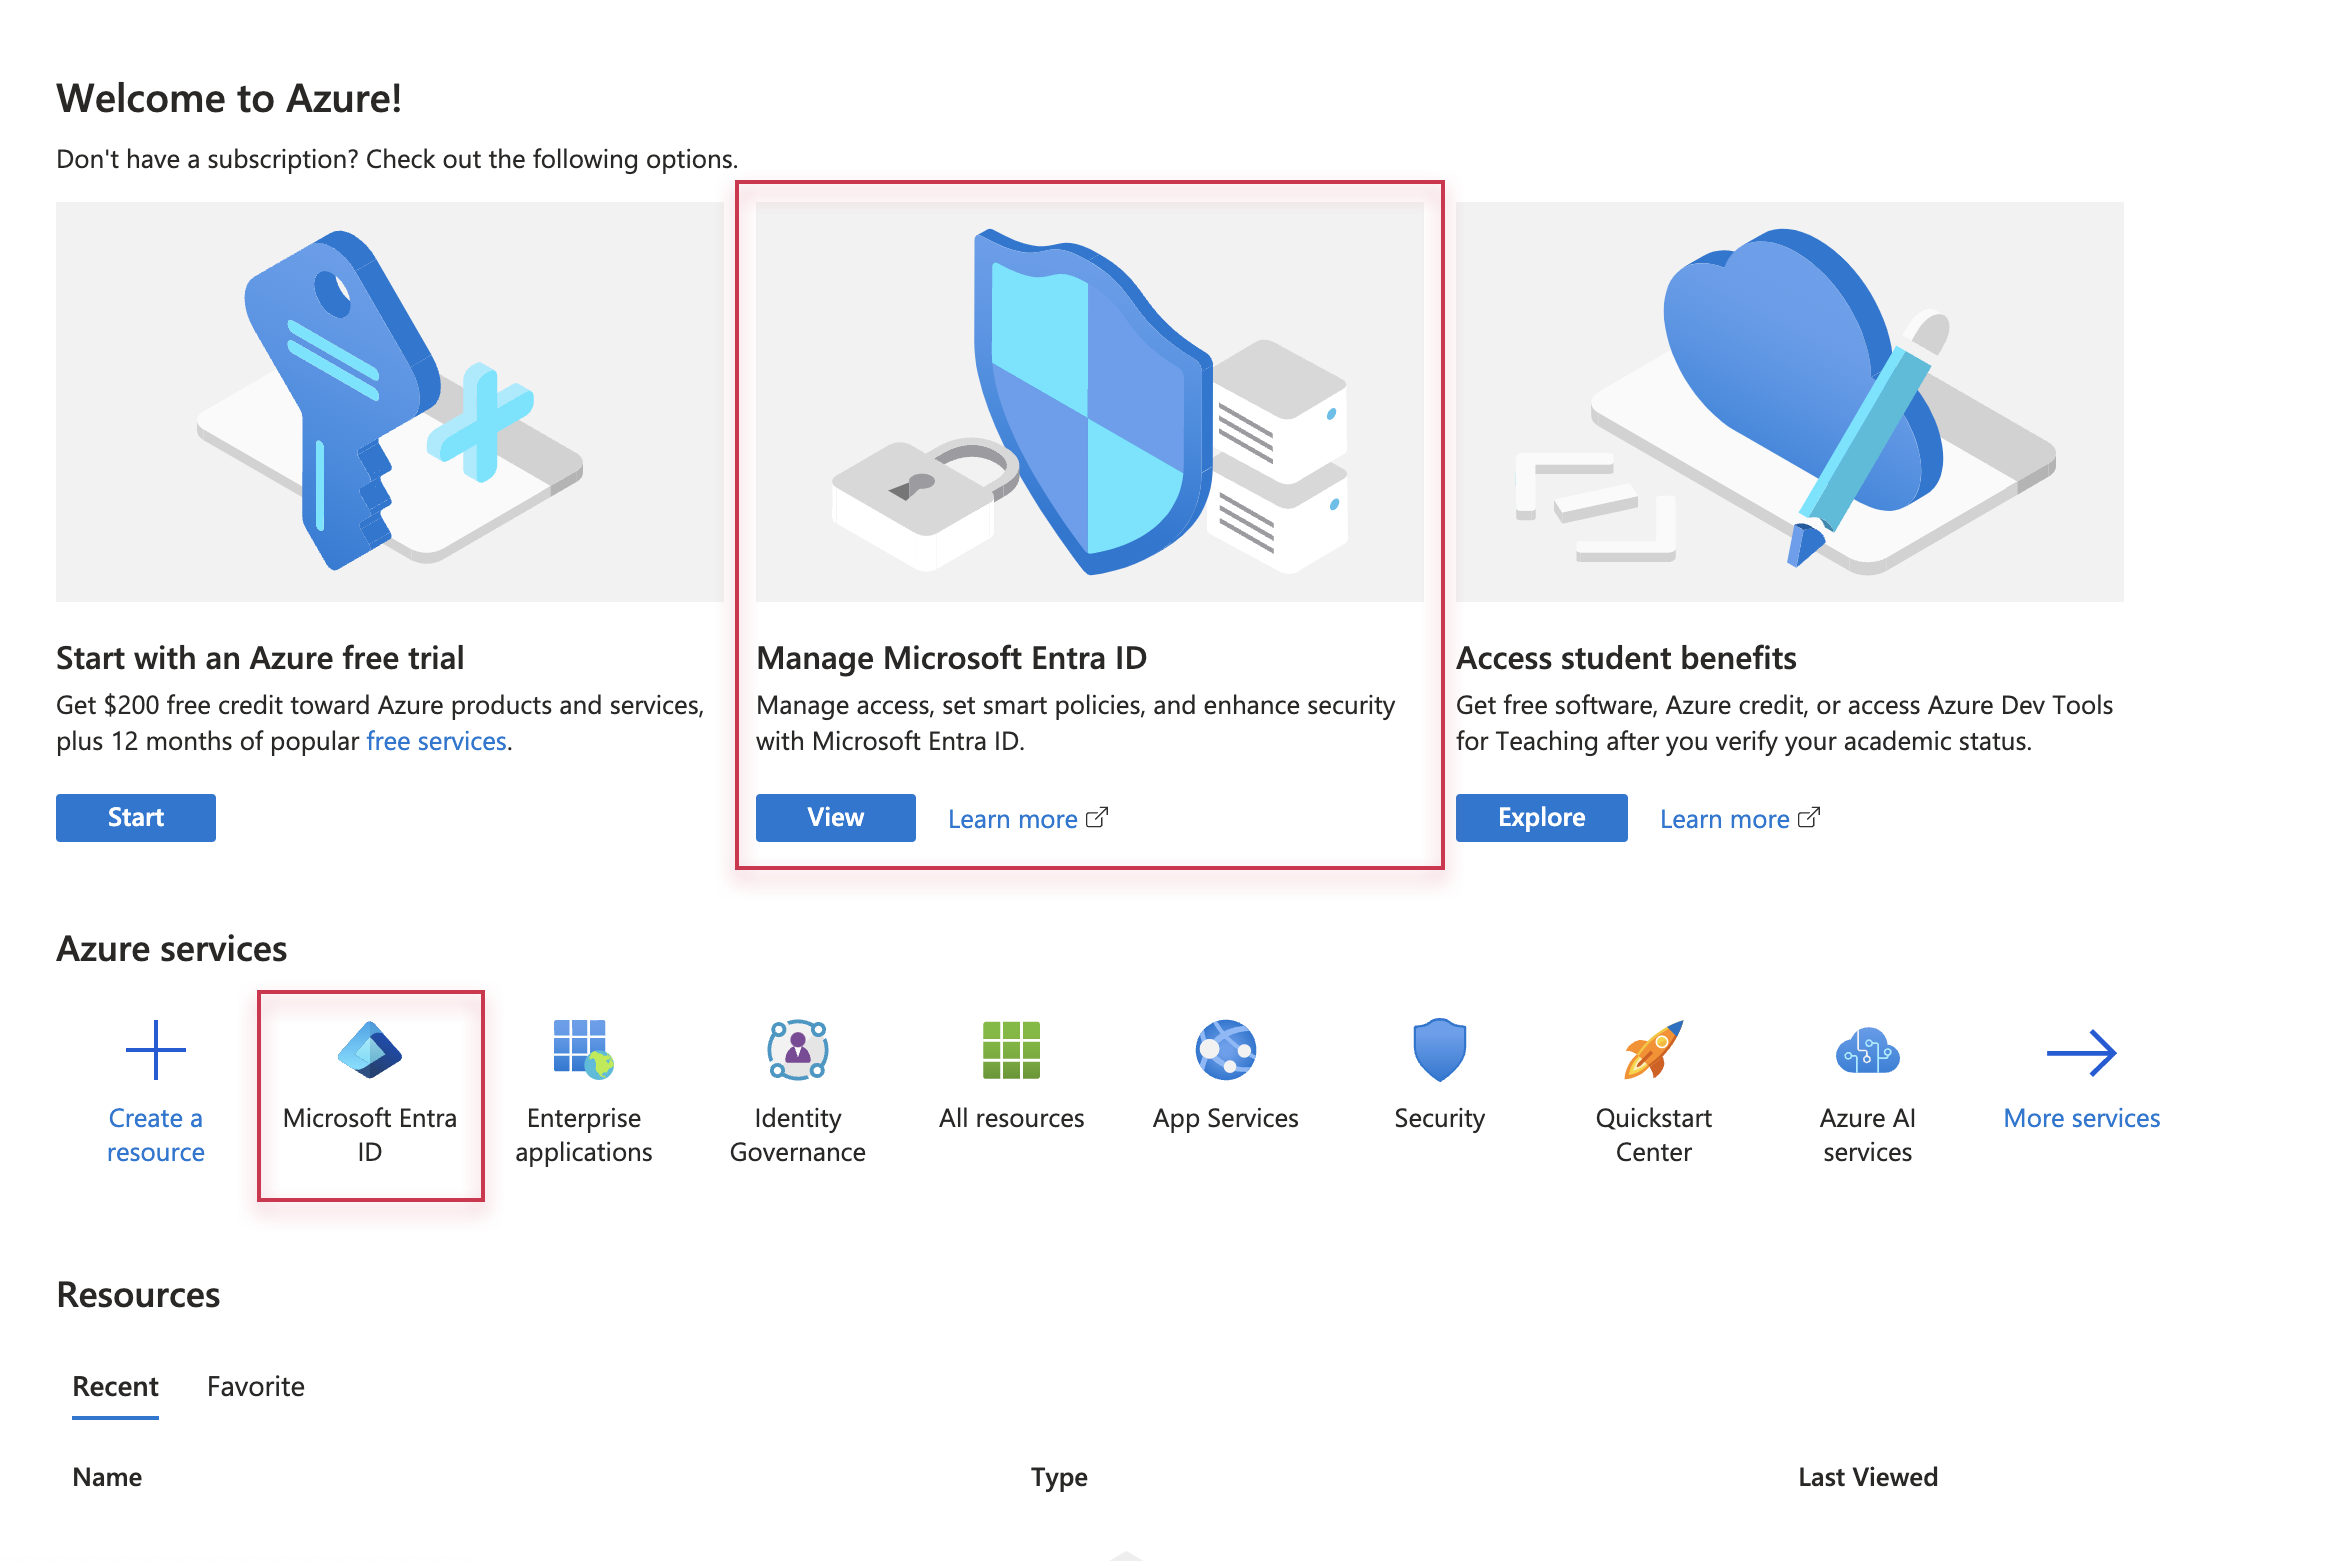
- Log into your Microsoft Azure account and go to Microsoft Entra ID.
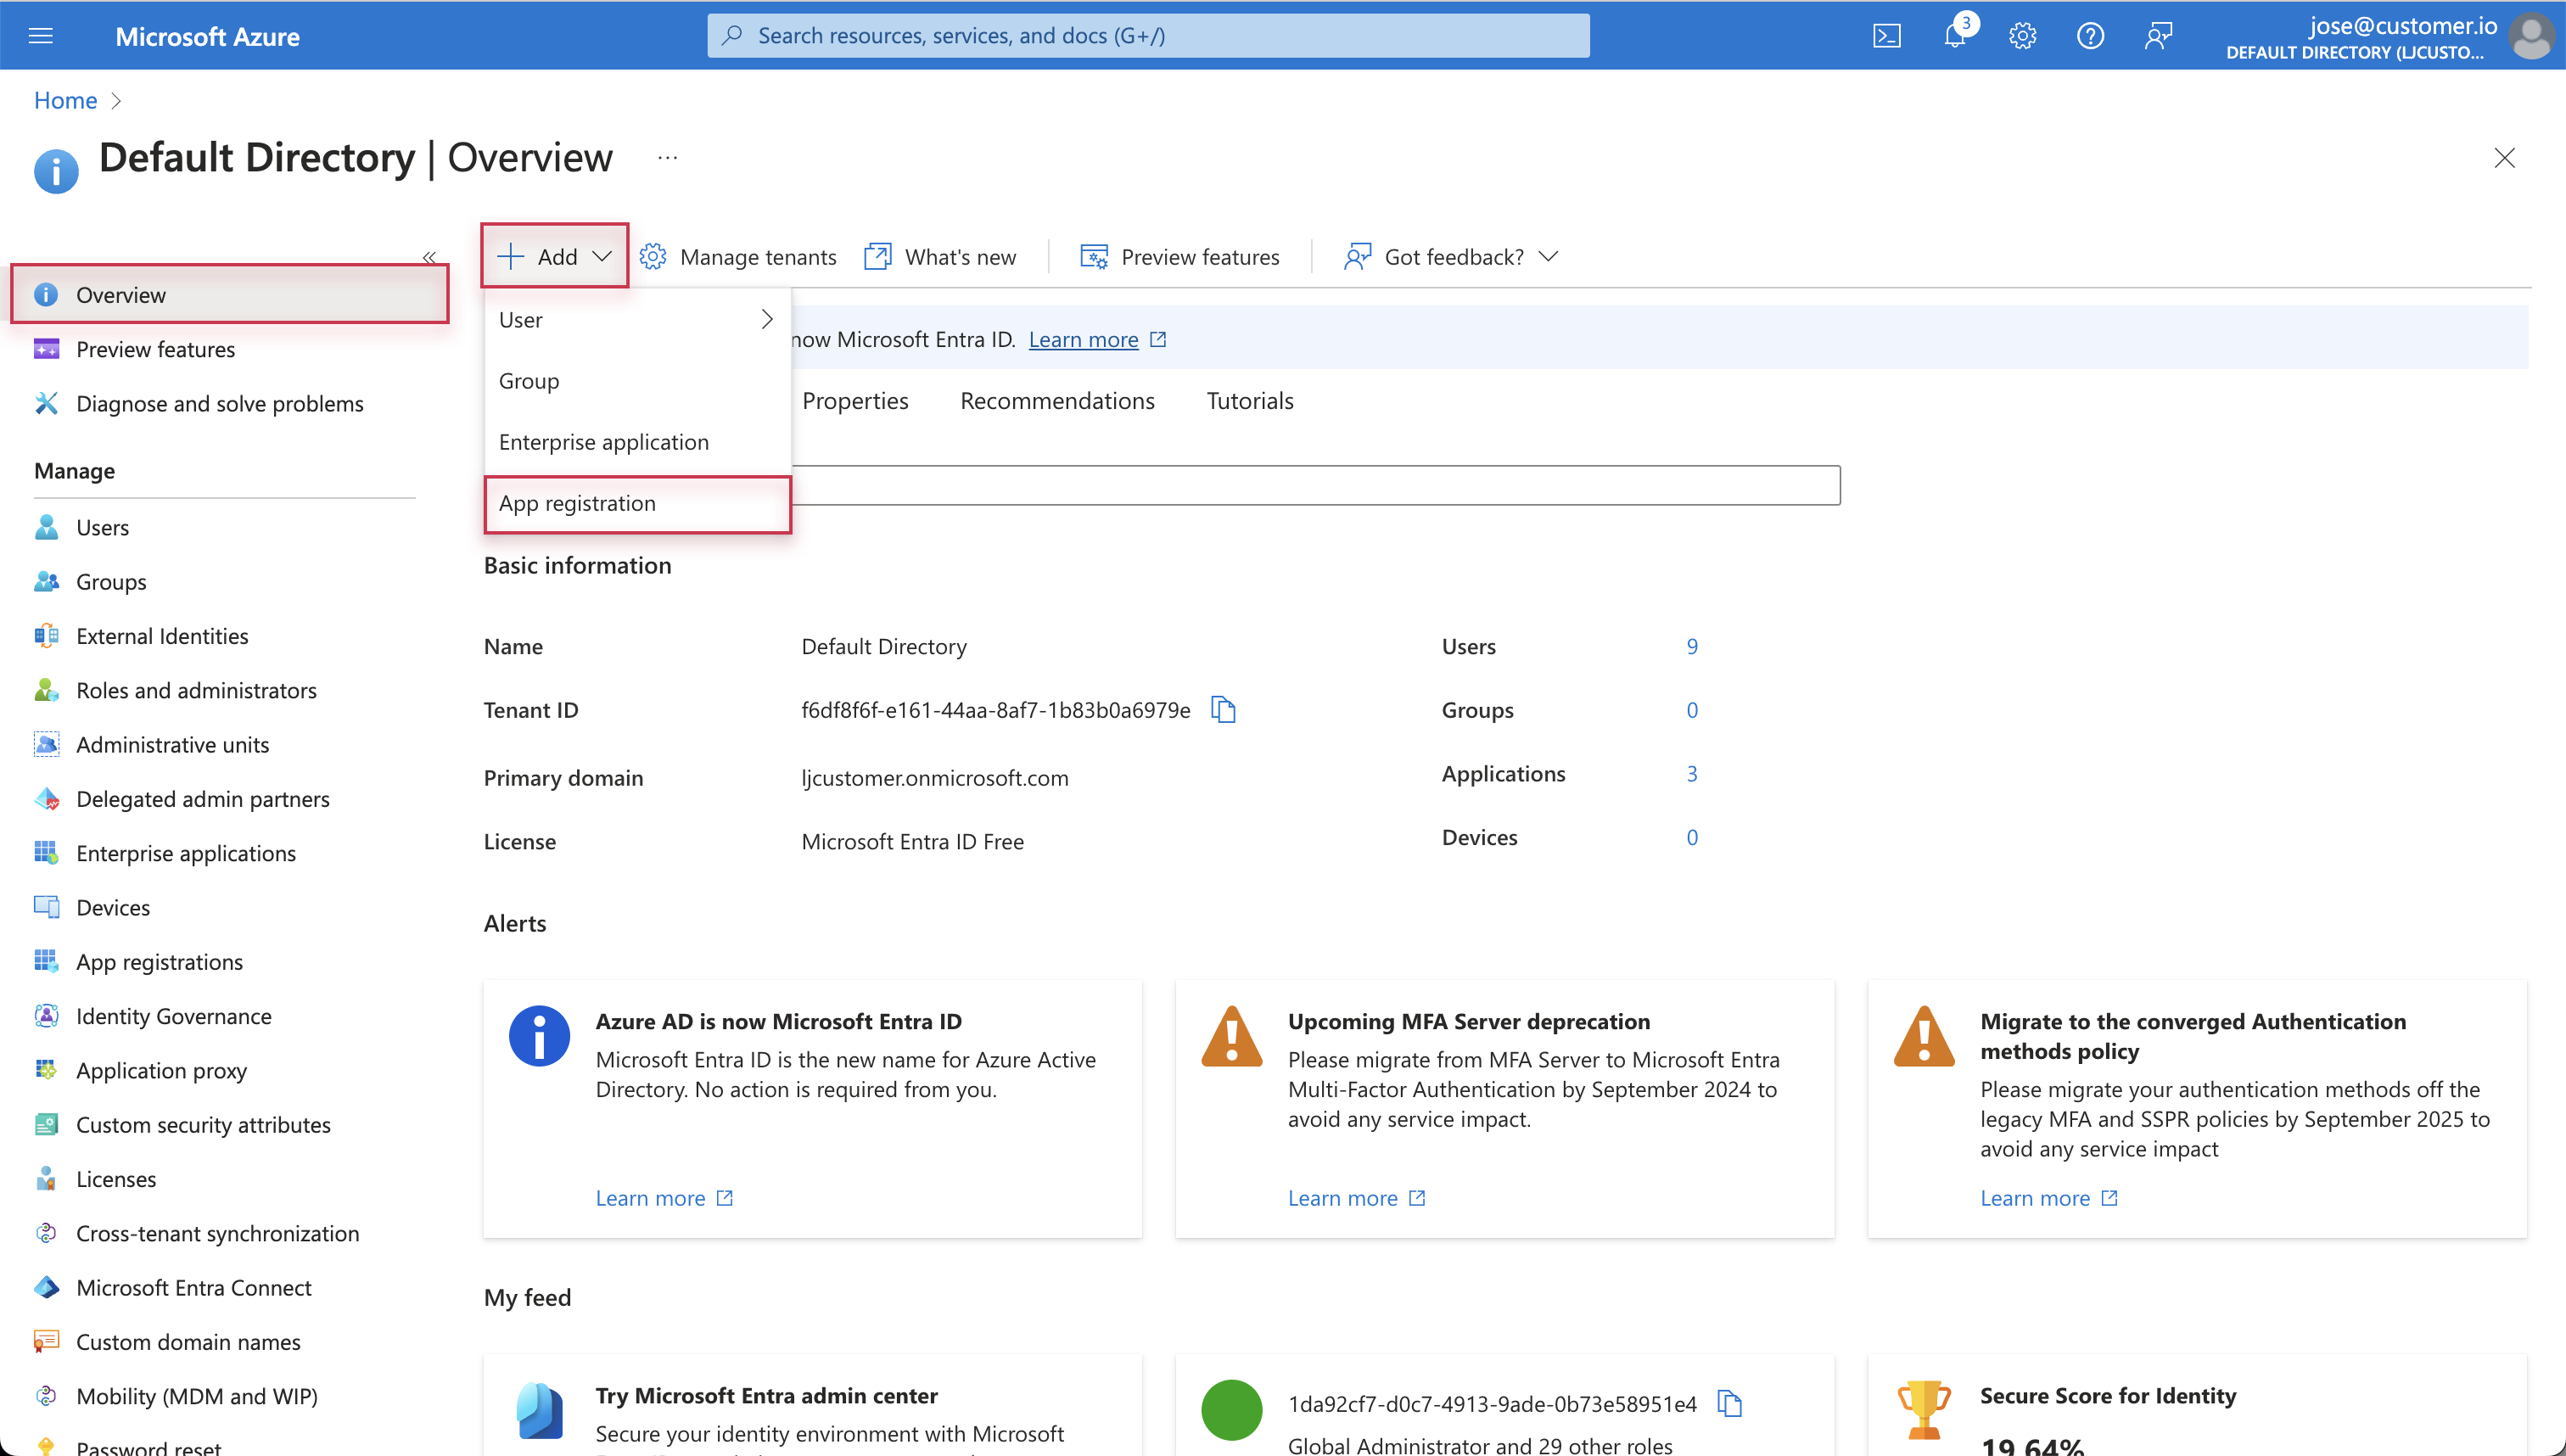
- On the Overview page, click Add at the top and select App registration.
- Enter a display Name for your application. This helps you distinguish between your registered apps. This will not appear in Customer.io.
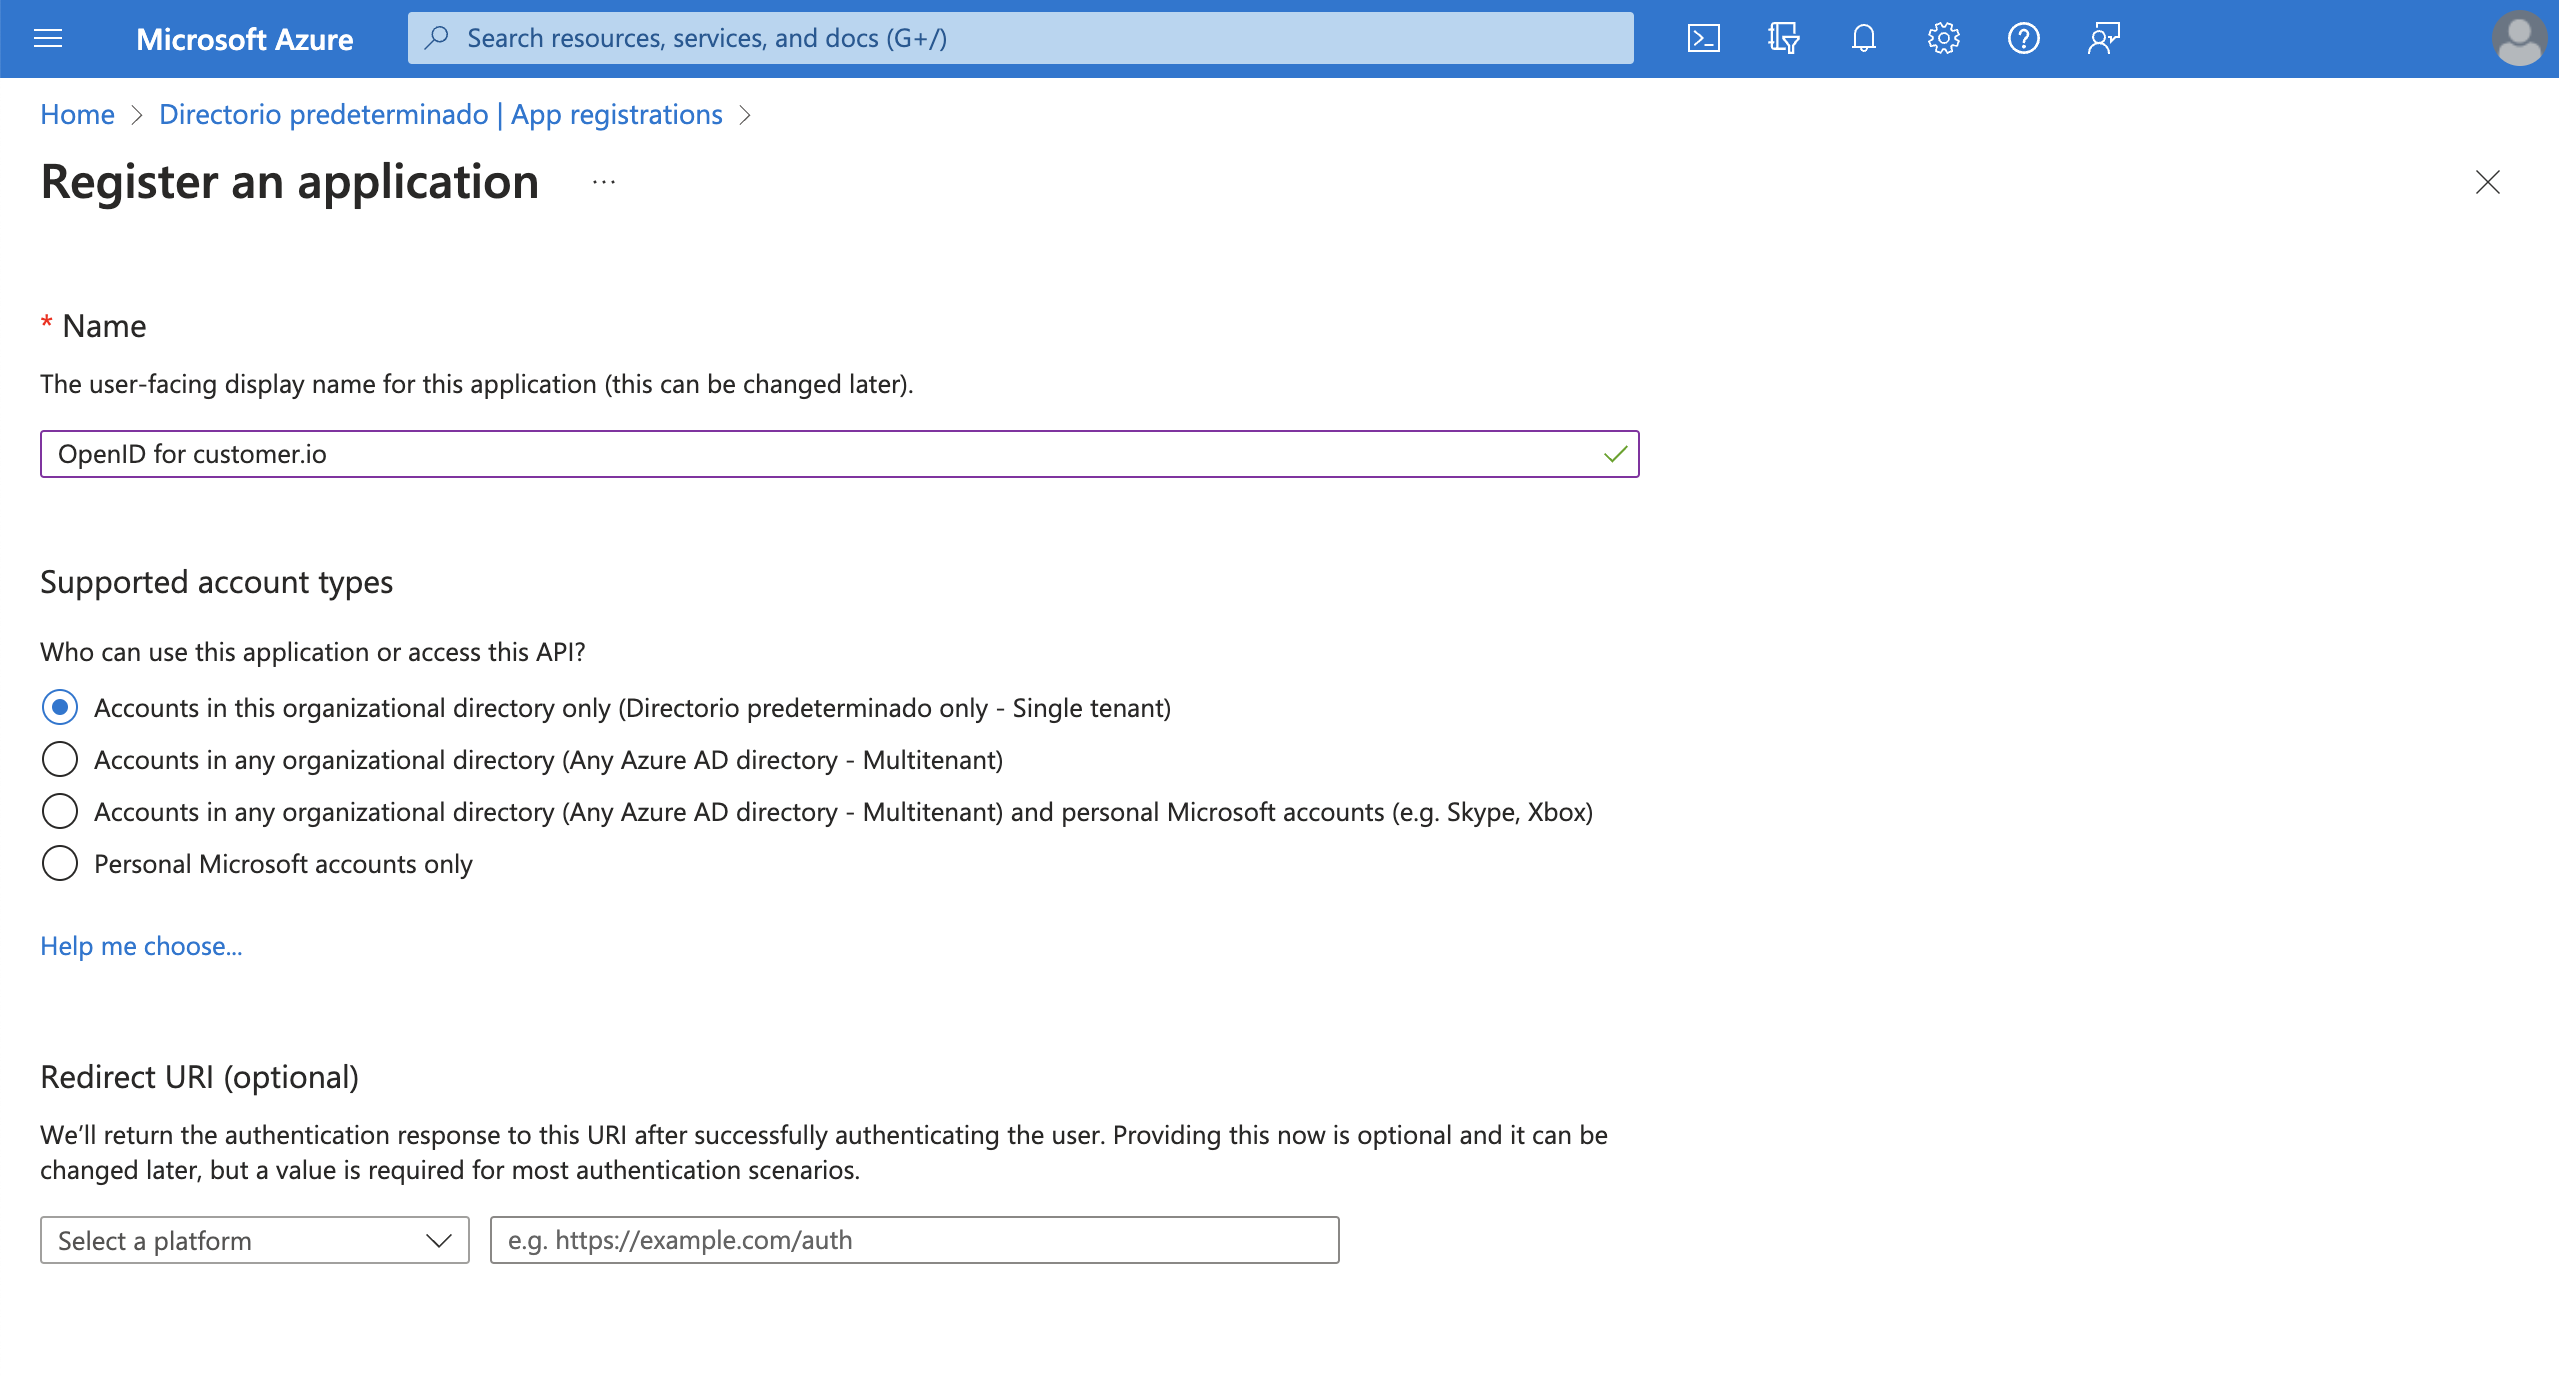
- Click Register to complete initial setup.
Configure your app
- To finish configuring your registered app, go to Authentication > Add a platform.
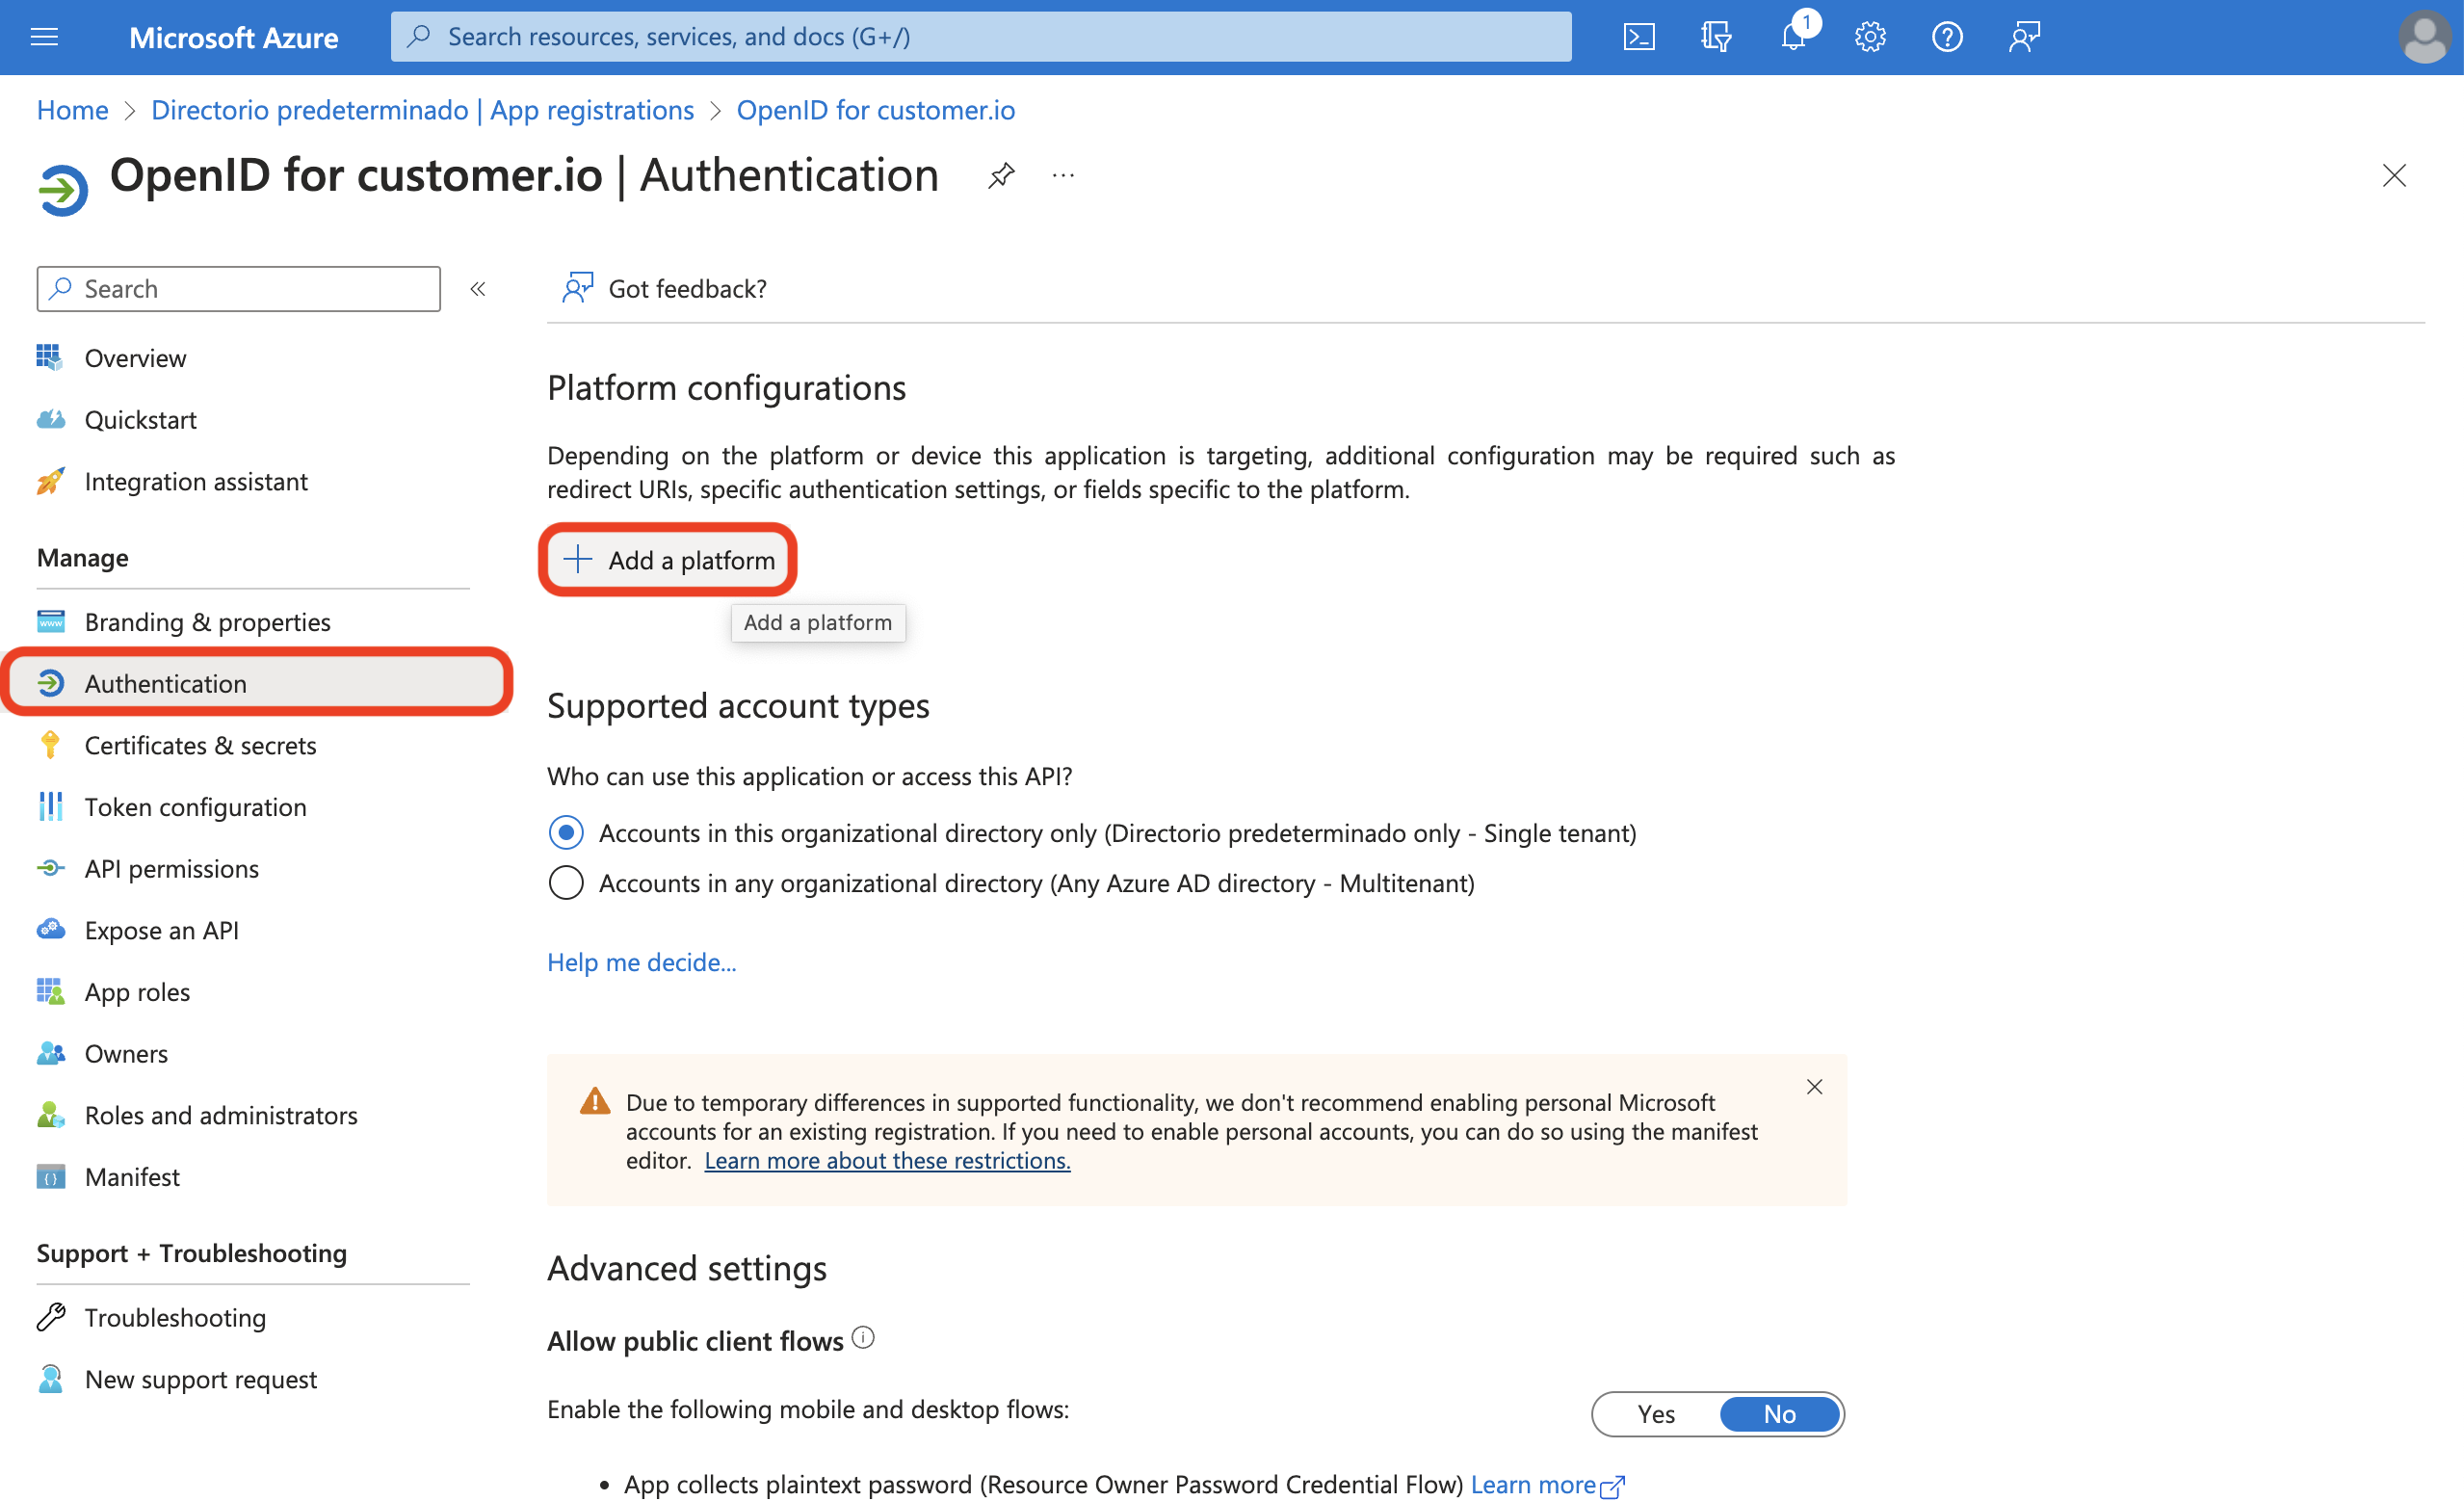
- Select Web.
- Add this redirect URI: https://fly.customer.io/oauth2/redirect.
- Select Configure.
Add credentials
Select Certificates & secrets > Client secrets > New client secret.
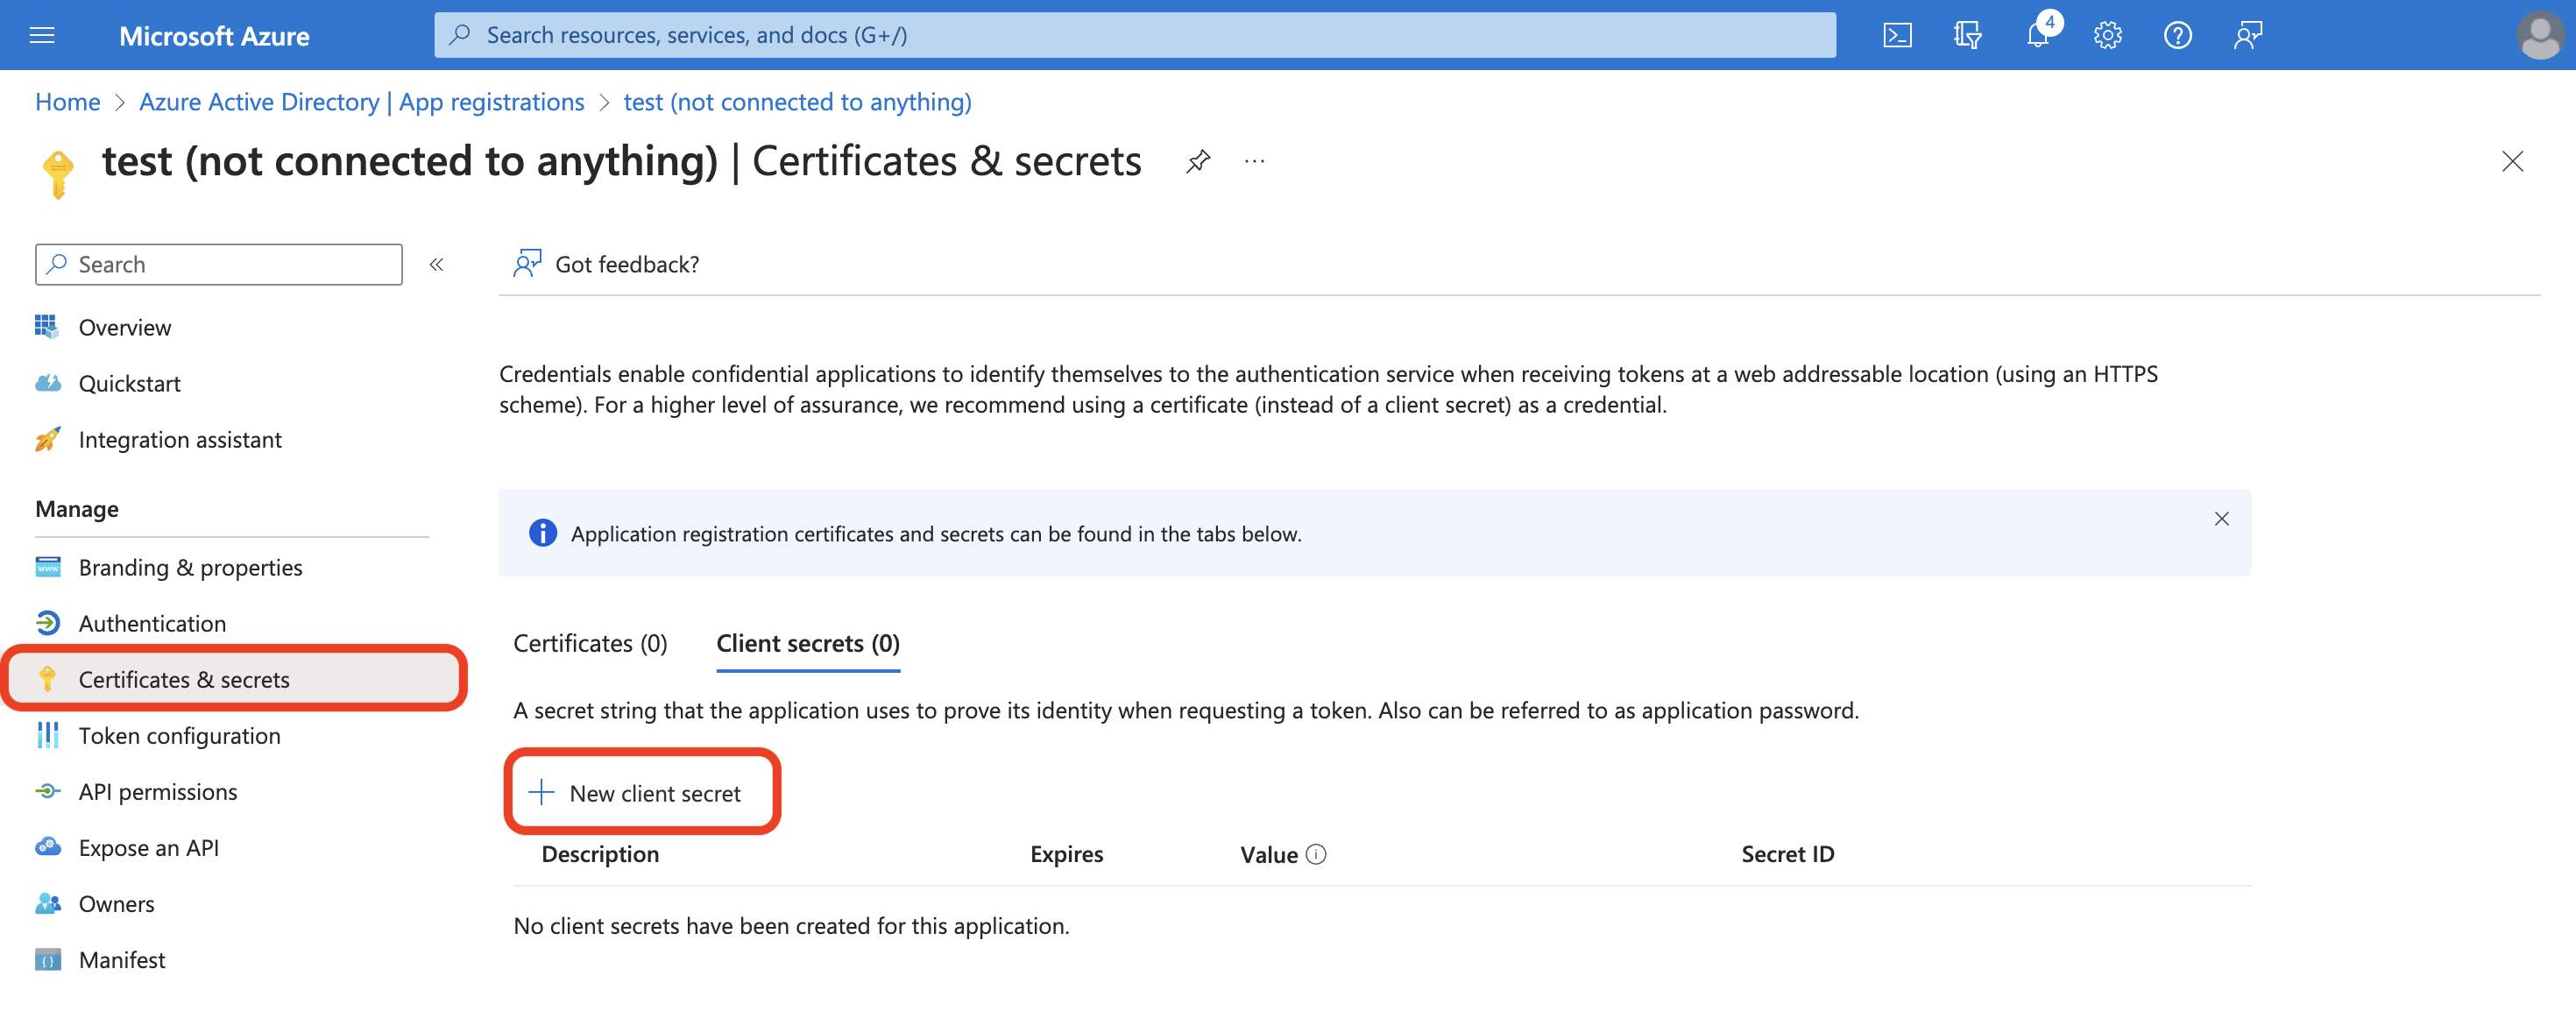
Enter a Description for your secret. Change the Expiration time period if you need.
Keep track of your expiration timeline
Customer.io doesn’t know when your client secret will expire. You’ll need to track your client secret’s expiration date outside Customer.io to maintain a smooth sign-in process
Select Add.
- Your client secret is under Value.
Keep your Microsoft Azure account open to finish integrating with Customer.io.
Finish setup in Customer.io
- Go to Account Settings > Security > Enable Single Sign-On (SSO).
- Select Entra ID SSO with OpenID Connect.

- Back in Microsoft Entra ID, select Overview from the left-hand menu.
- Then click Endpoints from the top menu. Copy the OpenID Connect metadata document and paste into OpenID configuration document URL in Customer.io. The URL should follow this pattern:
https://login.microsoftonline.com/{tenant_id}/v2.0/well-known/openid-configuration. - Copy the Application/Client ID and paste into Azure Active Directory Application Client ID in Customer.io.
- Then click Endpoints from the top menu. Copy the OpenID Connect metadata document and paste into OpenID configuration document URL in Customer.io. The URL should follow this pattern:
- In Microsoft Entra ID, select Certificates & Secrets.
- Copy the Value of your client secret and paste into Azure Active Directory Application Client Secret in Customer.io. Your configuration will not authenticate if you use the Secret ID; make sure you use the Value.
- In Customer.io, select Authenticate your Microsoft Azure Active Directory account. You will be prompted to sign in using Azure. You will see a success banner upon completion or information to help you remedy any issues in your configuration.
SSO with OpenID
You can enable SSO for providers beyond Google, Okta, and Azure using our generic OpenID SSO option in Account Settings. OpenID SSO works with any provider that is compliant with OpenID Connect, such as OneLogin and Auth0.
Requirements
Like with other IdPs, these are the general requirements to get started:
- Have an existing account with the provider
- Have an Account Admin role in Customer.io, and
- Disable “Require 2FA” for your Customer.io account
Set up OpenID SSO
- Configure your IdP:
- Register your app with your IdP.
- Configure the app.
- Create a client secret.
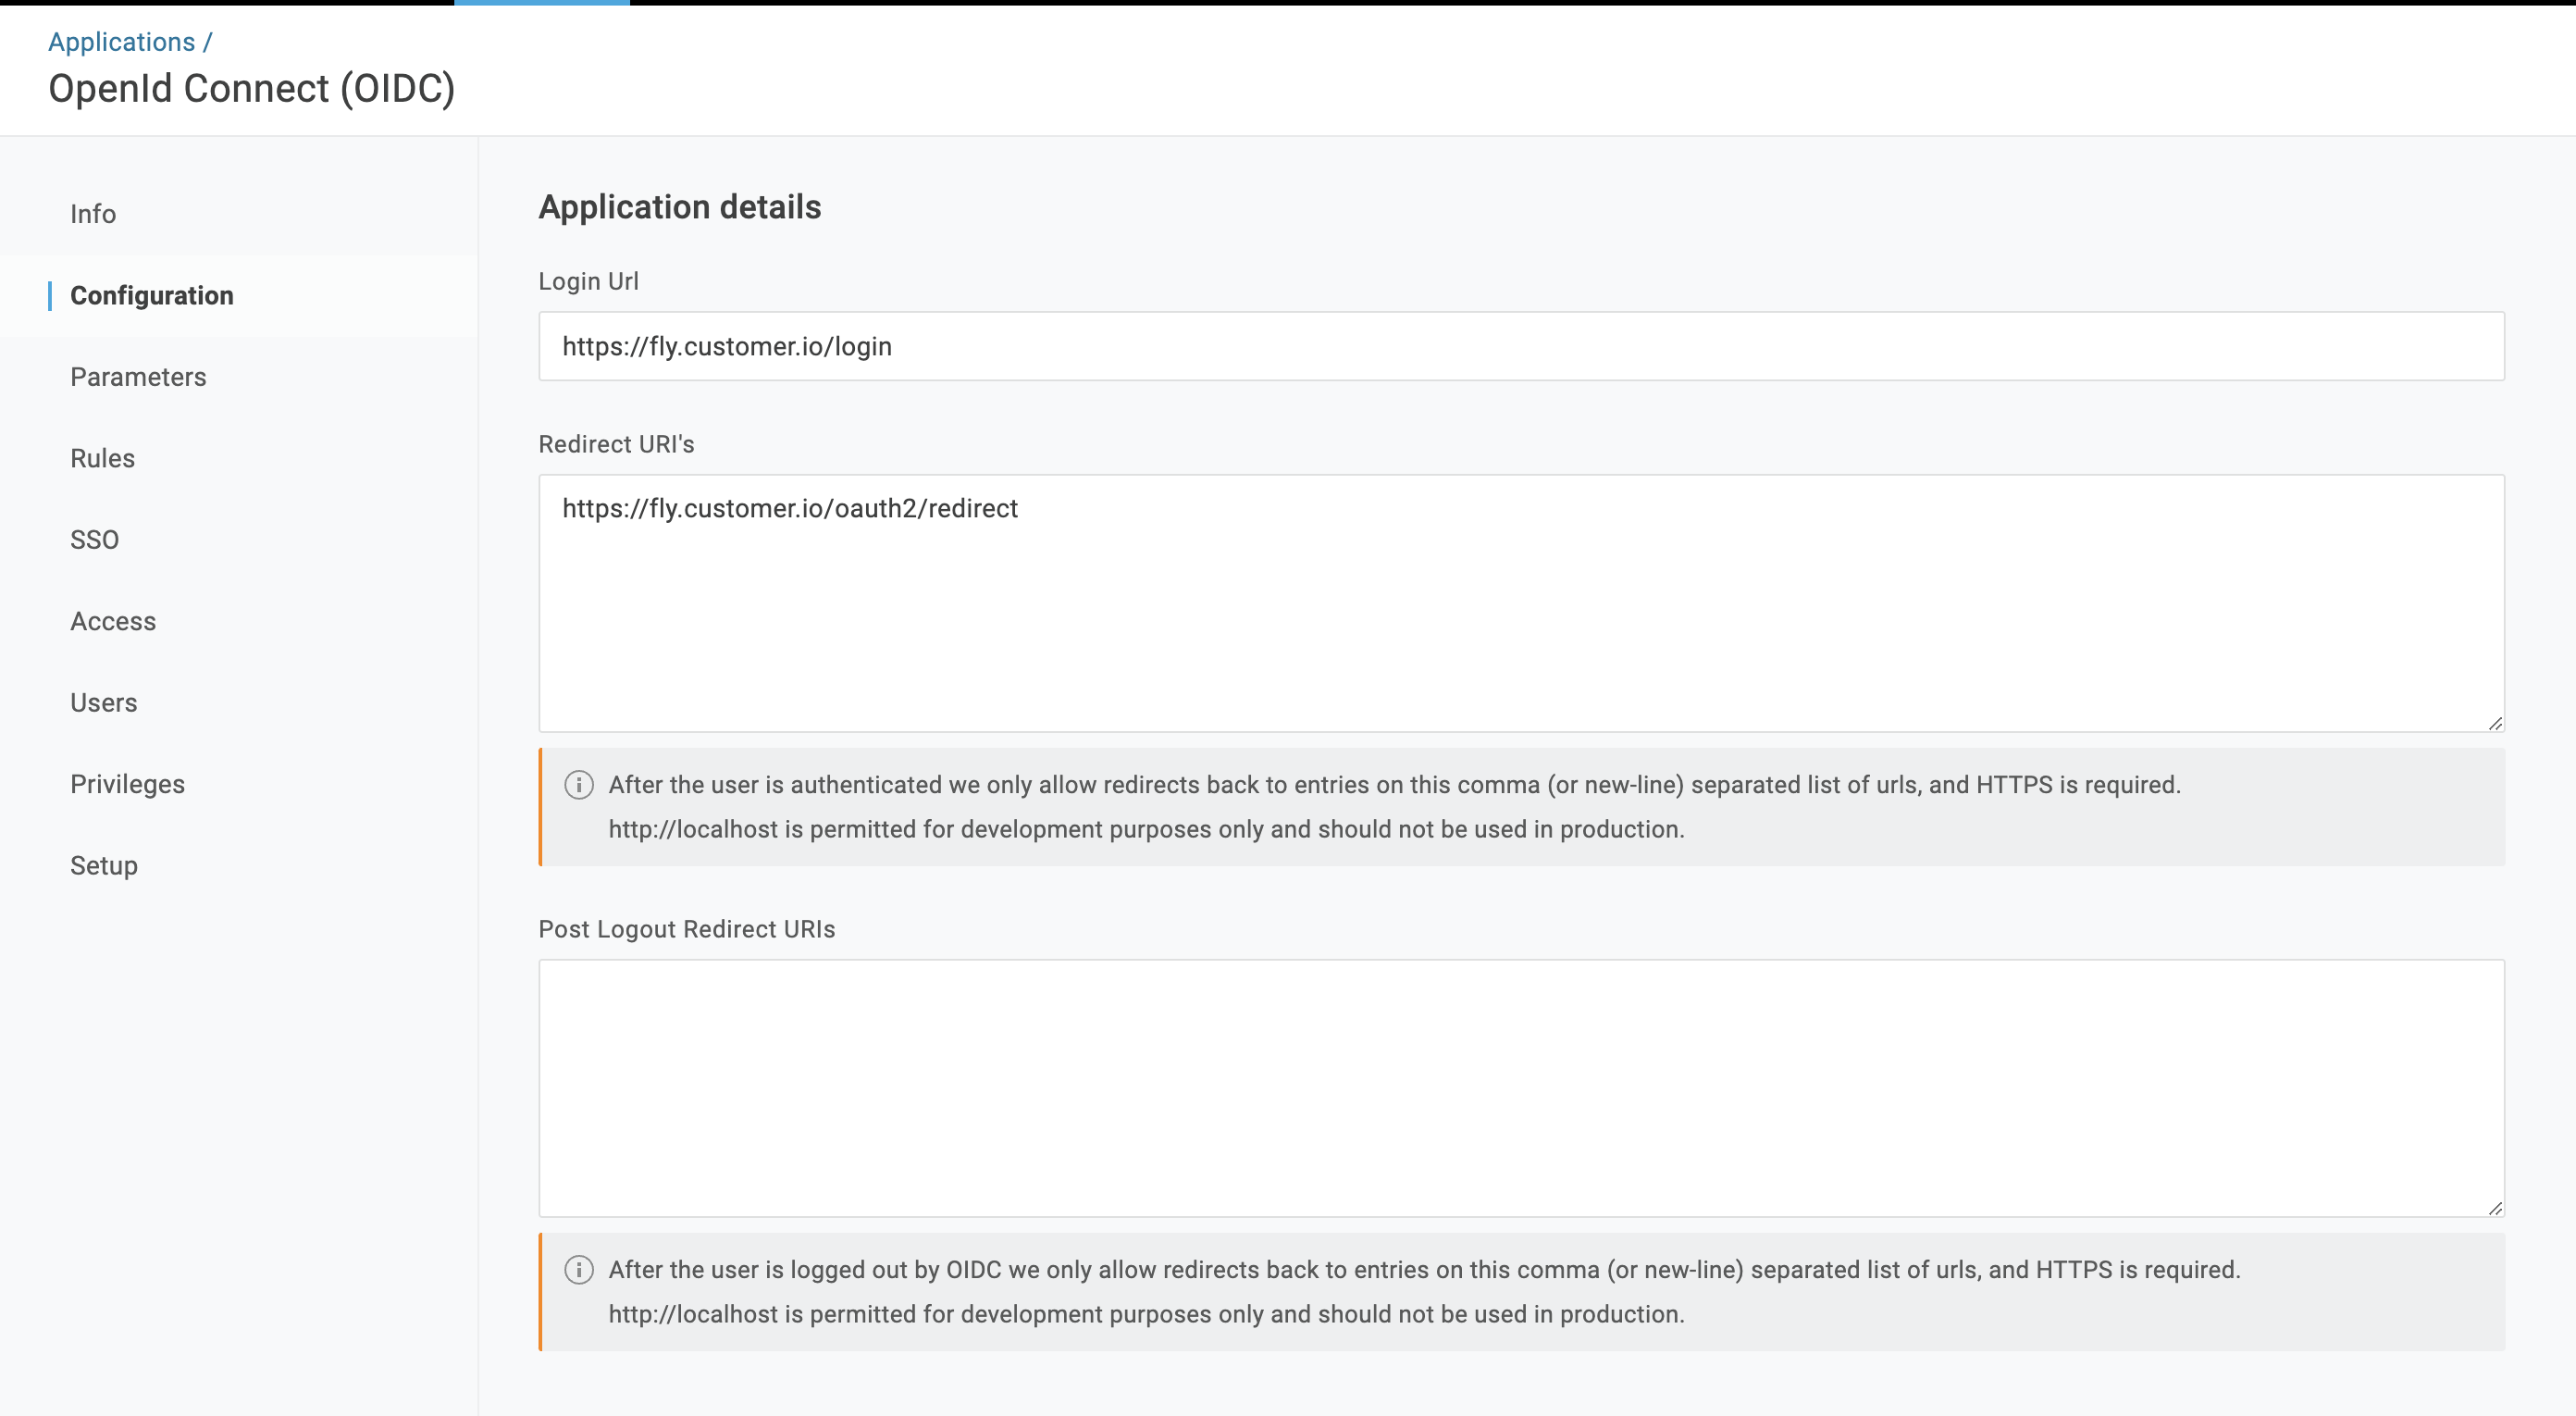
- Set up the login URL and redirect URI to send a user to the correct place after your identity provider verifies your users’ identities. The image below is an example from OneLogin.
- Login URL: https://fly.customer.io/login
- Redirect URI: https://fly.customer.io/oauth2/redirect
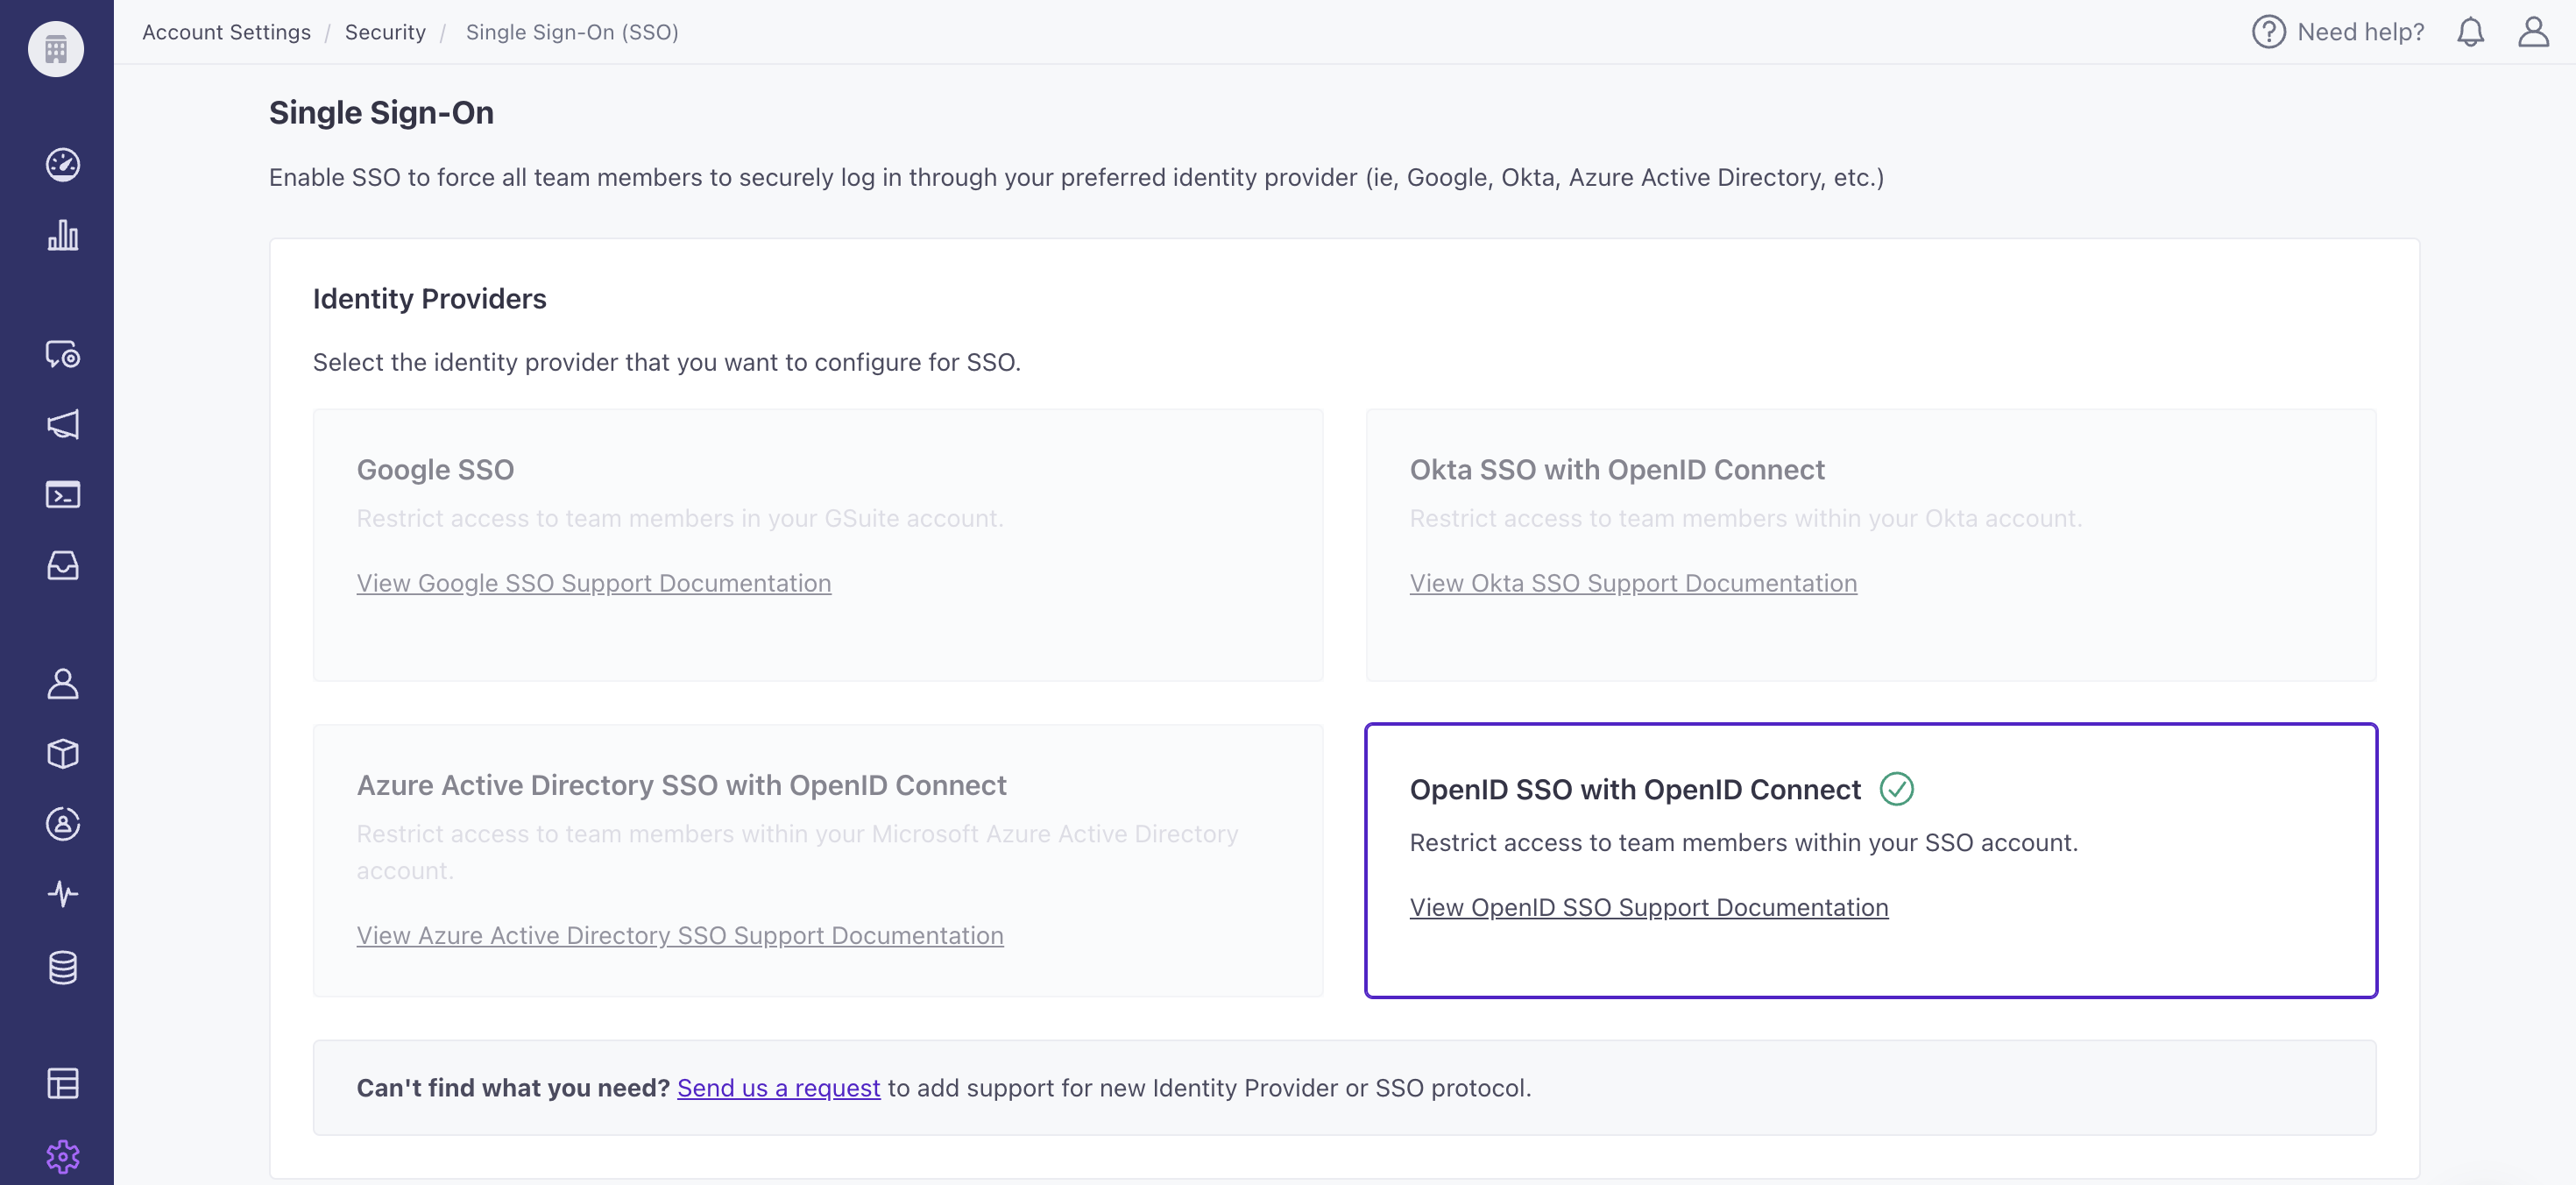
- Set up your Customer.io account:
- Go to Account Settings > Security > Enable Single Sign-On (SSO).
- Select OpenID SSO with OpenID Connect.
- Fill in the following using the equivalent fields in your IdP:
- OpenID Configuration Documentation URL
- Client ID
- Client Secret
- Select Authenticate. You’ll be prompted to sign in using your IdP. You will see a success banner upon completion or information to help you remedy any issues in your configuration.
SSO with SAML
You can enable SSO for some providers using our SAML option in Account Settings. The table below shows the providers we’ve tested and whether or not they work with Customer.io.
Because our solution complies with the SAML 2.0 specification, it may work with other providers. Contact us if you need help with a specific provider.
| Provider | Supported |
|---|---|
| Cloudflare | ✅ |
| JumpCloud | ✅ |
| Okta | ✅ |
| ❌ | |
| Azure | ❌ |
| Auth0 | Not Tested |
Requirements
To get started, you must be an Account Admin in Customer.io, and disable 2FA for your Customer.io account.
Set up SAML
Follow these steps for JumpCloud or Cloudflare. For Okta, check out their specific instructions below.
- Register your app with Cloudflare or the IdP JumpCloud.
- Set SAML Subject NameID Format to email address, just like the NameID.
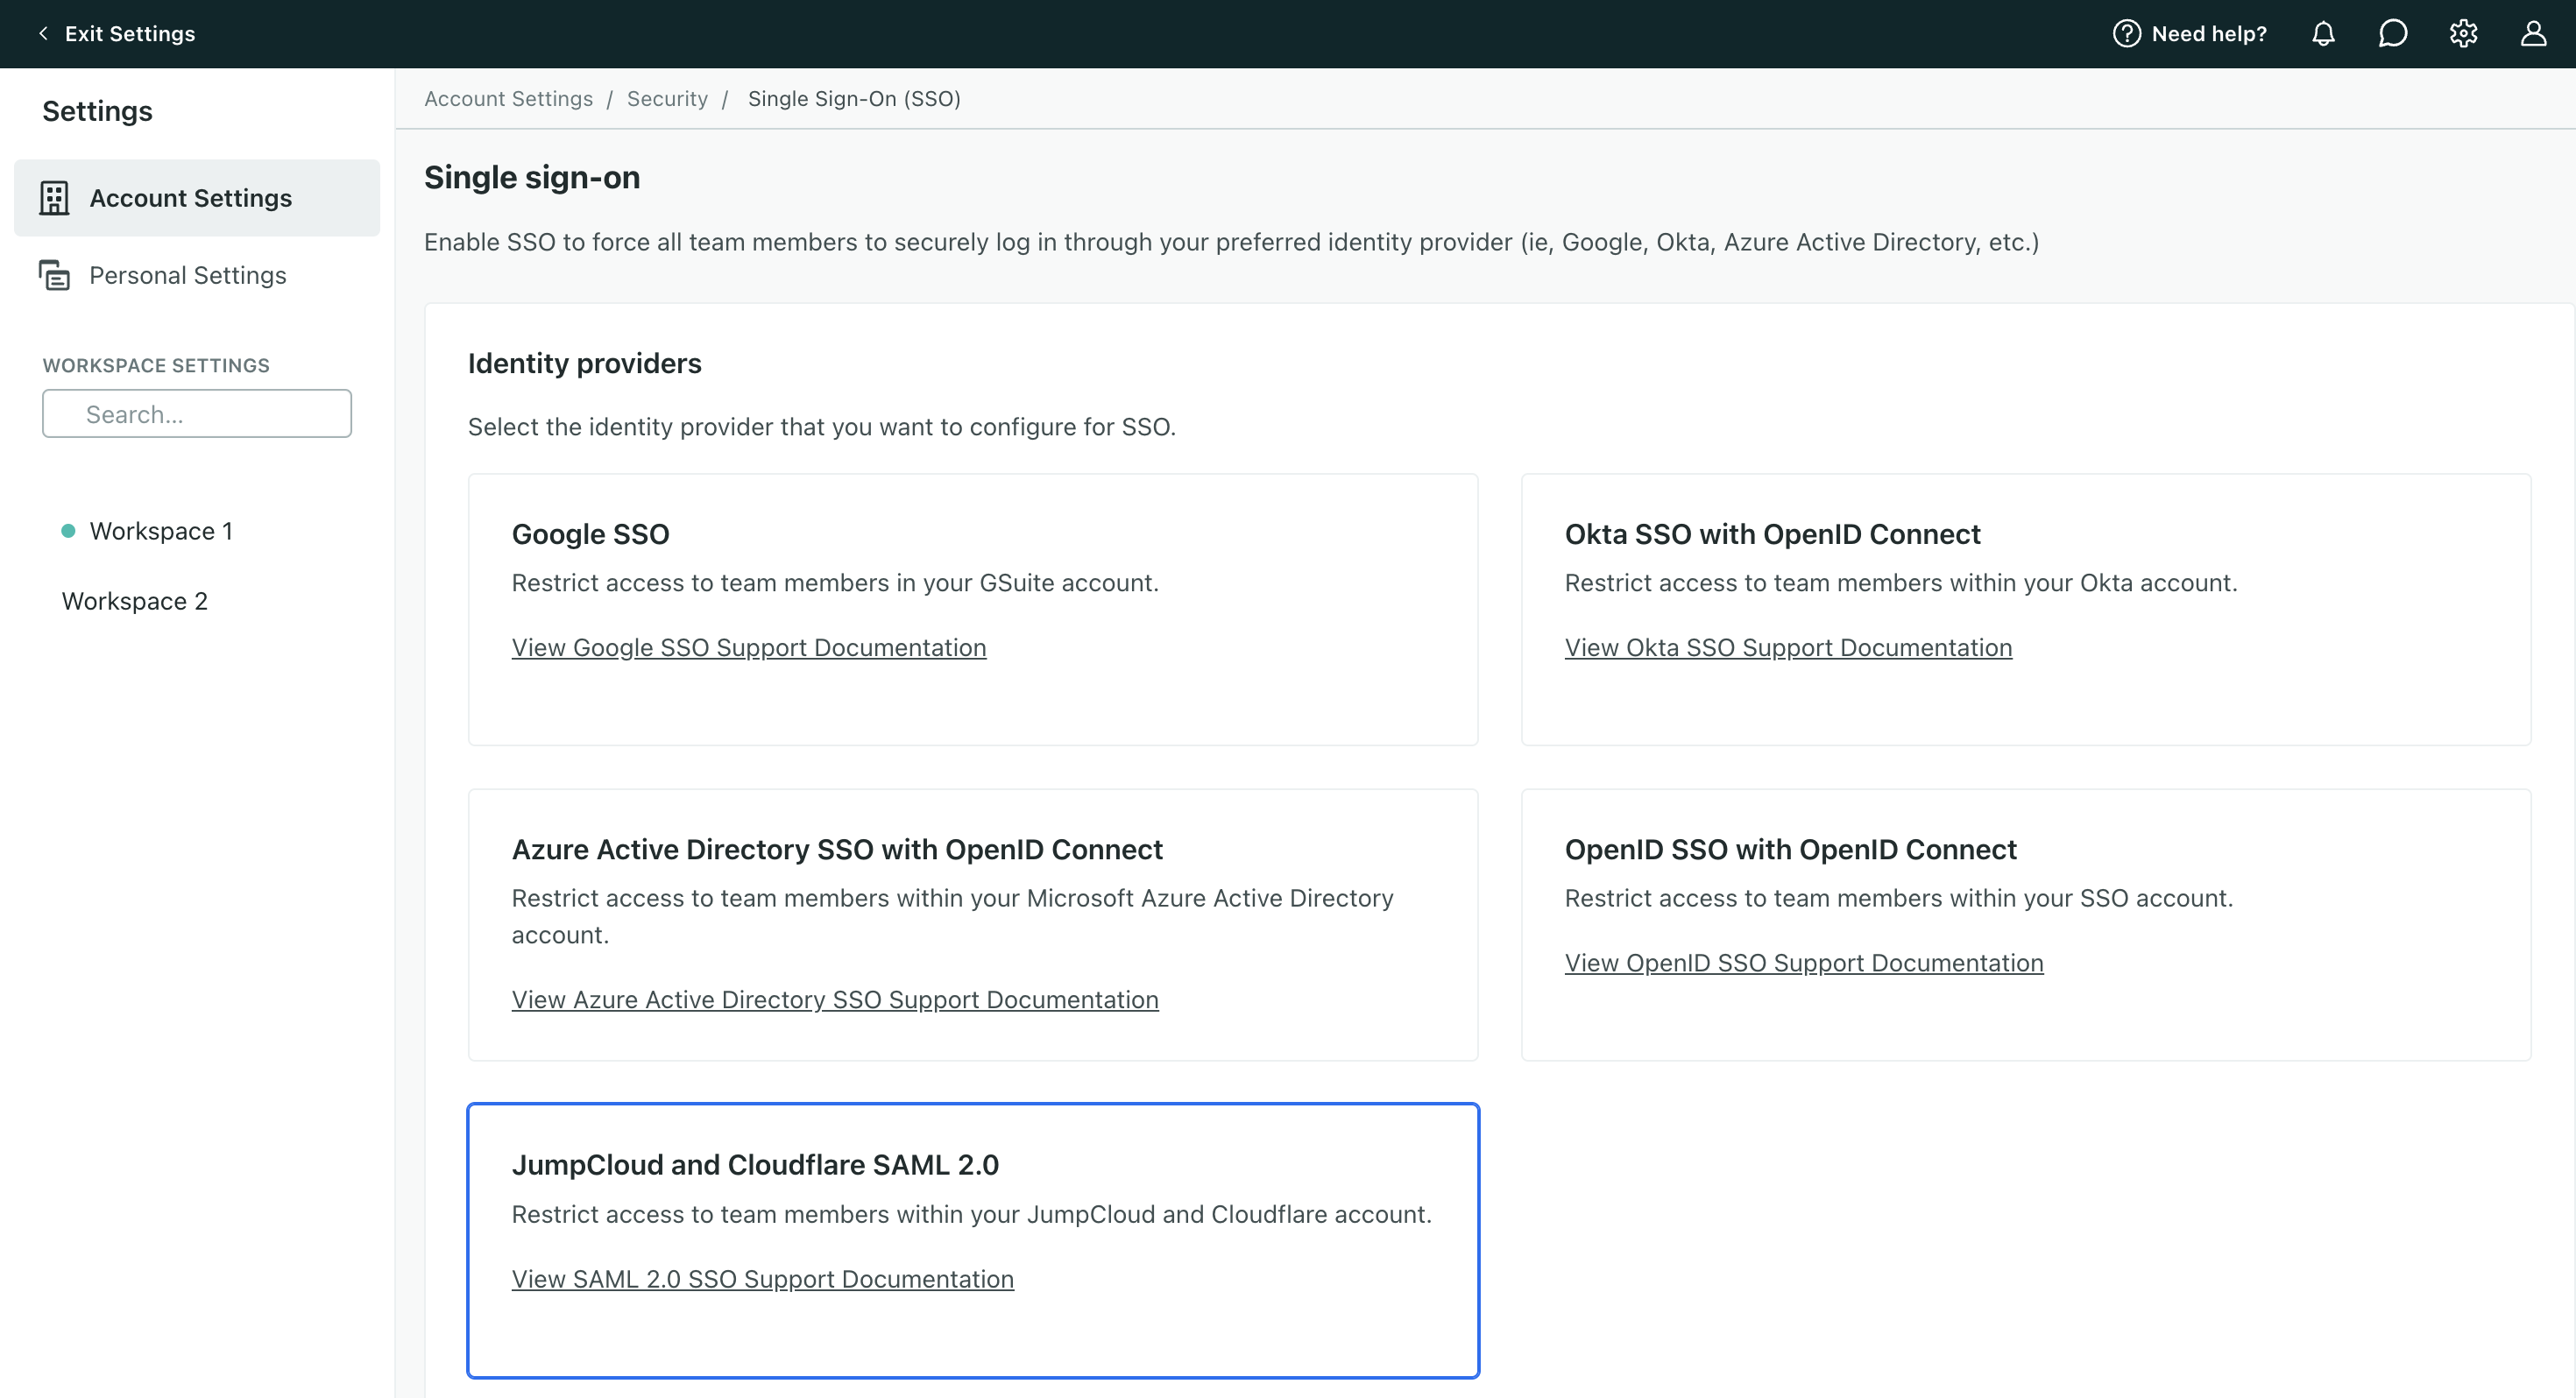
- Set up your Customer.io account:
- Go to Account Settings > Security > Enable Single Sign-On (SSO).
- Select SAML 2.0.
- Paste in the Metadata URL from the equivalent field in JumpCloud or Cloudflare.
- Select Generate your SAML SSO metadata.
- Finish configuring your IdP:
- Copy these fields from Customer.io and paste them into the corresponding fields in the SSO app you just made in your IdP:
- Service Provider (SP) Entity ID
- ACS URL
- Click Export SP Certificate in Customer.io, and then upload this to SP Certificate in your SSO app.
- Save your changes.
- Copy these fields from Customer.io and paste them into the corresponding fields in the SSO app you just made in your IdP:
Set up SAML for Okta
- Set up your Customer.io account:
- Go to Account Settings > Security > Enable Single Sign-On (SSO).
- Select SAML 2.0.
- Add a temporary link to the Metadata URL. We’ll update this later. It must start with
https://. - Select Generate your SAML SSO metadata. You’ll see a banner indicating that team members must log in with SSO now. Note, if they’re already logged in, they won’t be kicked out.
- Create a SAML app in Okta’s Admin Console.
- Go to Applications > Applications, and click on Create App Integration.
- Select SAML 2.0, and click Next.
- Enter an App name so you know it’s for Customer.io, and click Next.
- In SAML Settings, set the Single sign-on URL as the ACS URL from Customer.io.
- Set the Audience URI as the SP Entity ID from Customer.io.
- Change Application username to Email, and then click Next.
- Click Finish.
- Finish configuring Okta in Customer.io.
- Click Update metadata URL, and type in the value from your Okta app.
- Click Save.
- If applicable, continue to Enable SCIM.
You do not need to export the SP certificate from Customer.io to input into Okta.
Provision access
After you’ve set up SAML SSO, decide how you want to manage team member access:
- Add your colleagues to both your IdP and Customer.io for them to successfully log into Customer.io or
- Set up System for Cross-domain Identity Management (SCIM) 2.0 provisioning so you only have to add/remove team members from your IdP.
In either case, your team members must log in from Customer.io, not from within your IdP.
We do not support Just-in-Time (JIT) provisioning.
Set up auto-provisioning
After authenticating your SSO provider, you can set up SCIM 2.0 provisioning to automate the management of your team members in Customer.io. Once enabled, you can automatically add and remove team members in Customer.io when they are added or removed from your identity provider.
JumpCloud
- In Account Settings > Security > Enable Single Sign-On (SSO), go to your authenticated identity provider, and click Enable SCIM.
- In JumpCloud, go to Applications > Identity Management > Configuration Settings.
- Choose SCIM API under API Type.
- Choose SCIM 2.0 under SCIM Version.
- Copy the Base URL and Token from Customer.io and paste them into the corresponding fields in your IdP.
- Enter a valid email address for your SSO under Test User Email. For the test to work, this address cannot already be a team member in Customer.io.
- Click Test Connection in the upper right. The test user will be created and deleted from Team Members in Customer.io.
- Toggle OFF Group Management; this is not supported through Customer.io’s implementation.
- Under Attribute Mapping, click exclude for passwords.
- Set the following fields and click include to the right of each:
UserName=Company EmailName.FamilyName=Last NameName.GivenName=First Name
- Click Activate in the top right. SCIM 2.0 is now enabled on your account!
- Back in Customer.io, go to Team Members and you’ll see the users you’ve provisioned in your SAML app. Change their roles and permissions from this screen; their level of access is managed within Customer.io, not JumpCloud.
Cloudflare
- In Account Settings > Security > Enable Single Sign-On (SSO), go to your authenticated identity provider, and click Enable SCIM.
- Go to Cloudflare One’s docs for more information on Generic SAML applications.
- Back in Customer.io, go to Team Members and you’ll see the users you’ve provisioned in your SAML app. Change their roles and permissions from this screen; their level of access is managed within Customer.io, not Cloudflare.
Okta
In Account Settings > Security > Enable Single Sign-On (SSO), go to your authenticated identity provider, and click Enable SCIM.
In Okta’s Admin Console, go to Applications > Applications, and click on your app.
Go to the General tab, and select SCIM under Provisioning. Then click Save.
Click the Provisioning tab, choose Integration, *and fill in the info:
- SCIM connector base URL: paste in the Base URL from Customer.io.
- Unique identifier field for users: type in
email. - Supported provisioning actions: select Import New Users and Profile Updates, Push New Users, and Push Profile Updates.
- Authentication Mode: change to HTTP Header.
- Authorization: paste in the Token from Customer.io.
Click Save.
Click To App within the Provisioning tab, and choose Edit. Select these three options:
- Create Users
- Update User Attributes
- Deactivate Users
Click Save.
Finally, click the Assignments tab, and assign users as needed. User assignments sync to Customer.io.
Note, Okta does not automatically provision users assigned to the Okta application from before SCIM provisioning was in place. It’s easiest to remove then re-add the user to the application to provision them.
Back in Customer.io, go to Team Members and you’ll see the users you’ve provisioned in your SAML app. Change their roles and permissions from this screen; their level of access is managed within Customer.io, not Okta.
Login
After you provision access for your team members, they must:
- Accept the invite email from Customer.io to join your account
- Go to Customer.io and log in; team members cannot log into Customer.io from within your IdP.
Disable SSO
Disabling SSO will affect all of your team members
After you disable SSO, we log your team members out which may interrupt their work and cause them to lose unsaved changes.
- Go to Account Settings > Security > Enable Single Sign-On (SSO).
- Click Disable and confirm the action.
- All team members will need to use Customer.io credentials to sign in moving forward.
Do not sign up for a new account after SSO is disabled
Troubleshooting
I’m getting an error when I click Authenticate.
If you’re still getting an error after double checking your organization URL, client ID and client secret, check to see that you’ve added yourself to the Customer.io app.
I’m getting an error when trying to log in using my identity provider’s app card.
This is expected behavior. Customer.io only supports Service Provider (SP)-initiated SSO, which means you must start the login process from Customer.io’s login page at fly.customer.io/login. You cannot log in directly from your identity provider’s app card or dashboard.
I’m using an aliased email (like ami+cio@customer.io) as my Customer.io login. Can I still SSO?
Yes. Simply update your username in your IdP to your aliased email in the scope of the Customer.io app.
For Google SSO: you can login using ami@customer.io and have access to CIO accounts linked to ami@customer.io, ami+cio@customer.io, etc.
For Okta, Azure, and other IdPs: it has to be a 1-to-1 match. If your account has ami+cio@customer.io, your CIO account must be ami+cio@customer.io (not ami@customer.io).
If you use aliased logins to manage multiple accounts, consider guest access instead. Your main Customer.io login acts as a guest in each account, so you sign in once and reach every account you work in—see how to migrate.
I’m unable to log in after SSO was enabled. What do I do?
The email address you use to log into Customer.io must match the email registered in your IdP. An Account Admin on your account can verify or update your email in Customer.io on the Team Management page.
Reach out to support at win@customer.io if you’re still experiencing issues logging in.

