

Workspaces in Customer.io
Workspaces are a way of working with multiple products, sites or apps from a single Customer.io account. Everyone starts with one (its name is the same as your account name), and you can add or remove them as needed.
Manage workspaces
Click your workspace in the upper left corner and then click Manage all workspaces to see a list of your workspaces. From here you can add, edit or delete workspaces (if you have more than one).
.png)
Add a workspace
By default, new workspaces use email, phone, and id as identifiers The attributes you use to add, modify, and target people. Each unique identifier value represents an individual person in your workspace.
- To get to your Workspaces page, click your workspace in the upper left corner and then click Manage all workspaces.
- Click Add Workspace.
- Give your new workspace a name and a custom color to help you differentiate between your workspaces.
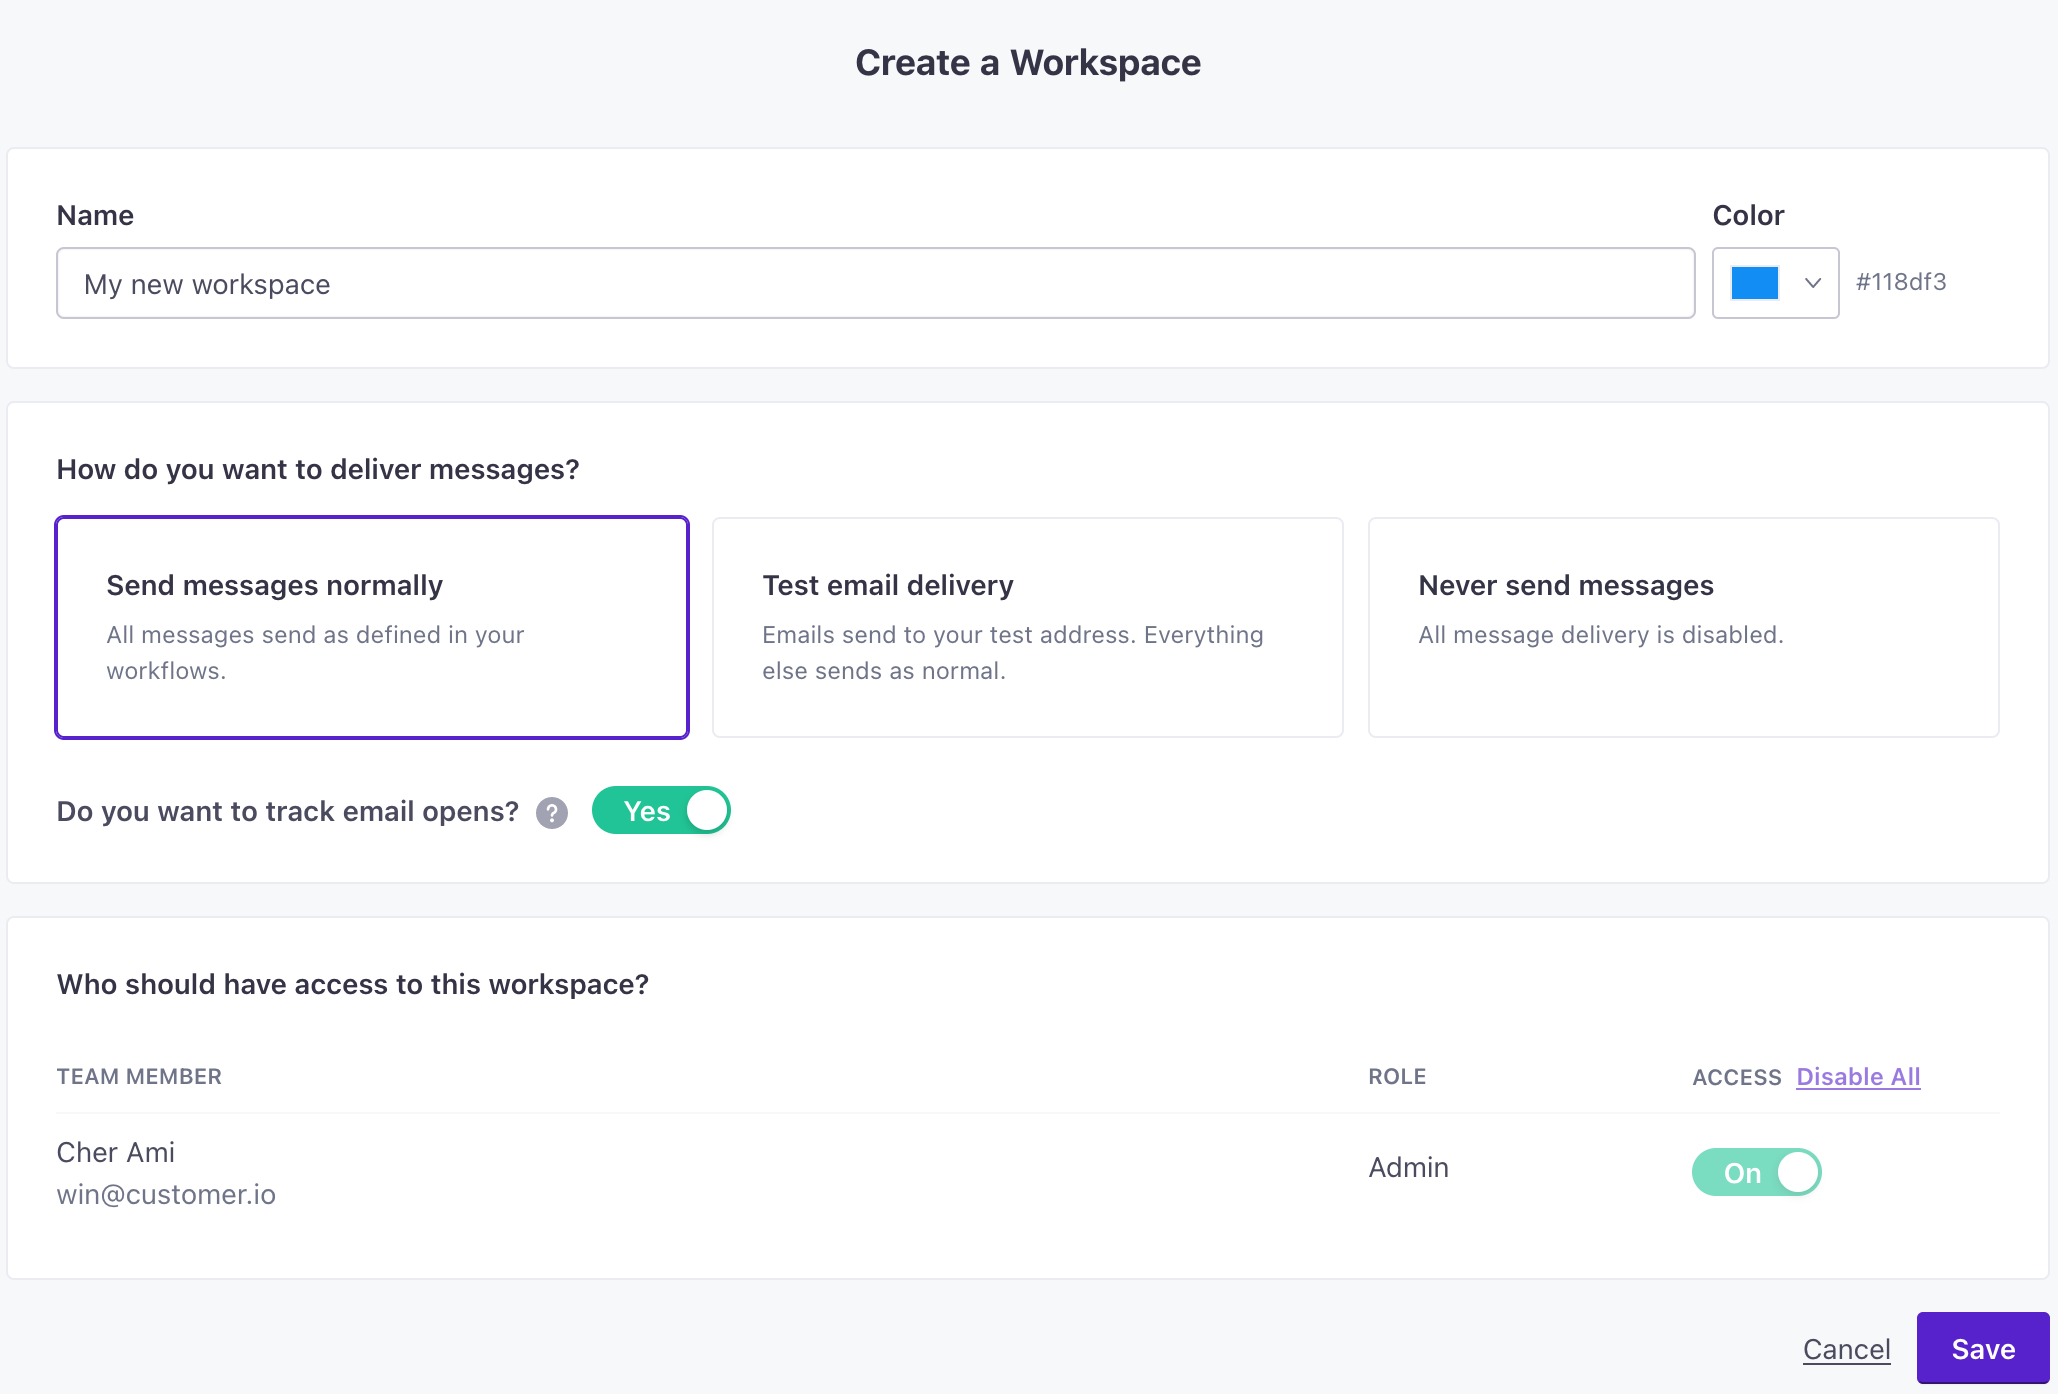
- Set the default send behavior for the workspace:
- Send messages normally: All messages send as defined in your workflow.
- Test email delivery: Emails will send to a defined test address; other messaging types (Slack, webhooks, etc.) send as normal.
- Never send messages: Message delivery is disabled.
- (Optional) Disable open tracking for emails.
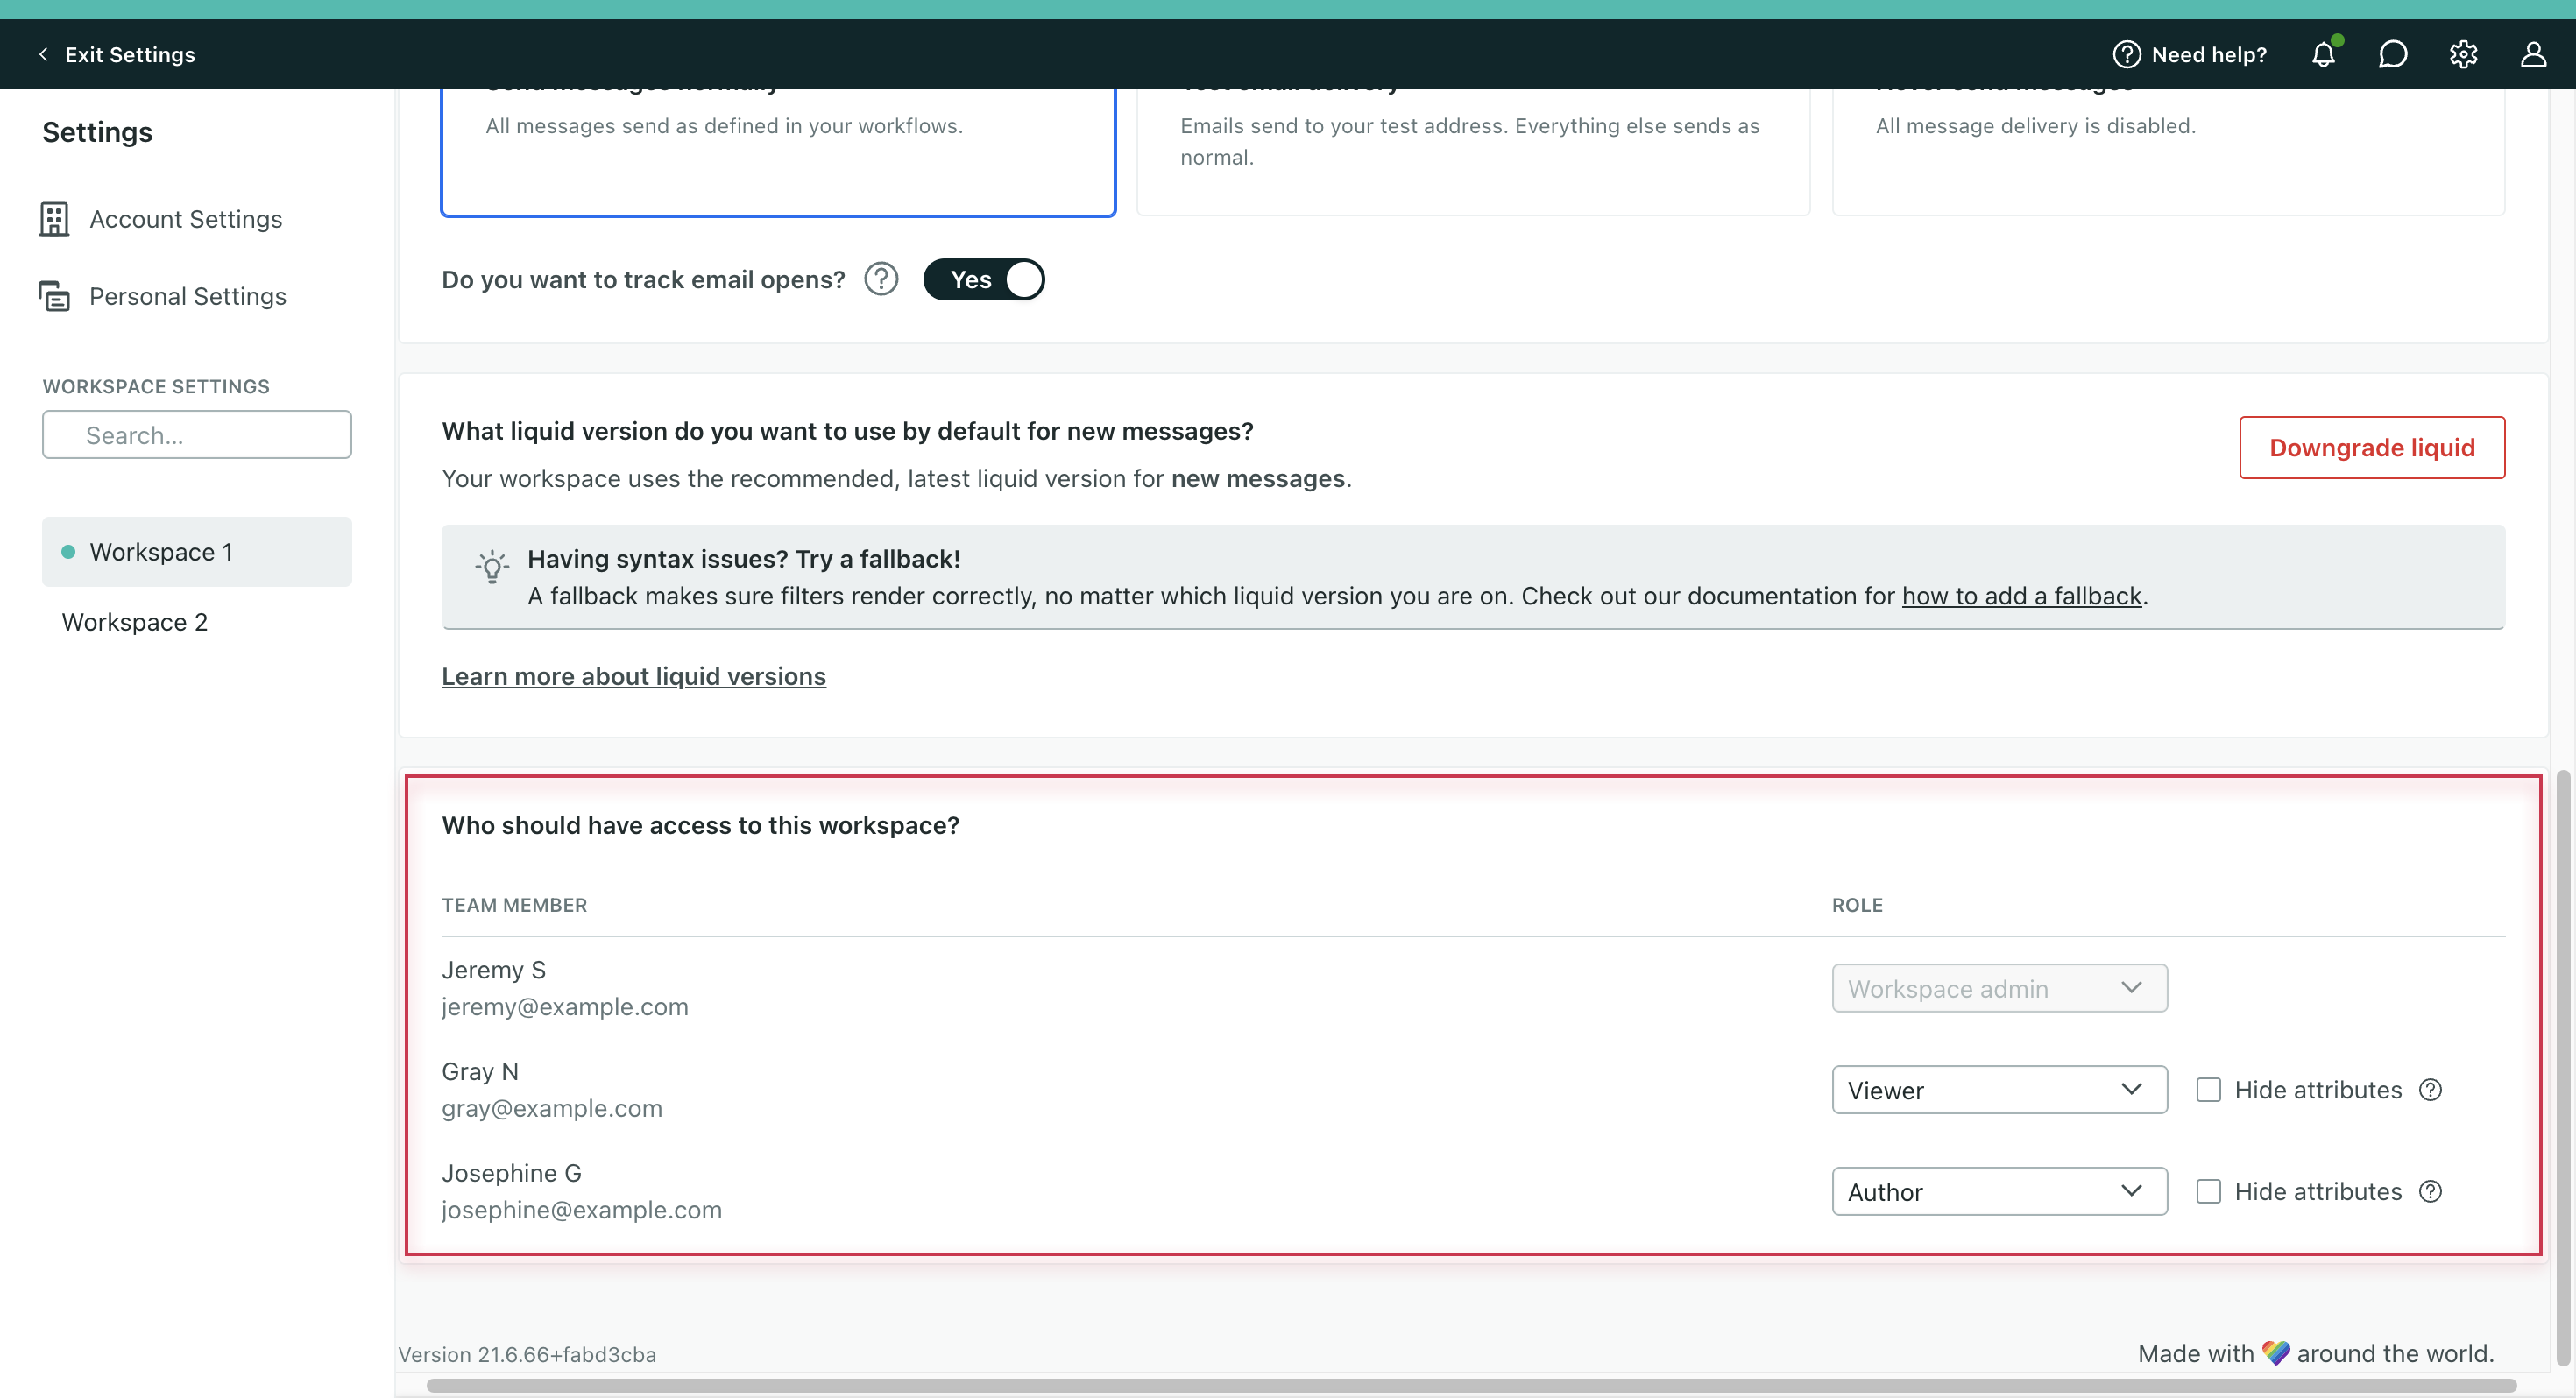
- Select the team members who can manage and access the new workspace. You can’t disable access to a workspace for an Account Admin; Account Admins can access all workspaces in an account.
- Click Save.
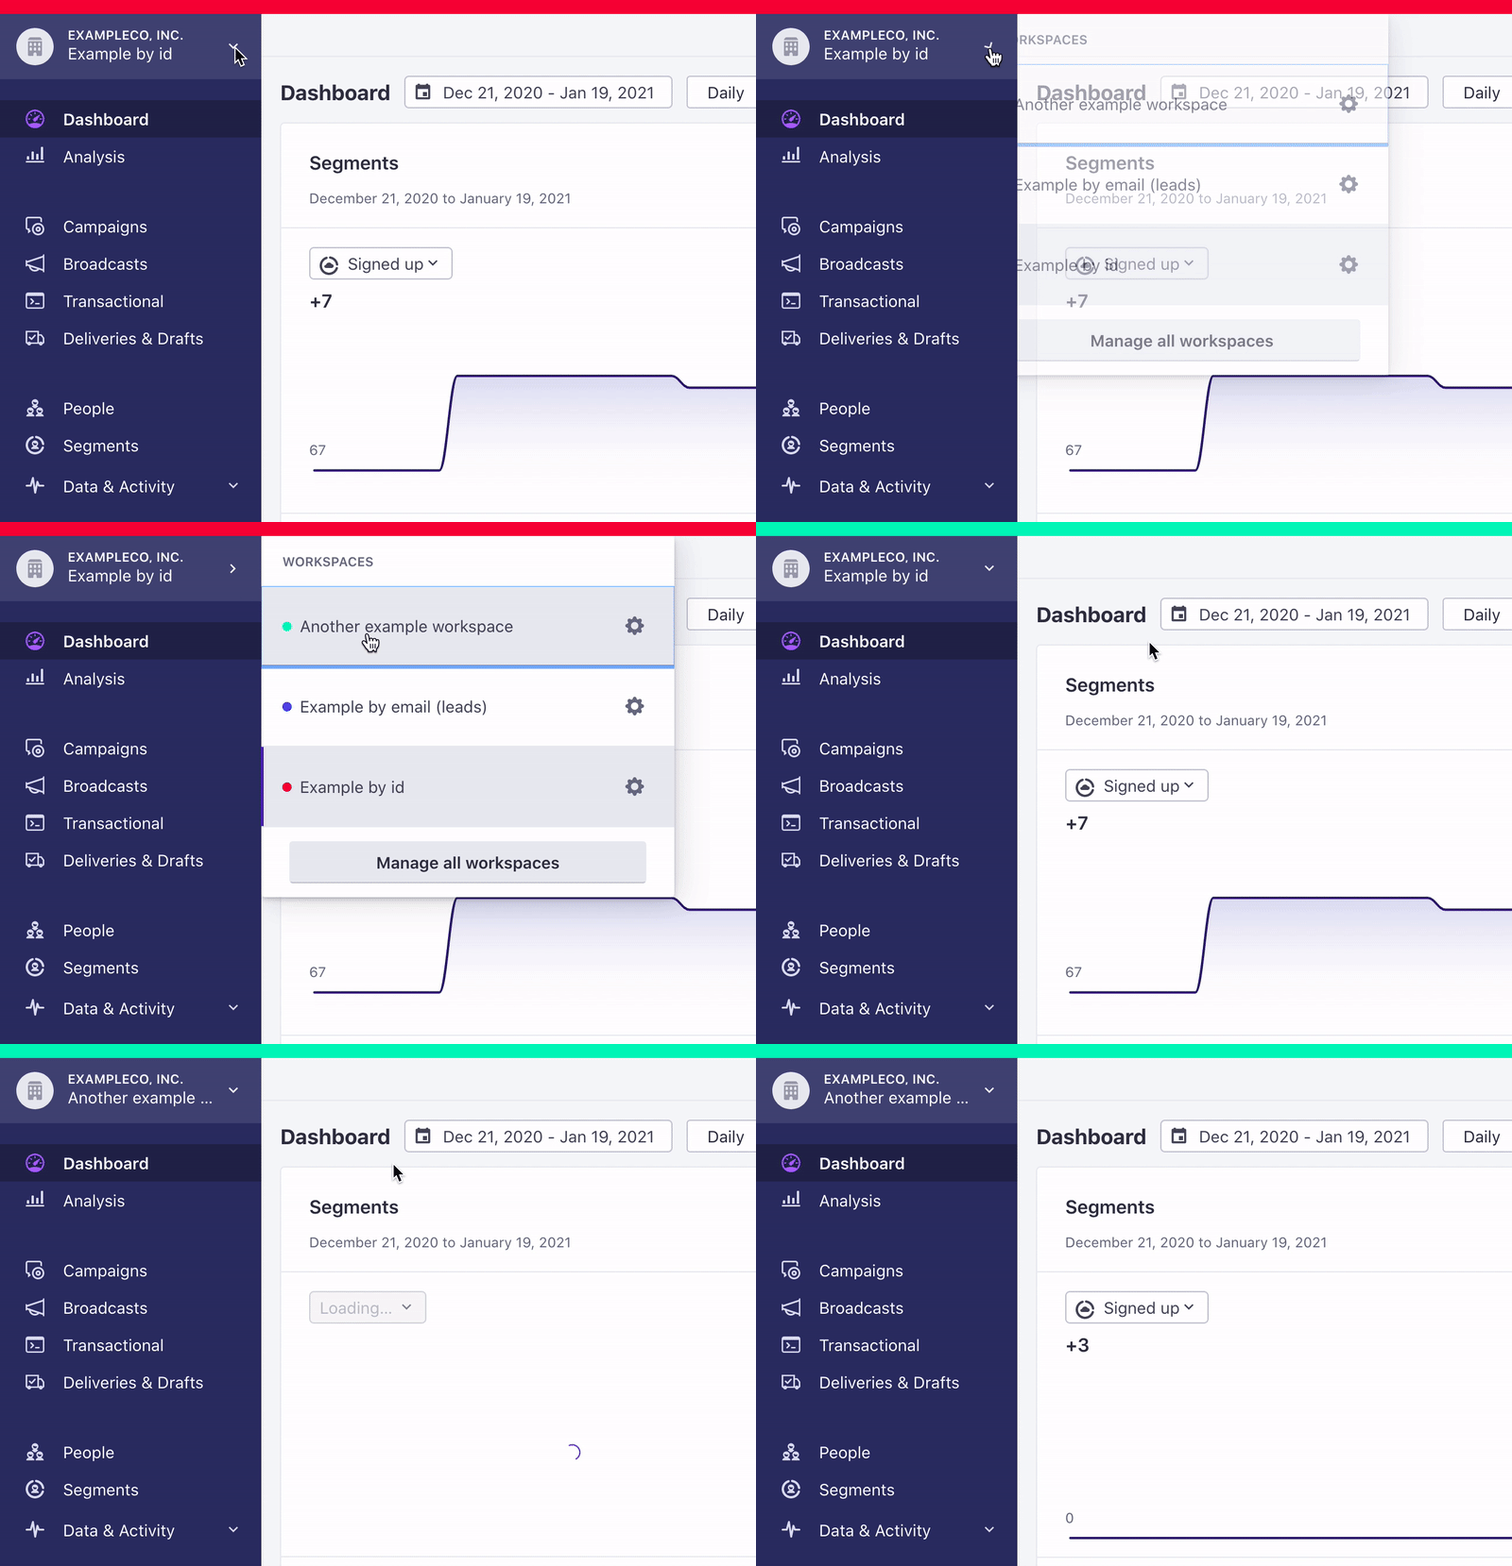
When you’ve finished adding your workspace, you can switch between workspaces from the main navigation bar.
Edit a workspace
To edit an existing workspace, go to the Workspaces page and click ‘Edit’ in the Manage settings:
.png)
You can change your workspace’s name, delivery settings or access permissions for team members. You can also change the color assigned to the workspace to help you differentiate between them.
Delete a workspace
Deleting a workspace permanently removes all data associated with the workspace—including automations, emails, people, etc. You may want to export your data before you delete a workspace.
To remove a workspace, go to the Workspaces page and click Delete. You must type your workspace’s name (case-sensitive) to delete it.
General workspace settings
After you create a workspace, you can change settings by going to Settings > Workspace Settings > General Workspace Settings.
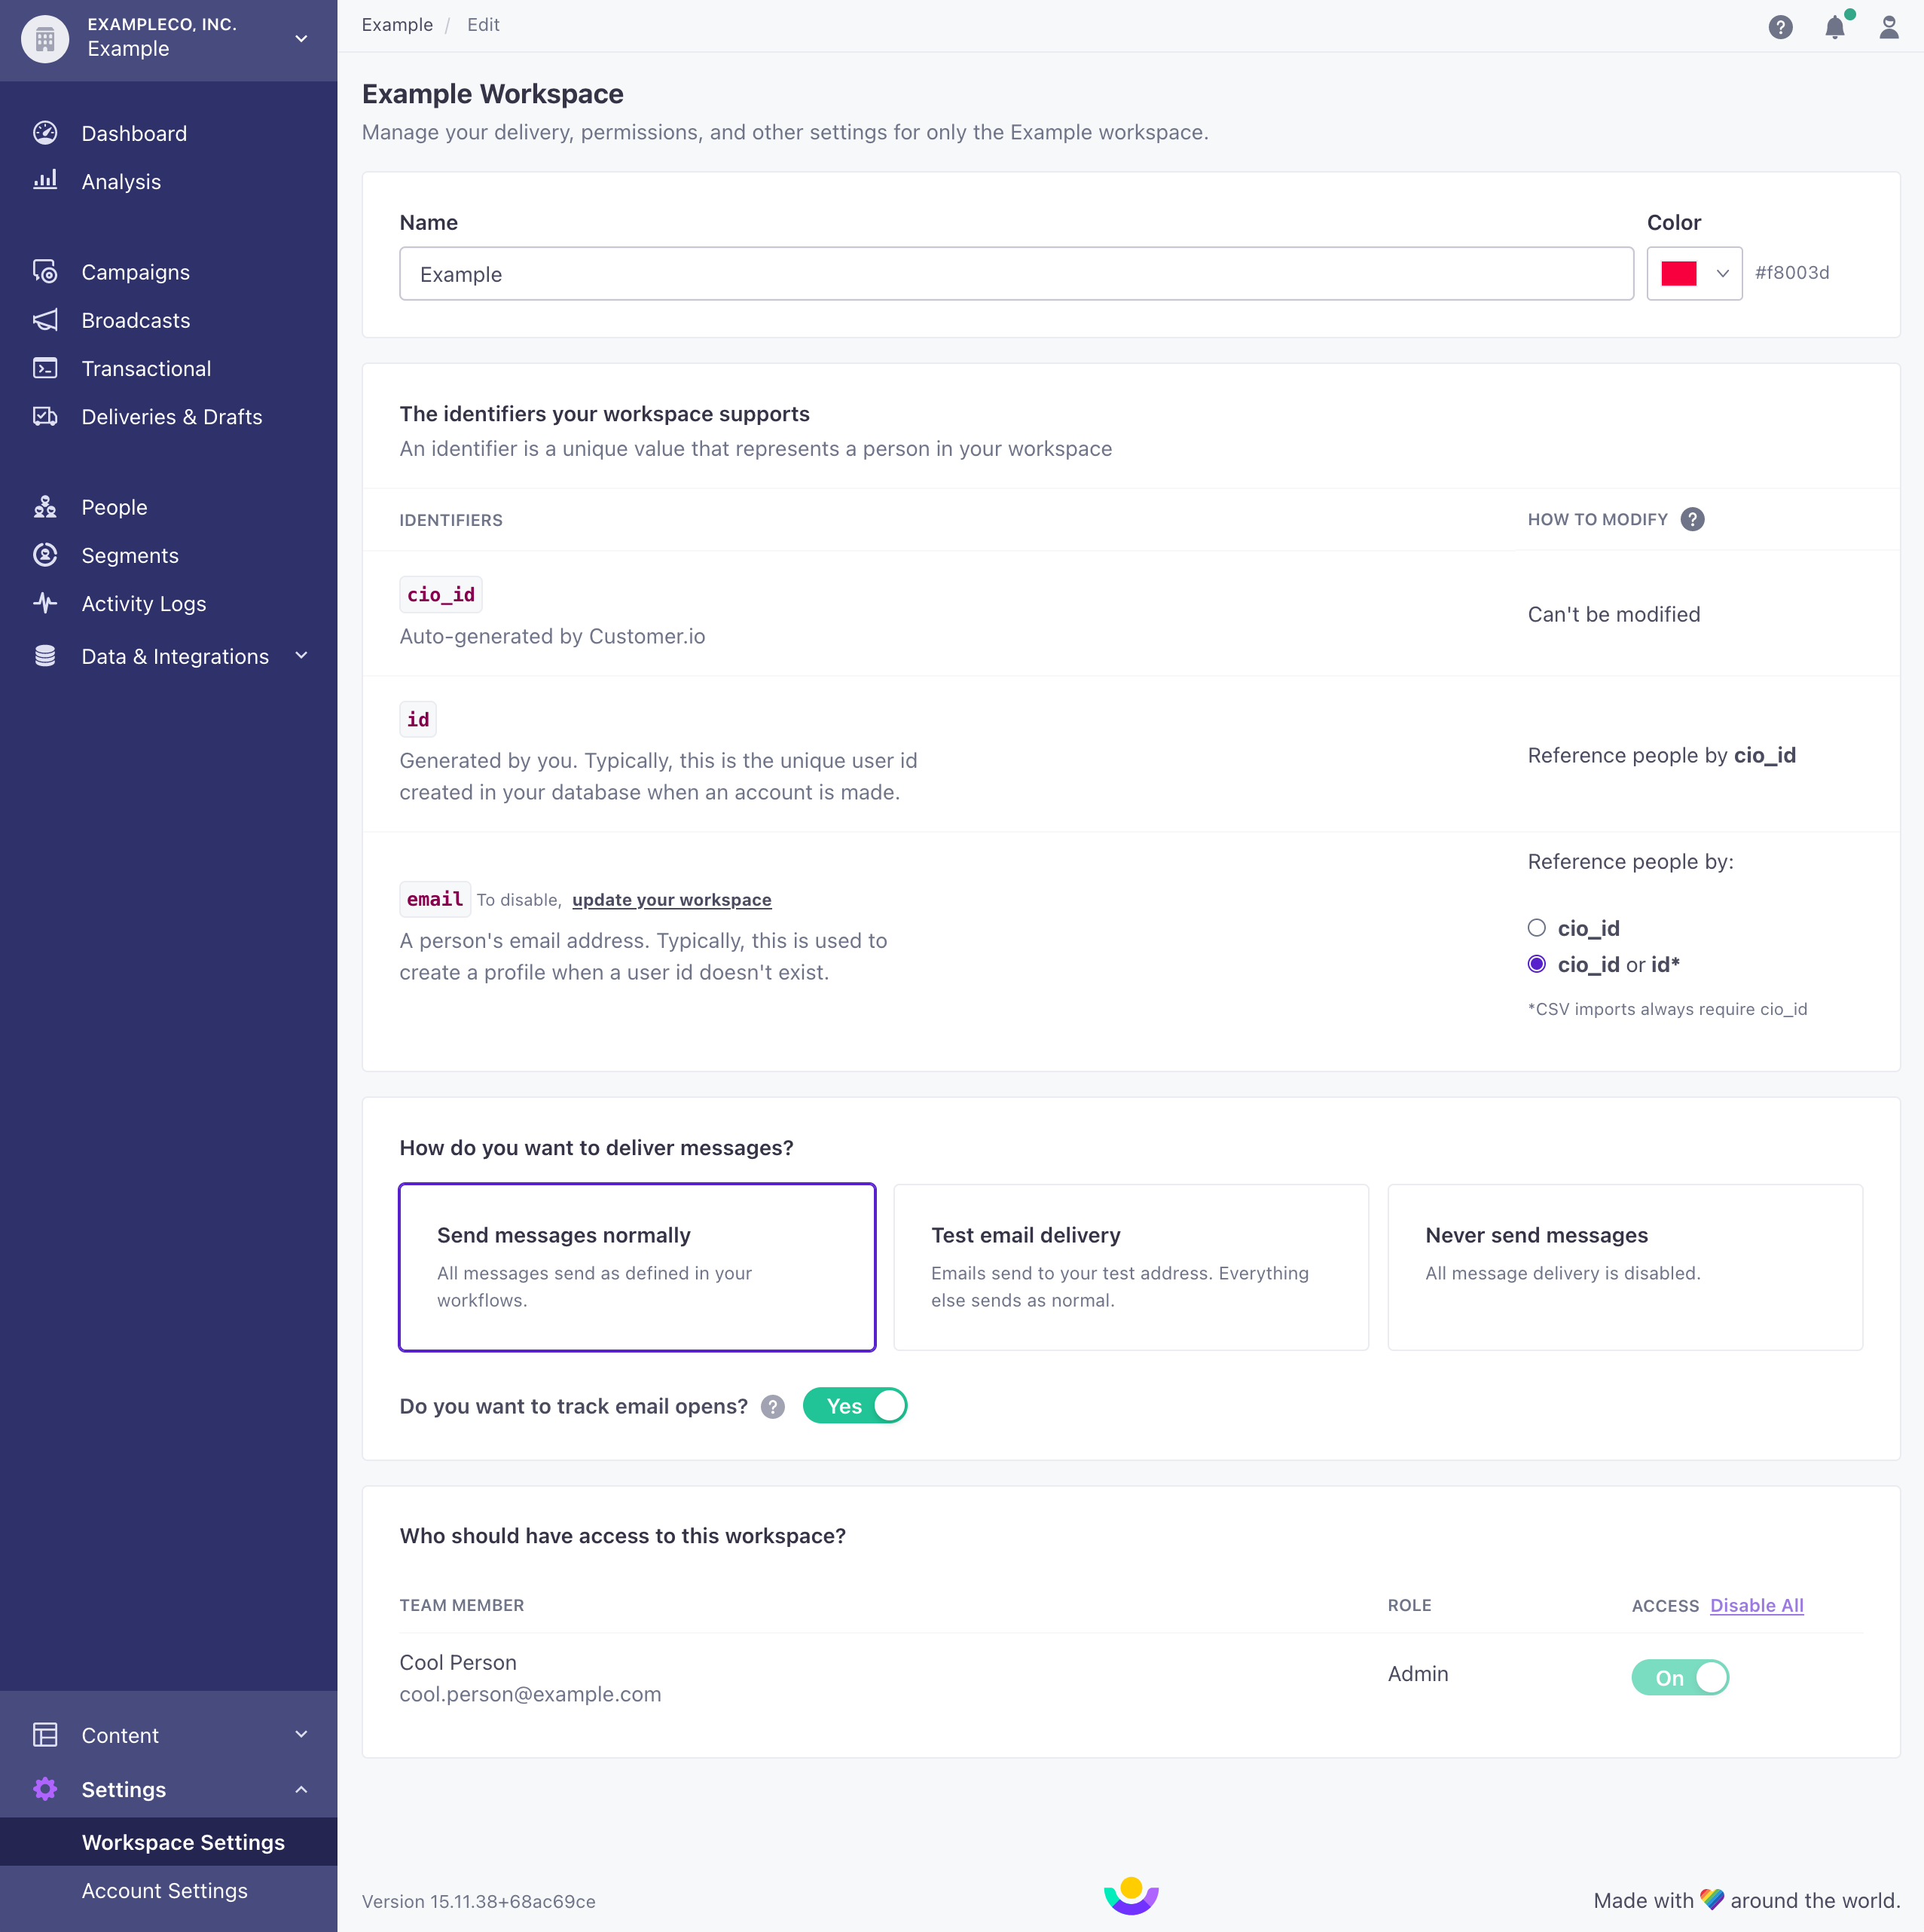
This is where you define the identifiers for people, which you need to add or update people in your workspace. You can always identify people by id and cio_id. You’ll also decide whether to identify people by email and phone—both are optional identifiers that you can enable or disable.
This chart shows what it means to update email or id based on these settings. phone follows the same rules as email: it’s an optional identifier, so the same update logic applies.
Enable or disable email and phone as identifiers
Email and phone are optional identifiers The attributes you use to add, modify, and target people. Each unique identifier value represents an individual person in your workspace.id and cio_id are always available and can’t be disabled.
Disabling an identifier only prevents you from using that value to add or update people; you can still use it as an attribute A key-value pair that you associate with a person or an object—like a person's name, the date they were created in your workspace, or a company's billing date etc. Use attributes to target people and personalize messages.phone attribute and use it to send SMS.
Keeping email or phone enabled can be helpful for cases where you initially identify people who are interested in your product (leads) by email address or phone number and then assign them IDs later, when they become customers.
When you enable email or phone as an identifier, people who share the same value become duplicates—two profiles that would resolve to the same identifier. As part of the enable flow, you choose how to handle them:
- Keep the oldest profile: we merge each set of duplicates into the profile that was created first.
- Keep the newest profile: we merge each set of duplicates into the profile that was created most recently.
- Resolve duplicates yourself: we don’t merge anything. If your workspace has duplicate values, the change doesn’t complete; we send you a report of the affected people so you can merge or update them before you try again.
To enable or disable email or phone as an identifier:
- Go to Settings > Workspace Settings and click General Workspace Settings.
- In the identifiers table, click Enable or Disable next to
emailorphone.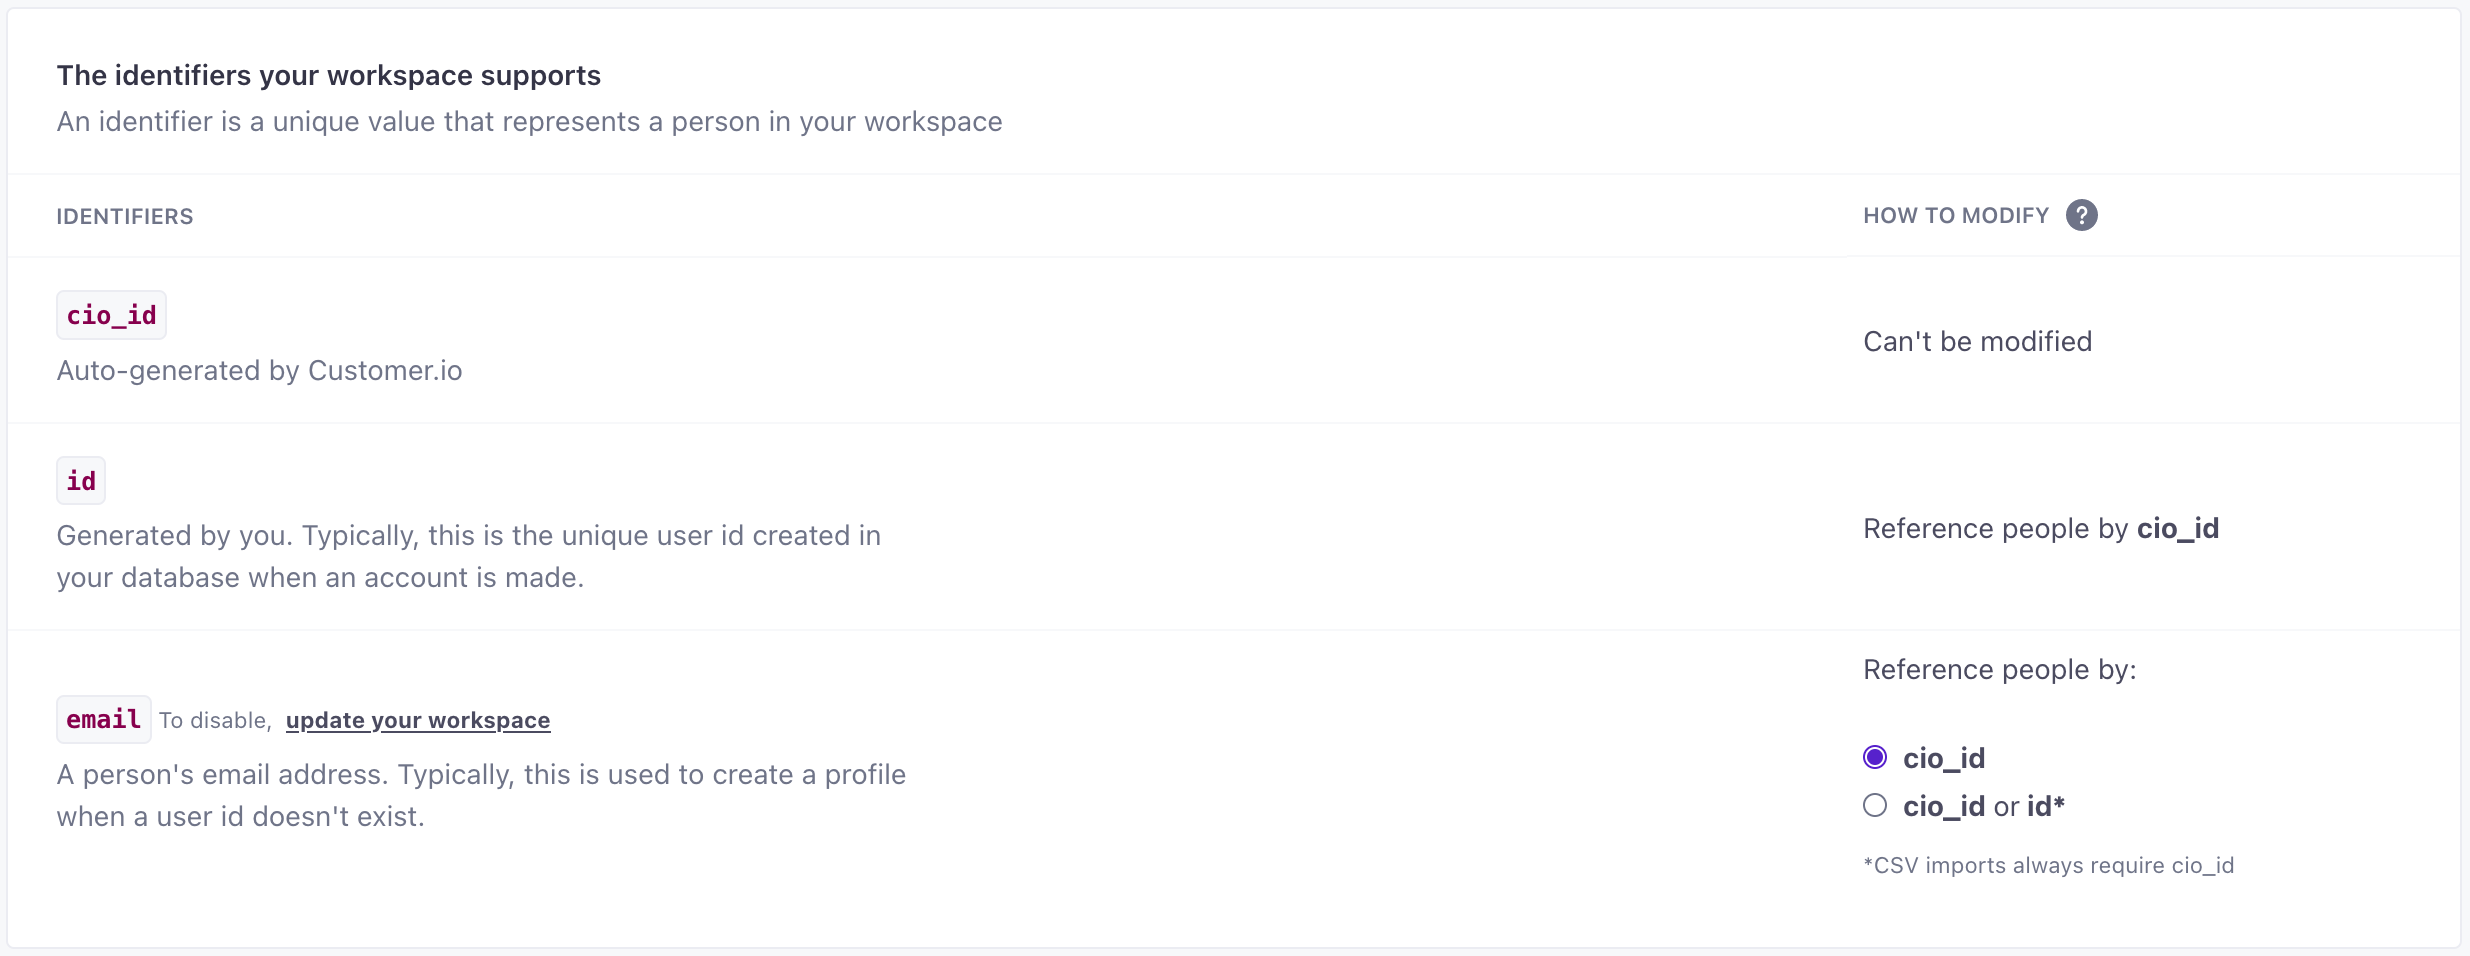
- Carefully read about the behaviors that will change for your workspace, then confirm. When you enable an identifier, you choose how to handle people who share the same value—keep the oldest profile, keep the newest profile, or resolve duplicates yourself—and your workspace pauses processing while we revalidate your data. When you disable an identifier, you can’t leave any person with
cio_idas their only identifier—every profile must keep at least one ofid,email, orphone. If disabling would orphan people, we’ll show you the affected profiles so you can resolve them first.
Where you can identify people by phone
While making phone an identifier ensures that it’s unique to a person in Customer.io—no two people can share the same phone number—you can’t identify people by phone with all of our integrations. You can identify people by phone number in the UI and through these sources:
| Data-in source | Identify people by phone? |
|---|---|
| Track API v2 | Yes |
| CSV and Google Sheets imports | Yes |
| Track API v1 | No |
| Pipelines API, including mobile SDKs, JavaScript library, and reverse ETL syncs | No |
| Forms | No |
For integrations that don’t support phone, identify people by id or email and send the phone number as a phone attribute. Don’t send a phone number as the primary identifier through these integrations: they can’t check your workspace’s identifier settings, so the phone number becomes the person’s id. If the same person later arrives in an integration that supports phone as an identifier, you’ll end up with duplicate profiles—one where the phone number is the profile’s id and one where it’s the phone attribute.
Behaviors for people without an ID
When you identify people by email or phone, you may notice slightly different behaviors from workspaces that only use id.
- Reporting Webhooks: the
customer_idkey is null if you add a person without an ID (byemailorphoneonly). You should update your endpoints to use the newidentifiersobject. See our webhook documentation for more information. - Segment Source events: After you migrate, message opens, clicks, etc. for people without an
idare sent with another identifier (such as theiremail) as ananonymousId. You can map these anonymous events to another destination or drop them.
Reference people by ID (allow updates to email and phone using ID)
If your workspace uses The attributes you use to add, modify, and target people. Each unique identifier value represents an individual person in your workspace.email or phone alongside id as identifiersemail or phone after you set it. If you created your workspace after January 28, 2022, this setting is on by default.

In general, if you see a lot of failed “Attribute Change” requests in your workspace, or a significant number of your identify calls fail, you might try turning this setting on. You can also try enabling Multi-identifier profile merge and Auto-merge on update.
-
cio_id: you must identify a person by
cio_idto change their email address or phone number.A person’s
cio_idis set when you create them, and is immutable. It acts as a canonical identifier across changes to a person’sid,email, orphone.For example, imagine that a person already has an
emailaddress and you want to change it. The request on the left below identifies a person by theircio_idand would succeed. The one on the right would fail. The same applies when you change a person’sphone.Successful request Failed request CURLcurl --request PUT \ --url https://track.customer.io/api/v1/customers/cio_1234 \ --header "Authorization: Basic $(echo -n site_id:api_key | base64)" \ --header 'content-type: application/json' \ --data '{"email":"new.email@example.com"}'CURLcurl --request PUT \ --url https://track.customer.io/api/v1/customers/id1234 \ --header "Authorization: Basic $(echo -n site_id:api_key | base64)" \ --header 'content-type: application/json' \ --data '{"email":"new.email@example.com"}' -
cio_id or id: you can change a person's email address or phone number in any request that includes a person's
id.This makes it significantly easier to change your audience’s email address or phone number using our JavaScript snippet, the API, any of our reverse ETL integrations and so on.
Message sending
Under “How do you want to send messages?” you can choose from:
- Send messages normally
- Send emails to a test address—note that this only applies to emails
- Never send messages
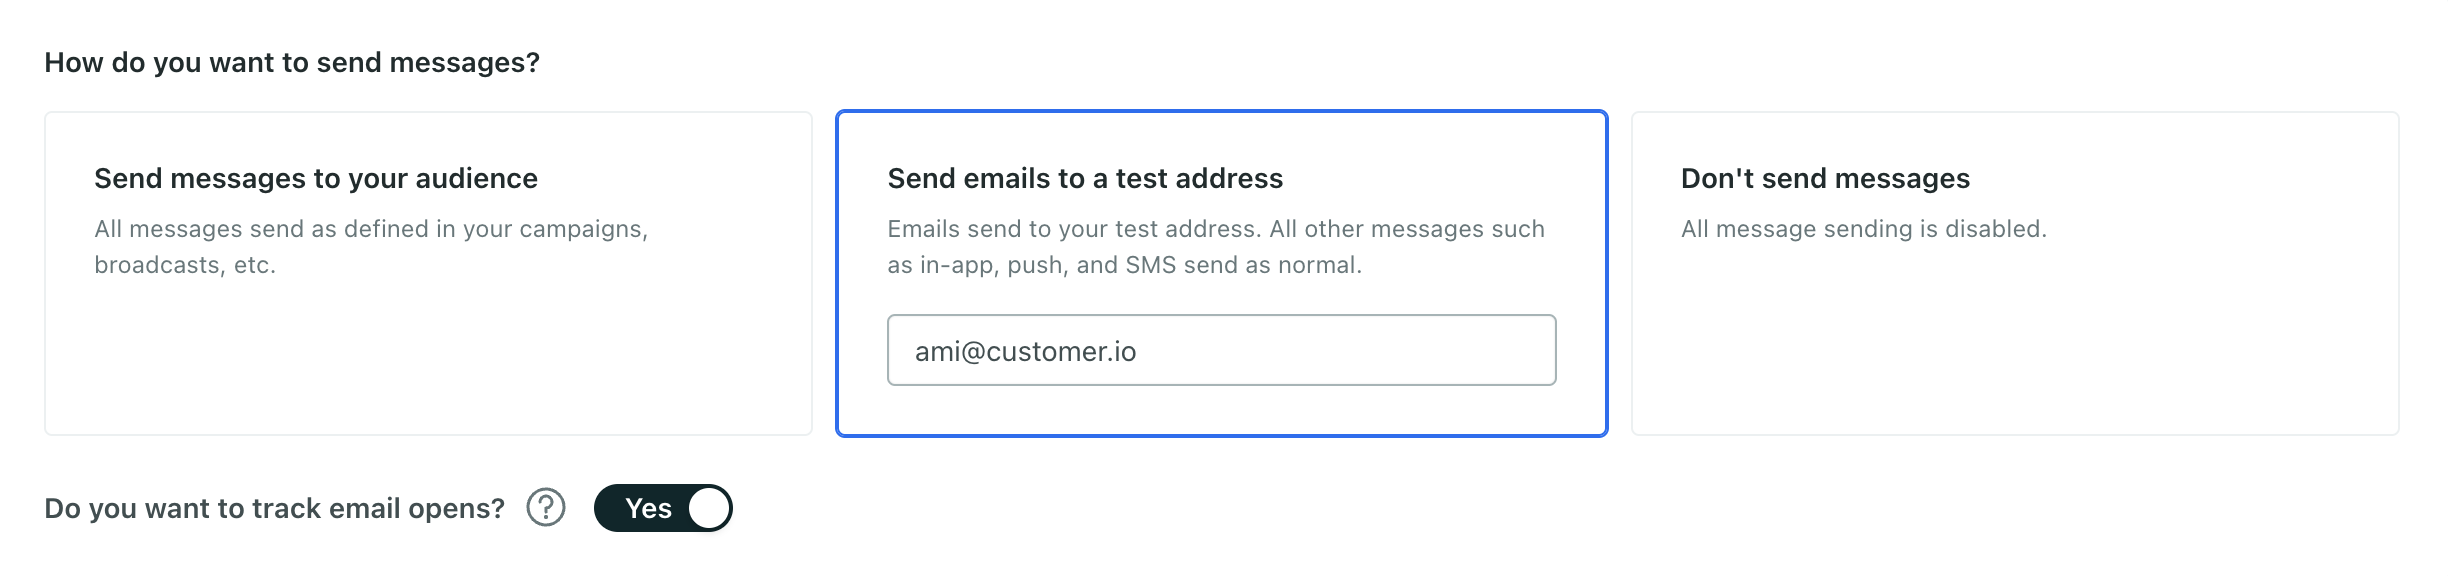
When you first sign up for Customer.io, your account will send emails to a test address. This lets you send emails to a person in your account without verifying a domain so you can test your emails right away. You can see who will receive test emails in the top-left of your workspace. If you’ve integrated with other channels like in-app, those will send normally when “send emails to a test address” is selected.

By default, we’ll send test emails to the address that created the account. Account Admins and Workspace Admins can select another team member to receive test emails from the dropdown. The address for “send emails to a test address” is the same for all team members in the workspace; it’s not unique to each team member.
After you verify your domain and are ready to send emails, click Send messages normally. Unless you are explicitly sending a test email, this setting ensures your messages send to actual recipients, as specified in the To field of your message.
You can also choose to Never send messages of any type (email, in-app, etc.). This disables all message delivery and ensures no one can receive a message from any automation, broadcast, or transactional message. You might choose this option for test workspaces.
Disable open tracking
Open tracking relies on a tracking pixel—a small image—in your messages; when a user opens an email containing the tracking pixel, the image loads from a remote location and tells us that a user opened the message.
However, open tracking is not always reliable. In the interest of user privacy, Apple and the makers of other email clients offer options to prevent images like tracking pixels from loading when users open messages; this prevents us from tracking open events. In some cases, email clients and corporate firewalls immediately download images when a person receives an email, causing us to record an open even if a person didn’t actually open the message.
To disable open tracking at the workspace level and prevent tracking pixels from being added to your emails entirely, you can go to Settings > Workspace Settings > General Workspace Settings. This setting overrides the message-level Track opens and link clicks in this message setting. Disabling open tracking this way can help you both respect your audience’s privacy and prevent you from focusing on sometimes-unreliable open rates, as opposed to clicks or conversions.

When you disable open tracking, open metrics for emails may still appear in some charts or tables (in automation metrics, etc), but will always show zero results.
Whether you continue to track opens or not, we recommend setting conversion criteria for your messages and tracking link clicks as more reliable ways to determine the success of your messages and automations.
Assign workspace access
If you isolate workspaces by project, client, app, etc, you may want to limit who has access to each workspace. You assign access based on workspace, so your team members can have full access to one workspace and partial access to another.
Only Account Admins can manage access for team members. They can change access when:
- creating or editing a workspace
- adding or editing team members
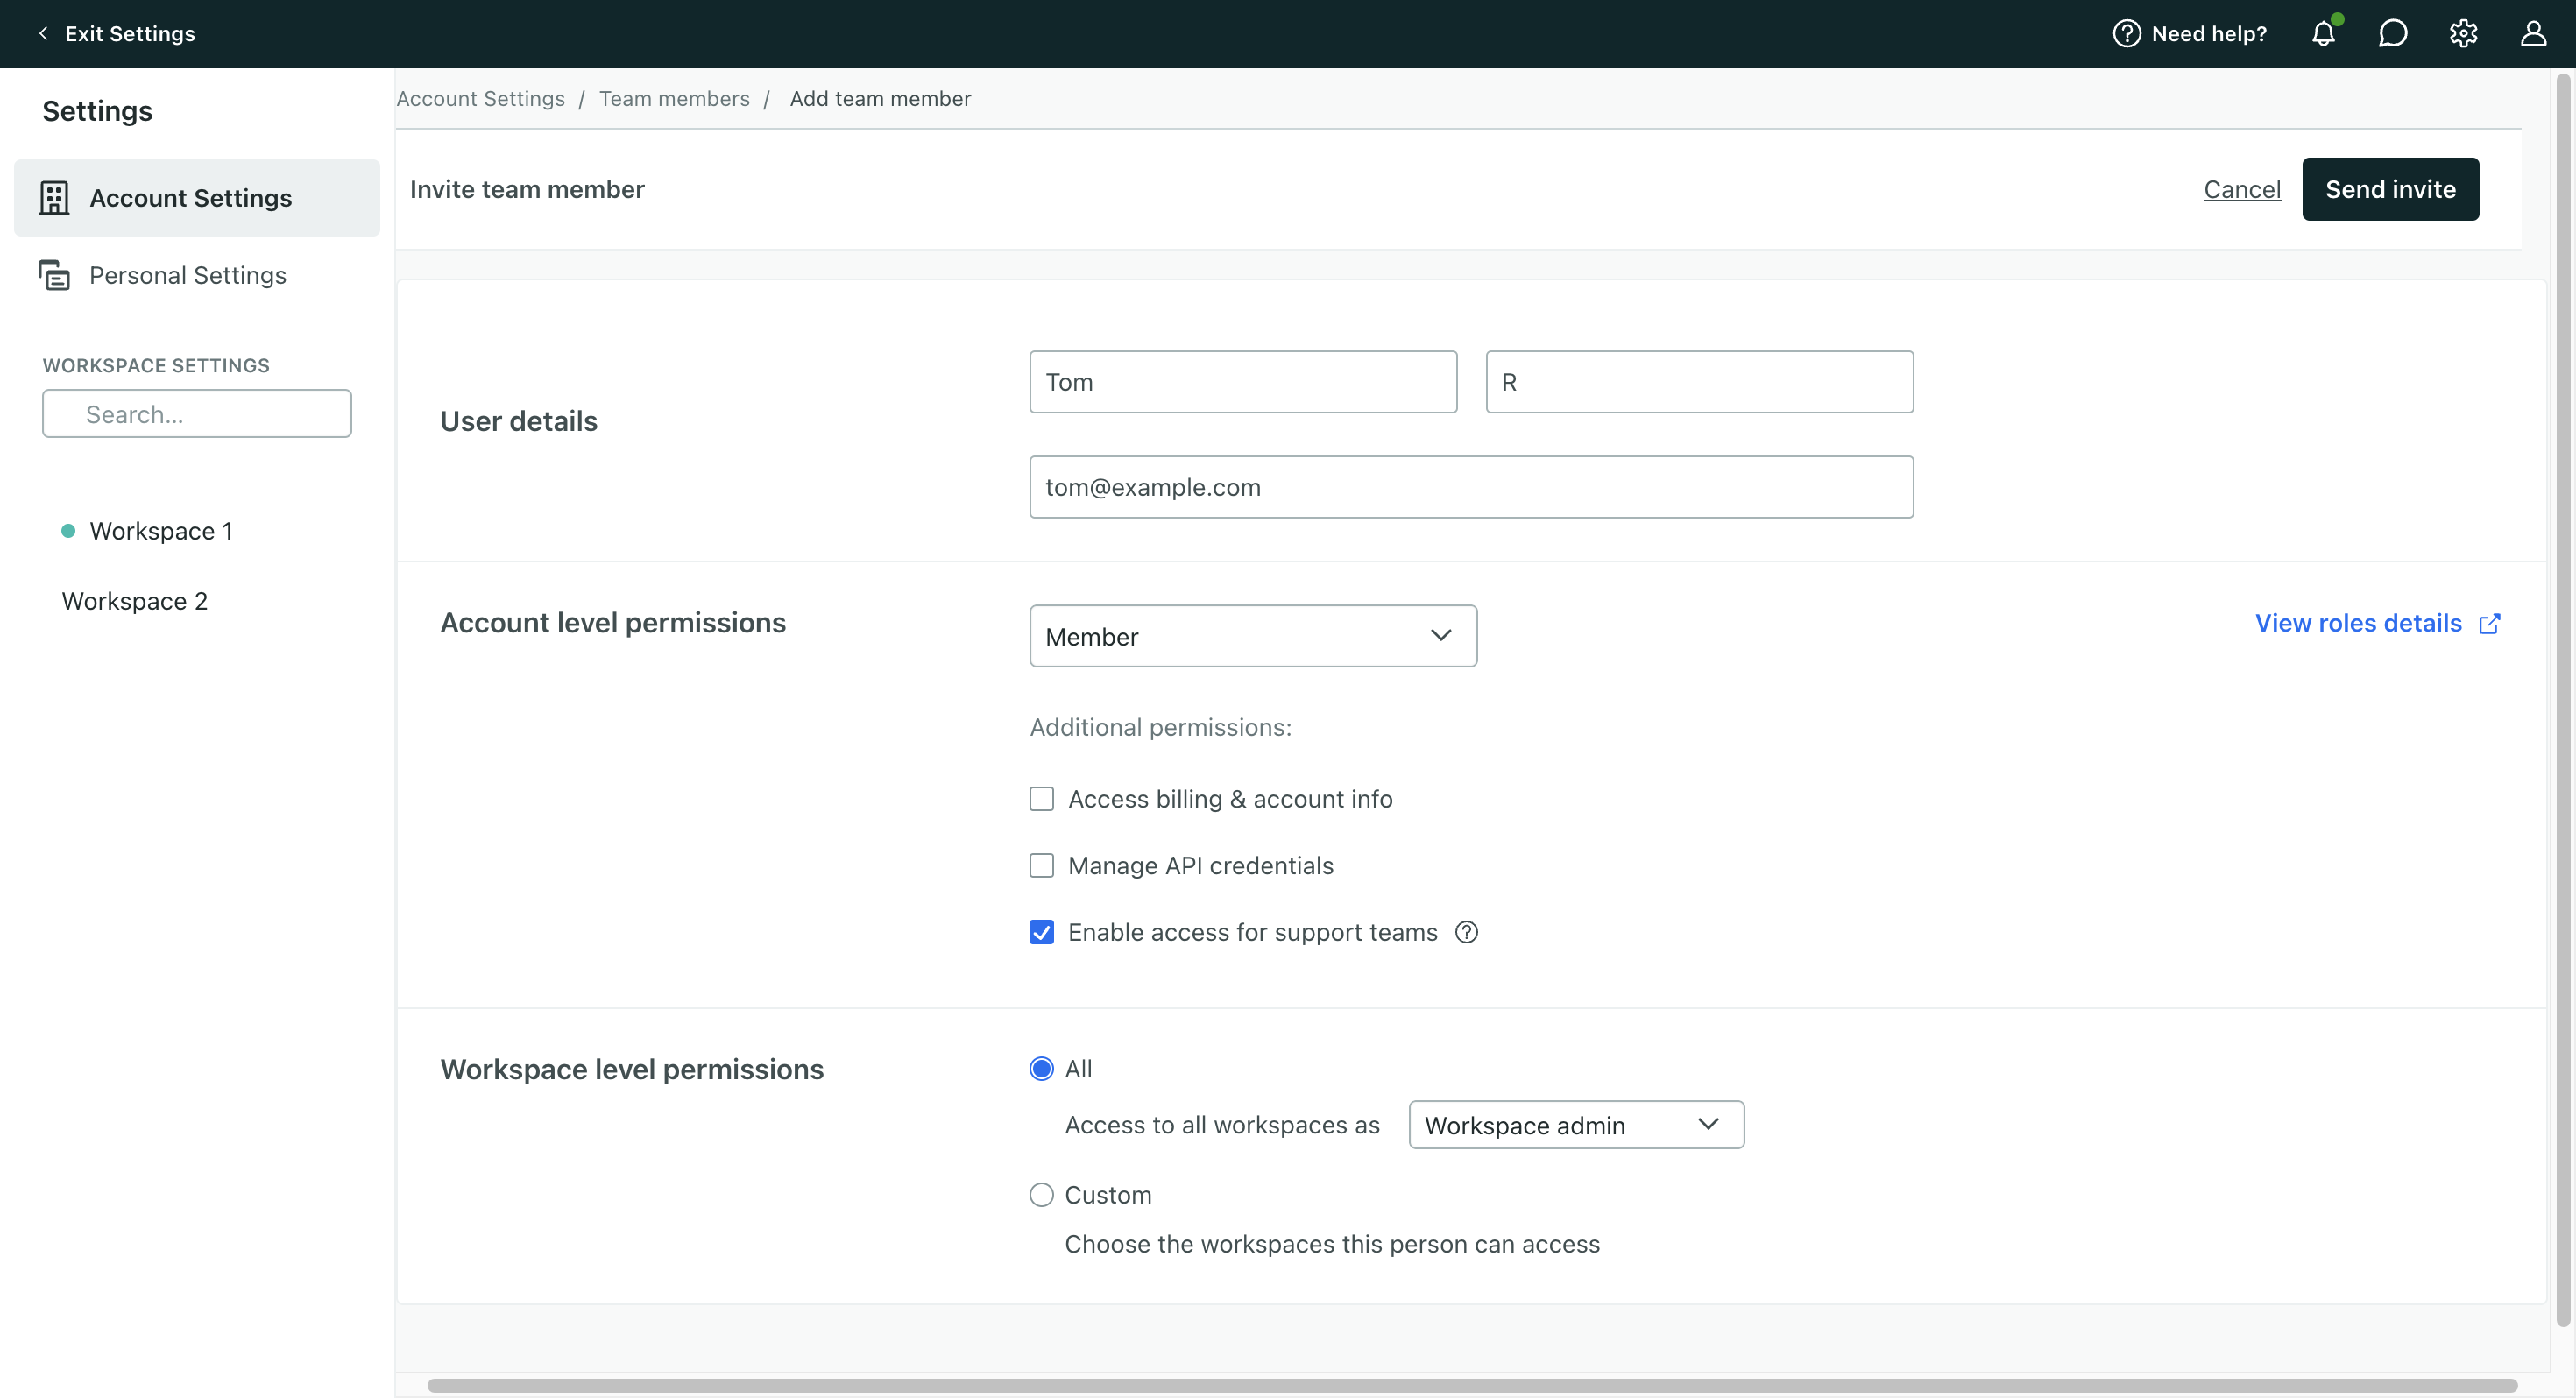
Account Admins have access all workspaces in the account. You cannot disable an Account Admin’s access to a workspace.
FAQs
What data is shared across workspaces?
No information is shared between workspaces.
Workspaces are essentially separate instances of Customer.io. Each workspace has its own people, automations, metrics, and other data.
How is billing calculated across workspaces?
We bill based on people, objects, emails sent, and Data Pipelines API calls across all your workspaces. Check out How We Bill for more info.
Is there any way of sharing data between workspaces?
Workspaces are completely separate instances of Customer.io, each with their own people and associated data. This prevents sharing information and potentially messaging the wrong person. However, you can copy workflow actions across workspaces.
What about testing? Are workspaces a way to do that?
Although not designed specifically for testing, workspaces can be used as a sandbox to set up testing/staging environments. Each workspace is assigned its own set of API keys and are completely separate from your other workspaces. Once you’re ready to migrate a Automation or message from test to production, you can copy entire workflow actions from one automation to another across workspaces.
How do I move a workspace to another account?
To move a workspace from one account to another, you’ll need to contact Customer.io support. This process requires manual assistance from our team to ensure data integrity and proper migration. Click Need help? at the top of your workspace and then submit your request through Get help with an issue.