Attio destination integration
UpdatedAbout this integration
Powerful, flexible and data-driven, Attio makes it easy to build the exact CRM that your business needs.
Our Attio destination creates or updates records for people, users, companies, and workspaces in Attio. This integration helps you keep your Attio workspace up-to-date with the latest information about your customers.
Getting started
Go to Data & Integrations > Integrations and select the Attio entry in the Directory tab.
(Optional) Select the data sources that you want to connect to your outbound integration. You can always connect data sources later. We’ll only show you data sources that work with your integration.
Configure your integration.
Click Enable Destination.
Identify User
Attio has two different kinds of records for people: Person and User. The Identify User action asserts both records and links them together. Make sure you enable this in Actions.
A Person represents an actual human. People have names, email addresses, Twitter profiles, email and calendar interactions, etc. (In some other CRMs, you might think of this as a lead or contact.)
A User represents a user login or profile in your product. Users might have feature flags, permission levels, etc. In Attio, a person can have multiple user records—like a person that has multiple logins across workspaces.
When you identify someone, the Attio Identify User action creates both records—a person and a user—and links them together. Attio relies on both email and ID values to create, update, and associate people so your `identify call must capture both properties:
- An email property, to create or update a Person. By default, we map to
traits.emailin youridentifycall. - An ID property, to create or update an associated User. By default we map to the
userIdin youridentifycall.
{
    "type": "identify",
    "userId": "user-id",
    "traits": {
        "email": "user@example.com"
    }
}
If you need to assert people and users independently, you can configure an Assert Record action instead.
Make sure you’ve activated the user object
Set people and user attributes
Make sure that your attributes exist in Attio
You can send attributes or traits to Customer.io and we’ll create them if they don’t already exist. That’s not the case in Attio. If you map an attribute that doesn’t exist in Attio, your action will fail and we’ll show errors for your identify requests. See attribute types below for more information.
You can assign attributes to people or users in Attio as a part of your Identify User action. To do this, you’ll need the IDs or slugs of the attributes you want to set. In general, the human-readable slugs are easier to deal with.
To set attributes in your Identify User action, click Add Key/Value for Additional User attributes or Additional Person attributes. The value on the left is the attribute ID or slug from Attio, and the value on the right is the trait from your incoming identify call that you want to set on the person or user.
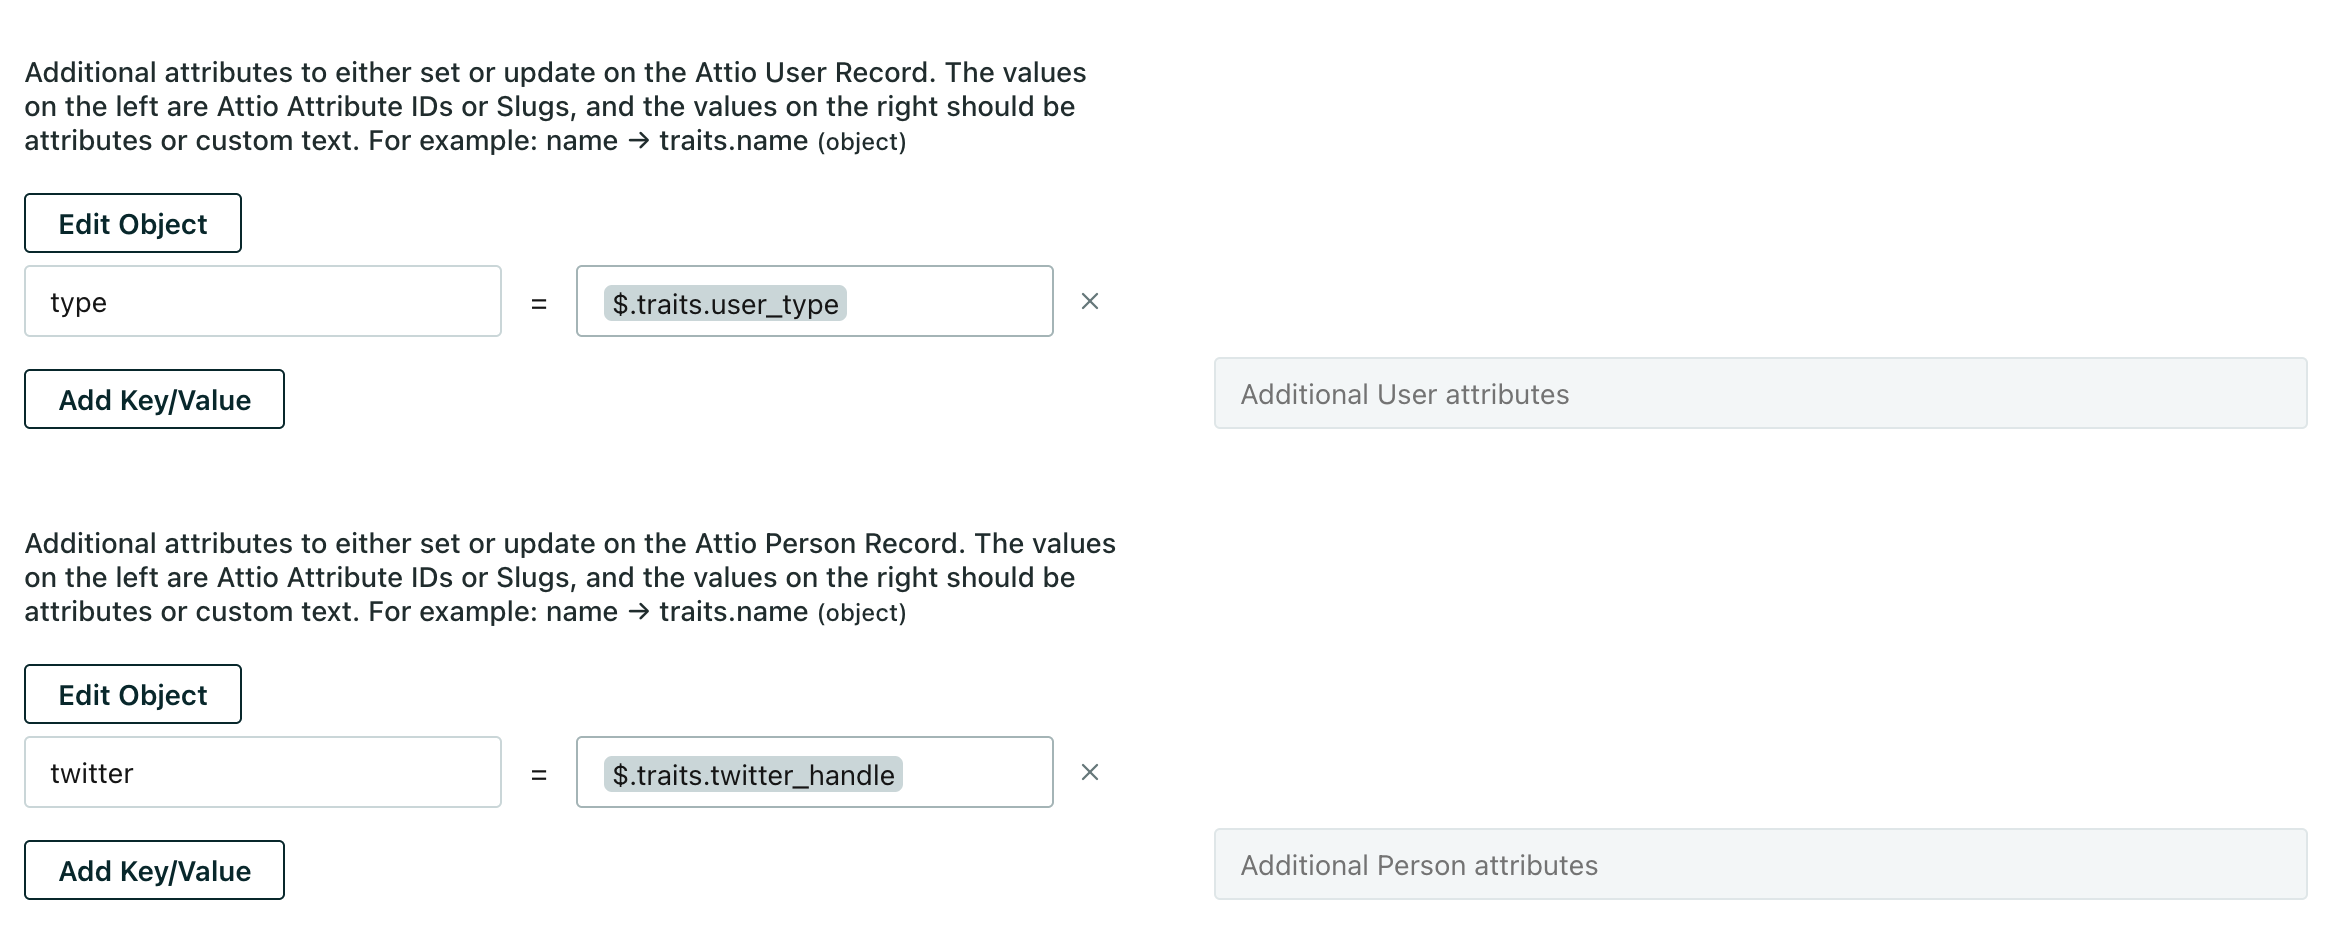
Note that users don’t typically have many default attributes in Attio. Make sure that your attributes are declared in Attio before you add them to your Identify User action. See attribute types below for more information.
Associate people with a workspace
If you want to group users together in Attio, associate them with a workspace. You’ll need to update the Identify User action:
- Click Actions.
- Beside Identify User, click then Edit.
- Beside Additional User attributes, click Add Key/Value.
- Set the Key to
workspace. - Set the Value to the variable
$.groupId. - Click Save.
Then your payload would look like this:
{
    "type": "identify",
    "userId": "user-id",
    "groupId": "workspace-id",
    "traits": {
        "email": "user@example.com"
    }
}
Make sure you’ve activated the workspace object
Group Workspace
The Group Workspace action creates or updates a company (by domain, like company.com) and an associated workspace (by name). Make sure you enable this in Actions.
- A Company can have names and domains, as well as enriched properties like ARR or category.
- A Workspace represents a group of users in your product. Workspaces might have feature flags, billing configurations, customer support representatives, etc. A company can have more than one workspace.
To support both companies and workspaces, your group calls need to include both a groupId and a website trait. The groupId corresponds to Workspace ID in Attio and the website is the company’s Domain in Attio.
{
    "type": "group",
    "groupId": "Workspace ID",
    "traits": {
        "website": "company.com"
    }
}
If you want to create a company and workspace in Customer.io AND Attio, include an object type ID in the payload. We recommend you first create your object type in Customer.io then use the ID in the call. You can represent an object typeAn object type is a group of objects. An object type could be Online Classes while an object within the type could be English 101. Customer.io generates a unique, immutable object_type_id. in Customer.io as a company in Attio and an objectAn object is a non-person entity that you can associate with one or more people—like a company, account, or online course. as a workspace.
{
  "type": "group",
  "groupId": "Workspace ID",
  "traits": {
    "website": "company.com",
    "objectTypeId": 5
  }
}
This mapping asserts both a company and workspace and links them together. If you need to assert your companies and workspaces independently, you should set up your own Assert Record action(s).
Make sure you’ve activated the workspace object
Set company and workspace attributes
Make sure that your attributes exist in Attio
You can send attributes or traits to Customer.io, and we’ll create them if they don’t already exist. That’s not the case in Attio. If you map an attribute that doesn’t exist in Attio, your action will fail and we’ll show errors for your group requests. See attribute types below for more information.
To assign attributes to a company or workspace in Attio, you’ll need the ID or slug of the attribute you want to set. In general, the human-readable slug is easier to deal with.
To set attributes in your Group Workspace action, you’ll click Add Key/Value for Additional Company attributes or Additional Workspace attributes. The value on the left is the attribute ID or slug from Attio, and the value on the right is the trait from your incoming group call that you want to set on the person or user.
For example, if you want to set a company name or workspace name in Attio, and you send traits.companyName and traits.workspaceName in your group call, you’d add the following keys and values.
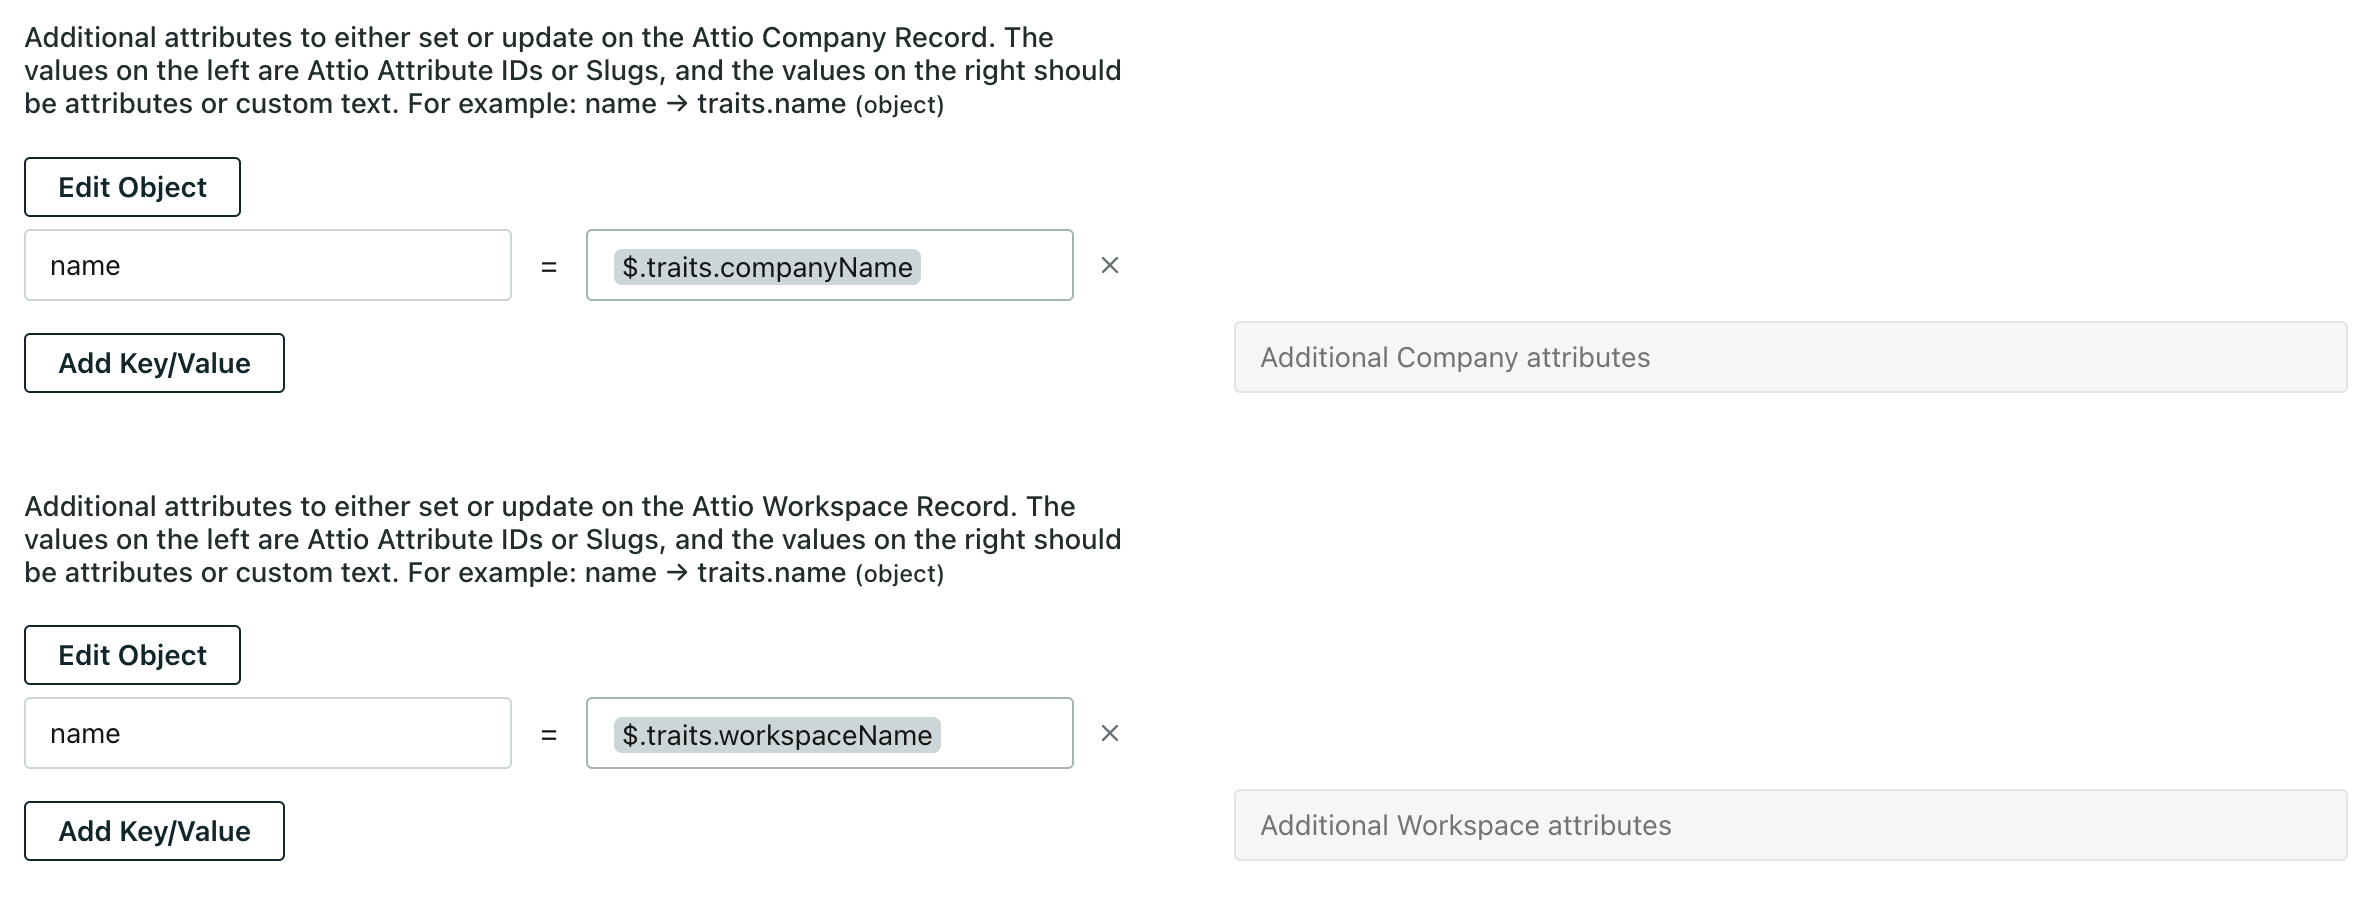
Or if you want to set a twitter attribute in Attio, but you send traits.twitter_handle in your group call, you would set up your mapping like this:

Workspaces don’t typically have many default attributes in Attio. Make sure that your attributes are declared in Attio before you add them to your Group Workspace action. See attribute types below for more information.
Assert Record: create your own action
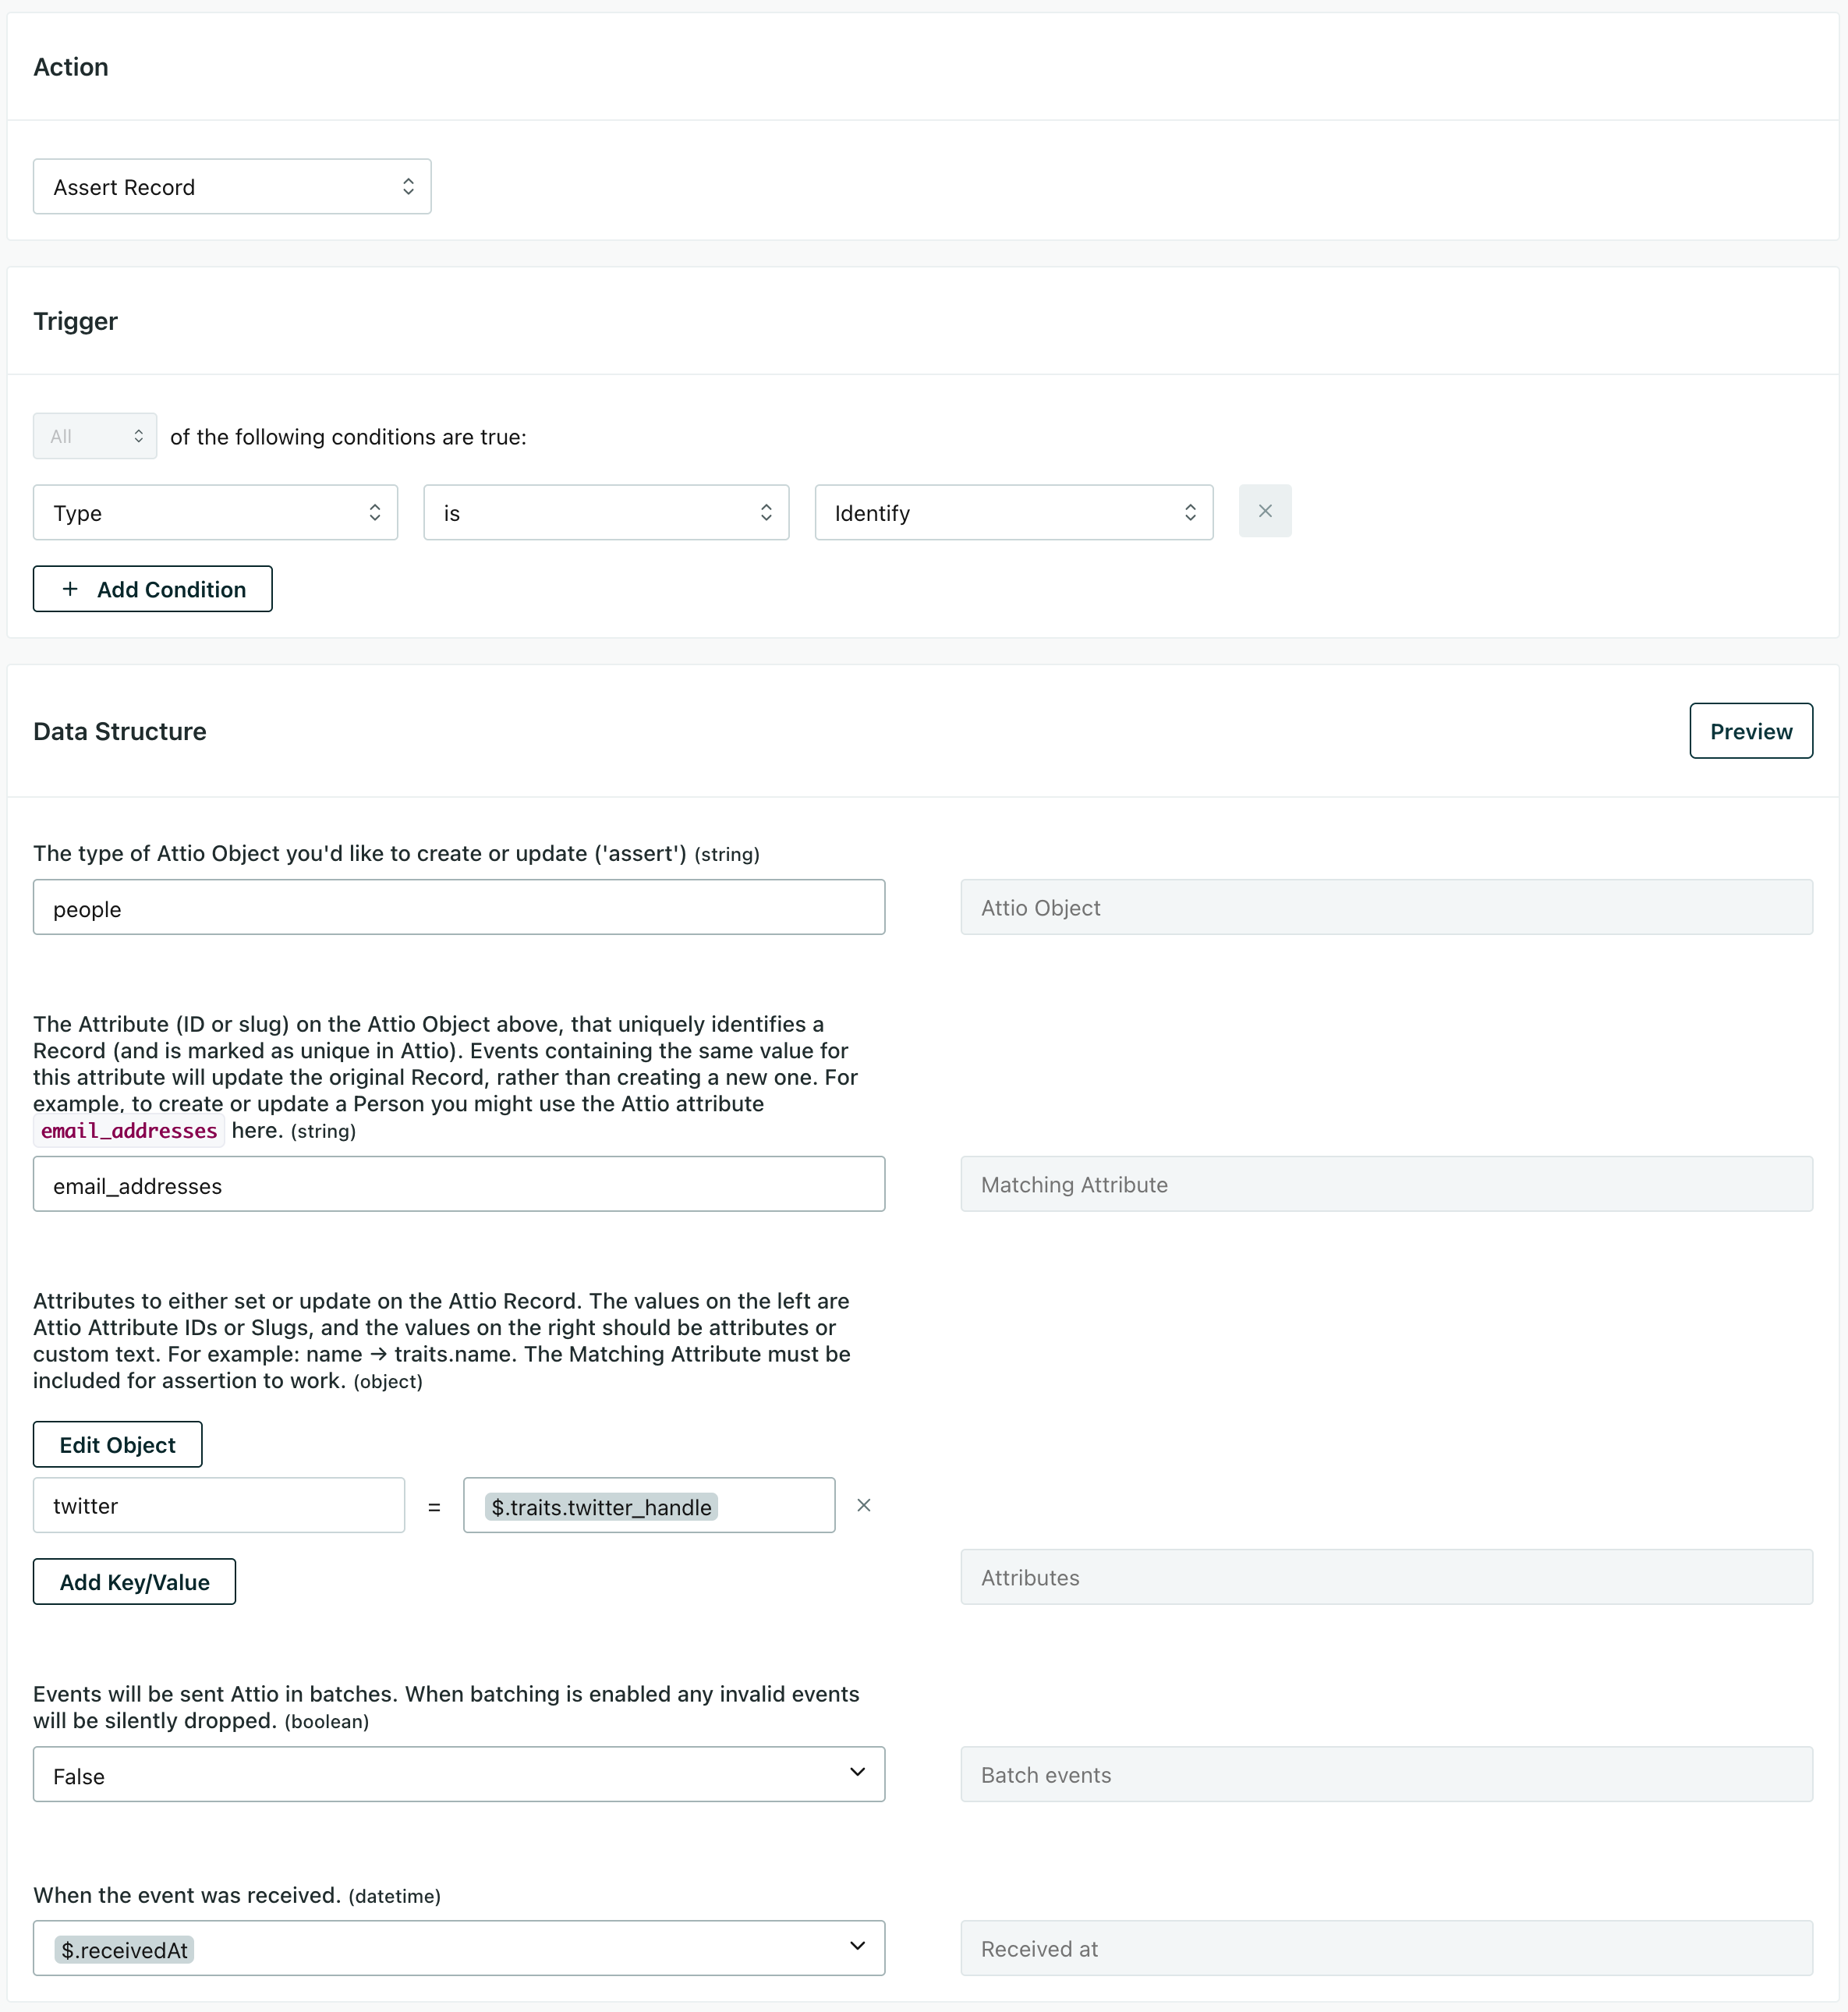
The Assert Record action lets you create or update an Attio object (like a person or a company) with a matching attribute and value. For example, you could assert an individual person by ID by email address without updating associated user records.
When you set up an Asset Record, you’ll need to set the Attio Object property. This is the kind of record you want to assert (create or update) in Attio.
Then, you’ll need to set the Matching Attribute property. This is the slug for the attribute in Attio, and must also be present in your incoming call. Using our example above, we’d select Person as our Attio Object and email as our Matching Attribute.
So, imagine we send an identify request that looks like this:
{
    "type": "identify",
    "userId": "person@example.com",
    "traits": {
        "twitter_handle": "@example-person"
    }
}
This action then attempts to find an existing person where the email matches your incoming userId. If it finds the email, we’ll update the associated twitter attribute. If it doesn’t find the email, we’ll create a new person with the email and twitter handle you’ve provided.
Attribute types
Before you add attributes to any of your Attio destination actionsA block in a campaign workflow—like a message, delay, or attribute change., you should make sure that they exist in Attio and that you have the right ID or slug.
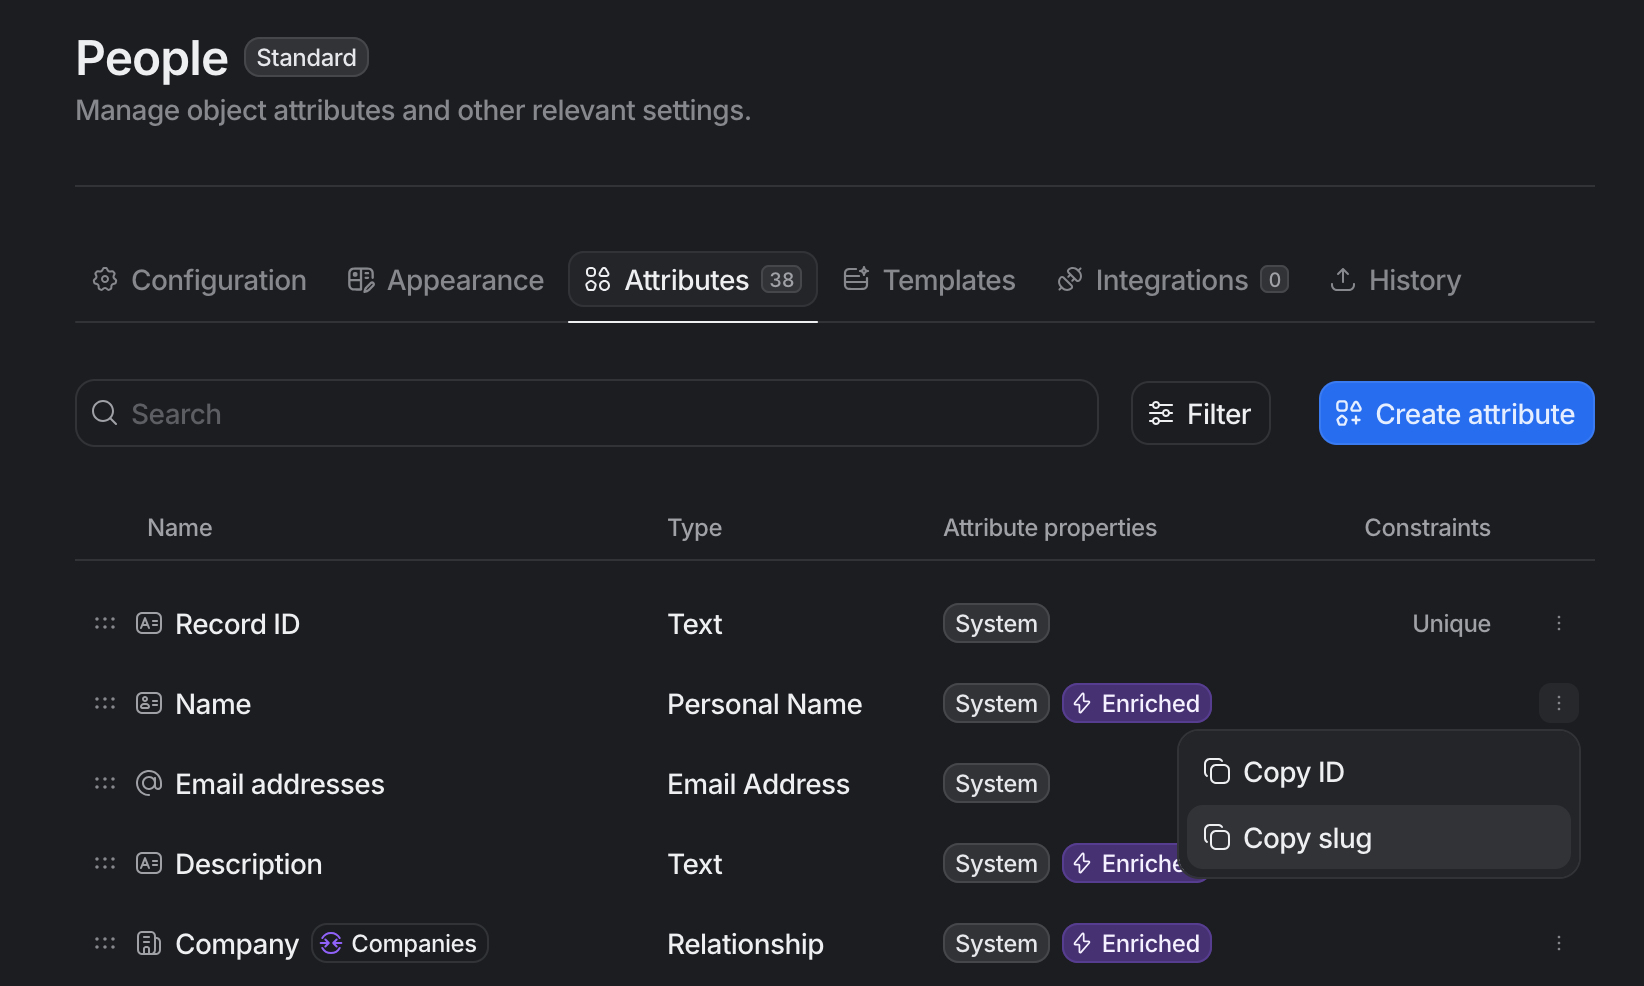
- Go to your Objects page in Attio.
- Select the object you want to set attributes on and go to the Attributes tab.
- Find your attribute, click ︙ and select Copy slug.
Our Attio destinationAn integration that sends data out of Customer.io—your data’s ultimate destination. integration supports all of Attio’s attribute data types. Below are examples of the formats that Attio expects for each type of attribute. A request will fail if you attempt to send a value that doesn’t match the attribute type in Attio.
You can pass null to unset any attribute value in Attio.
type | Format | Example values |
|---|---|---|
actor-reference | An email address of a workspace member | "alice@attio.com" |
checkbox | Boolean | true, false |
currency | Number with up to 4 decimal places | 99, 29.9999 |
date | YYYY-MM-DD | "2023-09-28" |
domain | {domain}.{tld} | "app.attio.com", "www.example.com" |
email | A valid email address | "person@example.com" |
location | String with all valid address parts (street address, city, state, country, and postal code) combined | “1 Infinite Loop, Cupertino, CA, US” |
number | Number, stored as a 64-bit float | 42.192, 17 |
personal-name | Last name(s), First name(s) (note the comma in the middle) | "Bloggs, Joe" |
phone-number | E.164 format, starting with +... | "+15558675309" |
pipeline | A UUID or title representing the status | "open", "closed" |
rating | Integer from 0 to 5 | 0, 5 |
record-reference | Specifies a reference to another record. See Attio’s Record reference for more information. All standard records have at least one “record reference” attribute. For example, you typically reference a person in Attio by email address or a user by ID. | |
"person@example.com", "app.attio.com", "0677efa..." | ||
select | A UUID or title representing the option | "open" |
text | String | "A piece of text" |
timestamp | ISO8601, e.g. YYYY-MM-DDTHH:MM:SS. See Attio’s Timestamp documentation for more about supported timestamp formats. | "2023-09-28T04:39:17" |

