Forms API (backend integrations)
UpdatedYou can use the Customer.io Forms API to capture form submissions from any form provider. This makes it easy to capture and respond to leads based on information you receive in your backend.
How it works
When someone submits your form, we’ll identifyThe Customer.io operation that adds or updates a person. When you identify a person, Customer.io either adds a person if they don’t exist in your workspace, or updates them if they do. Before you identify someone (by their email address or an ID), you can track them anonymously. the form submitter and assign them attributesA key-value pair that you associate with a person or an object—like a person’s name, the date they were created in your workspace, or a company’s billing date etc. Use attributes to target people and personalize messages. based on the values they provide in your form. You can map form fields to attributes when you set up your form (normally after the first submission).
Form submissions also act as eventsSomething that a person in your workspace did. Events can trigger campaigns, add people to segments, etc, and you can use properties from events to personalize messages. that you can use to trigger campaigns, making it easy to respond to your audience automatically when they submit your forms!
Use the Forms API
If you don’t want to use our JavaScript snippet, you can write your own backend integration with the Customer.io /forms API. Even if you use our JavaScript snippet, you may want to maintain a backend API integration in case your audience blocks or disables JavaScript.
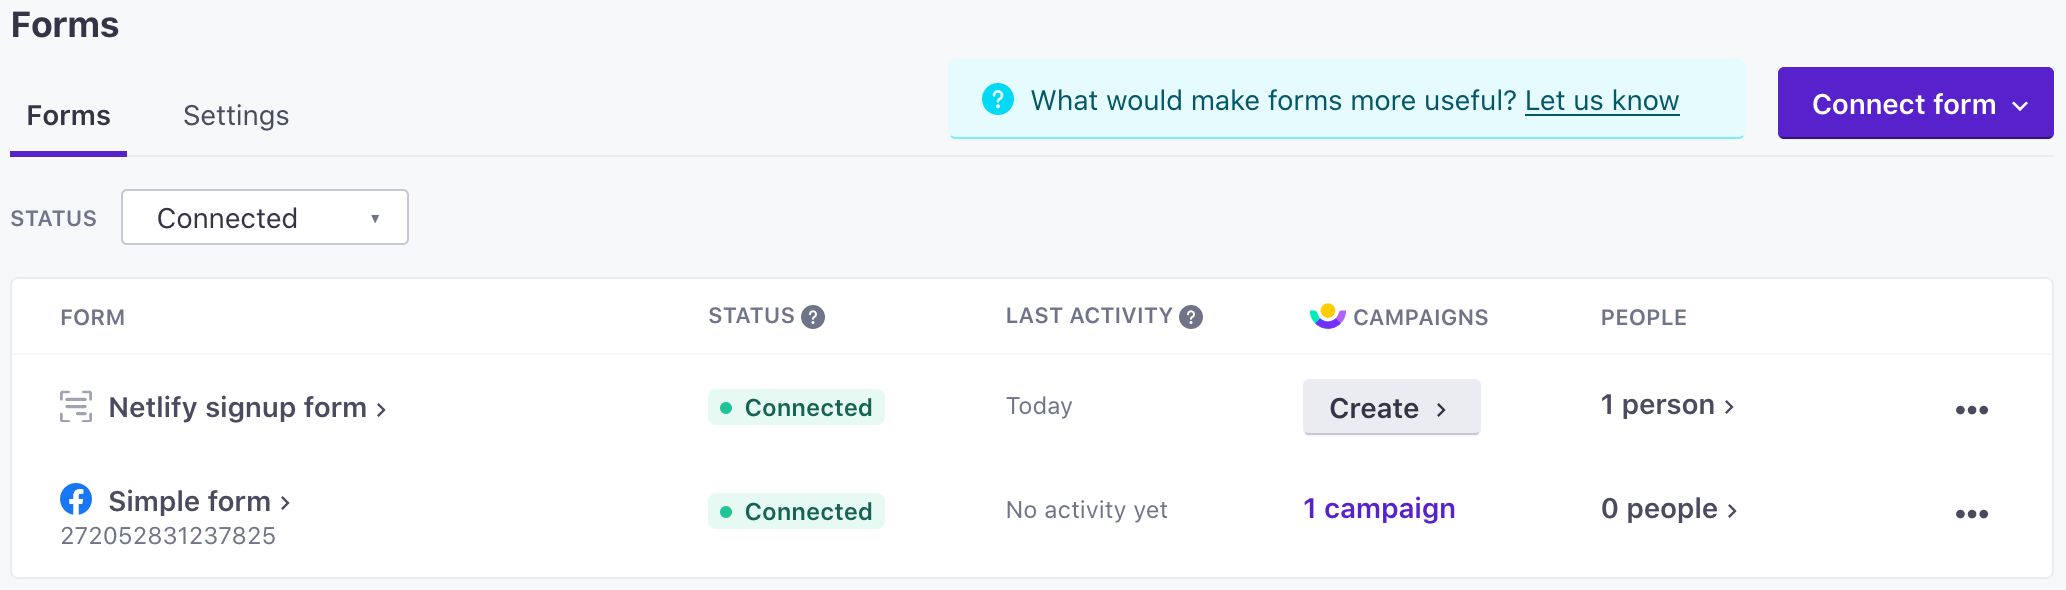
To connect your form to Customer.io, just send a send a POST to https://track.customer.io/api/v1/forms/{form_id}/submit when someone submits your form. The form_id is an arbitrary string value representing your form. If we haven’t seen the form ID before, we create a new form connection (found on the Data & Integrations > Integrations > Forms page). Requests with the same form ID are treated as submissions from the same form.
The payload of a request is a data object that must contain field that maps to an identifierThe attributes you use to add, modify, and target people. Each unique identifier value represents an individual person in your workspace.—the email or ID of the person filling out the form. If these attributes are titled email or id, we’ll map them automatically. If not, your form will show an error on the Go to Data & Integrations > Integrations > Forms page after your first submission, and you can re-map map fields to the appropriate identifiers. If the person represented by the identifier in your request does not already exist, we create them.
Additional keys in the data object represent form fields and values from the form that a person submitted. By default, we map form fields in your request directly to attributes, e.g. if you have a form field called first_name, we map that field to the first_name attribute.
{
    "data": {
        // each key represents a form field
        // form fields map directly to attribute names unless you re-map them
        "first_name": "Cool Person",
        "email": "cool.person@example.com",
    }
}
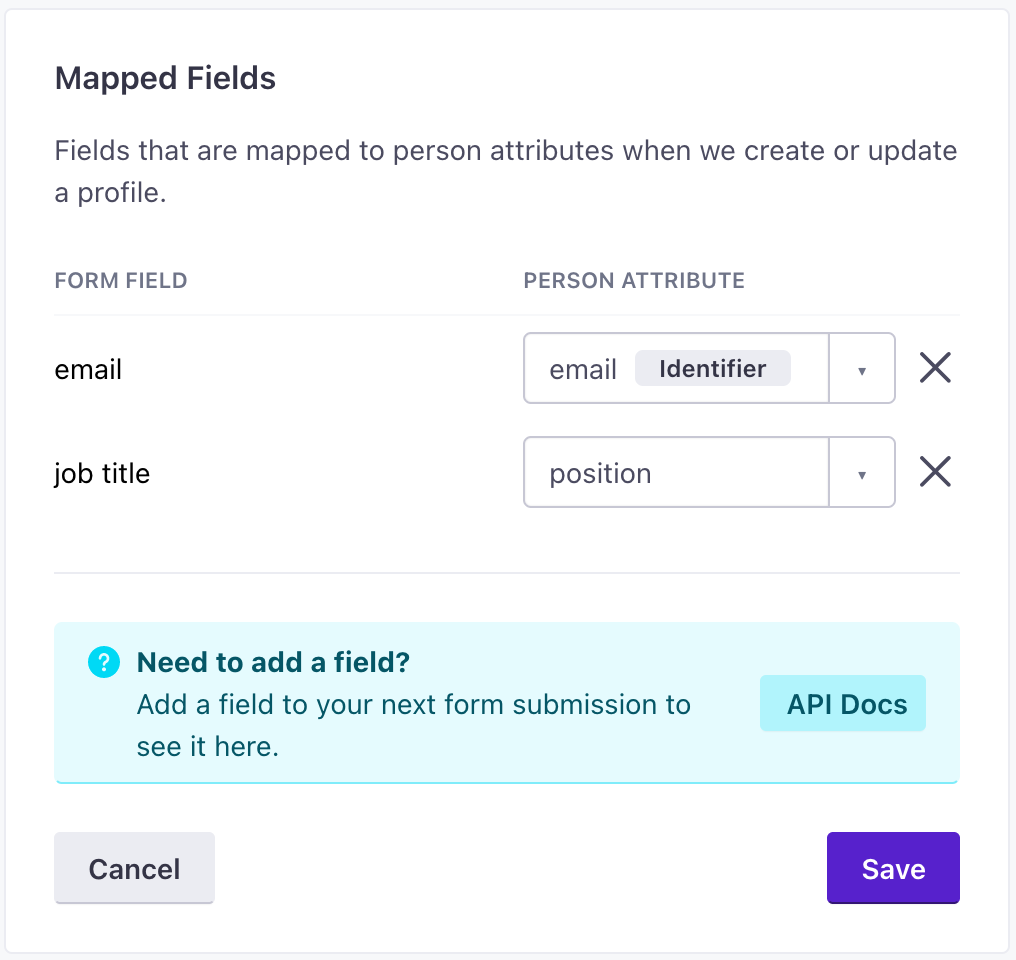
After you submit your first /forms request, you can re-map form fields (properties in the data object) to attributes on the Data & Integrations > Integrations > Forms page.
You cannot disable fields sent to the /forms API
/forms API. If you send data to the /forms API, we’ll apply it to the person represented in the request.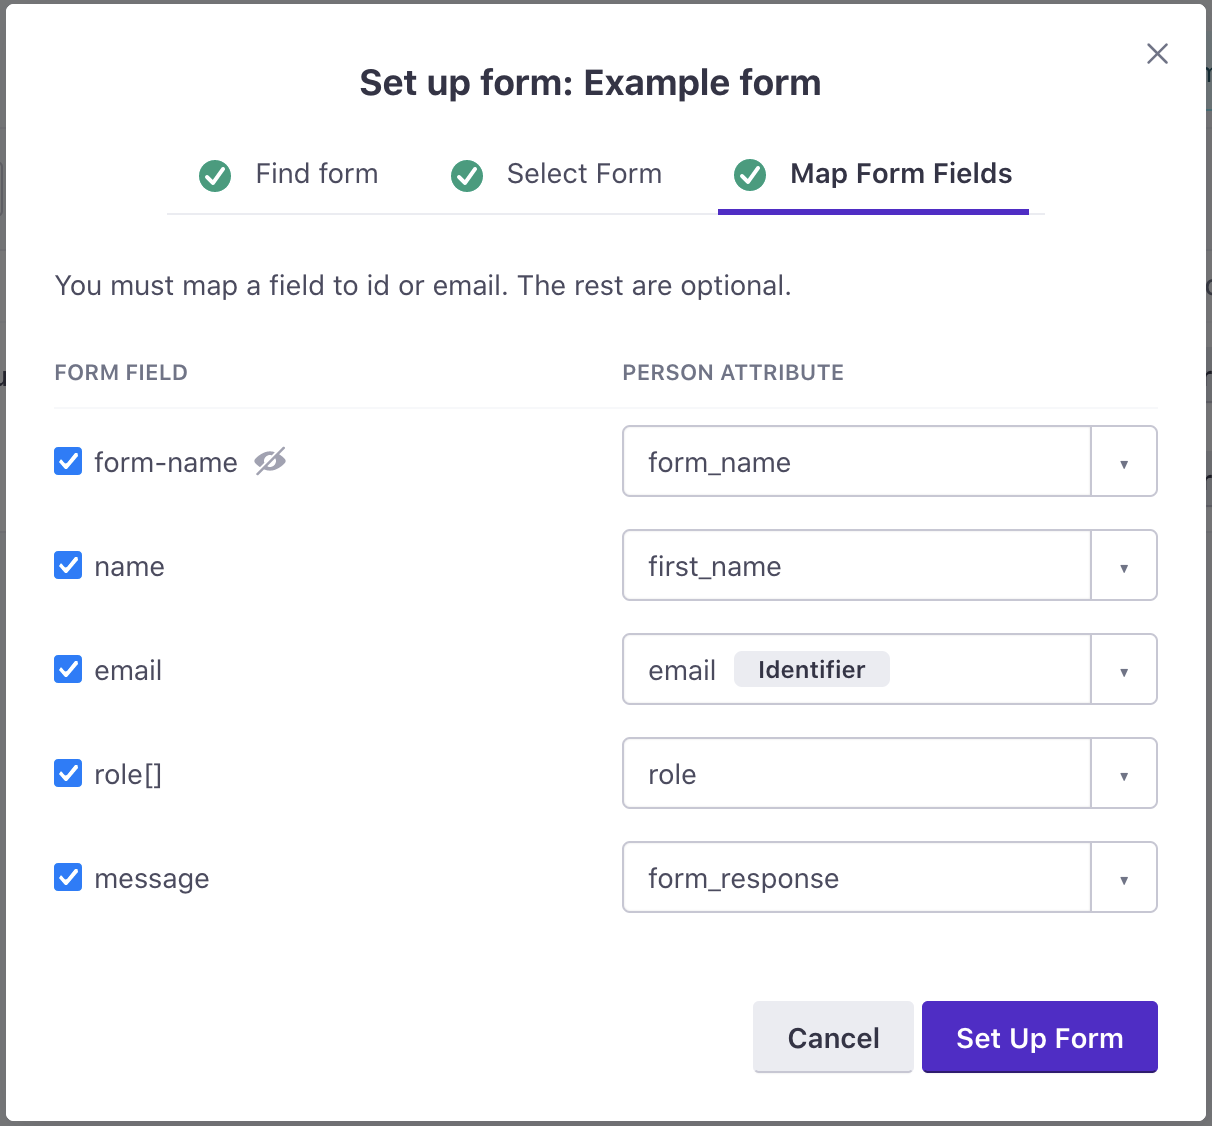
Mapping identifiers and initial form submission errors
If an identifier in your form does not map directly to an identifierThe attributes you use to add, modify, and target people. Each unique identifier value represents an individual person in your workspace.—i.e. a field capturing email addresses is called something like email_address rather than email in your initial request—you’ll receive a 400, but we’ll still add your form on the Data & Integrations > Integrations > Forms page. You can then re-map your email_address field to email, and your form will begin working normally.
Submit forms using the action attribute
You can assign a POST method and action to your HTML form tag to submit forms directly to Customer.io without using our JavaScript snippet. When you set up a form this way, we generate a URL that you’ll copy directly to your form’s action attribute. Your form must have a success page—a page that you redirect people to when they click Submit.
<form
  method="POST"
  action="https://customerioforms.com/forms/submit_action?site_id=1ea07cb331d4ed0c39ba&form_id=2d75e032c78a41a&success_url=https://success.example.com/thanks"
>
<!-- by default, we map input name attributes to Customer.io attributes -->
  <label for="email_input">E-mail address</label>
  <input id="email_input" name="email" type="email" />
  <label for="job_title">Job Title</label>
  <input id="job_title" name="job title" type="text" />
  <button>Submit</button>
</form>
By default, we map form fields to attributesA key-value pair that you associate with a person or an object—like a person’s name, the date they were created in your workspace, or a company’s billing date etc. Use attributes to target people and personalize messages. using the name property. For example, if you have a field with a name property job_title, we’ll set that attribute on people who respond to your form. You can remap fields after your first submission.
Your form must contain one field that maps to an identifierThe attributes you use to add, modify, and target people. Each unique identifier value represents an individual person in your workspace.—the email or ID of the person filling out the form. If your identifier field has a name attribute of id or email, we’ll map it to the appropriate identifier automatically. If your identifier field isn’t named id or email, your form will show an error and you’ll have the opportunity to map your fields after your first submission.
You cannot disable fields sent to the /forms API
/forms API. If you send data to the /forms API, we’ll apply it to the person represented in the request.Set up a form with an action attribute
- Go to Data & Integrations > Integrations and select Forms.

- Select Custom Form, click View other options, and click Action attribute.
- If your workspace has multiple sets of Track API credentials, select the credentials you want to use for your form.
- Enter your Success page address URL. This is the page your form sends people to when they click Submit.
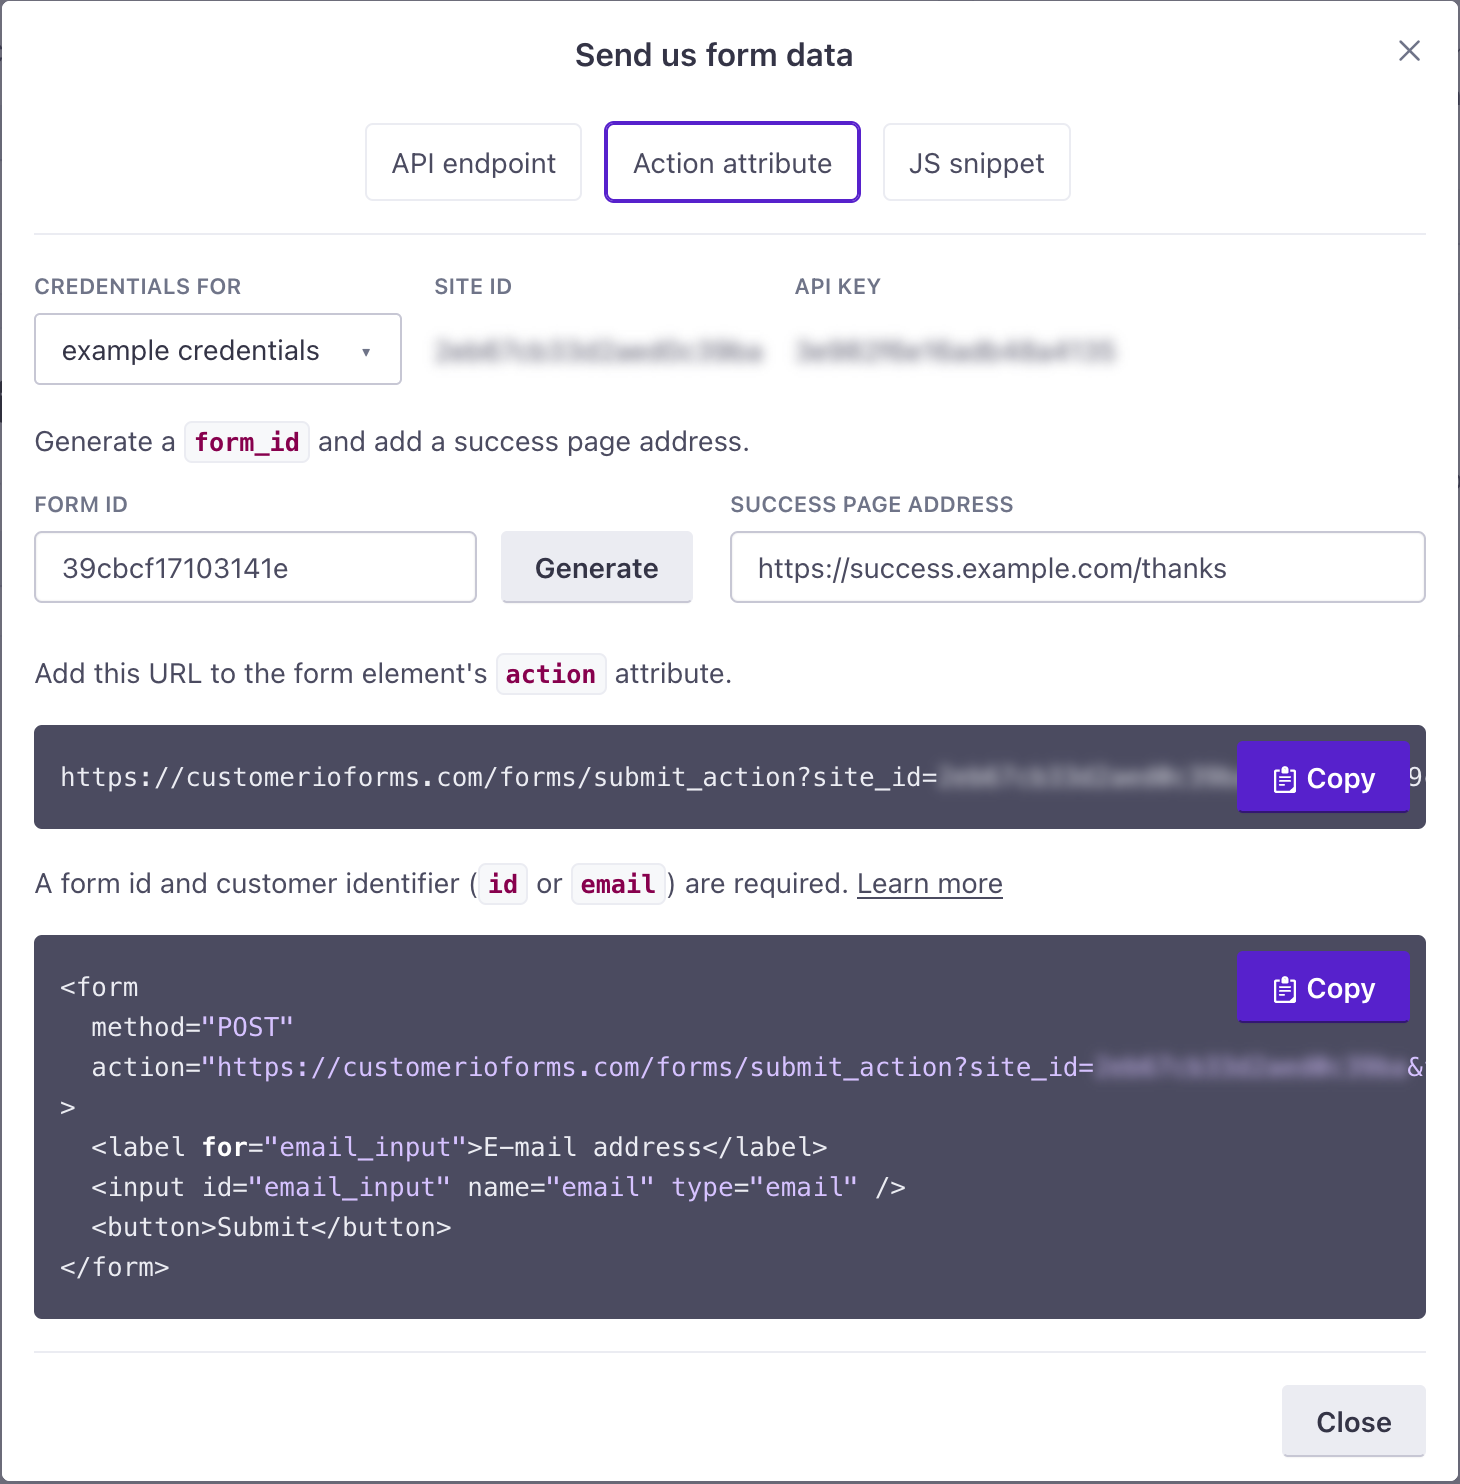
- Copy the HTML snippet and adjust the form to add your form’s fields. Or, Copy the URL to your form’s
actionattribute and make sure that your form’smethodattribute is set toPOST. - Submit your form as a test. This makes it appear in your Customer.io Forms dashboard.
- Return to the Data & Integrations > Integrations > Forms page, and select the form you just added. Make sure that the Mapped Fields reflect the attributes that you want to assign to people who submit your form. If they don’t, click Edit and re-map attributes appropriately.