Custom JS integrations
UpdatedOur JavaScript forms snippet automatically adds people and triggers campaigns when people submit your forms. This makes it easy to capture and respond to leads, people who provide feedback, and more—even for form providers that don’t have a direct integrations with Customer.io.
How it works
When someone submits your form, we’ll identifyThe Customer.io operation that adds or updates a person. When you identify a person, Customer.io either adds a person if they don’t exist in your workspace, or updates them if they do. Before you identify someone (by their email address or an ID), you can track them anonymously. the form submitter and assign them attributesA key-value pair that you associate with a person or an object—like a person’s name, the date they were created in your workspace, or a company’s billing date etc. Use attributes to target people and personalize messages. based on the values they provide in your form. You can map form fields to attributes when you set up your form (normally after the first submission). Form submissions also act as eventsSomething that a person in your workspace did. Events can trigger campaigns, add people to segments, etc, and you can use properties from events to personalize messages. that you can use to trigger campaigns, making it easy to respond to your audience automatically when they submit your forms!
For some providers, like Jotform and Typeform, we can directly integrate with their services. For other providers, like Formstack, you can use our custom forms JavaScript snippet—which is different from our other JavaScript integrations—to capture form submissions.
Install the custom forms JavaScript snippet
To capture form submissions using the custom forms JavaScript snippet, you need to:
Scan your form to Customer.io on the Data & Integrations > Integrations > Forms page. For us to scan your form, it must:
- Use a
<form>tag. We cannot scan<div>-based forms. - Not be inside an
<iframe>. - Have fields with
nameattributes;nameis how we identify non-textarea fields and map them to attributes. - Have a field that maps directly to one, and only one identifier—
idoremailas determined by your workspace settings.
- Use a
Install the custom forms JavaScript snippet on the page(s) containing your form.
You can do these things in any order, but you cannot capture form information until you’ve done both.
1. Scan a form
To add a form, provide the URL of the page containing your form. Customer.io can scan most forms that use the <form> tag, as long as your form is not inside an <iframe> and your form fields have name attributes. If your form contains <textarea> fields that do not have a name (as with Squarespace), we’ll number them (e.g. textarea_1).
If your form is on multiple pages, you only need to add your form once.
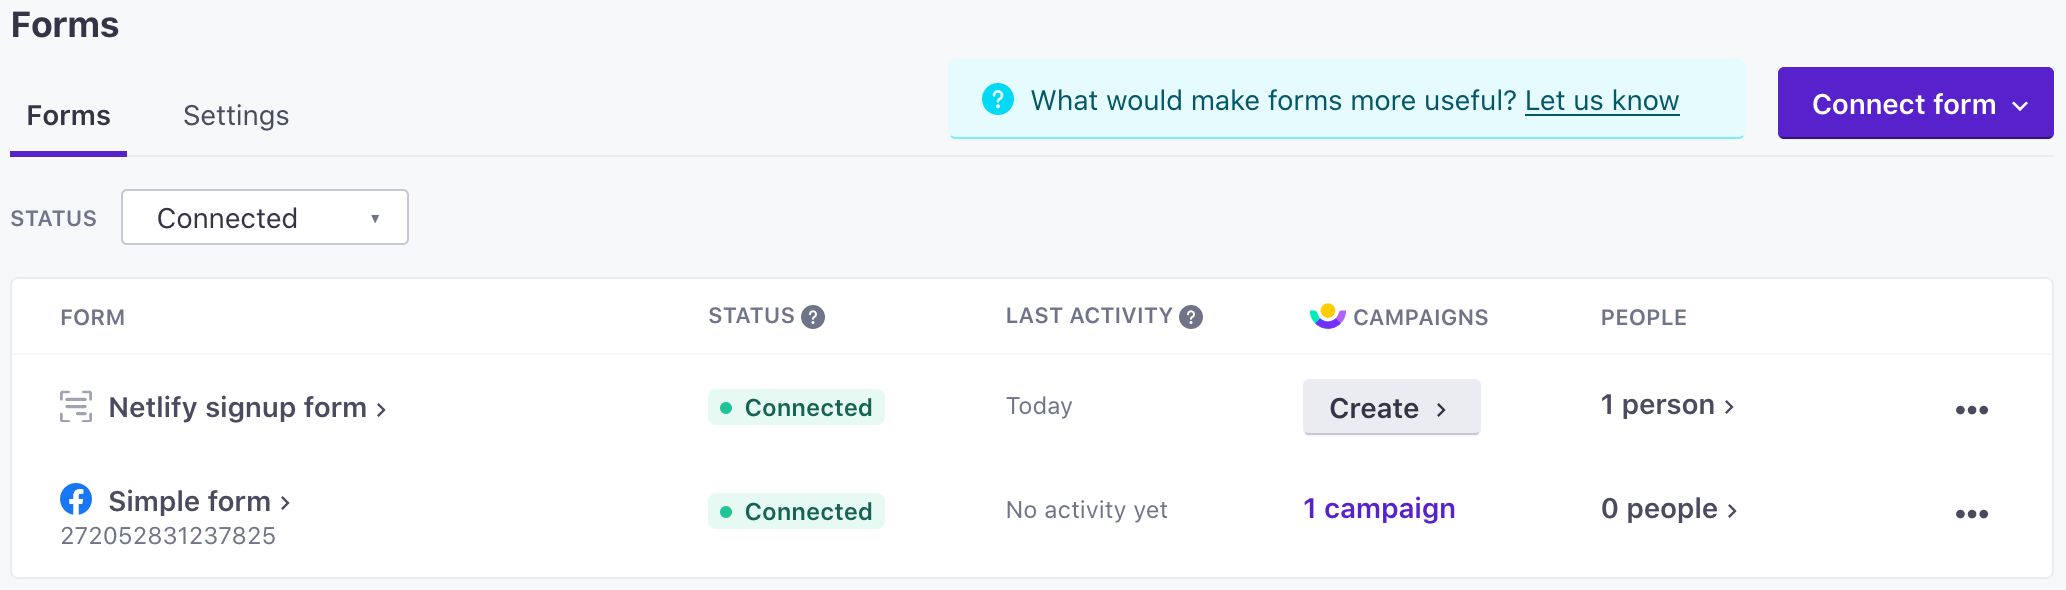
- Go to Data & Integrations > Integrations > Forms.
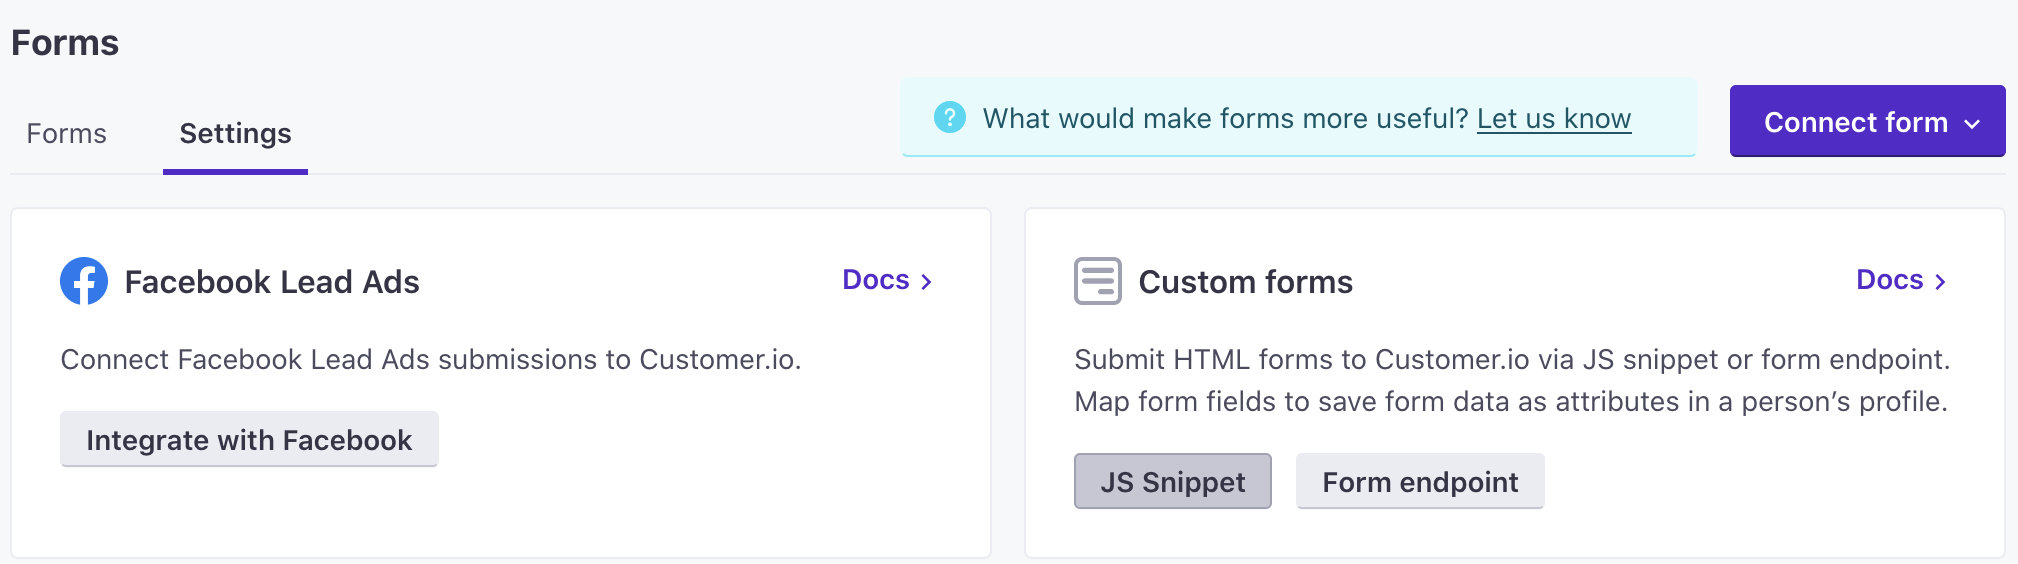
- Select Custom and click Connect form.
- Enter the URL of your form and click Scan for Forms.
- Select the form(s) you want to connect to your workspace and click Choose Form. If your page contains multiple forms, you can select each form and set a Name. The Name is how you’ll select forms in the UI.
- If you haven’t already, Install the custom forms JavaScript snippet. Go to the Settings tab to find the snippet.
2. Add the custom forms JavaScript snippet to your site
The custom forms JavaScript snippet is not the same as our basic JavaScript snippet. You must install the Connected forms JavaScript snippet to send data from scanned forms back to Customer.io.
Before you can find the custom forms JavaScript snippet, you must have scanned at least one form.
To find and install this snippet:
Go to Data & Integrations > Integrations > Forms and click Settings. The Settings tab only appears after you scan your first form. If you haven’t already done so, scan a form.
Click JS Snippet.
Copy and paste the snippet. Where you paste the snippet may vary based on your form provider.
- Custom HTML or Netlify Forms: paste the script on the page containing your form. The script can go anywhere in the
<head>or<body>tags. - Other form providers: See the supported providers below.
- Custom HTML or Netlify Forms: paste the script on the page containing your form. The script can go anywhere in the
You can install both Customer.io JavaScript snippets
Form fields and URL parameters captured by the JavaScript snippet
The custom forms JavaScript snippet captures both form fields and URL parameters on the page containing your form, but the two work differently: form fields are converted to attributesA key-value pair that you associate with a person or an object—like a person’s name, the date they were created in your workspace, or a company’s billing date etc. Use attributes to target people and personalize messages. on a person who submits a form; URL parameters are not.
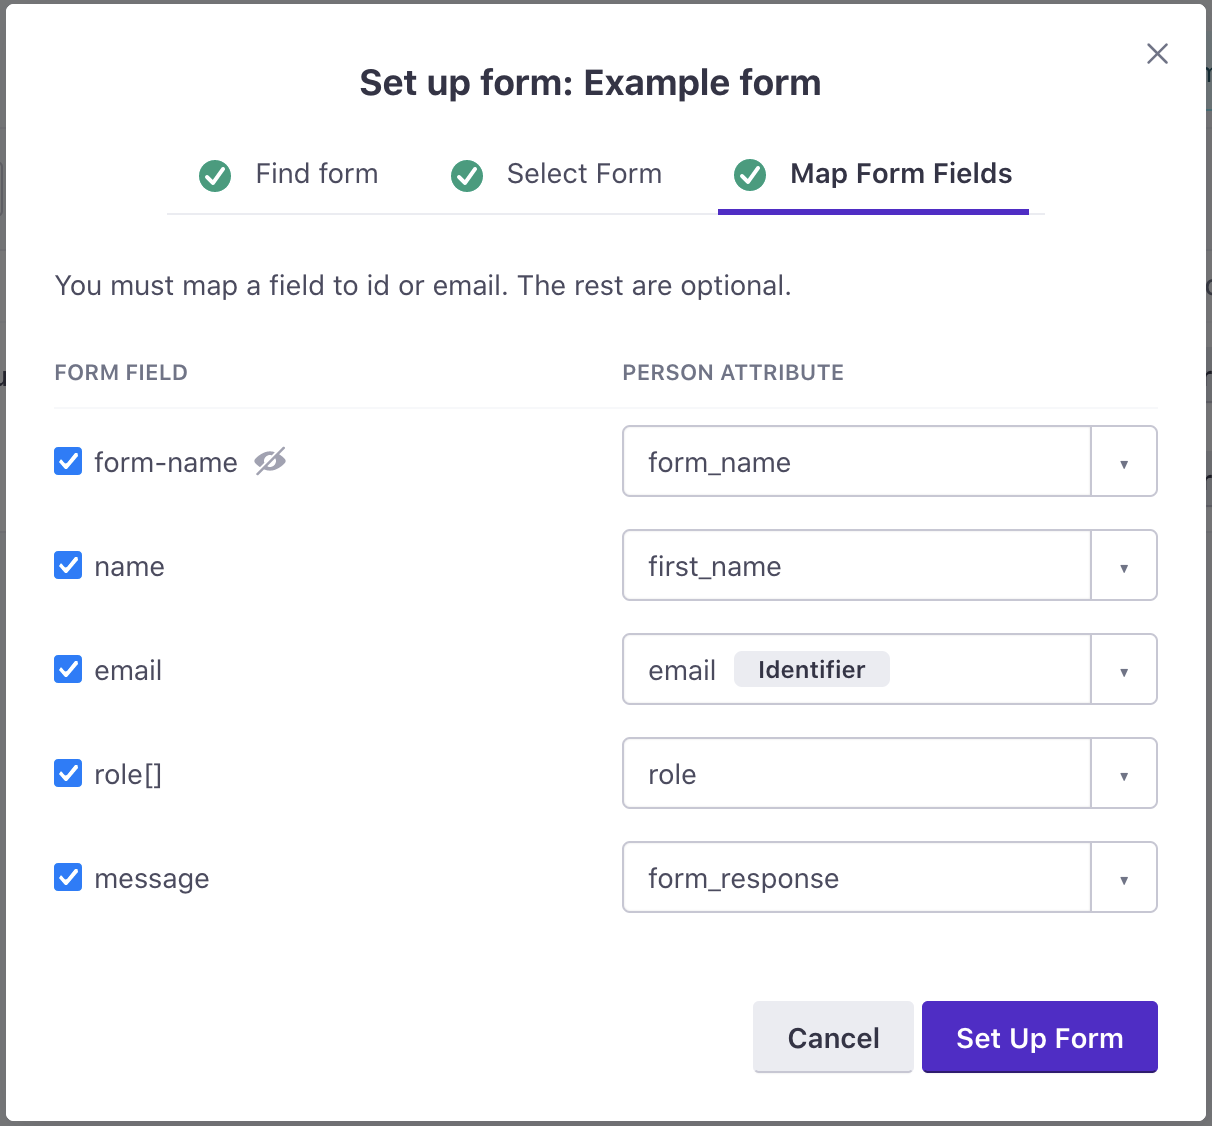
Form Fields: When you set up a form in Customer.io, you scan a URL for forms. Customer.io identifies fields in your form by name attributes. After you scan a form, you determine which fields we capture, and map each field to an attribute for people who submit the form.
Customer.io also reserves three fields: form_id, form_name, and form_type; if fields on your form (or in your API payload) include these fields, we’ll ignore them.
form_id: Assigned by customer.io when you scan the form or through the API in the path.form_name: Assigned when you map your form in Customer.io.form_type: Represents the form’s origin. Using the JavaScript snippet or API, this will always readcustom. Other values represent direct integrations with Facebook Lead Ads, Jotform, Typeform, etc.form_url: The URL of the page that a user submitted your form from.form_url_params: An array of URL parameters present when a user submitted your form.
URL Parameters: When someone submits a form, we capture URL parameters on the form page, so that you can segment people and filter campaigns based on these values. But, because URL parameters are not mapped to attributes when you connect your form to Customer.io, we cannot apply URL parameters to people as attributes.
URL parameters captured in this way appear in the form_url_parameters array, to help you understand which fields come from your form and which come from the page URL; items in this array are not applied to to a person as attributes. If a form field and URL parameter have the same name, the form field will win and we’ll ignore the URL parameter.
Use an attribute change to apply URL parameters to people
By default, we only capture URL parameters for segmentation purposes. However, you can use an attribute change event in a form-triggered campaign to convert URL parameters to attributes for people who submit your forms.
Mapping identifiers and initial form submission errors
If an identifier in your form does not map directly to an identifierThe attributes you use to add, modify, and target people. Each unique identifier value represents an individual person in your workspace.—i.e. a field capturing email addresses is called something like email_address rather than email in your initial request—you’ll receive a 400, but we’ll still add your form on the Data & Integrations > Integrations > Forms page. You can then re-map your email_address field to email, and your form will begin working normally.
Tested form providers
While we have complete setup instructions for a number of other form providers, we’ve we’d like to call out a few specifics for the following providers:
Instapage
You can install the JavaScript snippet in the head, body, or footer of your Instapage form page. If you use a custom domain (as opposed to the default, pagedemo.co URL), it may take a while before you can begin transmitting data to Customer.io due to DNS propagation issues.
Netlify
Netlify forms are basically custom HTML forms that include a data-netlify="true" parameter in the <form> element.
Include the JavaScript Form Snippet on the page containing your form. It can go anywhere in the <head> or <body> tags. Form submissions will appear both in Netlify and as people in your Customer.io workspace.

