Wordpress with WPForms
UpdatedYou can connect forms to your Customer.io workspace to automatically add people and trigger campaigns when they submit forms on your Wordpress site. This makes it easy to capture and respond to leads.
How it works
This integration lets you identifyThe Customer.io operation that adds or updates a person. When you identify a person, Customer.io either adds a person if they don’t exist in your workspace, or updates them if they do. Before you identify someone (by their email address or an ID), you can track them anonymously., update, and trigger events for people who submit your forms on your Wordpress site using the WPForms plugin. You may be able to capture form submissions from other Wordpress plugins, but we can only guarantee support for WPForms. Contact us if you need support for a different Wordpress plugin.
When someone submits a form, we’ll automatically identifyThe Customer.io operation that adds or updates a person. When you identify a person, Customer.io either adds a person if they don’t exist in your workspace, or updates them if they do. Before you identify someone (by their email address or an ID), you can track them anonymously. them and update their attributes. We also collect the submission as an event that you can use to trigger campaigns and respond to people who submit your form.
To connect your form to Customer.io:
- Scan your form: Link us to a page containing your form, so we can read the form fields and map them to attributesA key-value pair that you associate with a person or an object—like a person’s name, the date they were created in your workspace, or a company’s billing date etc. Use attributes to target people and personalize messages. in Customer.io. You’ll need to scan each form you want to connect to Customer.io.
- Install the custom forms JavaScript snippet: This is a different snippet than our other JavaScript integrations; you only need to install the snippet once.
- Test your implementation: Submit your form with a test profile—a profile that doesn’t represent a real person—to make sure that your fields map correctly before you send real submissions.
1. Scan your form
You’ll give us the URL of a page containing your form. We’ll scan the page and map the form fields to attributesA key-value pair that you associate with a person or an object—like a person’s name, the date they were created in your workspace, or a company’s billing date etc. Use attributes to target people and personalize messages. in Customer.io. While we scan your form to map fields to attributes, this process doesn’t capture form submissions. You’ll need to install the custom forms JavaScript snippet to complete the setup process.
You only need to scan a form once
If you use the same form on multiple pages, we’ll treat them as the same form (so long as the custom forms JavaScript snippet is installed on all pages containing the form).
- Go to Integrations > Directory and select the Forms integration.
- Select Custom and click Connect form.
- Enter the URL of your form (or a page containing your form) and click Scan for Forms.
- Select the form(s) you want to connect to your workspace and click Choose Form. If your page contains multiple forms, you can select each form and set a Name. The Name is how you’ll select forms in the UI.
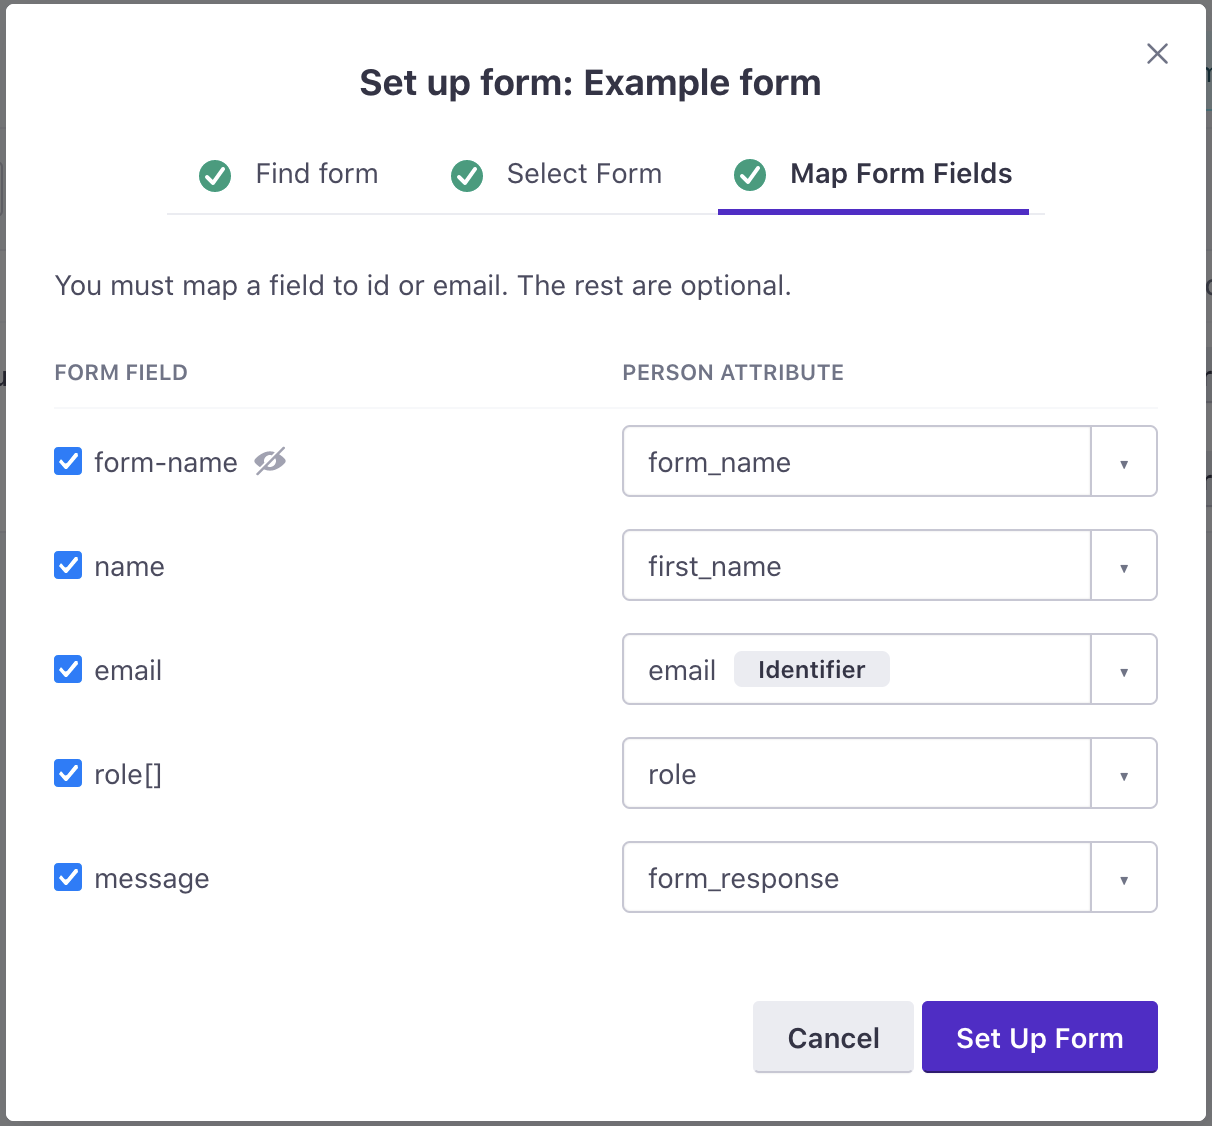
- (Optional) Re-map fields to attributes. We automatically map the
nameattribute of fields to attributes in Customer.io. But you might change mappings to better match the format of attributes in your workspace. For example, if a field name comes through asfirst_namebut you camel-case your attributes, you might change it tofirstName.
If you haven’t already, Install the custom forms JavaScript snippet. Go to the Settings tab to find the snippet.
2. Add the custom forms JavaScript snippet to your site
You’ll need to add the JavaScript snippet to pages containing your form. If your form is on a few pages, you can add a custom HTML block below the form and paste the JavaScript snippet into the block. You can add the snippet to your site using Google Tag Manager, the Wordpress Insert Headers and Footers plugin, and so on, but the instructions below are just for the standard custom HTML block.
The custom forms JavaScript snippet is not the same as our other JavaScript snippets. Even if you’ve used one of our other JavaScript integrations, you must install the Custom forms JavaScript snippet to take advantage of this integration.
To find and install this snippet:
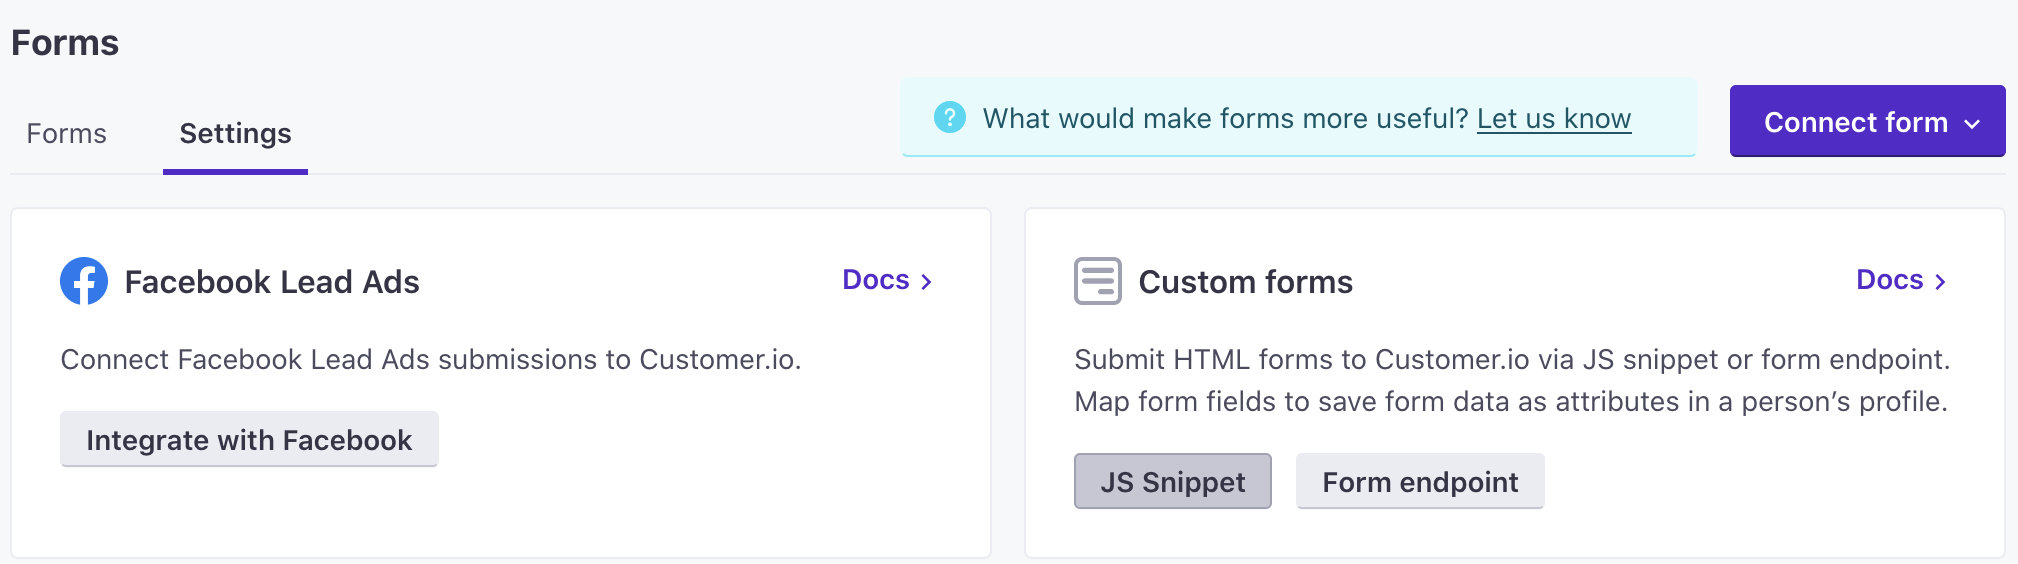
- Go to the Settings tab of your Forms integration. If you’re not already on the Forms integration, go to Integrations > Connections and select your Forms integration.
- Click JS Snippet, select the credentials you want to use for your forms integration, and click Copy.
Because this snippet is different from our other JavaScript integrations, you might want to create a new set of credentials specifically for your forms!
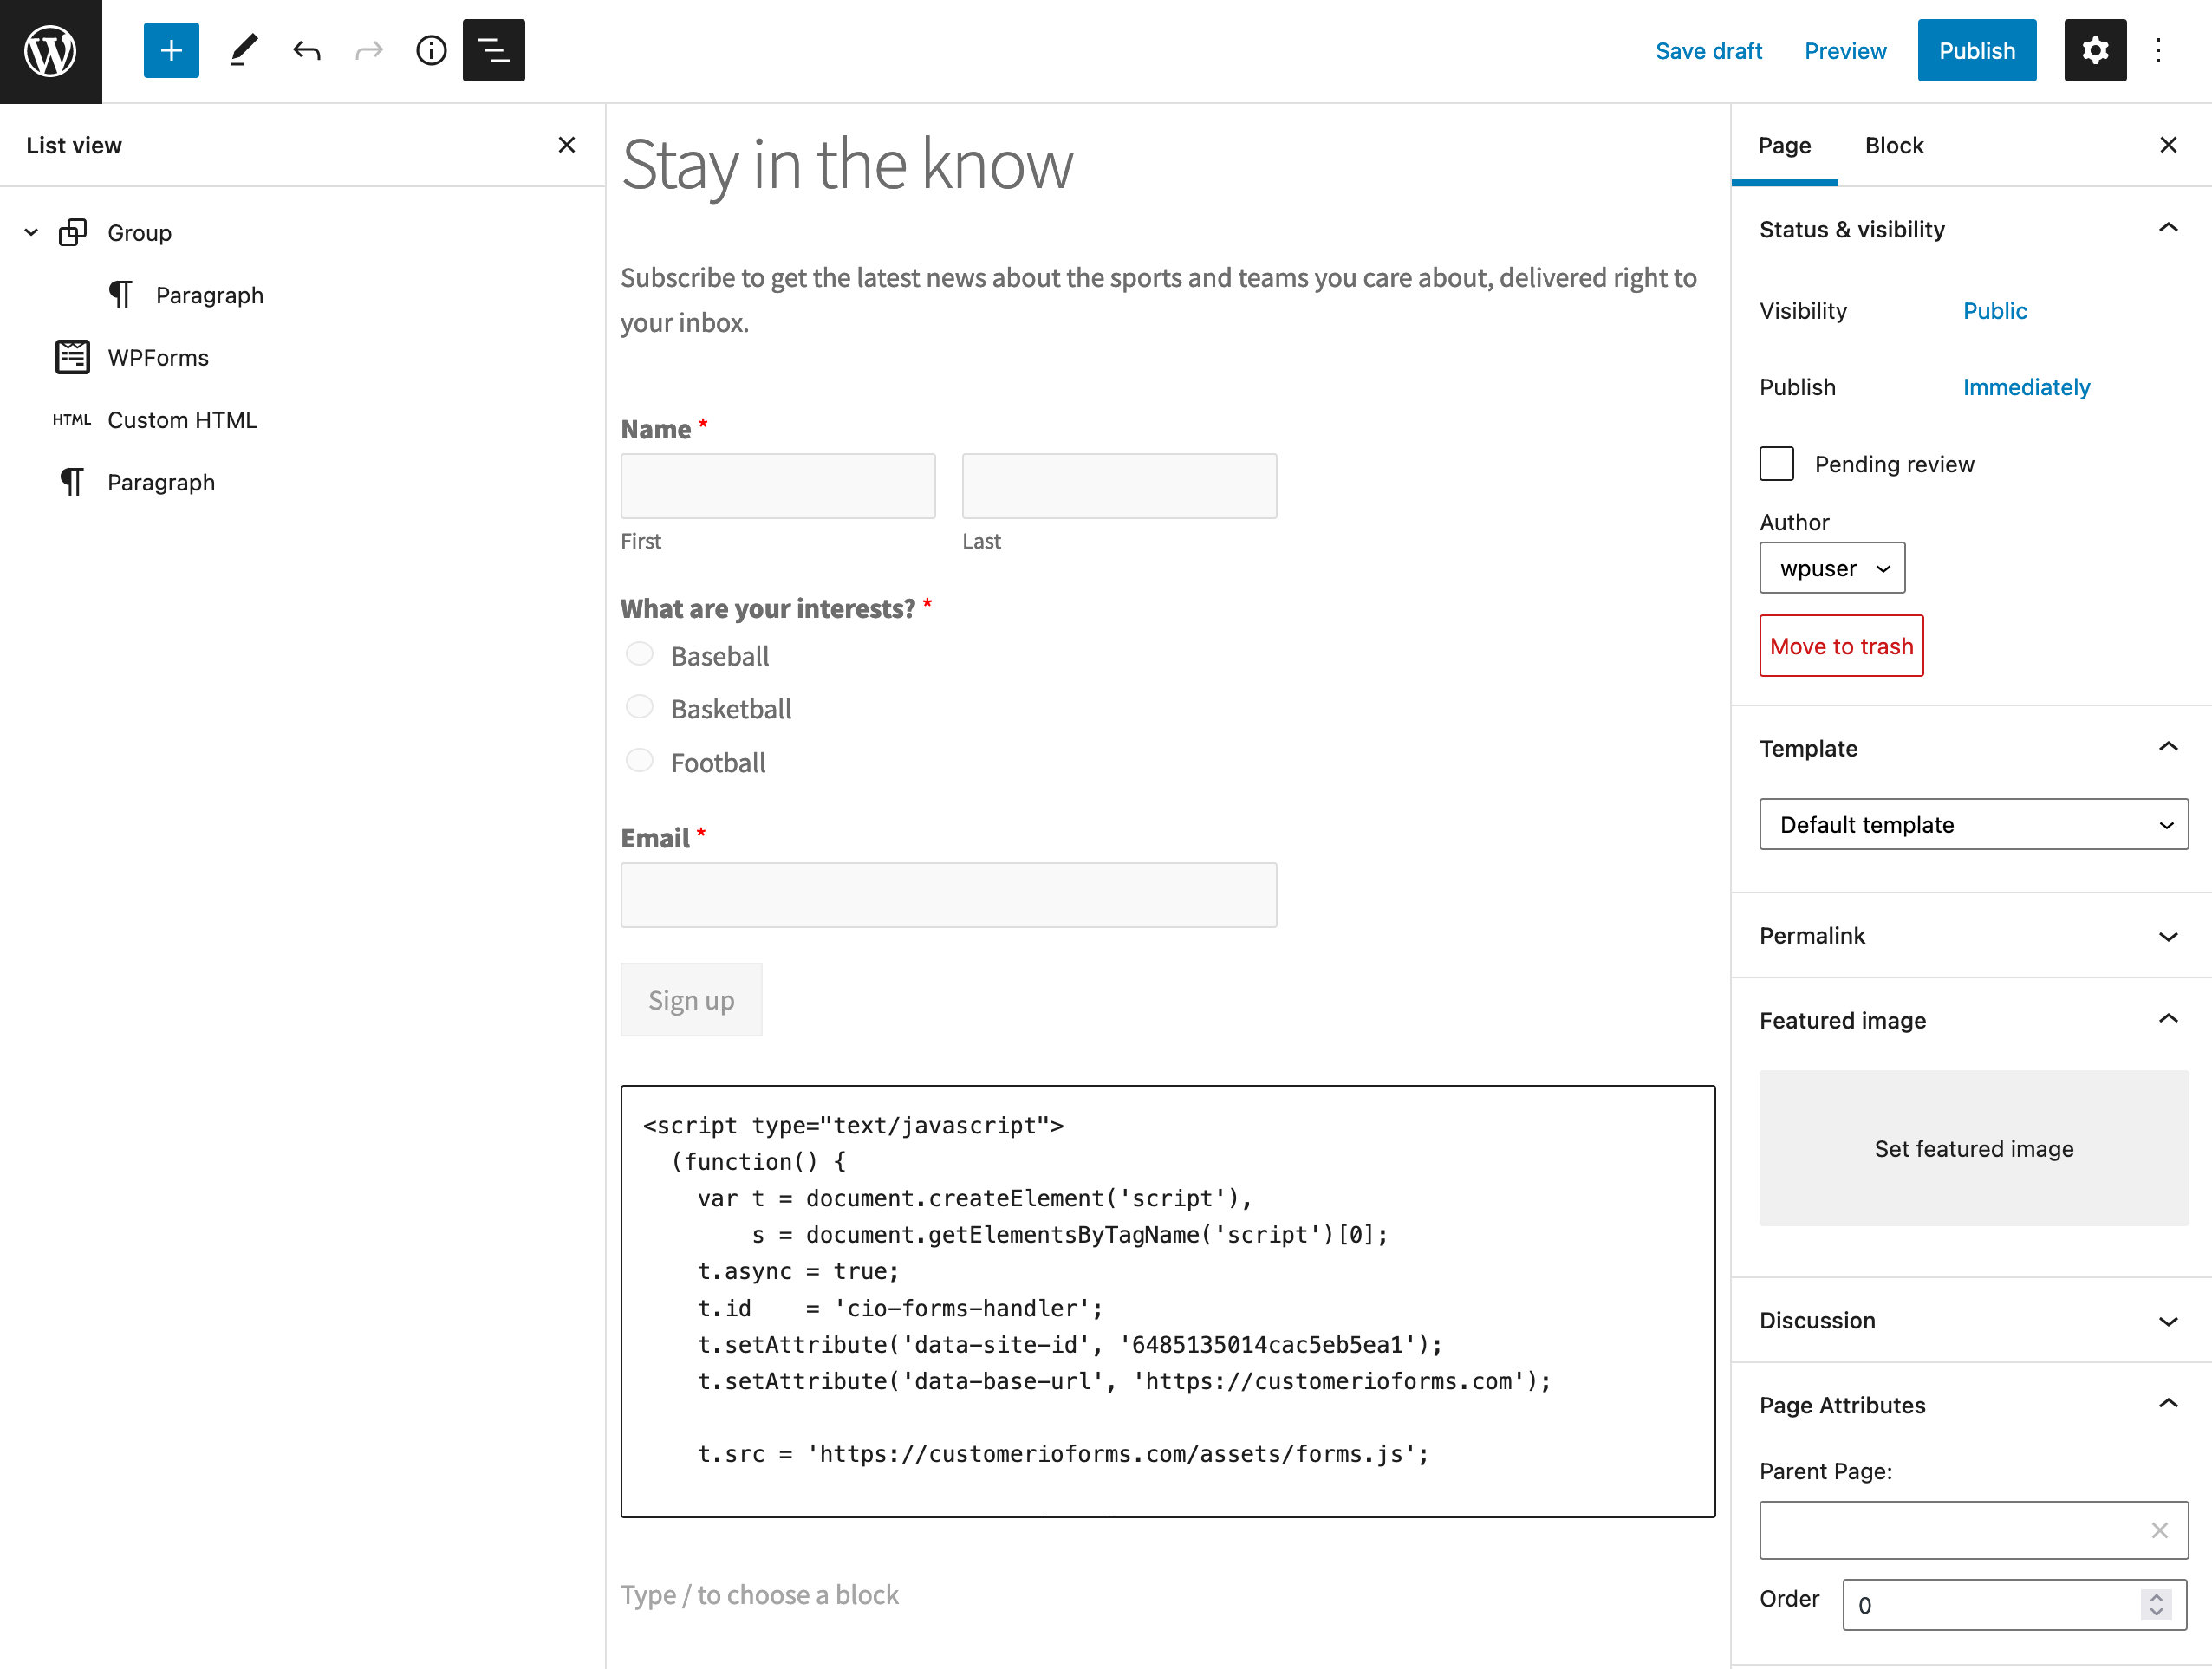
- In Wordpress, go to the page containing your form.
- Add a custom HTML block below the form and paste the JavaScript snippet into the block.
- Publish the page containing the form. When you publish the page, it’ll begin submitting results to your workspace.
Now you can take advantage of form submissions to trigger campaigns, personalize messages, and more. See Use form data in Customer.io for more information.

