# Set up push notifications
Our Flutter SDK supports push notifications over FCM—including rich push messages with links and images. This page helps you add push support to your app.
## How it works[](#how-it-works)
If you’ve followed our [getting started instructions](/integrations/sdk/flutter/getting-started/#install), you’re already set up to send push notifications to your Android audience. But you’ll need to add a bit of code to support your iOS users.
Remember that a device/user can’t receive a push notification until you:
1. (iOS) Register a device token for the device; code samples on this page help you do that.
2. [Identify a person](/integrations/sdk/flutter/identify/). This associates a token with the person; you can’t send push notifications to a device until you identify the recipient.
3. (Both iOS and Android) Check for notification permissions. If your app user doesn’t grant permission, notifications will not appear in the system tray.
4. (Optional) Set up your app to report push metrics back to Customer.io.
Did you already set up your push providers?
To send, test, and receive push notifications, you’ll need to set up your push notification service(s) in Customer.io. If you haven’t already, set up [Firebase Cloud Messaging (FCM)](/push-getting-started/#for-android).
## Set up push for Android[](#register-push-android)
If you followed our [Getting Started instructions](/integrations/sdk/flutter/getting-started/), you’re already set up to send push notifications to Android devices. You just need to [set up iOS push support](#register-push) in your app.
Next, you can set up [deep links](/integrations/sdk/flutter/push-notifications/deep-links/#deep-links-android) if you want your notifications to link into your app.
### Set or change your push icon[](#set-or-change-your-push-icon)
You’ll set the icon that appears on push notifications as a part of the `AndroidManifest.xml` file in your app’s `android` folder. If your icon appears in the wrong size, or if you want to change the standard icon that appears with your push notifications, you’ll need to update your app’s manifest.
```xml
```
## Set up push for iOS[](#register-push)
You’ll need to add some additional code to support push notifications for iOS. You’ll need to add push capabilities in XCode and integrate push capabilities in your app.
### Add push capabilities in Xcode[](#add-push-capabilities-in-xcode)
Before you can work with push notifications, you need to add Push Notification capabilities to your project in XCode.
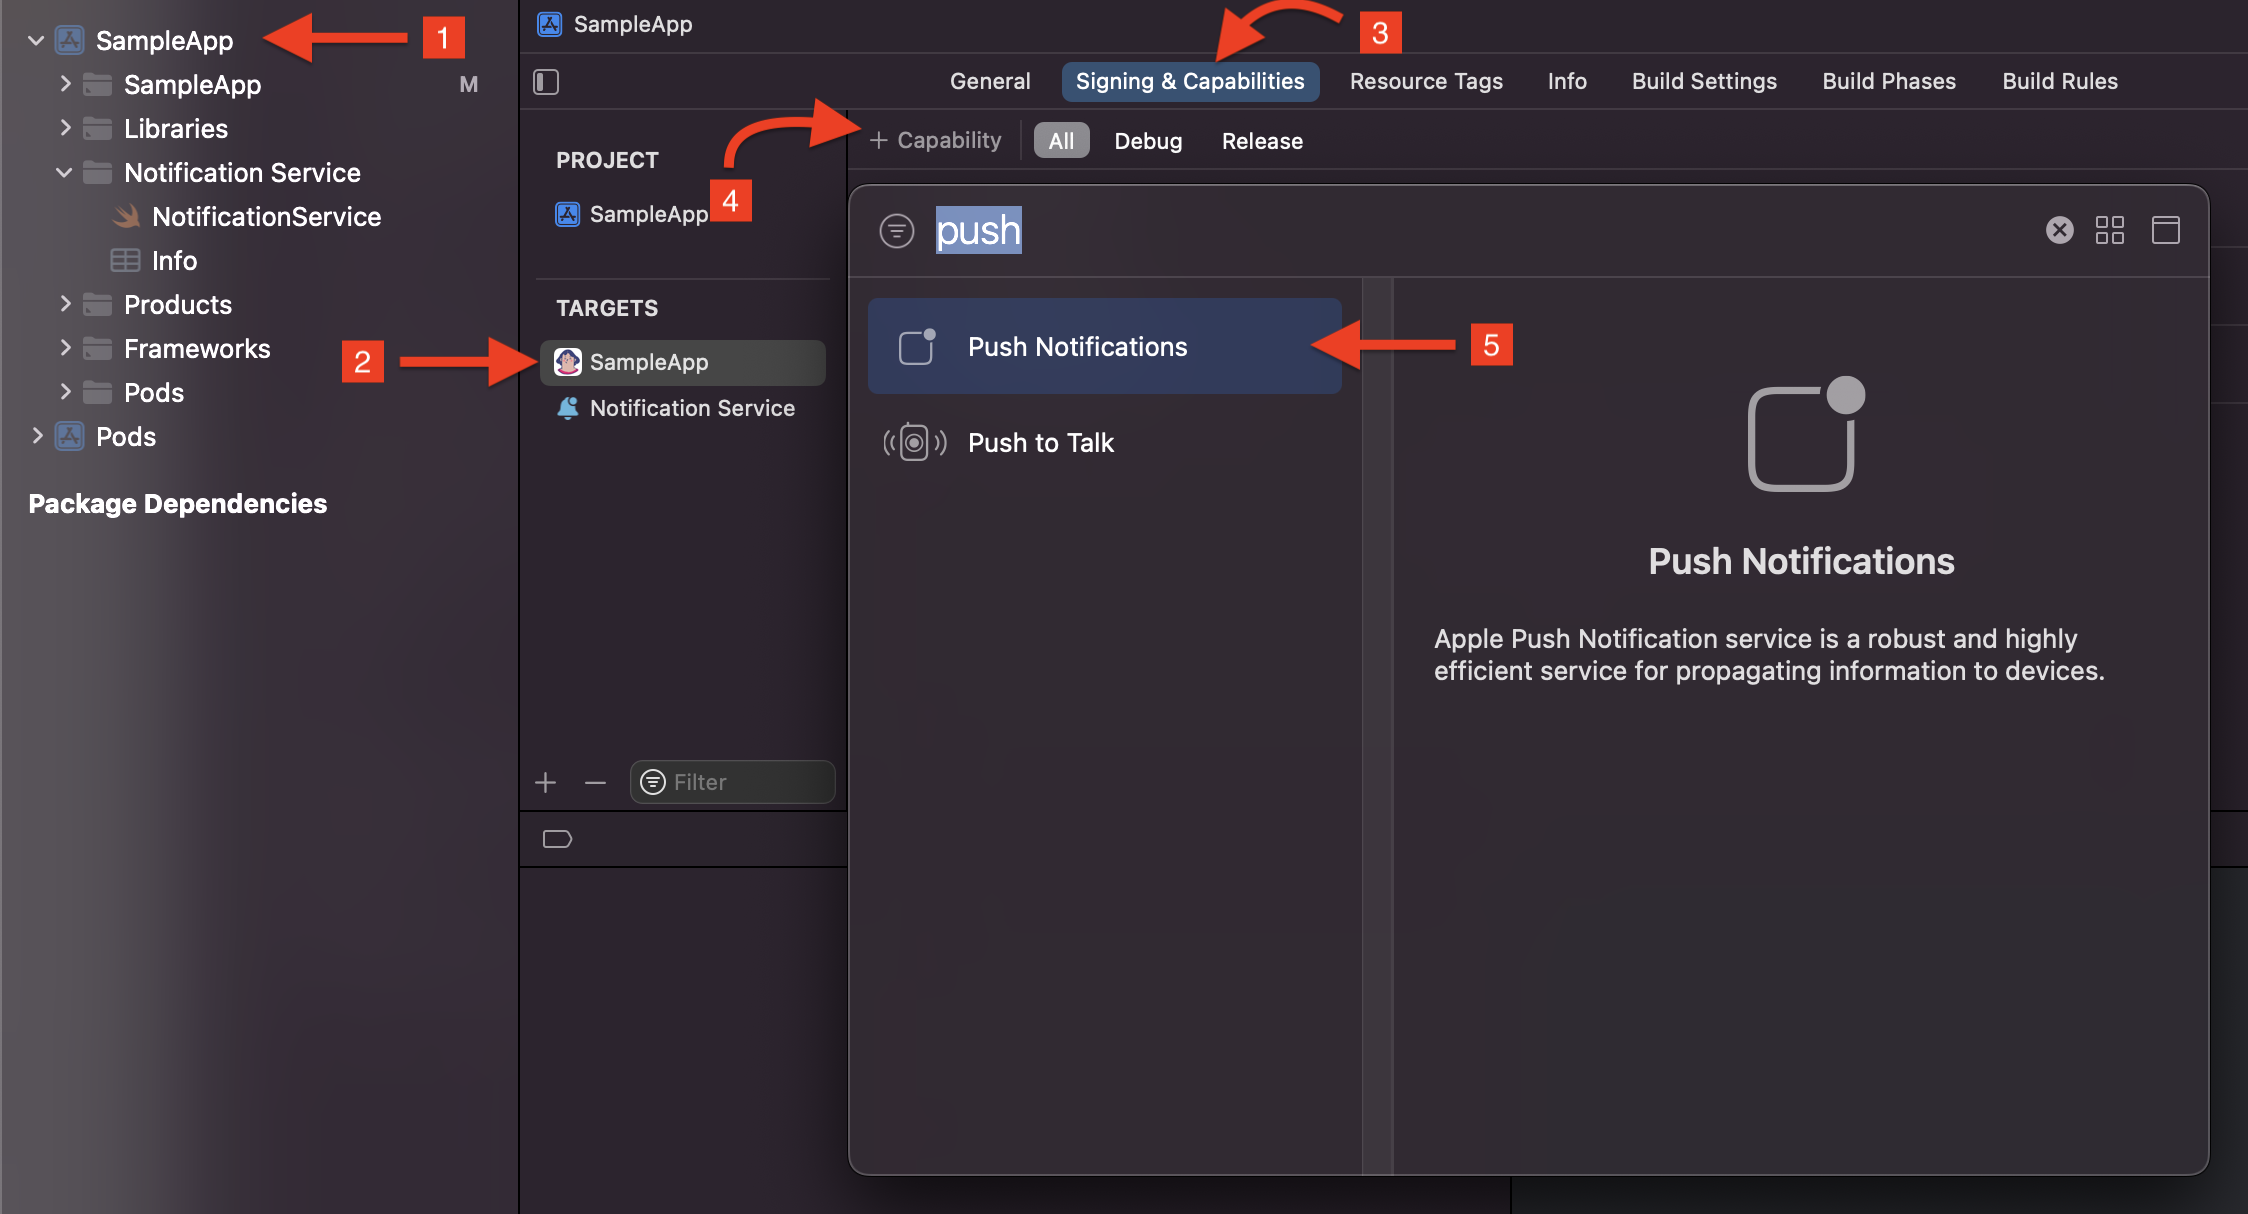
1. In your Flutter project, go to the `ios` subfolder and open `.xcworkspace`.
2. Select your project. Under *Targets*, select your main app.
3. Click the **Signing & Capabilities** tab and click **Capability**.
4. Add **Push Notifications** to your app.
[](#b837646bba75943a4f08d0fee059210c-lightbox)
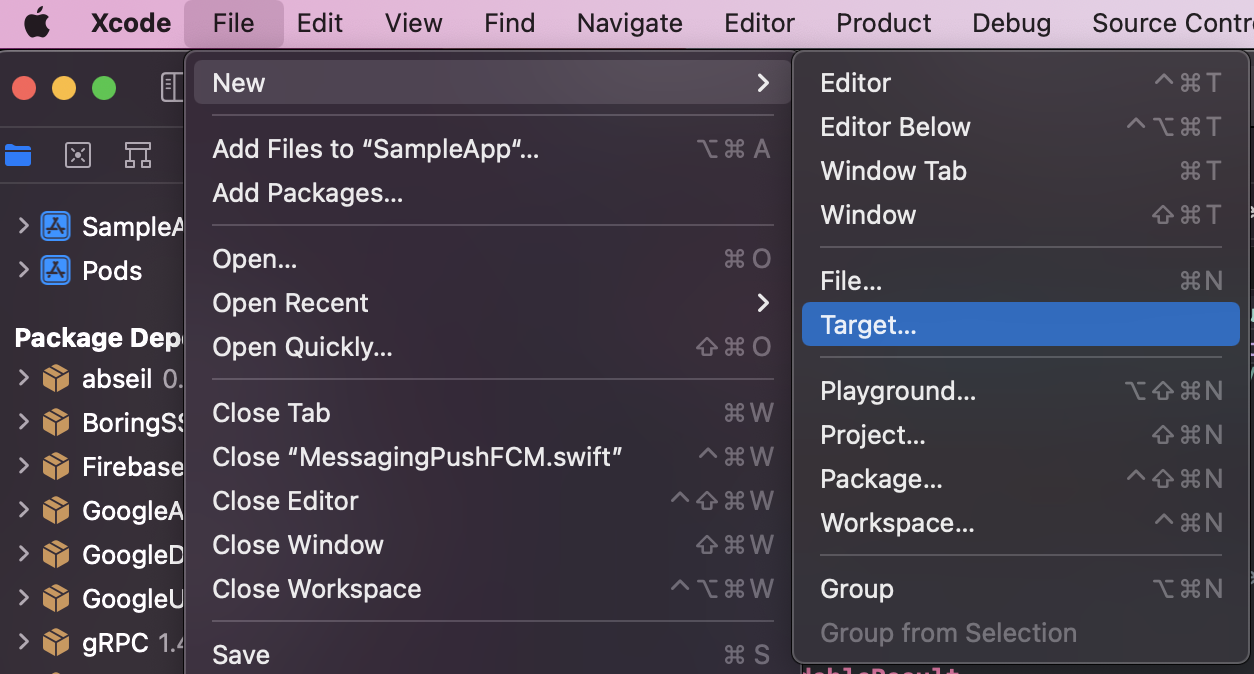
5. Select **File** > **New** > **Target**.
[](#64d64173bde7b46bad5fc1f14cc8f36a-lightbox)
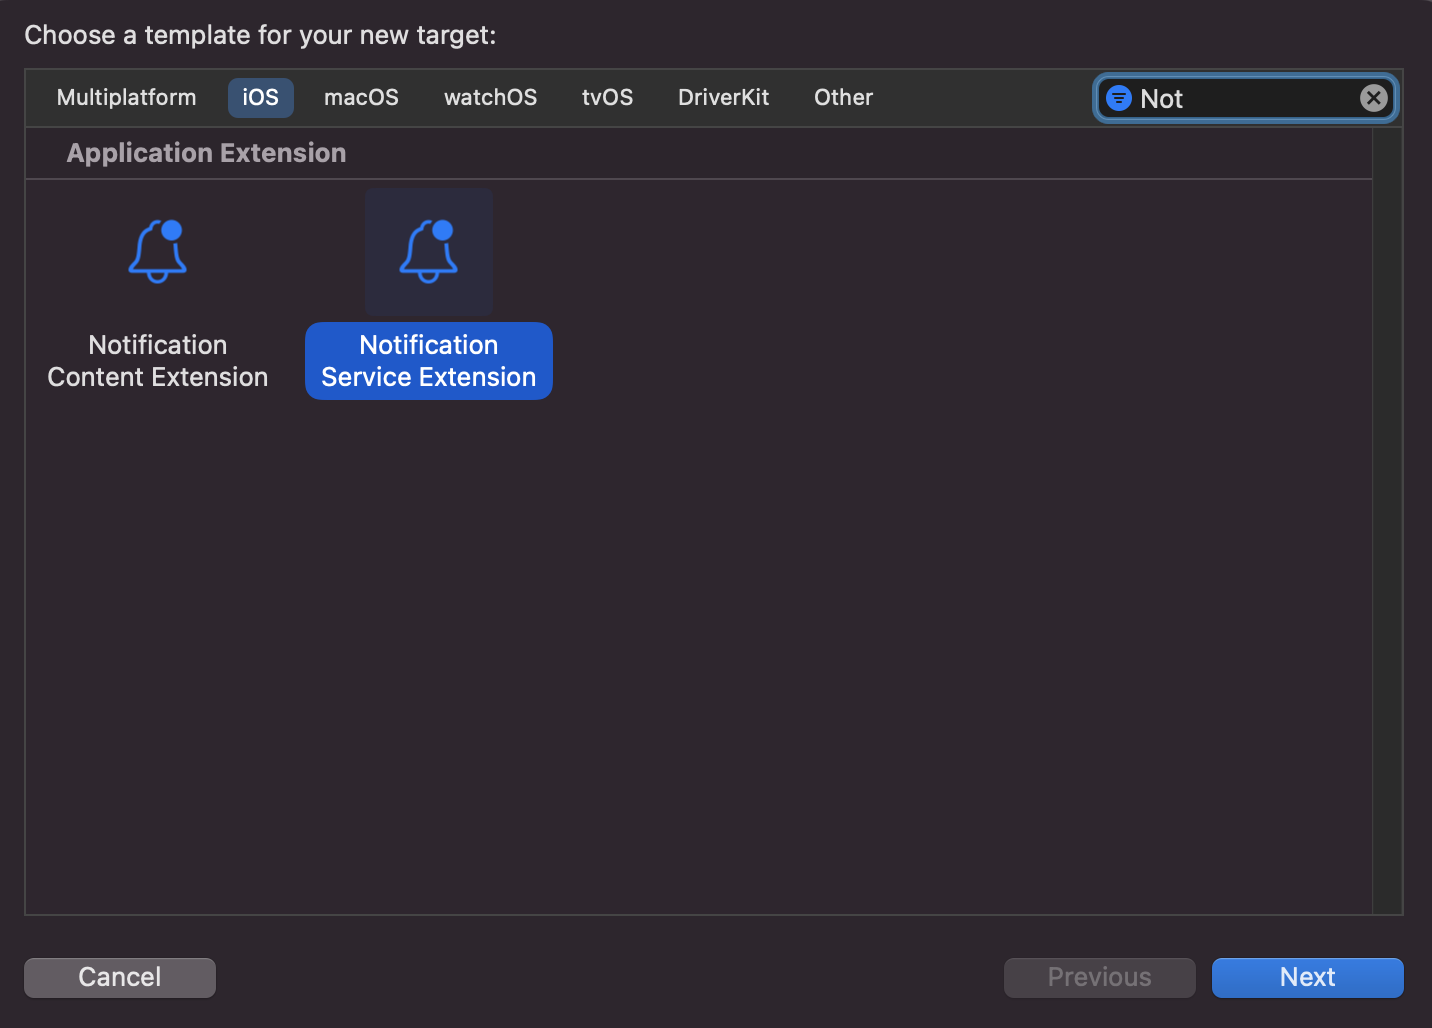
6. Select *Notification Service Extension* and click *Next*.
[](#6413f7694da0358105aca5a02cf835dc-lightbox)
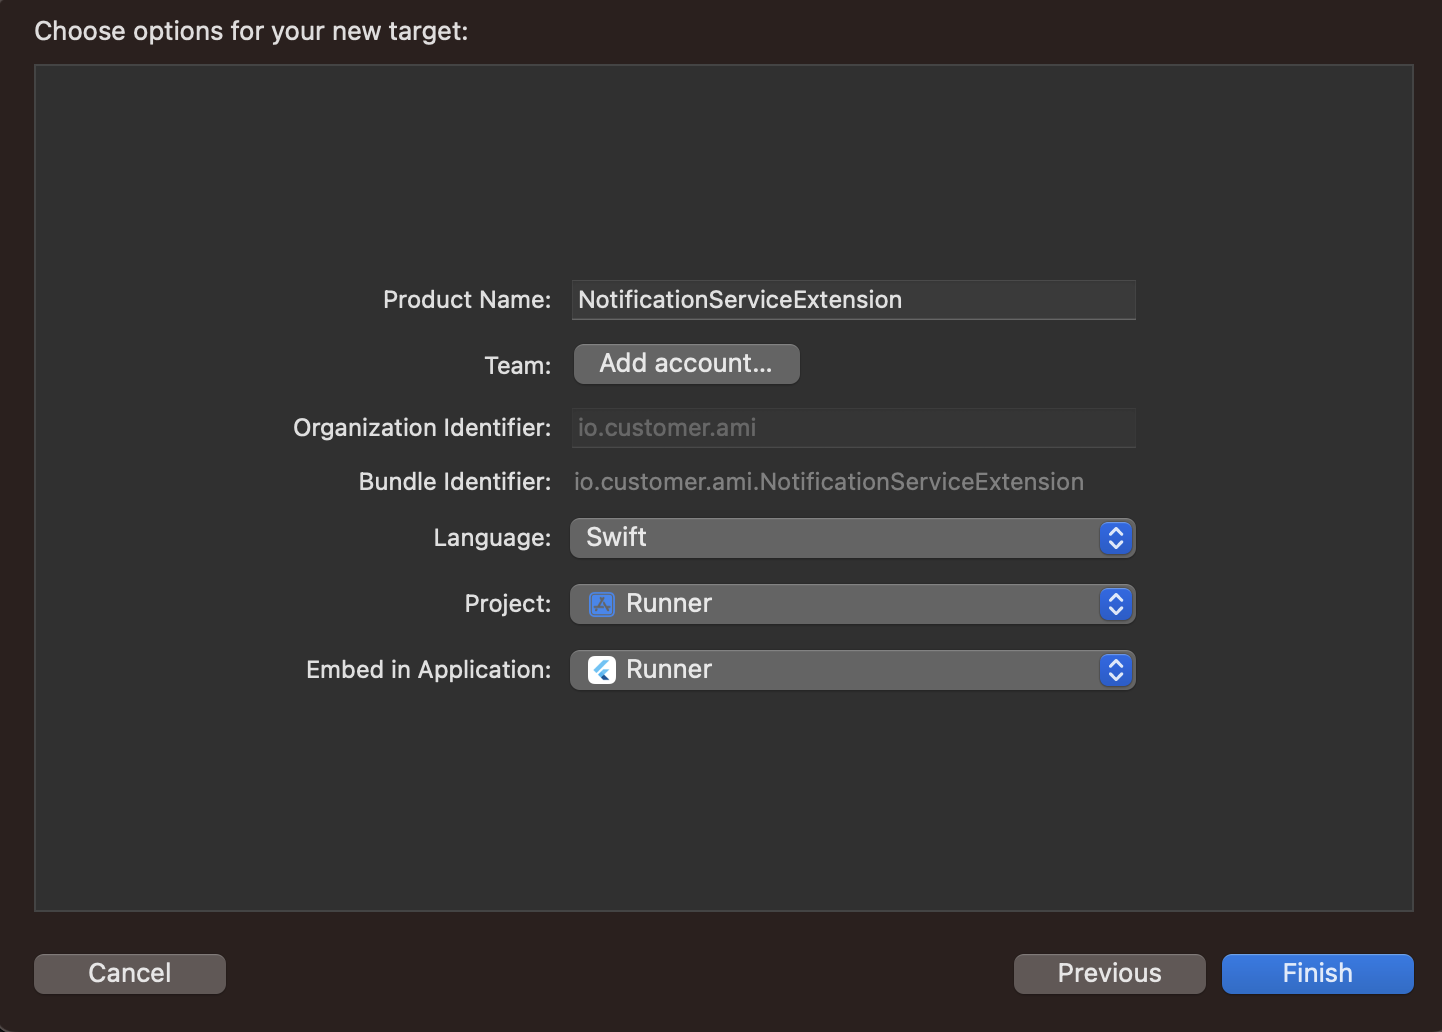
7. You should see a window such as this:
[](#97f7eea0f5f268a29a24b1bdea3c767c-lightbox)
You can leave many of the options in this window as their defaults, but you should:
* Enter a product name, like *NotificationServiceExtension* (which we use in our examples on this page)
* Confirm that your main app is selected in the *Embed in Application* drop-down menu
When you’re done, click **Finish**.
8. When presented with the dialog below, click **Cancel**. This will help Xcode continue debugging your app and not just the extension you just added.
[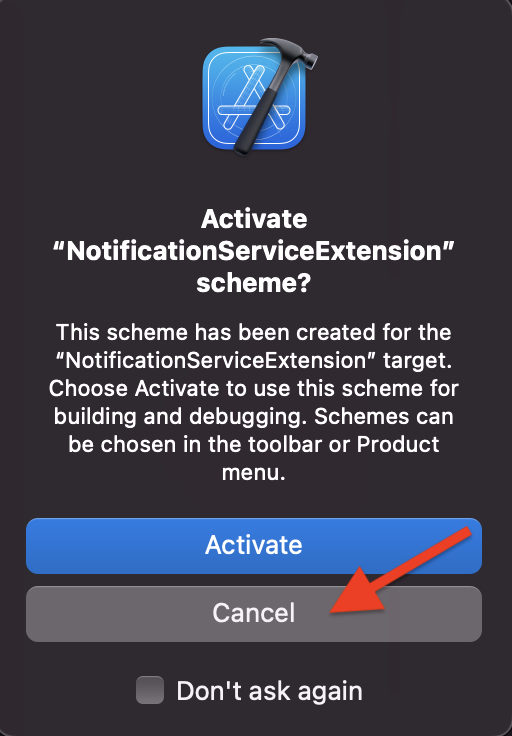](#7a87192ad7f0dc9047625d6dfc407e77-lightbox)
Now you have another target in your project navigator named `NotificationServiceExtension`. We’ll configure this extension when we [Integrate Push Notifications](#swift-push) in the following section.
### Integrate push capabilities in your app[](#swift-push)
#### Install dependencies[](#install-dependencies)
You can install iOS dependencies using CocoaPods or Swift Package Manager (SPM).
Switching to SPM?
If you’re migrating from CocoaPods to SPM, see [Upgrade from 3.x to 4.0.0](/integrations/sdk/flutter/whats-new/4.0.0-upgrade/) for step-by-step instructions.
CocoaPods
#### CocoaPods[](#CocoaPods)
If you previously enabled SPM, make sure it’s disabled by running `flutter config --no-enable-swift-package-manager`.
1. Open the file `ios/Podfile` and make the following modifications:
```ruby
target 'Runner' do # Look for the main app target.
# Required by FCM push notification service
use_frameworks!
# Make all file modifications after these lines:
config = use_native_modules!
# Add the following line to add the Customer.io native dependency:
pod 'customer_io/fcm', :path => '.symlinks/plugins/customer_io/ios
end
# Next, copy and paste the code below to the bottom of your Podfile:
target 'NotificationServiceExtension' do
pod 'customer_io_richpush/fcm', :path => '.symlinks/plugins/customer_io/ios'
end
```
2. Run `pod install --repo-update --project-directory=ios` from the root directory of your Flutter project. When dependencies finish installing, you should see a message like this:
```fallback
Pod installation complete! There are X dependencies from the Podfile and Y total pods installed.
```
Swift Package Manager (SPM)
#### Swift Package Manager (SPM)[](#Swift Package Manager \(SPM\))
Before you start, make sure you meet the following requirements:
* Flutter 3.24+
* Xcode 16.0+
* `firebase_core: ^3.5.0` and `firebase_messaging: ^15.2.0` or higher (older versions don’t support SPM). We recommend at least `firebase_core: ^4.6.0` and `firebase_messaging: ^16.1.3`.
1. **Enable SPM (if not already enabled).** Run `flutter config --enable-swift-package-manager`, and then run `flutter pub get`. The Customer.io SDK is automatically resolved - no manual Xcode setup needed for the main app.
2. **Update your Podfile.** Remove any `customer_io` pod lines and the `NotificationServiceExtension` target block from your `ios/Podfile`:
```ruby
pod 'customer_io/fcm', :path => ...
pod 'customer_io/location', :path => ...
pod 'customer_io_richpush/fcm', :path => ...
```
With SPM enabled, Flutter’s pod helper automatically skips SPM-handled plugins.
3. **Set up Rich Push (NSE).**
1. Open `ios/Runner.xcworkspace` in Xcode.
2. Select the **NotificationServiceExtension** target.
3. Go to **General** > **Frameworks and Libraries** > click **+** and add **FlutterGeneratedPluginSwiftPackage** if it isn’t already added.
[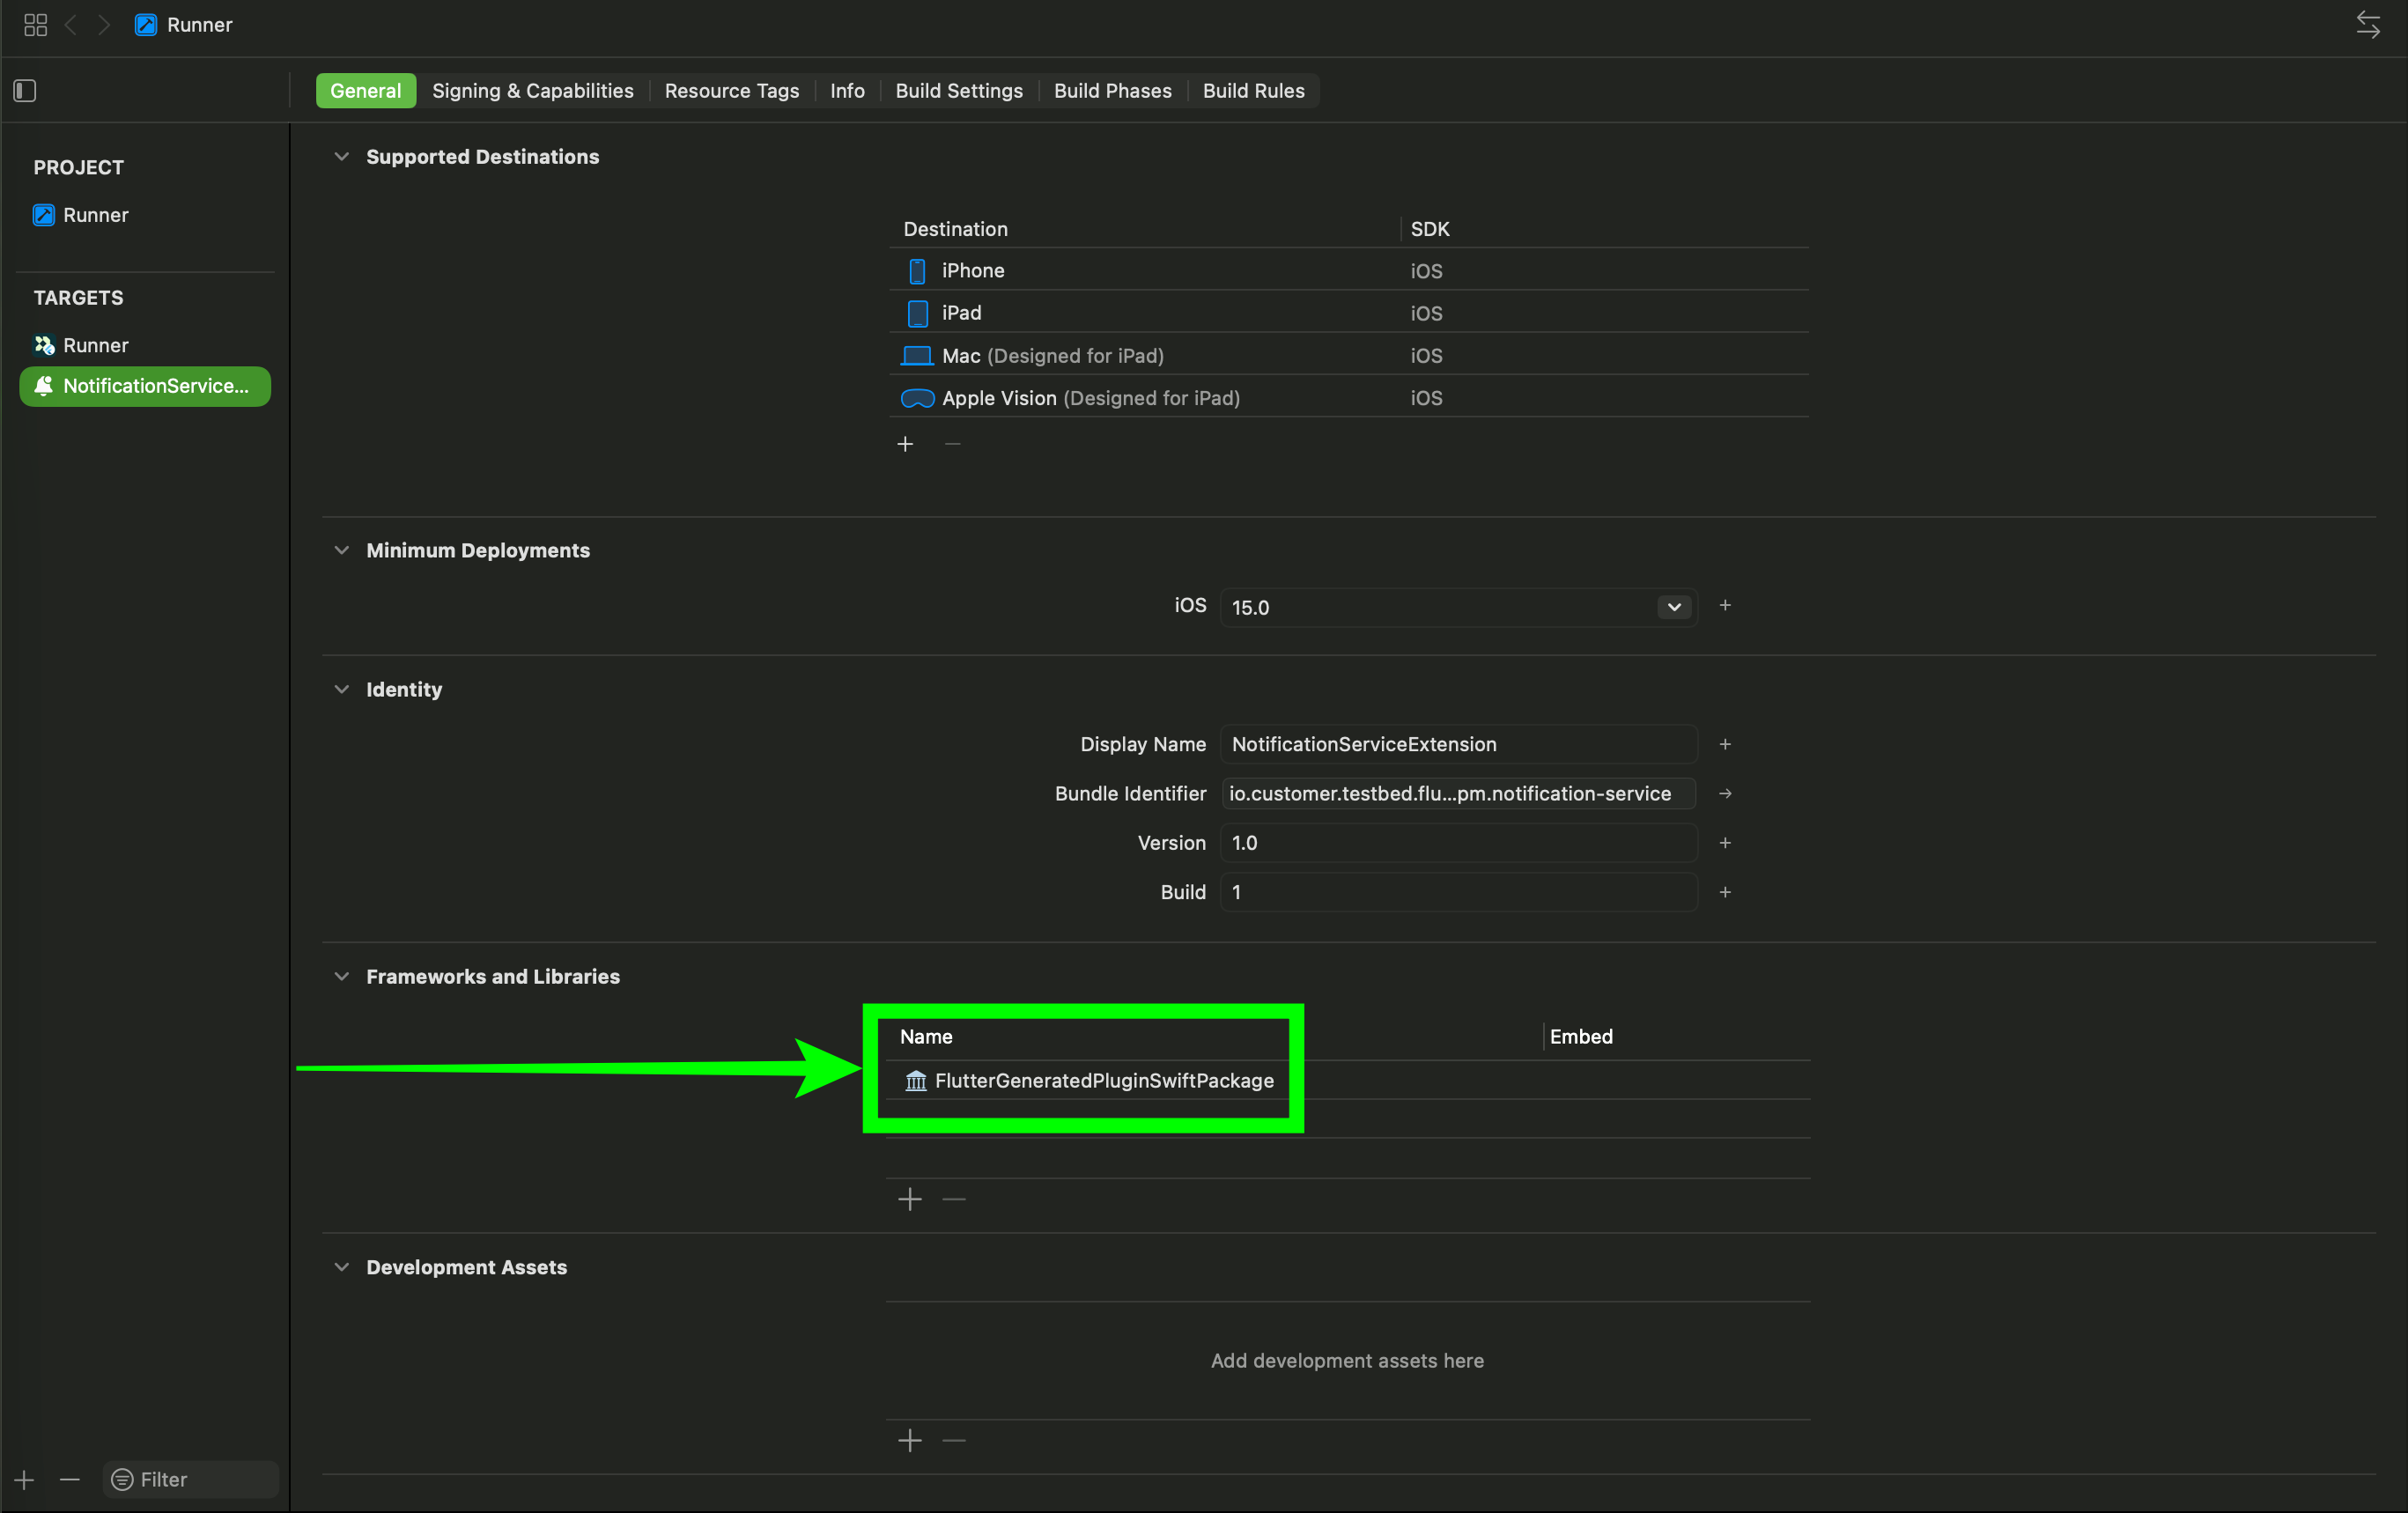](#63f96c00dae3d457f55911fae69d4722-lightbox)
The plugin automatically includes the following modules via SPM:
Module
Purpose
DataPipelines
Core SDK
MessagingInApp
In-app messaging
MessagingPushFCM
Push notifications and Firebase integration
The Location module is not included by default. To include it, set `customerio_location_enabled=true` in your `android/gradle.properties` file. This flag controls both Android and iOS. See [Location tracking](/integrations/sdk/flutter/tracking/location/) for details.
#### Configure your app[](#configure-your-app)
1. Update your `AppDelegate.swift` file to handle push notifications:
```swift
import UIKit
import Flutter
import CioMessagingPushFCM
import CioFirebaseWrapper
import FirebaseMessaging
import FirebaseCore
@main
class AppDelegateWithCioIntegration: CioAppDelegateWrapper {}
class AppDelegate: FlutterAppDelegate {
override func application(
_ application: UIApplication,
didFinishLaunchingWithOptions launchOptions: [UIApplication.LaunchOptionsKey: Any]?
) -> Bool {
GeneratedPluginRegistrant.register(with: self)
// Depending on how you install Firebase,
// you may need to add functions to this file, like:
// FirebaseApp.configure()
//
// Read the official Firebase docs to install Firebase correctly!
MessagingPushFCM.initialize(
withConfig: MessagingPushConfigBuilder()
// .appGroupId("group.com.example.myapp.cio") // Optional: for reliable delivery tracking
.build()
)
// Add line below only if you want to have custom control over notifications being presented and processed - Customer.io will handle those automatically
UNUserNotificationCenter.current().delegate = self as UNUserNotificationCenterDelegate
return super.application(application, didFinishLaunchingWithOptions: launchOptions)
}
override func application(_ application: UIApplication,
didRegisterForRemoteNotificationsWithDeviceToken deviceToken: Data) {
super.application(application, didRegisterForRemoteNotificationsWithDeviceToken: deviceToken)
Messaging.messaging().apnsToken = deviceToken
}
}
```
2. Open your `NotificationService.swift` file in Xcode and modify it with the highlighted changes below:
```swift
import CioMessagingPushFCM
import UserNotifications // Required when using SPM
class NotificationService: UNNotificationServiceExtension {
override func didReceive(_ request: UNNotificationRequest,
withContentHandler contentHandler:
@escaping (UNNotificationContent) -> Void) {
MessagingPushFCM.initializeForExtension(
withConfig: MessagingPushConfigBuilder(cdpApiKey: "YourCdpApiKey")
// Optional: set your Customer.io account region (.US or .EU). Default: US
.region(.US)
// .appGroupId("group.com.example.myapp.cio") // Optional: for reliable delivery tracking
.build()
)
MessagingPush.shared.didReceive(request, withContentHandler: contentHandler)
}
override func serviceExtensionTimeWillExpire() {
MessagingPush.shared.serviceExtensionTimeWillExpire()
}
}
```
`import UserNotifications` is required when using SPM. CocoaPods transitively imports system frameworks, so the import isn’t required with CocoaPods, but it doesn’t hurt to include it.
Now you can run your app on a physical device and send yourself push notifications with images and deep links to test your implementation. You’ll have to use a physical device because emulators can’t receive push notifications.
### Sound in push notifications (iOS Only)[](#sound-in-push-notifications)
When you send a push notification to iOS devices that uses our SDK, you can opt to send the *Default* system sound or no sound at all. If your audience’s phone is set to vibrate, or they’ve disabled sound permissions for your app, the *Default* setting will cause the device to vibrate rather than playing a sound.
In most cases, you should use the *Default* sound setting to make sure your audience hears (or feels) your message. But, before you send sound, you should understand:
1. Your app needs permission from your users to play sounds. This is done by your app, not our SDKs. [Here’s an example from our iOS sample app](https://github.com/customerio/customerio-ios/blob/main/Apps/APN-UIKit/APN%20UIKit/Util/NotificationUtil.swift#L12-L13) showing how to request sound permissions.
2. iOS users can go into *System Settings* and disable sound permissions for your app. Enabling the *Default* setting doesn’t guarantee that your audience hears a sound when your message is delivered!
We don’t support custom sounds yet
If you want to send a custom sound, you’ll need to handle it on your own, outside the SDK and use a custom payload when you set up your push notifications.
## Display push notifications in the foreground (iOS)[](#ios-foreground-notifications)
By default, iOS doesn’t display push notifications when your app is in the foreground. The `showPushAppInForeground` configuration flag (set to `true` by default) tells iOS to display notifications even when your app is active.
```swift
MessagingPushFCM.initialize(
withConfig: MessagingPushConfigBuilder()
.showPushAppInForeground(true)
.build()
)
```
For more information about handling push notifications in the foreground, including custom handling for non-Customer.io push notifications, see [push metrics and custom handling](/integrations/sdk/flutter/push-notifications/push-metrics/#show-push-app-foreground).
### Implement the notification center delegate for more control[](#implement-the-notification-center-delegate-for-more-control)
For more granular control over foreground notification behavior, you can implement the `userNotificationCenter(_:willPresent:withCompletionHandler:)` method in your `AppDelegate.swift` file. This native implementation takes precedence over the `showPushAppInForeground` configuration flag.
This method lets you inspect the notification content and decide whether to display it, and choose which presentation options to use (banner, list, badge, sound, or any combination).
Add this method to the `AppDelegate` class you set up in the [integration step](#swift-push) above:
```swift
override func userNotificationCenter(
_ center: UNUserNotificationCenter,
willPresent notification: UNNotification,
withCompletionHandler completionHandler: @escaping (UNNotificationPresentationOptions) -> Void
) {
// Show notifications in foreground with banner, list, badge, and sound
completionHandler([.banner, .list, .badge, .sound])
// Or return empty array if you do NOT want notifications shown in foreground
// completionHandler([])
}
```
## Test your implementation[](#rich-push-payloads)
After you set up rich push, you should test your implementation. Below, we show the payload structure we use for iOS and Android. In general, you can use our regular rich push editor; it’s set up to send messages using the JSON structure we outline below.
If you want to fashion your own payload, you can use our [custom payload](/journeys/push-custom-payloads/#getting-started-with-custom-payloads).
[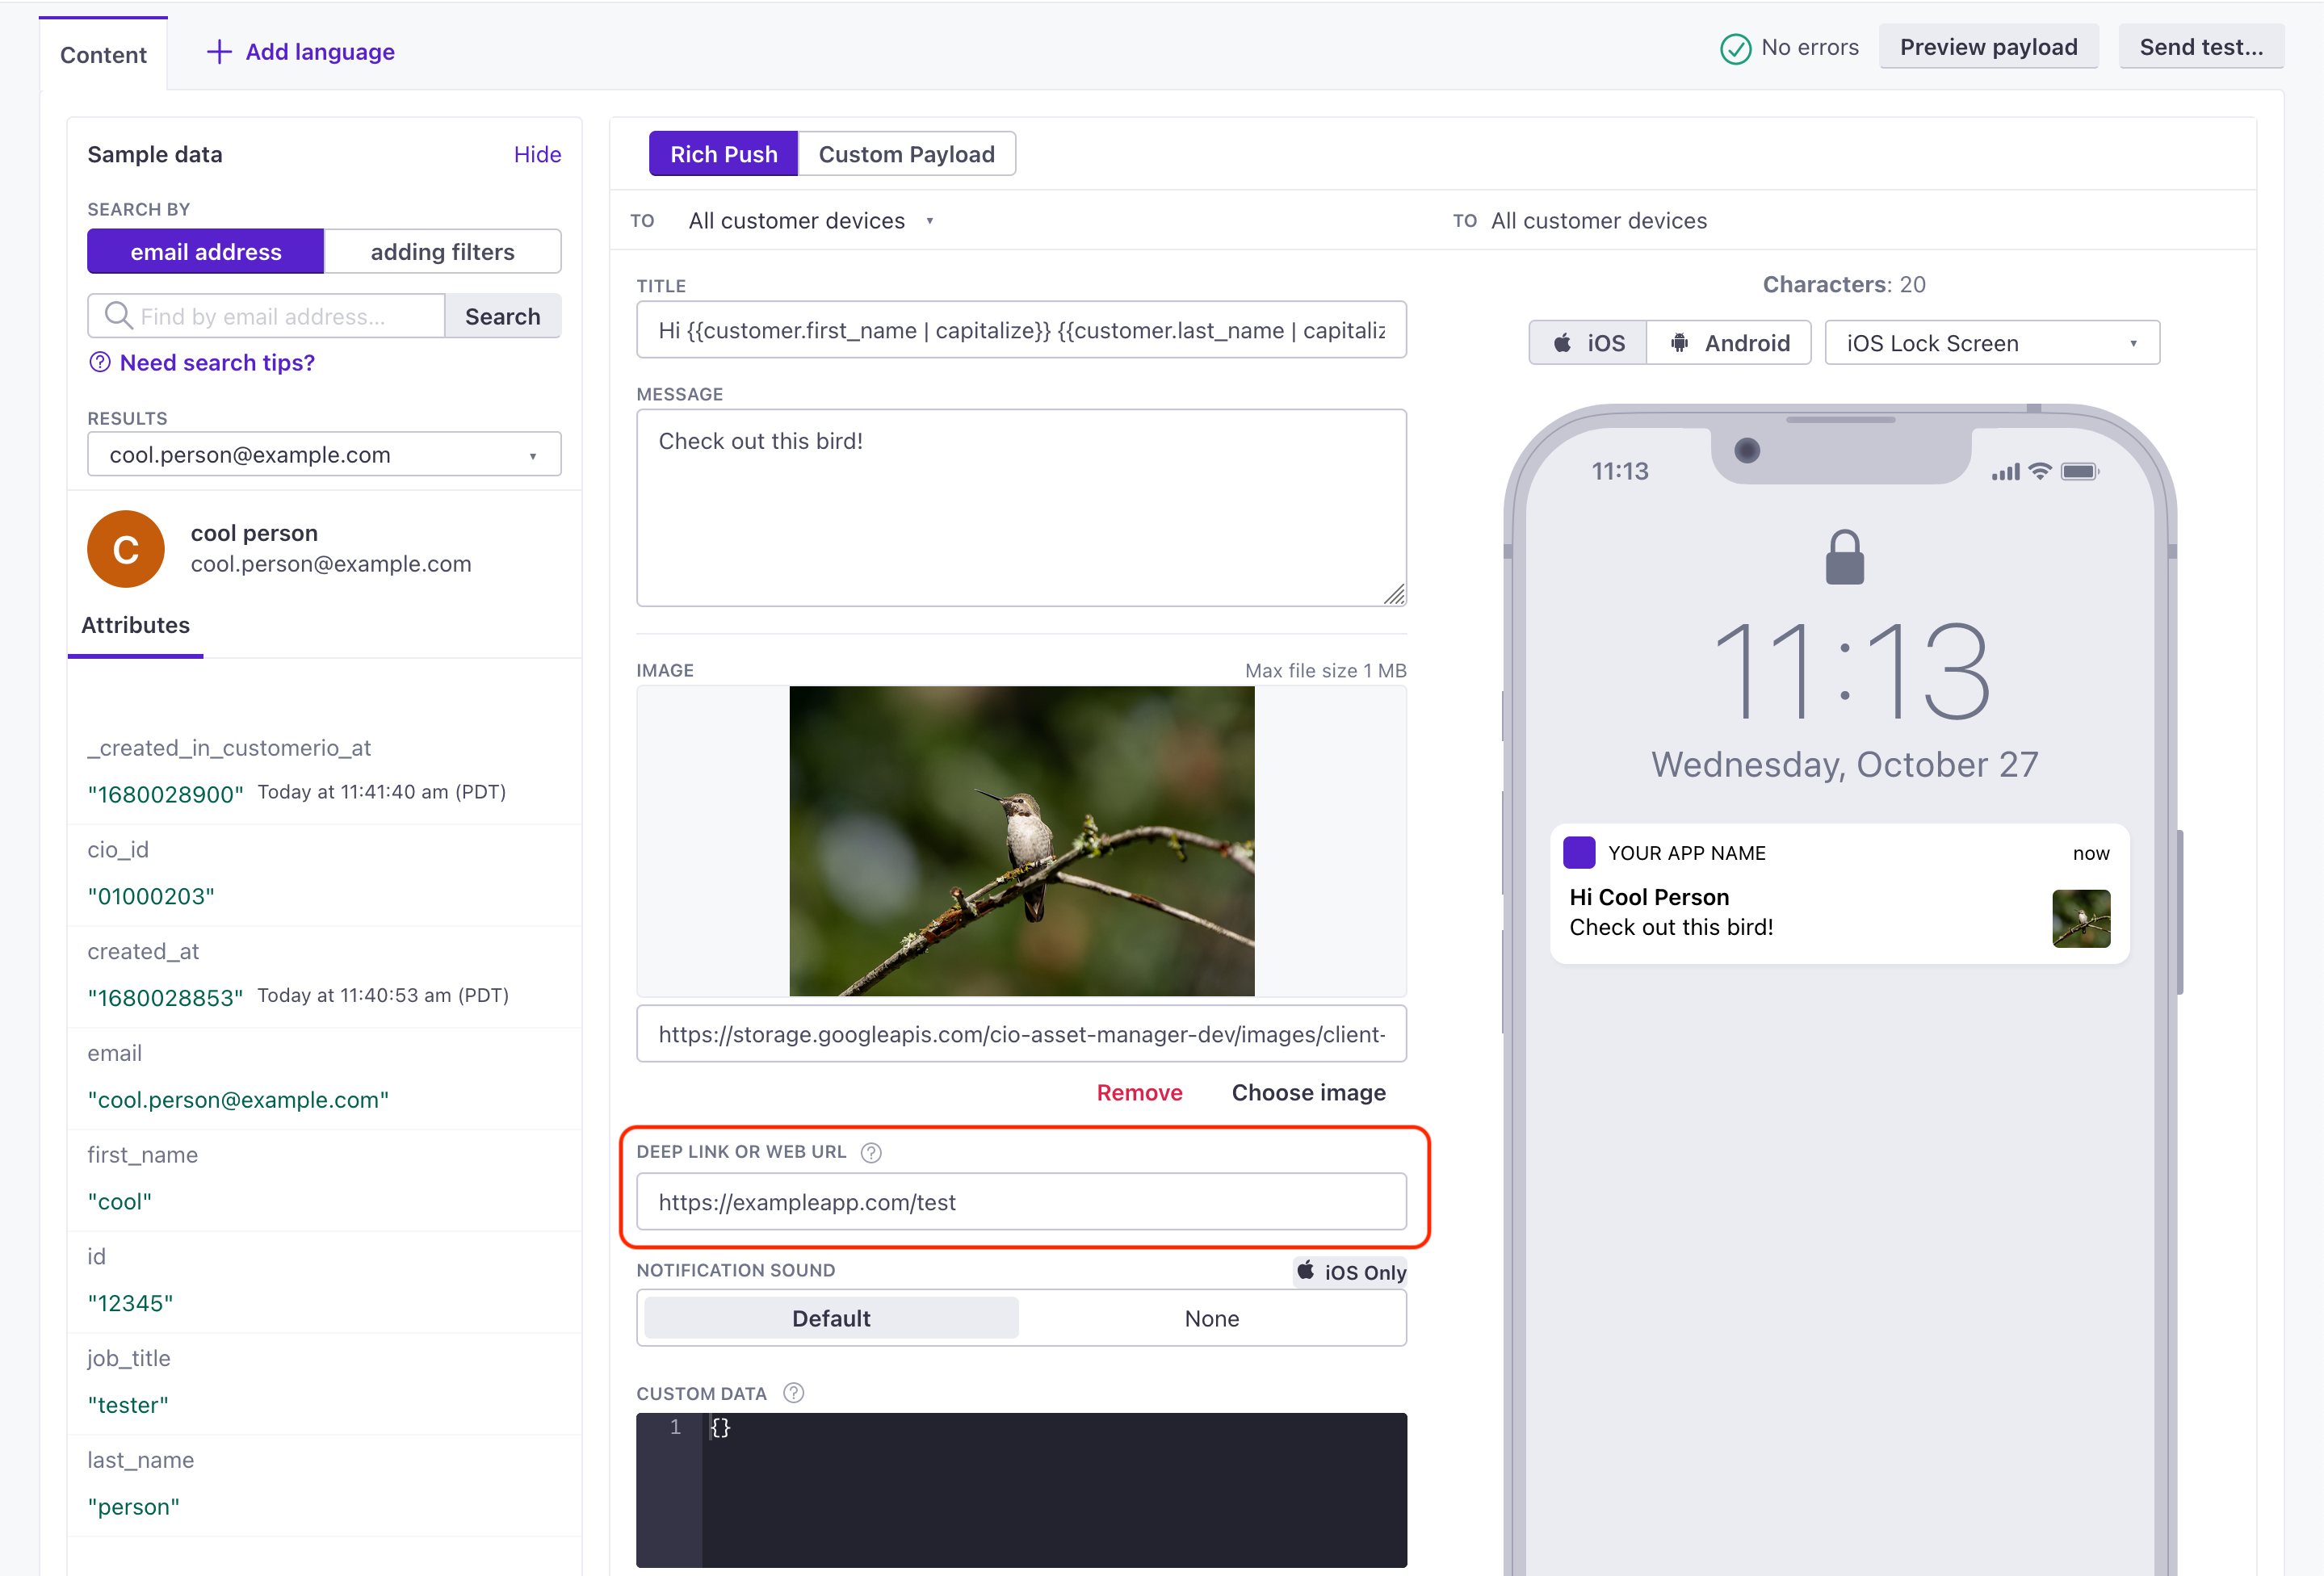](#4e089ac68a22d5b994db09266a531737-lightbox)
iOS FCM payload
#### iOS FCM payload[](#iOS FCM payload)
```json
{
"message": {
"apns": {
"payload": {
"aps": {
// basic iOS message and options go here
"mutable-content": 1,
"alert": {
"title": "string", //(optional) The title of the notification.
"body": "string" //(optional) The message you want to send.
}
},
"CIO": {
"push": {
"link": "string", //generally a deep link, i.e. my-app://... or https://yourwebsite.com/...
"image": "string" //HTTPS URL of your image, including file extension
}
}
},
"headers": {
// (optional) headers to send to the Apple Push Notification Service.
"apns-priority": 10
}
}
}
}
```
* message object
Required The base object for all FCM payloads.
* apns object
Required Defines a payload for iOS devices sent through Firebase Cloud Messaging (FCM).
* headers object
Headers defined by [Apple’s payload reference](https://developer.apple.com/documentation/usernotifications/setting_up_a_remote_notification_server/sending_notification_requests_to_apns) that you want to pass through FCM.
* payload object
Required Contains a push payload.
* CIO object
Contains properties interpreted by the Customer.io iOS SDK.
* push object
Required A push payload for the iOS SDK.
* *Custom key-value pairs\** any type
Additional properties that you've set up your app to interpret outside of the Customer.io SDK.
Android payload
#### Android payload[](#Android payload)
```json
{
"message": {
"data": {
"title": "string", //(optional) The title of the notification.
"body": "string", //The message you want to send.
"image": "string", //https URL to an image you want to include in the notification
"link": "string" //Deep link in the format remote-habits://deep?message=hello&message2=world
}
}
}
```
* message
Required The parent object for all push payloads.
* android object
Contains properties that are **not** interpreted by the SDK but are defined by FCM. You need to write your own code to handle these Android push features.
* data object
Required Contains all properties interpreted by the SDK.
* android object
Contains properties that are **not** interpreted by the SDK but are defined by FCM. You need to write your own code to handle these Android push features.
* data object
Contains the `link` property (interpreted by the SDK) and additional properties that you want to pass to your app.
* notification object
Required Contains properties interpreted by the SDK except for the `link`.
## Next steps[](#next-steps)
After you set up push notifications, configure [App Groups](/integrations/sdk/flutter/push-notifications/app-groups/) for reliable delivery tracking on iOS. Without App Groups, iOS can end the Notification Service Extension before delivery metrics are sent, which means some data may never reach Customer.io. App Groups provide shared storage so the SDK can recover any lost metrics on the next app launch.