Compose JSON messages in the advanced editor
UpdatedThis page is part of the build-your-own inbox approach.
When you send an inbox message from a campaign or broadcast—or from your backend—you author its content in the advanced editor. The advanced editor delivers your message as the JSON payload that you render from your bespoke inbox client.
Add an Inbox message to your campaign or broadcast workflow (or create an Inbox transactional message), then choose the Advanced editor.
Define your message settings: Topics, Type, and Expiration.
- Topics: help you filter the inbox for specific messages.
- Type: acts as a signal to your inbox client about how to render the message.
- Expiration: the time between when the message is sent and when it expires. Messages only expire if they’re sent but not delivered. By default, messages expire after 60 days, which is also the maximum.
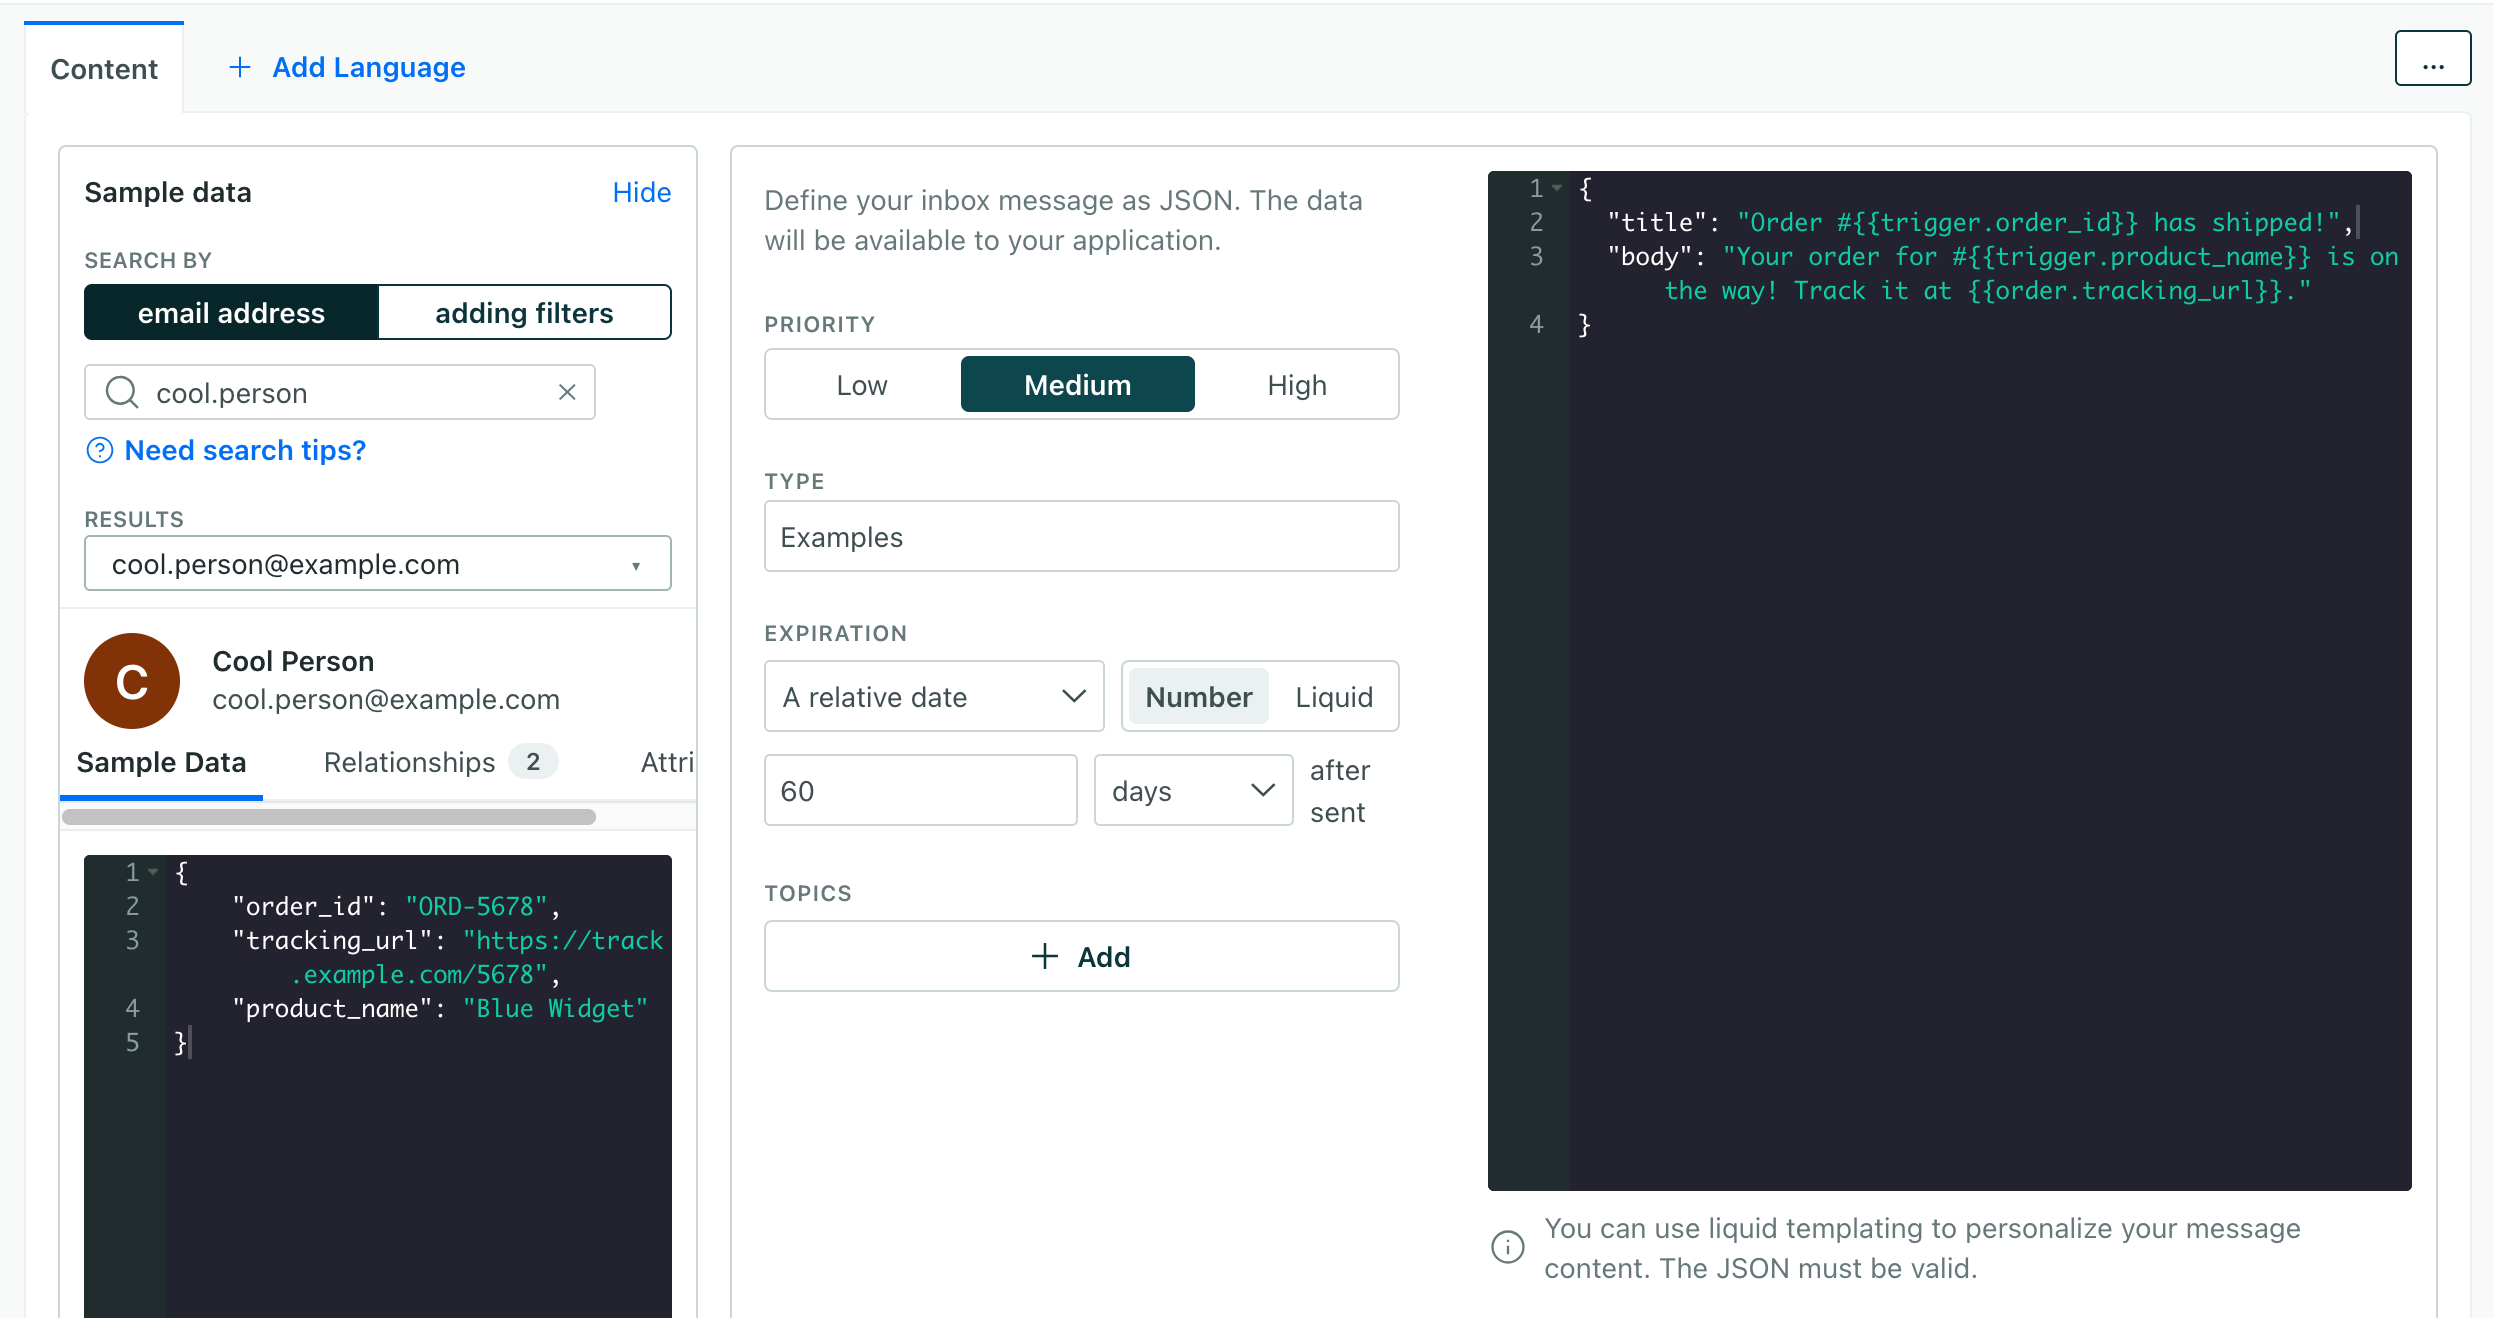
In the JSON area, provide the payload that represents your message. By default we include a
titleandbody, but you can add any fields your client expects, like animageorlink.Personalize content with liquidA syntax that supports variables, letting you personalize messages for your audience. For example, if you want to reference a person’s first name, you might use the variable
{{customer.first_name}}.: use{{customer.<attribute_name>}}for profile attributesA key-value pair that you associate with a person or an object—like a person’s name, the date they were created in your workspace, or a company’s billing date etc. Use attributes to target people and personalize messages.,{{event.<attribute_name>}}for event data, and{{trigger.<attribute_name>}}for broadcast or transactional trigger data.{ "title": "Hey, {{customer.first_name}}, your order shipped!", "body": "You can track your order #{{event.order_number}} here:", "link": "https://example.com/orders/{{event.order_number}}" }Save your message.
For the full campaign and broadcast flow, see send inbox messages. To trigger messages from your backend, see trigger inbox messages from your backend.