

Cohort tests
When you want to A/B test something other than email content, try a cohort test! Randomly assigning people to cohorts gives you a way to perform tests independently of individual messages.
Cohort testing is great for things like:
- Testing timing: different delay times before sending a message
- Single vs multi-touch: sending a user one email vs. several emails
- Blackhole/holdout testing: where you want to send a message or no message at all. Check out our recipe specifically for holdout tests.
Ingredients
You’ll need:
- A basic understanding of liquid
- The ability to create automations
If you decide to assign cohorts via API, you’ll also need:
- A terminal window and basic knowledge of cURL (or a friendly developer)
- Your site ID and API key
Method
To create a cohort test:
- Randomize and assign cohorts to your users via an automation or our API.
- Create an automation to run your cohort test. For our example, we’ll run an automation that sends an email five minutes or ten minutes after a person performs an event.
Step 1: assign a cohort attribute
In this example, we’ll trigger an automation for people who sign up for your product and assign people a cohort attribute to divide them into groups. This can be used for any automation moving forward!
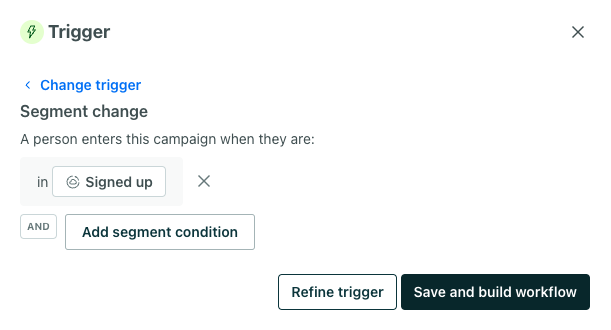
- Go to Automations and click Create Automation. Enter a name.
- Click Choose trigger and select Segment change.
- Specify users in the segment Signed Up and click Save.
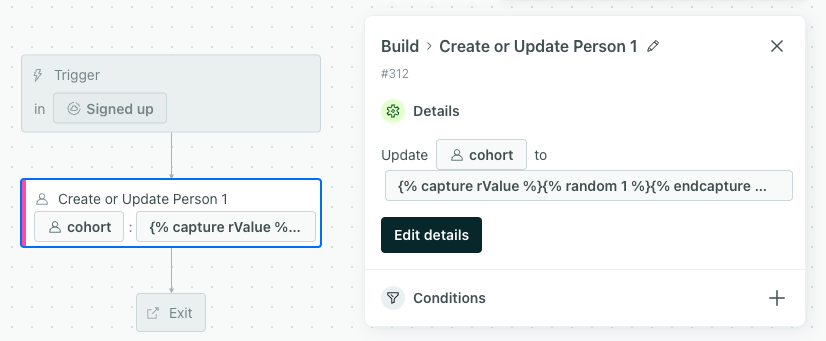
- Drag a Create or Update Person block onto the canvas. Click the block then click Add details.
- Under “Who do you want to update?” select “the person in the workflow.”
- Under “Which attributes do you want to add, change, or remove?” add liquid to randomize cohort assignment.
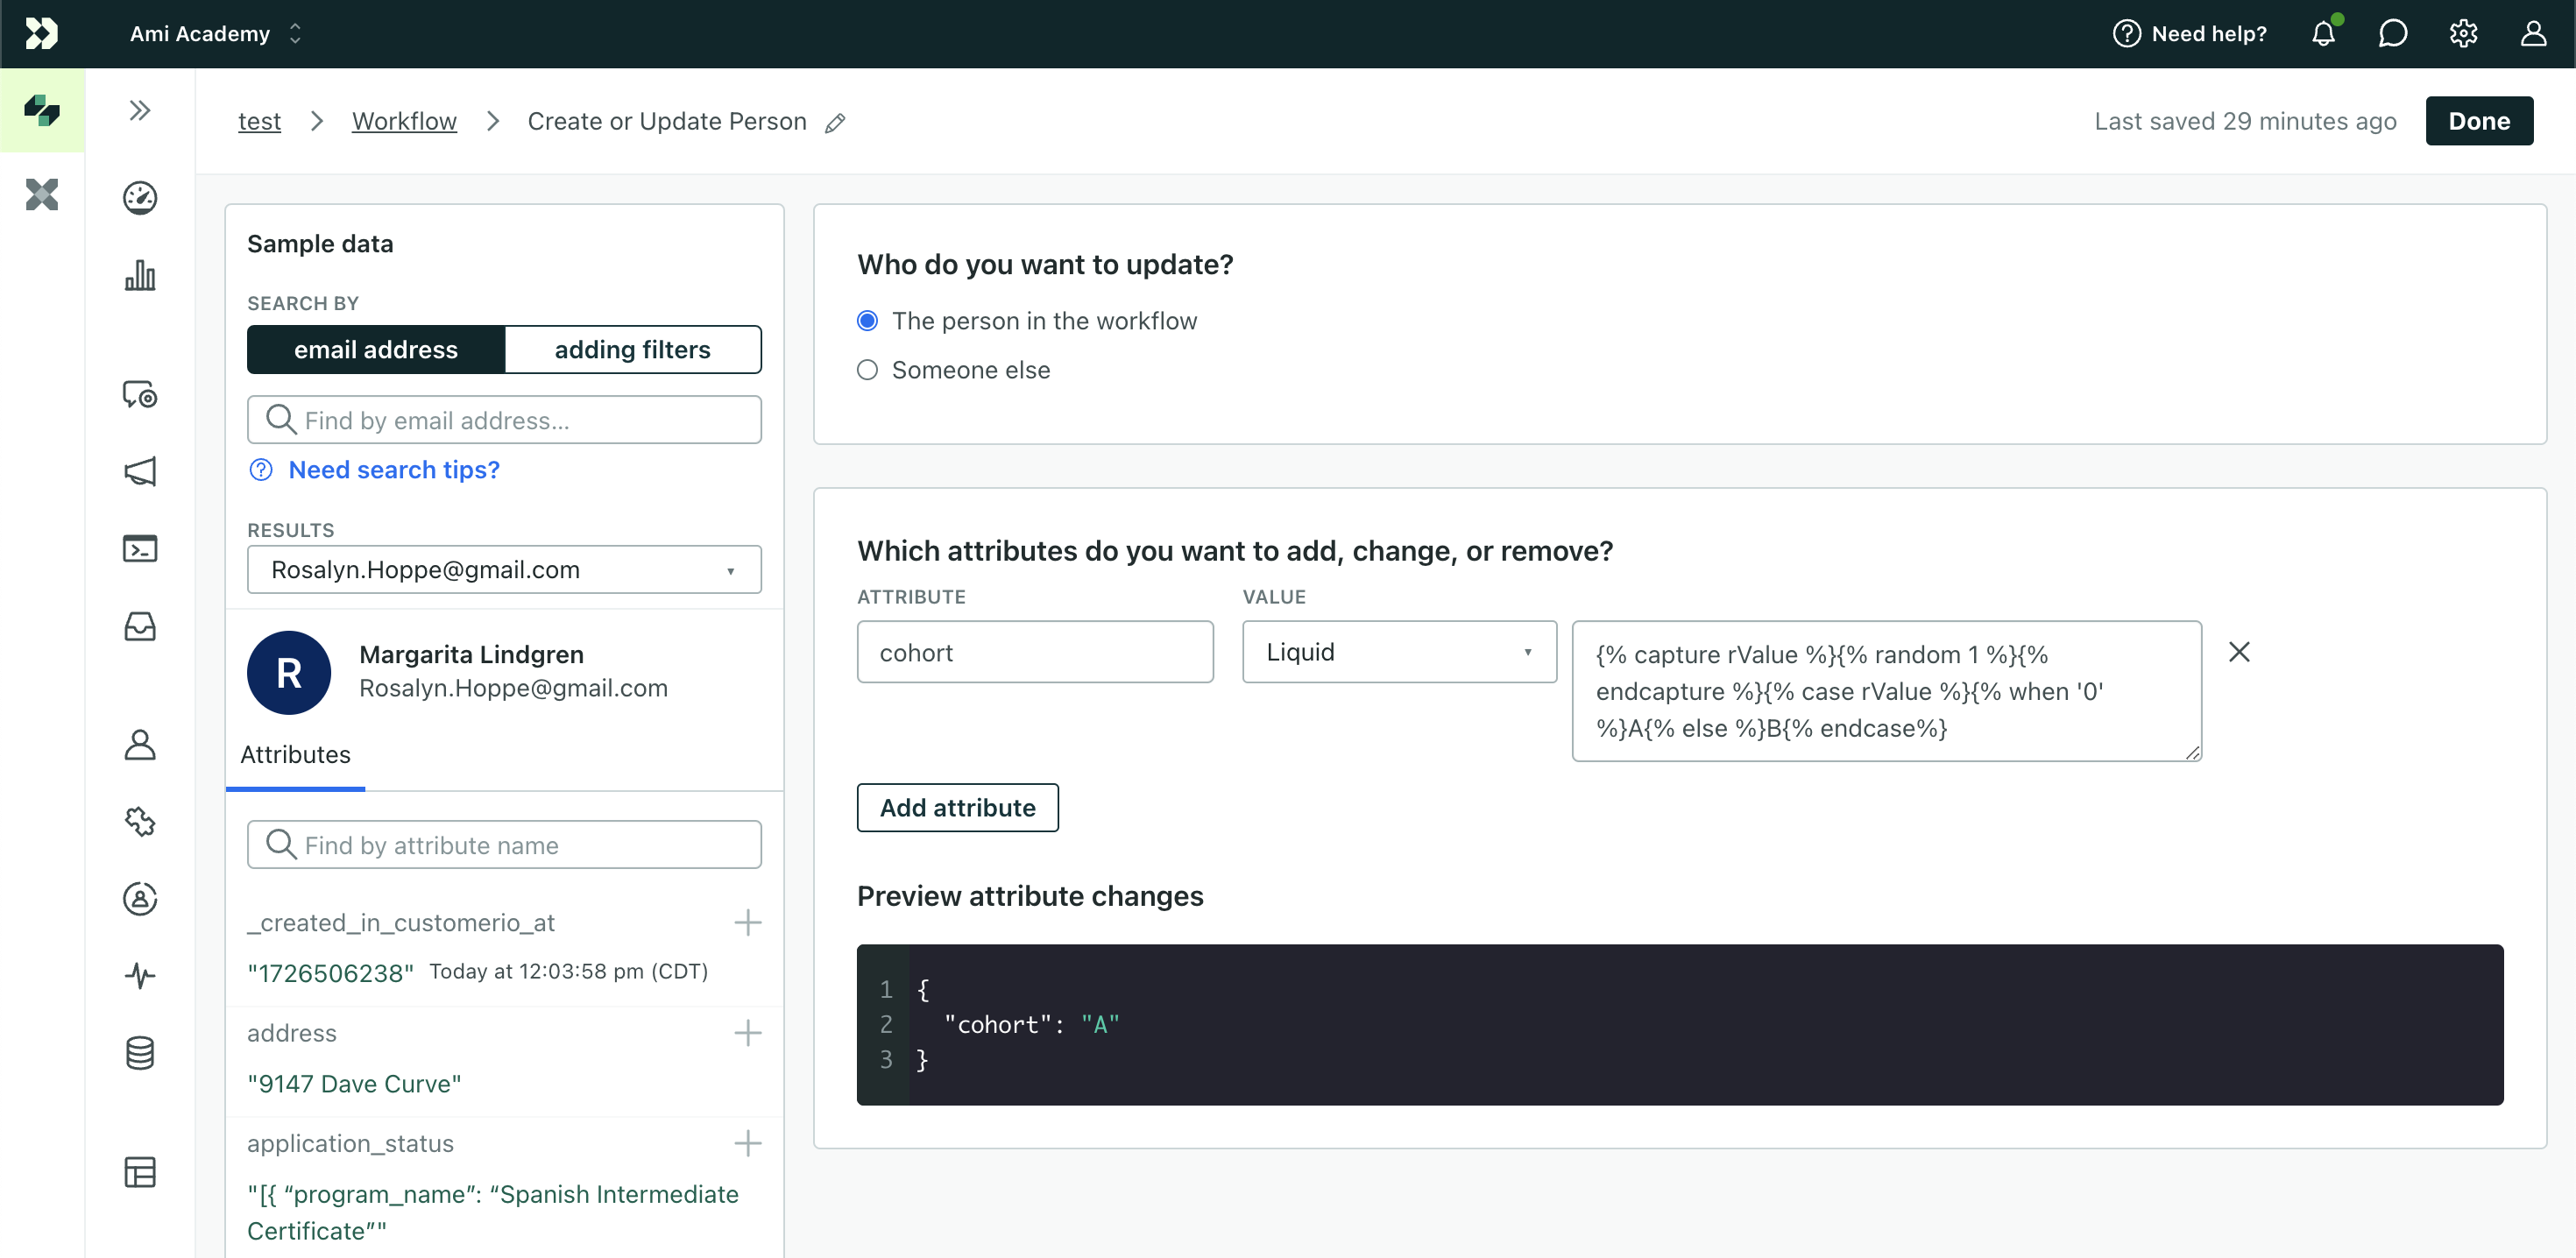
- To create two groups:
- Set a new attribute called
cohortwith a Liquid value and use the code below to generate a number, 0 or 1. If the outcome is 0, it sets thecohortattribute to A. If it’s 1, it’s set to B.
{% capture rValue %}{% random 1 %}{% endcapture %}{% case rValue %}{% when '0' %}A{% else %}B{% endcase%} - Set a new attribute called
- To create more than two groups:
- Here’s an example that assigns one of 10 possible options (A to J):
{% capture rValue %}{% random 9 %}{% endcapture %}{% case rValue %}{% when '0' %}A{% when '1' %}B{% when '2' %}C{% when '3' %}D{% when '4' %}E{% when '5' %}F{% when '6' %}G{% when '7' %}H{% when '8' %}I{% when '9' %}J{% endcase %}
- To create two groups:
- Click Save Changes then Done.
- On the review step, let’s choose to update Current people and future additions, though you can choose “Future additions only” if you don’t want to update users already in your database.
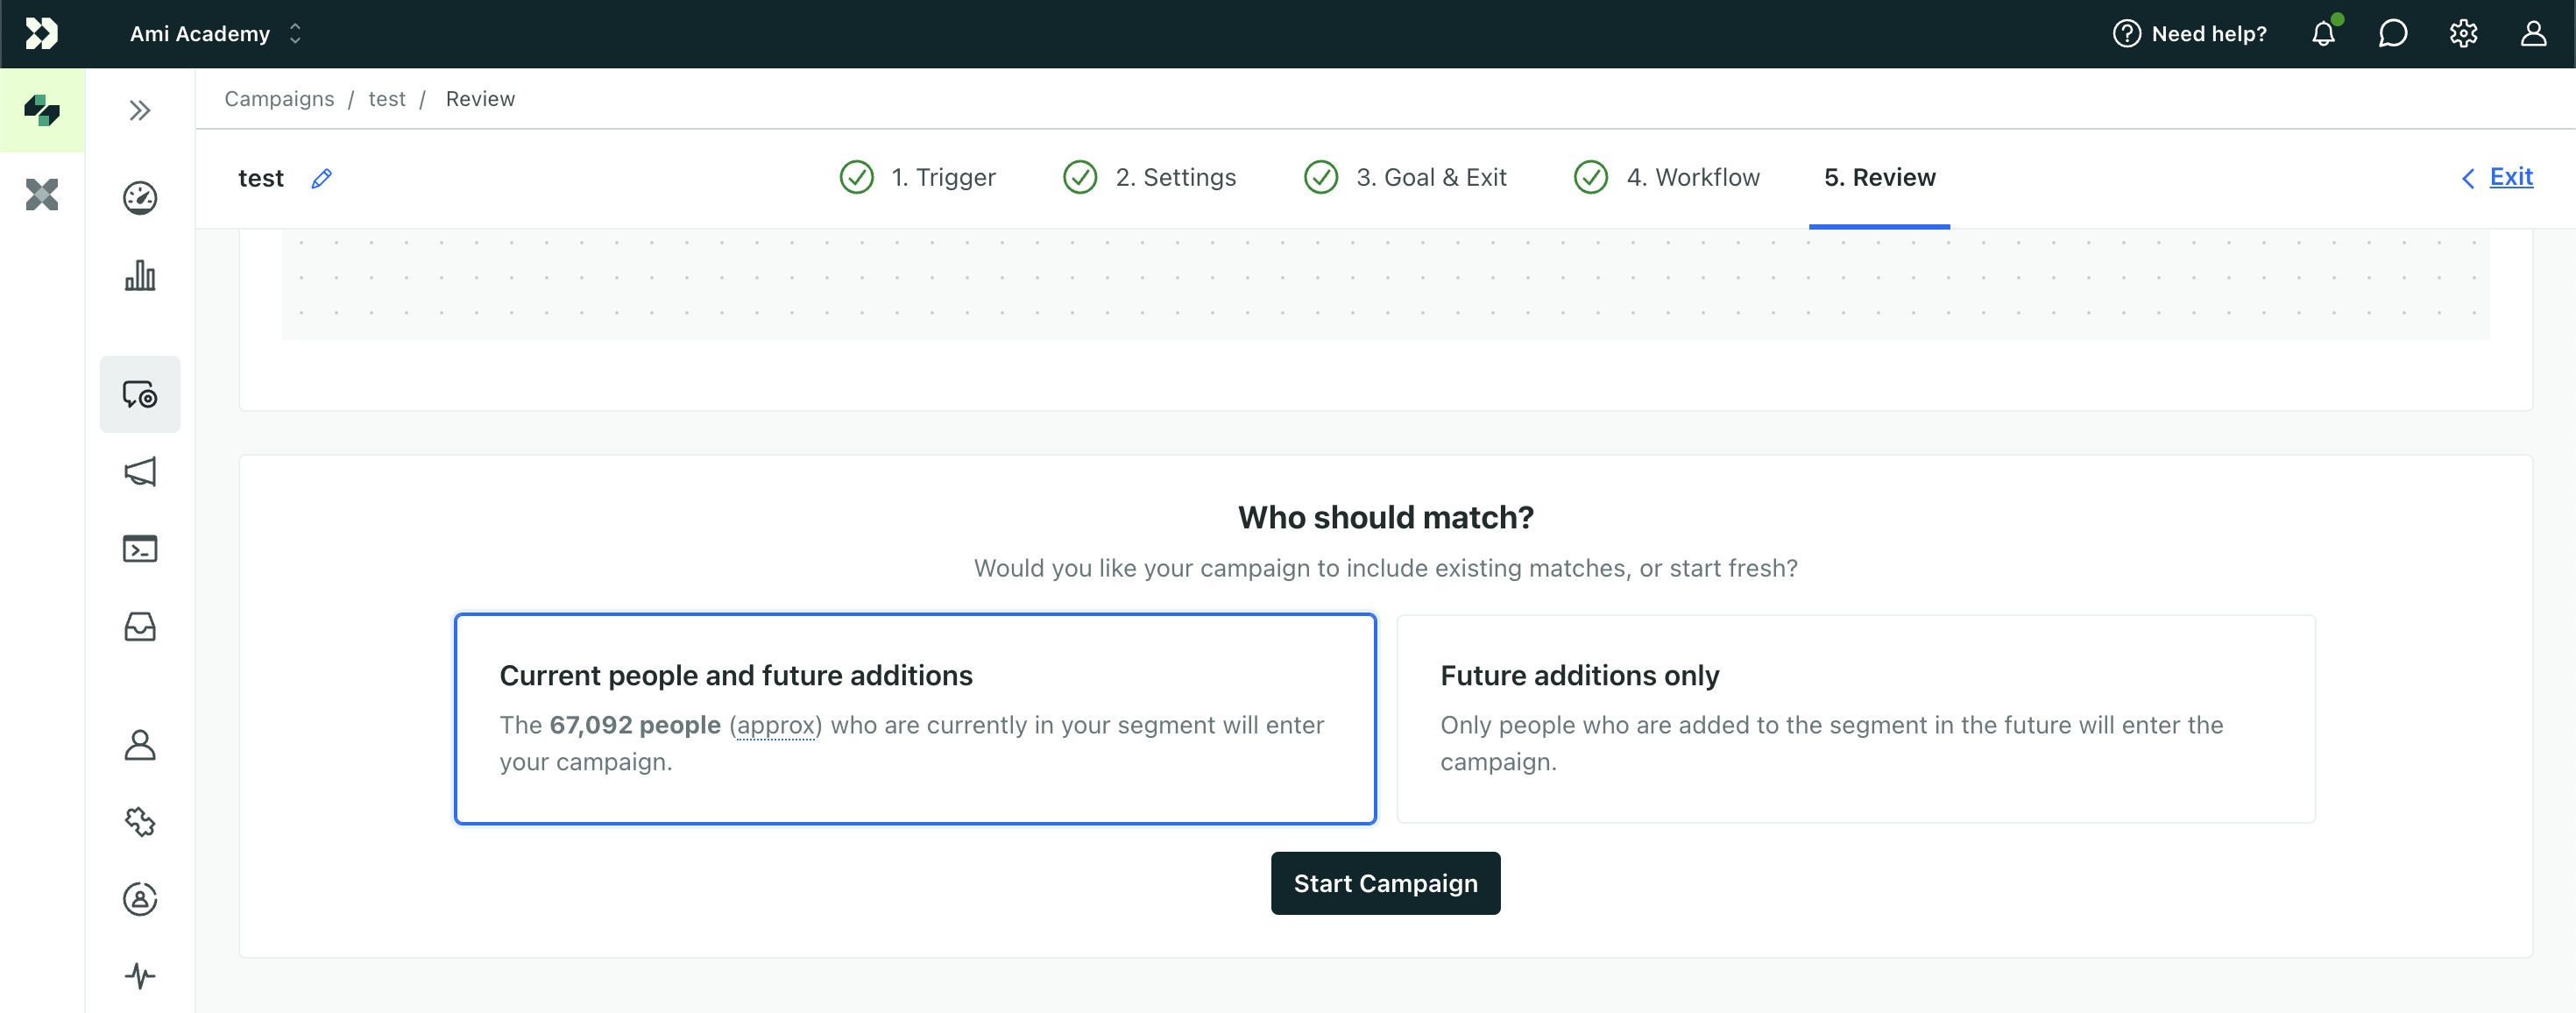
This sets us up for future cohort testing, as anyone who signs up in the future will randomly get an A or B value, in addition to our existing people.
Now, we’re ready to test!
Step 2: create an automation to test your cohorts
In this example, we’ll create an automation to test how our cohorts’ behaviors change when we delay sending an email at different intervals. We’ll send the same email to people who view a product. But for one cohort, we’ll send it five minutes after the event, and for the other, after 10 minutes.
We’ll create an automation triggered by the event viewed_product, and the workflow will contain two time delays before an email, where each time delay has a condition targeting a different cohort.
- Go to Automations and click Create Automation. Enter a name.
- Select Event as the trigger.
- Enter the event name, in this case,
viewed_product. - Specify your message settings and your goal and exit criteria.
- On the workflow step, drag two Time Delay blocks onto the canvas followed by an Email block.
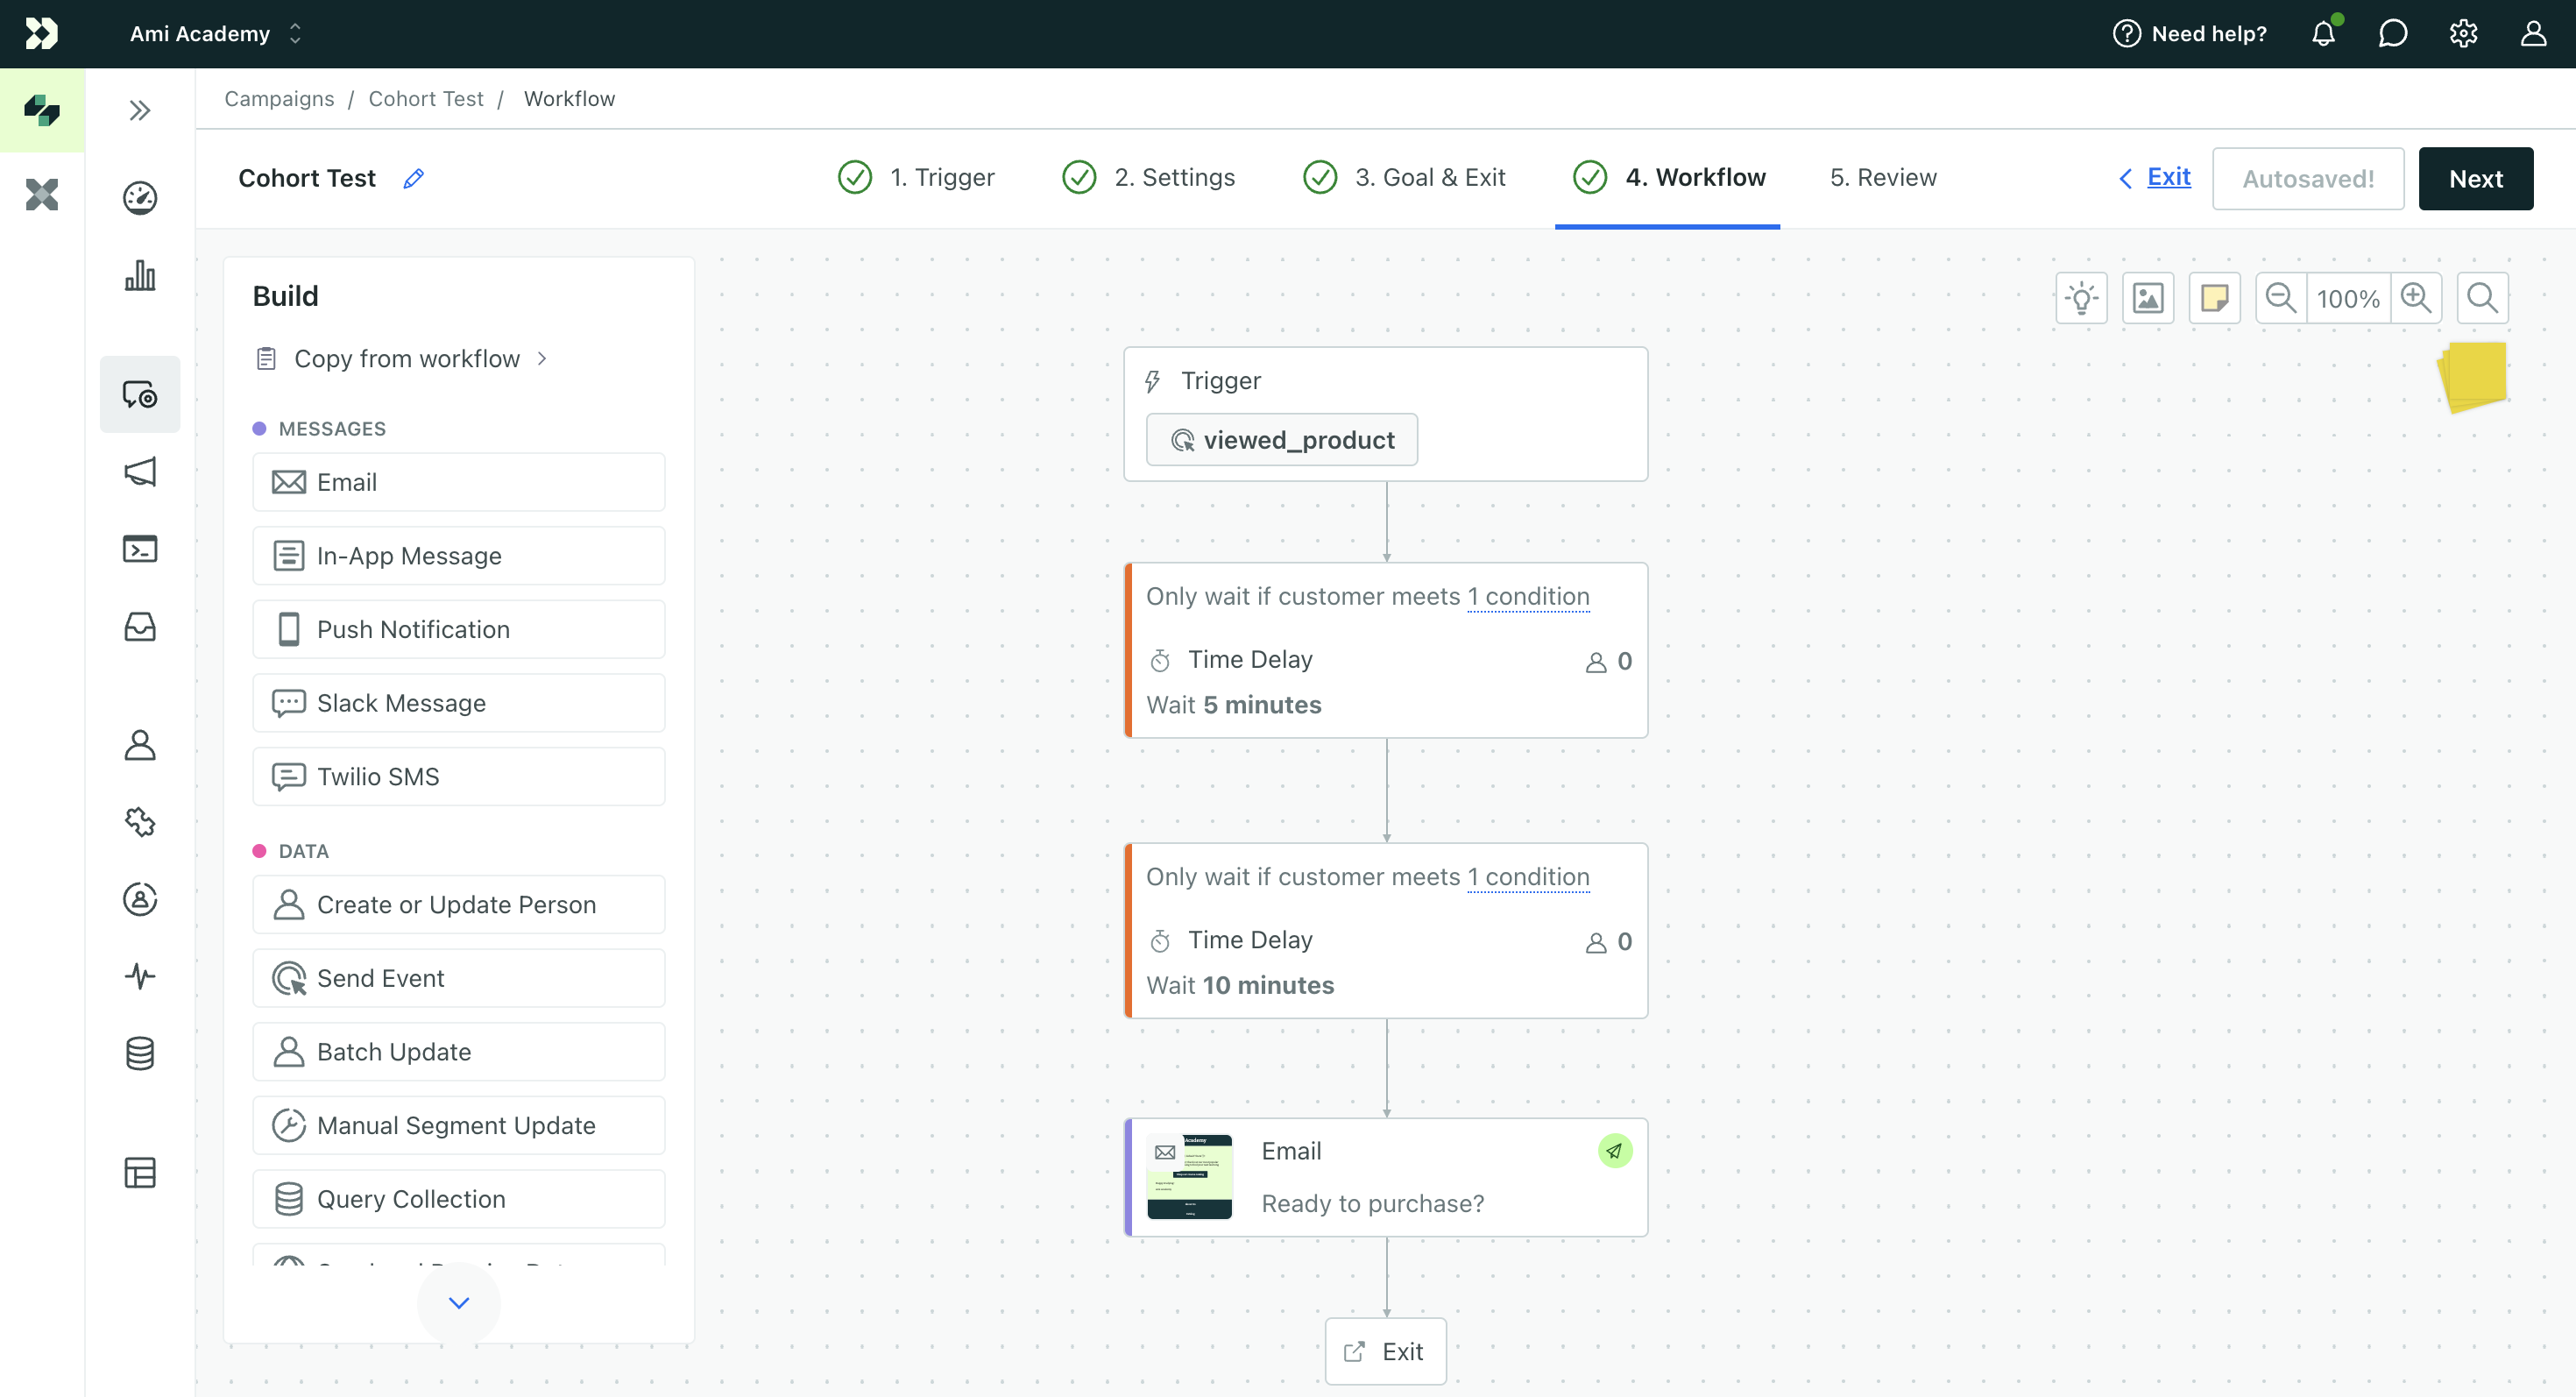
- Click a delay block and specify “Wait 5 minutes.” Then add an attribute condition where
cohortis equal to the value A. Save your changes.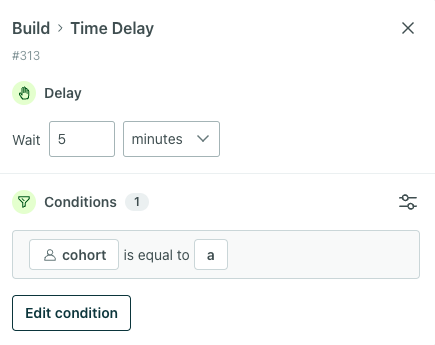
- Click the other delay block and specify “Wait 10 minutes.” Then add an attribute condition where
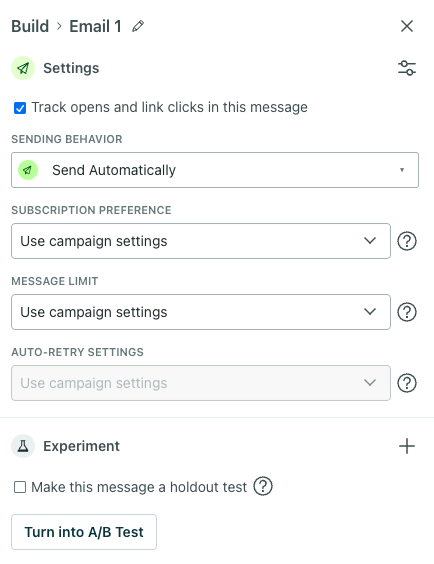
cohortis equal to the value B. - Click the email block and create your message. Remember to update the sending behavior to Send Automatically.
- Click Review items at the top if you have outstanding steps to complete then click Start Automation for a final review.
As soon as people view a product, they’ll enter the automation and wait to receive the email based on the time delay that matches their cohort attribute.
Notes
When to assign the cohort attribute
You can assign a cohort value within your testing automation by combining both automations into one. This might be useful if you want to run A/B tests in some automations and A/B/C/D in others. However, assigning cohorts separate from testing cohorts lets you trigger tests based on different criteria.
Testing one cohort per automation or one-time send
If you want to test multiple automations against each other, you can create a segment for each cohort you want to test then add this as a segment trigger condition or filter.
If you want to test multiple one-time sends against each other, add an attribute condition and target a specific cohort or add a segment condition that targets a specific cohort.