Collections
PremiumThis feature is available for Premium plans. EnterpriseThis feature is available for Enterprise plans. UpdatedCollections provide a way to store data in your workspace that you can use in campaigns with Liquid.
What’s a Collection?
A collection is a new type of data in Customer.io that’s separate from people or events in your account. They represent any set of “things” that exist in your business. For instance, a Collection could be a list of upcoming events, promotions/coupons, or available classes.
You should store this data in Customer.io when it’s helpful to be able to sort through the Collection to identify a specific set of data that you want to include in a message, tailored to the data you know about each person. Let’s take the example of an online learning service. By storing all the courses offered in a Collection, you could retrieve the specific set of classes that are relevant for each individual person and list them in a campaign email.
Collections are flexible. They’re simply lists of JSON objects that do not require specific schemas or indexes. However, your collection cannot be larger than 10 MB, and rows in your collection are limited to 10 KB.
You cannot use collections with Newsletters
For now, you can only take advantage of collections in Campaigns.
Create a Collection
You can upload your collection as JSON, a CSV file, or by sharing a Google Sheet with us. If you upload a CSV file or share a Google Sheet, we expect your file to be a simple table with headers, as in this example. To share a Google Sheet with us, you must grant Customer.io access to specific files in your Google Drive.
Collections must be smaller than 10 MB and you cannot have more than 50 collections in your workspace.
To add a collection:
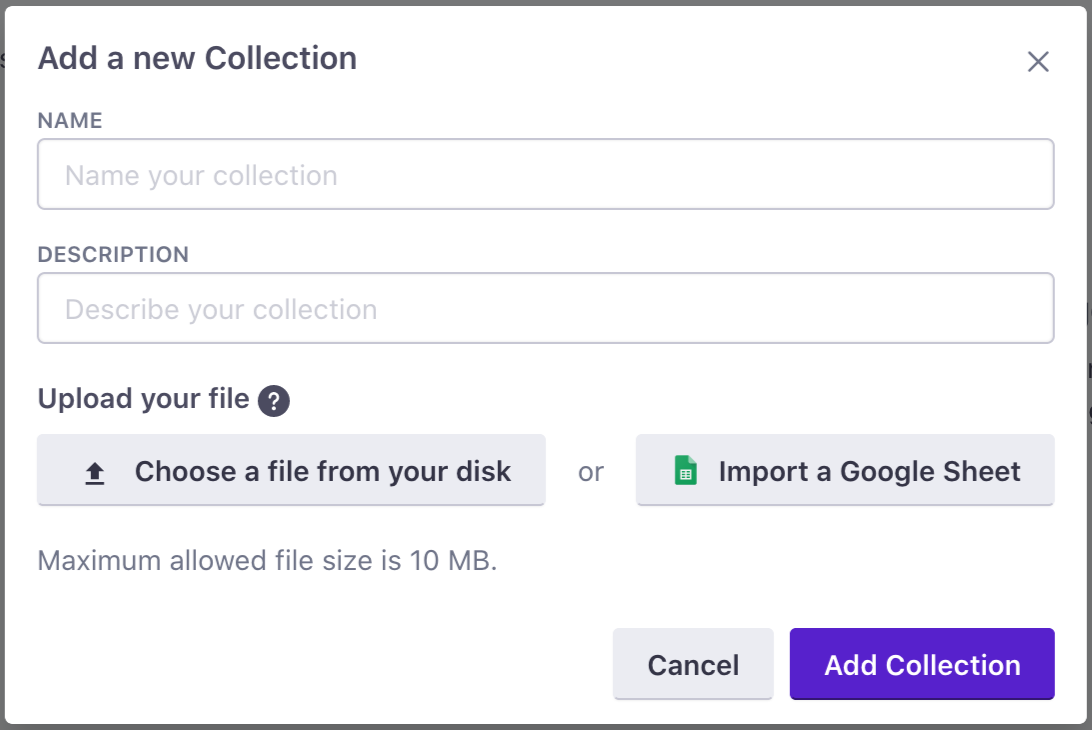
- Go to Data & Integrations > Collections and click Add Collection.
- Give your collection a name and description.
- Select your collection file: JSON, CSV, or Google Sheet.
- Click Add Collection.


Use Collection data in your messages
Now that you’ve added a Collection, the next step is to use them in your campaigns. The power of Collections is that you can query the Collection as part of a campaign workflow, meaning that you can retrieve only the Collection items relevant to that particular person and campaign.
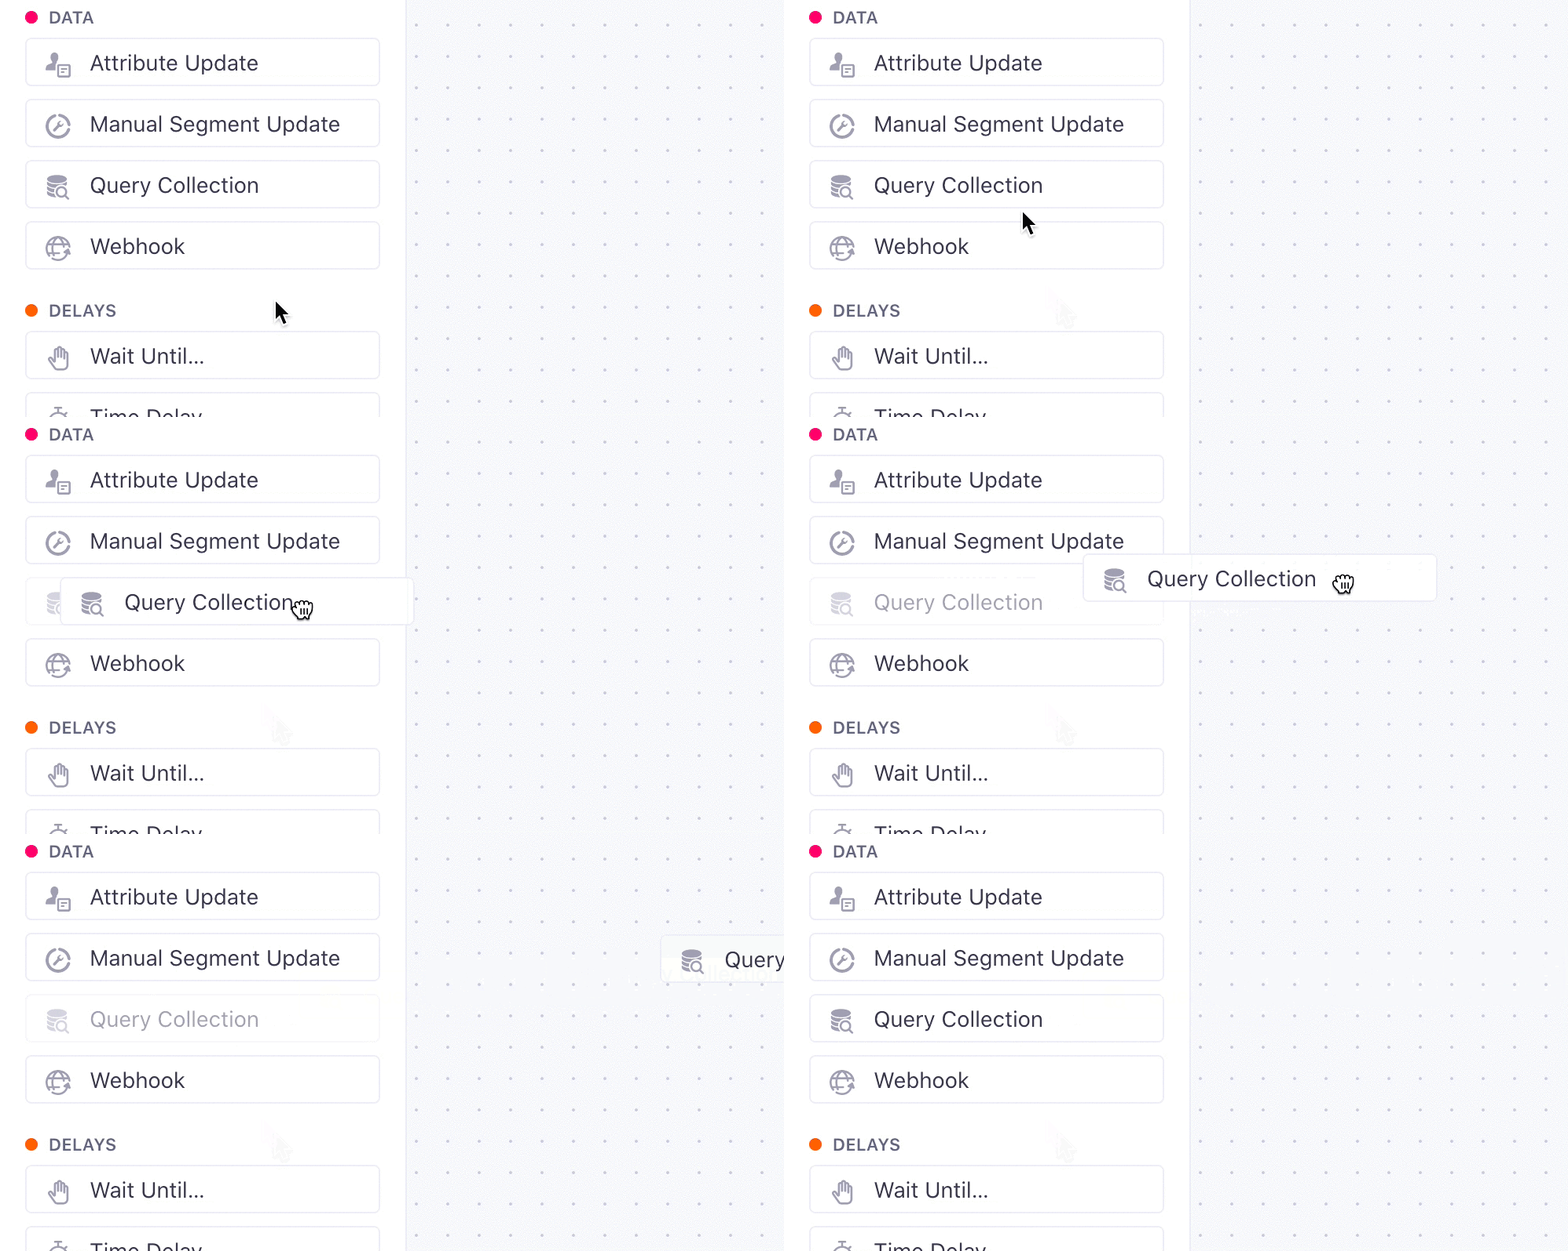
Add a Query Collection action
When a person reaches this action, the campaign retrieves collection data and stores info based on your parameter. Then you can use this data in subsequent messages.

Build a query to retrieve relevant info
Select the query collection action, give it a name, and click Add Query to get started.


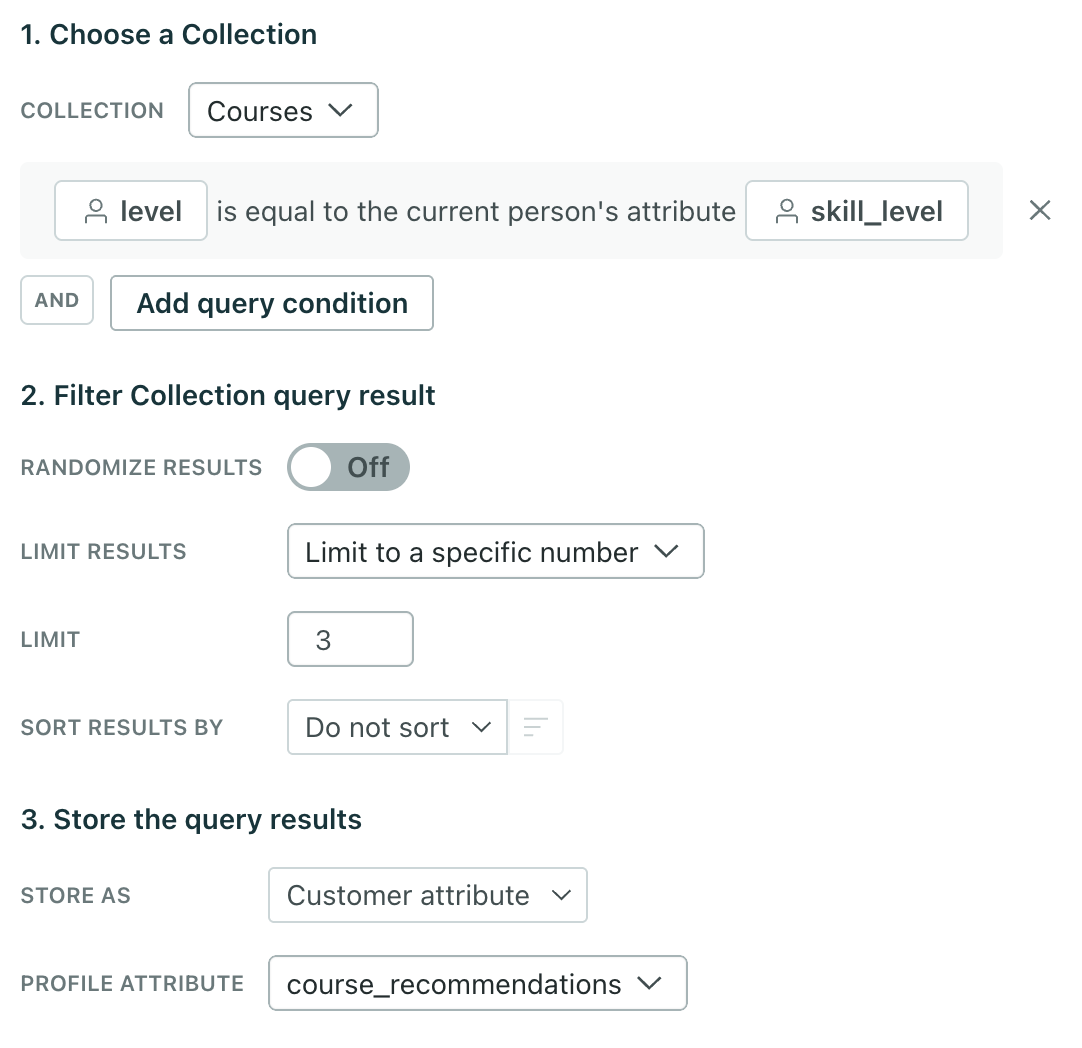
Let’s build a query that retrieves course recommendations based on a person’s skill level.
Choose a collection to query
- Select the Collection you want to query.
- Click Add query condition to filter for the courses you want to send a message about.
For example, you could filter for all courses where the collection attribute level is equal to the person’s attribute skill_level.
Decide how to store the results
Under Store the query results, decide whether you want to use this information outside of the campaign or not:
- Choose Customer Attribute to store data on the person’s profile, accessible outside of the campaign.
- Choose Journey Attribute to store data temporarily during the journey; this data expires when the person exits the campaign.
Then choose or create an attribute, like course_recommendations. We store data on this attribute as JSON.
These are the limits on journey attributes:
- Overall limit: 100 journey attributes per journey
- Name limit: 128 bytes
- Value limit: 100 KB
You can create or change up to 100 journey attributes per journey. We hope this is generous enough, but here’s an example of when updates to journey attributes would fail: if you set 100 journey attributes in a response, any attempt at updating these journey attributes or adding new ones would fail because that’s over 100 changes to journey attributes for that particular journey. The person would move forward without the update.
Preview the results
Choose a person from the Sample data panel to preview the query results. Go to the Preview tab to see what the Collection rows would return for the sample user.
Reference collection data with liquid
Now that you’ve set up your query, you can use the collection data in a message!
Reference profile attributes
For collection data stored as Customer Attributes, reference them using the customer object:
{% for item in customer.course_recommendations %}
  {{ item.name }}
{% endfor %}
If the data is an array, you can use liquid filters, such as first, last, and map, to get specific items or attributes.
{% assign first_course = customer.course_recommendations | first %}
If you limited your query to a single result, then the attribute value is an object, not an array. You can instead directly access the name and course description:
{{ customer.promo_course.name }}
{{ customer.promo_course.description }}
Reference journey attributes
For collection data stored as Journey Attributes, reference them using the journey object:
{% for item in journey.course_recommendations %}
  {{ item.name }}
{% endfor %}
If the data is an array, you can use liquid filters, such as first, last, and map, to get specific items or attributes.
{% assign first_course = journey.course_recommendations | first %}
If you limited your query to a single result, then the attribute value is an object, not an array. You can instead directly access the name and course description:
{{ journey.promo_course.name }}
{{ journey.promo_course.description }}
Collections API
The endpoints for Collections are available via our App API:
- US region:
https://api.customer.io/v1/ - EU region:
https://api-eu.customer.io/v1/
Creating a new Collection:
POST:/v1/api/collections
Create a new collection by providing both a name and either an array of JSON objects as data, or a url to download CSV or JSON data from.
{
  "name": "collection name",
  "data": [ { row }, { row } ],
}
If you provide a URL, the data can either be JSON (array or newline delimited) or a CSV file. Ensure that you provide a Content-Type definition so that we know how to parse the data. If you don’t provide a Content-Type, we use the file extension. If you don’t include a content type or file extension, we assume the URL contains JSON.
You cannot share a Google Sheet with us using this API.
Once created, a Collection has the following JSON definition:
"bytes": bytes_of_data_in_collection,
"created_at": 1589471110,
"updated_at": 1589471132
"id": 1,
"name": collection_name
"rows": number_of_rows_in_collection,
"schema": ["name1", "name2", "name3" ],
The schema will have a list of all attributes used by any items in the Collection, but remember that we don’t enforce that all items have this set of attributes.
Retrieve info about a Collection you’ve already created
GET:/v1/api/collections/:id
Get the details of a collection with the given id. This does not include the content.
Retrieve the content of a Collection you’ve already created
GET:/v1/api/collections/:id/content
Returns the entire content of the collection with the given id.
Retrieve a list of all your Collections
GET:/v1/api/collections
Returns the details (but not content) for all of your Collections:
{"collections": ["collection1", "collection2"]}
Update the content of a Collection
PUT:/v1/api/collections/:id/content
Provide the content of a Collection as JSON-encoded text or CSV-encoded data. This will replace all the content for the Collection. For example:
[
  {
    "name":"Steak",
    "price":20,
    "quantity":10,
    "can_deliver":false
  }
]
Update the name and content of a Collection
PUT:/v1/api/collections/:id
Update an existing collection. If name or data or url aren’t provided, the associated data is not updated. This will replace all content for the Collection.
{
"name": "collection name",
"data": [
  {"name":"Hot Dog","price":2,"quantity":1,"can_deliver":true},
  {"name":"Pizza","price":10,"quantity":2,"can_deliver":true},
  {"name":"Steak","price":20,"quantity":10,"can_deliver":false} ]
}
OR
{
  "name": "collection name",
  "url": "https://example.com/sheet.csv"
}
Delete a Collection
DELETE:/v1/api/collections/:id
Deletes the collection with the given id.

