Send events from your workflow
You can create an event within an automation through the Send event block. This makes it easy to trigger other automations or add people to segments. For webhook-triggered automations, this makes it easy to reshape and associate data from an outside source with people in your workspace, all without having to talk to a developer or write your own integration.
An event consists of a A syntax that supports variables, letting you personalize messages for your audience. For example, if you want to reference a person's first name, you might use the variable name and a data object. The name is typically how you’ll select an event, and you can further filter people based on data in the event. You can use properties in the data object to personalize automations using liquid{{customer.first_name}}.{{event.<property>}}.
{
  "name": "my_event",
  "data": {
    "a_value": "that-I-use-in-liquid"
  }
}
A Send event action has a size limit of 100 KB.
How it works in most automations
As long as your automation isn’t triggered by a webhook—i.e. it begins when a person performs an event, matches attributes A key-value pair that you associate with a person or an object—like a person's name, the date they were created in your workspace, or a company's billing date etc. Use attributes to target people and personalize messages. Something that a person in your workspace did. Events can trigger automations, add people to segments, etc, and you can use properties from events to personalize messages.
If you want to send an event for another person, you’ll need a value representing that other person either in the event that triggered the current automation, or stored as an attribute A key-value pair that you associate with a person or an object—like a person's name, the date they were created in your workspace, or a company's billing date etc. Use attributes to target people and personalize messages.
Send an event
When you use the Send Event action, you can pick from different types of values for your Event Name (the name key) and Event Attributes (contained by the data object):
- Static value: a value that is the same in every event
- Customer attribute: a value associated with the person in the automation
- Liquid
A syntax that supports variables, letting you personalize messages for your audience. For example, if you want to reference a person's first name, you might use the variable
: use liquid to modify customer or event attributes to fit your event—like reformatting a date value or appending a string to your event’s name.{{customer.first_name}}. - JavaScript: use JS to modify customer or event attributes to fit your event.
- Event attribute: a value from the
dataobject of the event that triggered the automation (if applicable) - Trigger object attribute: a value from the object that triggered the automation (if applicable) - To see a preview of the payload, make sure you select a person from the sample data on the left who has a relationship to the object.
- Trigger relationship attribute: a value from the relationship that triggered the automation (if applicable) - To see a preview of the payload, make sure you select a person from the sample data on the left who has a relationship to the object.
To send an event in an automation:
- Drag Send Event into your workflow and click it.
- Set the Event Name, and then click Edit event to set up your event. The event name helps you identify this action in your workflow; it’s not the
namevalue for the event.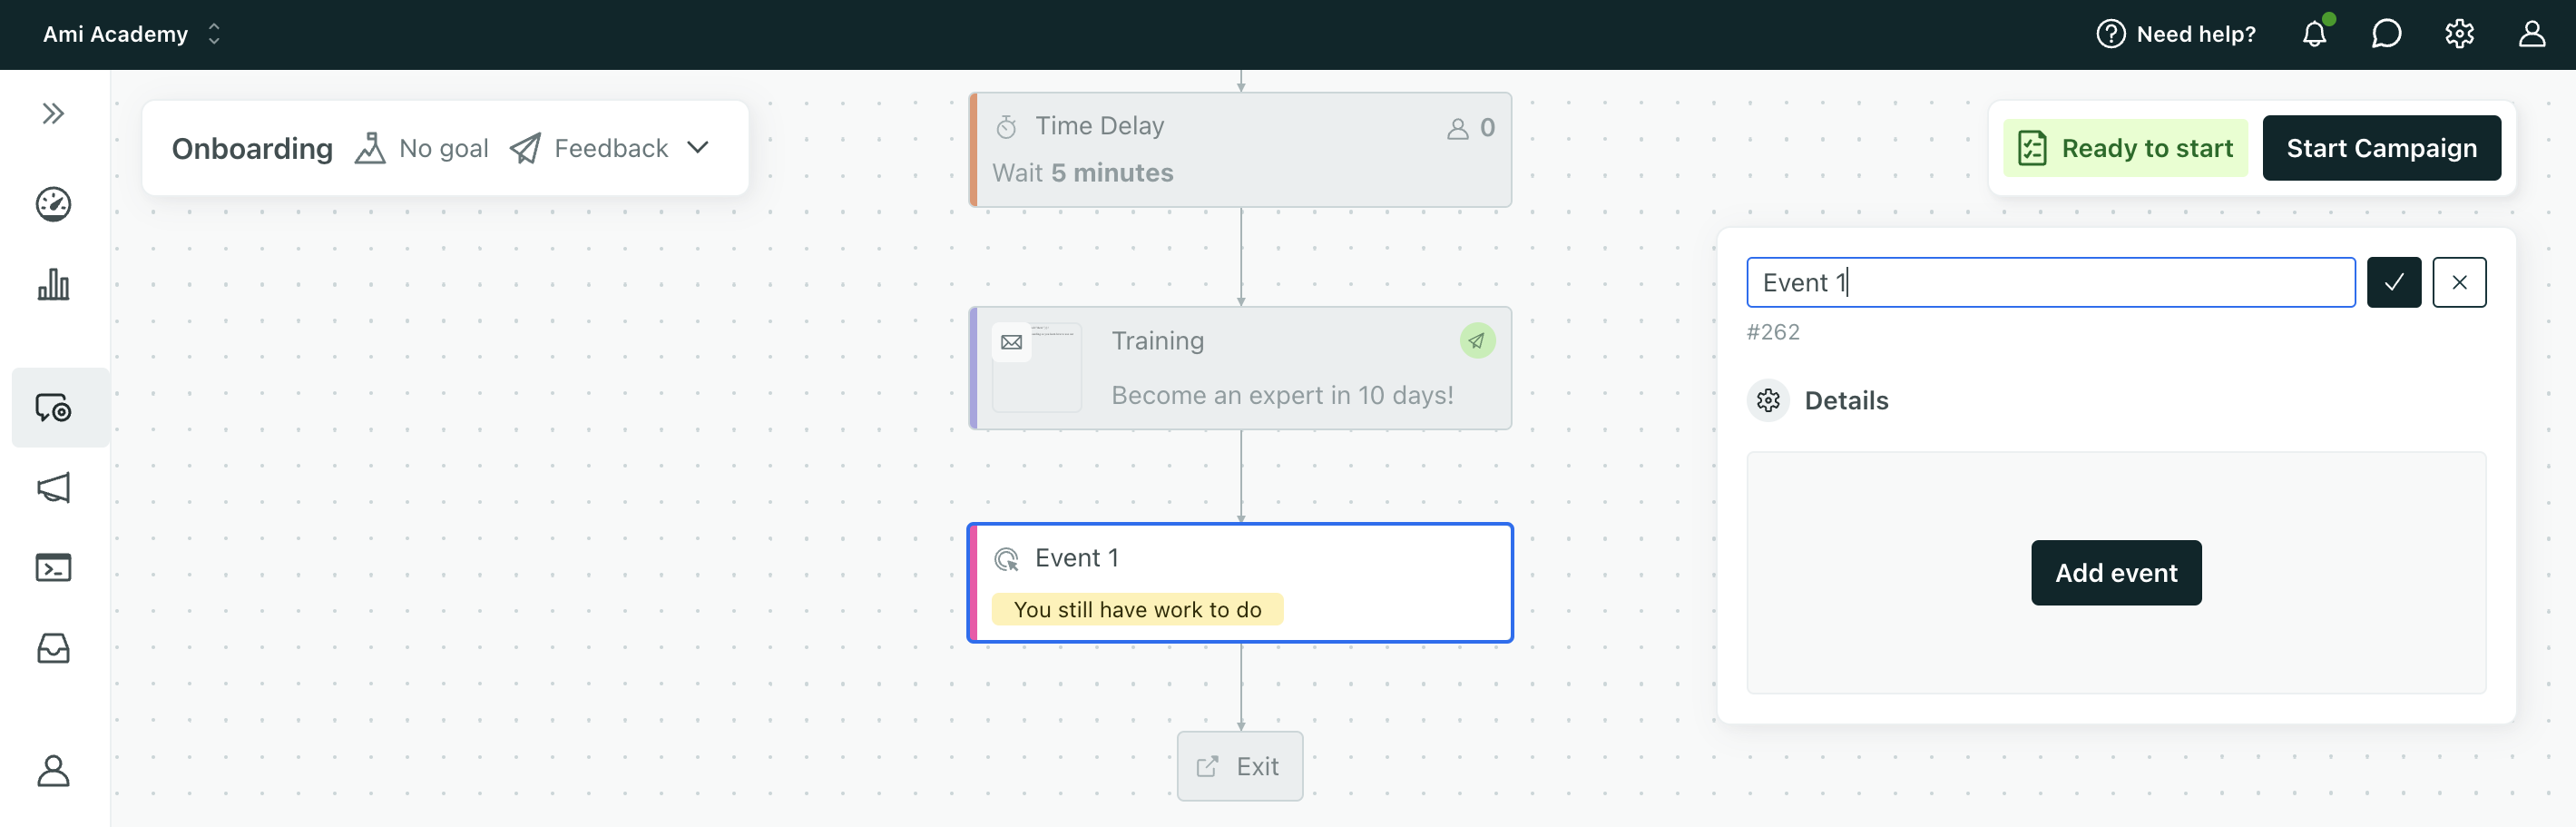
-
Select the person you want to send an event for. By default, this is the person in the current campaign.
If you select Someone else, you can pick the Workspace your other person belongs to, and you’ll need to select the value representing their identifier.
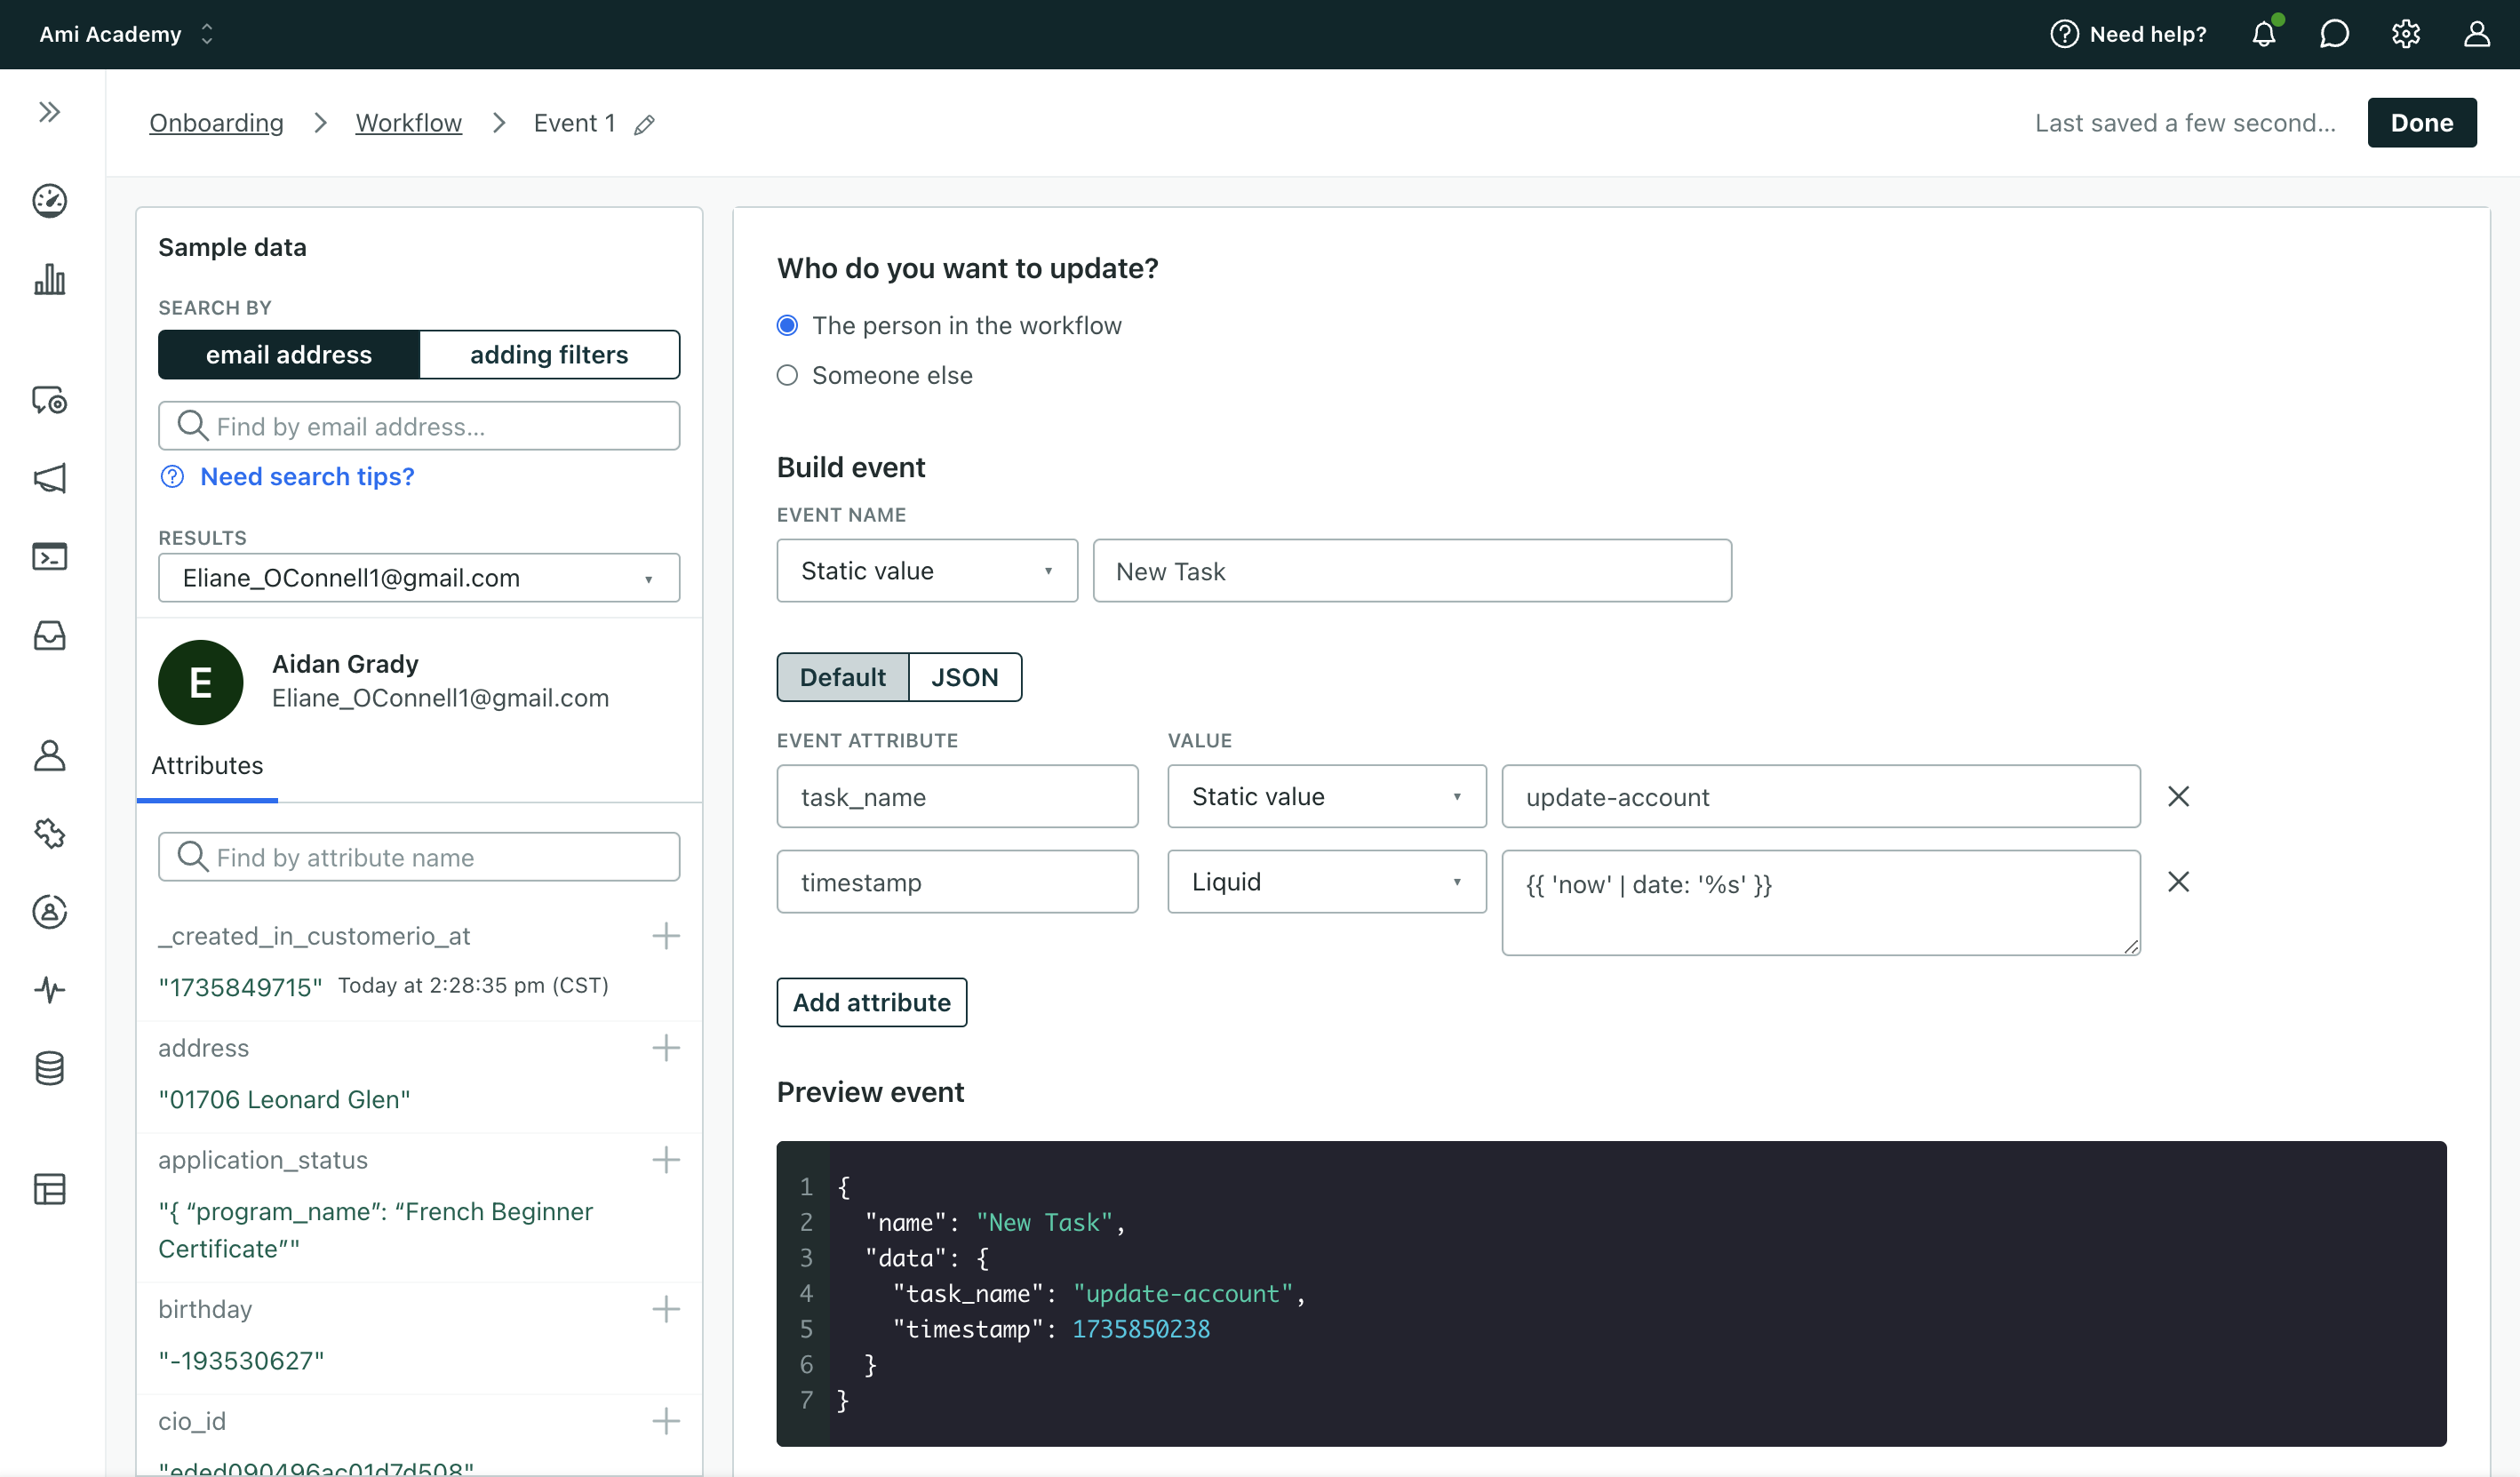
- Set the Event Name. This is the
namevalue in the event, and the way you’ll reference this event in automation triggers, segments, etc. - Add Event Attributes. These are the values that appear in the
dataobject of your event. You can use these properties to filter people into different automations, or reference them in messages using liquidA syntax that supports variables, letting you personalize messages for your audience. For example, if you want to reference a person's first name, you might use the variable
.{{customer.first_name}}. - Click Done.
How it works in a webhook-triggered automation
A Webhook-triggered automation is an automation that begins when you receive an incoming webhook. This incoming webhook is not directly associated with a person in your workspace. That’s often why you’ll create a new event: to re-shape and associate your incoming webhook data with a person in your workspace to trigger messages, add a person to segments, etc.
Your incoming webhook should contain a value that you use to identify people. When you create an event, you’ll associate a value in your incoming webhook with an identifier The attributes you use to add, modify, and target people. Each unique identifier value represents an individual person in your workspace.
Send an event from a webhook-triggered automation
When you create an event, you must specify an Event Name (the name key) and Event Attributes (contained by the data object). Each of these fields can be one of four types:
- Static value: A value that is the same in every event.
- Trigger attribute: A property from your Trigger data. You can start typing to find a key in the incoming data or click the value in the Trigger data.
- Liquid
A syntax that supports variables, letting you personalize messages for your audience. For example, if you want to reference a person's first name, you might use the variable
: Use liquid to modify trigger attributes to fit your event—like reformatting a date value or appending a string to your event’s name.{{customer.first_name}}. - JavaScript: Use JavaScript to modify trigger attributes to fit your event—like reformatting a date value or appending a string to your event’s name. Use JavaScript over liquid if you want to modify incoming JSON.
To send an event from your webhook-triggered automation:
- Drag Send Event into your workflow and click it.
- Set the Event Name. The event name helps you identify this action in your workflow; it’s not the
namevalue for the event. - Click Add event to set up your event.
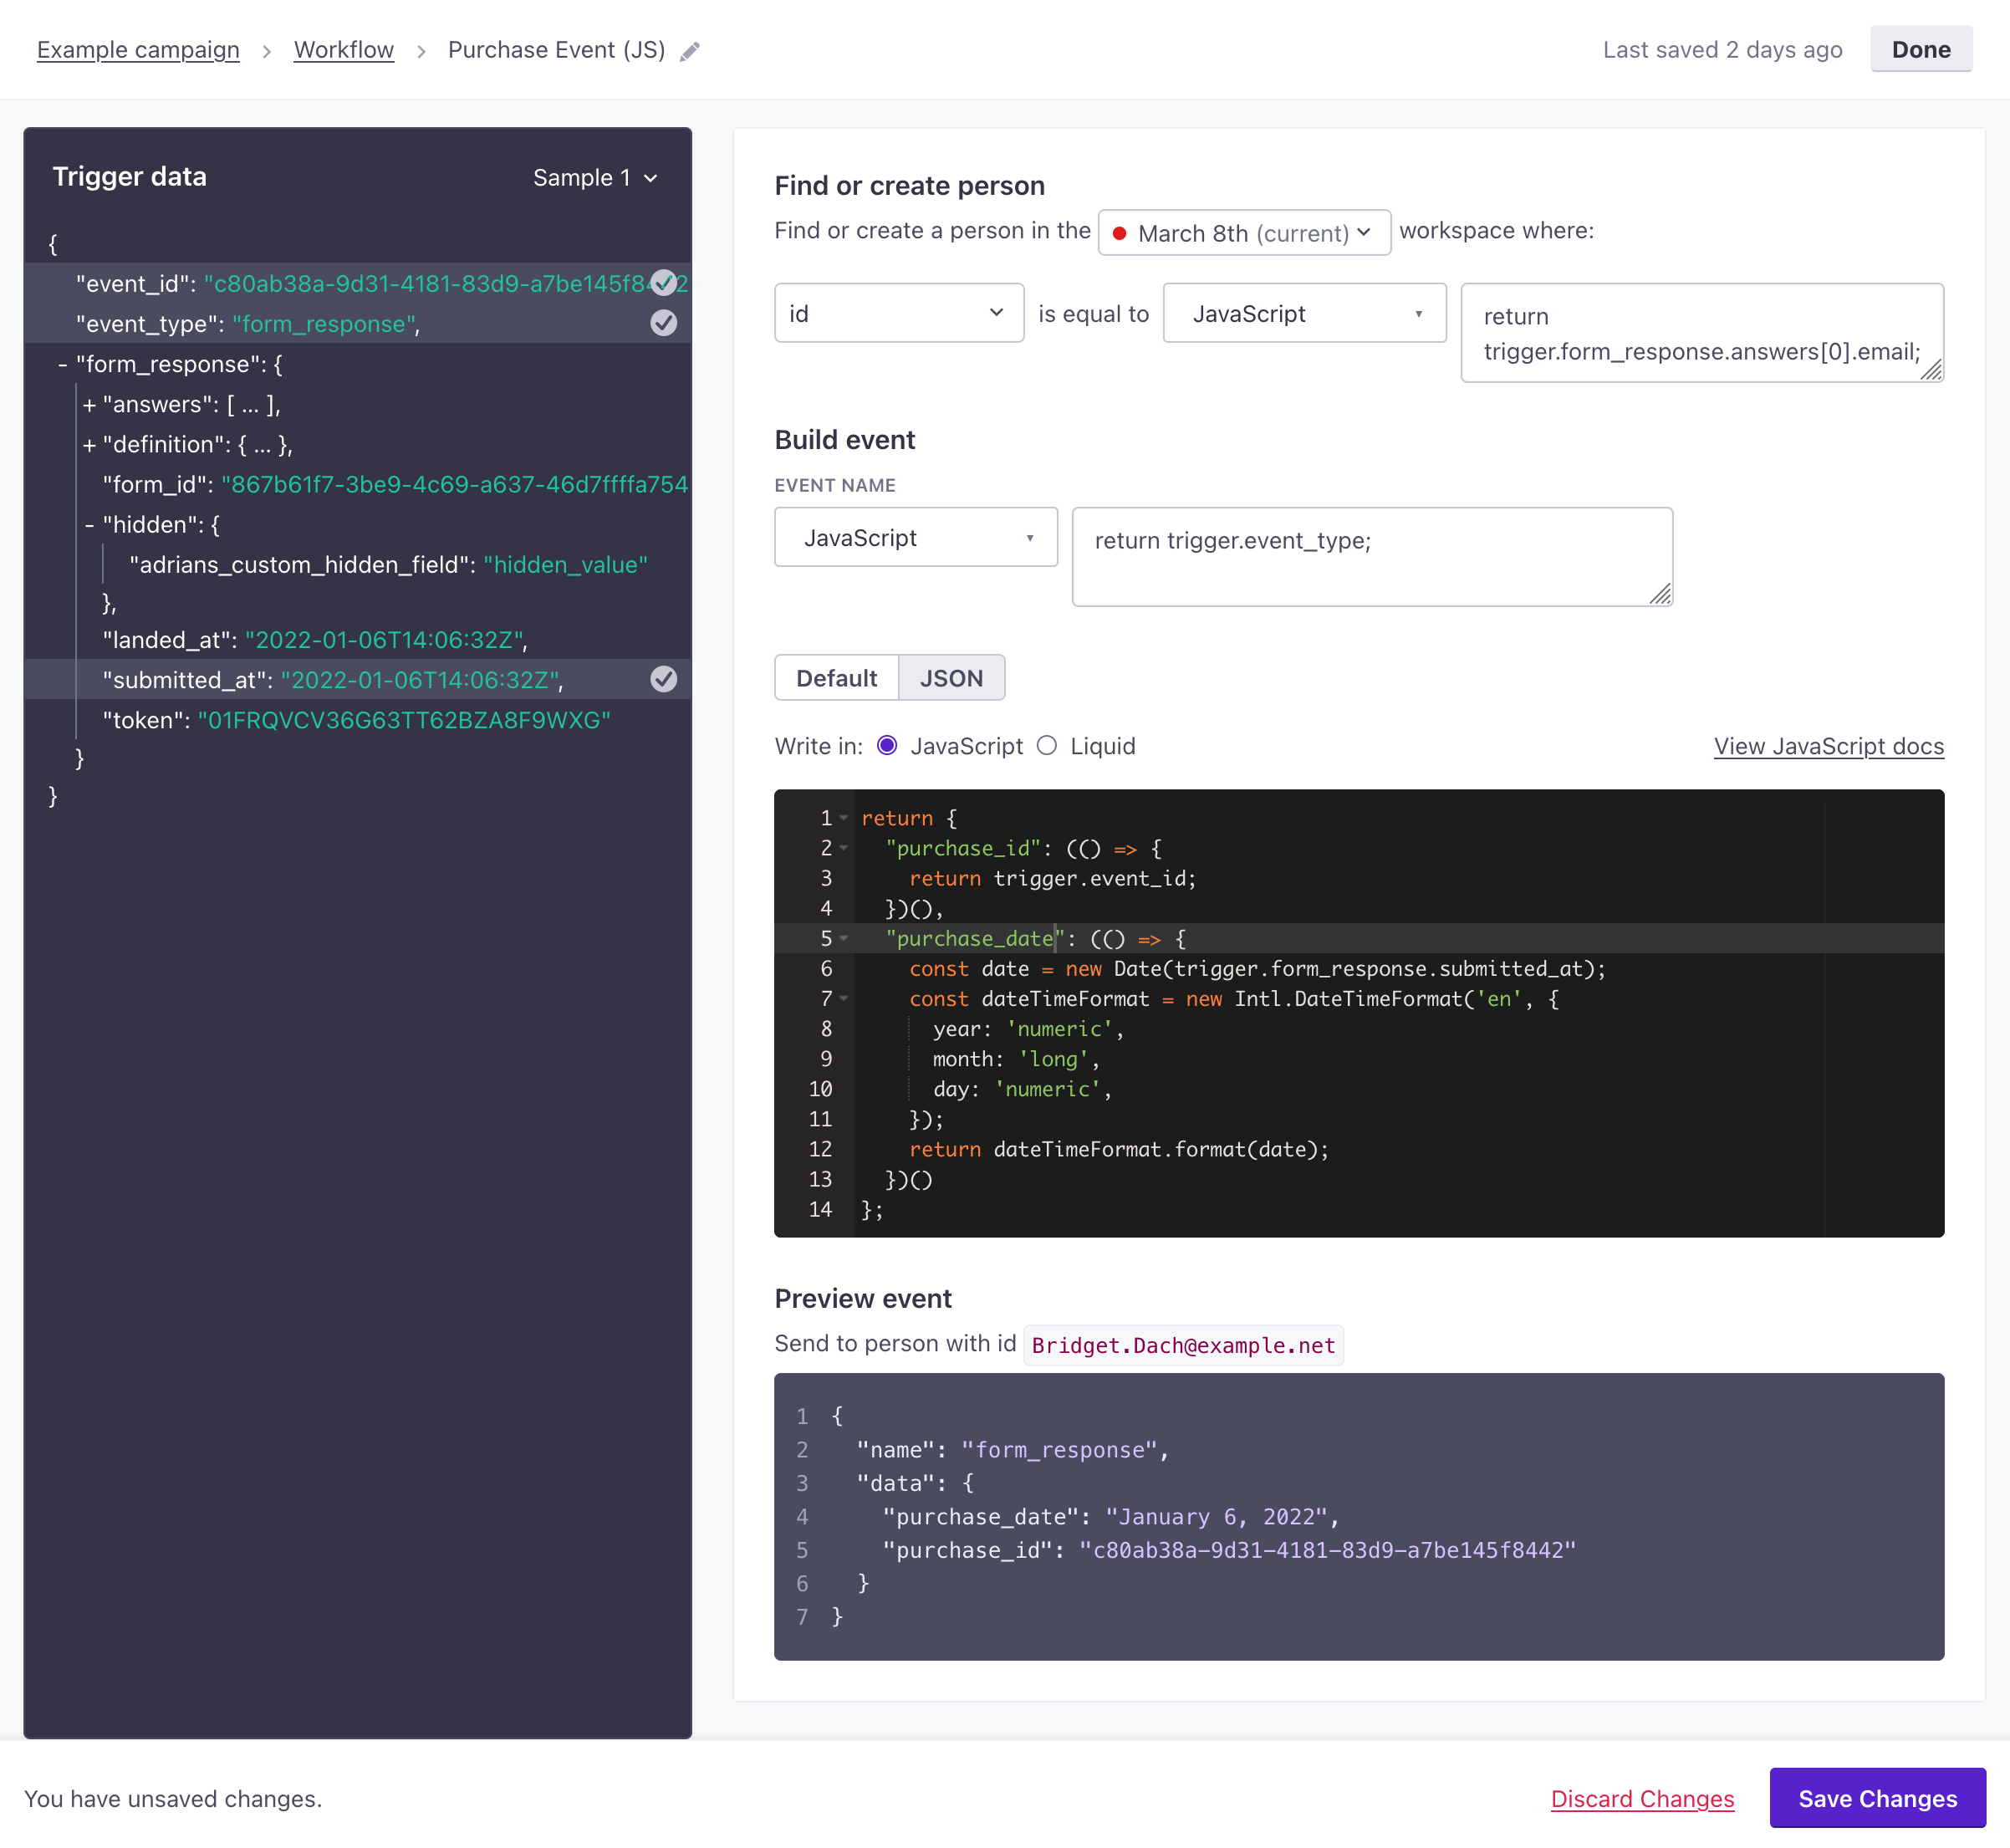
- Under Who do you want to update?, select the Workspace containing the people you want to attach events to.
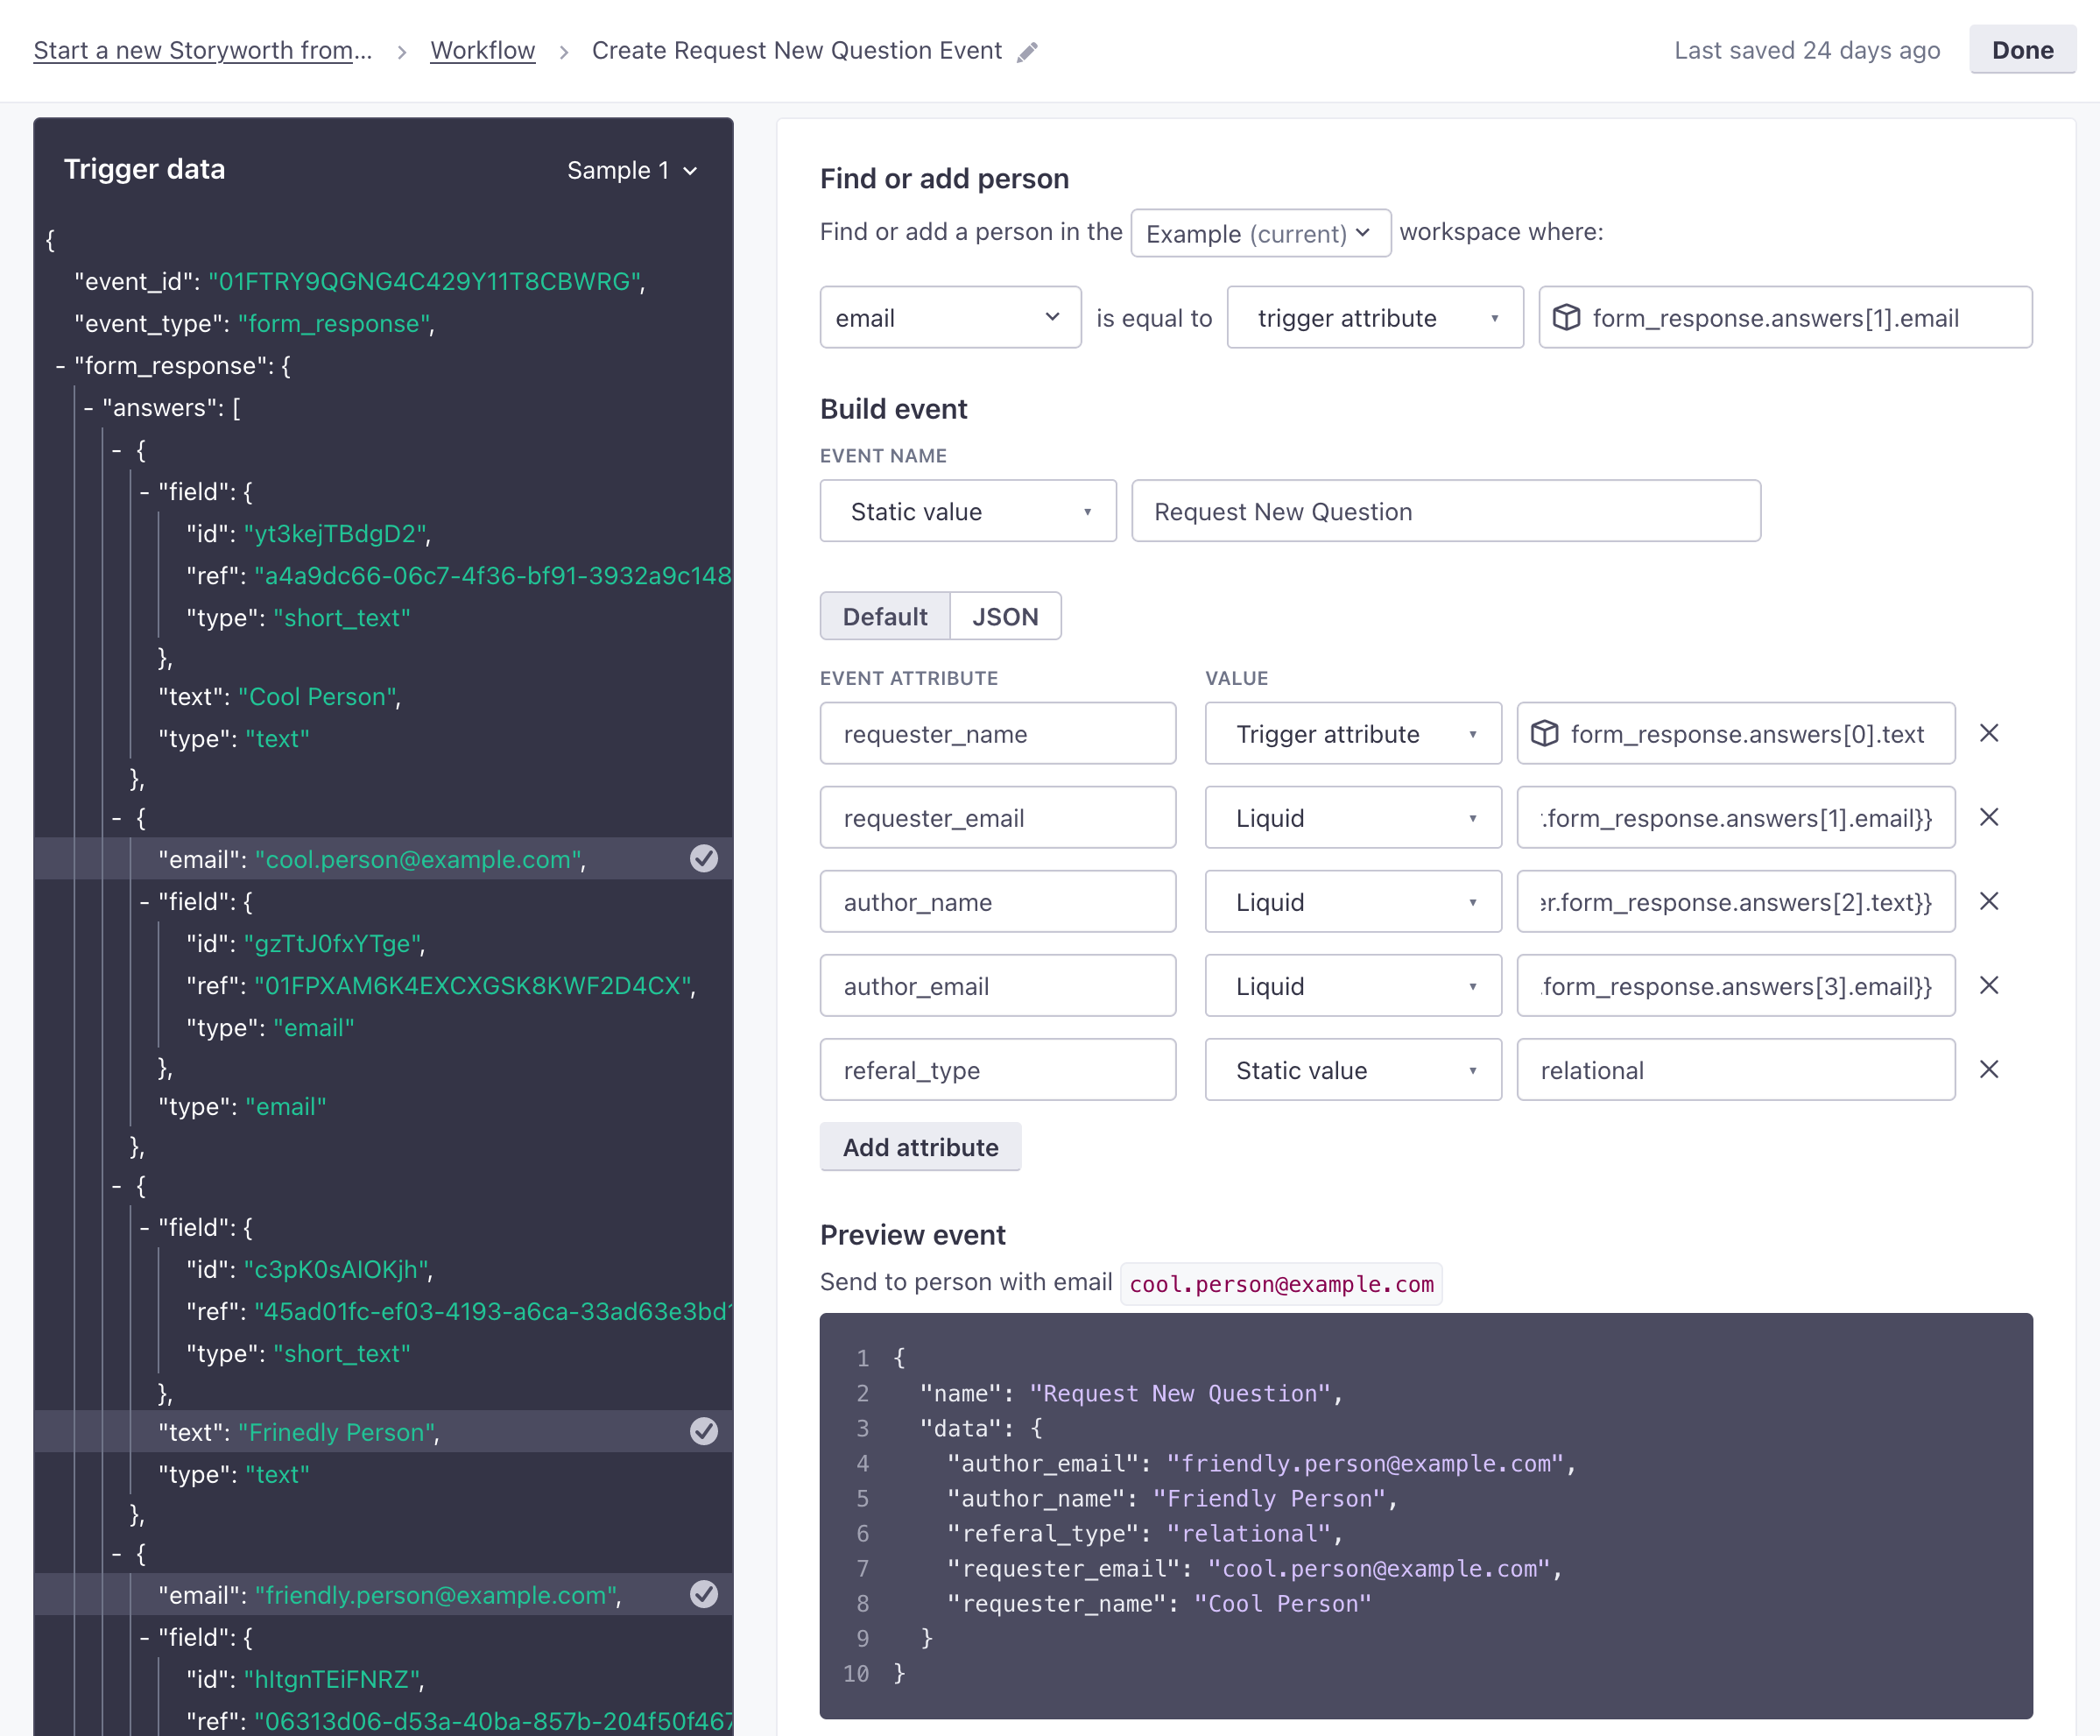
- Select the type of Identifier and set the identifier’s value for people in that workspace. You can identify someone from a trigger attribute, liquid, or JavaScript. Set a static value to always send events for the same person.
- Set the Event Name. This is the
namevalue for the event that you’ll reference outside of this automation in other automation triggers, segments, etc. - Add Event Attributes. These are values that appear in the
dataobject of your event. You can use these properties to filter people into different automations or reference them in messages using liquidA syntax that supports variables, letting you personalize messages for your audience. For example, if you want to reference a person's first name, you might use the variable
.{{customer.first_name}}. - Save your changes and click Done. Now you can finish building your webhook-triggered automation.
Use liquid to modify event properties
The Liquid value type (or the JSON editor) lets you manipulate data to fit your event using liquid A syntax that supports variables, letting you personalize messages for your audience. For example, if you want to reference a person's first name, you might use the variable {{customer.first_name}}.
- Customer attributes
A key-value pair that you associate with a person or an object—like a person's name, the date they were created in your workspace, or a company's billing date etc. Use attributes to target people and personalize messages.
begin withcustomer. If you wanted to access a person’s ID, you would use{{customer.id}}. - Events begin with
event. If you wanted to access a property in an event’sdataobject calledid, you would use{{event.id}}. - Objects begin with
objects. If you wanted to access a property for an object, you would use{{objects.<object_type>[#].<attribute>}}.- Objects trigger syntax would be
{{trigger.<object_type_singular>.<attribute>}}.
- Objects trigger syntax would be
- Relationships begin with
objects. If you wanted to access a property in a relationship, you would use{{objects.<object_type>[#].relationship.<attribute>}}.- Relationship trigger syntax would be
{{trigger.relationship.<attribute>}}.
- Relationship trigger syntax would be
- Webhook trigger data begins with
trigger. For example, you would access theidattribute from the trigger data below using{{trigger.identifiers.id}}.
{
  "name": "purchase",
  "identifiers": {
    "id": "abcd-1234",
    "email": "person@example.com"
  },
  "purchased_at": "Fri, 04 Feb 2022 23:49:39 GMT",
  "total": 123.45,
  "items": 2,
  "tax": 10.45
}
Liquid with arrays and objects
By default, liquid maps arrays and objects to strings (or, if an array contains only integers, liquid maps it to a single, concatenated number). You need to use to_json to maintain the shape of arrays or objects in your event. Otherwise, you won’t be able to access properties inside the array or object in automations or segments that use your event.
With to_json | Without to_json |
|---|---|
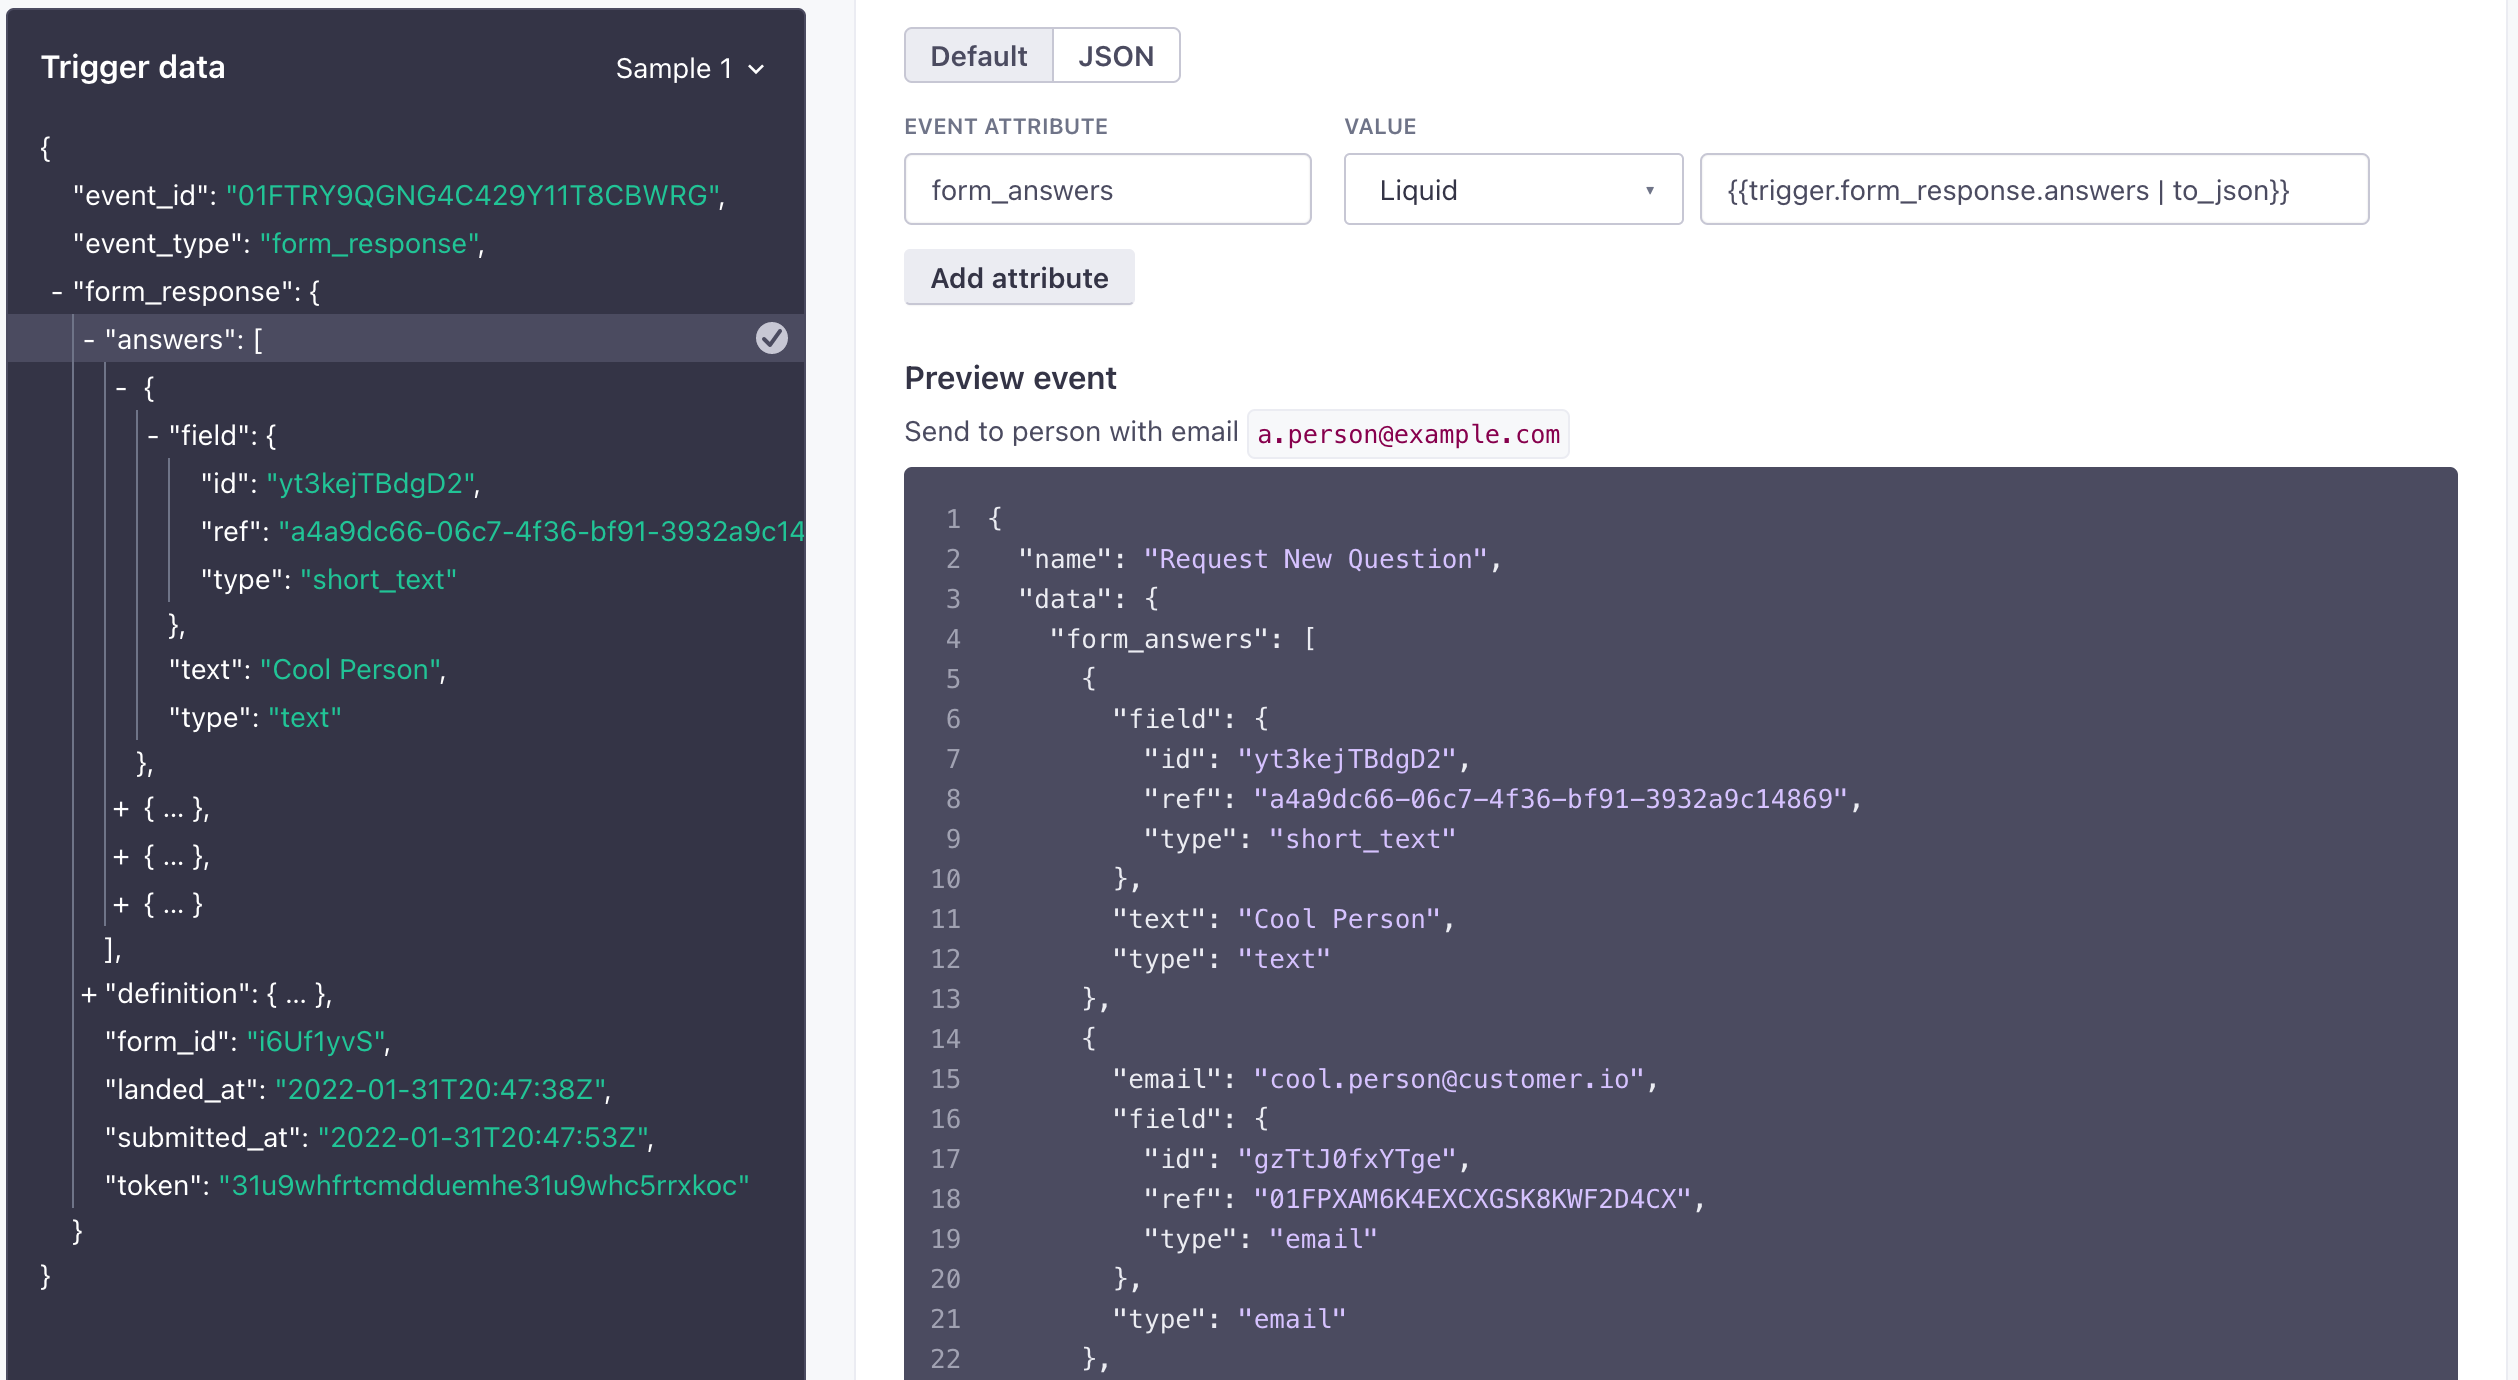 | 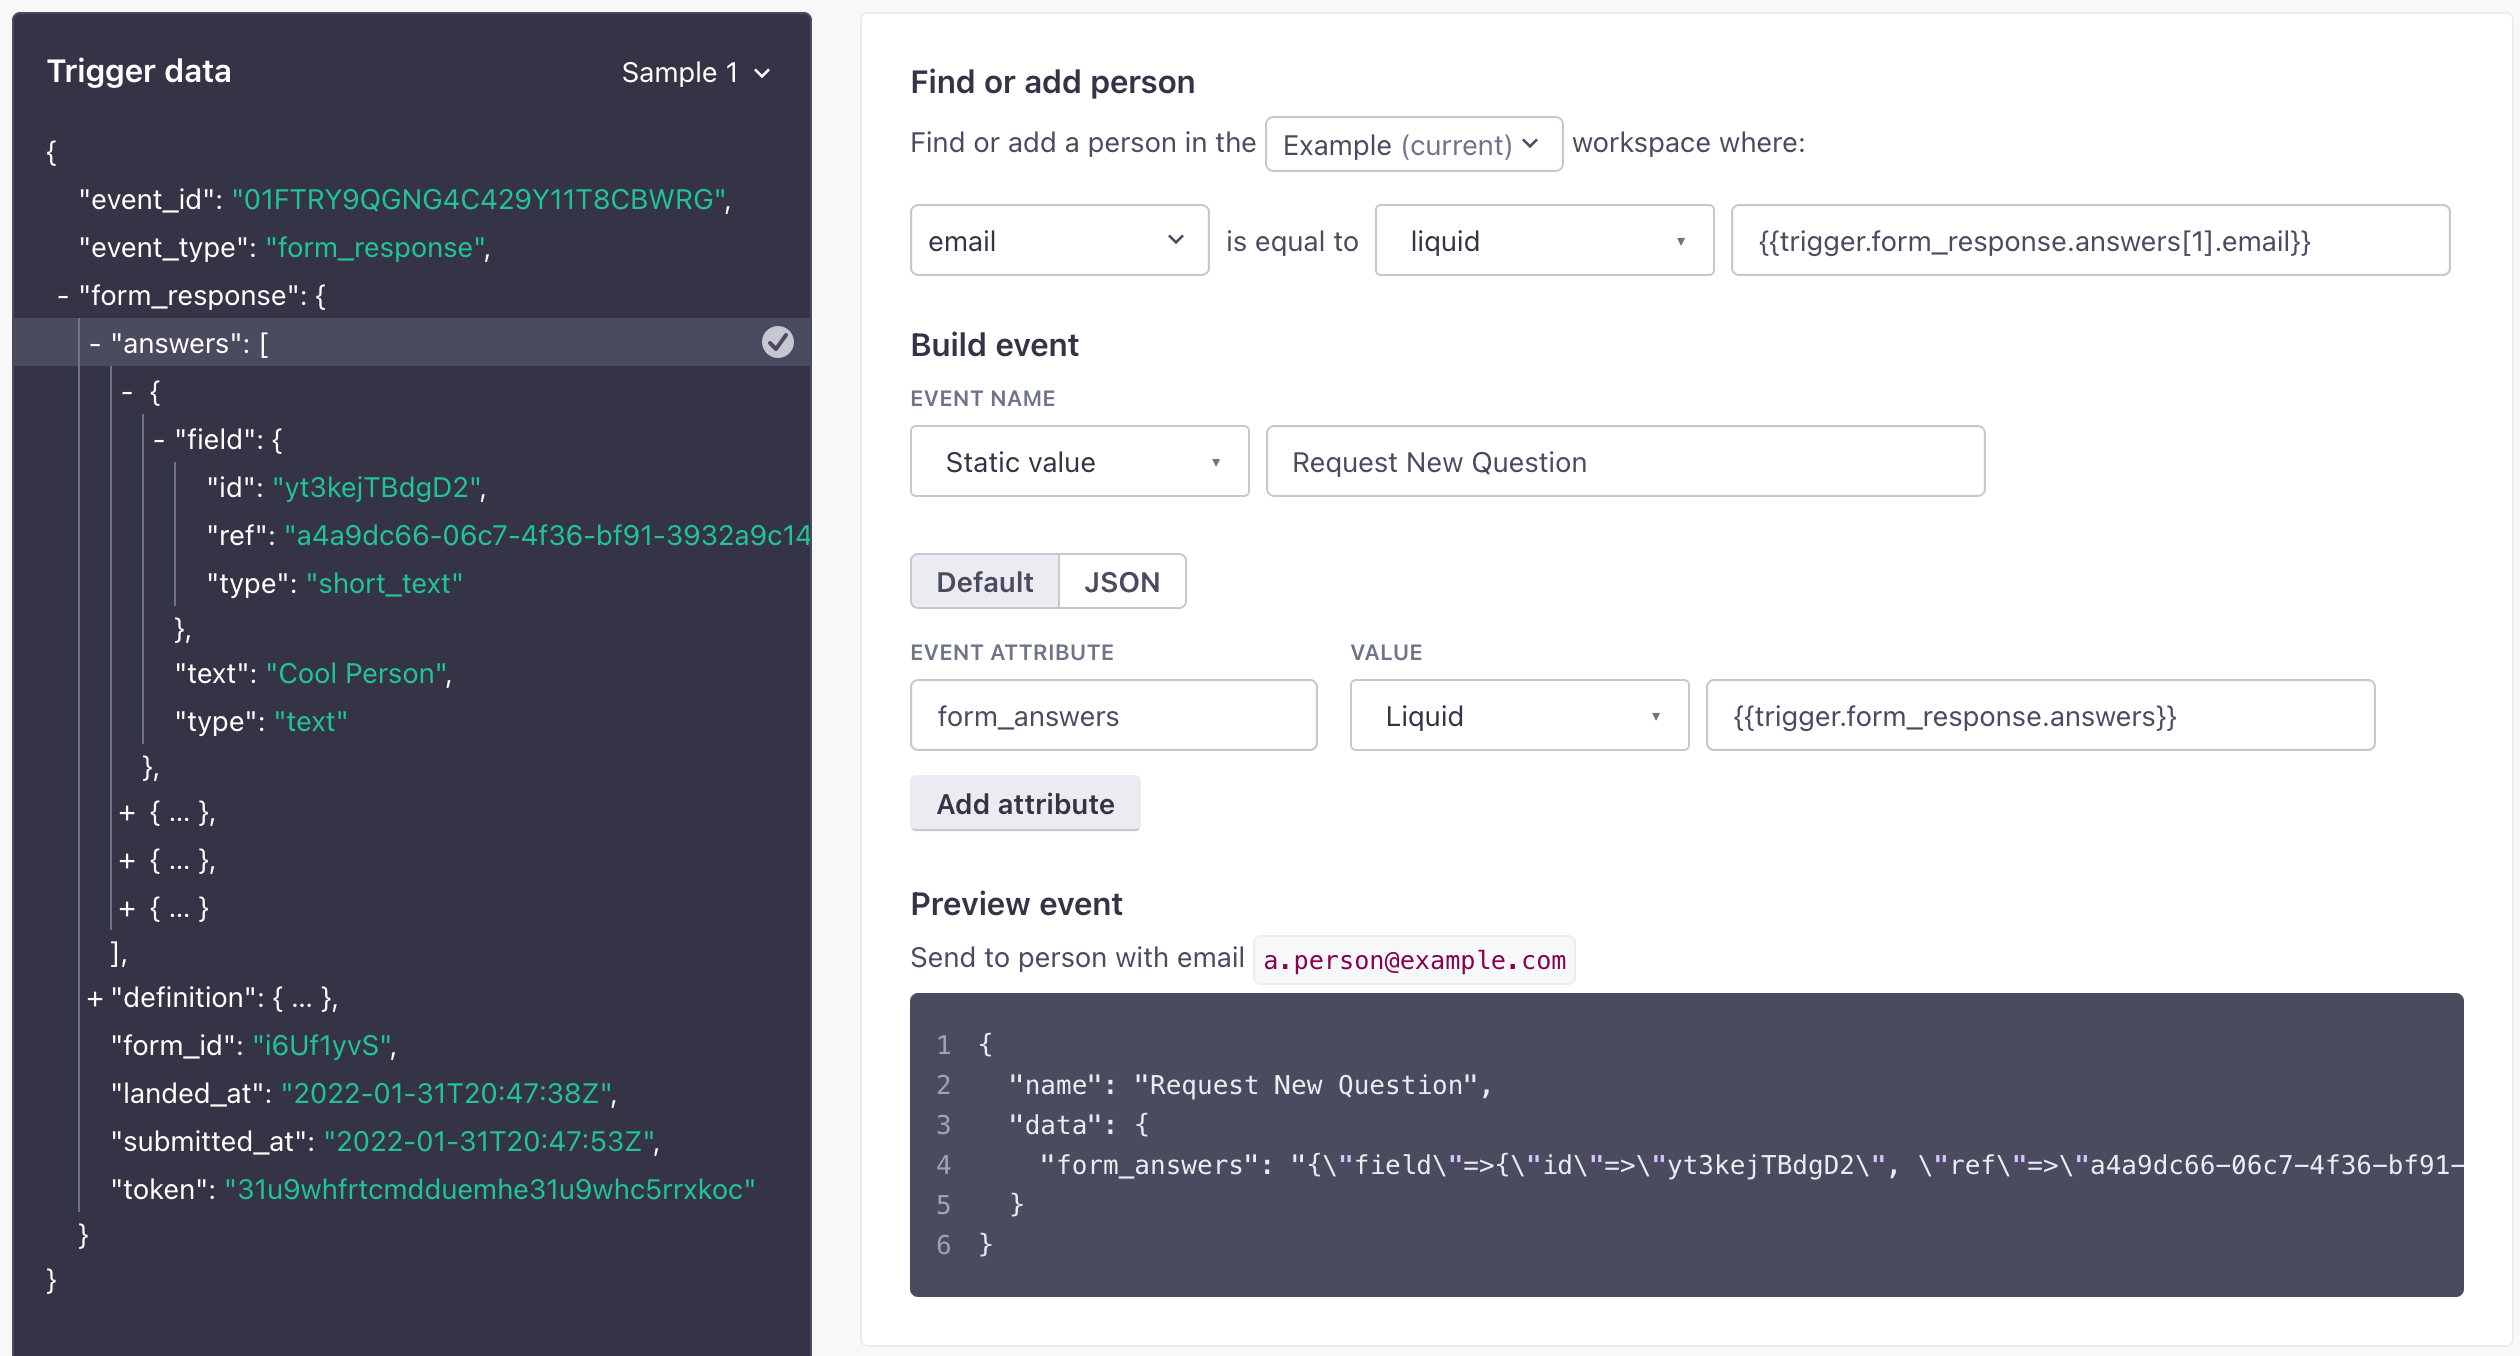 |
For example, if you want to send an event with the purchase array from the trigger data below, you would format your liquid like this: {{trigger.purchase | to_json}}. The to_json tag also maintains the original data type of items inside the object—strings, numbers, etc.
{
  "name": "purchase",
  "identifiers": {
    "id": "abcd-1234",
    "email": "person@example.com"
  },
  "purchased_at": "Fri, 04 Feb 2022 23:49:39 GMT",
  "total": 123.45,
  "items": 2,
  "tax": 10.45,
  "purchase": [
    {
        "product_name": "shoes",
        "sku": 1234,
        "qty": 1,
        "price": 73.00
    },
    {
        "product_name": "socks",
        "sku": 5678,
        "qty": 4,
        "price": 40
    }
  ]
}
Examples
When you add trigger data to your event with liquid, you can modify or even transform values to better support the things you want to do in Customer.io
See the liquid tag list to see all the ways you can modify these values. But, using the event above, here are a few quick examples of what you can do:
Reformat the purchase_at ISO date-time to a Unix timestamp using date %s.
"created_at": "{{ trigger.purchased_at | date: %s }}"

outputs 1644018579
Prepend or append the event name with a static value with append or prepend.
"name": "{{trigger.name | prepend "online_" }}"

outputs: online_purchase
Map the product names from the purchase array to a single key using map.
"products_purchased": "{{trigger.purchase | map: 'product_name'}}"

outputs: shoes, socks
Use JavaScript to modify event properties
You can manipulate values that you set in your event with JavaScript. When you use the JavaScript option, you’ll either produce a return statement for each data attribute in your event, or switch to the JSON editor and return an object containing all your event A key-value pair that you associate with a person or an object—like a person's name, the date they were created in your workspace, or a company's billing date etc. Use attributes to target people and personalize messages. Reusable content, like a company address, that you can reference with a liquid key across your messages.data properties. You can set properties from any source available in your automation—trigger data, attributes
For example, if you wanted to access a person’s id from the object we used in our Liquid example above, you would use return triggers.identifiers.id;.
See our JavaScript quick reference guide for more examples to help you take advantage of JavaScript in your workflow.