Google Postmaster Tools

Updated

Google Postmaster Tools (GPT) is a service Gmail provides free of charge that shows data about your sending reputation and Gmail spam rates. (Gmail does not notify senders when emails are marked as spam for privacy reasons.) Senders must stay below a 0.3% spam threshold in GPT.

If your recipient marks a message as spam and the email service provider sends that information back to Customer.io, we will automatically suppress that user profile so you can’t send to someone who clearly doesn’t want your messages in the future.

However, Google does not send information about spam complaints back to Customer.io. Remember that when viewing your Customer.io dashboard, the spam information displayed does not include Gmail users!
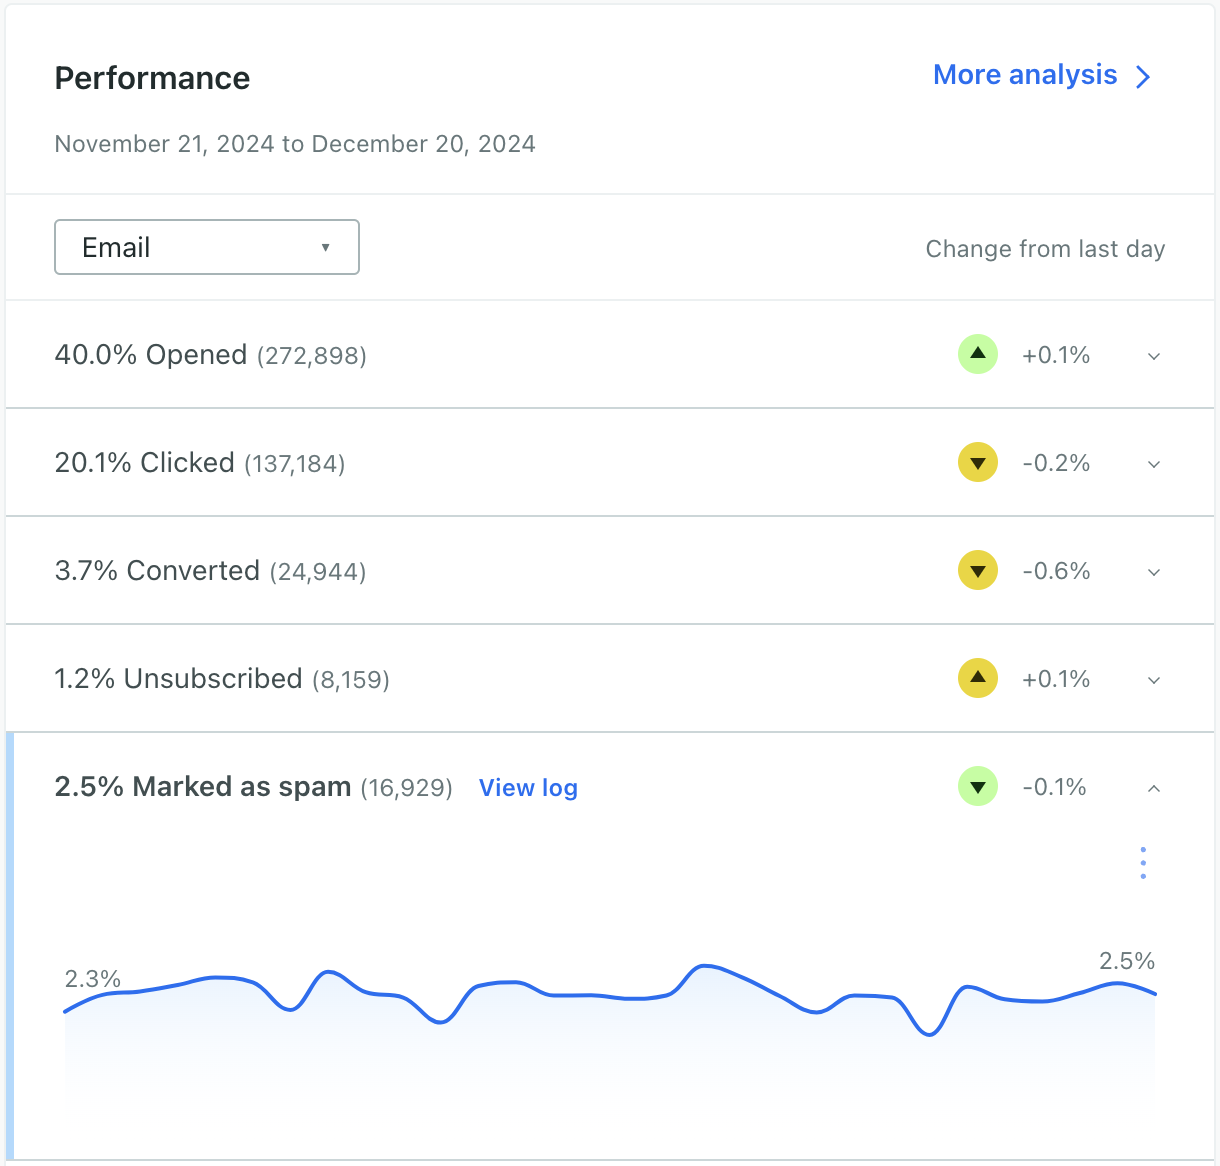
dashboard-performance-marked-as-spam.png

Google Postmaster Tools is the only place to view information about Gmail user-reported spam complaints.
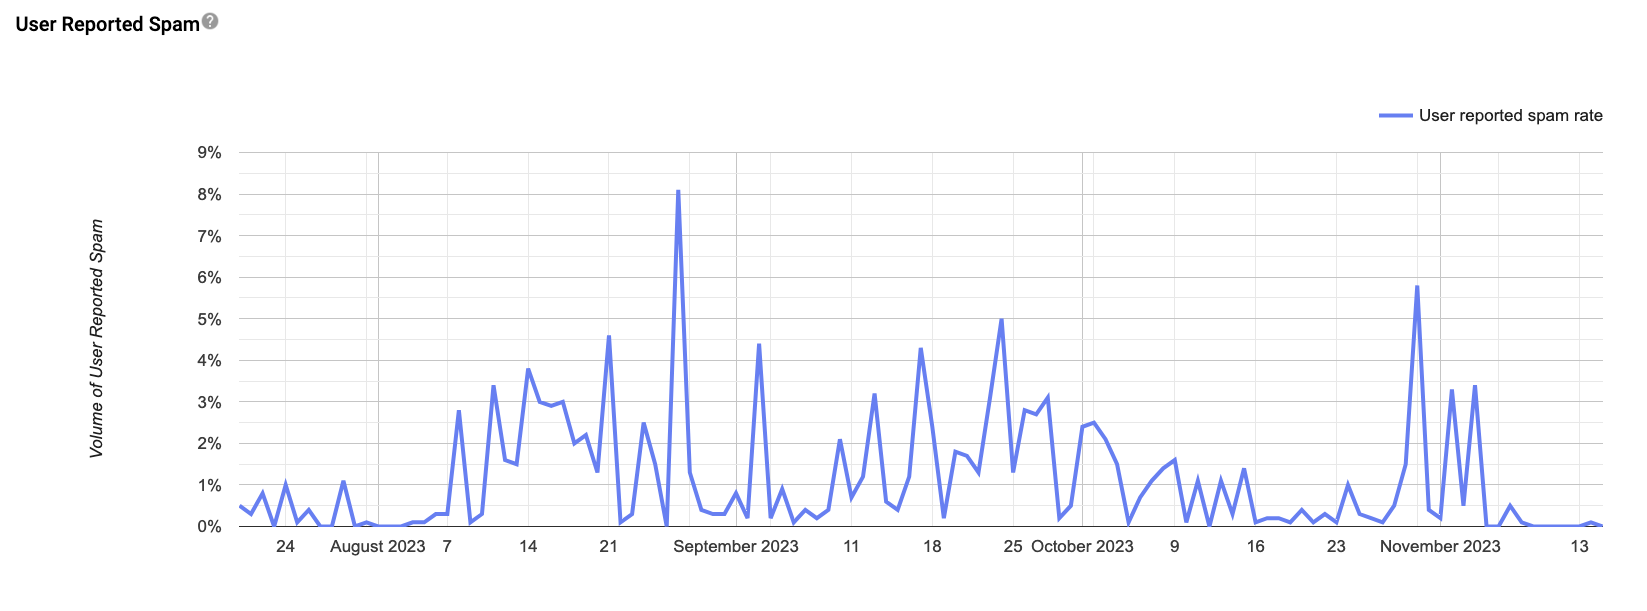
gpt-data.png
gpt-data.png

 Google Postmaster Tools does not show real-time data.

It’s often a few days behind, so if you see a spam spike in GPT on a particular day, know that the spike may not actually be from an email sent on that day. Because of this reporting delay, it can be challenging to identify if a particular send caused a spike in spam complaints.

Check out our blog article to learn more about the power of Google Postmaster Tools!

Set up GPT

  1. Log in or sign up for a Google Postmaster Tools account.

  2. Locate your subdomain in Customer.io: go to Workspace settings > Email and click Manage Domain. The subdomain is a combination of the Host Name of your MX or SPF records plus your root domain - like cioXXXXXX.yourdomain.com.
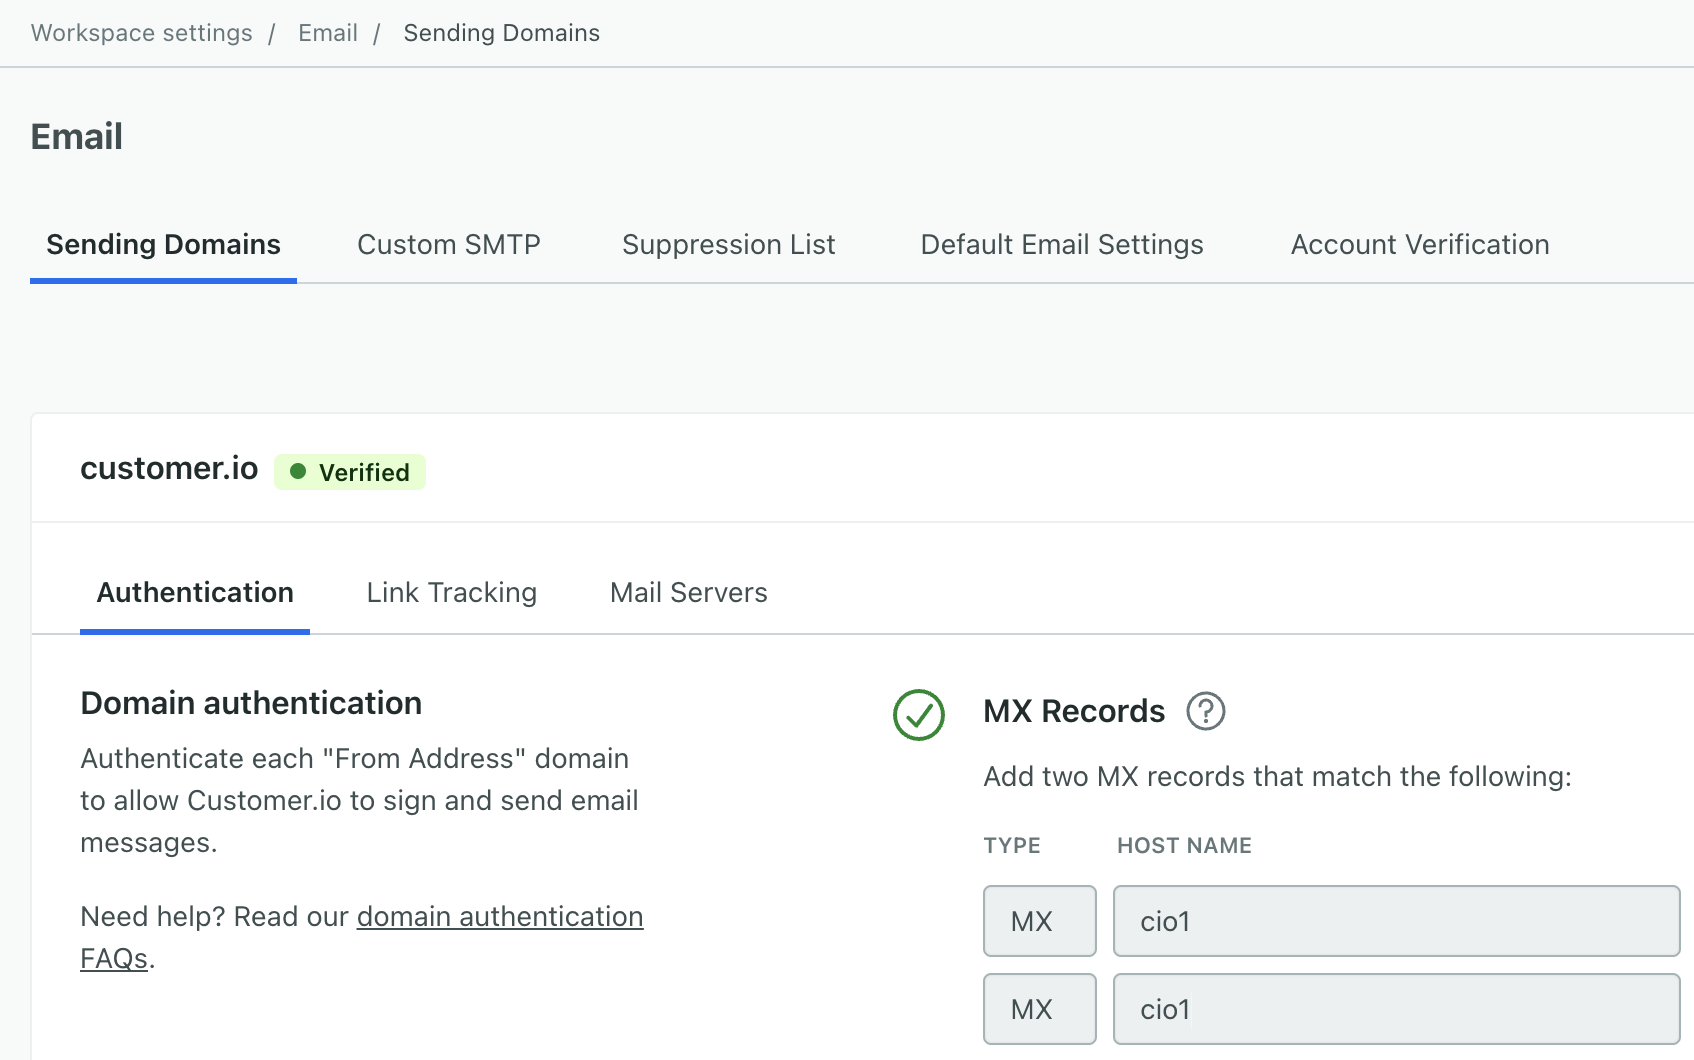
    Find your mx record to determine your CIO-specific subdomain
    Find your mx record to determine your CIO-specific subdomain

  3. Copy the Host name record from the previous step and paste it in the domain section of your Google Postmaster Tools signup (left). Then add your root domain to the end of the record to assemble your Customer.io-specific subdomain (right).
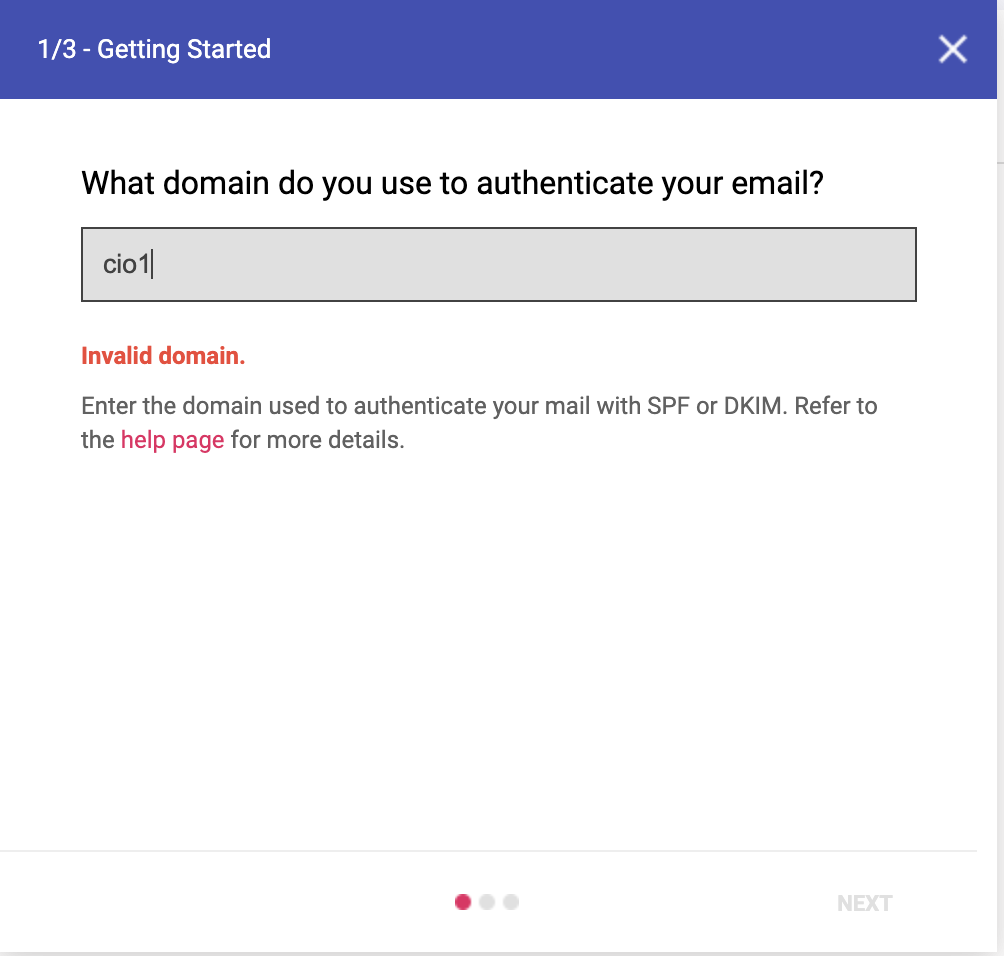
    Add your CIO sudbdomain to Google Postmaster tools
    Add your CIO sudbdomain to Google Postmaster tools
    Add your root domain to assemble your complete, CIO-specific subdomain
    Add your root domain to assemble your complete, CIO-specific subdomain
  4. Verify your domain: add the records GPT provides you to your domain registry to prove ownership of your domain.
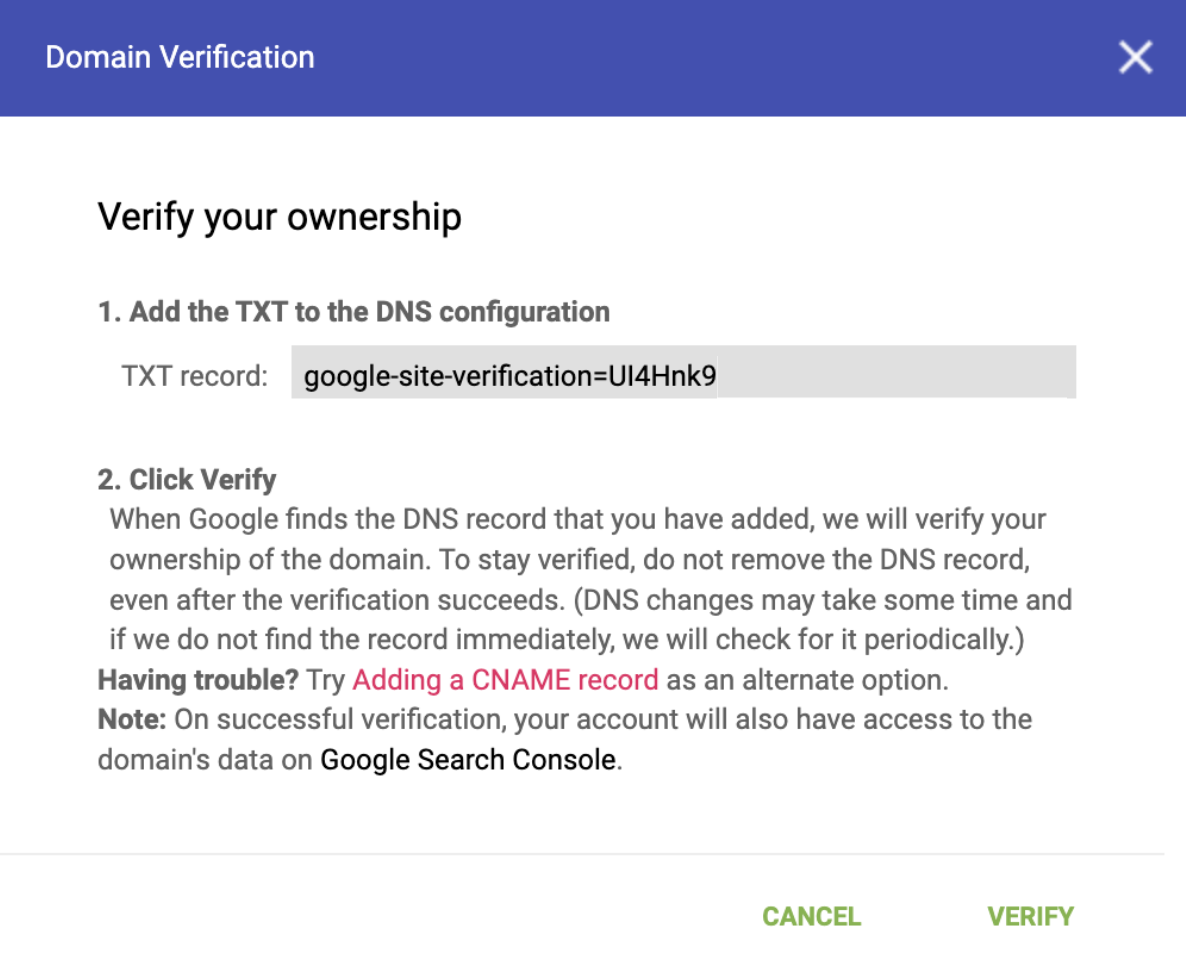
    gpt-verify-domain.png
    gpt-verify-domain.png

  5. (Optional) Grant Customer.io read-access to your account so we can help you troubleshoot deliverability issues.

    1. In Google Postmaster Tools, click the three vertical dots by your domain then click Manage Users.
      The three dots and Manage Users option displays in the top right of Google Postmaster Tools.
      The three dots and Manage Users option displays in the top right of Google Postmaster Tools.
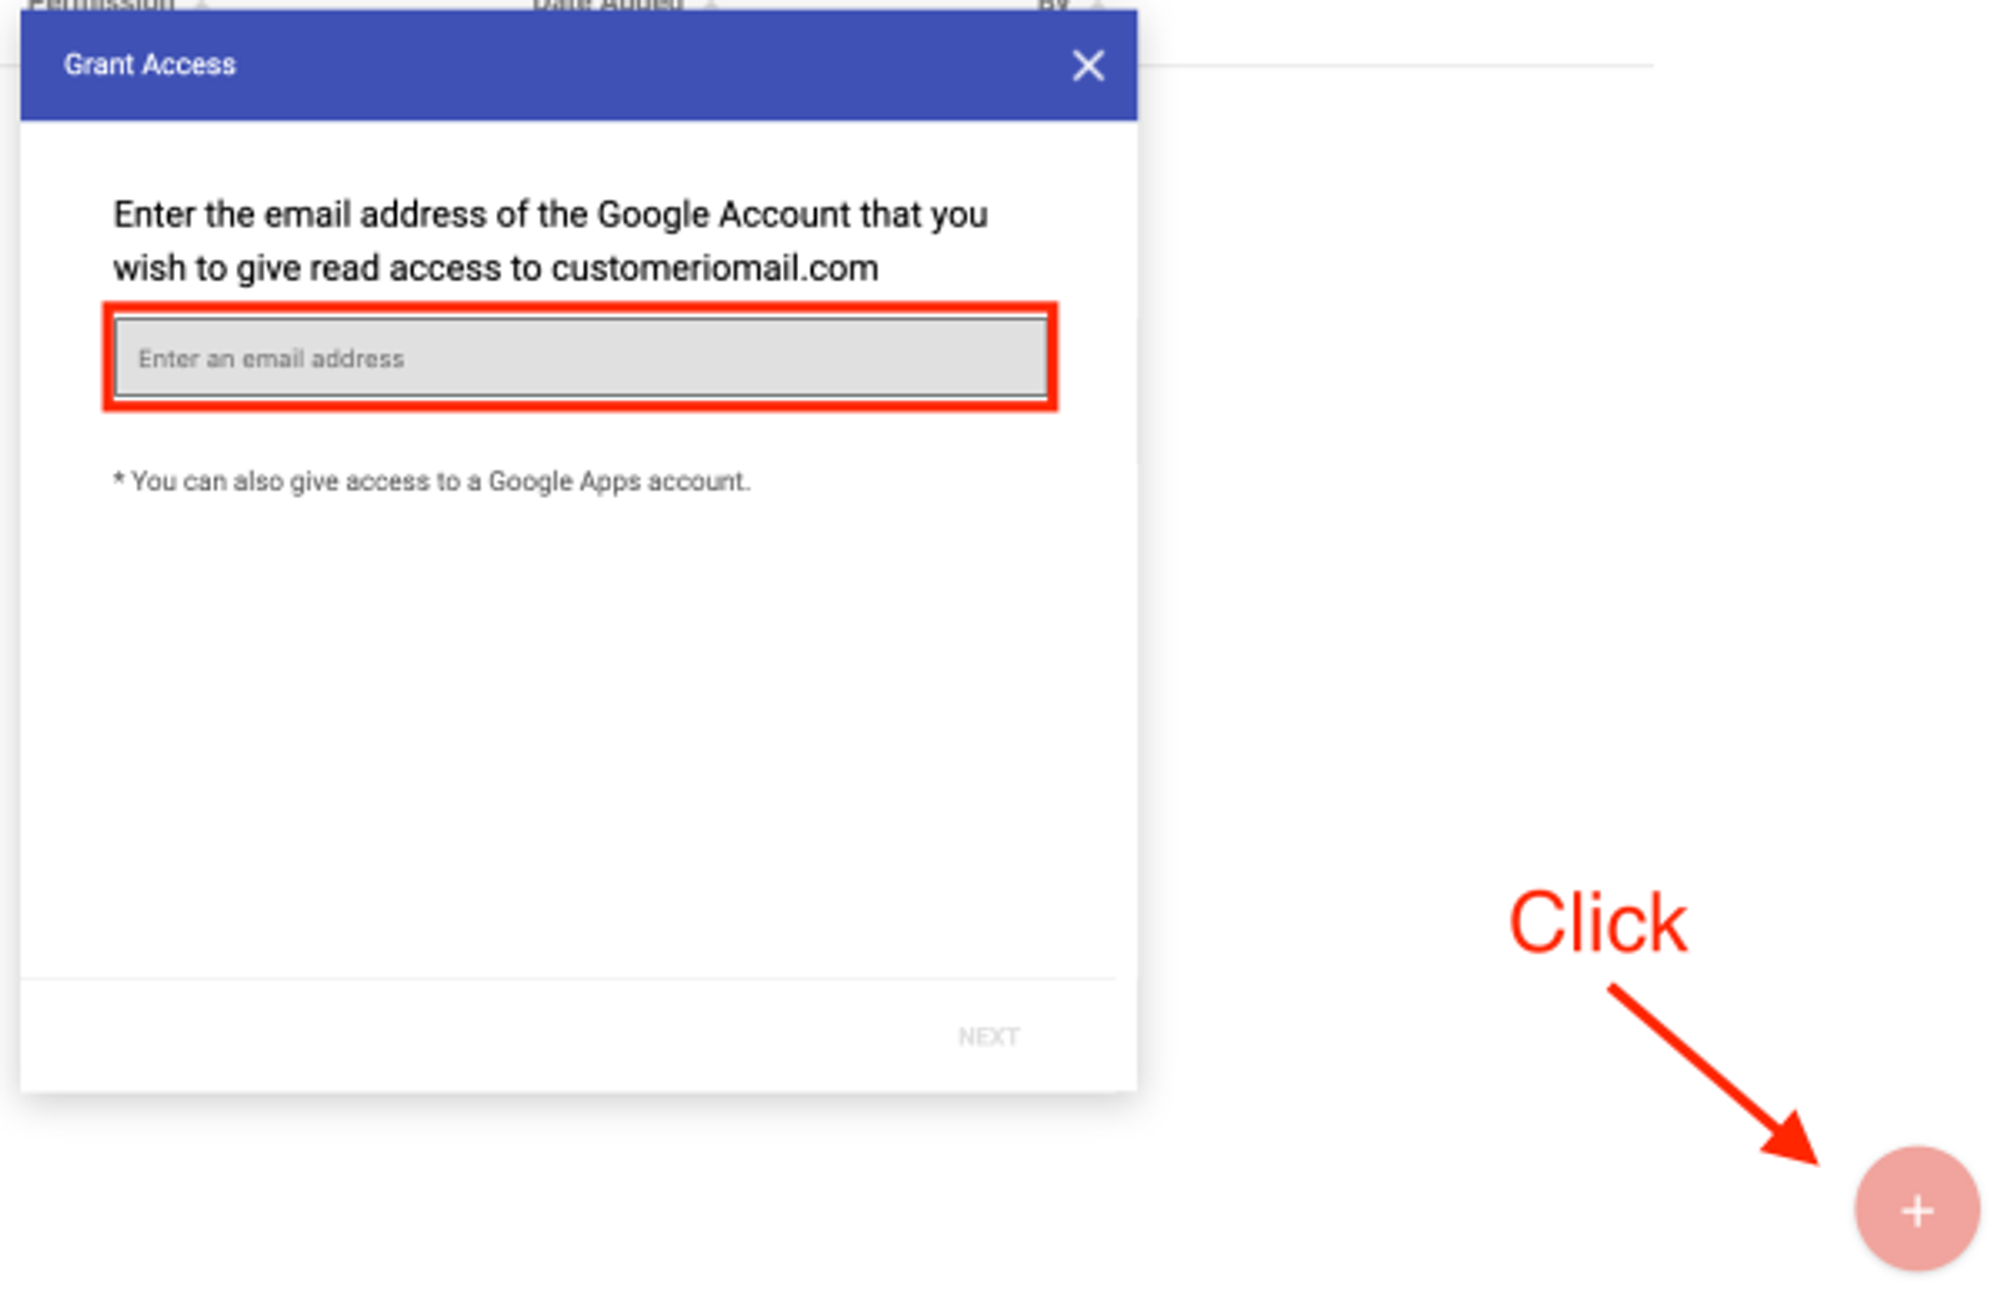
    2. Click the red icon.
      An image showing steps 2 through 3. The plus sign is in the bottom right. The email address field pops up in the middle of the screen.
      An image showing steps 2 through 3. The plus sign is in the bottom right. The email address field pops up in the middle of the screen.
    3. Enter ami@customer.io in the email address field.
    4. Click Next to finish.

Now you can monitor your sending domains for Customer.io in Google Postmaster Tools. If you gave us read-access, we’ll also be able to better troubleshoot deliverability issues with you!

Set up GPT Feedback Loop

You can add a Feedback-ID to the header of your emails to find the source of your spam complaints through the Feedback Loop feature of Google Postmaster Tools.

To set up a GPT feedback loop for an email:

  1. Go to your email’s envelope. Click Add custom.
    gpt-email-header-example.png
    gpt-email-header-example.png
  2. Add Feedback-ID to Name under Headers. This custom header contains identifying information about your message, and you’ll need to set it for each email you send from Customer.io.
  3. Add your header value in this format: a:b:c:SenderId. In the image above, the value is {{campaign.name}}:customerio. Note, GPT reads this from right to left. If the SenderId is empty, GPT will not generate data.
    • SenderId: a required, unique identifier (5 to 15 characters) of your choice that never changes. Use something simple like “customerio” or your organization’s name. This ID should be the same across all your emails.
    • a, b, and c: these are optional fields that allow you to specify up to three identifiers about your message (i.e. campaign name).

       Use liquid tags to easily insert identifying information

      This makes it easy to re-use it across your messages. (Note that the {{campaign.name}} tag returns the name of the campaign or broadcast, so it’s a great option!)

Why not include the message’s name in Feedback-ID?

Google is rather vague on what kind of volume is required to surface data insights in Google Postmaster Tools. They say that their tools are for “large volume senders,” and their Feedback Loop documentation says they will report “if a given Identifier is present in a certain volume of mails.”

We unfortunately don’t know exactly what the rules are (it’s not published information), but the reality is that GPT often doesn’t show you data at lower volumes, even if they’re still recording it. As an example, if you send fewer than 1,000 emails a day, you likely won’t see any domain reputation or spam complaint data in GPT at all!

The Feedback Loop can also be a bit erratic sometimes, and data can show some oddities. Its primary function is providing a general idea of where your spam complaints are coming from, but isn’t great for pinpointing one particular email.

This is why we recommend using your campaign name rather than the message name: it’s easier to determine if a campaign causes complaints than an individual message. Your mileage with the Feedback Loop may vary, but it’s currently the only method to get any further insights about your spam complaints from Google.

Feedback loop reports

GPT shows you the spam rate for your identifiers per day. Keep in mind, GPT does not display real-time data, so you may not see the results of your feedback loop for a few days.

In the example below, 4% of all emails sent to Gmail users on November 13 was marked as spam. The client either did not tag all of their emails with identifiers, or the other identifiers had a volume that was too low to be reported individually. But two specific identifiers were flagged as contributing 0.7% of the overall spam complaints each.

gpt-data-2.png
gpt-data-2.png

The feedback loop can help you identify which particular campaign(s) or broadcast(s) are generating the most spam complaints, allowing you to hone in and focus your efforts on those areas.

Best practices to reduce spam complaints from Gmail users

First and foremost, start with the basics: ensure you’ve implemented all of our deliverability best practices.

  • Send email that people want and expect to receive.
  • Think about how your sending relationship with the recipient was started: ensure you clearly outlined to your users that you’ll send them email and set expectations.
  • When necessary, remind the recipient why they’re receiving your email.
  • Keep your communications on-brand and recognizable.
  • Give recipients a quick, painless way to unsubscribe.

In addition, implementing engagement filtering and a sunset policy is absolutely critical. Google provides only aggregate data for the spam reported on any given day; Google will never tell you which specific recipients have flagged your message as spam. Letting go of unengaged users who don’t open your emails also removes users who have submitted spam complaints from your sending, without needing to know who they are, since they’re not opening your messages.

I follow best practices, but my spam rates are above 0.3%

With the limited information available by default in Google Postmaster Tools, you’ll likely have some hypotheses on where your spam complaints are coming from, but it can be difficult to pinpoint the source with certainty.

This is where Google Postmaster Tools’ Feedback Loop feature may help. Note that this feature requires additional effort to configure and can be a bit erratic sometimes, which is why we recommend implementing all of our standard best practices first.

Copied to clipboard!
  Contents
Is this page helpful?