Surveys
UpdatedWith Customer.io, you can send web and in-app surveys (NPS, CSAT, etc) using different arrangements of buttons. We track the buttons your audience clicks, and you can set up conditional branches in your campaigns or broadcasts to handle different responses to your survey.
How it works
You can use our in-app feature to send a message with an arrangement of buttons to solicit feedback from your audience—for net promoter score (NPS), customer satisfaction (CSAT), and other kinds of microsurveys.
We track the buttons that people click or tap in your messages, so you can see how your audience feels about your products, features, and so on. You can even use responses to follow-up with people based on their feedback.
Buttons in our surveys do two things:
- They record a rating or response.
- They dismiss the message.
user respond?} c-.->|User closes
message|d(No tracked response) c-->|User picks a
survey option|e(Customer.io captures response) d-.->f(Dismiss in-app message) e-->f
Your survey could have multiple steps!
A multi-step message provides a way to ask follow-up questions or thank your audience for their feedback automatically when they respond to your survey. See Multi-step messages for more information.
Create a survey
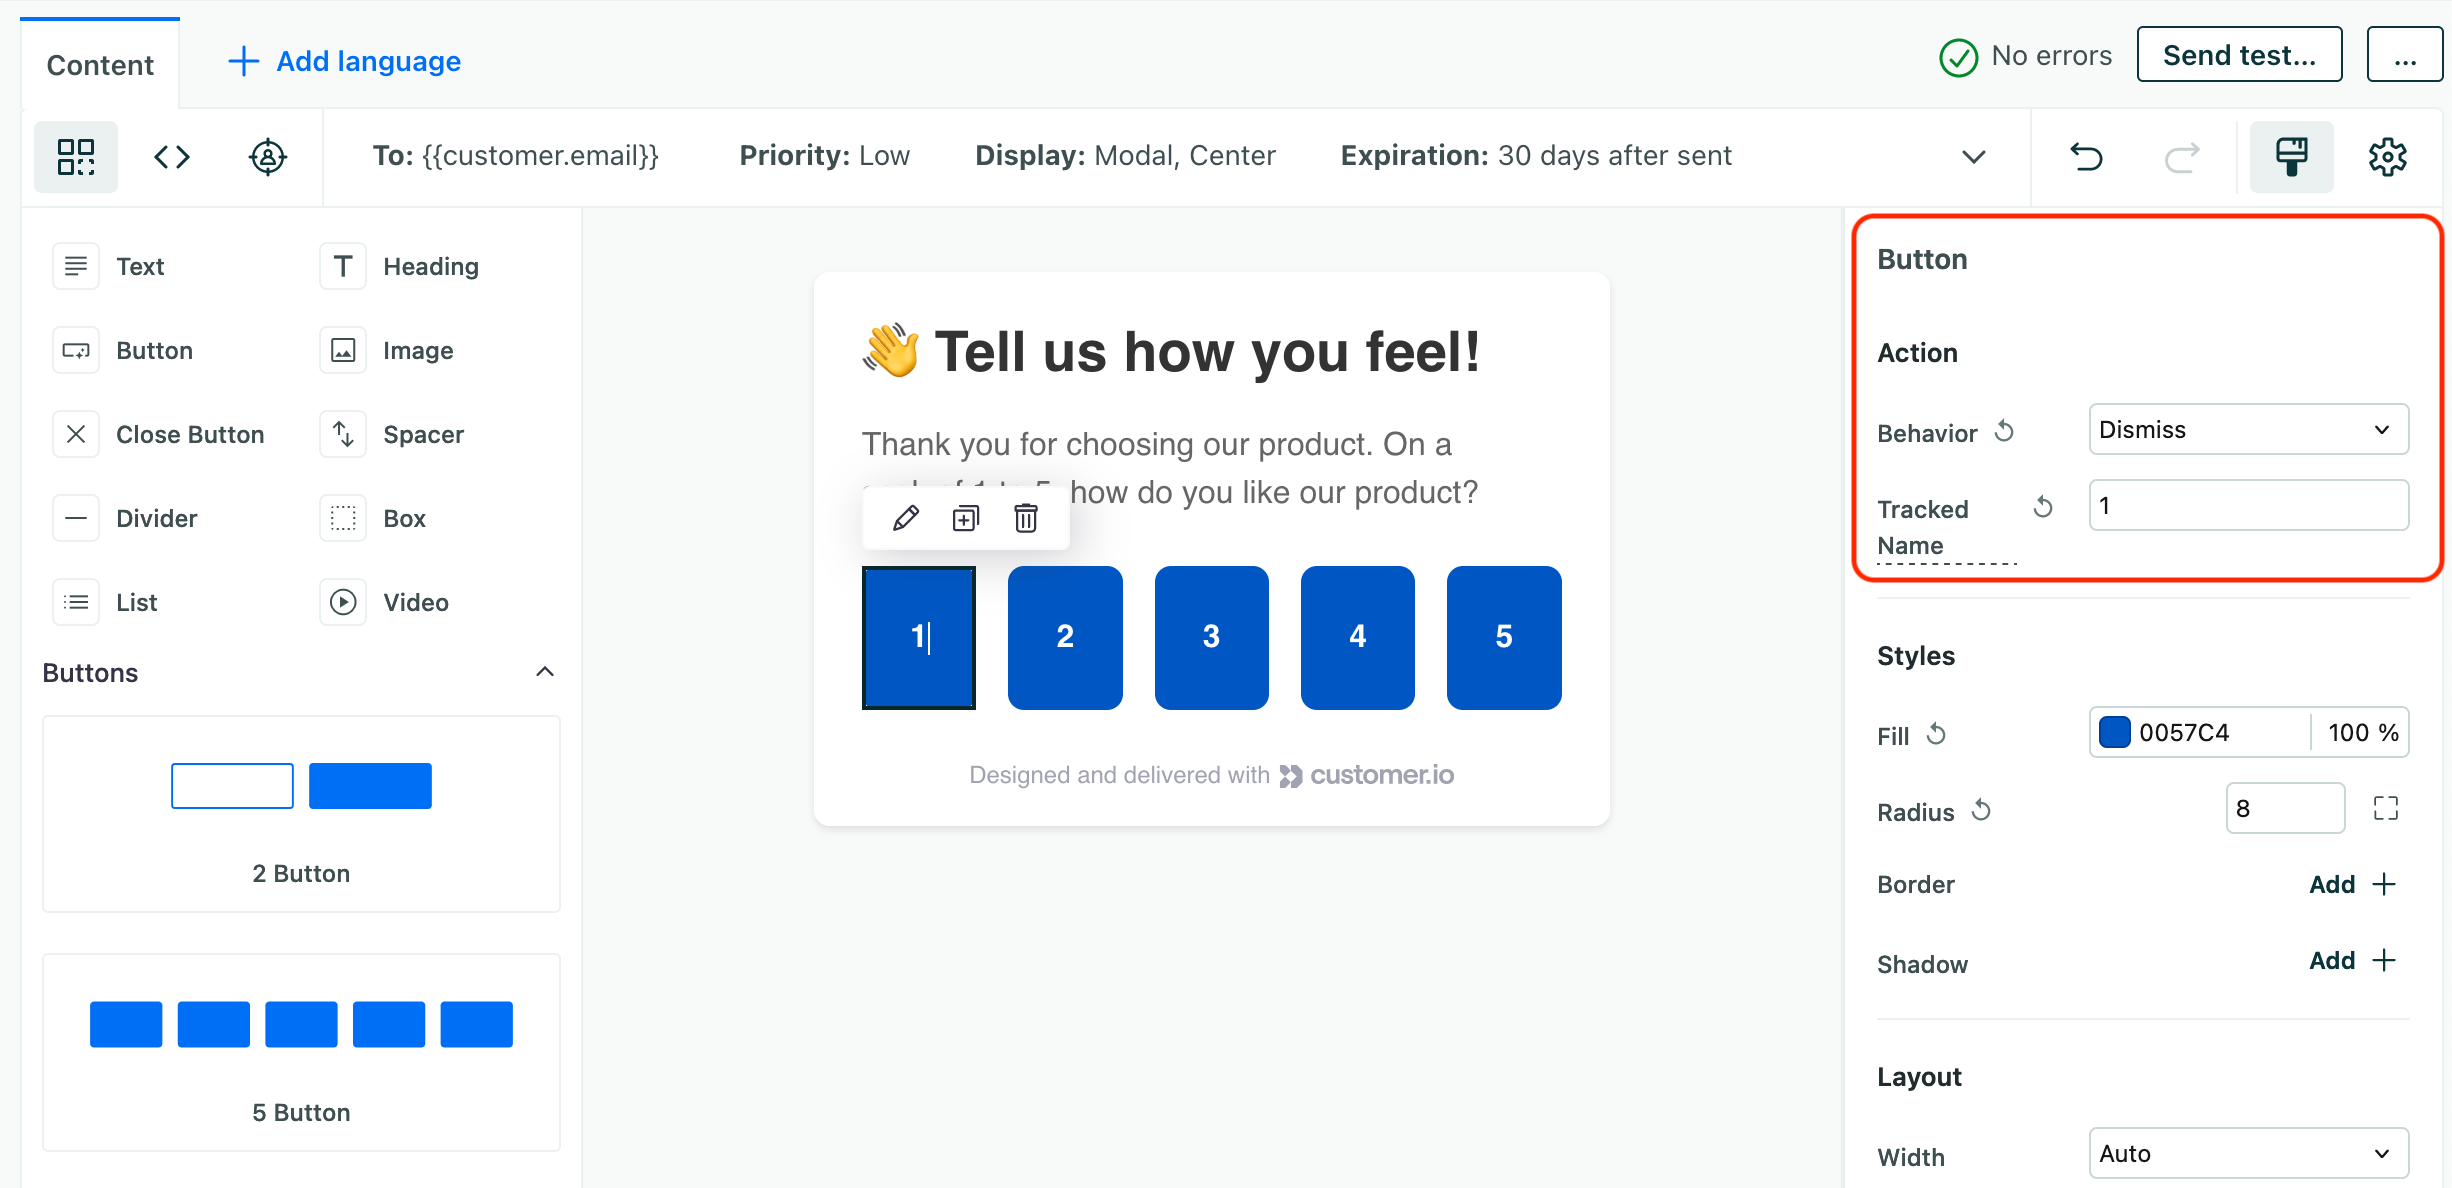
In any message that you want to act as a survey, drag Buttons into your message. When you select any of the buttons, you’ll see that they’re set up with:
- The action Behavior set to Dismiss. You shouldn’t change this value unless you want to link your audience somewhere in your app.
- The Tracked Name set to a value that’s meant to help you understand your rating scale. You might want to change this value to reflect your rating scale or your button text. For more about setting tracked names and strategies to help you group responses, see Tracked names and responses.
Use Tracked Name values to group responses
If your buttons have tracked names 0-10, like in an NPS survey, you’d have to set up branches for each number. But, if you add detractor, passive, and promoter as tracked names, you can set up branches for each of those groups. This makes it easier to manage conditional branches. See Tracked names and responses for more information.


Set up conditional branches based on survey responses
You can use conditional branches to act on your audience’s responses to your surveys. For example, you might send a follow-up message to thank your audience for their feedback, or link them to information about a feature that they indicate interest in.
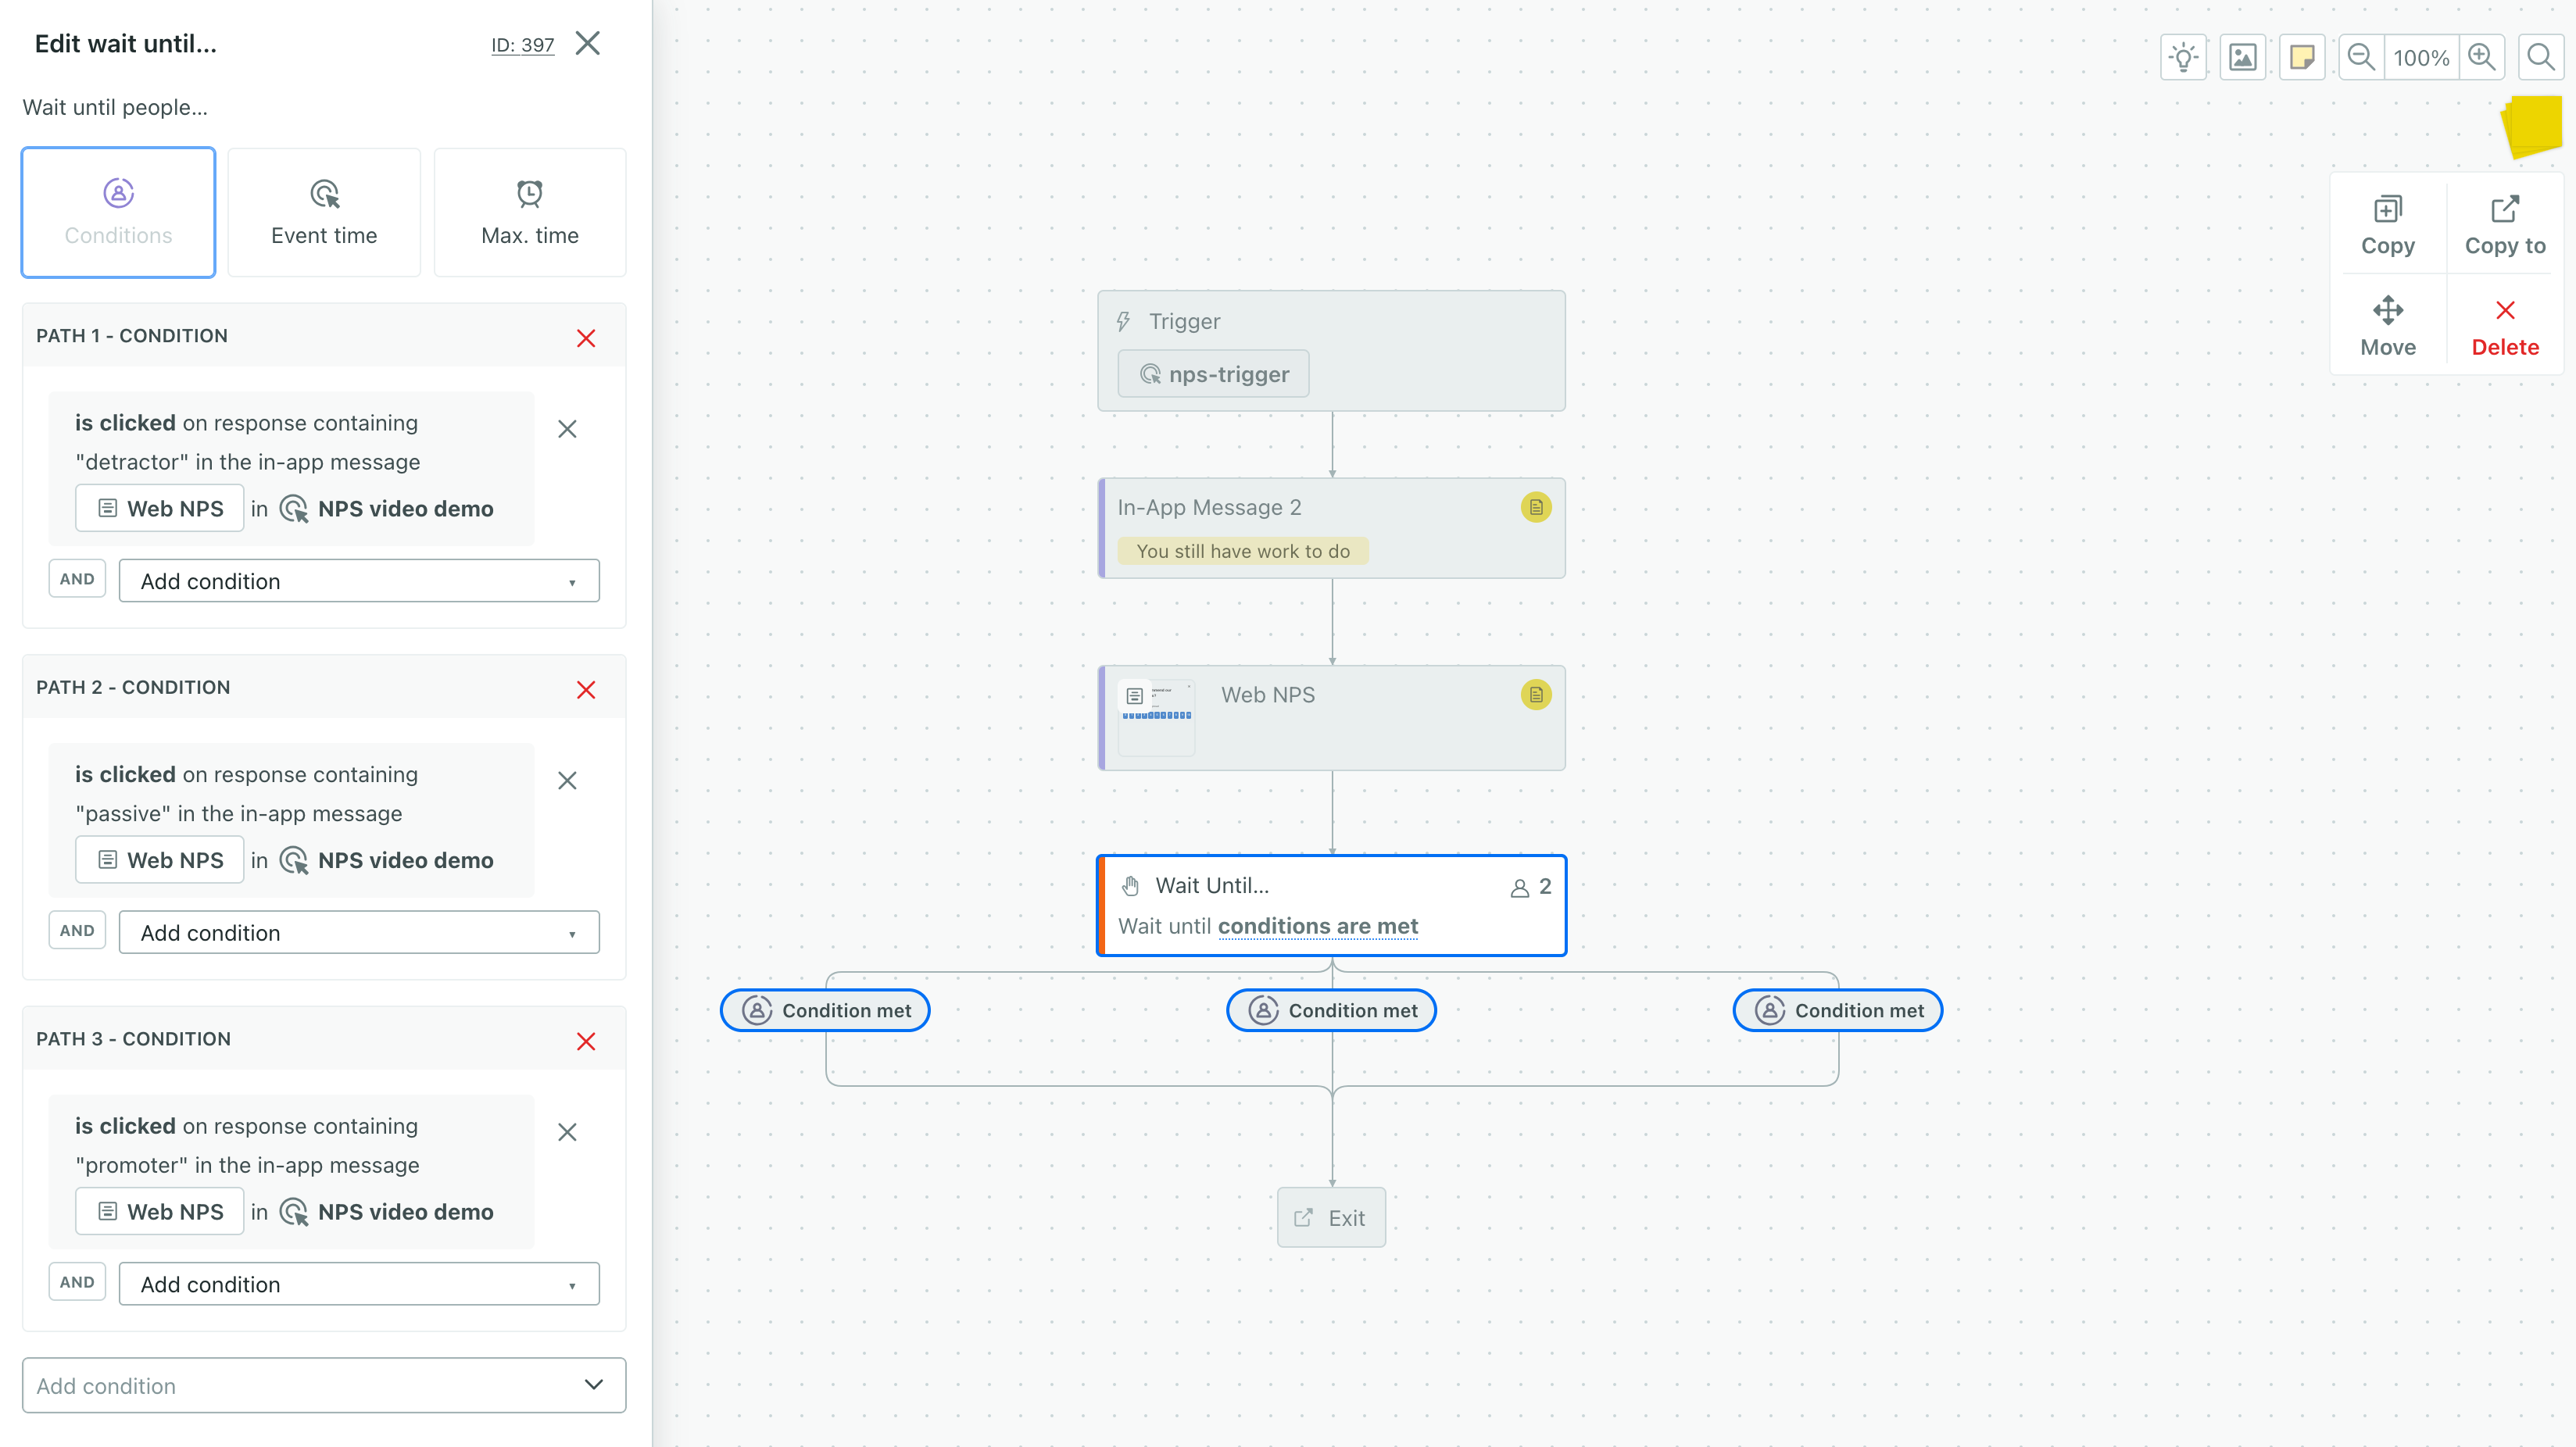
To do this, you’ll add a Wait Until block to your message. This lets you wait until a person engages with your message and set conditions based on the button(s) people click or tap in your message. You’ll send people down different branches in your workflow depending on how they respond to your survey.
In your campaign, add a Wait Until branch.
Add your conditions:
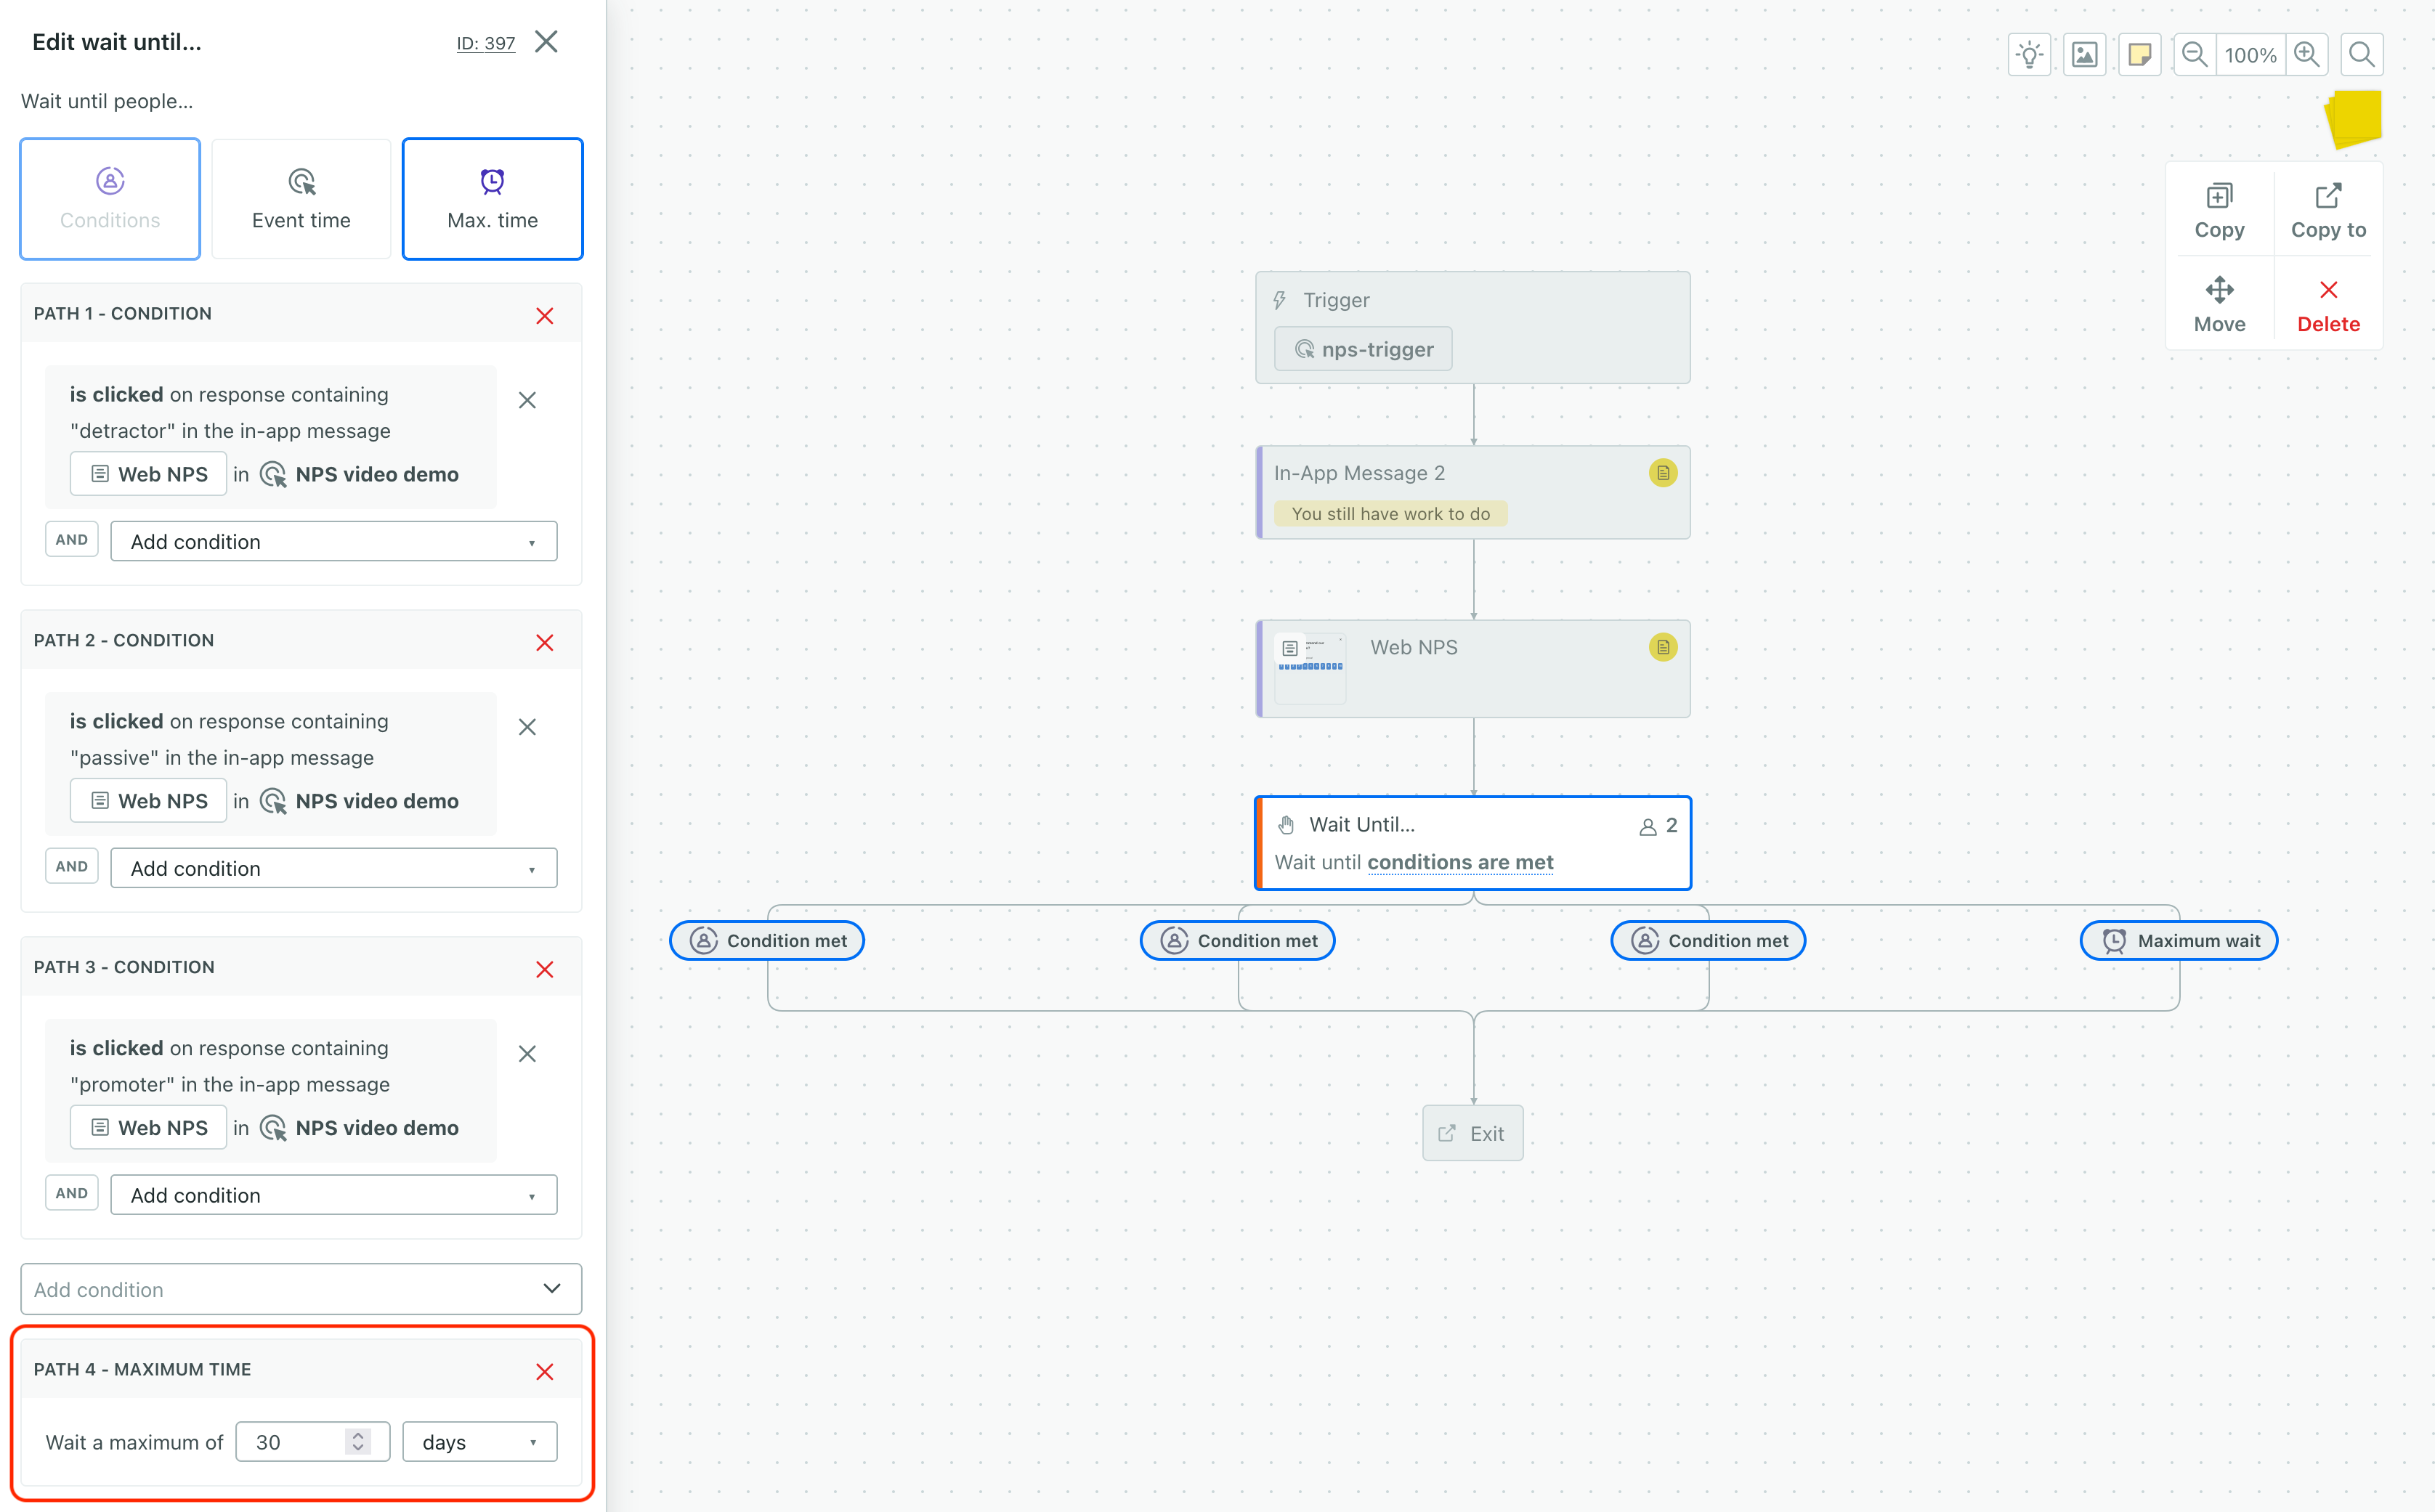
When you’re done with your conditions, you should set a Max Time condition for people who never receive your message or dismiss it without picking an option.
You might want to set your wait time to the expiration time for your message! This means that people have the maximum amount of time to respond to your survey before you act on their lack of response.


Tracked names and responses
Each button has a Tracked Name. This is the value we record when someone clicks or taps a button in your message. By default, the Tracked Name for each button matches the button text. So, for a row of 5 buttons, the buttons are named 1-5.
You might want to change tracked names if you change the names of your buttons—both to make it easier to understand your data and to make it easier to set up conditional branches based on your audience’s responses.
For example, if you have an NPS survey with buttons 1-5, you might want to set the Tracked Name for 1 to Very Dissatisfied and 5 to Very Satisfied; this’ll make it easier to understand your rating scale.


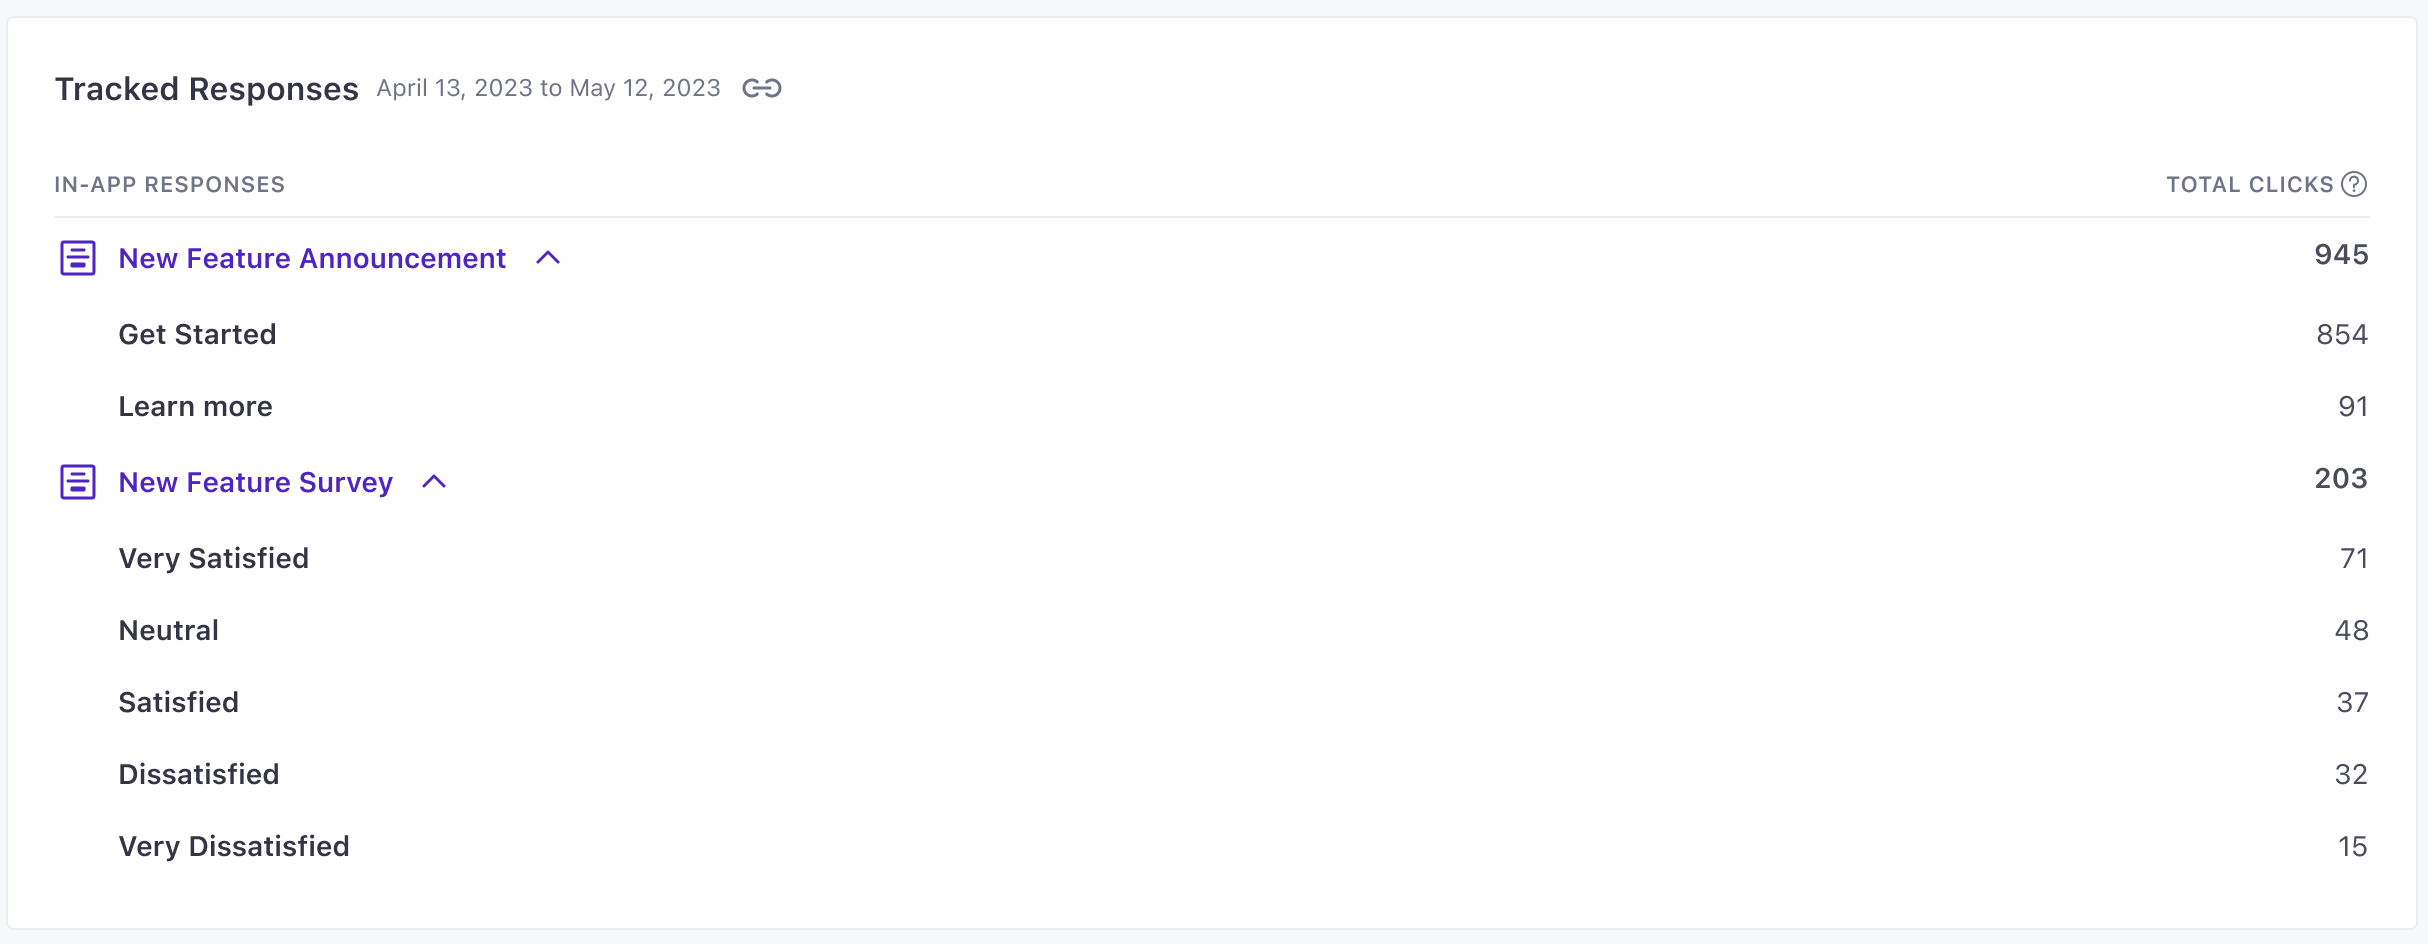
We count your audience’s responses (for any button that has a Tracked Name) under Tracked Responses in the metrics tab for your campaignCampaigns are automated workflows you set up to send people messages and perform other actions when they meet your criteria. or broadcast. We organize responses by message and action name, helping you understand how your audience responded to your messages and surveys.


We don’t track the close button by default
By default, the Close Button does not have a tracked name. But you might want to set a tracked name for the Close button if you want people to pass through a campaign even if they don’t respond to your message. Setting a tracked name for the close button lets you create a conditional branch for people who dismiss your message without setting an arbitrary Wait period.


