Relationships
UpdatedCreate relationships between objects and people to segment users based on the groups they belong to and to personalize messages with object data.
You can create and remove relationships between objects and people through:
- object and people pages in the UI
- our Track API
- our web sdk
- reverse ETL integrations
- our Segment integration
While you can relate objects to people, you can’t relate objects to objects. If this is functionality you need, please share your use case with us.
Set relationships in the UI
You can relate objects and people through our UI individually and in bulk. To remove relationships, visit an object or person page.
You can track the addition and removal of relationships in your Activity Log.
Set relationships in bulk
From the People page, you can relate multiple people to multiple objects within a single type.
- Go to the top right dropdown and select Add Relationships.
- Check the box next to each relevant person then continue to the next step.
- Check each object you want to relate to the people you checked.
- (Optional) Add relationship attributes—information that defines how the person is related to the object.
- Review and confirm.
You can also accomplish this from an Object Type landing page.
Set relationships individually
From a person’s page, you can add relationships to multiple objects.
- Go to People in the left hand nav.
- Select a person.
- Select Options > Add relationships in the top right.
- Select the Object Type you want to target.
- Check each object you want to set a relationship to.
- Review and confirm.
From an Object page, you can do the opposite - relate this one object to multiple people.
Delete relationships in the UI
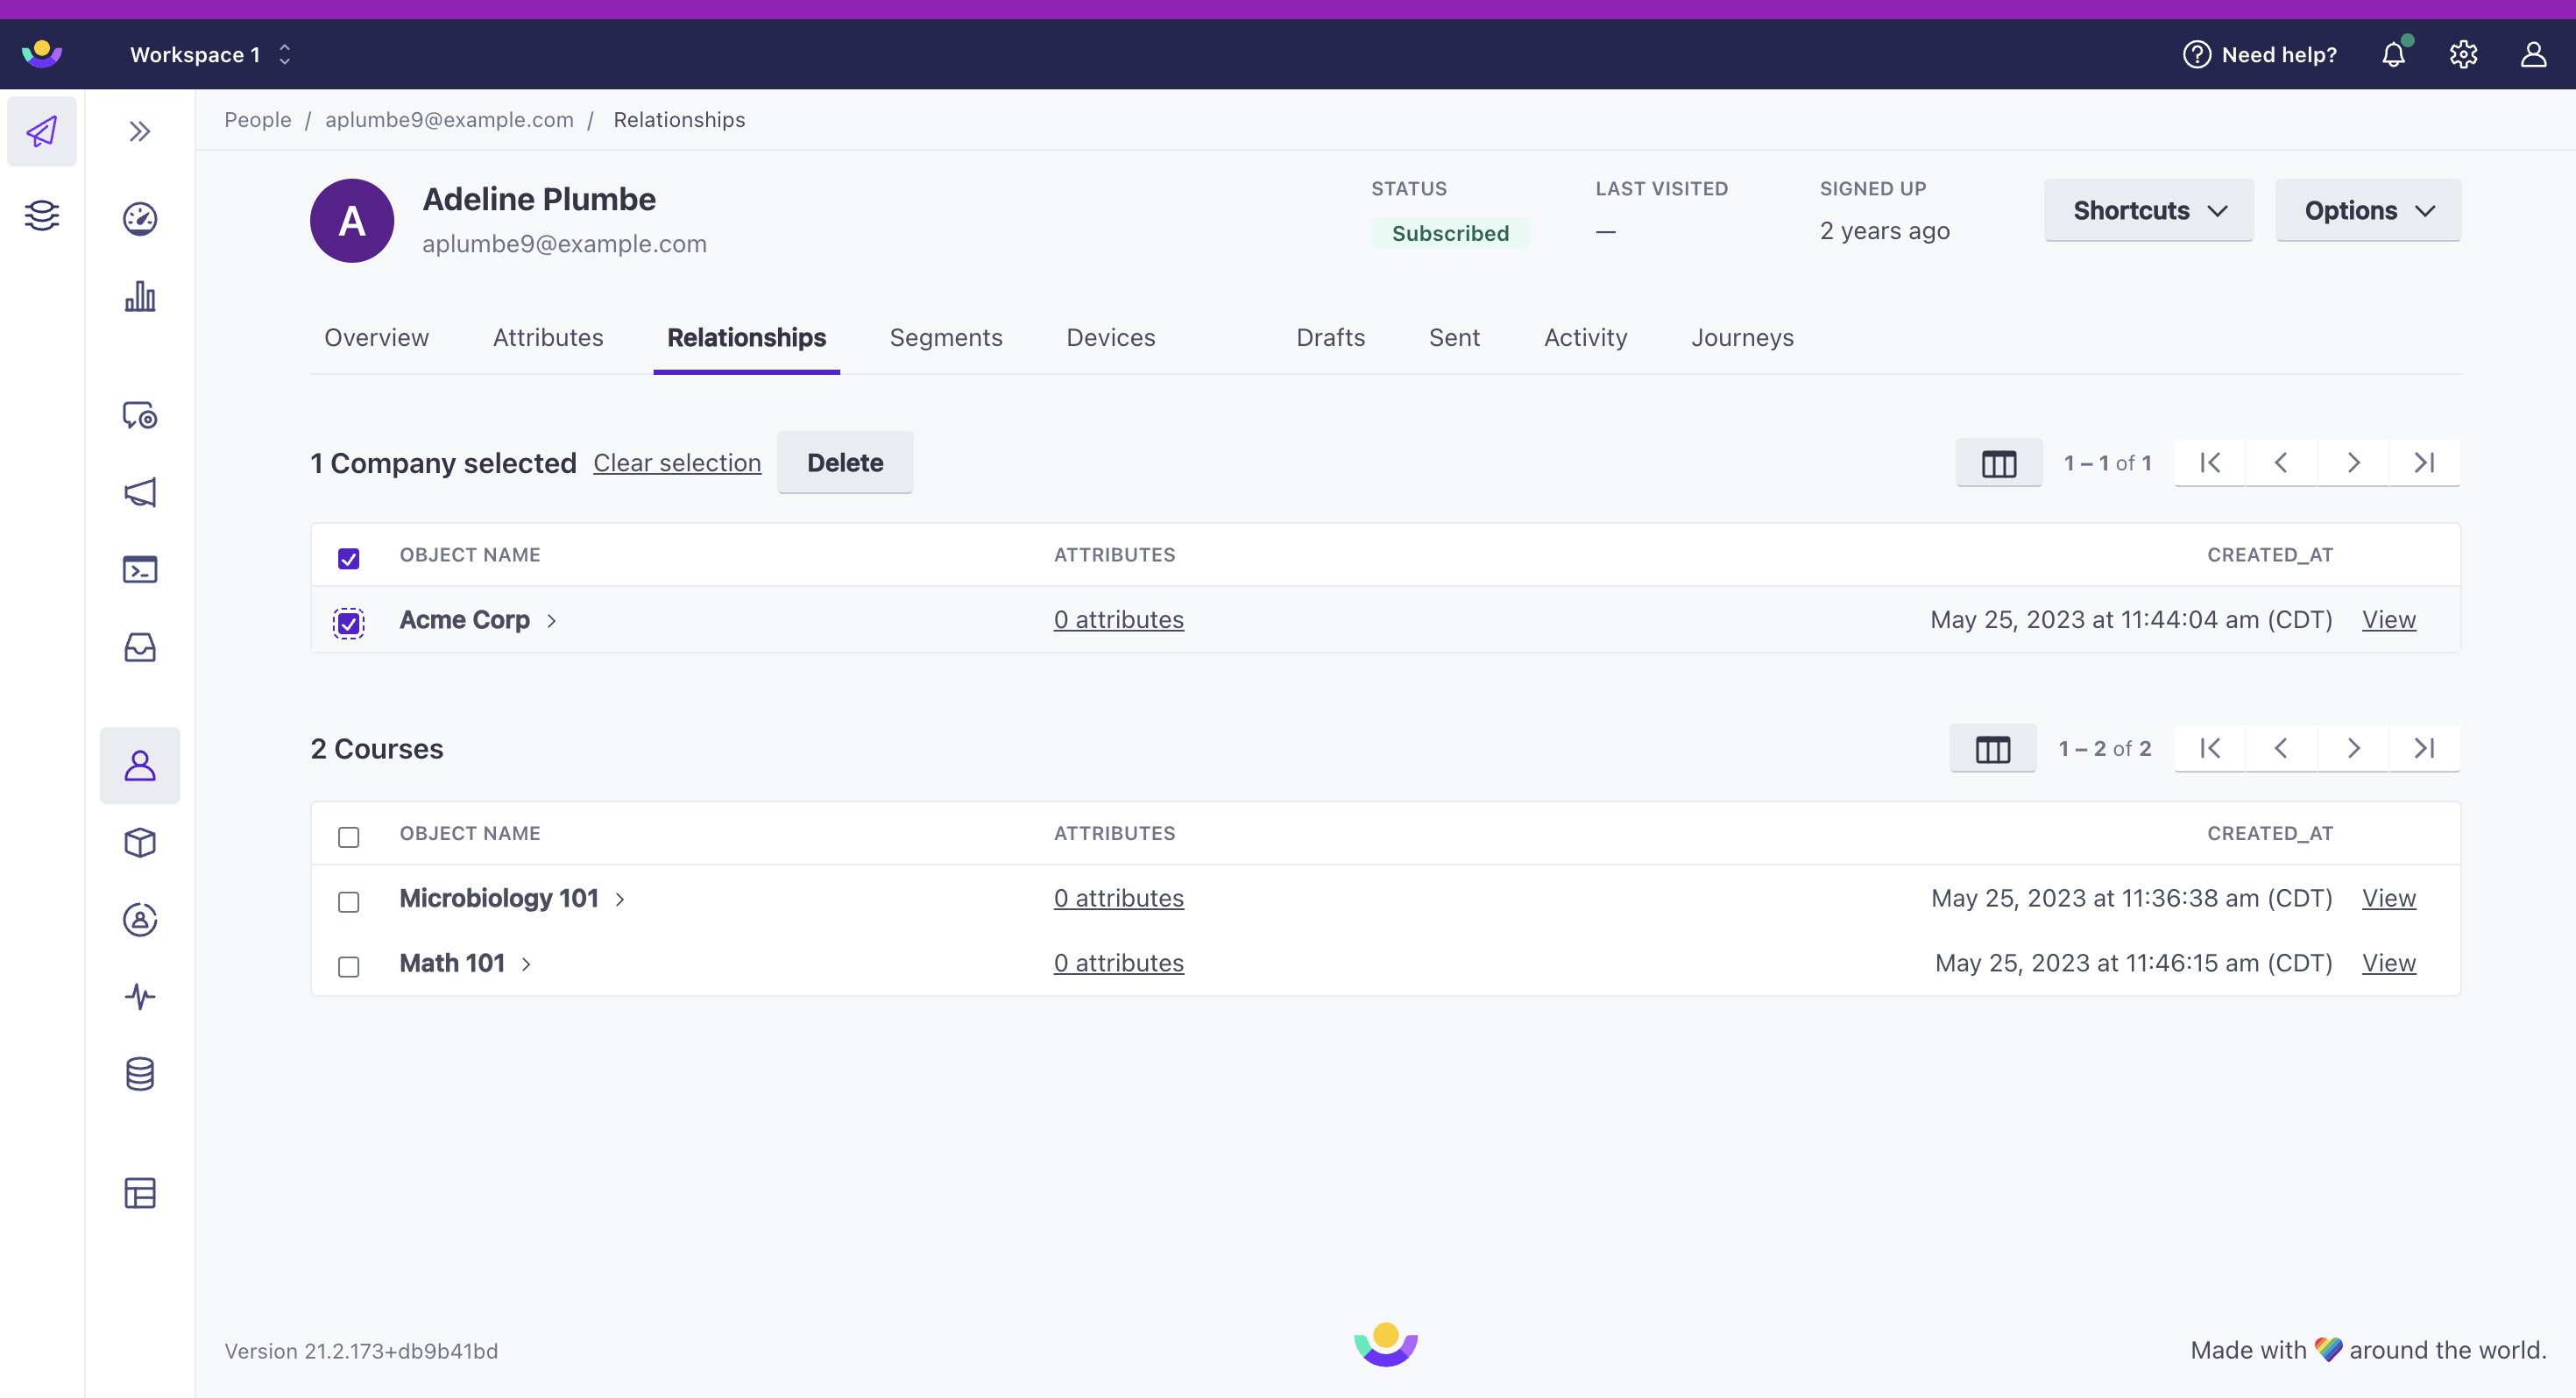
You can delete relationships from the Relationships tab of a person or object page.
To delete relationships for a person:
- Go to a person’s page.
- Select the Relationships tab.
- Check the box beside each relationship you want to remove.
- Select Delete at the top of the table and confirm your action.

Set/delete relationships programmatically
You can relate objects to people in the same ways you can create objects through our API, our Web SDK, our reverse ETL integrations, and our Segment integration.
You can set relationships when you create an object (the identify action) or later on, like when people enroll in a class or leave a company, with the add_relationships or delete_relationships actions.
You can also set relationships using our v1 API, but the examples below use our v2 API, which is more flexible and provides the ability to send multiple requests in the same call.
You can set relationships on an object or a person—determined by the type parameter. Specify an object if you want to set relationships with multiple people; specify a person if you want to relate them to multiple objects.
Object to multiple people
curl --request POST \
  --url https://track.customer.io/api/v2/entity \
  --header "Authorization: Basic $(echo -n site_id:api_key | base64)" \
  --header 'content-type: application/json' \
  --data-raw '
{
    "type": "object",
    "identifiers": {
        "object_type_id": "1",
        "object_id": "acme"
    },
    "action": "add_relationships",
    "cio_relationships": [
        {
            "identifiers": {
                "id": "42"
            }
        },
        {
            "identifiers": {
                "email": "billing-contact@example.com"
            }
        }
    ]
}'
Person to multiple objects
curl --request POST \
  --url https://track.customer.io/api/v2/entity \
  --header "Authorization: Basic $(echo -n site_id:api_key | base64)" \
  --header 'content-type: application/json' \
  --data-raw '
{
  "type": "person",
  "identifiers": {
    "email": "billing-contact@example.com"
  },
  "action": "add_relationships",
  "cio_relationships": [
    {
        "identifiers": {
            "object_type_id": "1",
            "object_id": "acme"
      }
    },
    {
        "identifiers": {
          "object_type_id": "1",
          "object_id": "globex"
      }
    }
  ]
}'
Person to objects (JS)
If you use our Web SDK, you can set relationships using the identify function. Your JavaScript snippet must include the line t.setAttribute('data-use-array-params', 'true');, or you’ll receive an error when you attempt to set relationships this way.
_cio.identify({
  id: 'userid_34',
  email: 'customer@example.com',
  cio_relationships: {
        action: "add_relationships",
        relationships: [
            {
                identifiers: {
                    object_type_id: "1",
                    object_id: "acme"
                }
            }
        ]
    }
});
Send fewer requests with the batch endpoint
You can use our /v2/batch endpoint to send multiple requests in the same payload.
Set relationship attributes with the Pipelines API
You can set relationship attributes using the Pipelines API and most of our integration libraries.
You can set relationship attributes in either a group call or an identify call. In both cases, you’ll put relationship attributes in the traits.relationshipTraits object.
We default object_type_id to 1
You don’t need to define the object_type_id, but we default to 1—your first object type—if you don’t include it.
Update relationship attributes
Just like you can add attributes to objects and people, you can also add attributes to relationships between objects and people. For instance, if someone is related to three account objects, you could set an attribute like role on their relationships to describe how they’re related to each account—like an owner on one account and a member of the others.
To set relationship attributes between a person and an object:
- On a person’s profile, select the Relationships tab.
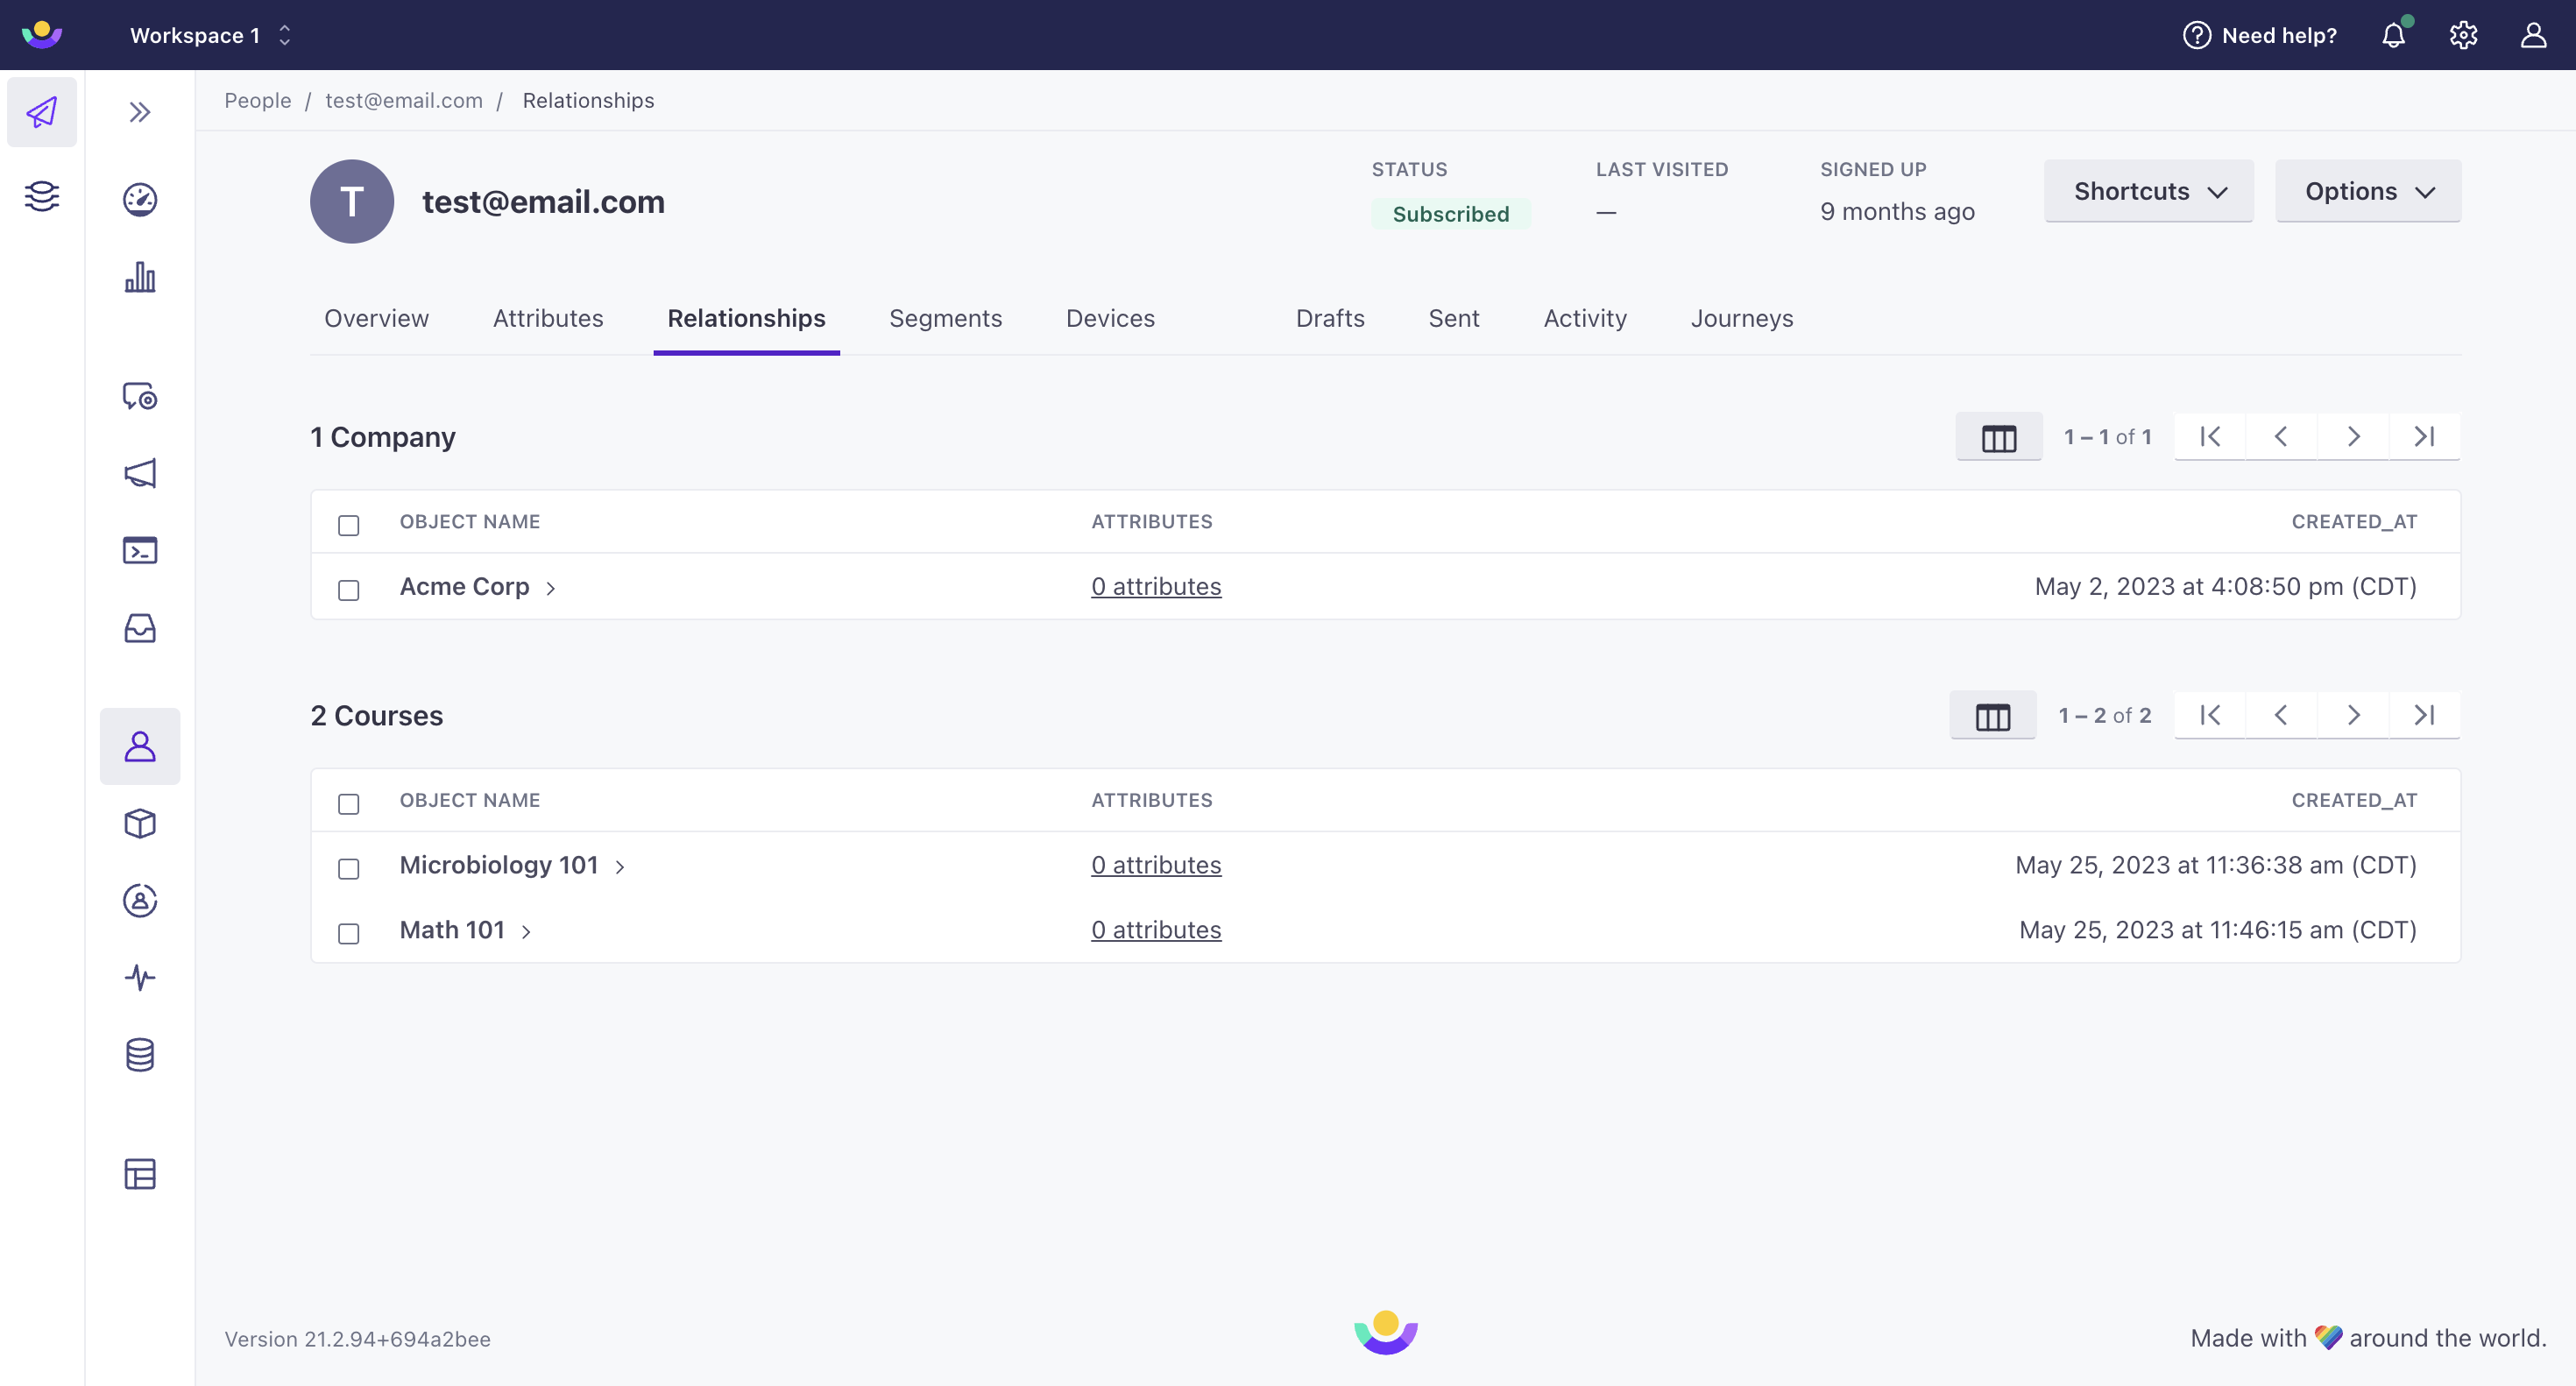

- Click on the attribute count.
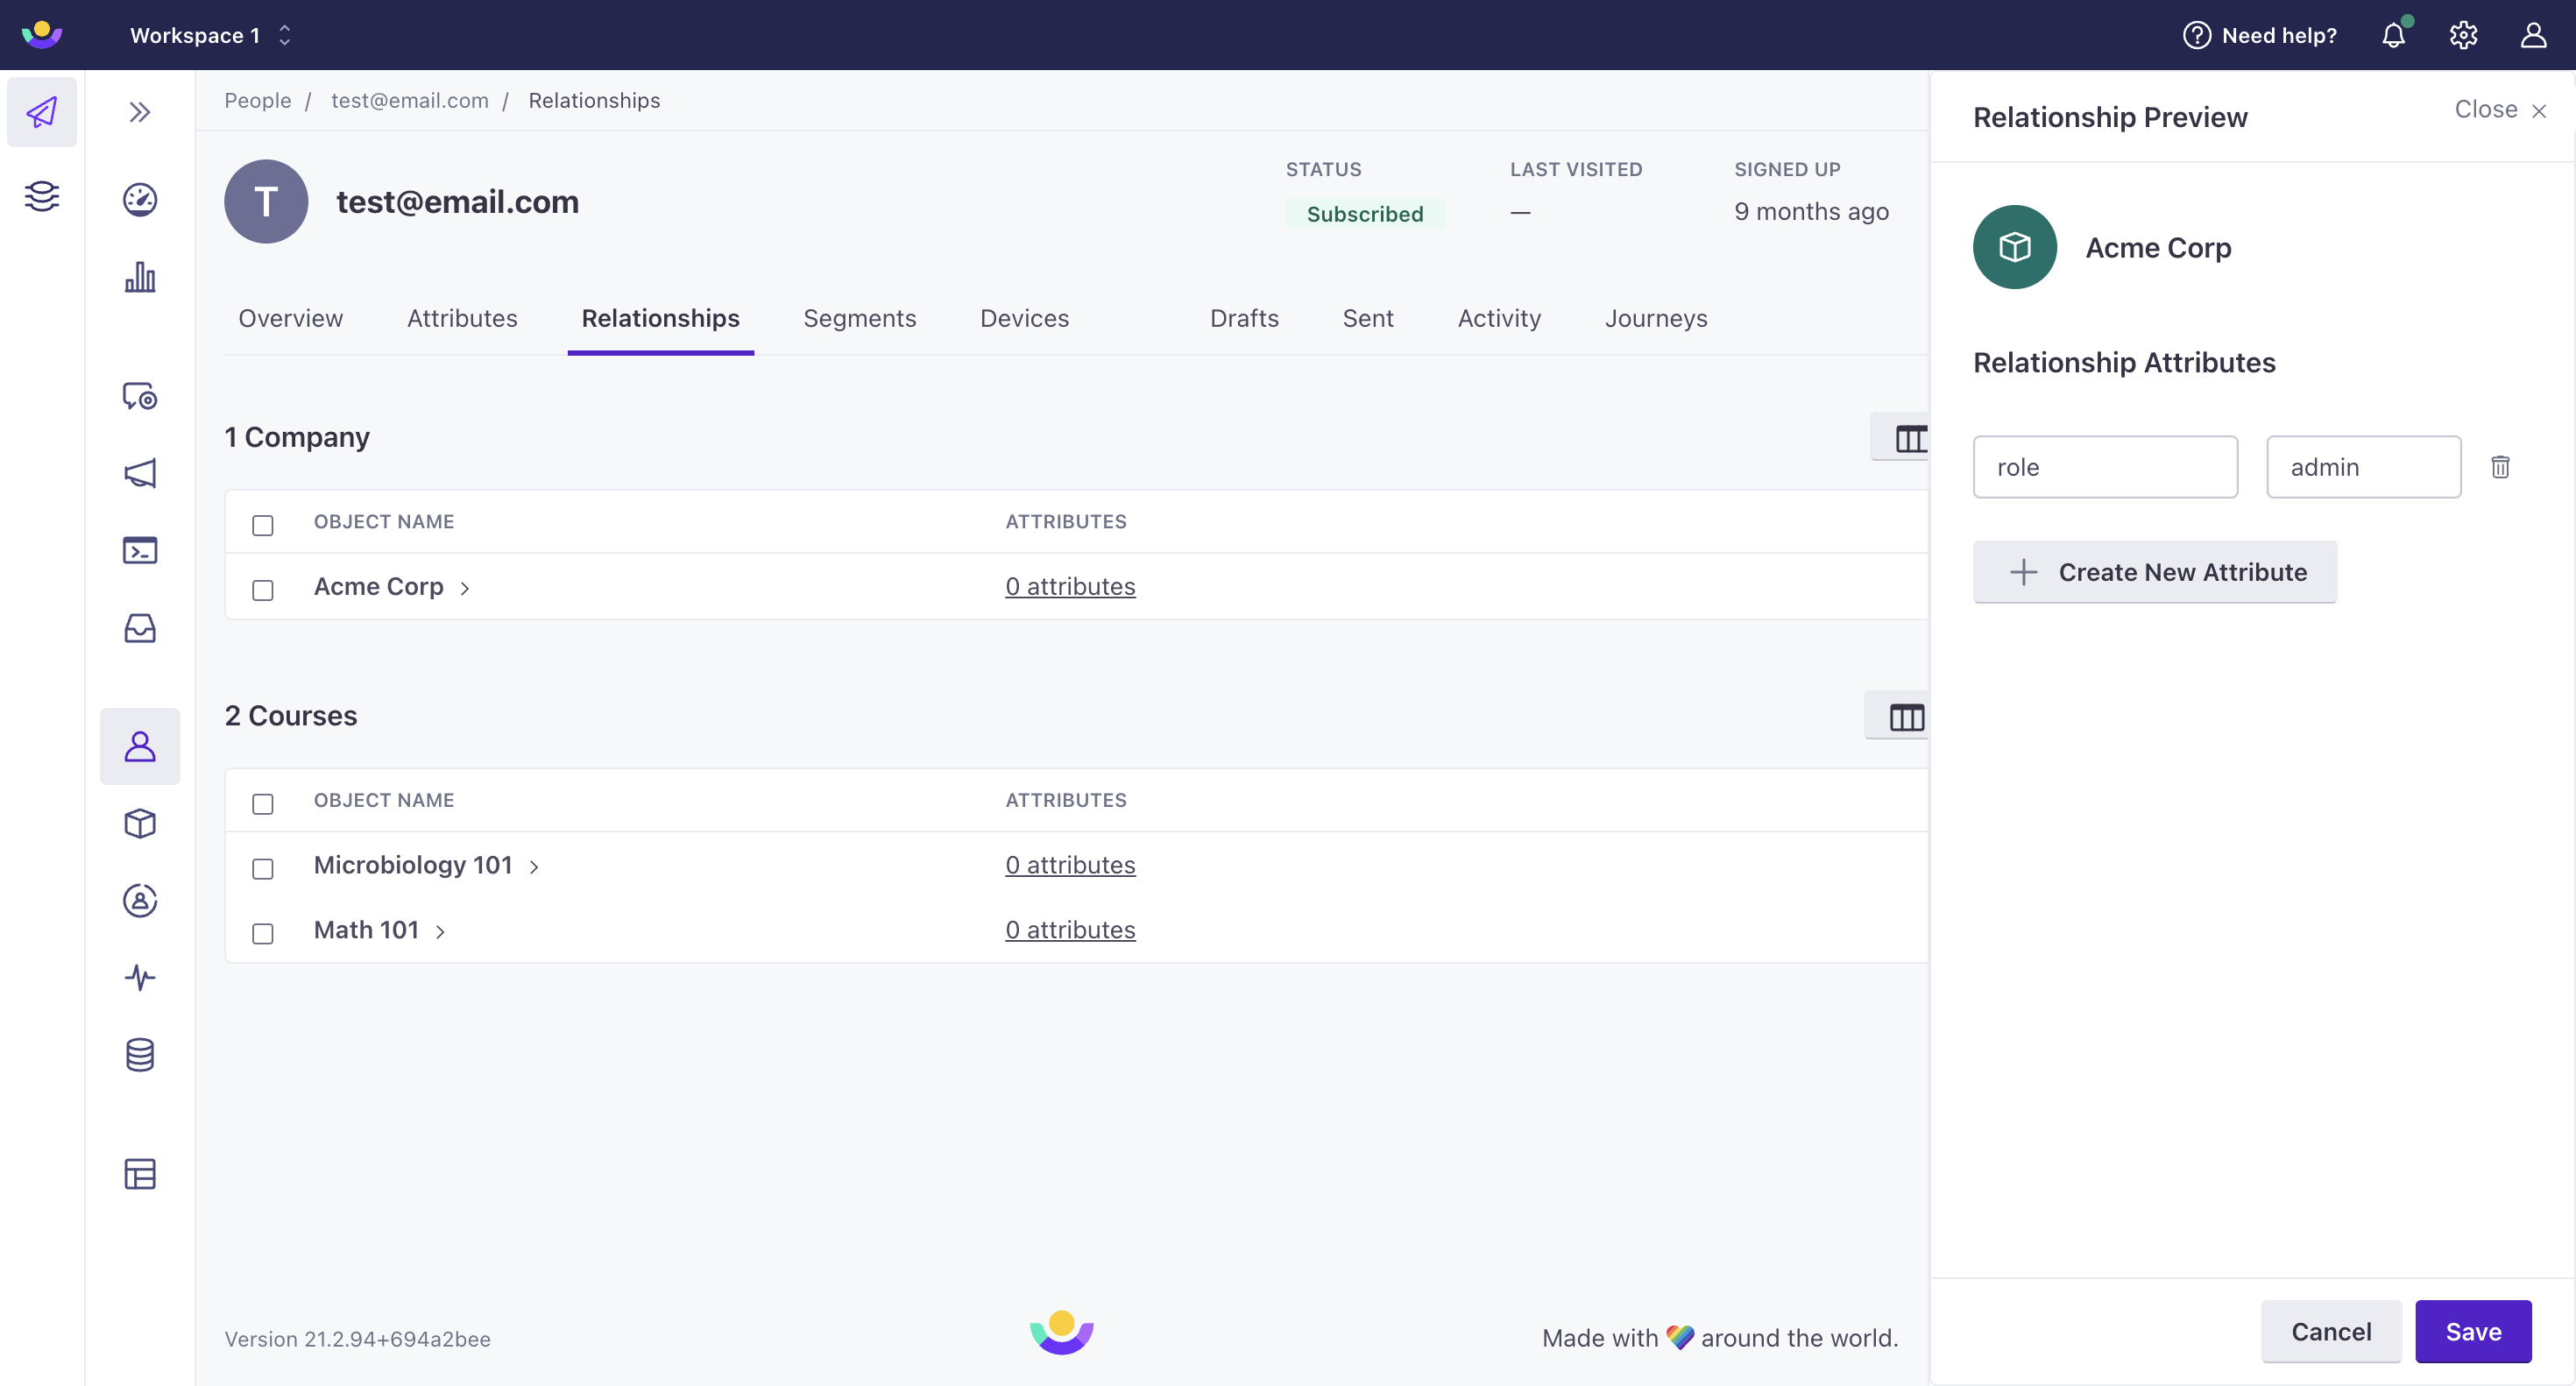

- Click Create New Attribute on the right hand panel.
- Enter the attribute name and value for the person.
- Click Save at the bottom of the panel.
You can also accomplish the above through the Relationships tab of an object’s page.
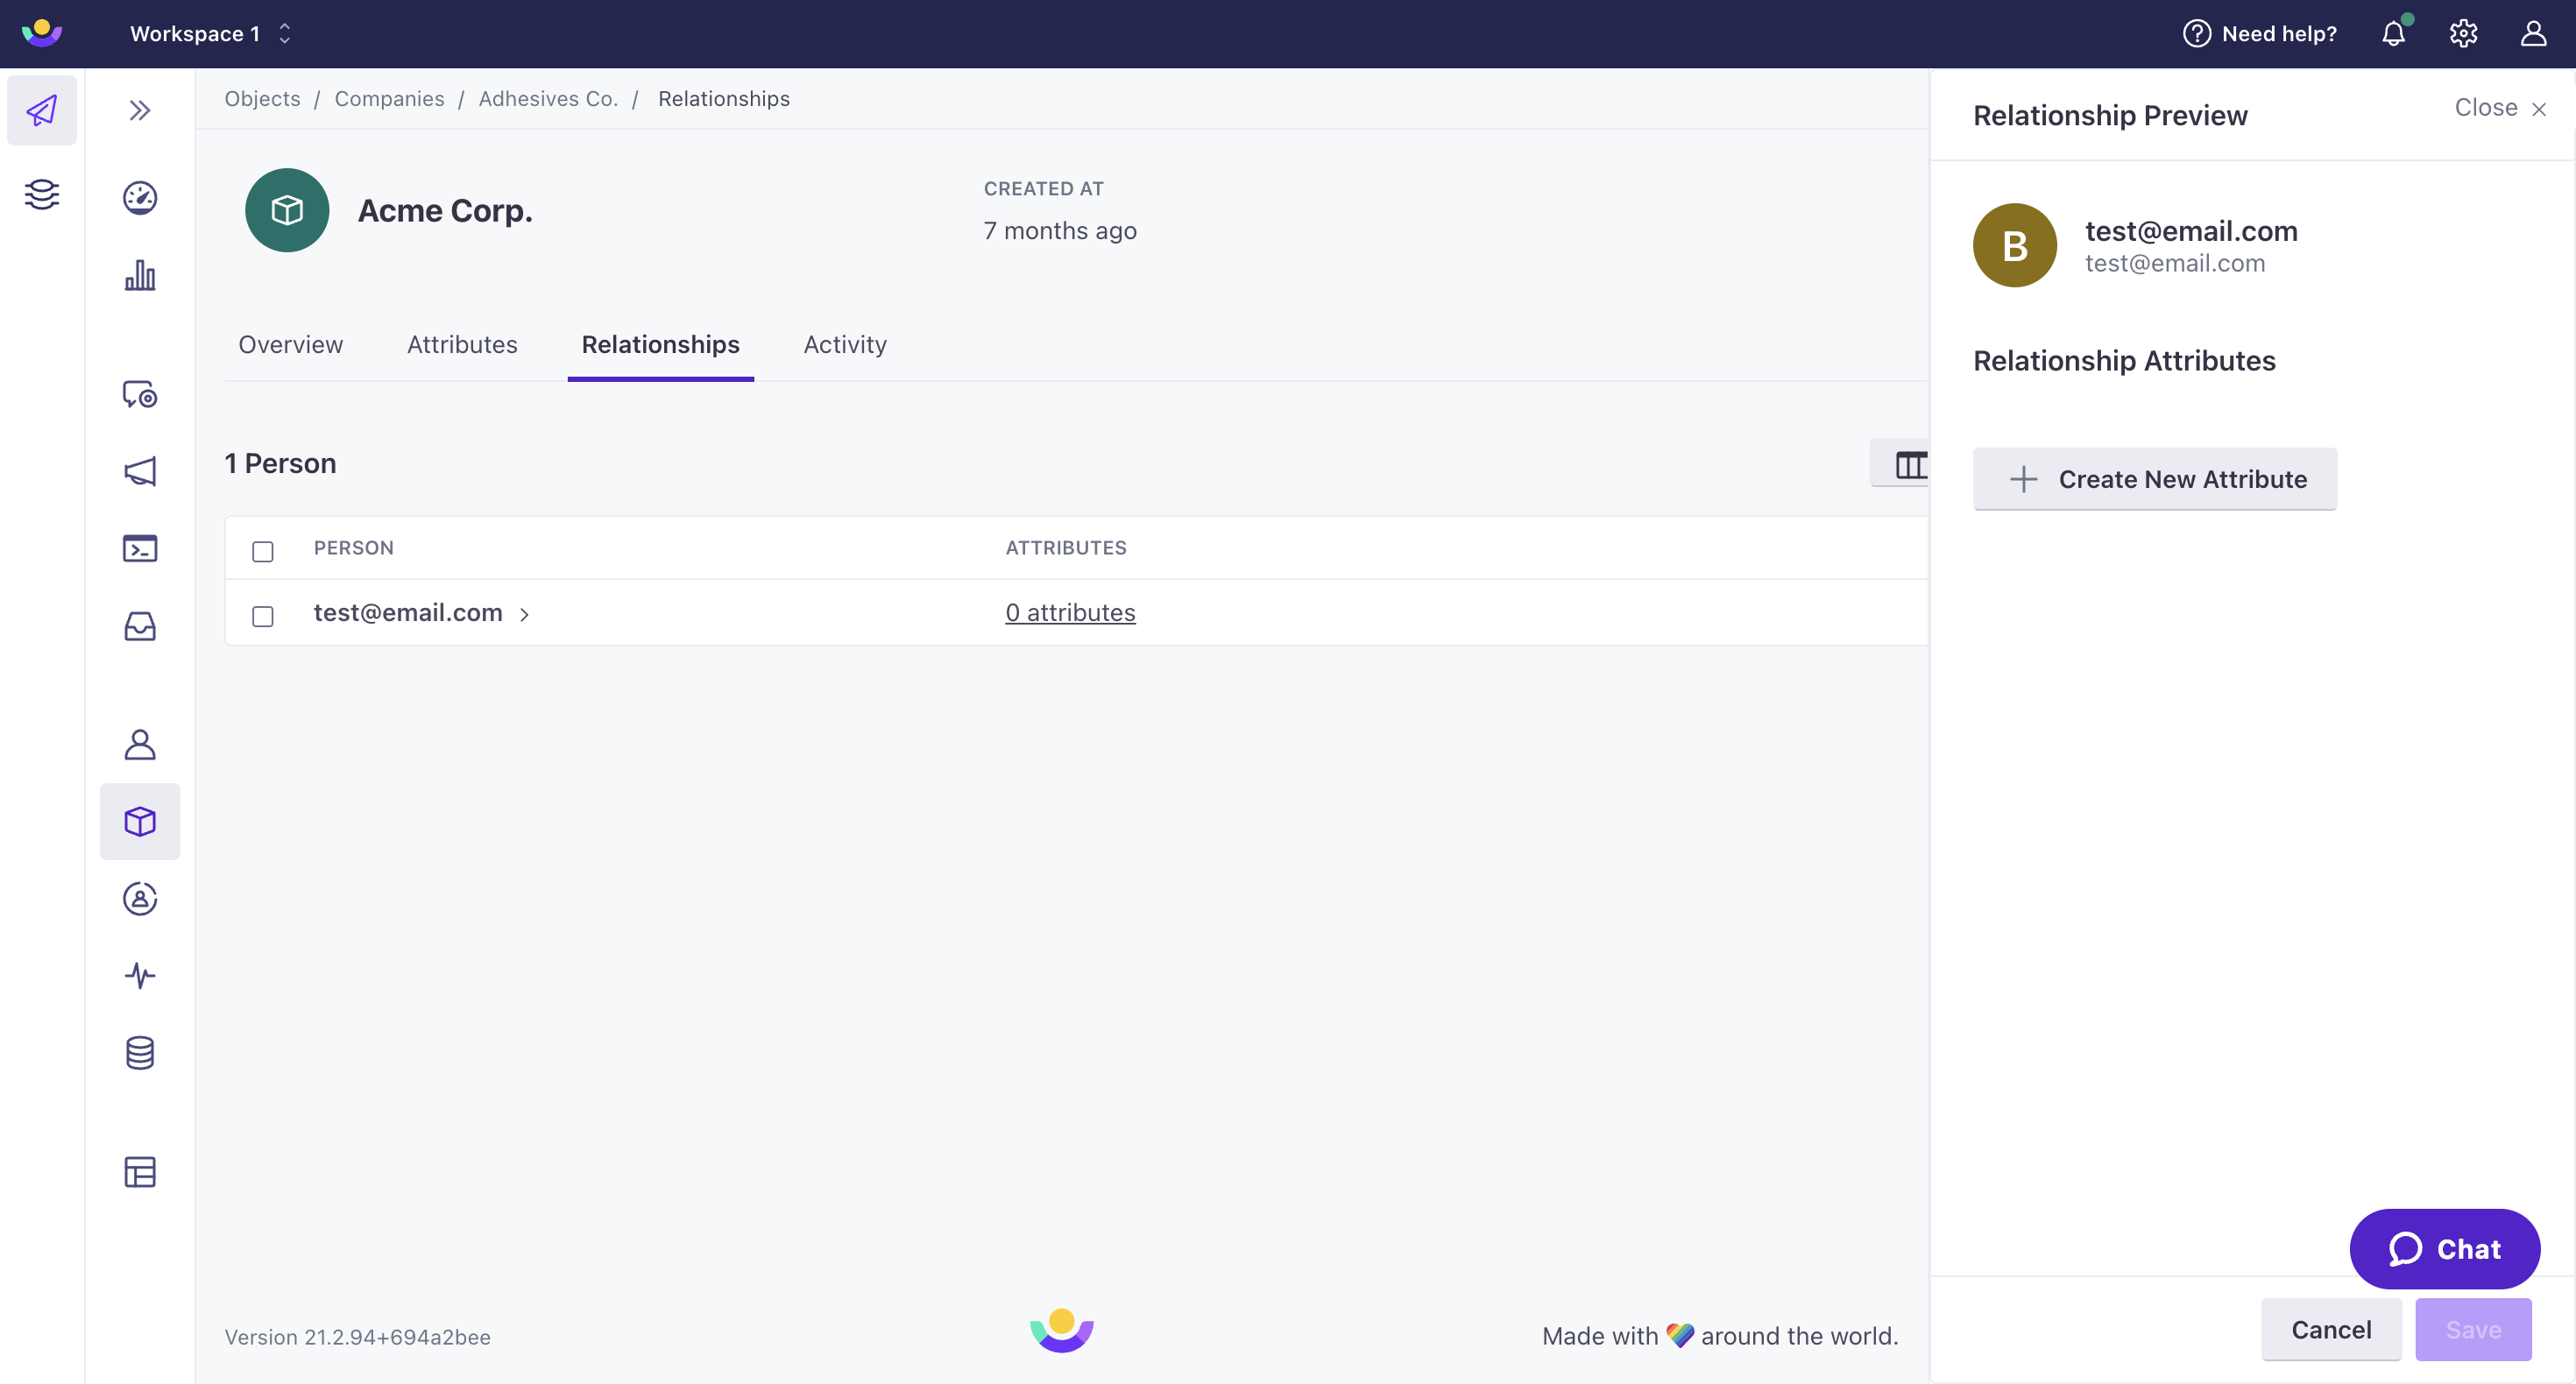

Use our Track v1 or v2 APIs to set relationship attributes programmatically:
Now, you can create a data-driven segment or trigger a campaign based on relationship attributes.
Reserved attributes
Customer.io has reserved these object and relationship attributes to support core functionality in the platform:
| Attribute | Purpose | Required | Data Format |
|---|---|---|---|
cio_object_id | A unique, immutable identifier for objects provided by Customer.io. If this does not yet exist in your workspace, we create a new object. | When importing by cio_object_id | |
object_id | A unique identifier for objects. If the object_id does not yet exist, we create a new object. | When importing by object_id | Our default id limit is set to 150 characters. All valid UTF characters are allowed. |
objectId | String | An analog for object_id in some Customer.io integrations. | |
relationship | Used to reference relationships to objects. Cannot be used as the name of an object attribute. | To reference relationships in liquid | |
_relationship | Used in relationship-triggered campaigns to reference audience members who did not trigger the campaign. Cannot be used as the name of a customer attribute. | To reference relationships in liquid | |
created_at | Unix timestamp when the object was first created. Used when listing objects in the UI, for example. | No | Unix timestamp |
timezone | The user’s time zone. Used for sending localized messages. | No | Region Format |
Find object relationships
You can find relationships from the Relationships tab of an object or person page.
To see who is related to an object:
Select an Object Type under People in the side menu.
Select an Object.
Click the Relationships tab to view a list of related people.


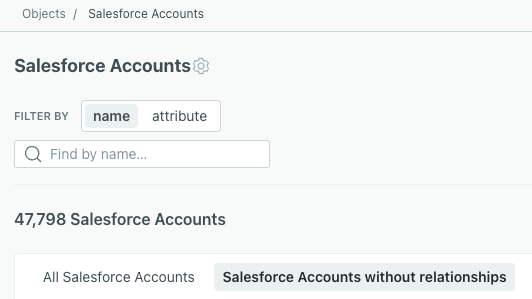
Filter for objects without relationships
Filtering for objects without relationships can help you determine if you have unused objects. Since objects count towards billing, it’s best practice to review them monthly and delete the objects you don’t need.
Select your object type in the left-hand navigation, and then click Objects without relationships to review them.

Learn more about how billing works and how to reduce billing overages.

