Delete inactive people
UpdatedIf a lead doesn’t convert or a user is inactive for a prolonged period of time, you should delete them to preserve your deliverability metrics and reduce your billable profile count.
You can create a campaign that tries to re-engage people one last time. If they re-engage, like open the email or click a link, they exit the campaign. If they don’t re-engage, the campaign deletes them through a webhook action.
How removing people impacts your workspace
You can delete or suppress a person to remove them from your workspace.
- Deleting a person removes them from your workspace, but they can be added back with the same identifiers at any time.
- Suppressing a person removes them from your workspace and prevents them from being added back to your workspace with the same identifiers. This is important for GDPR compliance and other regulations.
After you delete or suppress a person, metrics stay intact but become anonymous. Metrics for deleted people are associated with their Customer.io-generated identifier—cio_id, while metrics for suppressed people become anonymous.
Your current billing cycle counts the profile you removed, but future billing cycles will not. Learn more about calculating profile counts and billing overages in How we bill.
If you re-add deleted people, their historical activity does not show on their new profile. Each person in your workspace is unique, so historical activity is associated with the deleted profile, not the new one.
For more on the differences between deletion and suppression and other ways to remove people from your workspace, check out Delete people and suppress profile IDs.
Create a campaign to delete people
In this recipe, you create a campaign that deletes people in a dynamic segment, which means that as people enter the segment, they trigger your delete campaign. This recipe helps you maintain your workspace profile count automatically, so you can set this up once and let your workspace take care of the rest.
To delete people from your workspace, create a campaign with the following criteria:
- Trigger criteria that captures people who are inactive, didn’t convert, or otherwise should be removed from your workspace
- A message that notifies them of inactivity or encourages them to re-engage before they’re deleted
- A delay to give them time to re-engage
- A webhook action (Also known as the Send and receive data block) that deletes the person if they don’t re-engage
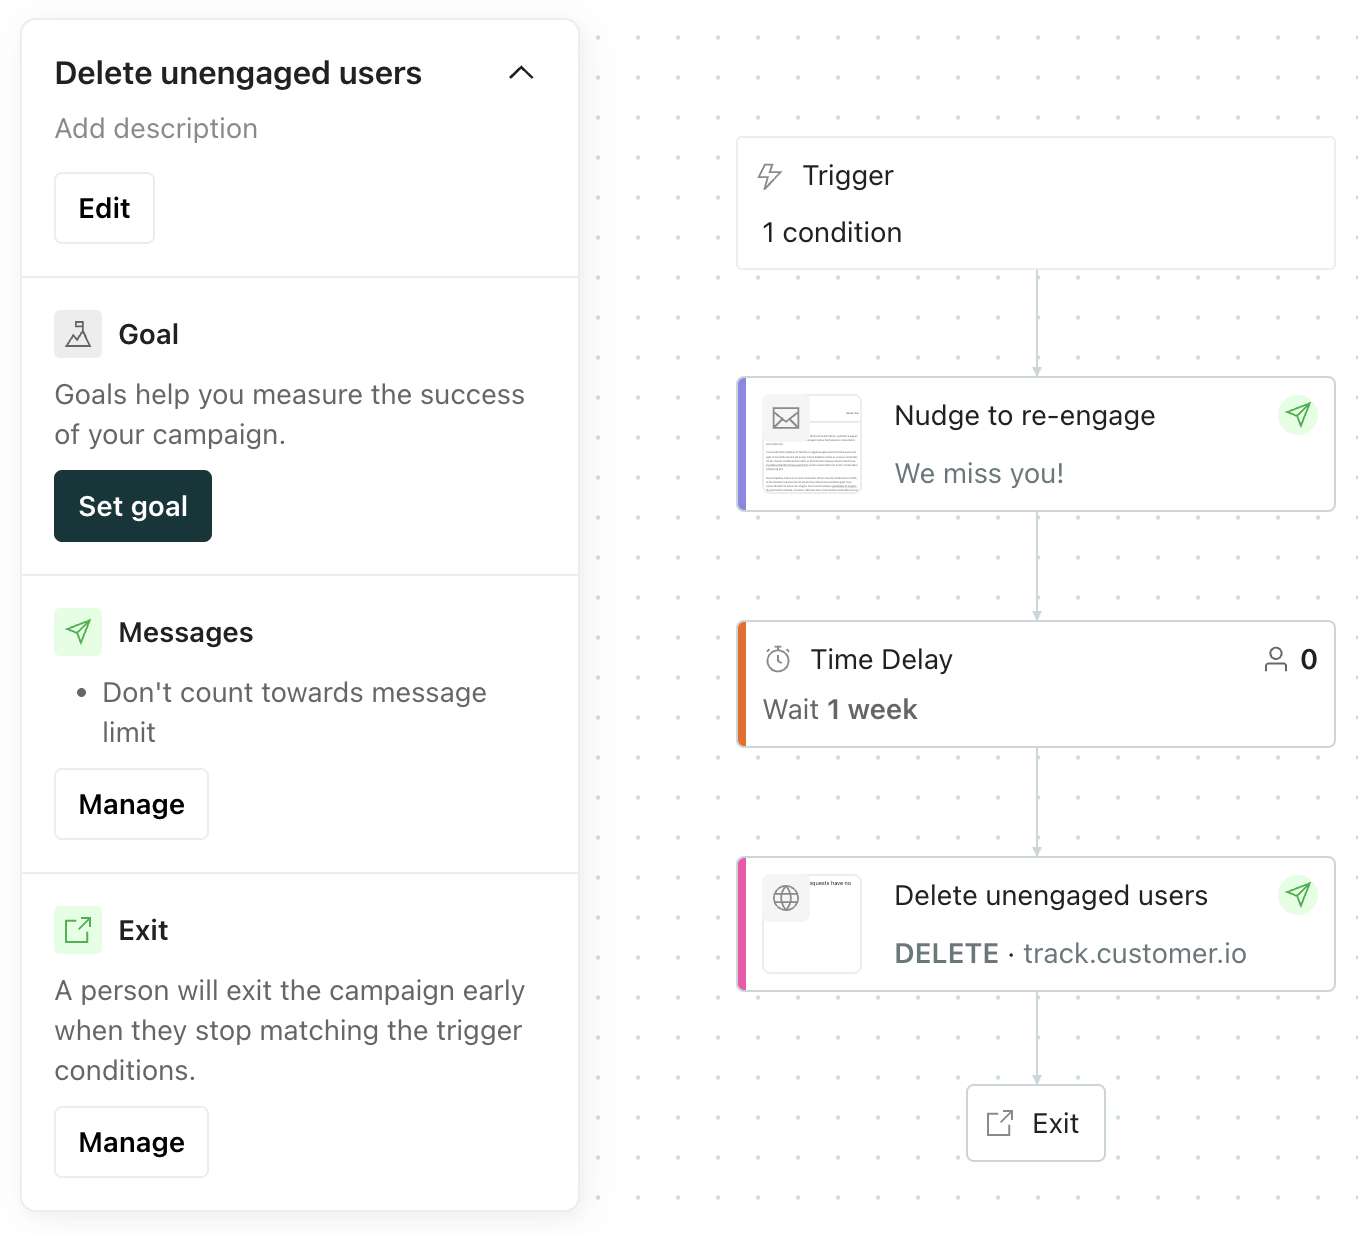
In this example, you create a campaign triggered by a segment that groups inactive users, email them to re-engage, then delete them if they don’t.
1. Create a segment for the people you want to delete
In this example, you create a segment that groups inactive users.
- Go to Segments and click Create Segment.
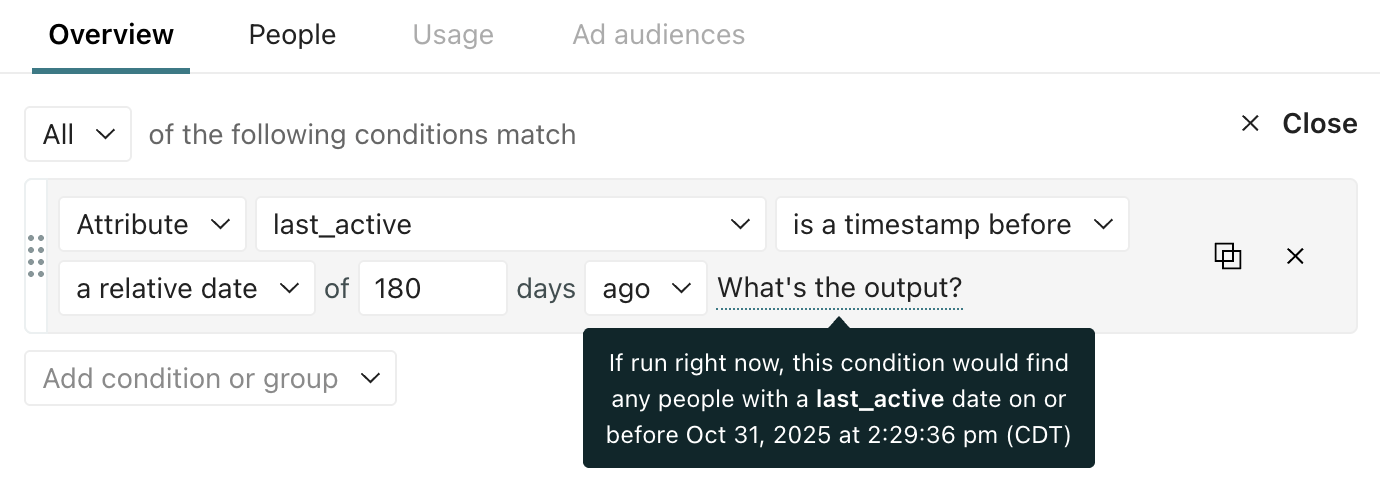
- Define the conditions that match the profiles you want to delete. For example, to target unengaged customers, you might set conditions like:
- Last active more than 180 days ago
- Hasn’t opened any emails in the last 90 days

Click Describe changes to ask the Agent for suggested conditions. Remember to review the results and modify as needed before saving.
- Last active more than 180 days ago
- Name your segment something descriptive, like “Unengaged - Delete candidates,” so you can quickly find it when creating your campaign.
- Review the people in your segment before you use it as a campaign trigger. Make sure the segment only matches profiles you actually want to delete!
2. Create a segment-triggered campaign
Next, assign your segment of inactive users as the trigger of a campaign.
- Go to Campaigns and click Create Campaign.
- Click Choose trigger, then select Attribute or Segment.
- Choose the segment you created in step 1.
3. Add a “last chance” email
Send inactive users a final nudge encouraging them to re-engage.
- Drag an Email action onto the canvas, and select Add Content.
- Write your message. It might include a discount code or other information to encourage people to engage with your offerings.
- After you save your changes, go back to your workflow, click the email, and select Settings. Update the sending behavior from Queue Draft to Send Automatically. This ensures the email is sent automatically when a person reaches your email action.
4. Add a delay to give them time to re-engage
Add a Time Delay to give people a set amount of time to re-engage before they’re deleted.
- Drag a Time Delay action under your email action.
- Set the delay to the amount of time you want to give people to re-engage, like 1 week.
5. Add a webhook action to delete profiles
If people don’t re-engage, delete them from from your workspace using a webhook action.
- Drag a Send and Receive Data action onto the canvas.
- Click the webhook action and then click Add Request.
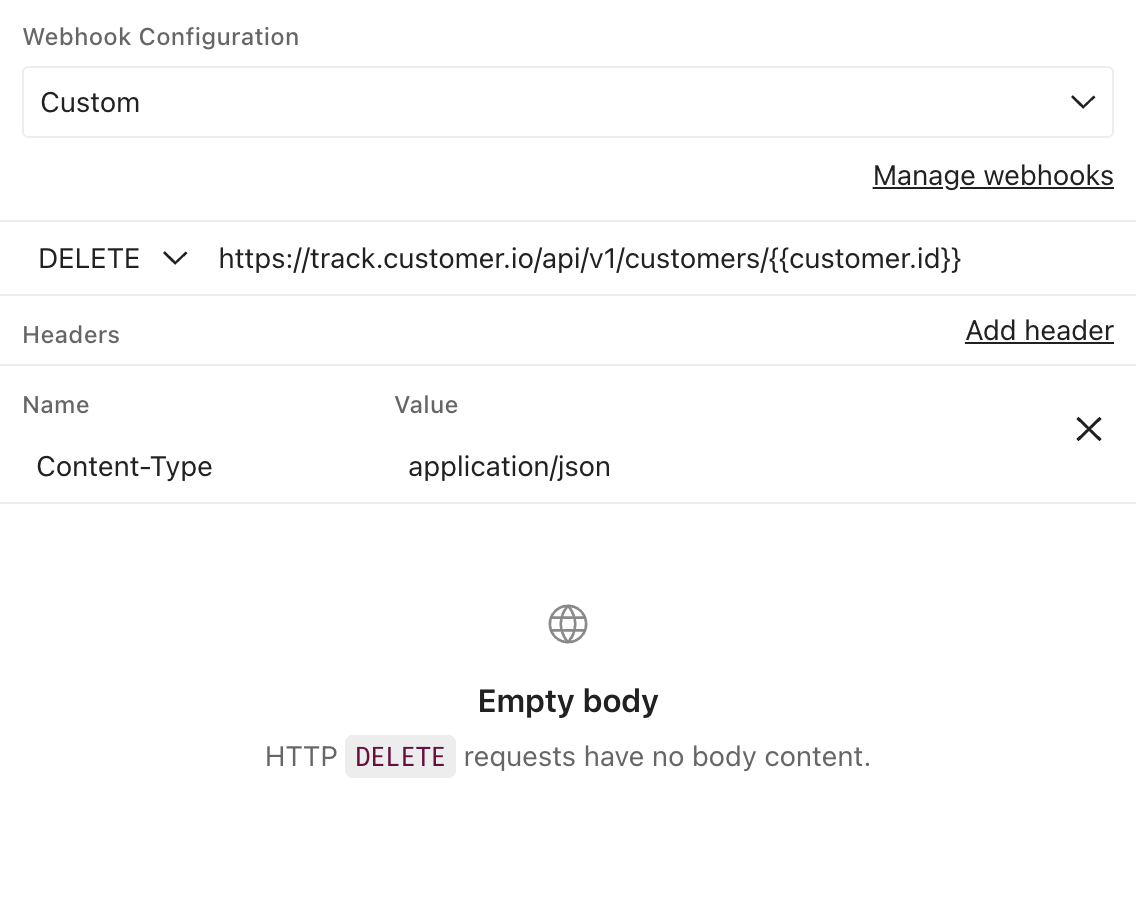
- Decide whether to delete only, or delete and suppress people. Learn more about the differences. Then add your request method and URL.
- To delete a person, use this Track API call: Delete a customer.
- To delete and suppress, use this Track API call: Suppress a customer profile.
If your workspace is in the EU region, use
track-eu.customer.ioinstead oftrack.customer.io.
- To delete a person, use this Track API call: Delete a customer.
- Replace
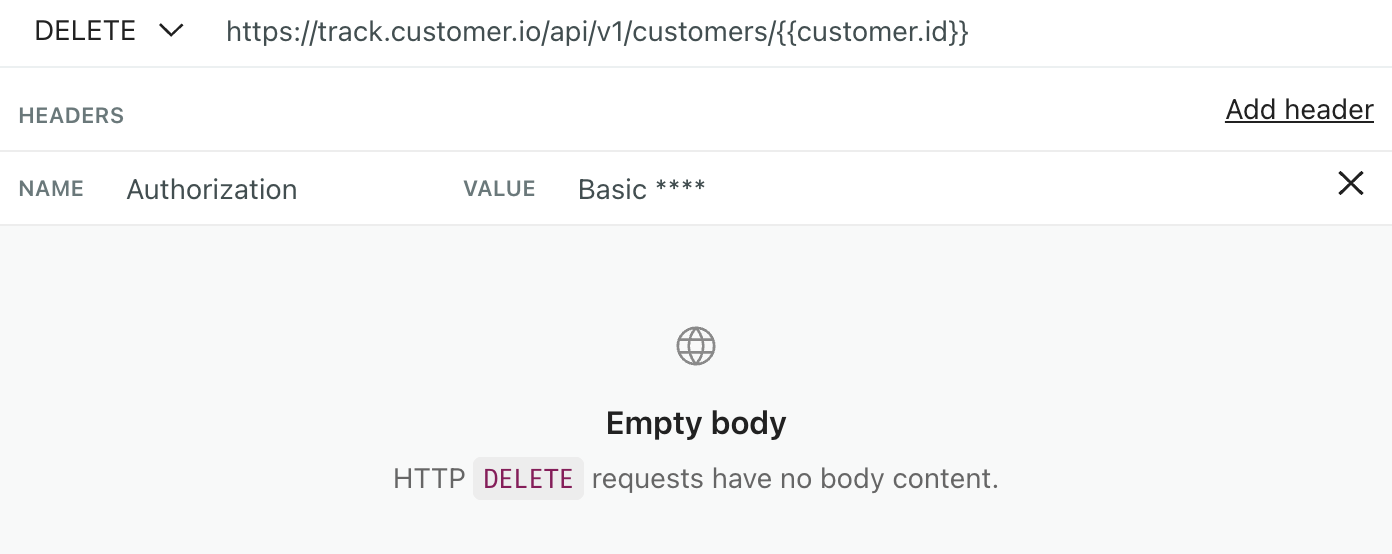
{identifier}with the identifier you want to use. You can always use{{customer.cio_id}}, an attribute assigned by your workspace, to delete them. Otherwise, check your workspace settings to see which other attributes are considered identifiers. - Add a Basic Authorization header with your Track API credentials. It must be base-64 encoded. You can ask the Agent to set up your header for you!
- After you save, go back to your workflow, click the webhook, and select Settings. Update the sending behavior from Queue Draft to Send Automatically. This ensures the webhook fires automatically when a person reaches this step.
6. Set your exit criteria
To make sure people exit your campaign if they re-engage, go to your exit criteria.
- Click at the top of your campaign.
- Choose Exit conditions.
- Set people to exit your campaign when they stop matching the trigger conditions.
Remember that people trigger your campaign when they become inactive, so this exit criteria means people exit your campaign when they become active again, that is, when they leaves your trigger segment.
7. Review and start your campaign
- Click Start Campaign to review your campaign settings.
- Choose between Current people and future additions or Future additions only. If you want people currently in your segment to trigger the campaign, choose Current people and future additions.
- Schedule the campaign or activate it now.

