Test your in-app messages
UpdatedYou can send test messages and preview in-app messages on your website before you send them to a live audience. These features help you validate your integration and make sure your messages look and behave the way you want them to.
There are different ways to test your in-app messages:
- Live preview: Preview your web message in real time on your actual website. Adjust display settings on the fly and see changes sync back to the editor automatically.
- Send a test message: Send a one-time test of your message to check that it shows up in the right place and behaves the way you expect.
| Send test | Live preview | |
|---|---|---|
| How it works | Sends a one-time test message | Opens an interactive session |
| Settings | Uses editor settings | Adjustable on the fly via preview bar |
| Platforms | Web and mobile | Web only |
| Duration | One-time | 30-minute session |
Preview your message on your website
Live preview lets you see your in-app message on your actual website as you build it. Unlike Send Test, which sends a one-time test message, live preview opens your website in a new window. You can adjust display settings—like position, display type, and max width—directly on your website and see your changes reflected in the editor in real time.
This is a great way to make sure that your message looks and behaves the way you want it to before you send it to your audience.
To start a live preview session:
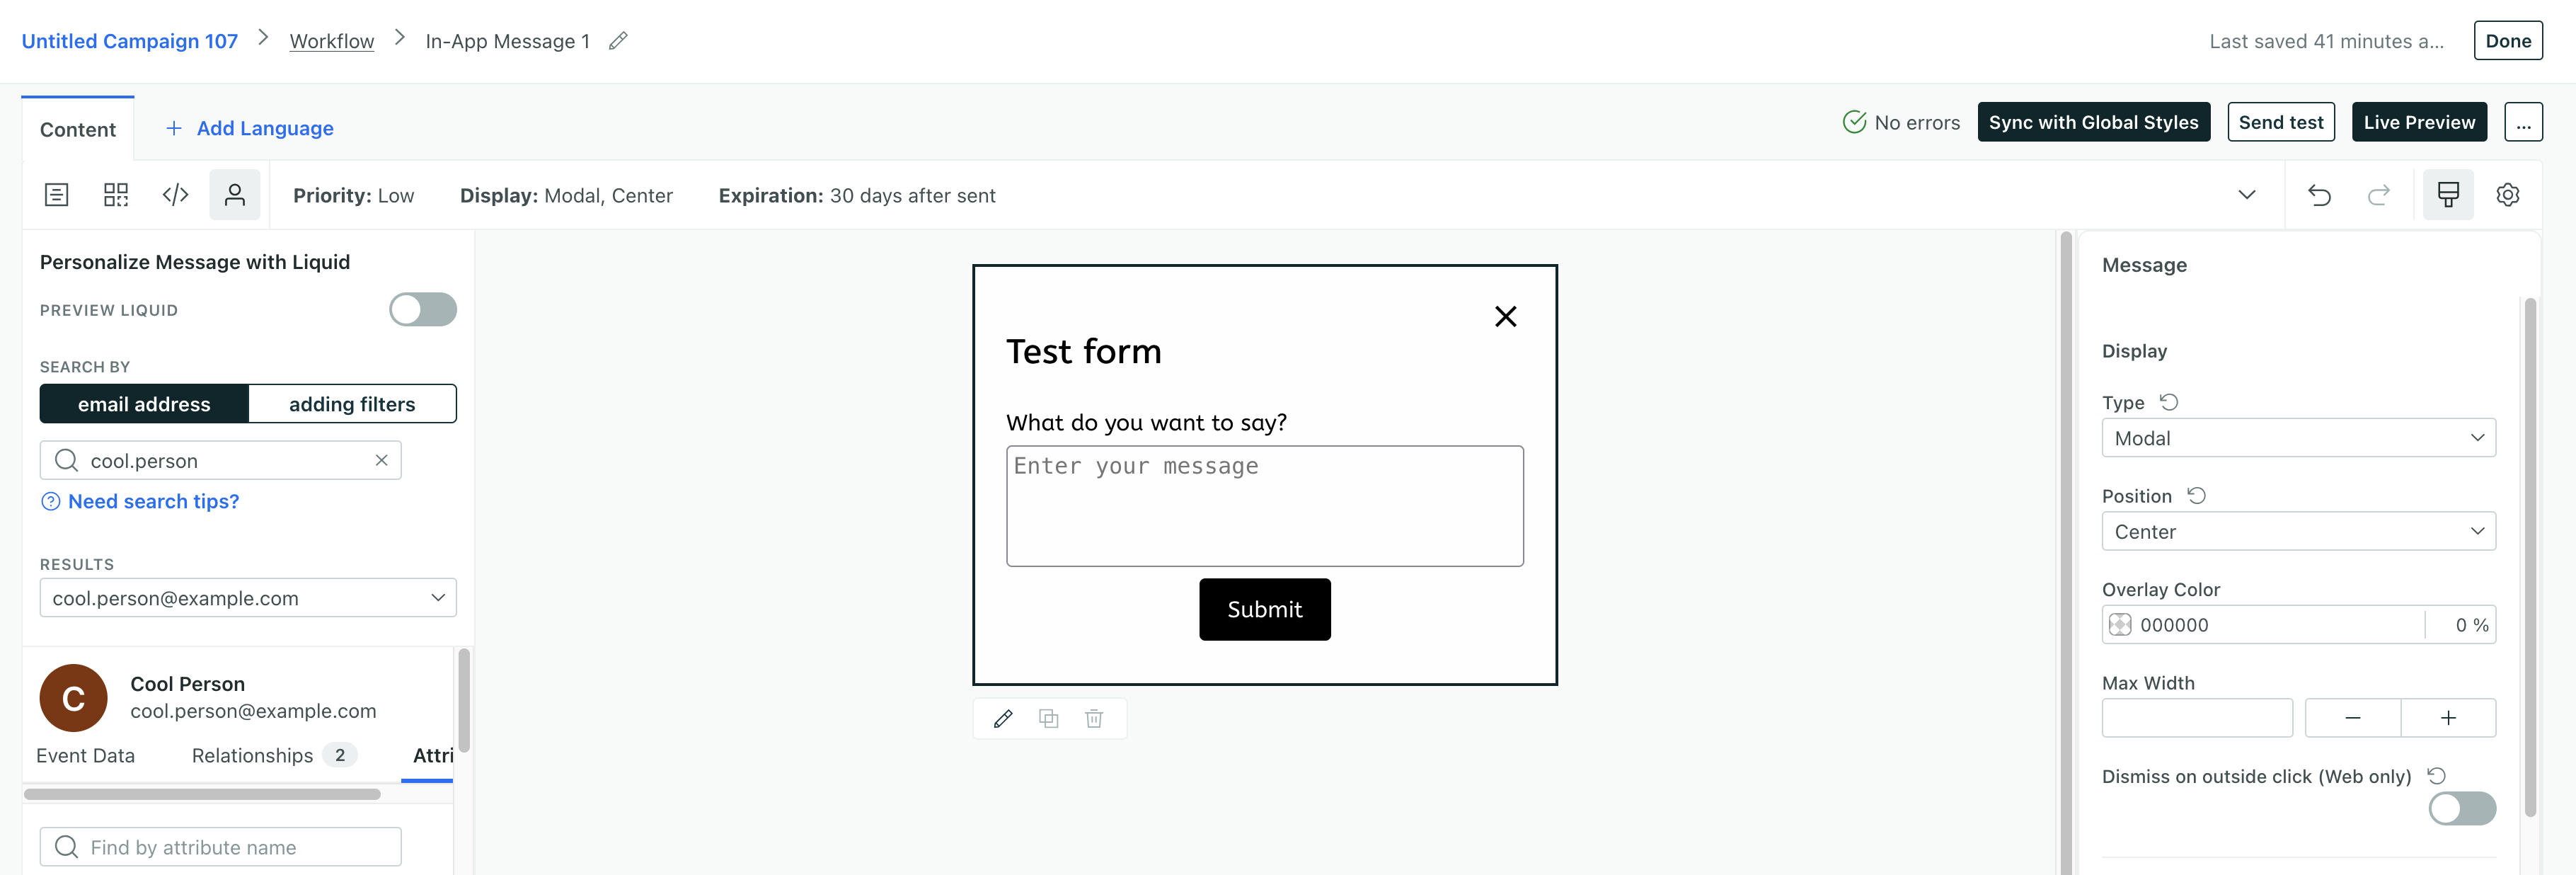
(Optional) In your in-app message, select a person you want to preview your message for. This populates the preview message, so you can test liquidA syntax that supports variables, letting you personalize messages for your audience. For example, if you want to reference a person’s first name, you might use the variable
{{customer.first_name}}. in your message.Click Live Preview.
Enter the URL of the page on your website where you want to preview the message.
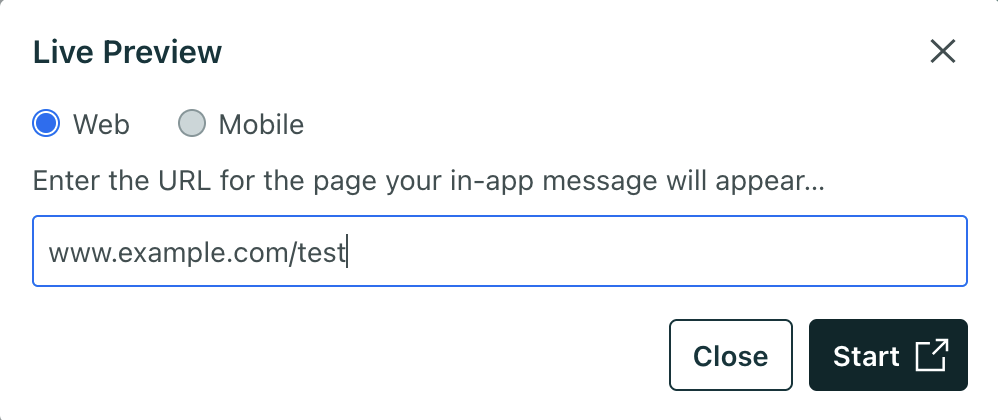
Click Start. Your website opens in a new browser window with a preview bar at the bottom.
Use the preview bar to adjust display settings. Changes you make in the preview bar sync back to the editor automatically.

For tooltip messages, your tooltip won’t appear unless you’ve already selected a target element. If you haven’t selected a target yet, click Select Element in the preview bar and click the element you want to anchor the tooltip. This automatically generates the CSS selector for you.
Return to Customer.io and click End Preview to end your preview session when you’re done.
Preview sessions last up to 30 minutes
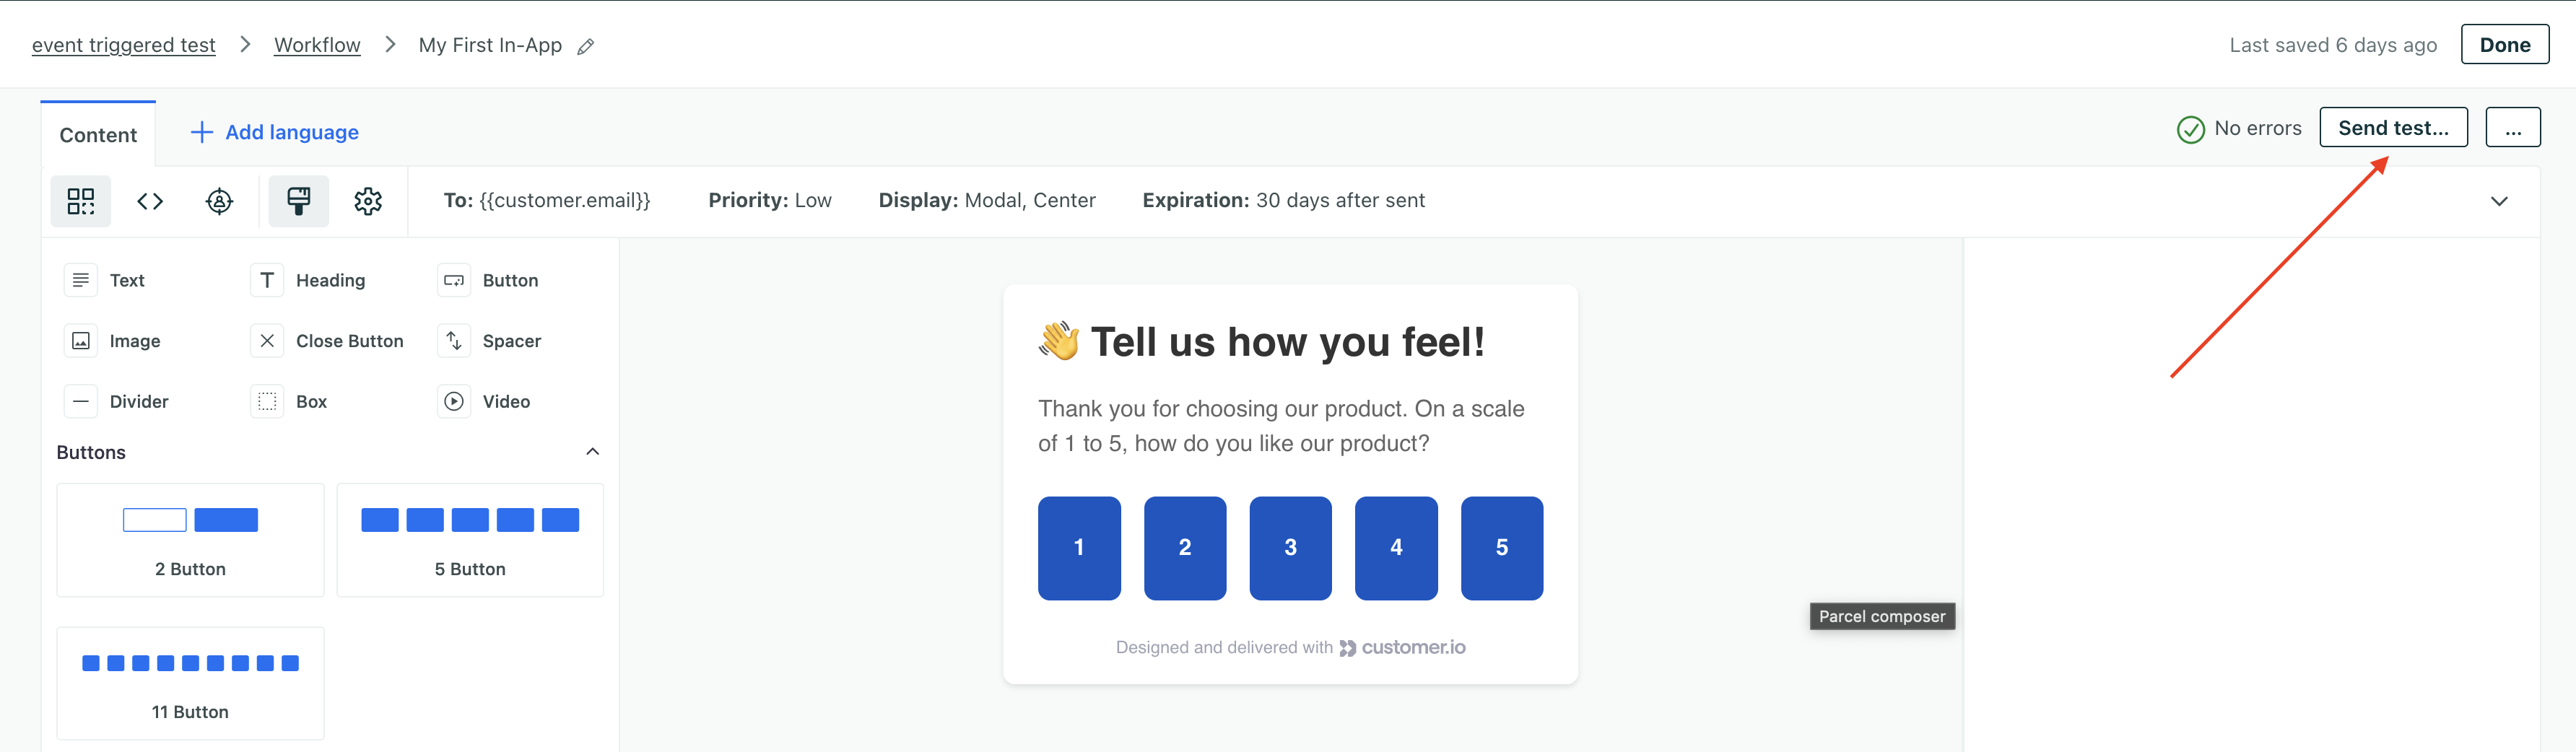
Send a test message from a campaign or broadcast
In a campaign or a broadcast workflow, you can click Send Test to test a real message. This lets you make sure that your message behaves the way you expect: it shows up on the right page or screen; it appears in the right place on a page or screen; and the content all renders as you expect it to.
Click Send Test.
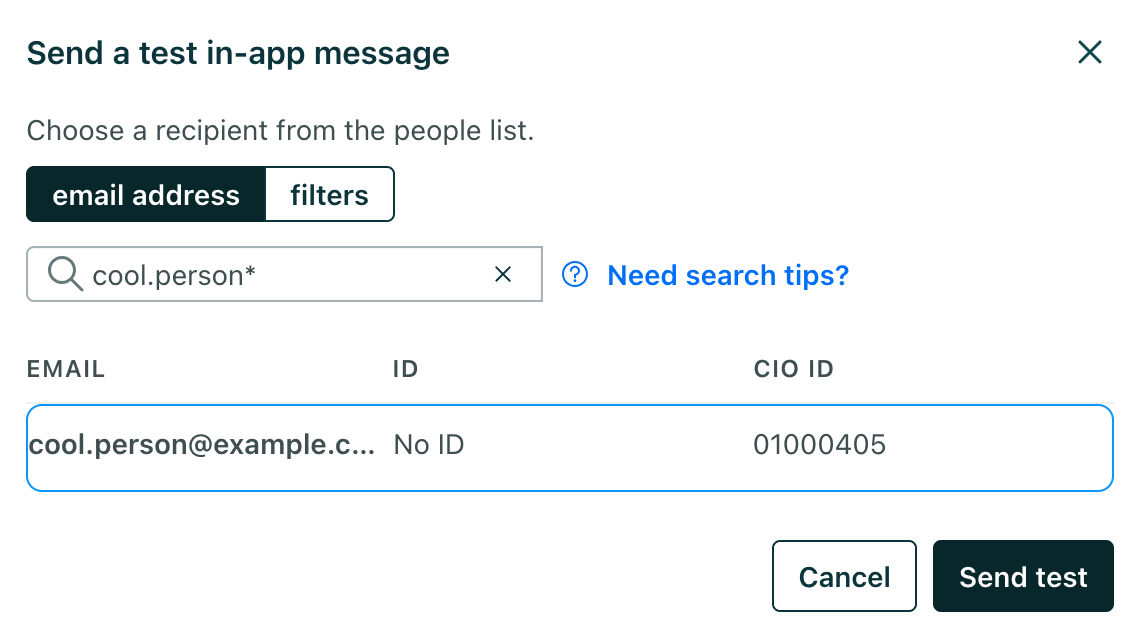
Enter the email or ID of the person you want to send your test to and click Send Test one more time.
Open the app or website where you expect the test to appear and verify that your message works the way you expect it to.
If you’re sending your very first message or test, you should start with your app or browser closed. If your app or browser are open when you send your very first test message, you may need to close and reopen your app, clear your browser cache, or refresh your page to get your message right away!
If the message includes redacted data (that is, an admin has hidden sensitive attribute values from you), then test sends will not show the values for those sensitive attributes.
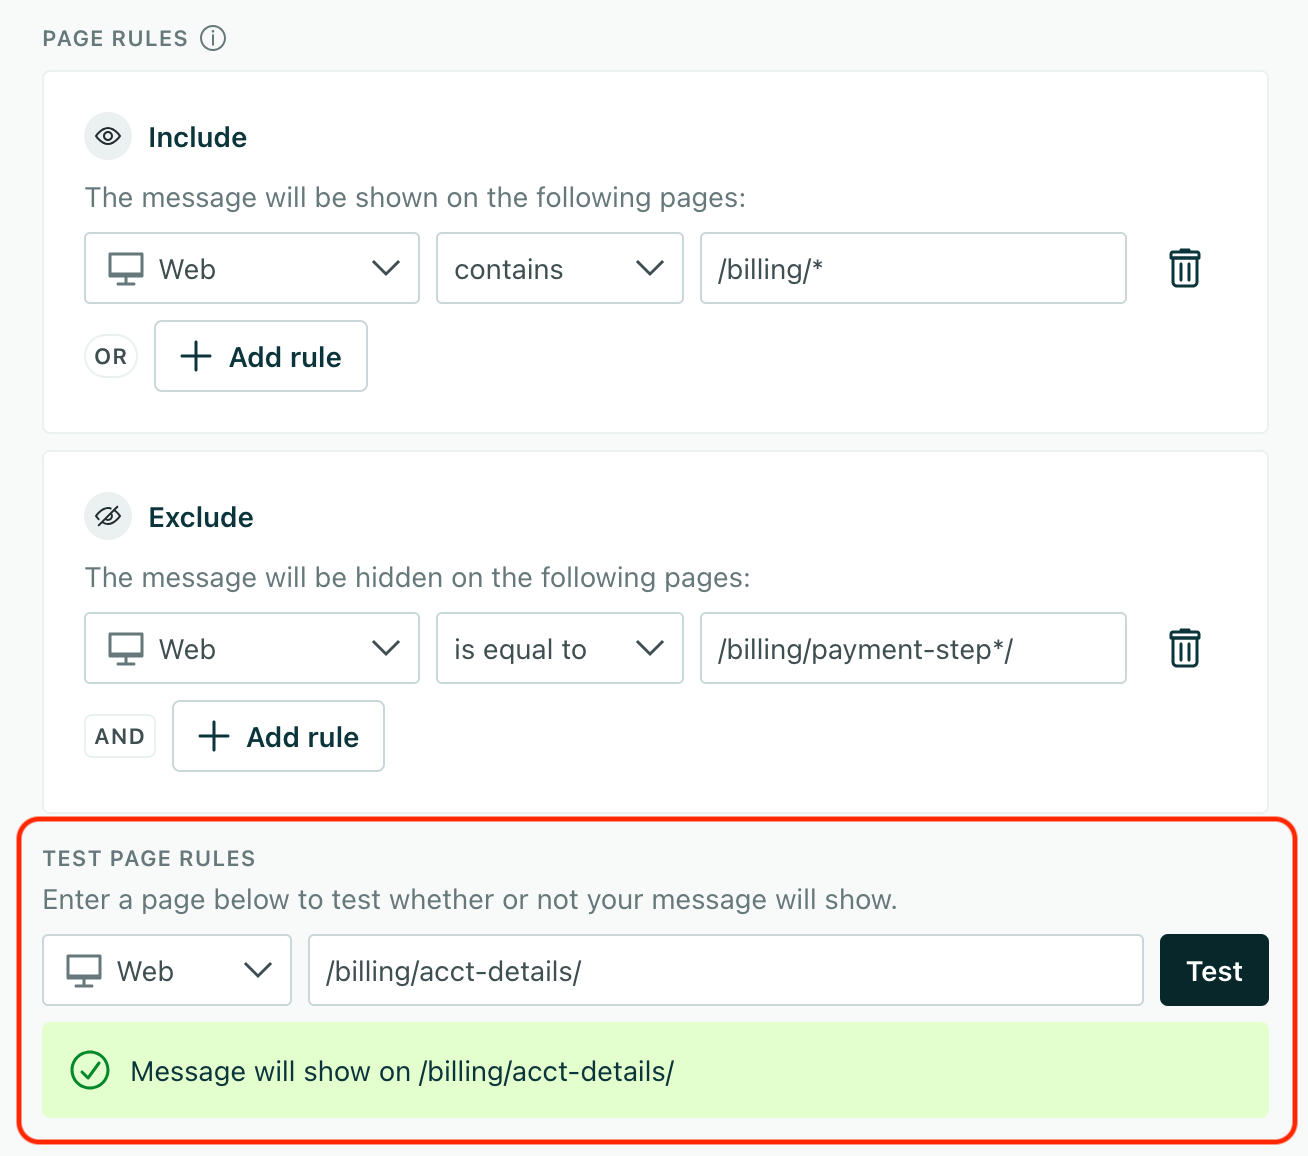
Test your page rules
Page rules may contain regular expressions, and the rules along which we evaluate them can be hard to understand. That’s why we have the Test Page Rules section below the page rule editor.
Here you can enter a URL or page path and see whether your message will appear or not. Use tests to fine-tune your page rules and make sure that your message appears on the right pages before you send it.
Tips for testing messages
You probably want to have some debugging tools available when you open your message. Nothing fancy but:
- For your website: open the inspect view in your browser so you can verify the styles in your message. You may even want to inspect the network calls to make sure that your buttons perform the correct actions.
- For your mobile app: you may want to set the Customer.io SDK log level to
debugso you can trace every aspect of your in-app message, from receipt to dismissal. - Close your browser or app before you send your first test! Before you send your very first message, we poll for messages at a slow rate. We update this rate when you send your first message—but only if your browser or app is closed. If you have your app or website open when you send your first message, it may take up to 3 minutes to see your message. This delay only occurs for the very first message you send from Customer.io.
- If you send your first test before you close your app or browser, you can clear your cache or restart your app to actively poll for messages.
Troubleshooting tips for your in-app integration
If you send a test message and don’t receive it:
Check that you sent your test to the correct user.
Make sure that you’ve identified the person you want to send your test to.
If testing your website, you might try sending a manual identify call in the console to get your message. If you get the message after you send an identify call manually, then your problem might be in how you send identify calls from your code!
cioanalytics.identify(<id or email>)Check your browser console or debug messages for errors on your website. You can trace traffic to and from Customer.io to find the error. On your website, you should see calls for
i(identify) andp(page) before you get your message.If you have a single page app, make sure that you’ve set up page calls correctly. We only send page calls automatically when a page loads. If you have a single page app, that won’t happen, so you’ll need to send page calls manually when the route changes.

