Set up a transactional push
UpdatedTransactional messages are email or push notifications that your audience implicitly opts-into, like a transaction receipt or a password reset request. You can send transactional messages programmatically through Customer.io.
Before you begin
Before you can send transactional push notifications you need to:
- Enable Push Notifications in your workspace for Android and/or iOS.
- Set up your app to receive push notifications from Customer.io. We strongly recommend that you use our SDKs. If this isn’t an option, you can follow the instructions here to configure push without our SDKs.
Create a transactional push notification
Try our Postman collection!
You can use our Postman collection and associated environment to get started with the Customer.io API. Our environment is based on our US endpoints; if you’re in our EU region, you’ll need to add -eu to track_api_url and app_api_url variables.
Go to the Transactional page and click Send your first message or Create message—depending on whether there are already transactional messages in your workspace.
Name your message and provide a description. These fields help your team members understand what kind of message this is (like “Password Reset Instructions”). You can also use the Name of your message instead of the
transactional_message_idwhen you send your message.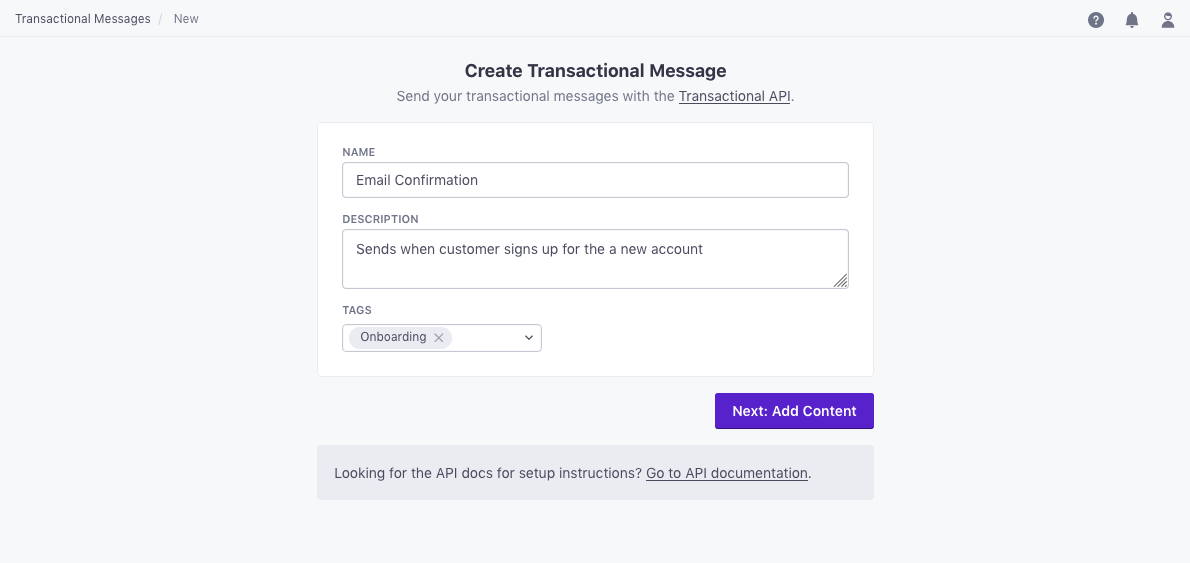
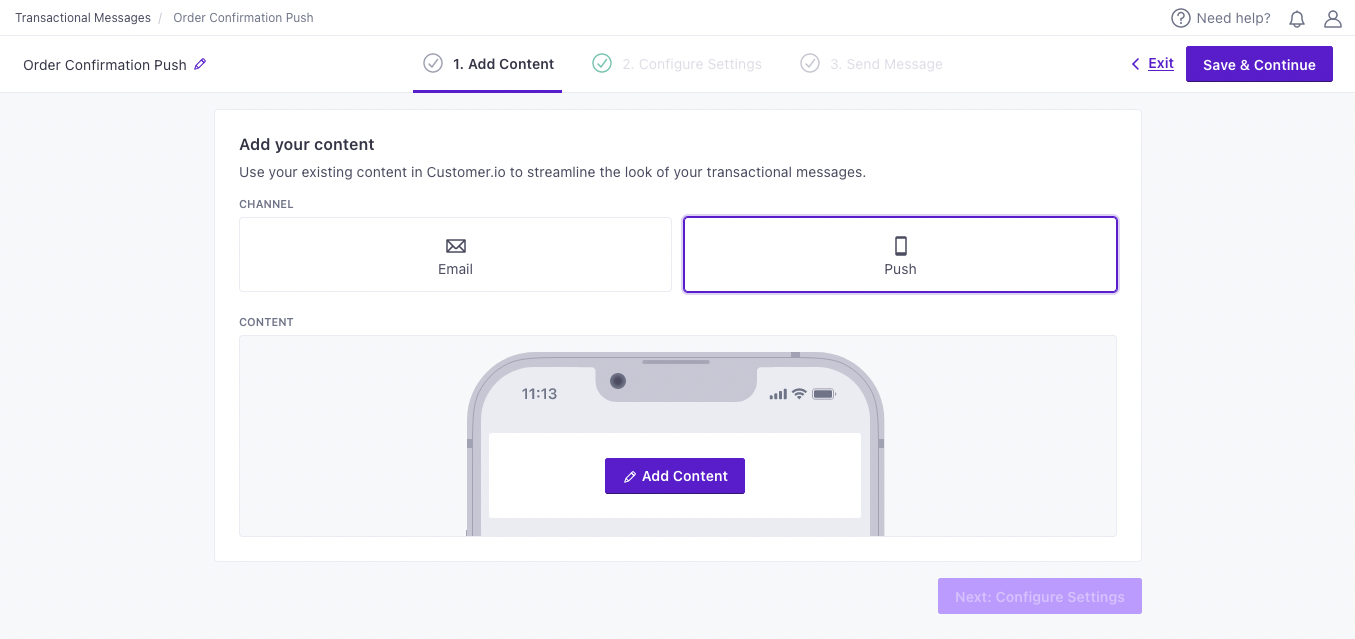
Click Next: Add Content to go to the next step. Select Push to create a transactional push notification.
Click Add Content and compose your push notification. Add images, deeplinks and custom data through the editor, or provide these values in the API request. You can also use attributes (
customer.<attribute>) or trigger data (trigger.<data-object-property>) to customize your message.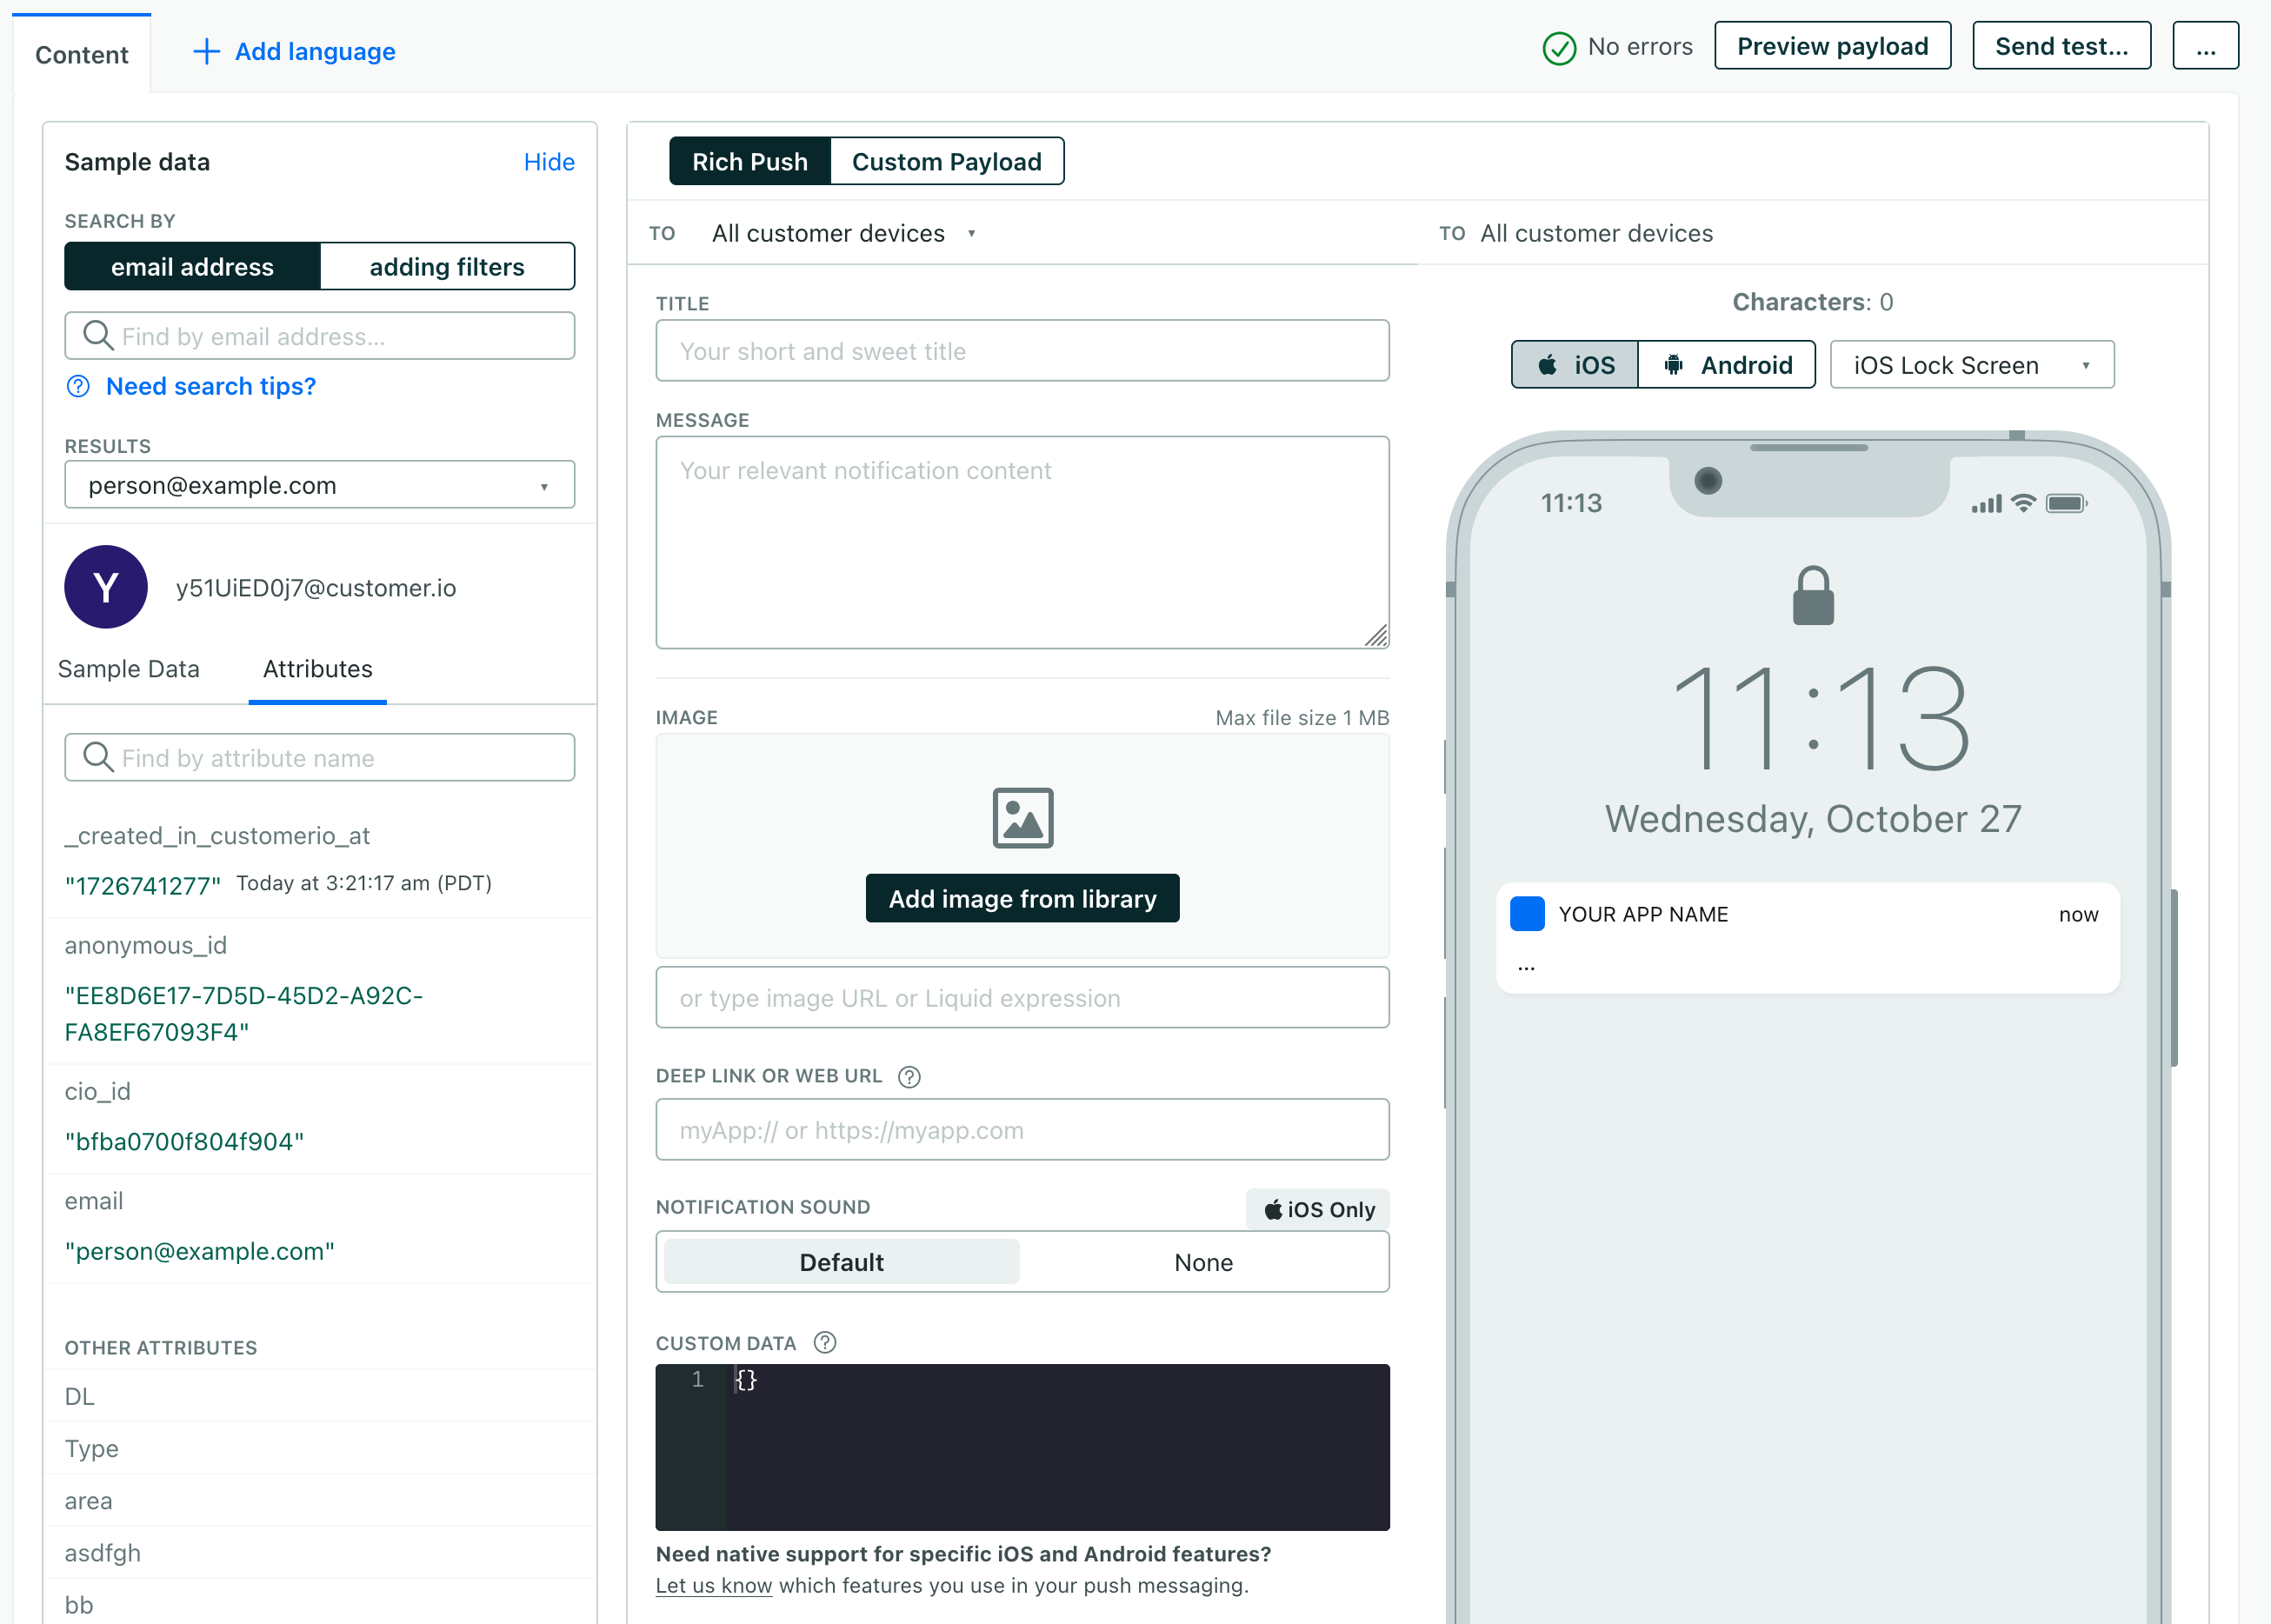
Need to track personalized links?
If you need to track personalized links, use the
cio_linkliquid tag. This helps you group and gather metrics for links that are different for each person—like password reset links, customer dashboards, or product recommendations. Example:{% cio_link url:"https://mydomain.com?token=123abc" %}. If you don’t use this tag, we’ll track each URL independently, which might make it difficult to gather metrics for a links in your push notifications.Configure your message settings.
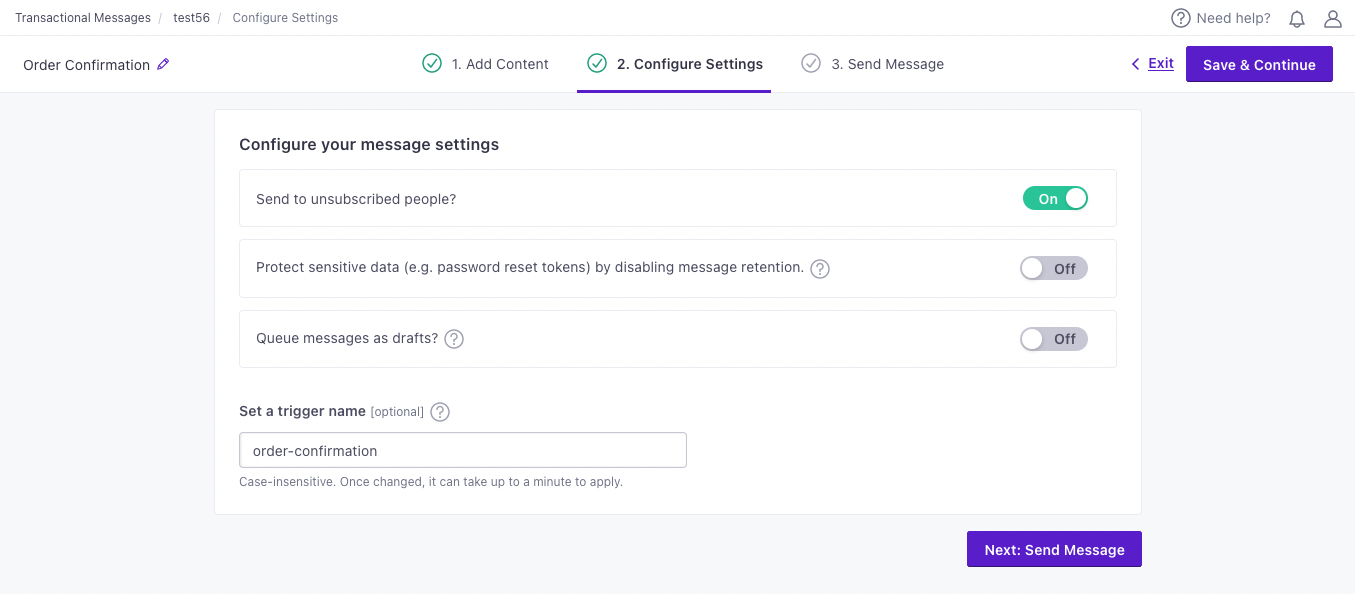
Send to unsubscribed people? Unsubscribed people usually still want to receive your important transactional messages.
Protect sensitive data by disabling message retention? This setting prevents Customer.io from retaining your message content in delivery history and associated API calls. You might want to do this to conceal sensitive content, like password reset tokens.
Queue messages as drafts? This setting generates a draft for every message you trigger, rather than sending them automatically. You can review these messages under the “Drafts” tab and decide whether to send or delete them.
Set a Trigger Name: This is a friendly name for your message that you can use instead of the
transactional_message_idwhen you send your message. It may help make your integration more human-readable if you use triggers that represent the kinds of messages you send—likepassword resetororder confirmation.
To complete the setup, you need to call the API and trigger a message. If you’re not yet ready to send a message directly from your code, you can use an HTTP client like Postman or send a cURL request from your terminal to test your message and complete the setup process.
It can take a few minutes for snippet updates to appear in your messages
Your customers may receive outdated content if you update a snippet and immediately trigger a message that uses it.
Examples and API parameters
Below are examples of transactional push notifications. We’ve provided a basic payload and examples for cURL, our Node.JS SDK, and our Python SDK.
Below the examples, you’ll find a list of parameters for transactional push payloads. Your payload changes based on whether you reference a transactional_message_id (a template) or not. See our REST API documentation for more information.
Basic Payload
{
  "transactional_message_id": 44,
  "title": "Did you really login from a new location?",
  "identifiers": {
    "email": "person@example.com"
  },
  "message_data": {
    "password_reset_token": "abcde-12345-fghij-d888",
    "account_id": "123dj"
  }
}
Node.js
const { APIClient, SendPushRequest, RegionUS } = require("customerio-node");
const api = new APIClient('app-key', { region: RegionUS });

const request = new SendPushRequest({
  to: "person@example.com",
  transactional_message_id: "44",
  message_data: {
    password_reset_token: "abcde-12345-fghij-d888",
    account_id: "123dj"
  },
  identifiers: {
    id: "2",
  },
});

api.sendPush(request)
  .then(res => console.log(res))
  .catch(err => console.log(err.statusCode, err.message))
Python
from customerio import APIClient, Regions, SendPushRequest
client = APIClient("your API key", region=Regions.US)

request = SendPushRequest(
  transactional_message_id="3",
  identifiers={
    "id": "2",
  }
)

response = client.send_push(request)
print(response)
cURL
curl --request POST \
  --url https://api.customer.io/v1/send/push \
  --header 'content-type: application/json' \
  --data '{"transactional_message_id":44,"title":"Did you really login from a new location?","identifiers":{"id":12345},"message_data":{"password_reset_token":"abcde-12345-fghij-d888","account_id":"123dj"}}'
- transactional_message_idRequired The transactional message template that you want to use for your message. You can call the template by its numerical ID or by the Trigger Name that you assigned the template (case insensitive).integerThe ID of the transactional message you want to send.

