Notify customers of their achievements
UpdatedAdd a banner or modal message on your website that highlights customers’ milestones to encourage them to purchase.
Consider what milestone or achievement you’d like to celebrate. In this recipe, we’ll create a campaign to notify customers of their one year anniversary using your product.

How it works
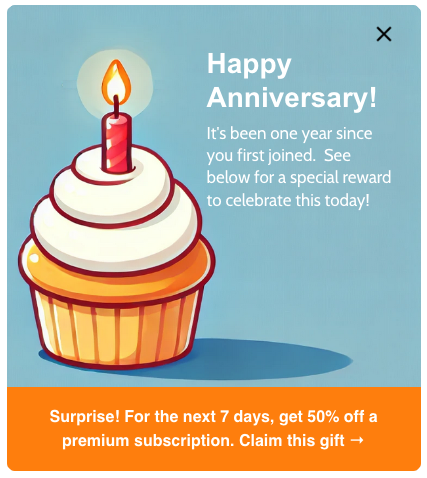
In this recipe, we’ll trigger a campaign based on the date a person started using your product. When they reach their one year anniversary, we’ll send them an in-app message to congratulate them and offer a discount code for their loyalty. Our message will persist until a user dismisses it.
Before you begin
This recipe assumes you’ve already set up your website to identify people and receive in-app messages. If you haven’t done that, you’ll need to:
- Set up your website with our JavaScript source integration. We have a helpful video to get you started!
- IdentifyThe Customer.io operation that adds or updates a person. When you identify a person, Customer.io either adds a person if they don’t exist in your workspace, or updates them if they do. Before you identify someone (by their email address or an ID), you can track them anonymously. your web visitors. People can’t see your message until you know who they are!
If you’ve already set up our JavaScript integration, identification is often automatic—based on a cookie. But people might not see your message immediately if they’ve recently cleared their cookies and cache or visit your website in a private browsing window.
1. Create a date-triggered campaign
- Go to Campaigns and click Create Campaign.
- Enter a name, like “One Year Subscribers.” Add a description so other team members can understand the campaign at a glance.
- Click Choose trigger then select Important date.
- Choose a person’s attributeA key-value pair that you associate with a person or an object—like a person’s name, the date they were created in your workspace, or a company’s billing date etc. Use attributes to target people and personalize messages. that reflects the date they started using your product. For this recipe, it’s
signed_up.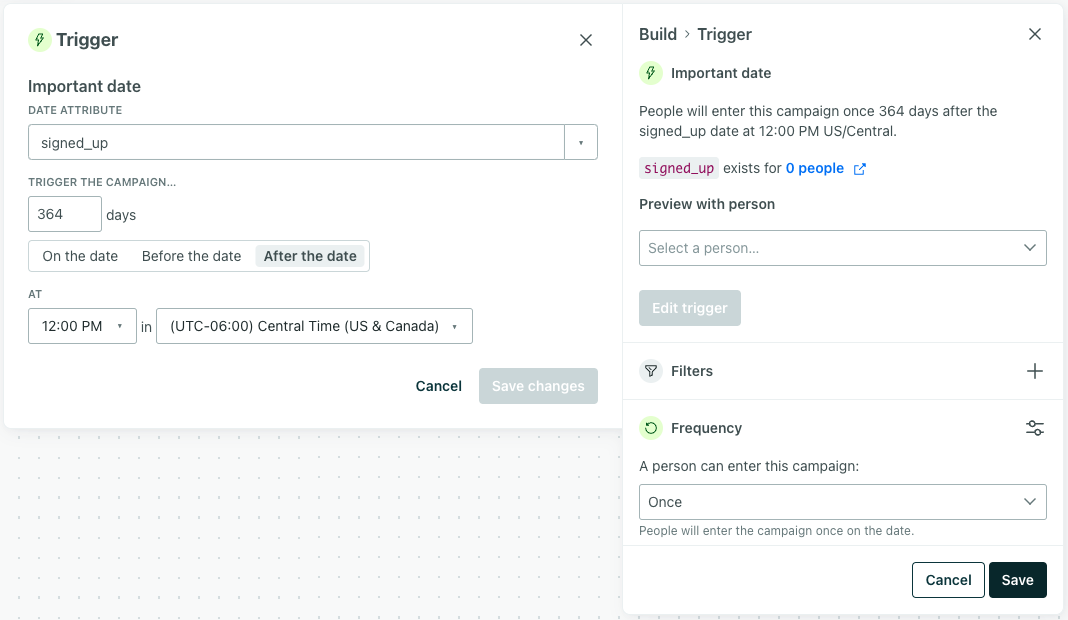

- Click After the date and specify 364 days.
- Change the time of day they should enter this campaign. You can set a specific time zone or set a user’s time zone.
- Set the frequency to once so people enter the campaign once, a year after they signed up for your product.
- Click the campaign’s name then go to Messages. Send your message to people with the appropriate subscription preference.
- Click Goal. Consider what should cause people to convert. In this example, we’ll say people convert when they use the discount code they can claim from the message. Let’s assume we’re sending the eventSomething that a person in your workspace did. Events can trigger campaigns, add people to segments, etc, and you can use properties from events to personalize messages.
purchase-with-one-year-discount, so we’ll count a conversion when someone performs this event within 1 week of being sent any delivery from this campaign.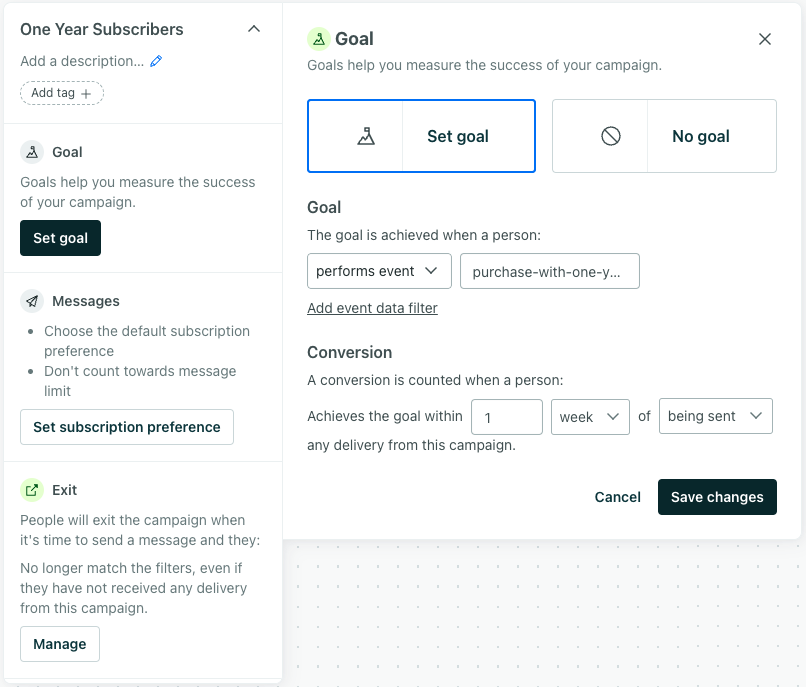

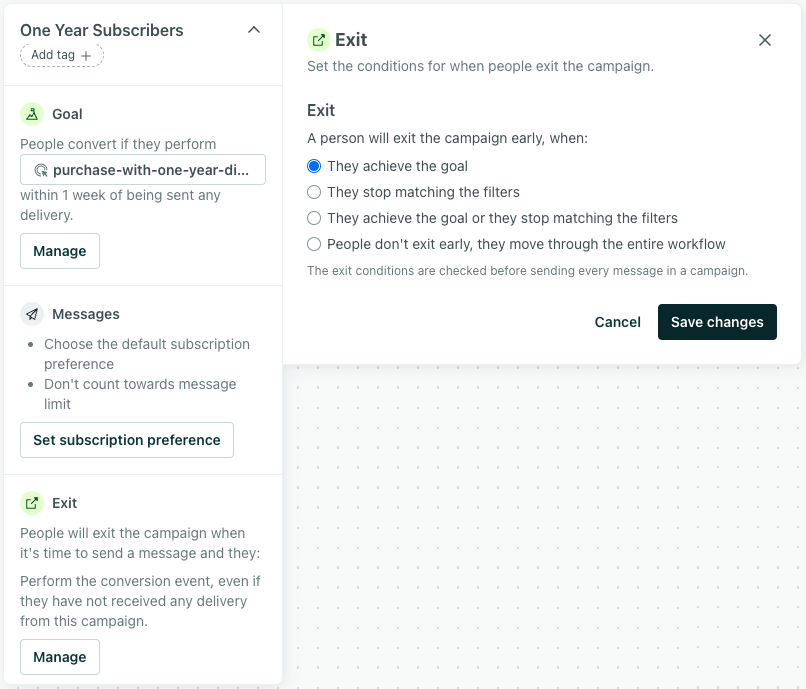
- Click Exit. If you set a goal, you might have people exit the campaign early if they match the conversion criteria.

Next, we’ll set up our in-app message.
2. Create an in-app message


Drag an In-App Message into your Workflow. Click it then Add Content.
You can create an in-app message from scratch, from a template, or from an in-app you’ve already made. In this example, we’ll click Drag-and-drop editor then Templates > Start from scratch. We’re using this code, which you can copy/paste into your own message! It celebrates people’s one year anniversary and links them to claim a discount code.
<x-base> <x-message width="auto" box-shadow="0 2px 4px 0 rgba(0, 0, 0, 0.1)" margin="0px" padding="0px" border-radius="8px" background="#f0f0f2" font-family="Helvetica" :line-height="1.5" color="#666666" ><x-box margin="0px" padding="16px 24px 16px 200px" background="url('https://userimg-assets.customeriomail.com/images/client-env-122460/1730248249031_cupcake_01JBDDA3VM69VJTQ1ZT7Y50P3A.png') left center / cover no-repeat"><x-image align="right" behavior="dismiss" width="26px" src="https://storage.googleapis.com/cio-in-app-templates/assets/close-padding.603304e2.png" /><x-heading-1 text-align="left" font-family="Arial, sans-serif" margin="0px 0px 8px" :font-size="28" :line-height="1.2" color="#ffffff" >Happy Anniversary!</x-heading-1 ><x-paragraph :line-height="1.3" font-weight="400" font-family="'Cabin', sans-serif" margin="0px 0px 160px" :font-size="17" text-align="left" color="#ffffff">It's been one year since you first joined. See below for a special reward to celebrate this today!</x-paragraph ></x-box><x-box align="left" padding="0px 16px" background="#ff7d00"><x-cta font-weight="700" padding="10px 16px" :new-tab="false" tracked-response-name="redeem" behavior="openUrl" align="left" background="">Surprise! For the next 7 days, get 50% off a premium subscription. <u>Claim this gift</u> →</x-cta></x-box> </x-message> </x-base>
3. Modify settings
- In the in-app message editor, click the bar above the message that shows Priority, Display, and Expiration.
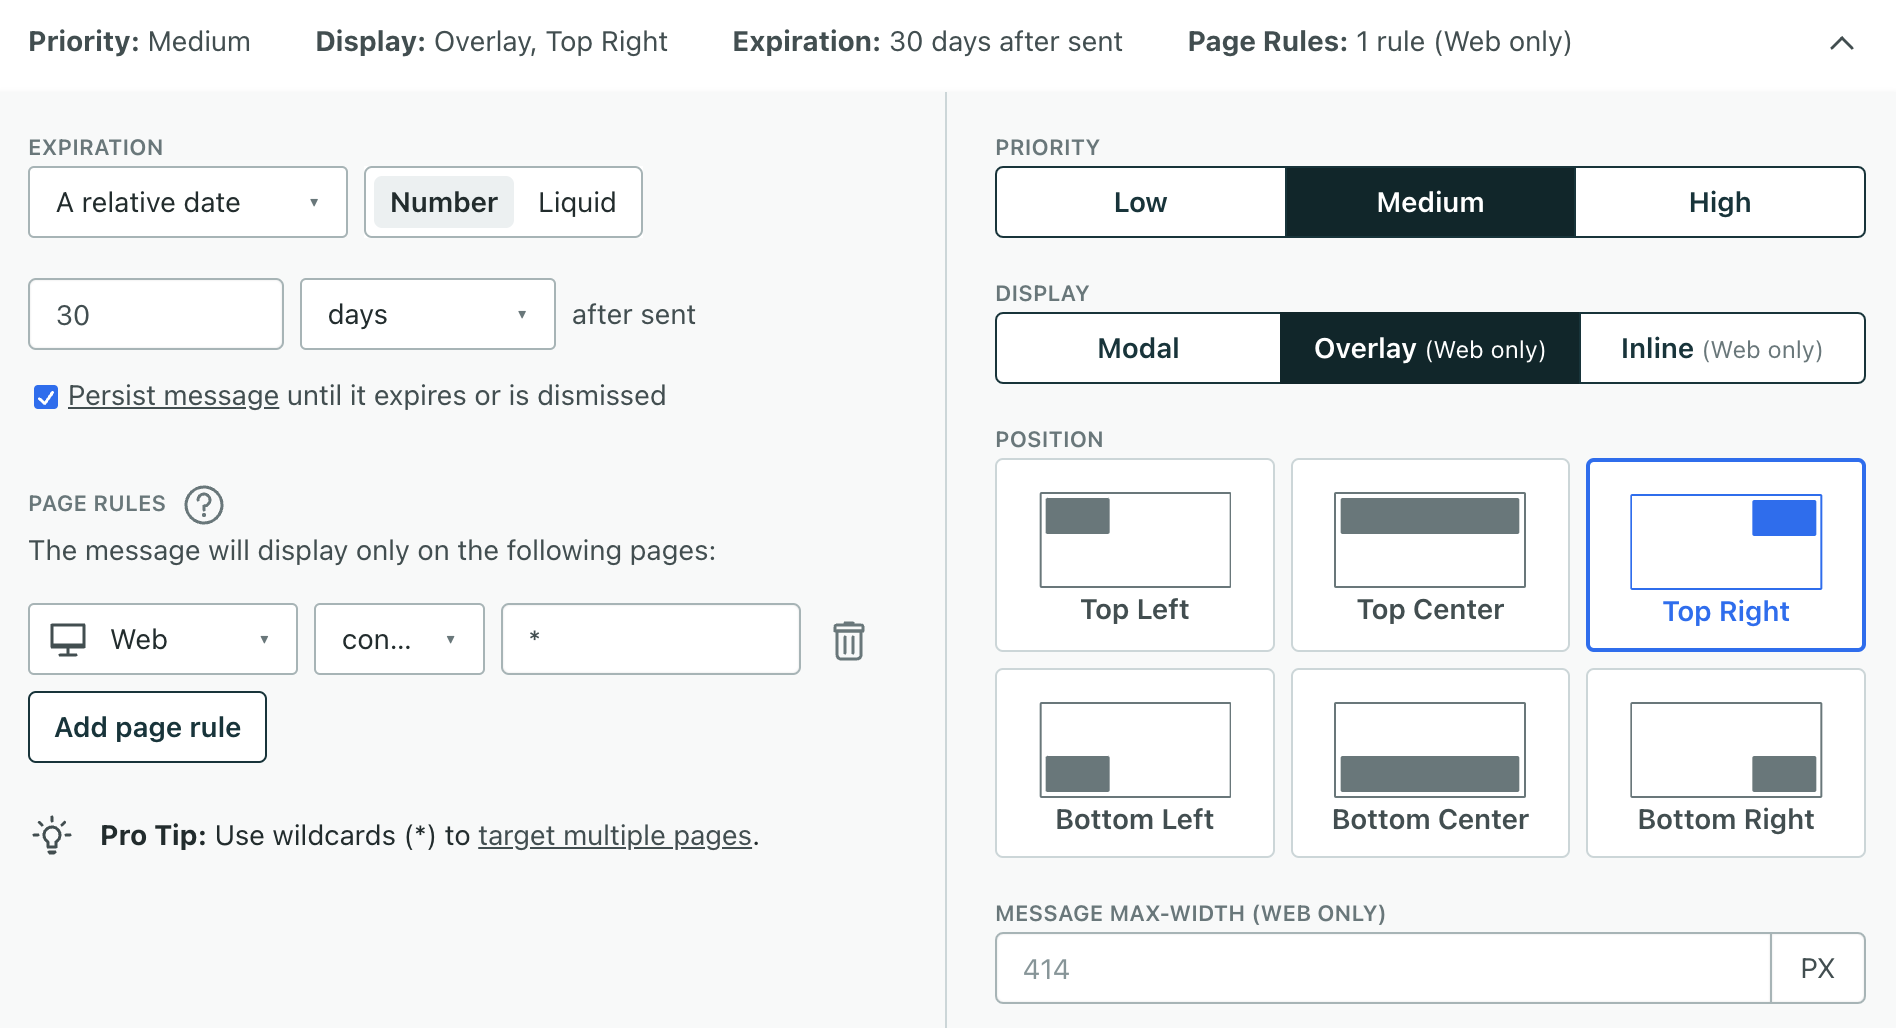

- Under Expiration, set the expiration period for the message. We’ll say a relative date of 30 days after being sent.
- Check Persist message until it expires or is dismissed. This will keep your message on the page until someone dismisses it.
- Set Page rules to determine where your message will appear. We want our promotion to appear everywhere until it’s dismissed, including checkout, so these subscribers know they can use a discount code. We’ll set a single page rule
Web contains *, where the asterisk respresents all pages on your website. - Set the Priority. Consider whether this should appear before other in-app messages for a customer. We’ll set this to Medium, seeing it as higher priority than say, a reminder to register for an event, but lower than a message encouraging them to upgrade.
- Set Display settings. Because our message is persistent, we probably don’t want to interrupt the user flow or cover up important information on the page! So, we’re changing our message to an Overlay that appears in the top-right of the page.
4. Modify the content
The following instructions help you modify the template above to match your brand:
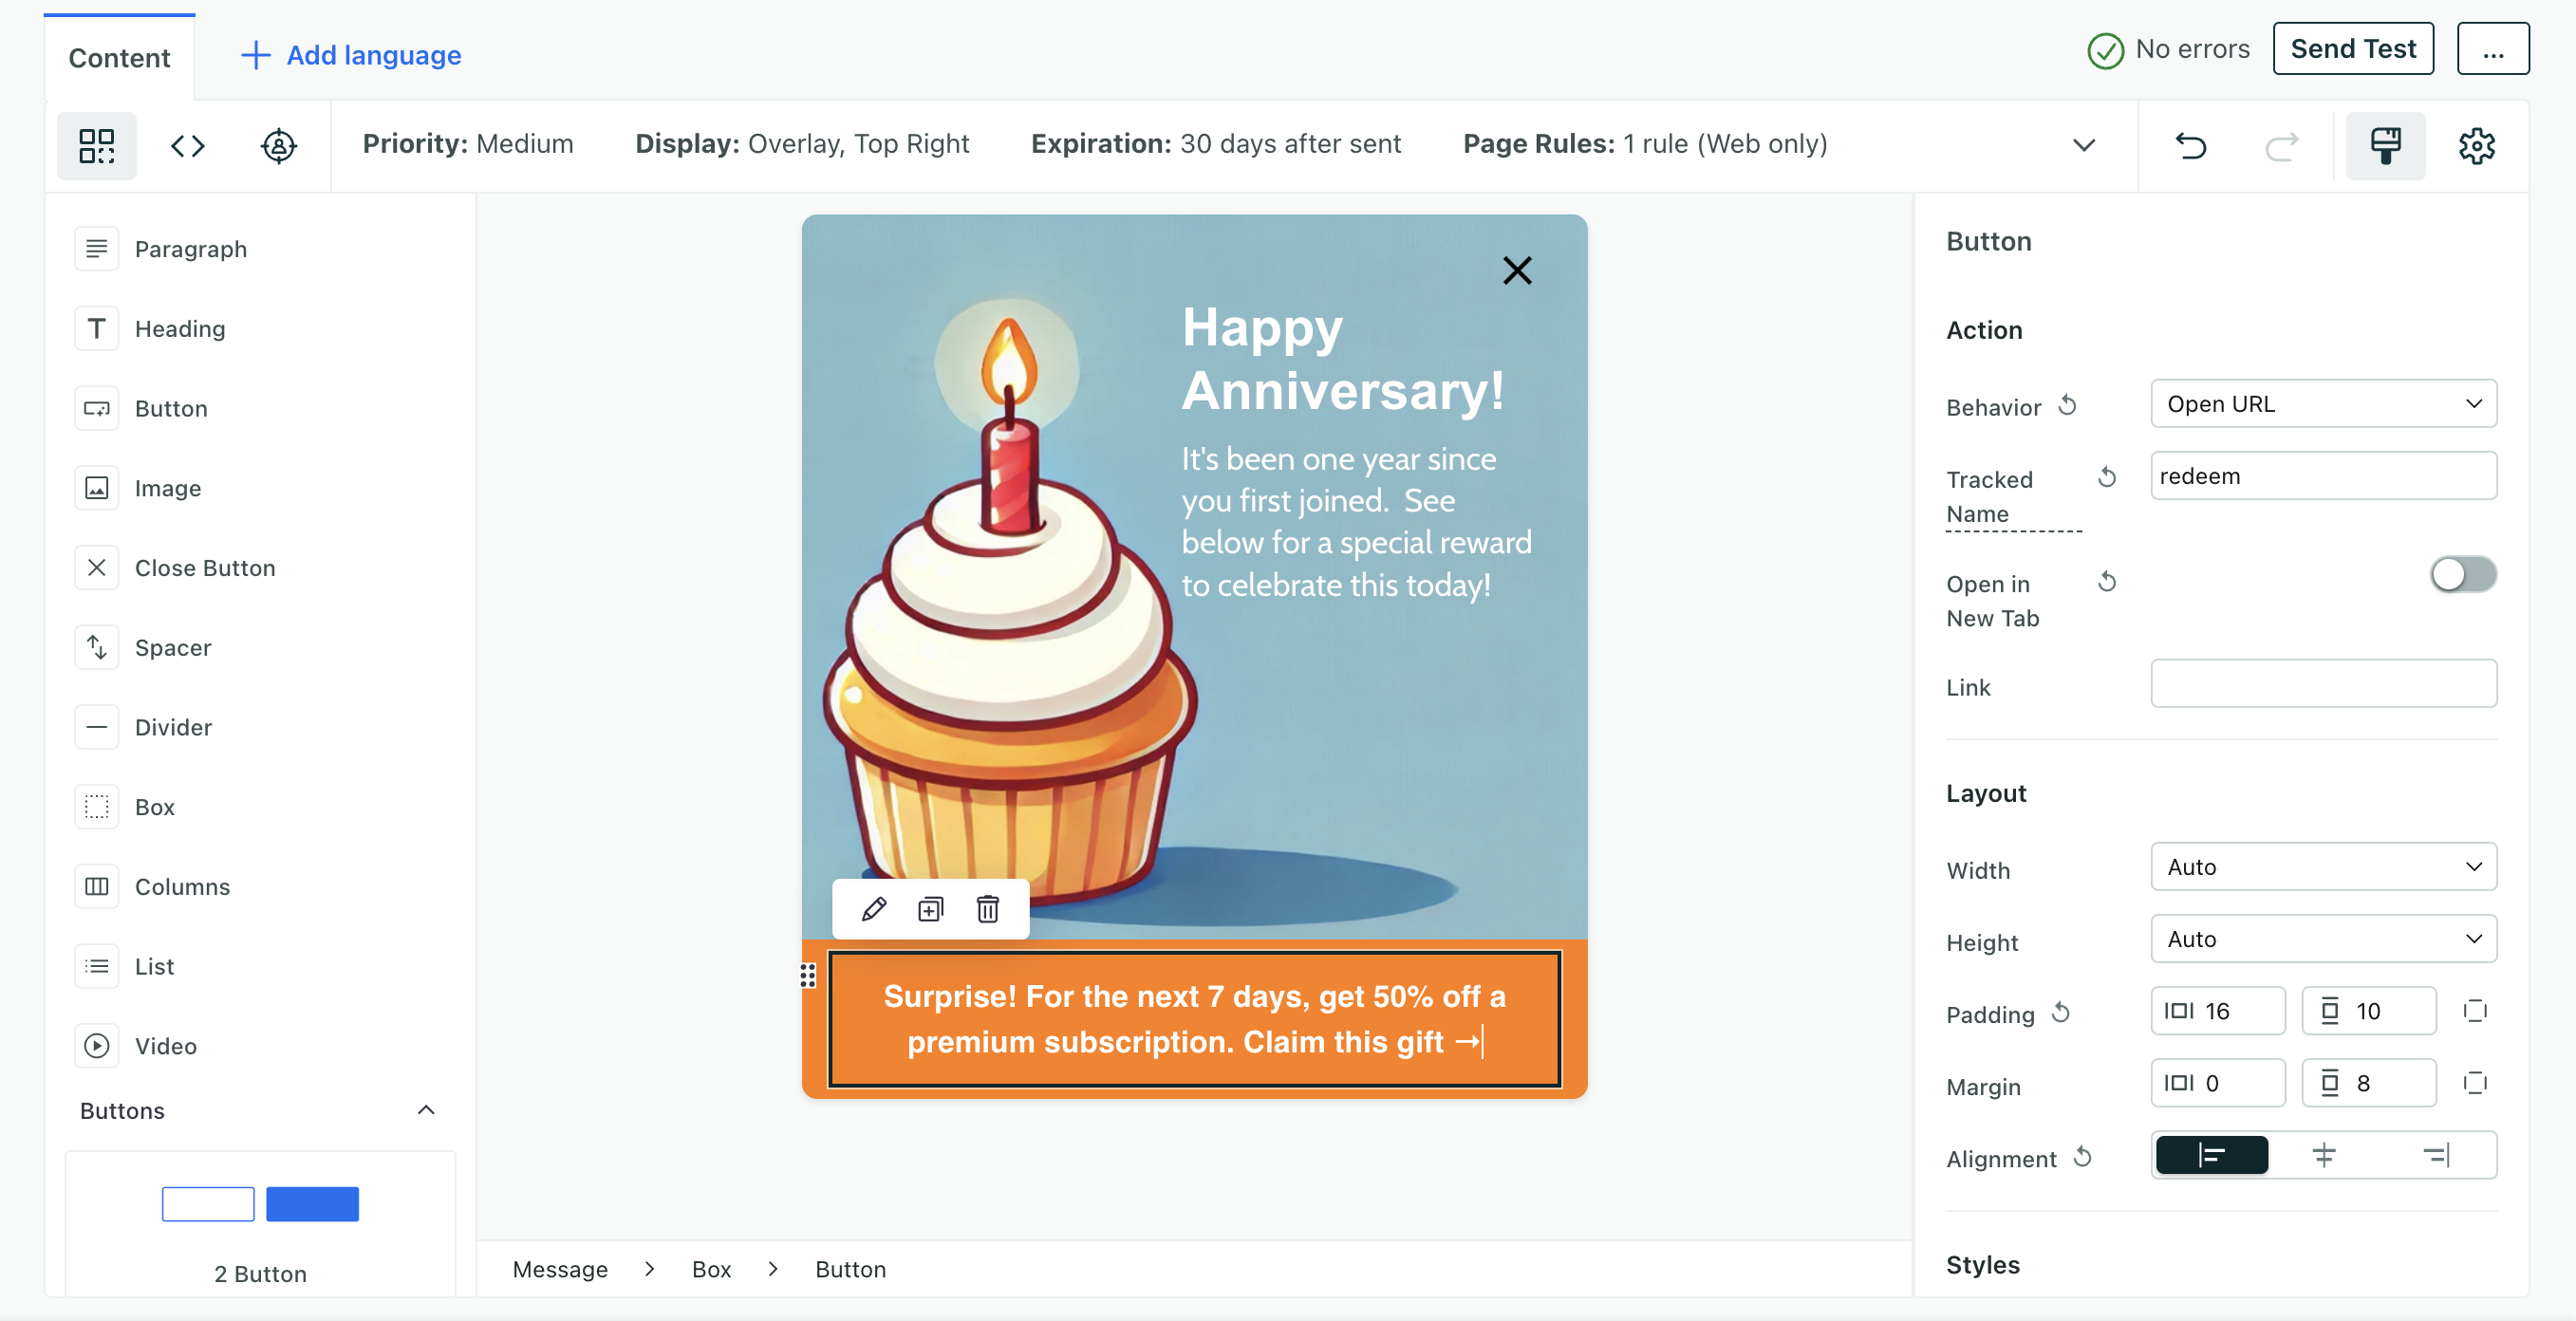

- Click the Close button and modify the styles as you see fit. Always include a button that lets people dismiss your message.
- Click the Image of the cupcake on the preview and replace it with a file you uploaded to your workspace or provide an external link.
- Click the Heading on the preview to change the text to fit what you’re celebrating.
- Click the Paragraph on the preview to modify the text.
- Click the orange Box on the preview to change the color to match your brand.
- Click the Button at the bottom of the preview to add your redemption Link and modify the styles as you see fit.
If you started from scratch using our drag-and-drop editor, here’s how you can build your message:
- Drag a Close Button from the left components menu to the top-right of your message.
- Add a Heading to your message.
- Add a Button to your message for people to claim their discount.
- Set the Action Behavior for the button.
- Set a Tracked Name for your button. This is the value we record when someone clicks your button.
- (Optional) Add an Image to your promotion if you have a specific product to highlight or a visual element that you want to include.
Make your image clickable!
Your in-app image can act like a button. Just add a Behavior and a Tracked Name, so people can interact with your image. You might give it the same action and tracked name as a button so people can click a much larger area of your message.
5. Review and start your campaign
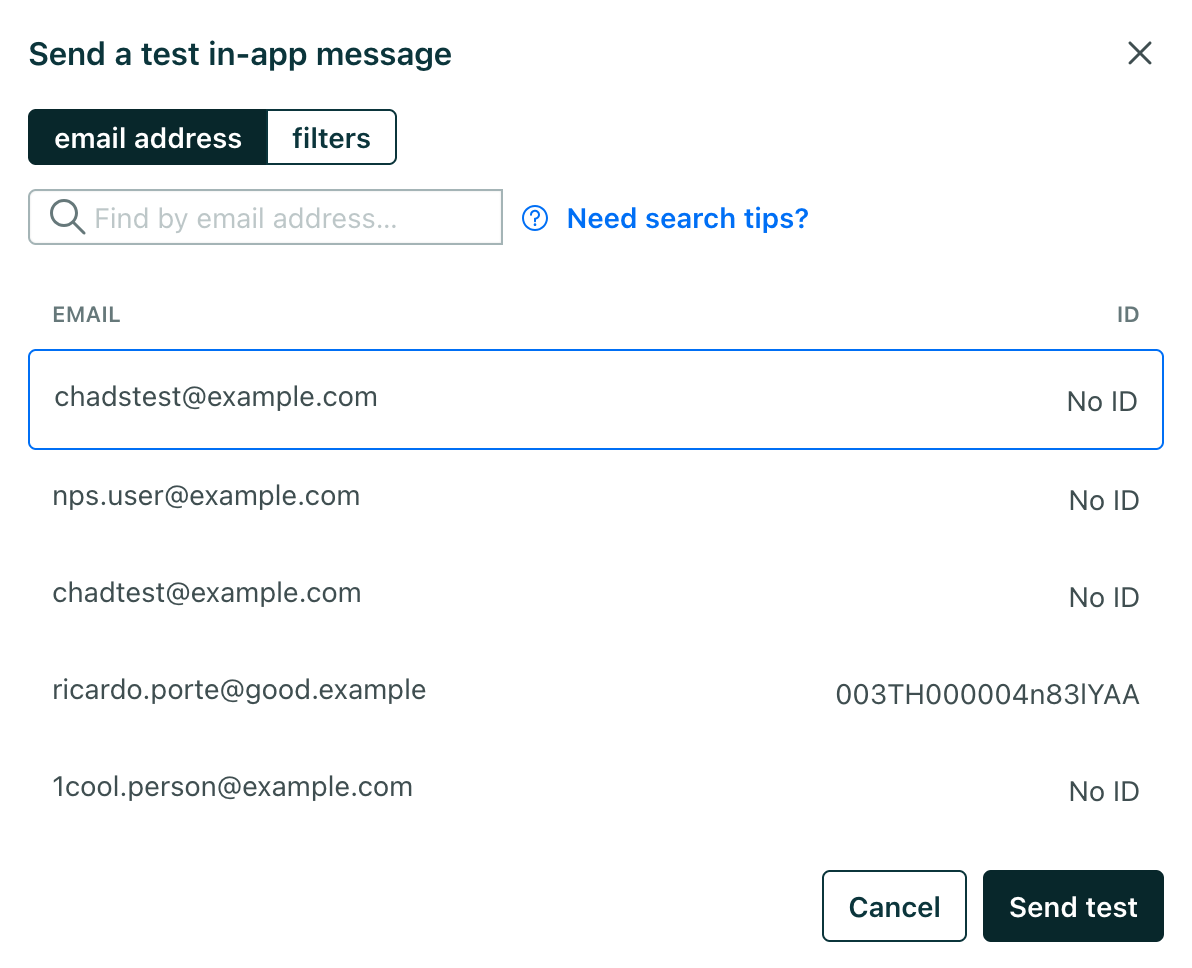
- In the in-app message editor, click Send Test to check it out! Open your website and make sure your message looks good and that your buttons and links work as expected.

- Click Save Changes then Done.
- Click the message again then click Settings. Change the sending behavior from Queue Draft to Send automatically.
- When you’re ready, click Start Campaign to go live!

