New feature announcement and adoption
UpdatedAdd a banner or modal message on your website to highlight a new feature! With in-app messages, you can announce features to drive adoption, increase subscriptions, and more.
How it works
In this recipe, we’ll trigger a campaign based on a segment of users who use your product regularly. We’ll send them an in-app message about the new feature and how to get started.
We’ll also set up our message so that it only appears on relevant pages and in the right spot. For example, we don’t want our message to block an Add to Cart button.
Before you begin
This recipe assumes you’ve already set up your website to identify people and receive in-app messages. If you haven’t done that, you’ll need to:
- Set up your website with our JavaScript source integration. We have a helpful video to get you started!
- IdentifyThe Customer.io operation that adds or updates a person. When you identify a person, Customer.io either adds a person if they don’t exist in your workspace, or updates them if they do. Before you identify someone (by their email address or an ID), you can track them anonymously. your web visitors. People can’t see your message until you know who they are!
If you’ve already set up our JavaScript integration, identification is often automatic—based on a cookie. But people might not see your message immediately if they’ve recently cleared their cookies and cache or visit your website in a private browsing window.
1. Create a segment of active users
- Go to Segments and click Create Segment.
- Add a name like “Recent Users,” and click Create Data-driven Segment.
- Click the dropdown “Add condition or group.” Select Attribute from the dropdown. With this recipe, let’s assume we save a
last_loginon people’s profiles. Enterlast_loginas the attribute name. Then specify it’s a timestamp after a relative date of 30 days ago. This means anyone who logged in in the last 30 days will join this segment.

- Click Save Changes.
Now you’re ready to create a campaign to drive feature adoption!
2. Create a segment-triggered campaign
- Go to Campaigns and click Create Campaign.
- Enter a name, like “Feature adoption:
feature-name.” If helpful, add a description so other team members can understand the campaign at a glance. - Click Choose trigger then select Segment change.
- Choose the segment you made to target active users.
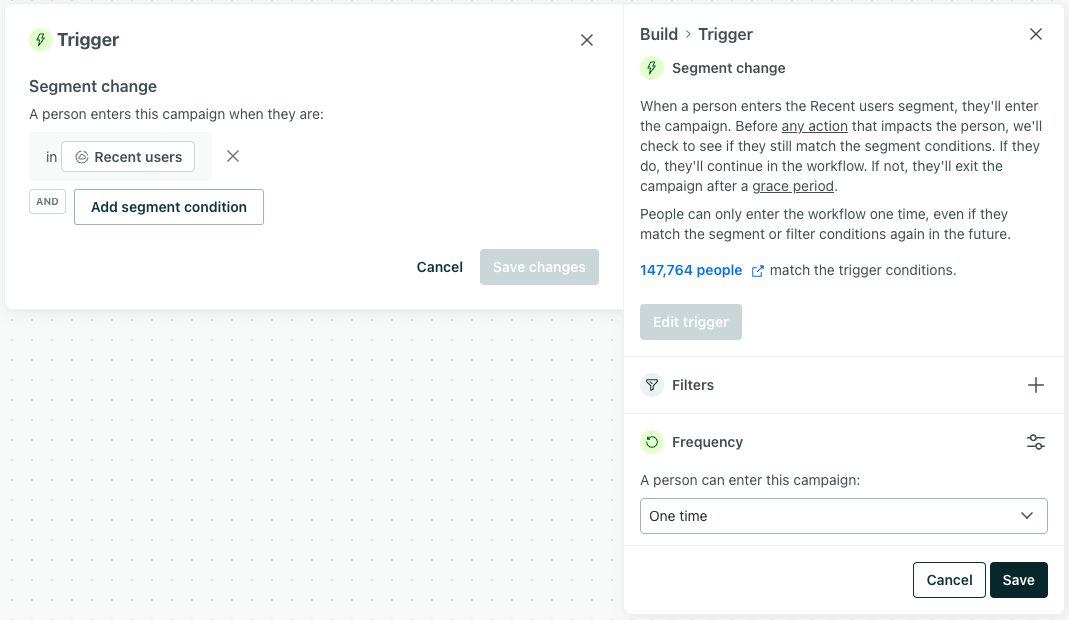

- Set the frequency of entry. We want this campaign to reach out to people once.
- Click the campaign’s name then go to Messages. Send your message to people with the appropriate subscription preference.
- Click Goal. Consider what should cause people to convert. In this example, we’ll say people convert when they perform the eventSomething that a person in your workspace did. Events can trigger campaigns, add people to segments, etc, and you can use properties from events to personalize messages.
adopt-featurewithin 1 week of being sent any delivery from this campaign.

- Click Exit. If you set a goal, you might have people exit the campaign early if they match the conversion criteria.
Now you’re ready to set up your in-app message!
3. Create an in-app message
- Drag an In-App Message into your Workflow. Click it then Add Content.
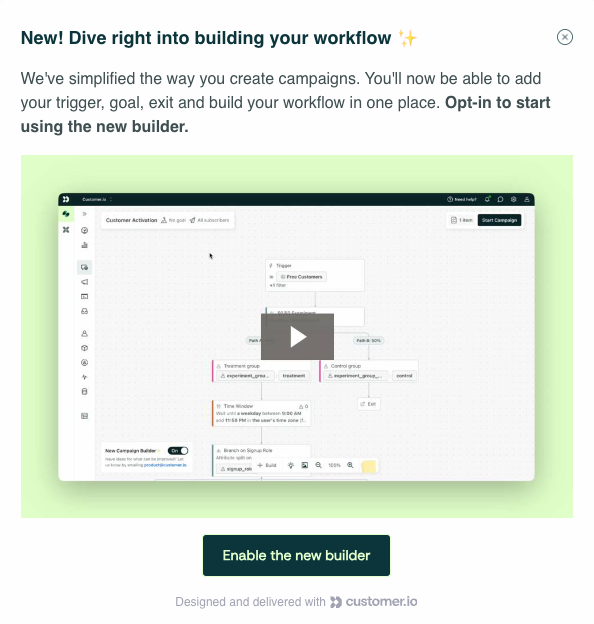
- You can create an in-app from scratch, a template, or from an in-app you’ve already made. Check out these samples to code a flip card, glowing button, and more! Here’s an example of an in-app you could make. It introduces a feature with a video and links people to enable it.

<x-base>
<x-message border-radius="8px 8px 8px 8px" padding="24px" background="#ffffff">
<x-row :gap="8" :layout='["auto",10]'>
<x-column>
<x-heading-2 :font-size="18" color="#0b353b" margin="0px 0px 16px" text-align="left">New! Dive right into building your workflow ✨<br></x-heading-2>
</x-column>
<x-column>
<x-image margin="0px" align="right" behavior="dismiss" width="16px" src="https://userimg-assets.customeriomail.com/images/client-env-138234/1715273992530_Close-Button-Forest_01HXF4R2DGQ70XVN3G37A71RVR.png" />
</x-column>
</x-row>
<x-box>
<x-paragraph color="#3f4e50" margin="0px 0px 16px" text-align="left">We've simplified the way you create campaigns. You'll now be able to add your trigger, goal, exit and build your workflow in one place. <strong>Opt-in to start using the new builder.</strong></x-paragraph>
</x-box>
<x-video src="https://customer-1.wistia.com/medias/hsyc6s5jtm" />
<x-cta action="enable-builder" tracked-response-name="opt-in" behavior="performAction" border-style="solid" border-color="#e4ffce" margin="16px 0px" font-weight="700" font-family="'Rethink Sans', sans-serif" align="center" text-align="center" :font-size="14" color="#e4ffce" background="#0b353b">Enable the new builder</x-cta>
</x-message>
</x-base>
4. Configure settings
- In the in-app message editor, click the bar above the message that shows Priority, Display, and Expiration.
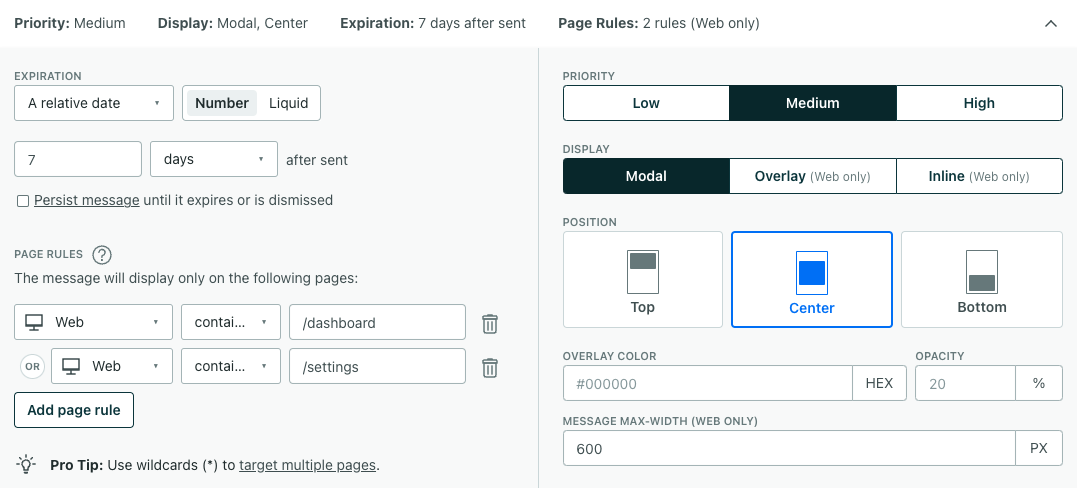

- Under Expiration, set the expiration period for the message. Let’s say we want this to appear for 7 days after being sent.
- Set Page rules to determine where your message will appear. We want our message to appear when people log in and when people visit settings so we’ll target web pages that contain
/dashboardor/settings. - Set a Priority in case a recipient is sent multiple in-app messages. We’ll set ours to Medium as it should appear before some messages but after others.
- Set Display settings - a modal message that appears in the center of the screen.
- Finally, let’s set our Message Max-width. We’ll set it to 600px so the video in the message can be more prominent.
5. Modify content
The following instructions help you modify the template above to match your brand:
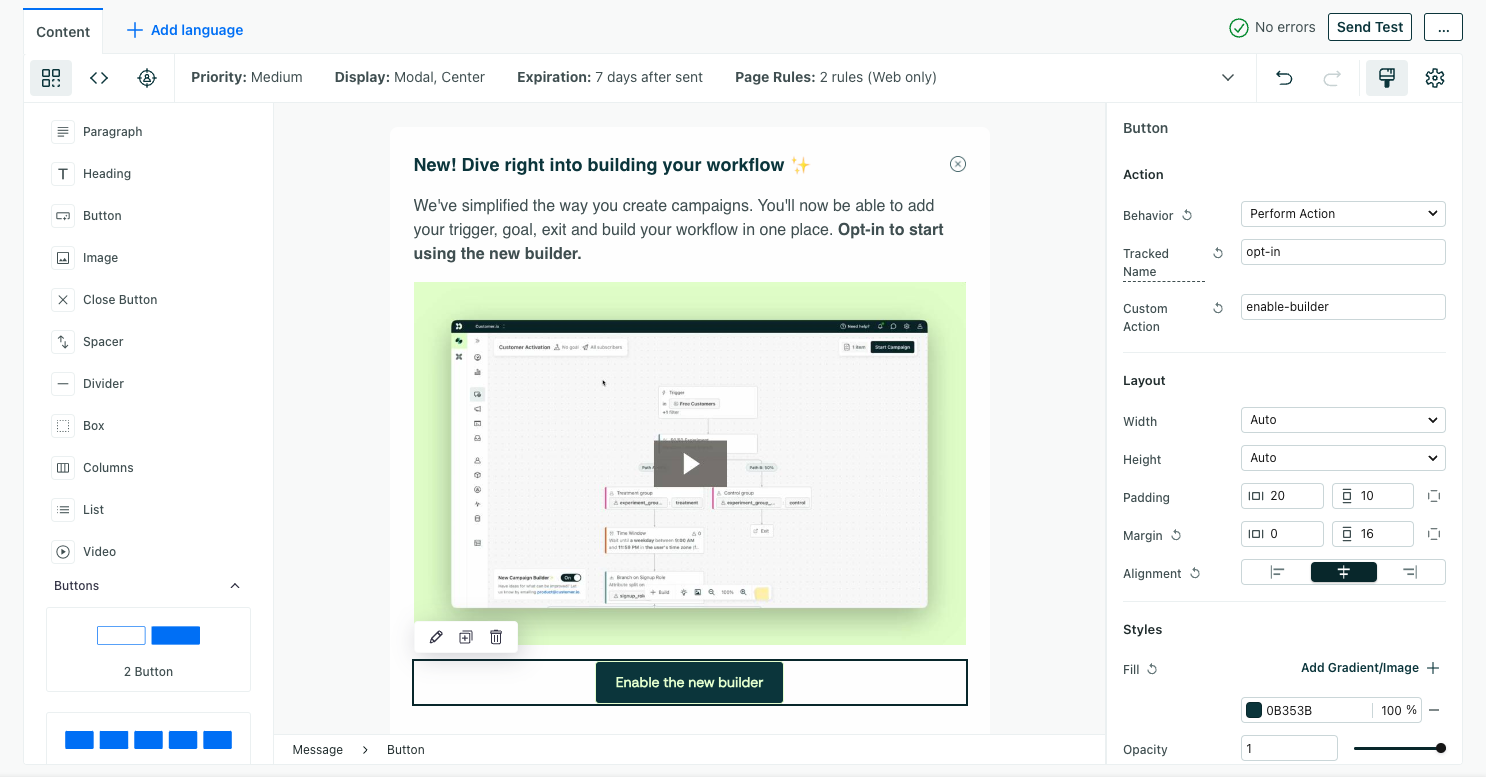

- Click the Close button and modify the styles as you see fit. Always include a button that lets people dismiss your message.
- Click the Heading on the preview to change the text to match your feature.
- Click the Paragraph on the preview to modify the description.
- Click the Video and replace with your own uploaded file or provide an external link.
- Click the Button: Enable the new builder. In the image above, the button is set to perform a custom action. This requires developer resources, but would enable the feature for the recipient if they clicked it! You can also change the behavior to something that does not require developer resources, like opening a URL.
6. Test and start your campaign
- In the in-app message editor, click Send Test to check it out! Open your website and make sure your message looks good and that your buttons and links work as expected.
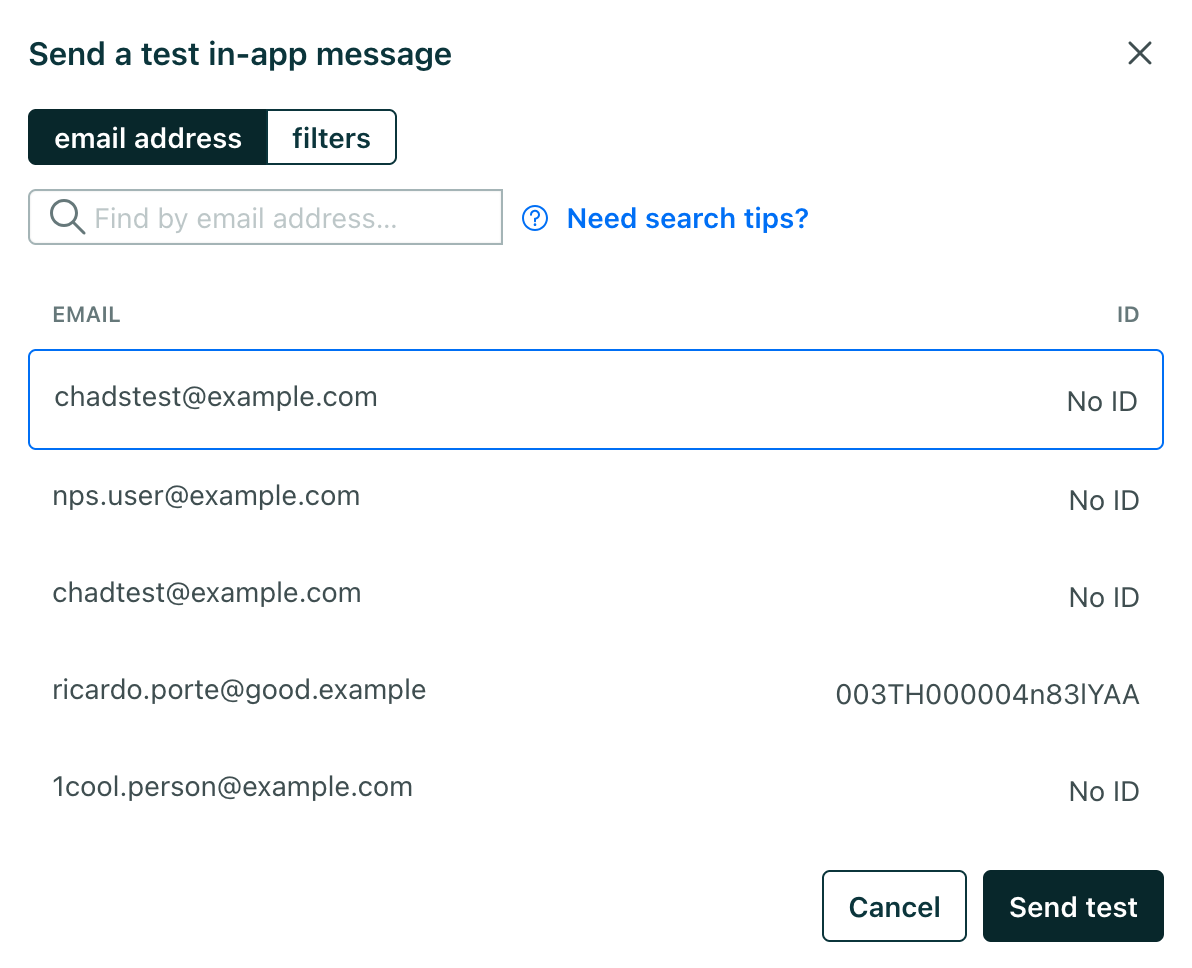

- Click Save Changes then Done.
- Click the message again then click Settings. Change the sending behavior from Queue Draft to Send automatically.
- When you’re ready, click Start Campaign to go live!

