Send an NPS survey to your website visitors
UpdatedNet promoter score surveys (NPS) help you measure how likely people are to recommend your product (or a part of your product) to others. With in-app messages, you can send a quick survey to your website visitors to gauge their satisfaction.
While we’ve provided instructions below, here’s a quick video explaining how to set up an NPS survey and conditional logic in your workflow to handle different responses.
How it works
If you want to gauge how people feel about your product, you can send them an NPS survey in your website to measure their satisfaction.
Here, we’ll help you set up a web in-app message to survey your customers. In your campaign, we’ll help you group responses so you can follow-up with people depending on the rating they give you—detractors (0-6), passives (7-8), and promoters (9-10).
Remember, while your campaign will send an NPS survey, users won’t see the survey until they:
- Go to a page on your website where you set your message to appear.
- Are identifiedThe Customer.io operation that adds or updates a person. When you identify a person, Customer.io either adds a person if they don’t exist in your workspace, or updates them if they do. Before you identify someone (by their email address or an ID), you can track them anonymously.. This is often automatic, but people might not see your message immediately if they’ve recently cleared their cookies and cache or visit your website in a private browsing window.
1. Setup your campaign
Before you set up your Campaign Trigger, have a group of users in mind that you want to survey. Common NPS scenarios include:
- A segmentA group of people who match a series of conditions. People enter and exit the segment automatically when they match or stop matching conditions. of users who’ve gotten to know your product—for example, people who’ve been users for at least 90 days.
- Users who’ve completed an event indicating that they use a particular feature you want feedback on.
- On the Campaigns page, click Create Campaign.
- Click Choose trigger on the canvas. For this example, we’ll trigger based on a Segment change.
- Choose your segment(s).
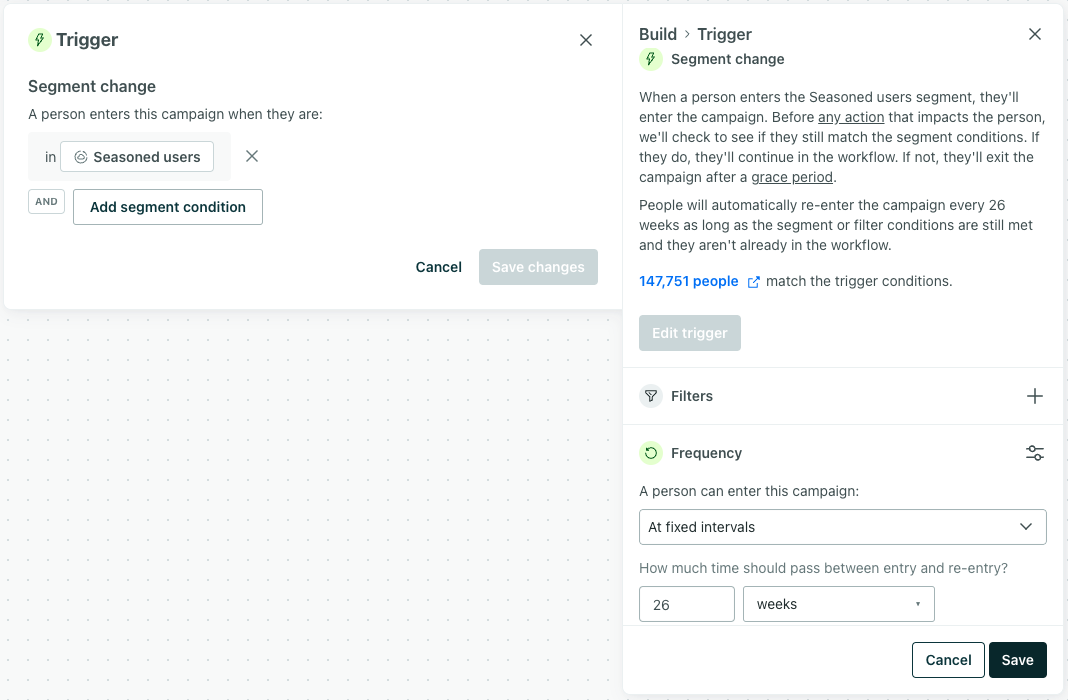
- Set your Campaign Frequency depending on how frequently you want to poll your audience. Make sure you don’t poll them too frequently! People might like your product, but they might not like being surveyed all the time. In this example, people can re-enter after a fixed interval of 26 weeks.
- Click your campaign’s name to find Goal. We’ll set ours to No Goal, since we want to gather feedback, not get people to join a segment or perform a specific event (outside of answering your survey). This isn’t to say that you don’t have a goal for your NPS survey! It simply isn’t the kind of goal that you can track with our goal settings.
2. Set up your message
- Drag an in-app message into your workflow. Select it and give it a name like Web NPS.
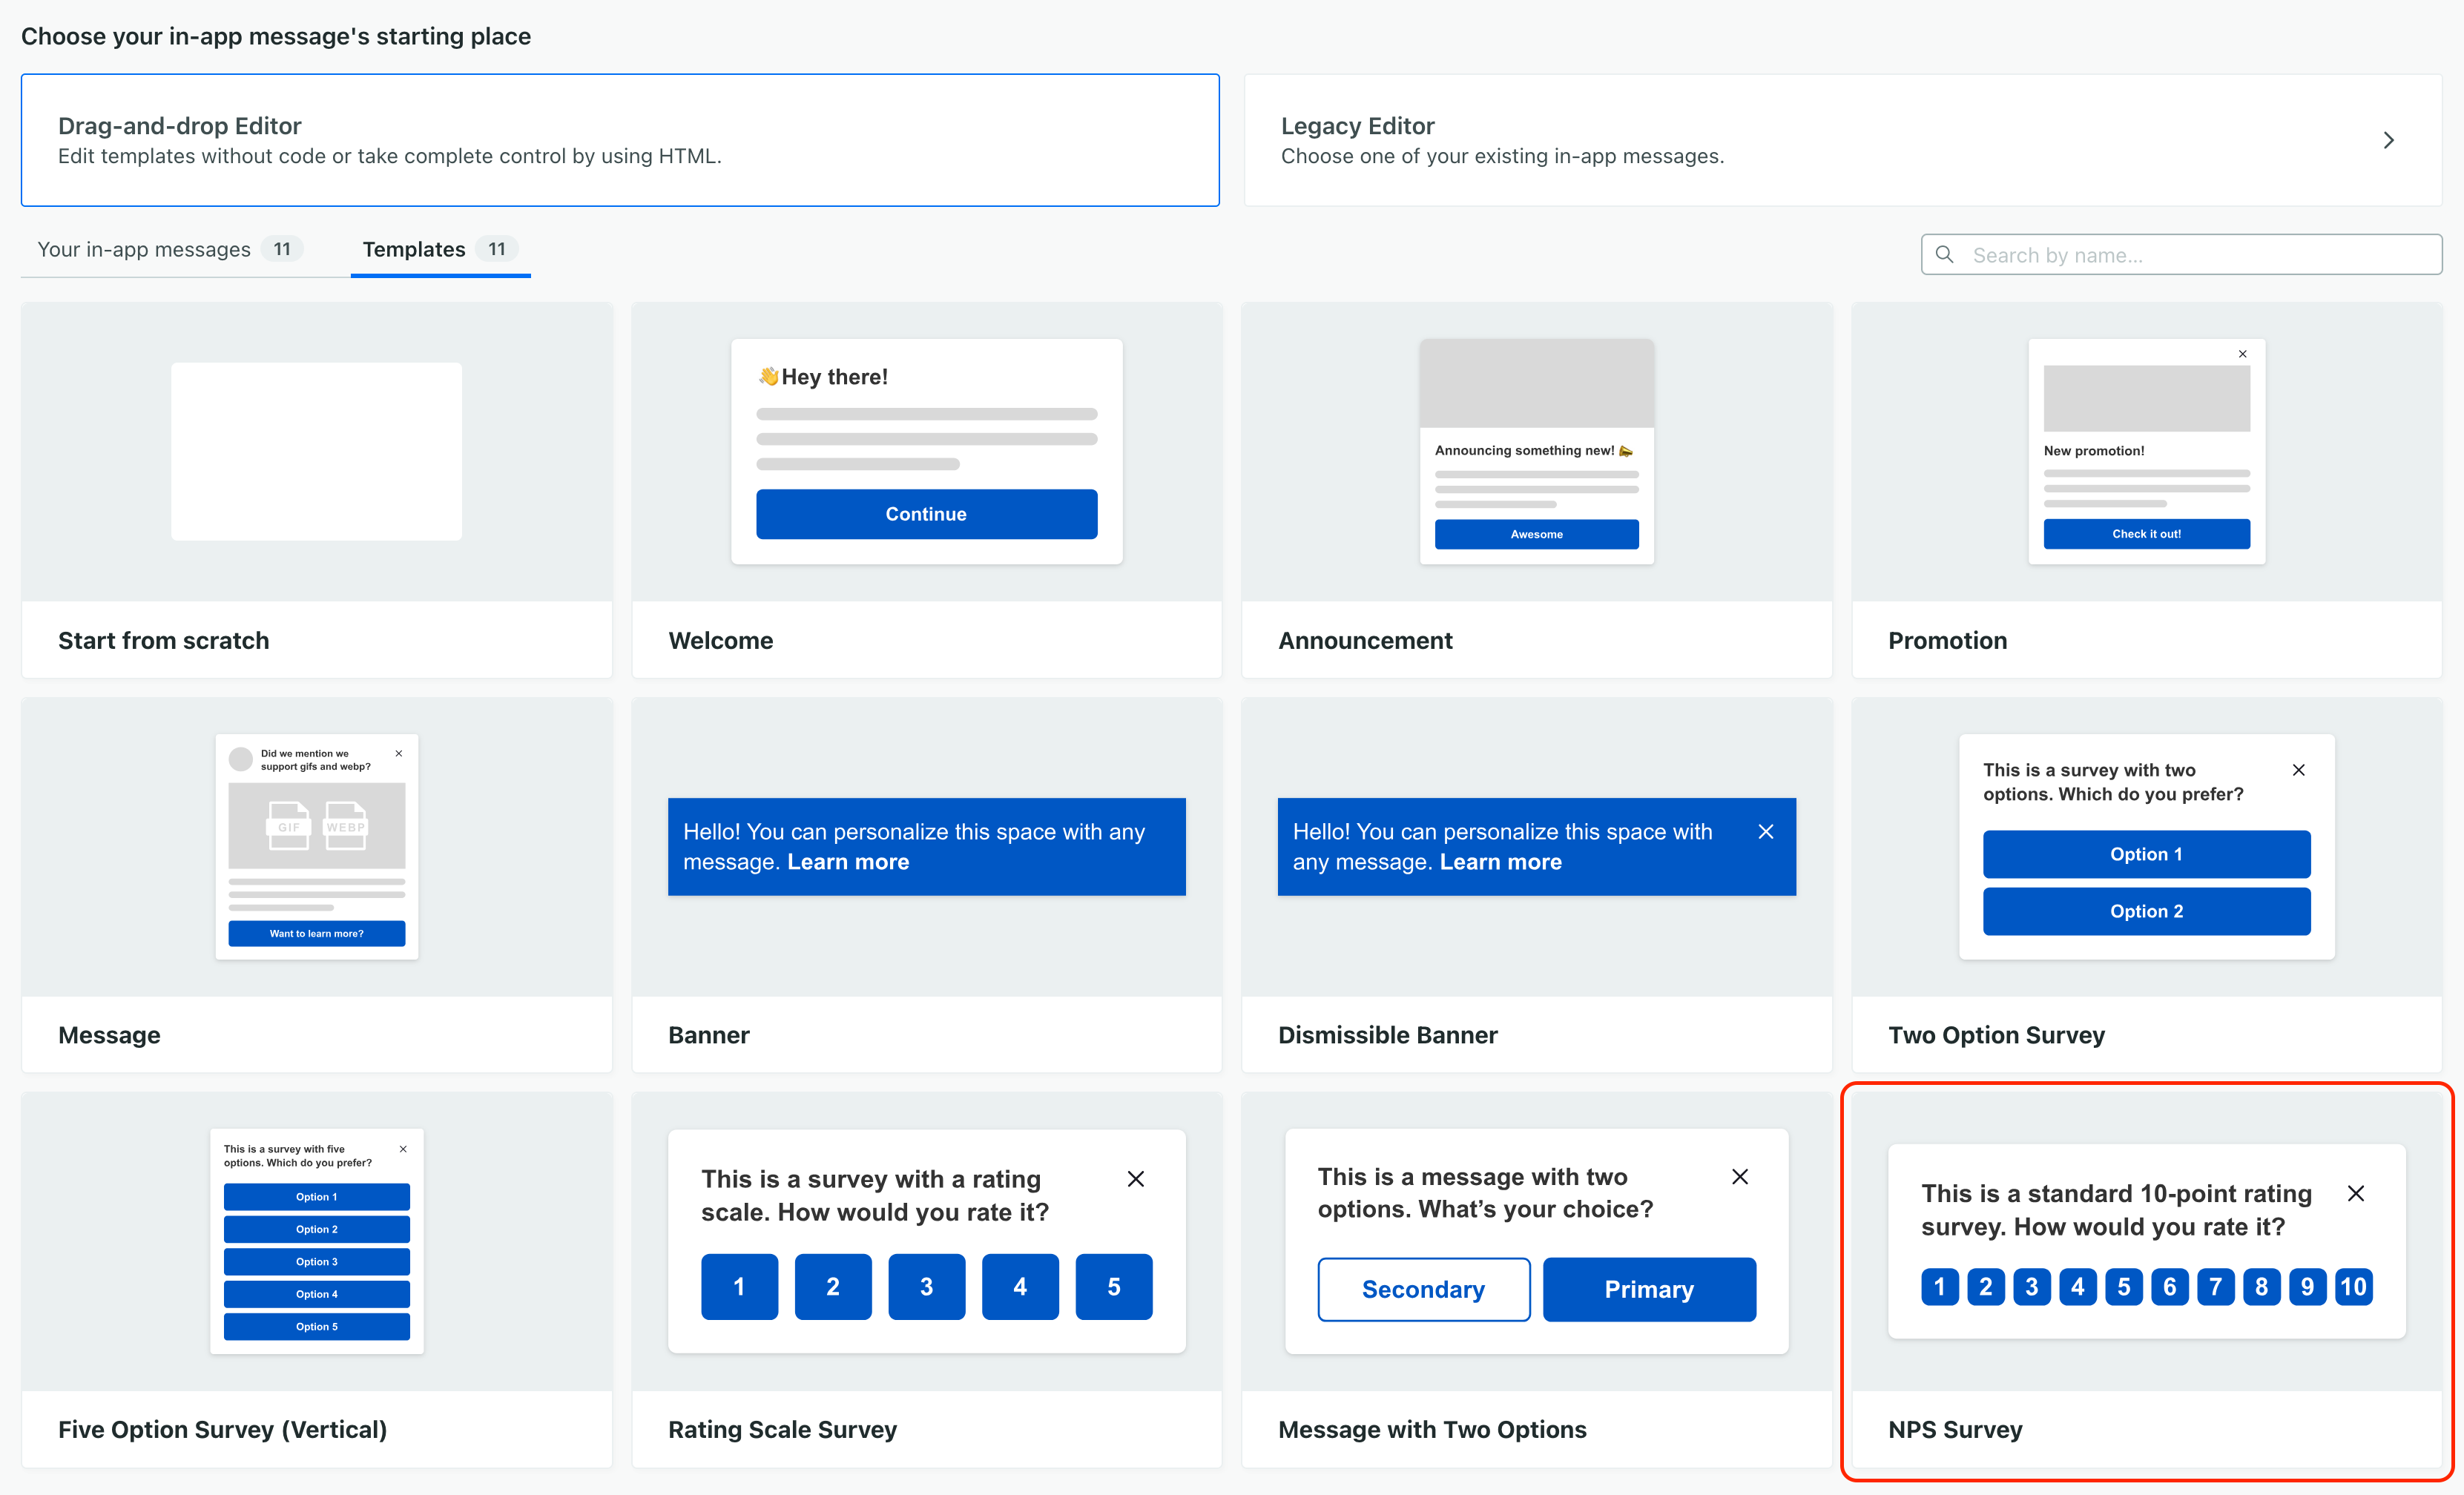
- Click Add Content to set up your survey. We have a template for NPS surveys that you can use, or you can create your own.
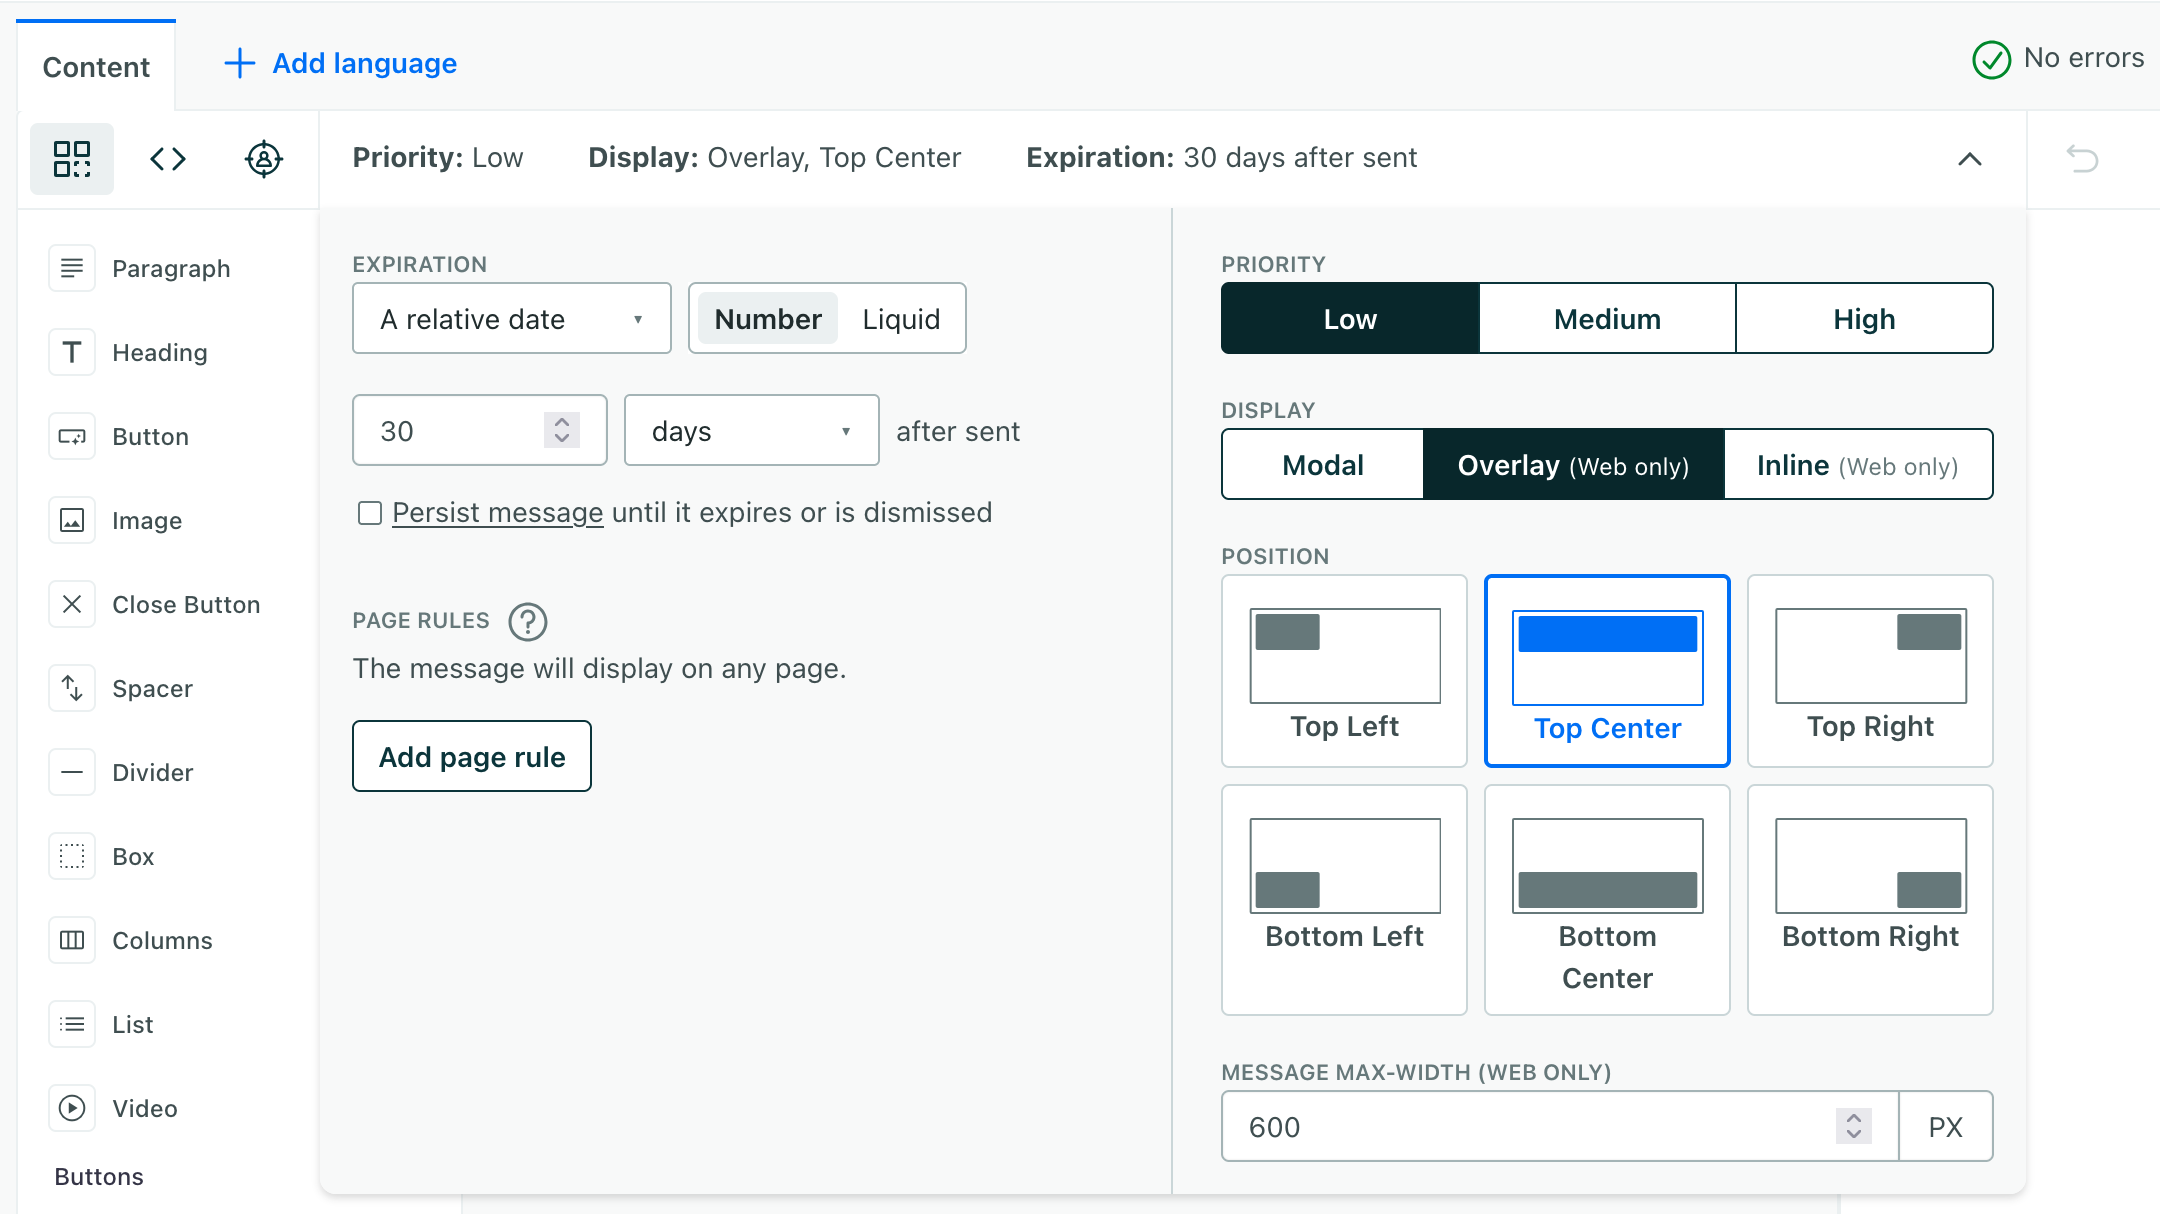
- Customize your survey’s placement and display settings:
- Change the placement of the survey on the page using the Position settings. In general, we recommend that you set your survey as an Overlay and set a Message Max-Width! This makes sure your survey doesn’t interrupt your user’s experience and limits your message to websites!
- Set an expiration period for the survey. When you send a message, it waits for people to visit the page(s) on your website. If they don’t visit the right page(s) before the message expires, they won’t see your survey.
- Set Page rules determining the pages of your site where the survey will appear.
- Customize your survey’s appearance:
- Customize the heading text of the survey.
- Change the colors to match your website’s theme. Select elements in your message to change their display settings.
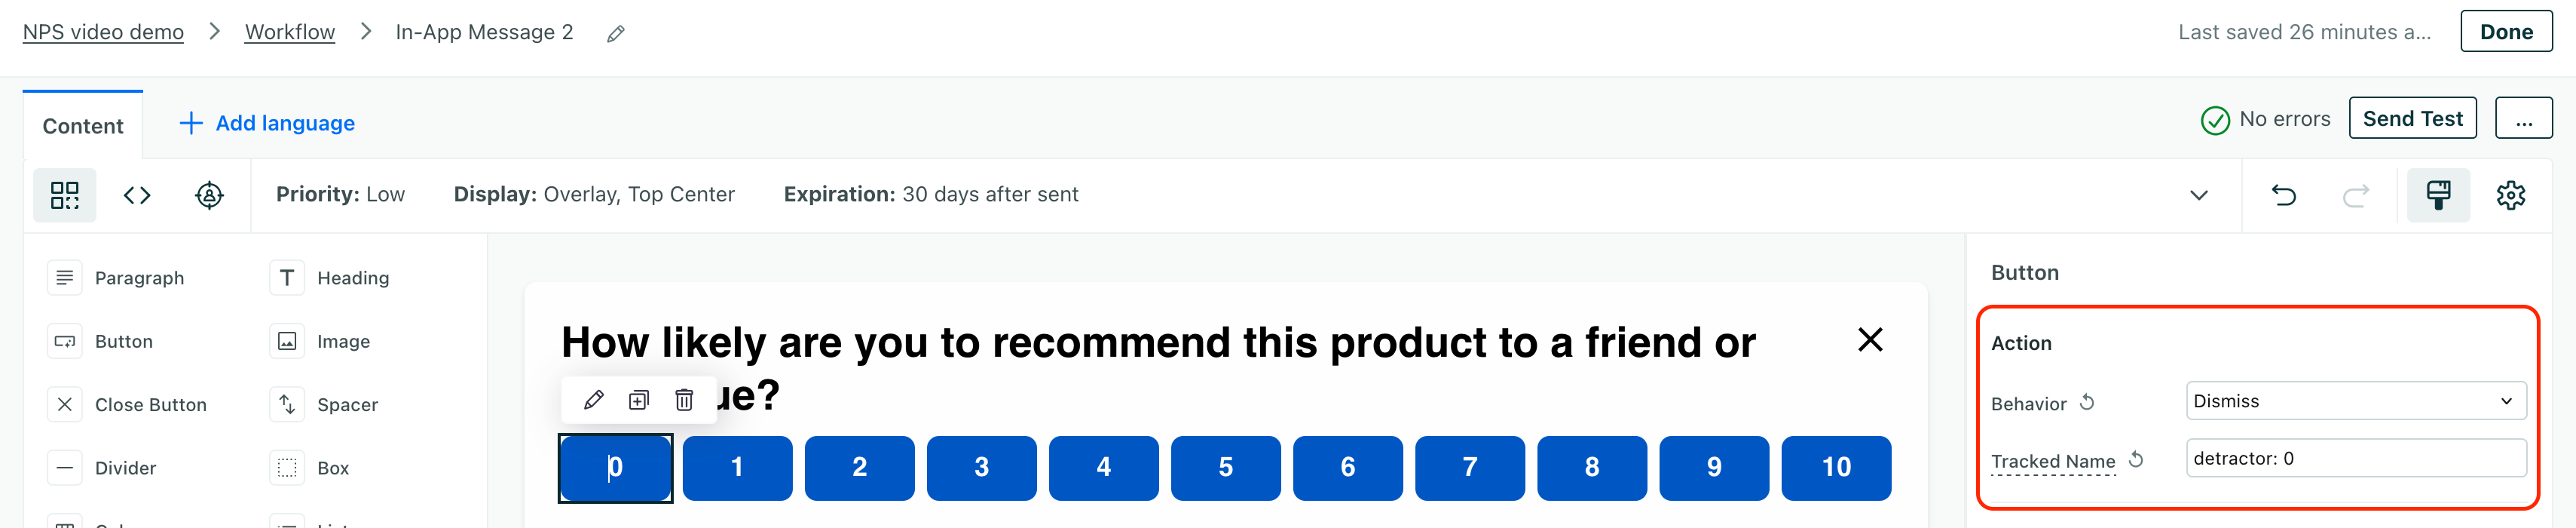
- Select the buttons in the survey. Where the Tracked Name has a number, 0-10, add the corresponding NPS value: detractor for scores 0-6, passive for 7-8, and promoter for 9-10. This is how we’ll group responses later!
- Select the various parts of your message and set up your colors, fonts, and so on.
- When you’re done, click Save and then click Done.
Send yourself a test!
Click Send Test in the upper right corner of the screen to send yourself a test message. This will help you see how your survey looks and behaves on your website. You can use tests to adjust your survey’s appearance and behavior before you send it to your users.
- Finally, select the message again and click Settings. Change the sending behavior to Send Automatically.
3. Handle different kinds of responses
If people are detractors, you might want to alert your customer success or tech support teams to follow up with the user. They might need help with your product! If people are promoters, you might want to ask them for a testimonial or a review.
To handle these different kinds of responses, we’ll add a Wait until action to our workflow. In the resulting branches, we can add actions to notify our team or send messages to to the user.
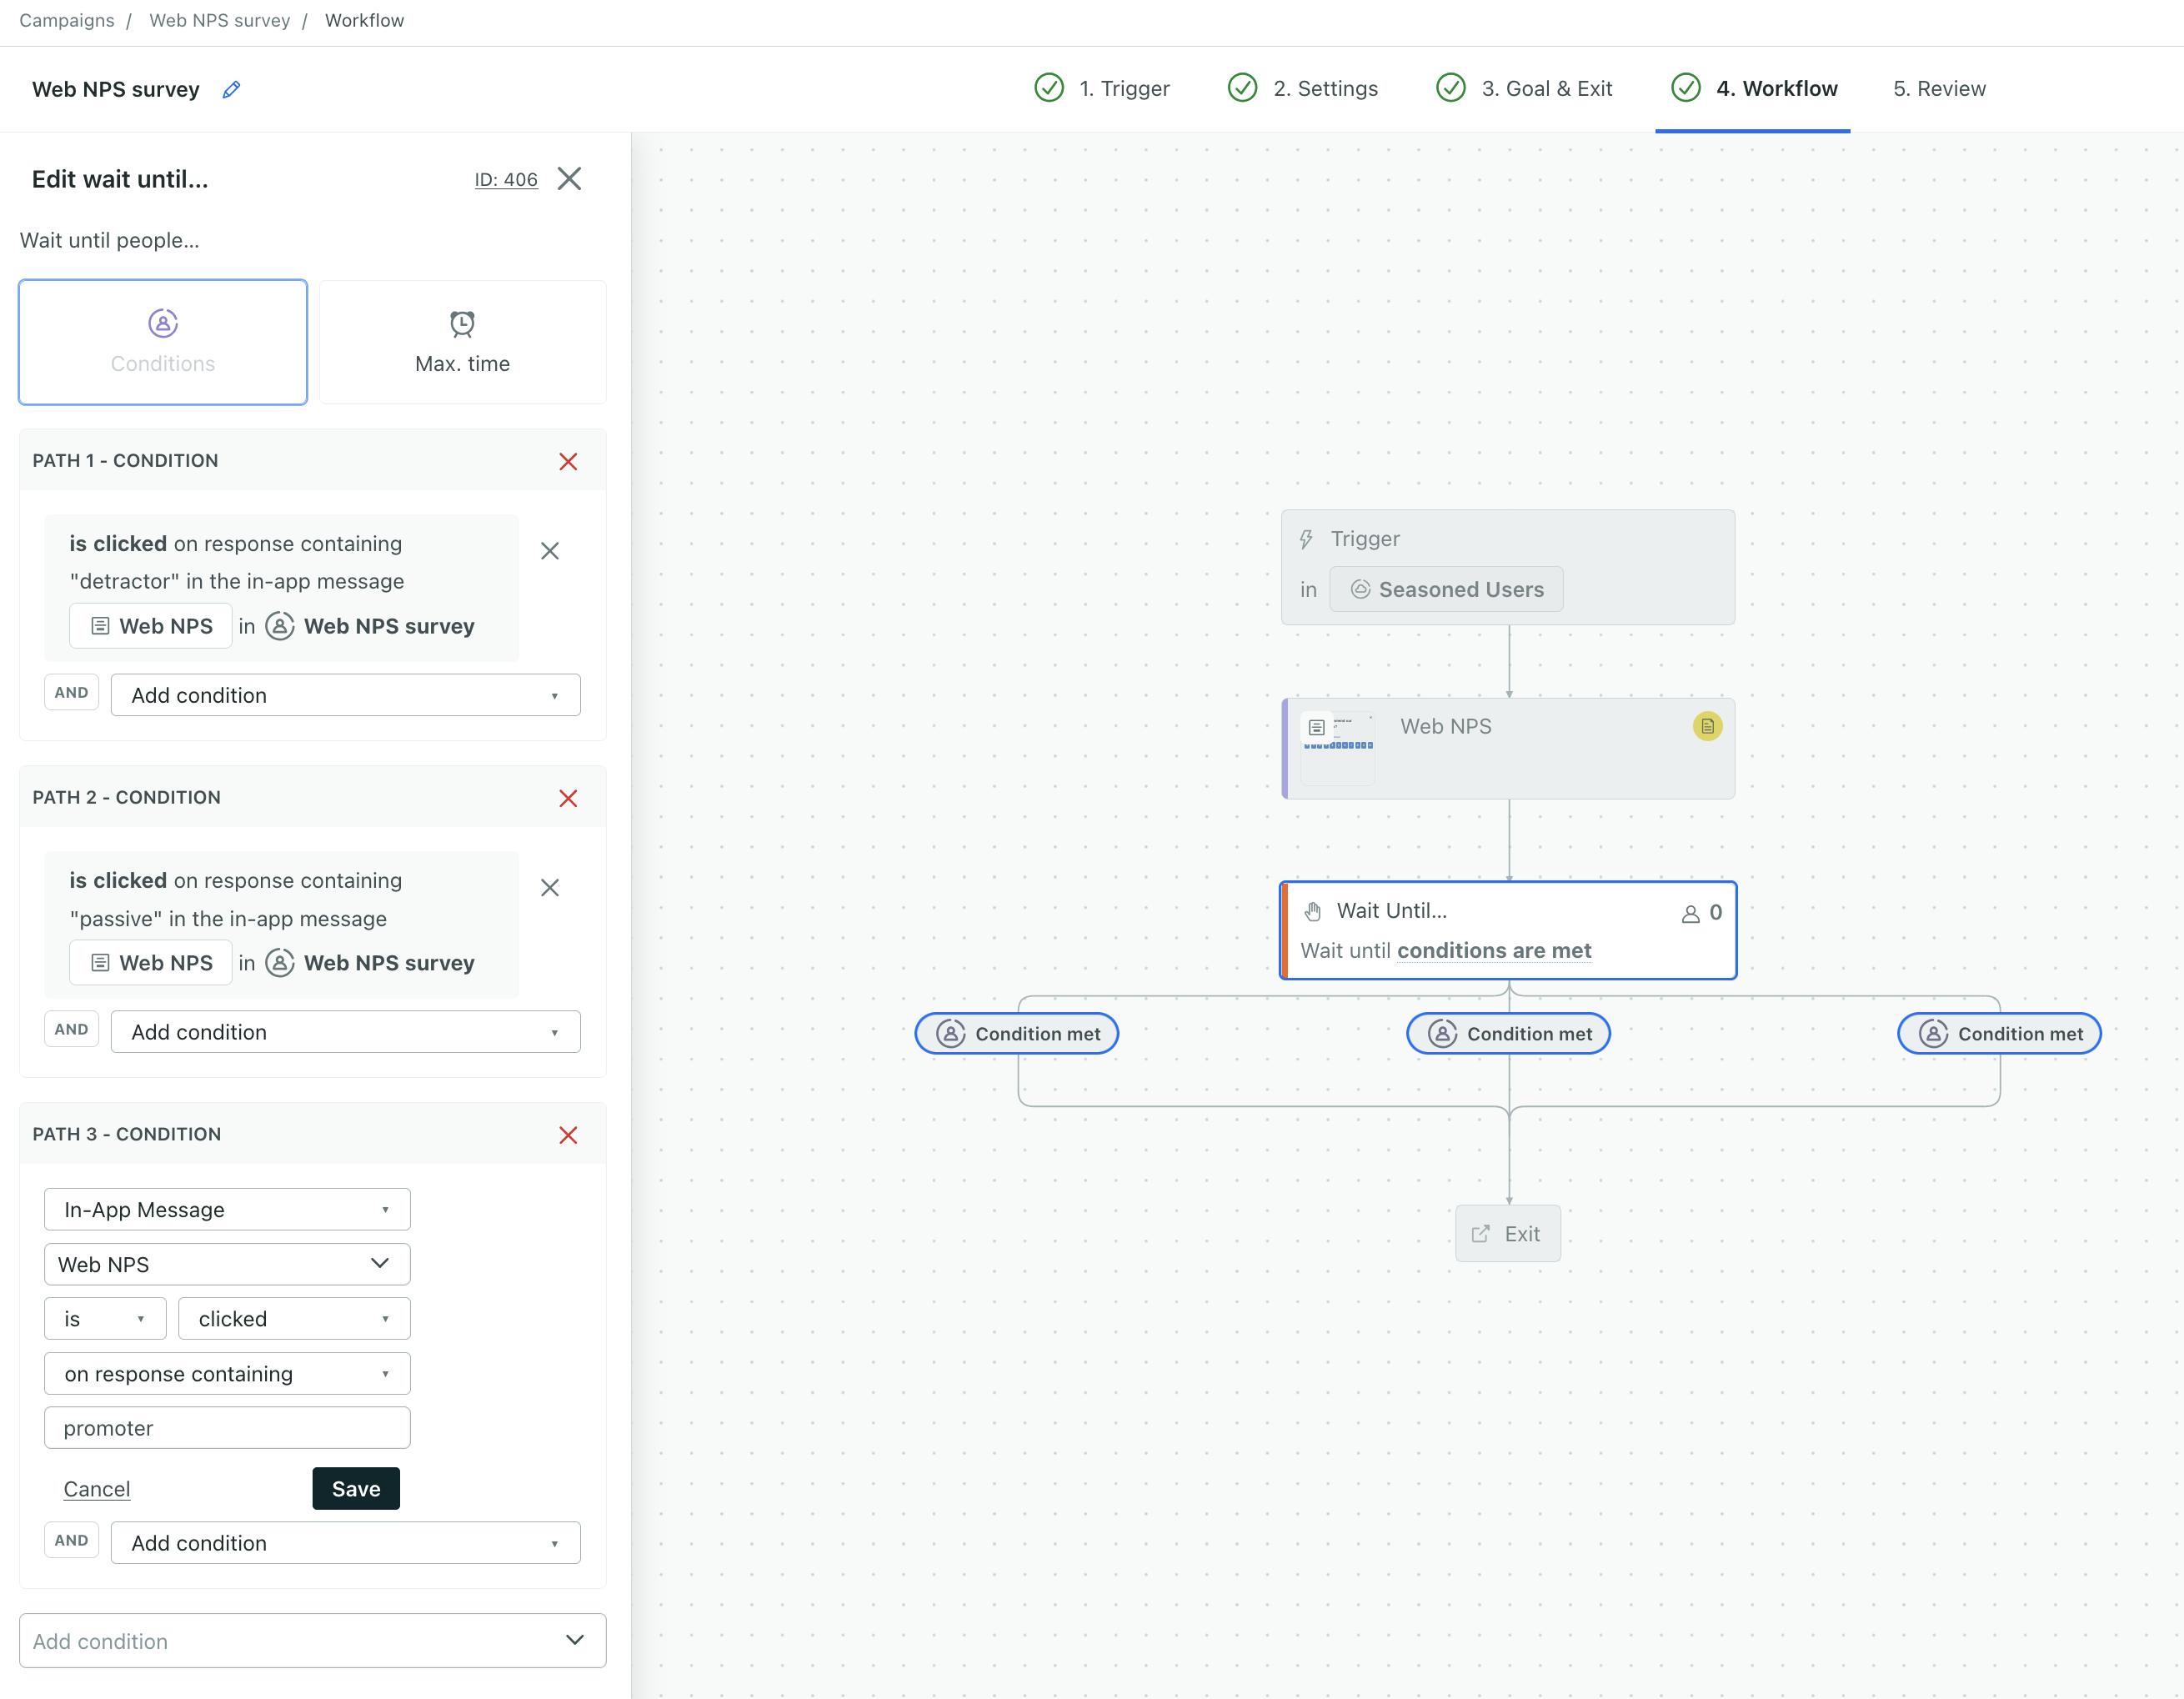
- Drag a Wait until block to the canvas, under your in-app message.
- Click Conditions and add your conditions. You’ll repeat the process below for detractor, passive, and promoter responses.
- Under Add conditions, select Message.
- Select In-app message.
- In the next box, select your NPS survey. Remember, we called our message Web NPS.
- Set the remaining boxes to:
isclickedon response containing. - In the final box, type detractor, passive, or promoter.
- Repeat this process for each response type.
- Click Max. Time and set the maximum time that you want to wait for responses. This should equal the expiration period for your in-app message. You only want to wait until the message expires!
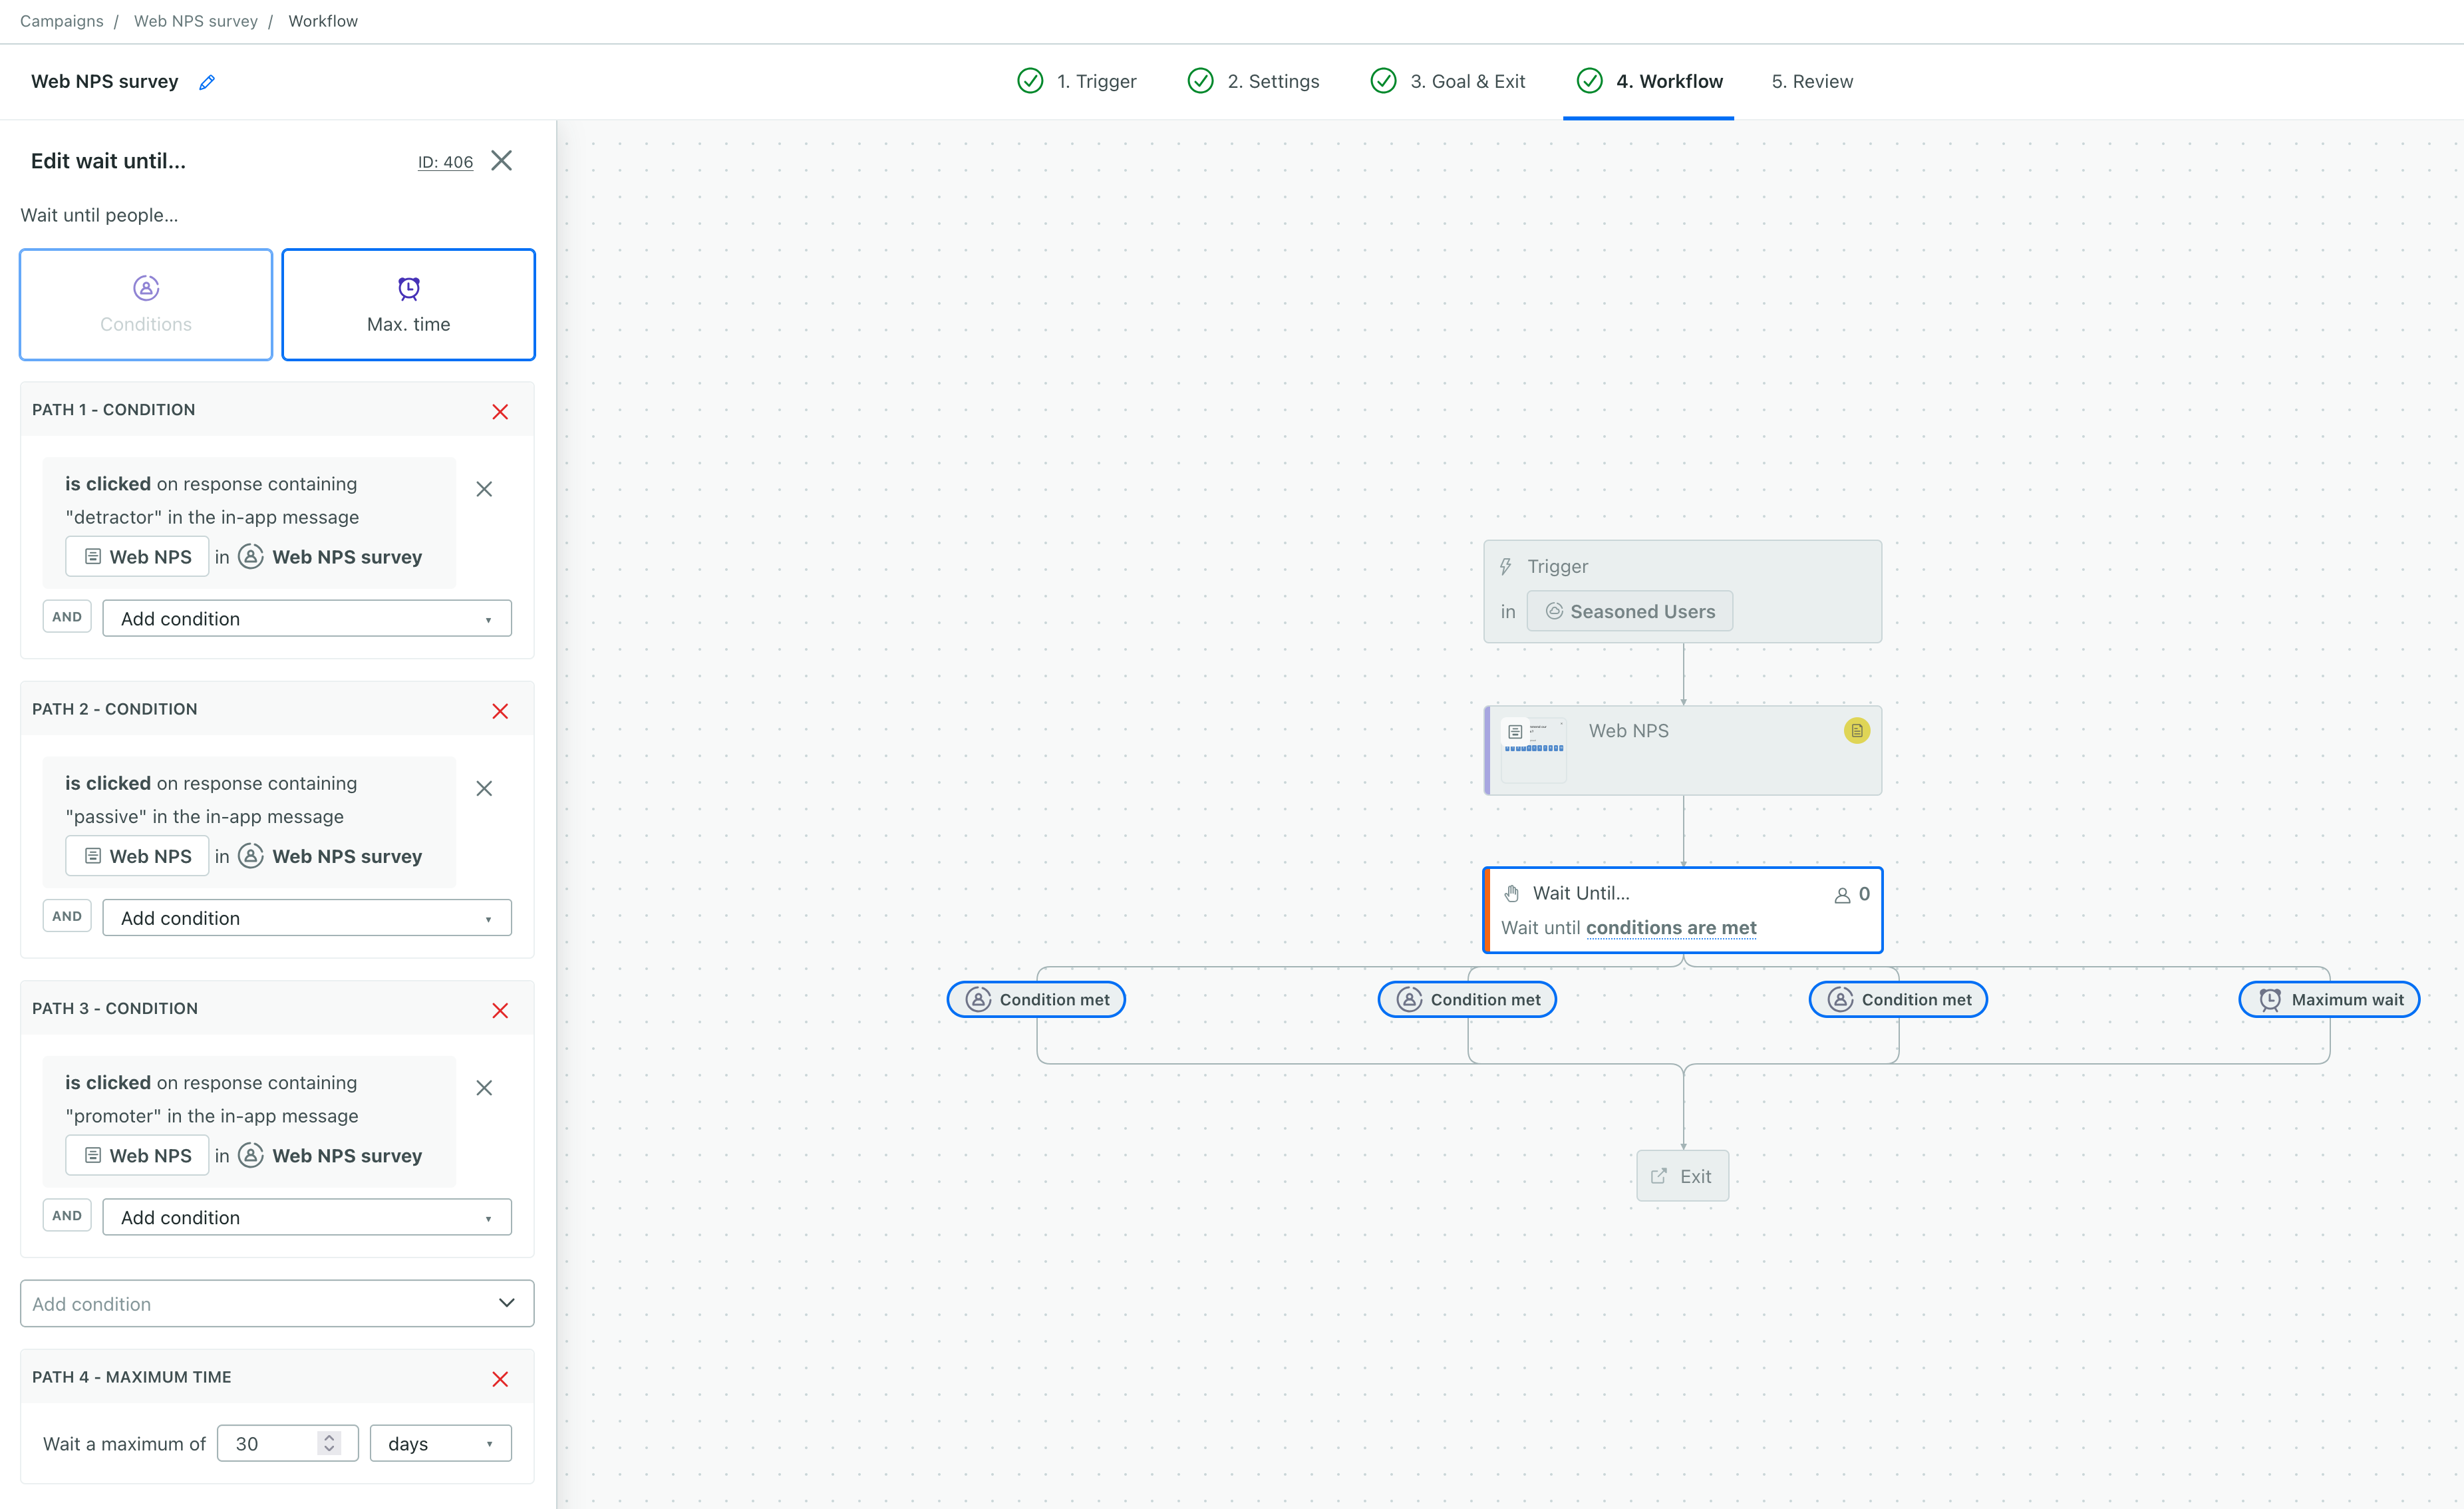
- Click Save.
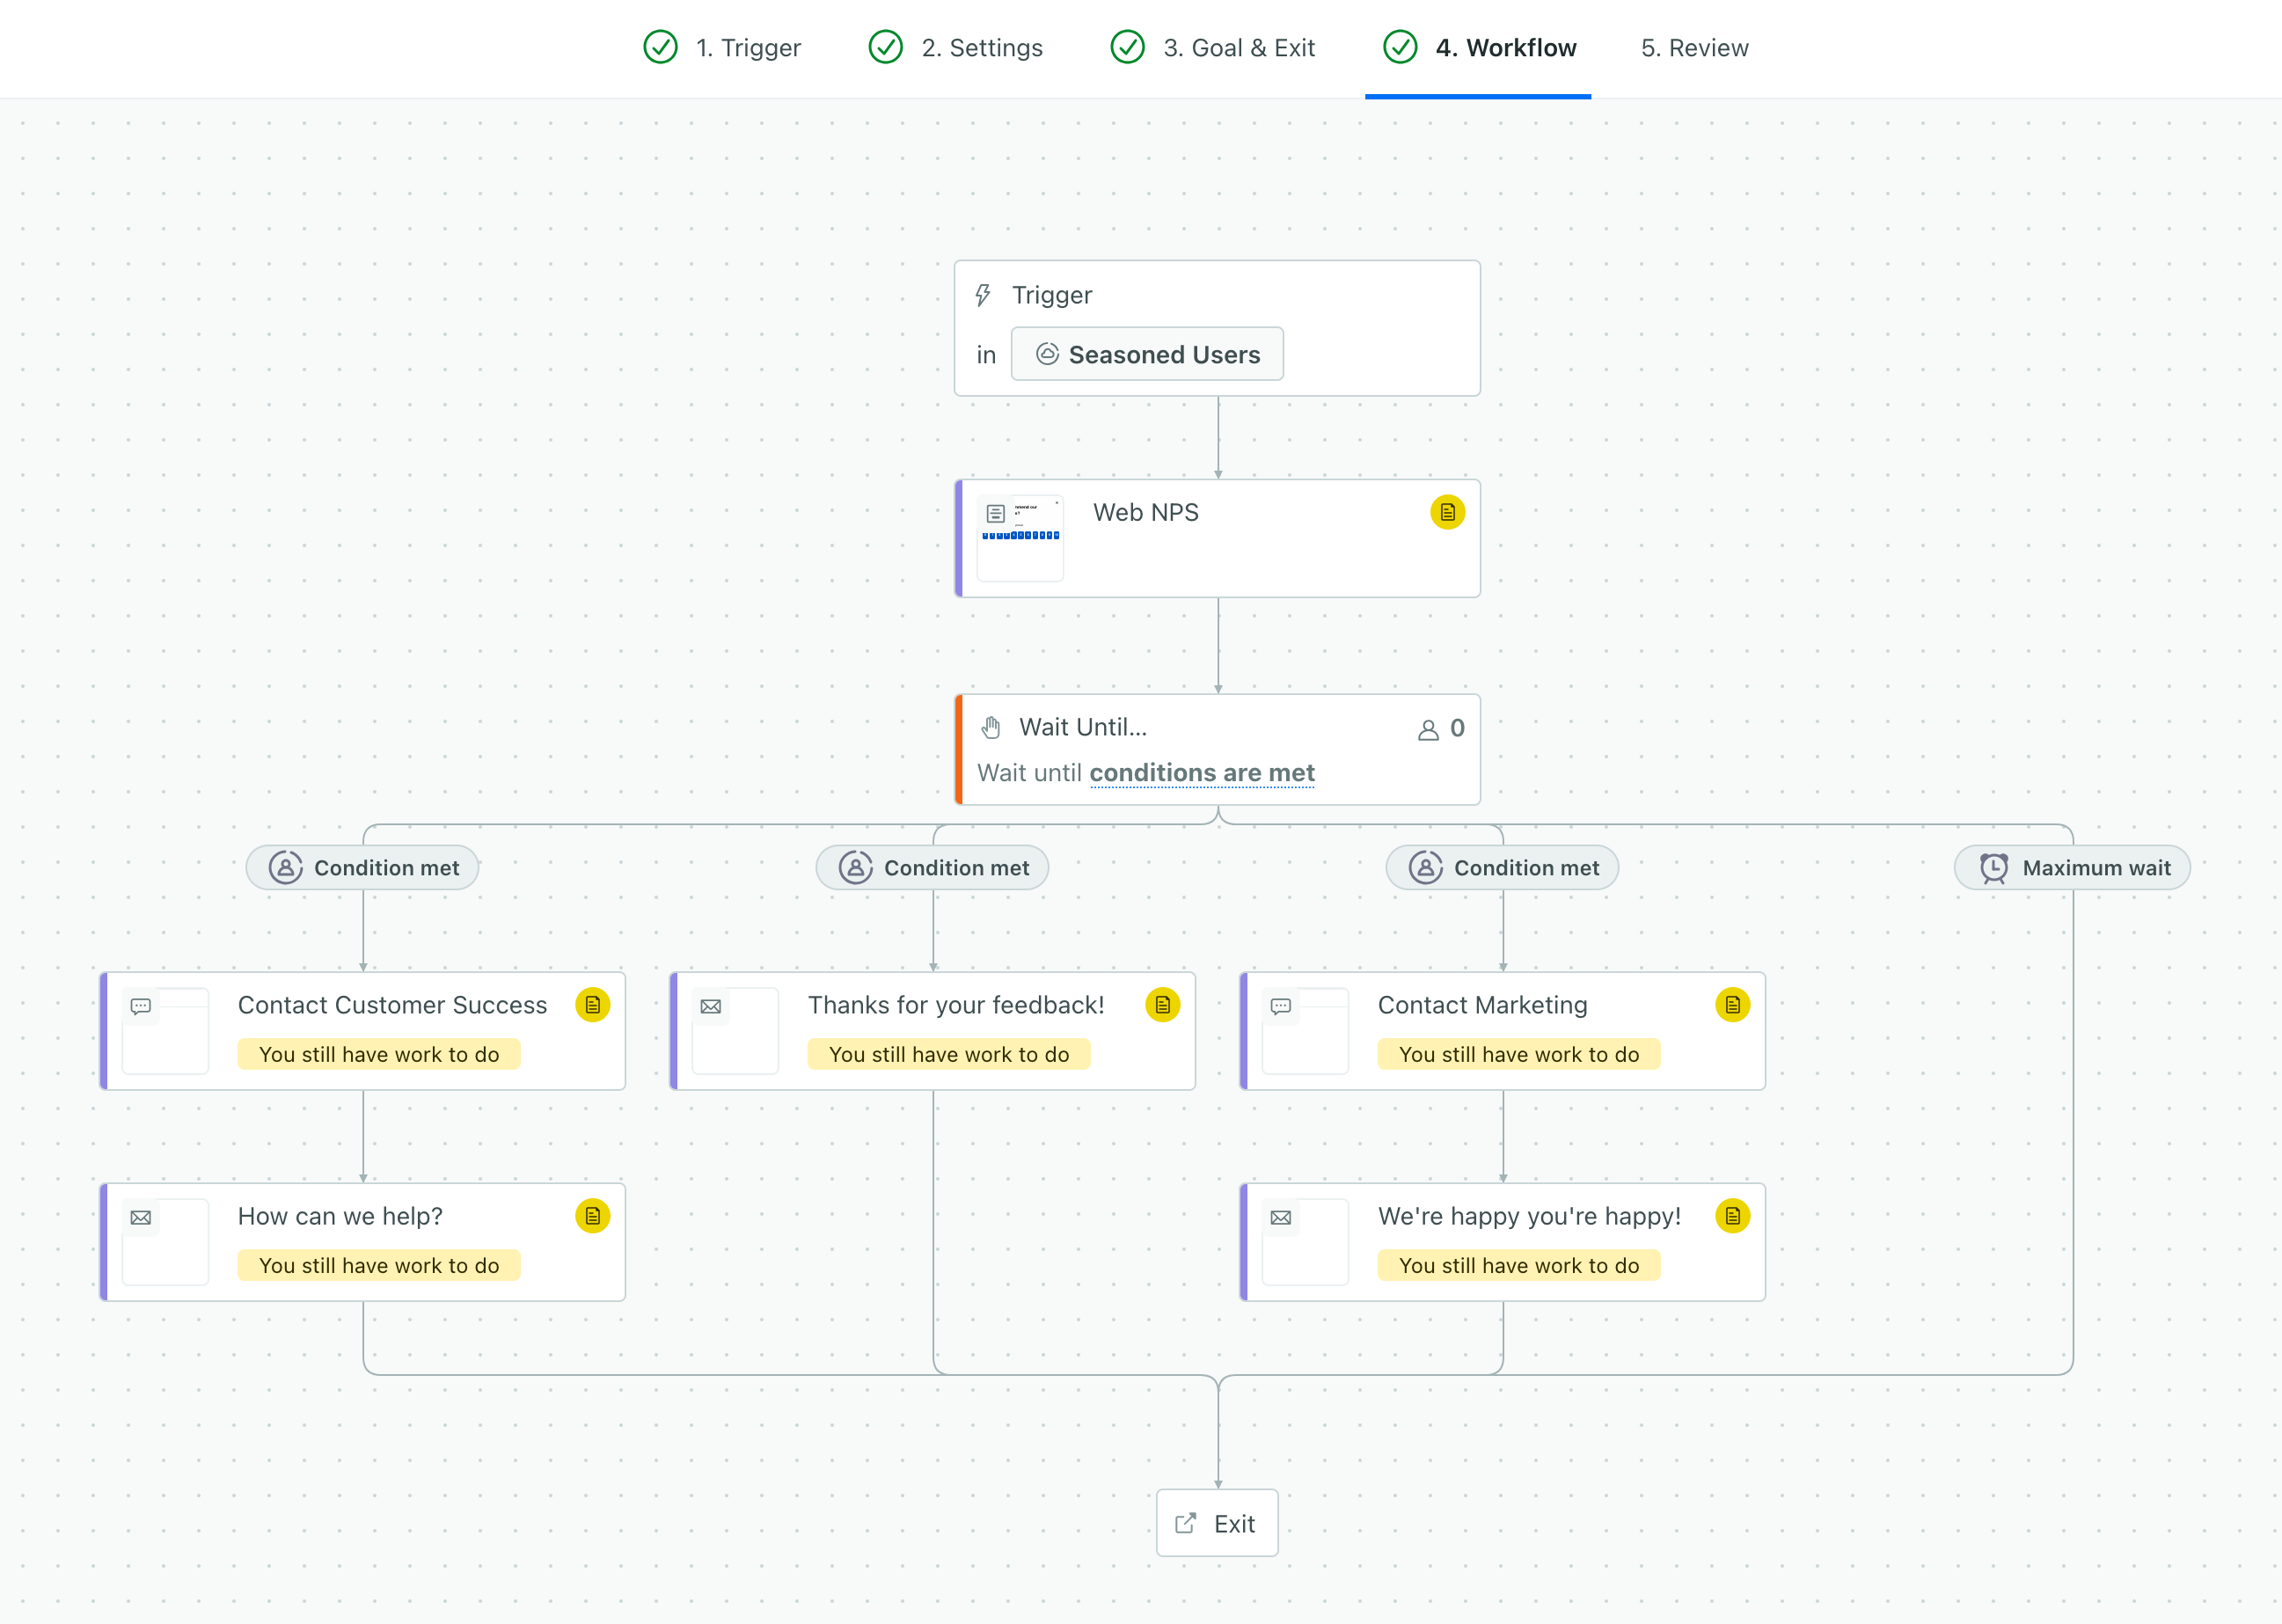
- In your workflow, add actions for the different kinds of responses. You might:
- Send slack notifications to your team about detractors or promoters.
- Send a follow-up email thanking people for their responses.
- Use the Create or Update Person action to store people’s responses as attributesA key-value pair that you associate with a person or an object—like a person’s name, the date they were created in your workspace, or a company’s billing date etc. Use attributes to target people and personalize messages..
- When you’re done, click Start Campaign to go live!
4. Calculate scores
As people respond to your survey, you’ll see their responses in the Metrics tab of your campaign.
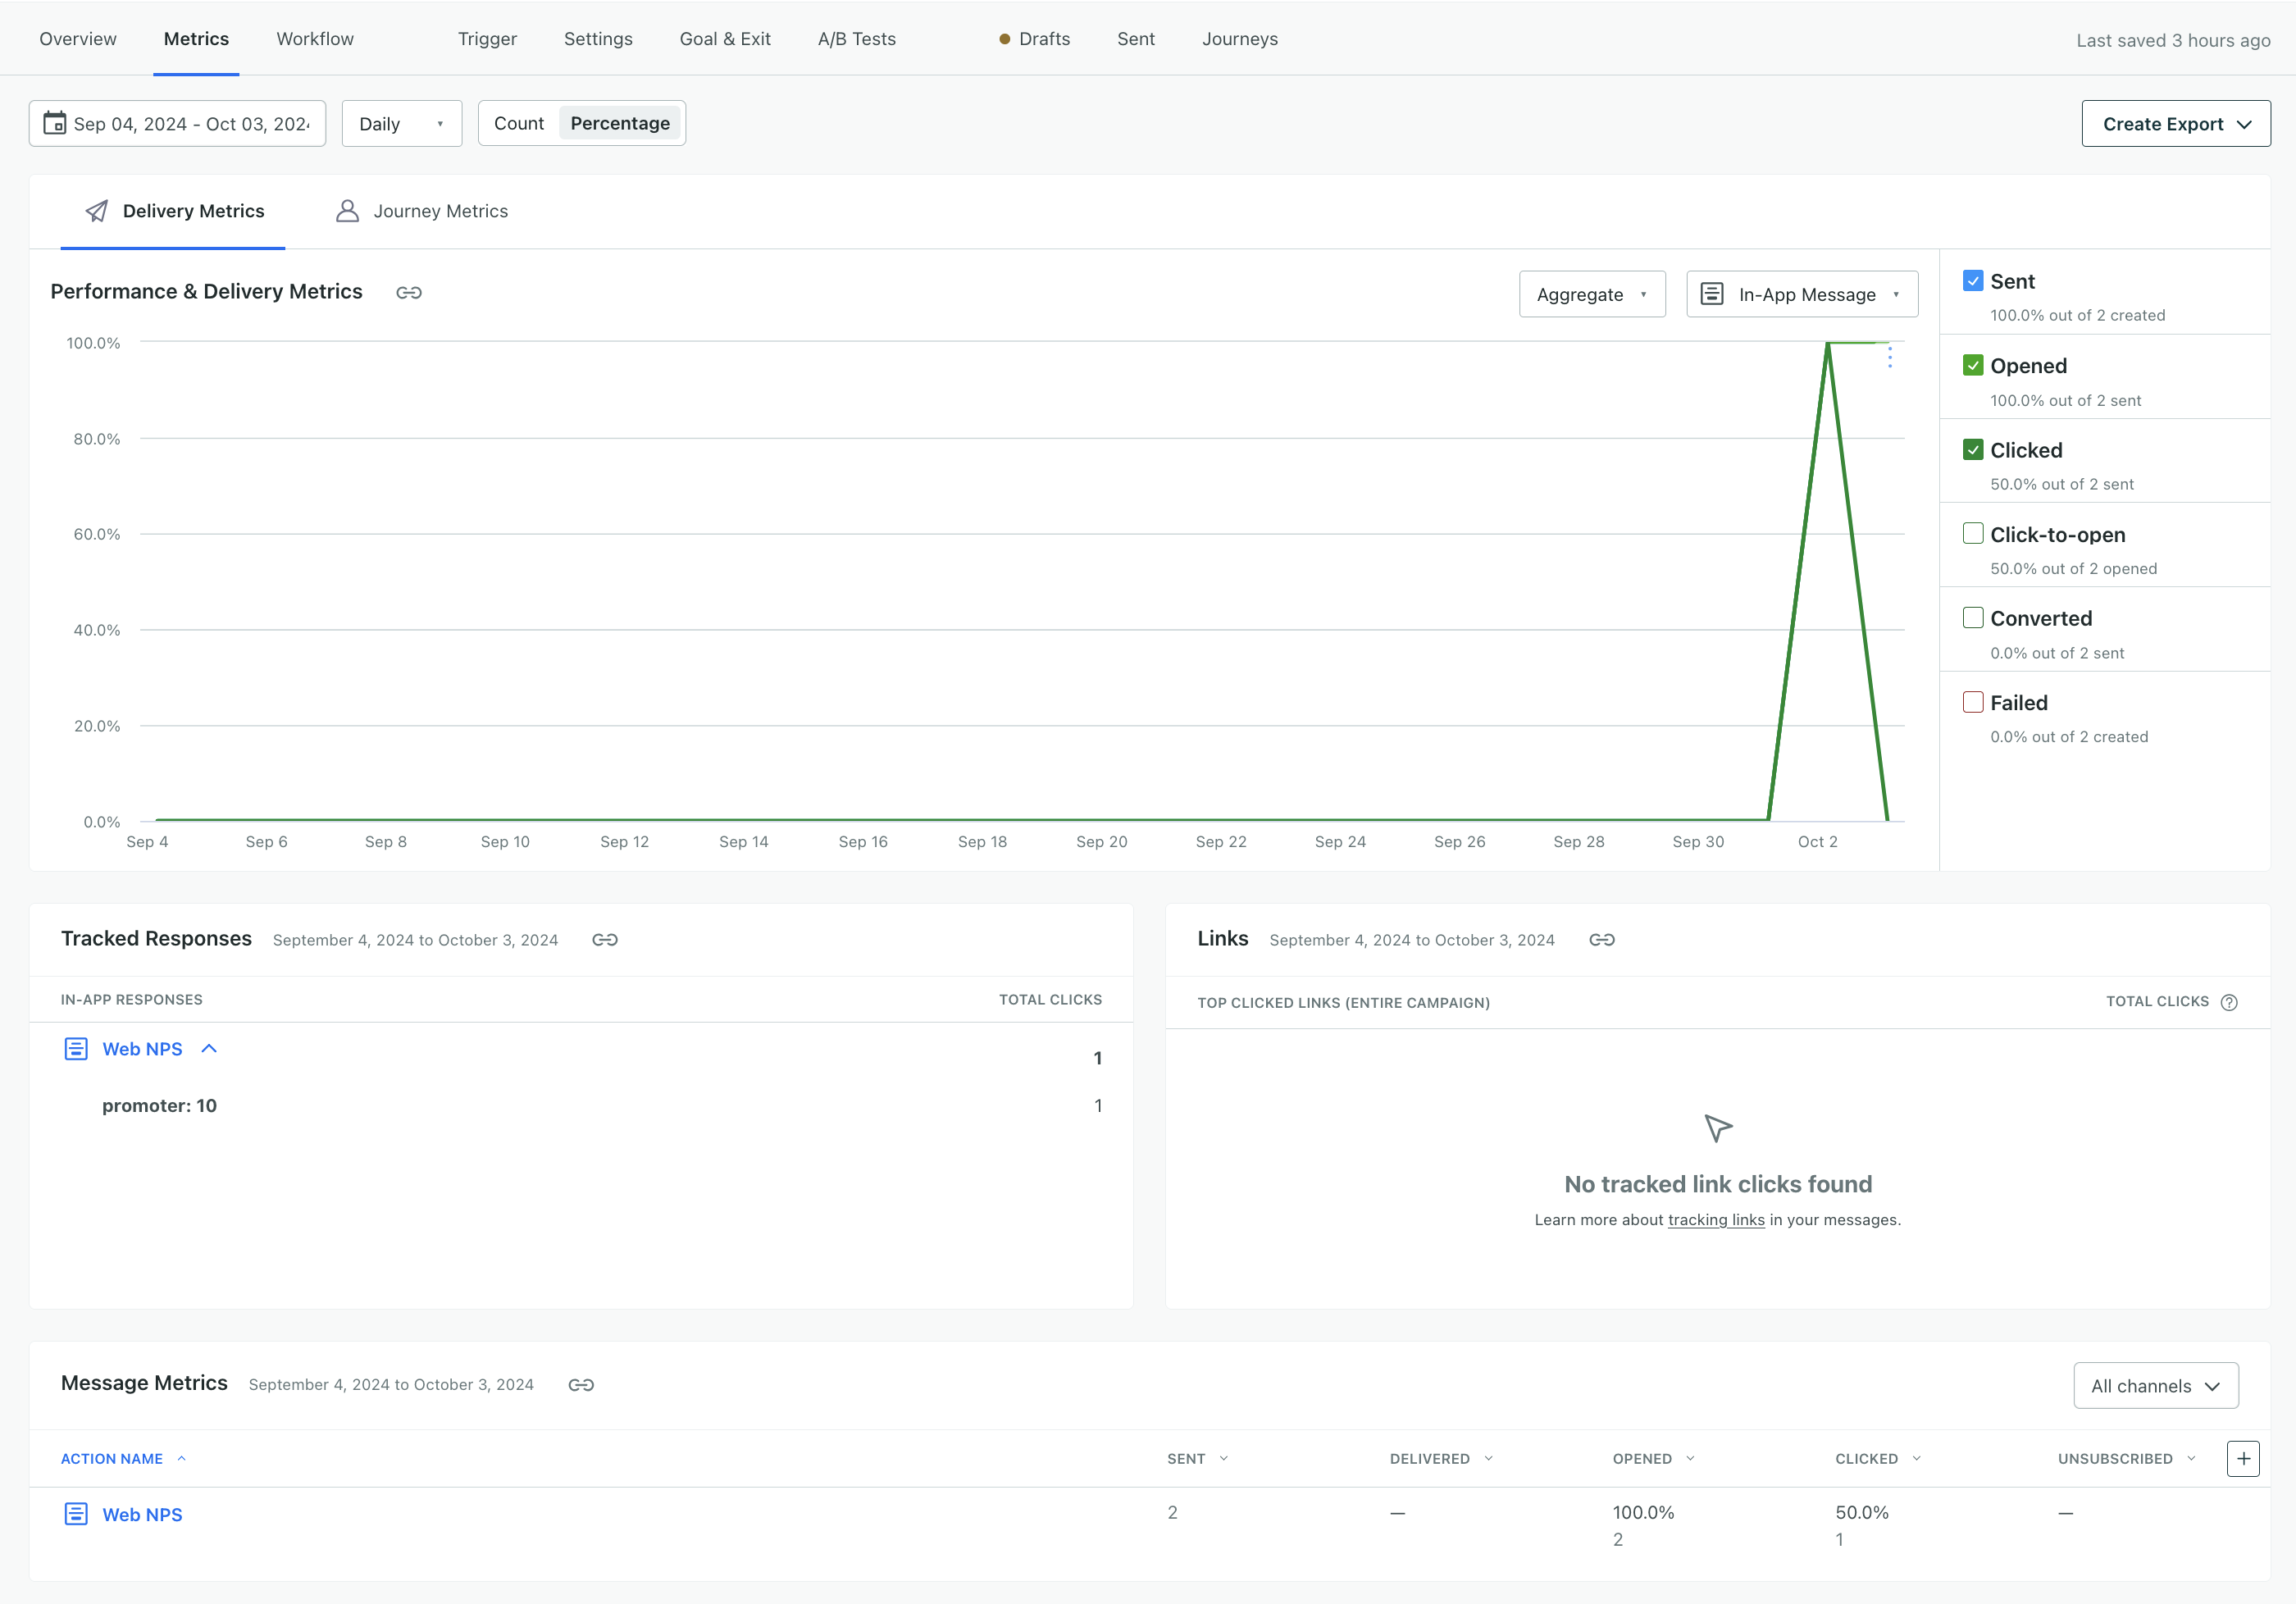
You’ll need to add up your detractors (0-6) and promoters (9-10) and calculate the percentage of each group. Then, subtract the percentage of detractors from the percentage of promoters to get your Net Promoter Score.
(NPS promoters / Total responses) x 100 − (NPS detractors / Total responses) x 100 = Net Promoter Score
Before you calculate your score, make sure you’ve achieved statistical significance! You’ll want to make sure you have a large enough sample size to make your score meaningful. For example, if you expect 1000 people to see your campaign but only have 10 responses, you probably don’t have enough data to make a meaningful calculation.
Advanced: Send data to your reporting tool to gather results
You can send message events to your analytics platform using outgoing integrations or reporting webhooks to send your survey responses to your reporting tool of choice. This way, you can analyze your survey results alongside other data you collect about your users.
For example, you might send your survey responses to Mixpanel where you can group and analyze NPS scores over time.
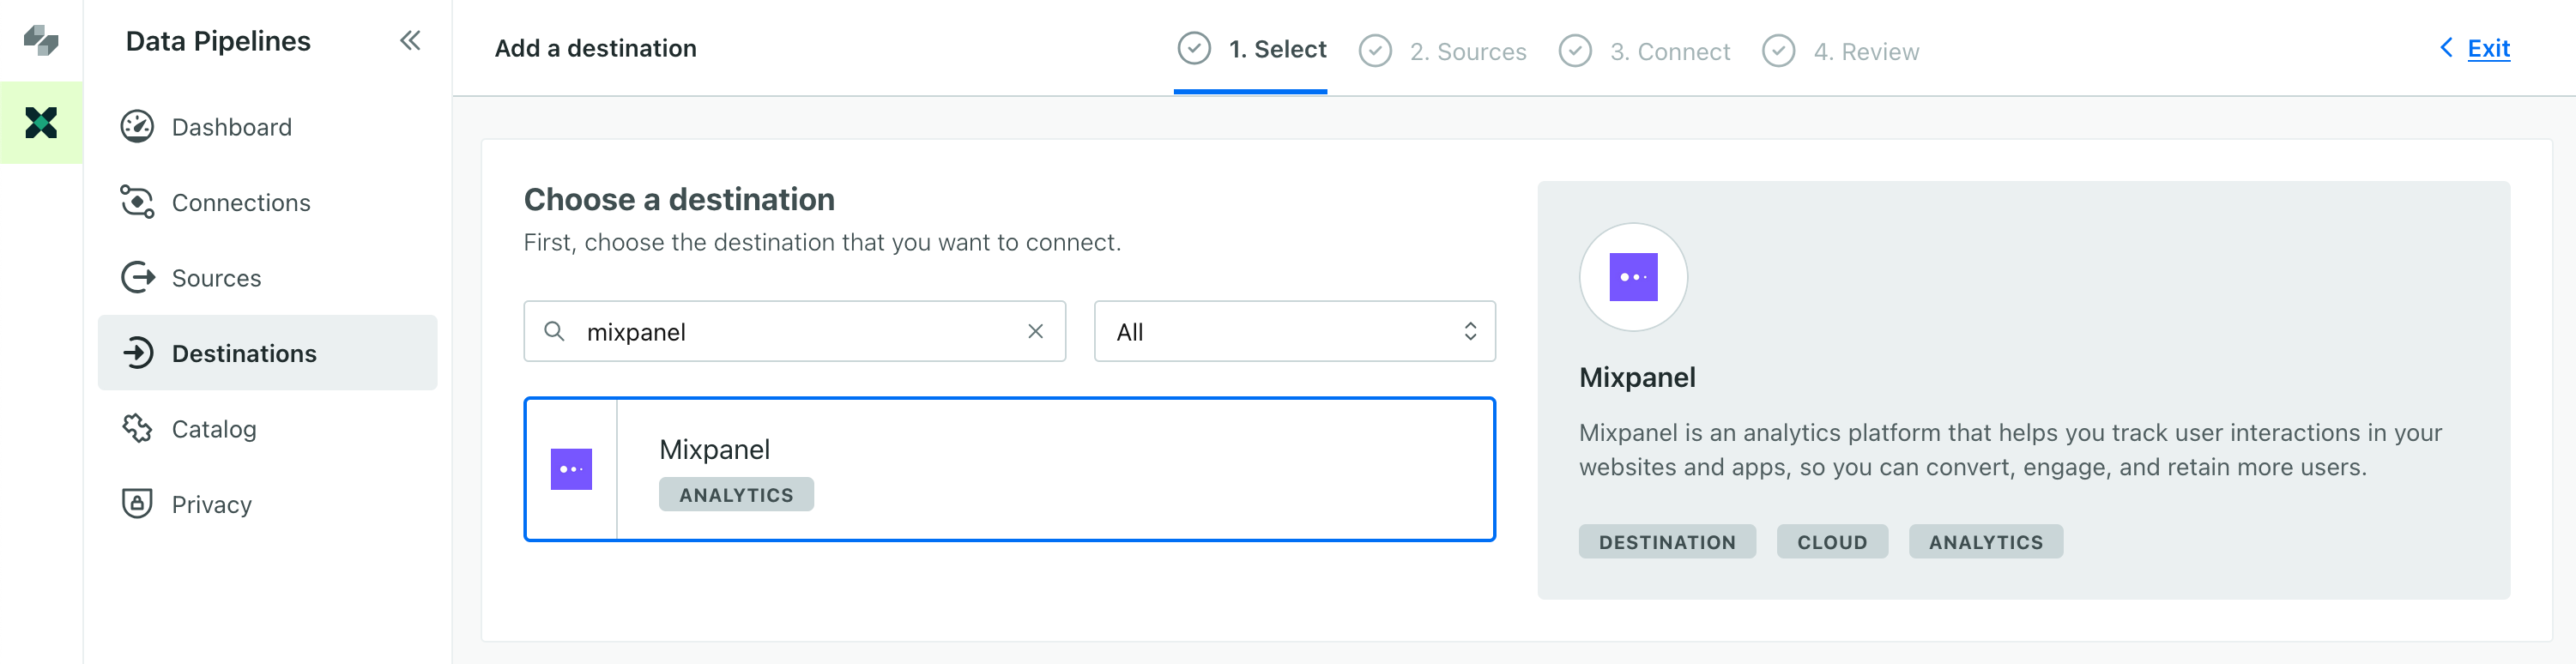
- Go to Data & Integrations > Integrations.
- Select your reporting tool, like Mixpanel or Amplitude. Pick the Advanced version of the integration.
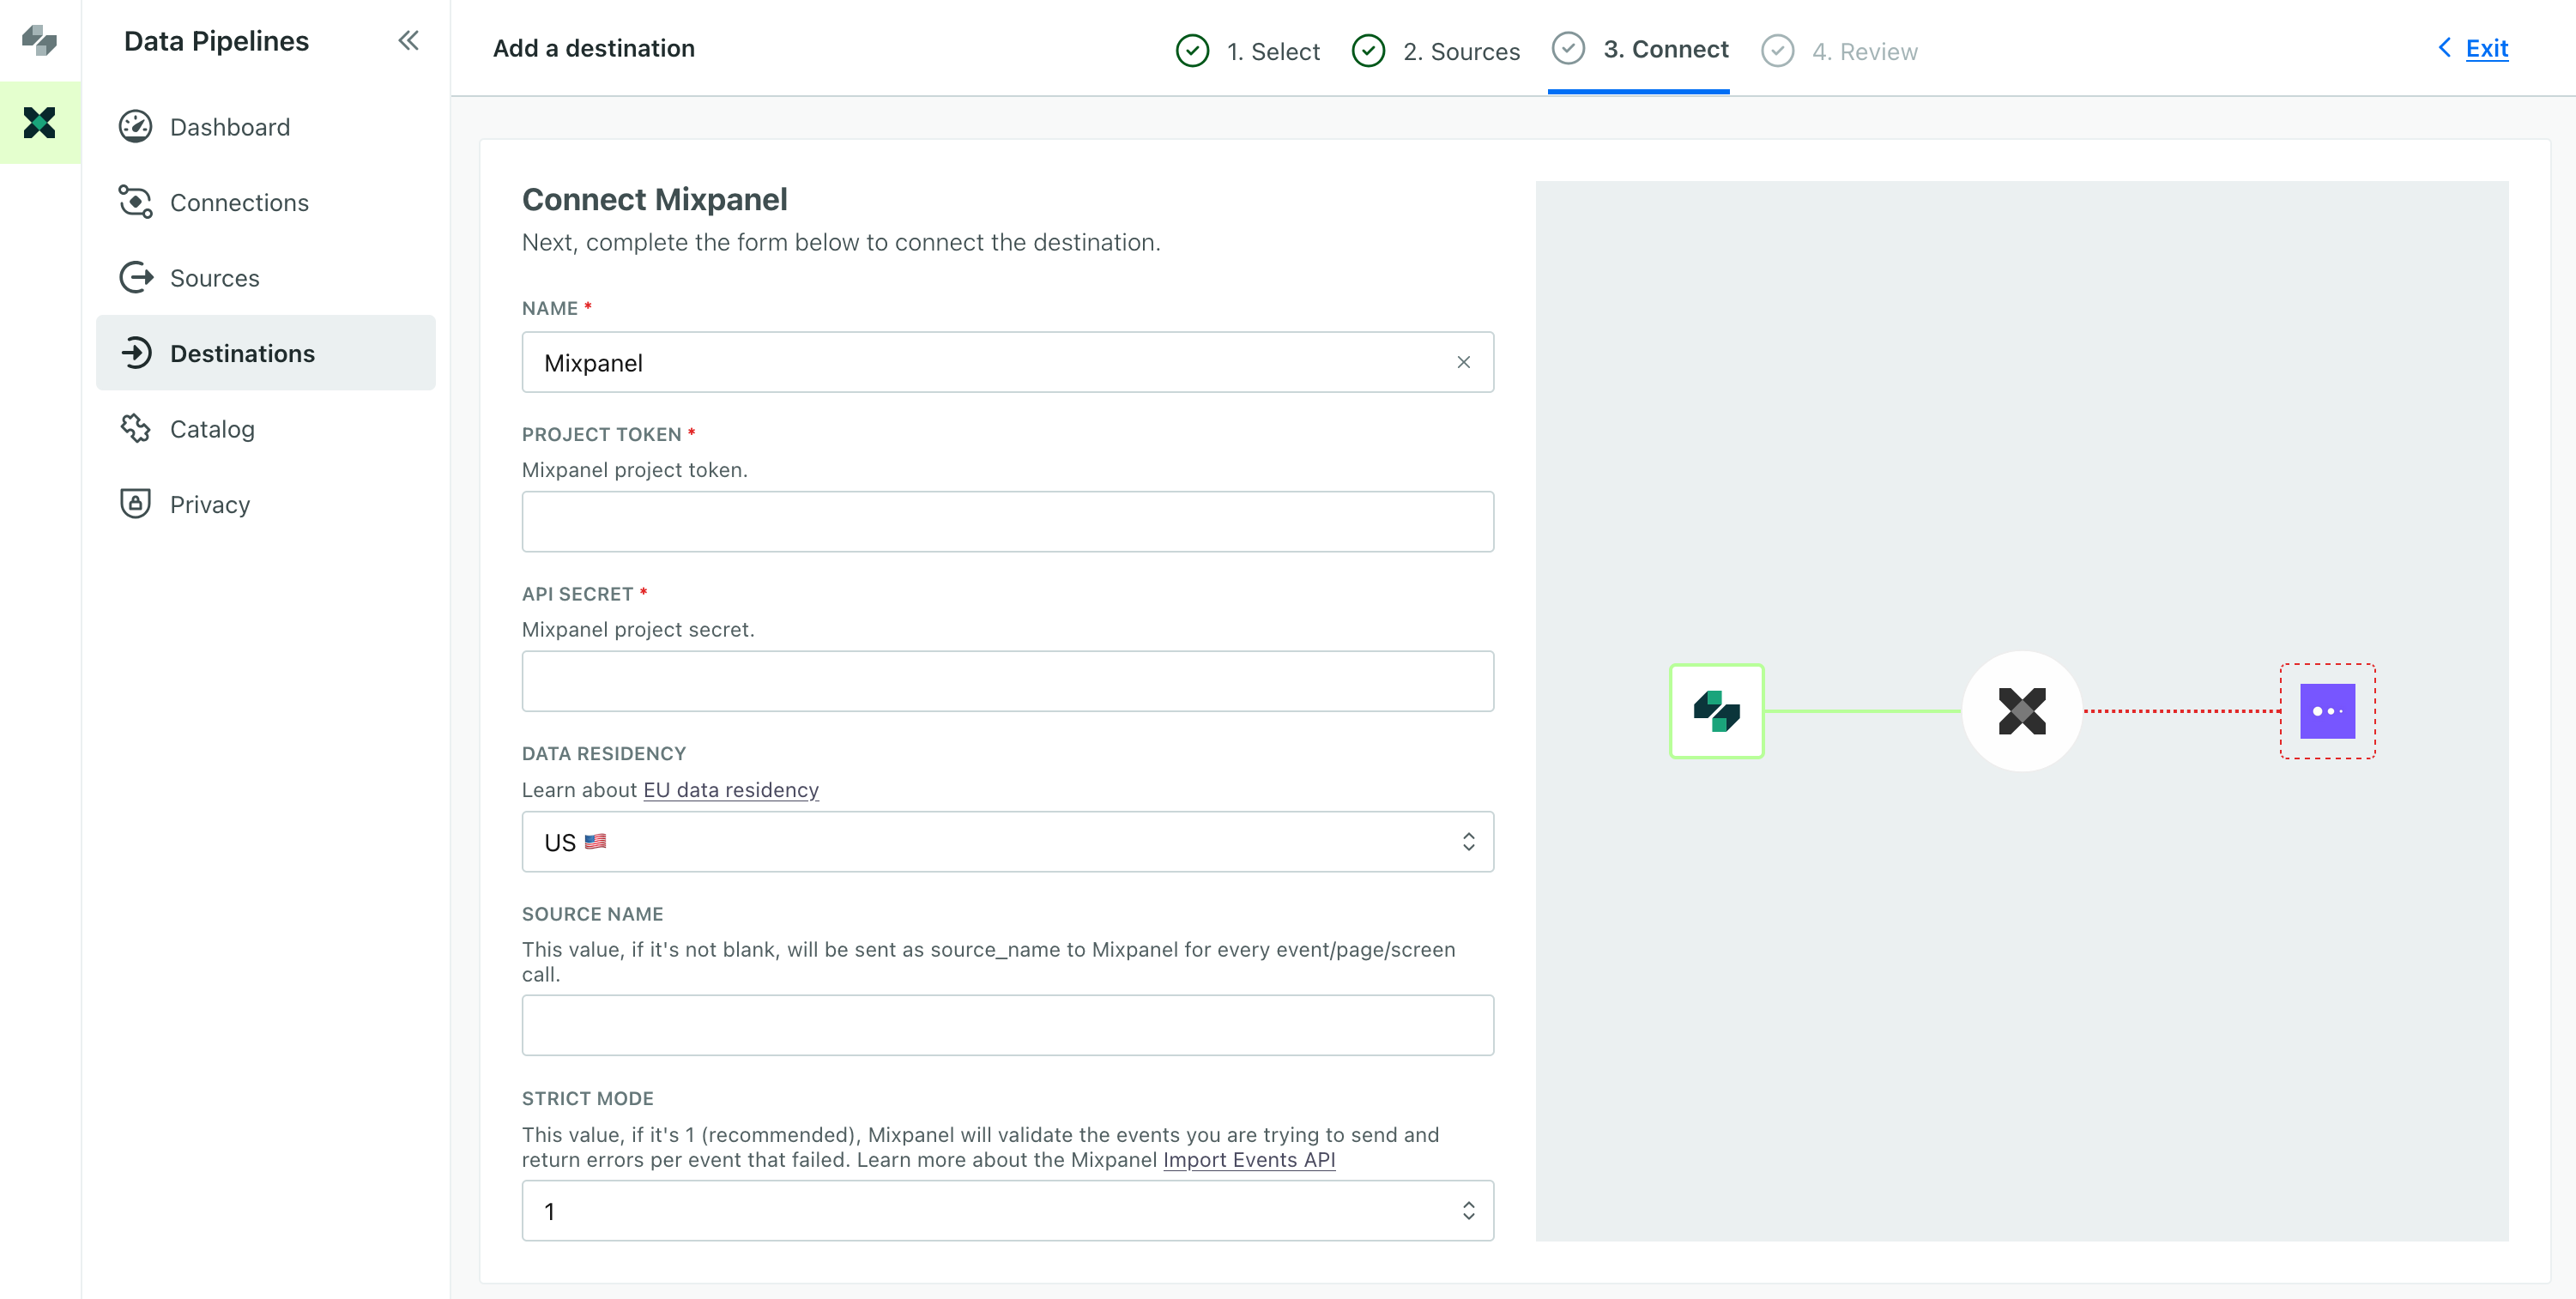
- Set up your integration. You’ll need to give us credentials to send data to your reporting tool. We’ve provided an example for Mixpanel below.
- In the Configure data step, you’ll see that we already capture message events from your workspace. But you can also select other data sources for your analytics platform.
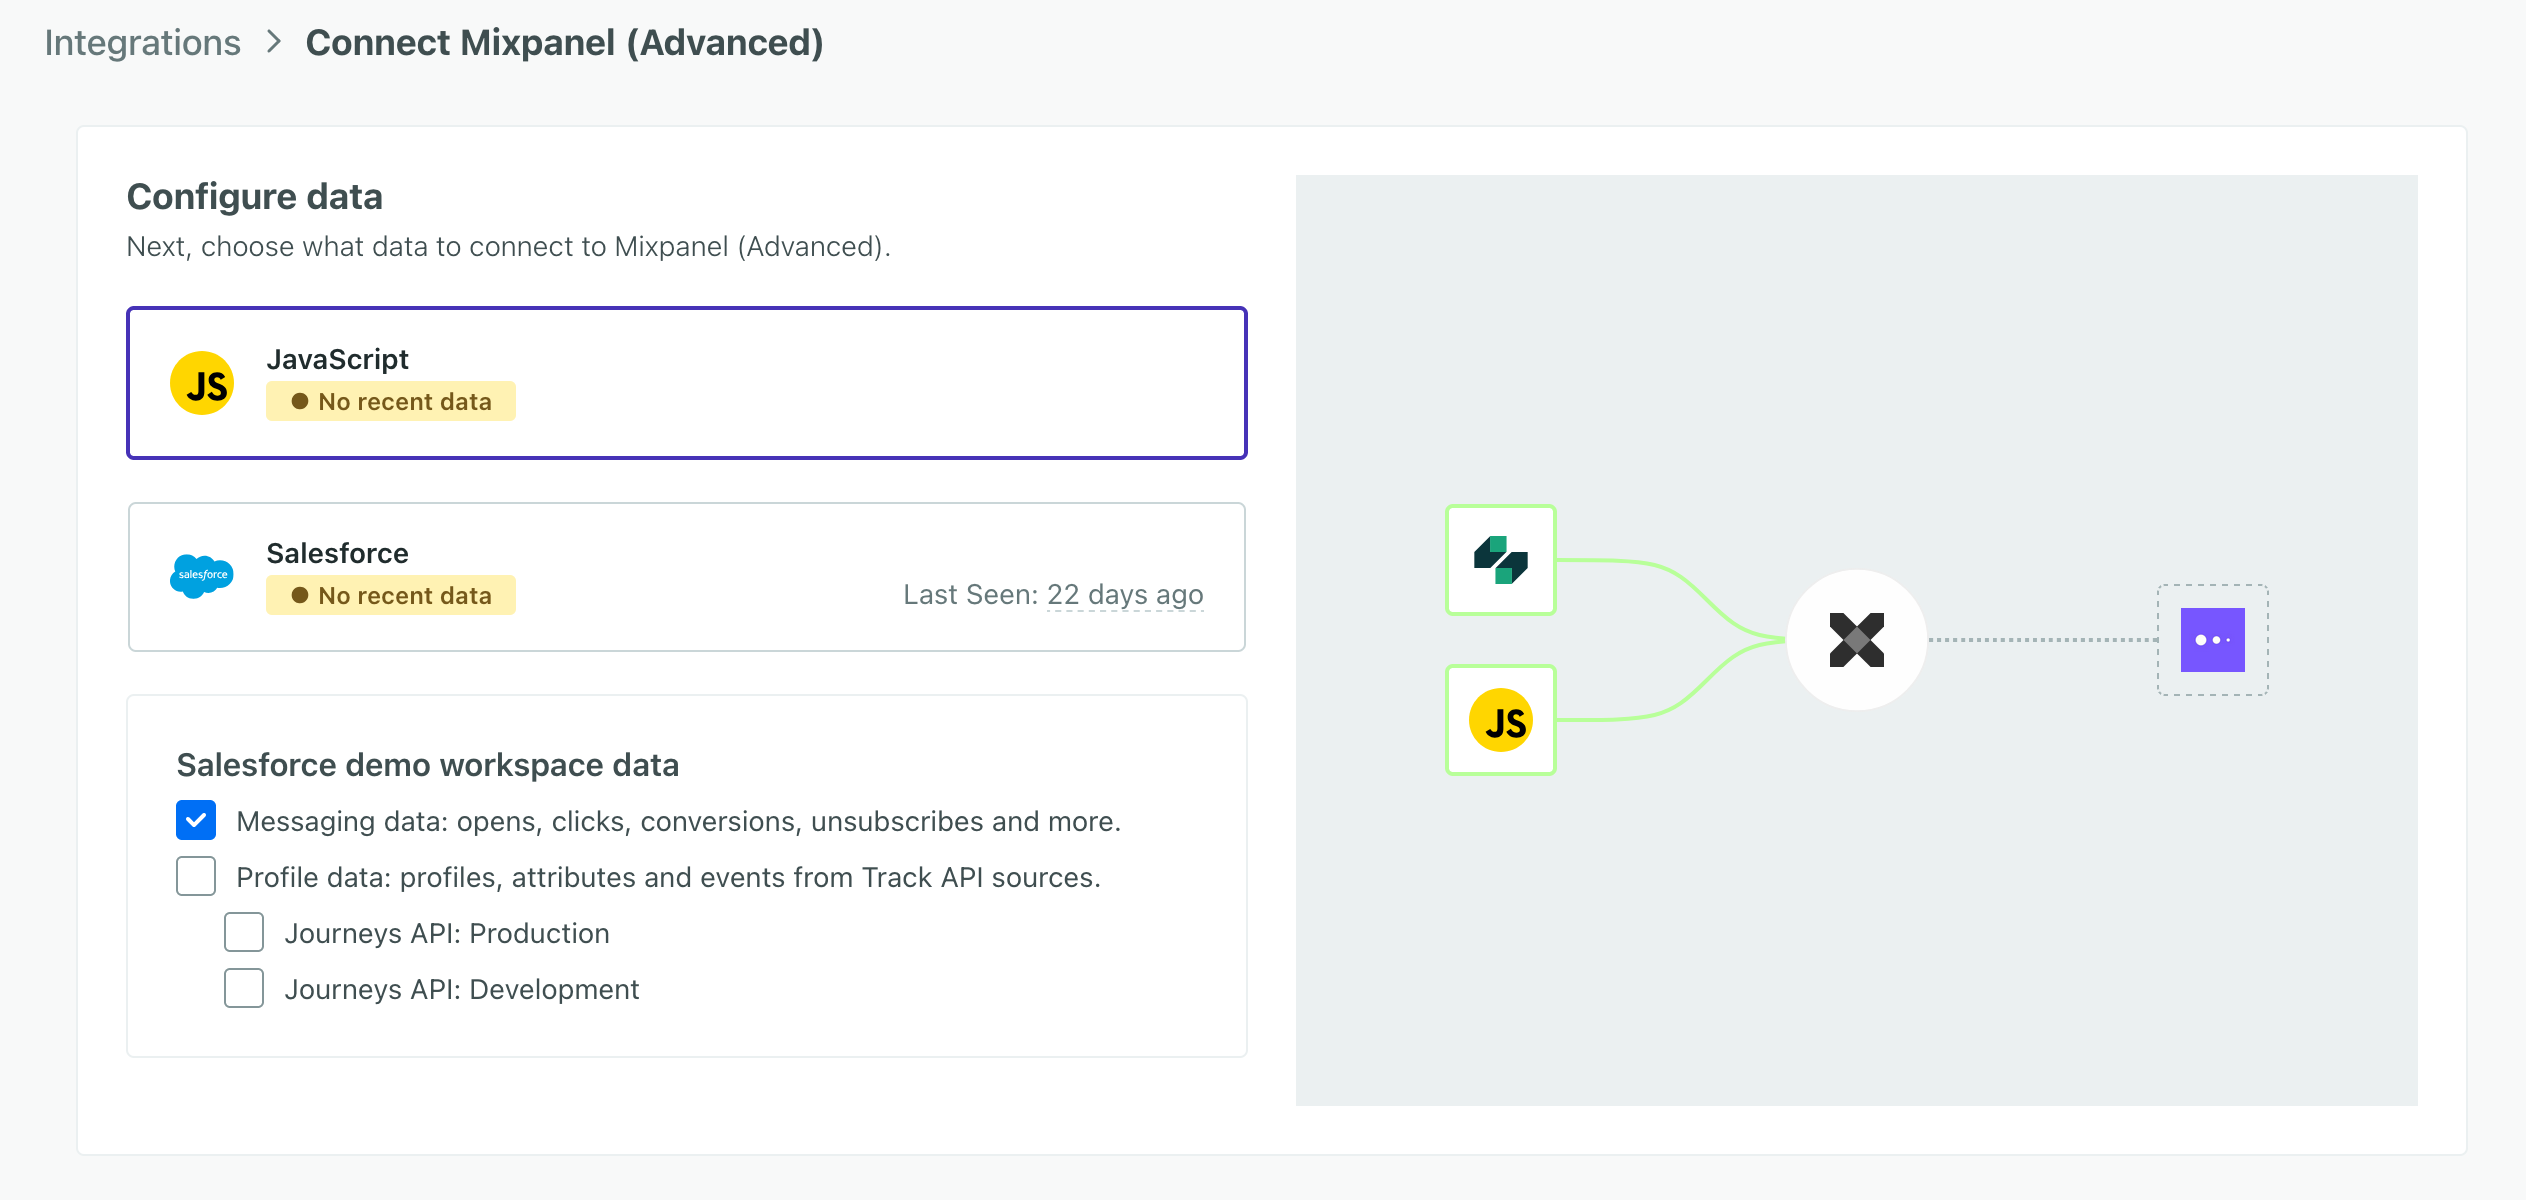
- Click Save integration and you’re all set! Now you can send data into Customer.io and downstream to your reporting tool!
You can even set up Actions to handle responses to NPS messages in your reporting tool differently—for example, if you want to send them with a specific event name that helps you categorize them

