

Objects and relationships in automations
You can trigger automations based on changes to objects and relationships. You can target trigger data in messages and specify who should enter an automation based on the relationship they have to objects.
Trigger automations based on objects or relationships
You can trigger automations based on changes to objects or relationships. You can trigger an automation when:
- An object is updated (like an Account’s name was changed).
- A relationship between an object and person is added.
- A relationship is changed (like a person is no longer associated with an Account).
- A date stored on an object is within a certain time frame (like an Account’s renewal date).
You can also narrow in on the audience for these automations. For both object and relationship-triggered automations, you can choose to send to:
- Every person in the object or
- Certain people in the object
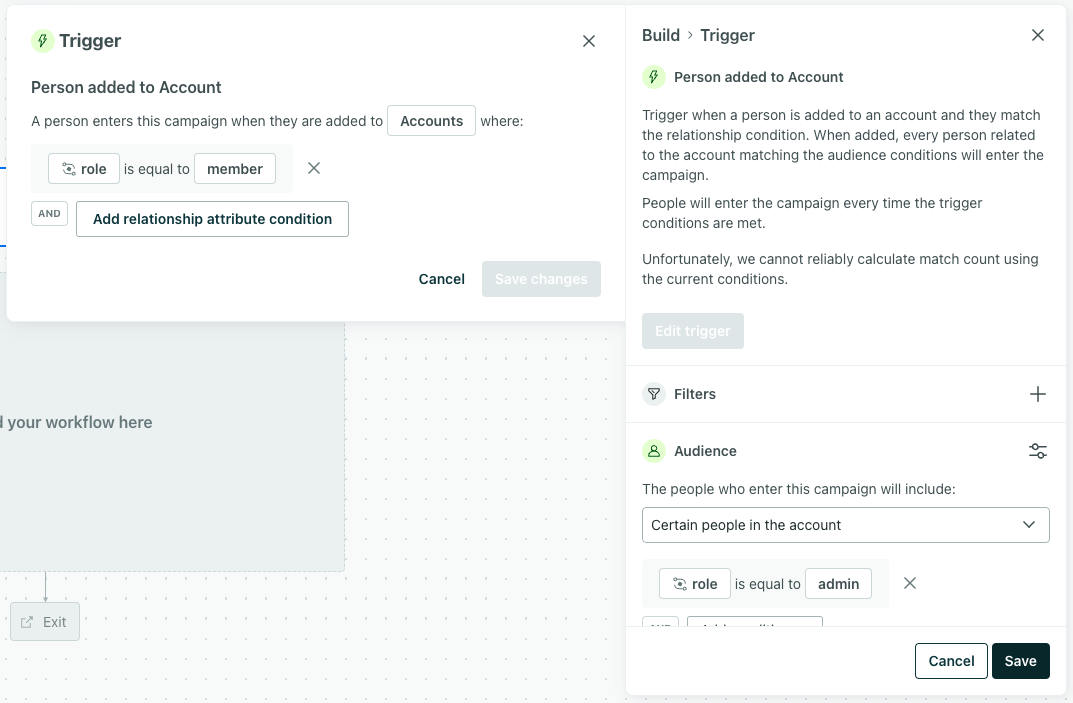
For relationship-triggered automations, you can also choose to send only to the person who triggered the automation.
Visit Automation Triggers for more on
- Object-triggered automations
- Relationship-triggered automations
- Date-triggered automations for custom objects
Per-trigger fan-out limit
When an object or relationship changes, the automation runs for every person related to that object. A single trigger event can fan out to a limited number of people, and the limit depends on your plan:
| Plan | People per trigger event |
|---|---|
| Premium and Enterprise | 5,000 |
| Essentials | 1,000 |
| Other plans | 500 to 5,000, depending on your plan |
If a trigger includes more people than your limit, none of them start a journey. If you need a higher limit, contact us to talk through your use case.
This limit is per trigger event, not per automation. Your automation can have far more total recipients than your limit. The limit only applies to how many people a single object or relationship update can reach at once.
Under the limit
You have 10,000 company objects, each related to 5 people (50,000 people total). When any company’s properties change, the automation triggers for the 5 people related to that company. Every person can go through the automation because each trigger event fans out to only 5 people.
Over the limit
You run an auction site with a single auction object related to 50,000 interested people. When the auction’s properties change, the trigger tries to fan out to all 50,000 people at once—but the fan-out limit blocks the entire batch, and nobody starts a journey.
Why the limit exists
A single object update can trigger messages for every related person simultaneously. Without a cap, one property change on a popular object could kick off thousands of simultaneous journeys, slowing down your workspace. The fan-out limit is a backstop to prevent this kind of problem.
Working within the limit
If an object or relationship update would fan out to more people than your limit, you might want to:
- Narrow your audience. Switch from “Every person in the object” to “Certain people in the object” and add conditions to reduce the total number of people per trigger.
- Restructure your objects. Break large objects into smaller ones with fewer relationships. For example, split a single “auction” object into regional auction objects so each update affects fewer people.
Date triggers on objects
When you trigger an automation from a date stored on an object, each scheduled date can start journeys for up to 50,000 people related to each object. If you send in your audience’s time zones, the limit applies to each time zone separately.
This limit works differently from the per-trigger fan-out limit. It doesn’t block the whole trigger: up to 50,000 people start a journey, and the rest of the object’s related people don’t. If you expect a date trigger to reach more people than this for a single object, contact us before the date arrives to talk through your use case.
Performance considerations
Imagine you have a few Account objects with 10 people related to each of them. Each Account has a lifetime_value attribute, and you have five segments and five automations that send messages based on an Account’s lifetime_value. Each time an Account’s lifetime_value gets updated, our system checks each of the 10 people related to that account to see if they should still belong to any of the segments or automations.
One little change - to a single Account’s attribute, in this case - caused us to check 100 things (5 segments x 10 people, 5 automations x 10 people). At this scale, that’s no problem.
But imagine you have hundreds of thousands of Accounts and most of them change every day. That can pretty quickly become hundreds of millions, even billions, of things for us to process. We know how to handle this - it’s our job! If your volume ever grows large enough to affect your workspace’s performance, we may contact you to help you adjust what you send.
Bottom line, the more segments and automations you have based on objects, the more you should make sure you’re targeting and updating the correct objects and relationships. For instance, instead of sending us your entire database every hour, send us only the object data we need. Of course, if you have any concerns, reach out to us and we’ll be happy to help!
Workflow actions for objects and relationships
You can use object or relationship data in any workflow item, including Create or update person, Send event, Send and receive data, Wait Until blocks, and Batch update.
Workflow actions can read object and relationship data, but they can’t update this data. If you want to update objects or relationship data from inside an automation or broadcast workflow, you’d need to use a Send and receive data action that calls our API.
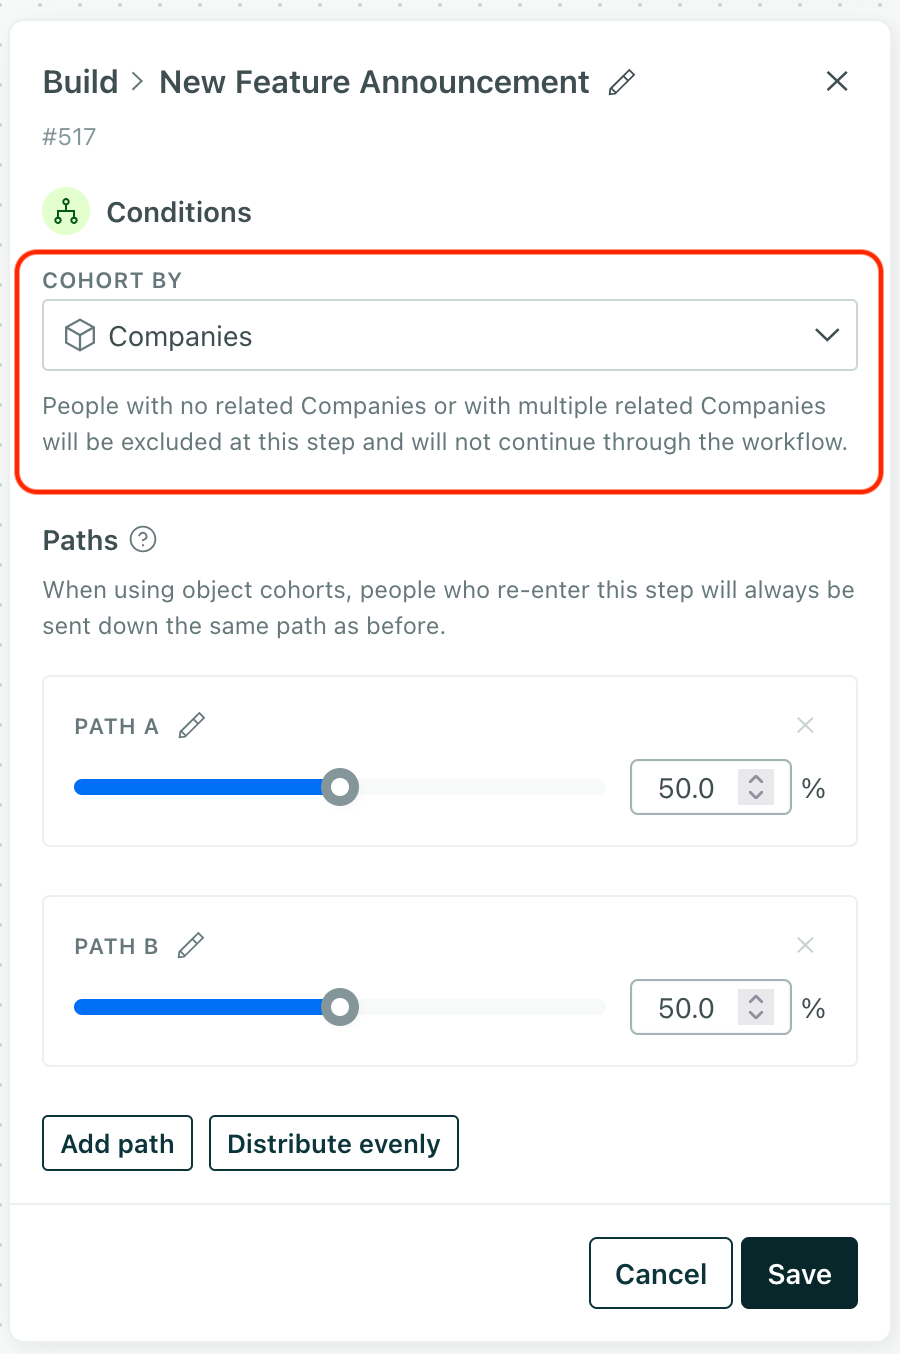
Random Cohort Branch
While random cohorts typically send people down different paths, you can use the Cohort by setting to send people related to the same custom object An object is a non-person entity that you can associate with one or more people—like a company, account, or online course.
True/false branch
In true/false branches, you can send people down different paths based on the their relationships to objects.
All automations, except those with webhook triggers
Drag a true/false branch onto your workflow. Click the branch, then click Add condition > Relationship to define a branch based on relationships to objects in your workspace. For instance, you could trigger an automation when people open a page explaining a certain feature (event-triggered automations). Then you could branch them based on whether they’re related to any premium account to personalize messaging.
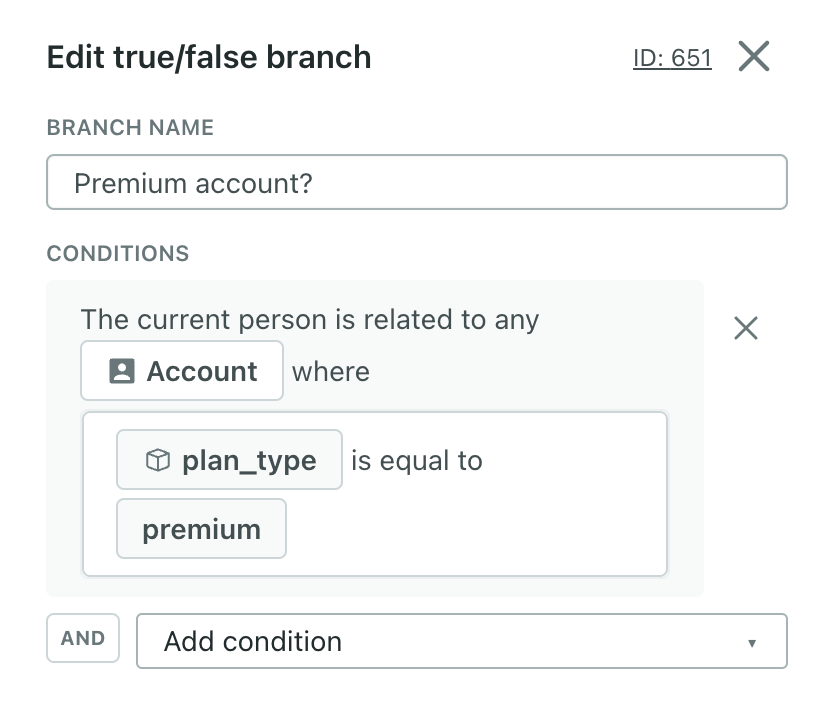
You can add other conditions to refine the path further - conditions are only joined by AND statements, not OR.
Automations triggered by an object or relationship
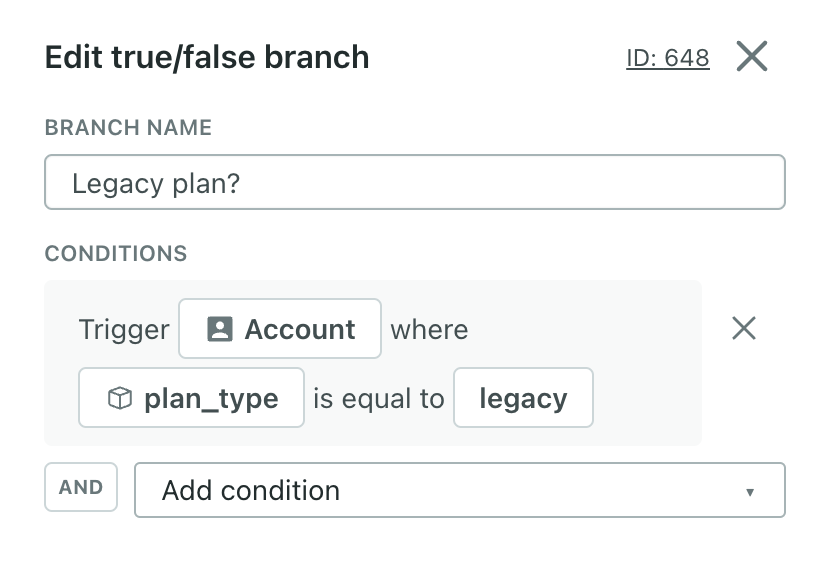
In an automation triggered by an object, a relationship, or an important date on a custom object, you can also refine true/false branches by the trigger object. Drag a true/false branch onto your workflow. Click the branch then click Add condition > Object-type-name (Trigger) to define a branch based on the object triggering the automation.
For instance, imagine you trigger an onboarding automation when a person is added as an admin to any account. The onboarding flow for accounts on legacy plans is different from those on newer plans. So you add a true/false branch to your workflow and split users based on whether the account they were added to has a legacy plan type.
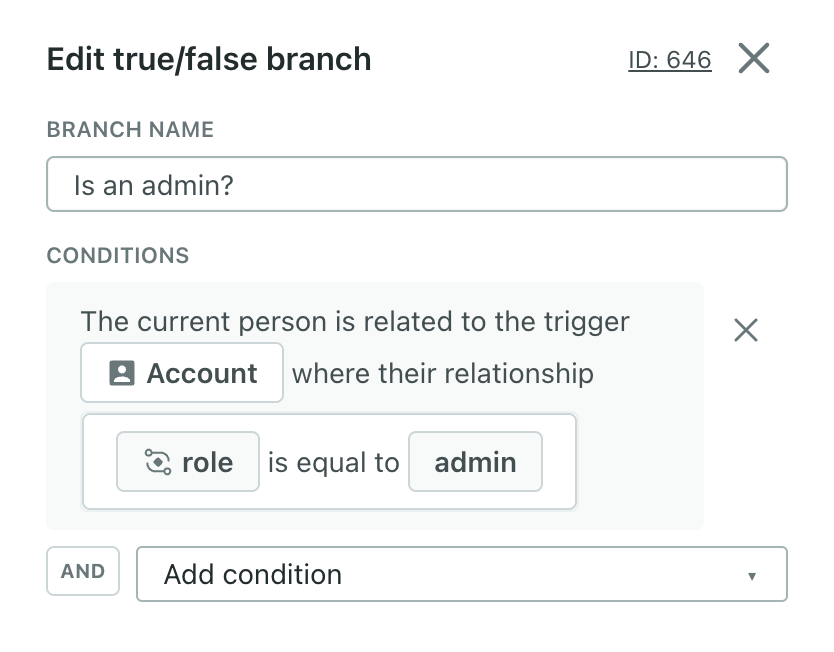
Or maybe you trigger an automation when an account’s plan type is upgraded to a modern one. This impacts admins of your accounts differently from all other roles so you add a true/false branch based on whether their relationship attribute role is equal to admin. For this, you’ll click Add condition > Relationship.
Multi-split branch
You can send people down different paths based on object and relationship conditions in multi-split branches. Unlike true/false branches, multi-split branches allow you to split people into more than two paths.
All automations, except those with webhook triggers
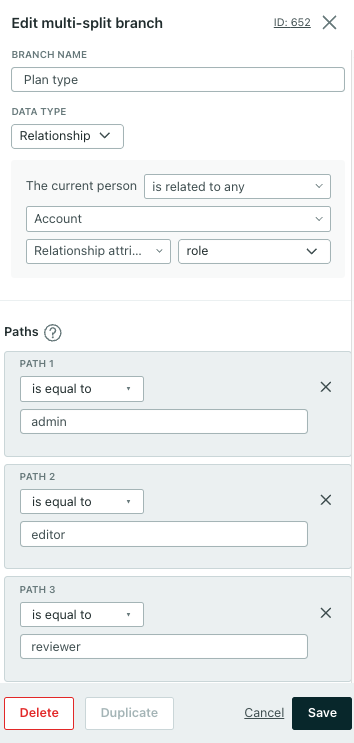
Drag a multi-split branch onto your workflow. Click the branch then click Data Type > Relationship. You can define people related to any object in your workspace.
For instance, imagine you want to encourage people to use your app after being inactive for 30 days. You could trigger an automation when they join a segment based on inactivity then branch these users based on their plan type to personalize messaging.
Automations triggered by an object or relationship
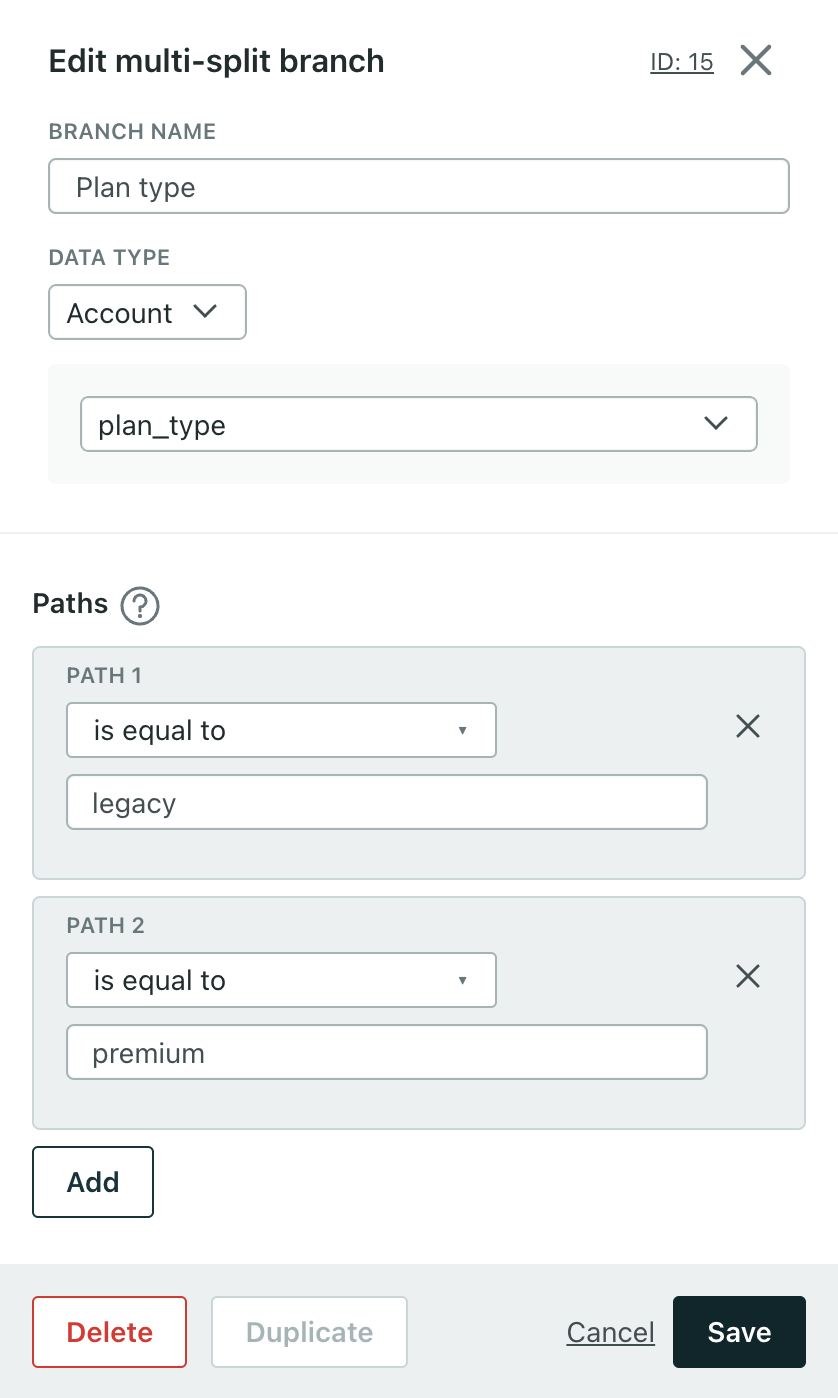
In an automation triggered by an object, a relationship, or an important date on a custom object, you can also refine branch conditions based on the trigger object. Drag a multi-split branch onto your workflow. Click the branch then click Data Type > Object-type-name (Trigger).
For instance, imagine you trigger an onboarding automation when a person is added as an admin to any account. The onboarding flow for accounts on legacy plans is different from those on newer plans. So you add a multi-split branch to your workflow and split users based on plan_type. You create different messaging for those on a legacy plan, premium plan, and all others.
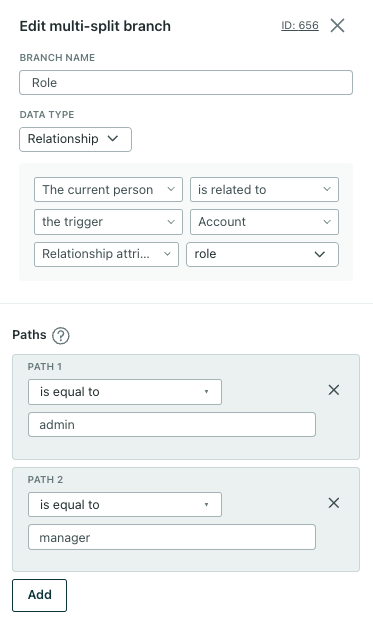
Or maybe you trigger an automation when an account’s plan type is upgraded to Enterprise. This impacts people differently based on their role on the account, so you add a multi-split branch based on the relationship attribute role. You create different messaging for admins, managers, and anyone without those roles. For this, you’ll click Data Type > Relationship.
Branch behavior across multiple journeys
A person can run more than one journey at a time in an object-triggered automation—one journey for each object related to the person who matched your trigger conditions. Each journey is bound to the specific object that started it. That means that branch conditions in any journey are evaluated against the object (or relationship to it) that started that journey. This means that the same person can follow different paths in different journeys at the same time.
For example, imagine an automation that triggers when an account’s plan_type updates to premium, with a multi-split branch on the trigger object’s region. If a person is an admin on three accounts that all upgrade to premium, they start three journeys. Each journey follows the path for its own account’s region, so one person can move down the north_america, europe, and apac paths at the same time—once per account.
Trigger an automation with a relationship-based segment
People enter segment-triggered automations when they join (or leave) a segment. But when you create a relationship-based segment, a person only joins the segment for their FIRST relationship to an object matching your criteria. Their segment membership won’t change on subsequent relationships. This means that a person will only trigger an automation for the first relationship matching your segment criteria. To trigger an automation for each relationship change, create a relationship-triggered automation.
For example, imagine that you have a segment of people related to online classes, and you use that segment to trigger an automation:
- When a person signs up for their first online class, they’ll join the segment and enter the automation.
- When they sign up for another online class, they won’t trigger the automation again because their segment membership didn’t change!
In this example, a person would only re-join the segment if they unenrolled from all their classes, causing them to leave the segment, and then re-enrolled in a class later.
Exit Conditions follow these same principles: a person won’t leave a segment (causing them to exit an automation) until they’re no longer related to any objects matching your segment criteria.
Use an object in a segment
You can create object-oriented segments A group of people who match a series of conditions. People enter and exit the segment automatically when they match or stop matching conditions.
- Go to Segments and click Create segment.
- Give your segment a Name and a Description, and click Create data-driven segment.
- Under Add condition or group, select Relationship and set a condition to Relationship to
your object typeexists.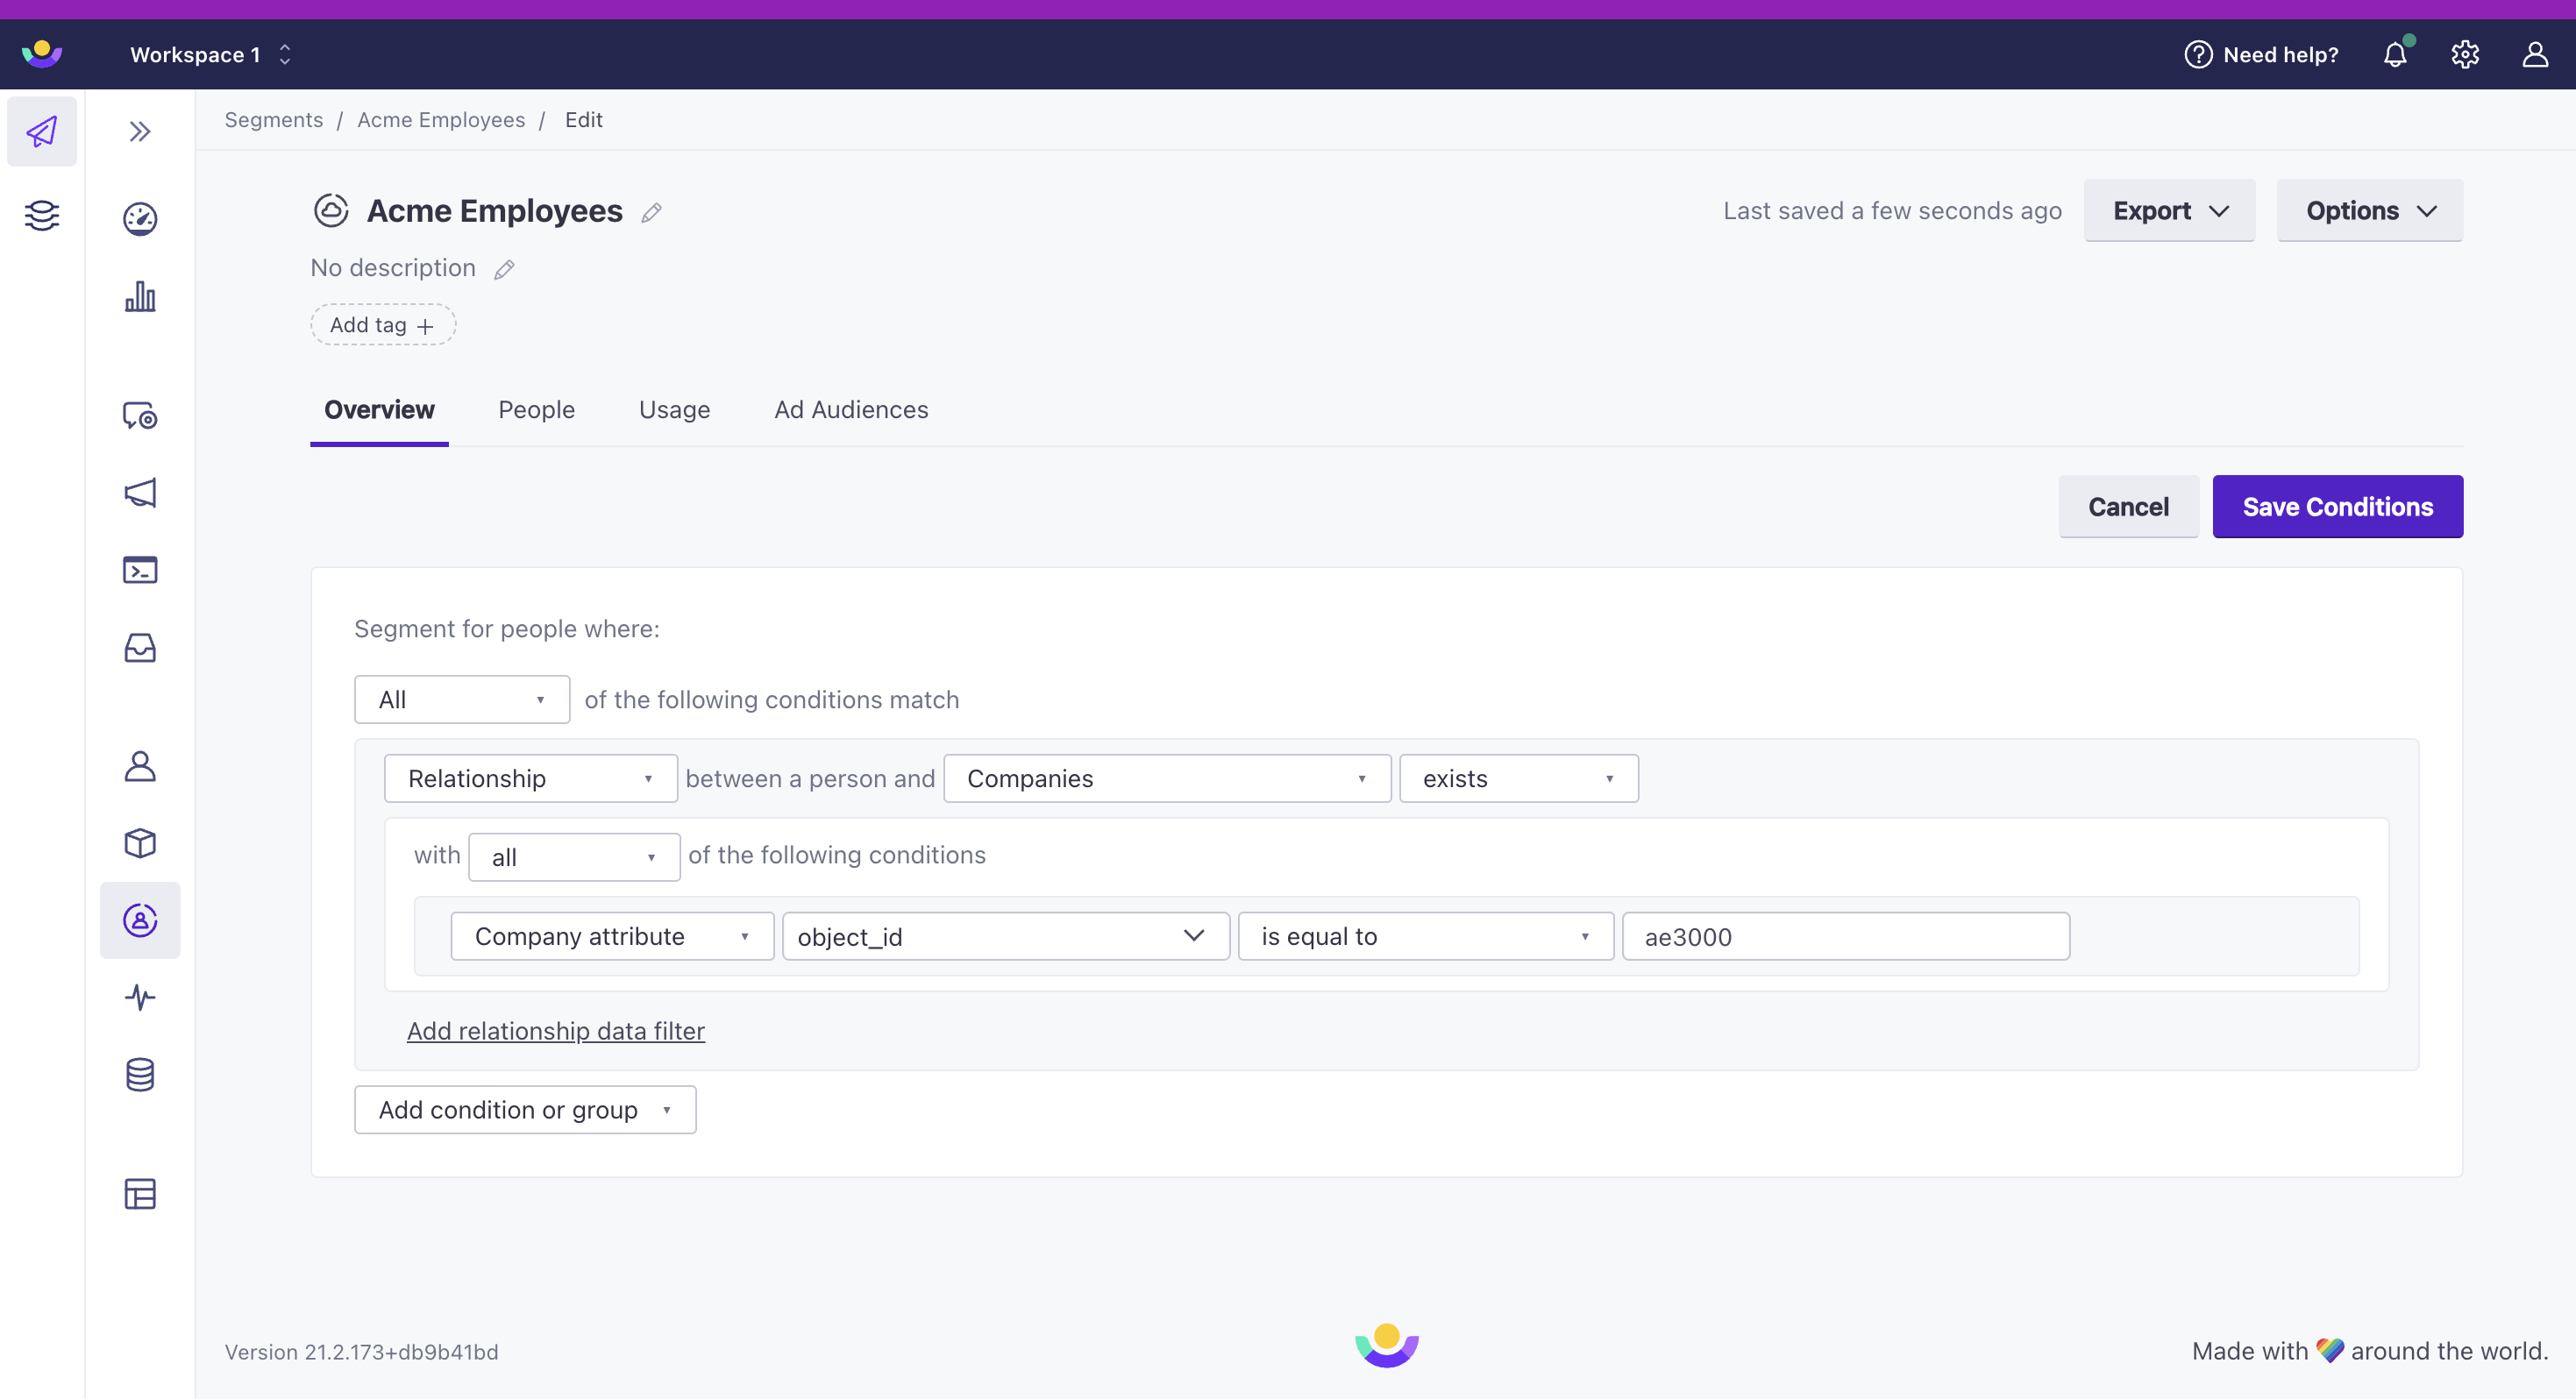
- (Optional) you can refine your selection by clicking Refine and selecting an object-based attribute condition. For example, you might want to limit a segment based on a
countryorplan_nameattribute. - When you’re done, click Save changes.
Now you can use your segment in one-time sends or to trigger automations.
You cannot backfill relationships
We don’t have a concept of historical relationships in Customer.io—at least not yet. For example, a person might have joined a company several years ago, but it will appear that they only recently joined the company when you set their relationship in Customer.io.
Because you can’t backfill relationships, you should be careful when using relationship-based segments to trigger your automations. For example, if you want to send a welcome automation for new employees of a company, and you relate people to the company after you set up your automation, you may inadvertently trigger a welcome automation for those people.