Set up in-app messages
UpdatedHow it works
An in-app message is a message that people see within the app. People won’t see your in-app messages until they open your app. If you set an expiry period for your message, and that time elapses before someone opens your app, they won’t see your message.
You can also set page rules to display your in-app messages when people visit specific pages in your app. However, to take advantage of page rules, you need to use screen tracking features. Screen tracking tells us the names of your pages and which page a person is on, so we can display in-app messages on the correct pages in your app.
in-app message]-->d{is the app open?} d-->|yes|f[user gets message] d-->|no|e[hold message
until app opens] e-->g{did the message
expire?} g-->|no, wait for user
to open the app|d g-->|yes|h[user doesn't
get the message]
Set up in-app messaging
In-app messages are disabled by default. Just set the inApp.siteId option in your CioConfig, and your app will be able to receive in-app messages.
Go to and select Workspace Settings in the upper-right corner of the Customer.io app and go to API and Webhook Credentials.
Copy the Site ID for the set of credentials that you want to send your in-app messages from. If you don’t have a set of credentials, click Create Tracking API Key to generate them.
const config: CioConfig = {
    cdpApiKey: 'cdp_api_key',
    region: CioRegion.US,
    inApp: {
        siteId: 'site_id',
    }
};
Page rules
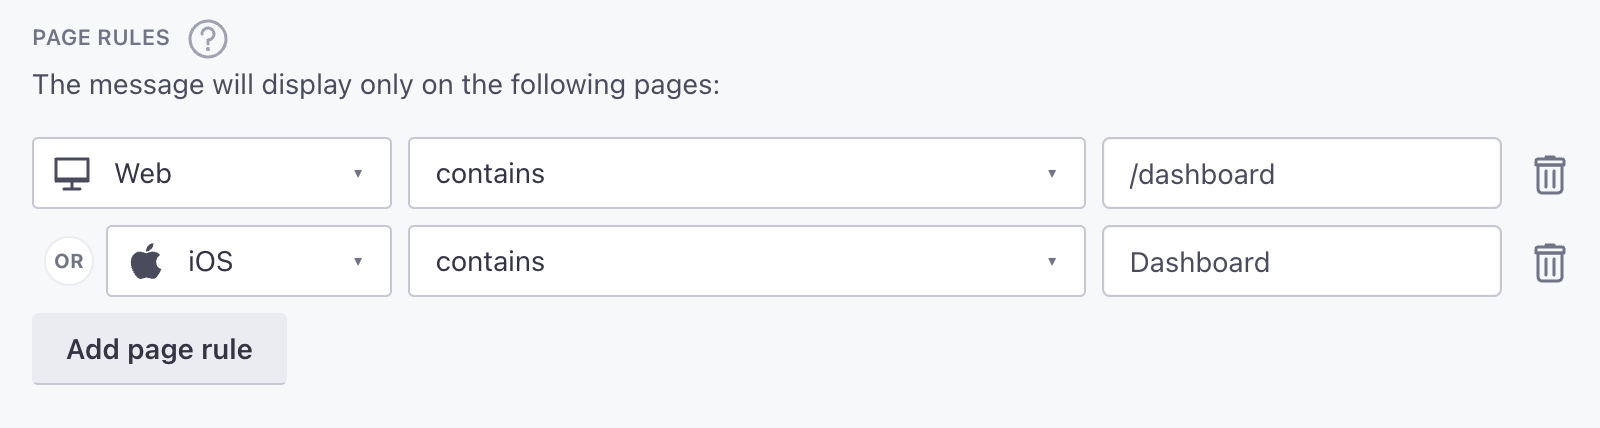
You can set page rules when you create an in-app message. A page rule determines the page that your audience must visit in your app to see your message. However, before you can take advantage of page rules, you need to:
- Track screens in your app. See the Track Events page for help sending
screenevents. - Provide page names to whomever sets up in-app messages in fly.customer.io. If we don’t recognize the page that you set for a page rule, your audience will never see your message.

Keep in mind: page rules are case sensitive. Make sure your page rules match the casing of the title in your screen events.
Anonymous messages
As of version 4.11, you can send anonymous in-app messages. These are messages that are sent only to people you haven’t identified yet.
You can use lead forms in anonymous messages to capture leads and potentially identify people when they submit your form. For example, you could use a lead form and offer a coupon or newsletter to people who provide their email addresses. See Lead forms for more information.

