

Add people
Learn how to add people to Customer.io, and how to get the most out of your data. In Customer.io, we refer to the process of adding a person as identification.
How it works
Customer.io revolves around your audience of people. People are the most common kind of data you store in Customer.io and represent people and the things they do.
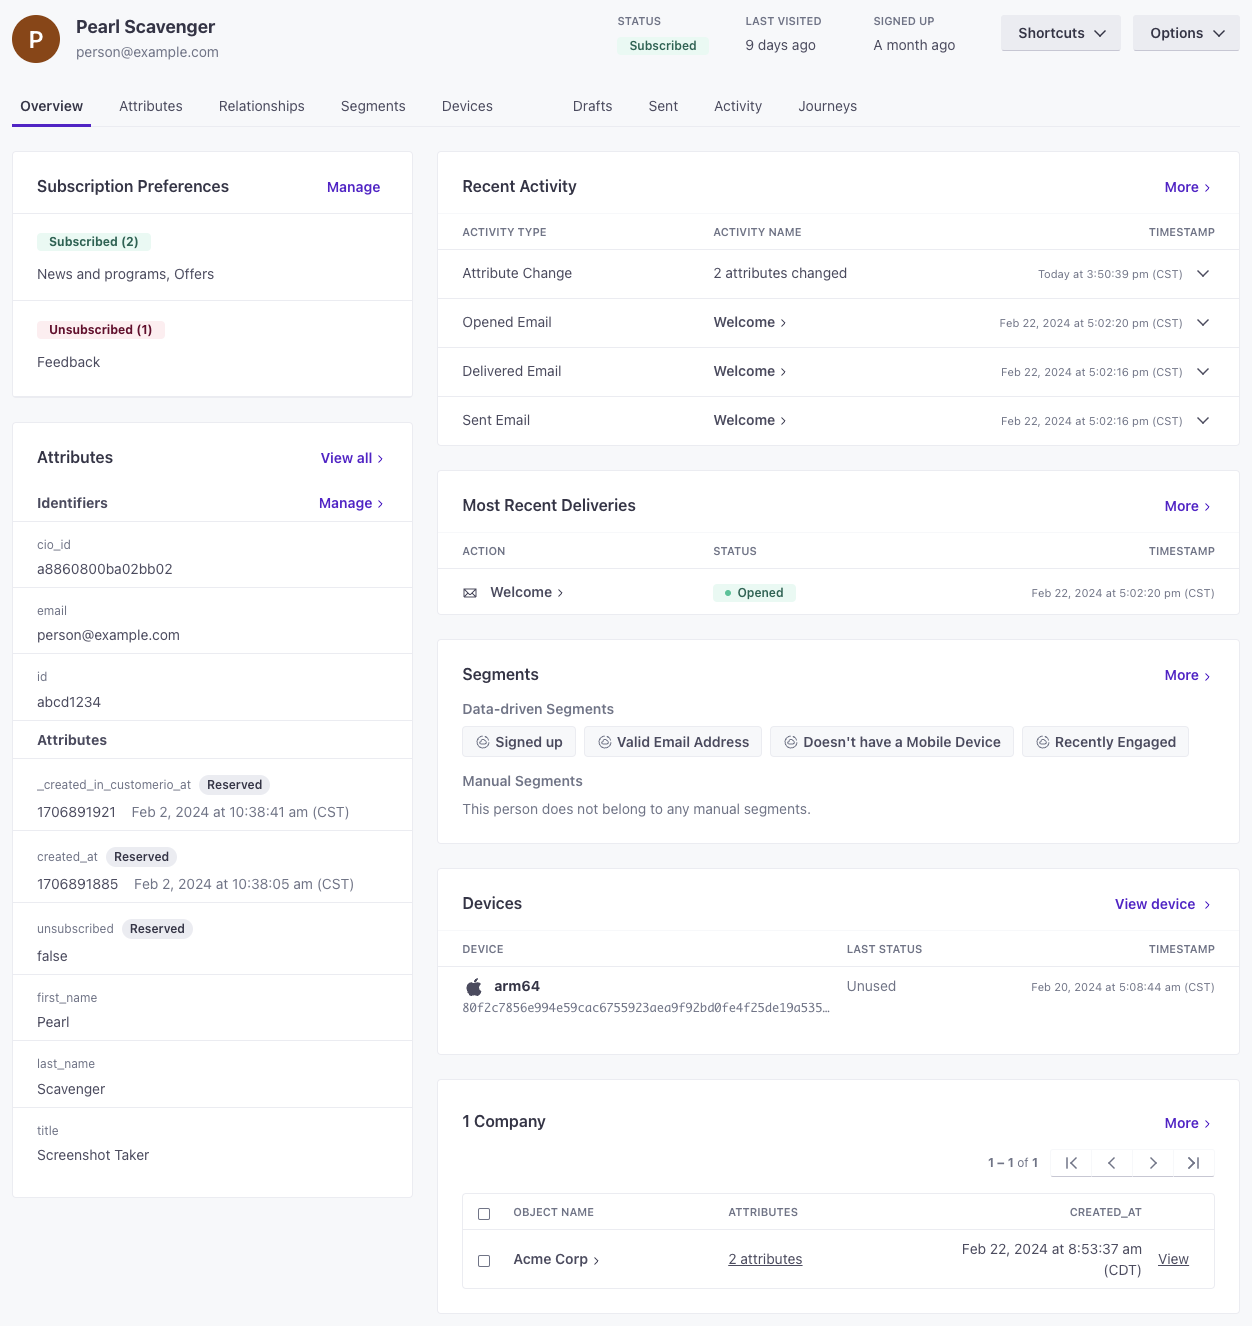
A “person” consists of a few things—all of which you can use to group people into segments A segment is a group of people in your workspace. Use segments to trigger automations, track membership over time, or fine-tune your audience. There are two types of segments: data-driven and manual. Data-driven segments automatically update when people start or stop matching criteria. Manual segments are static.
- Their identifiers
The attributes you use to add, modify, and target people. Each unique identifier value represents an individual person in your workspace.
: the values that make people unique in your system—like a databaseidoremailaddress. - Their attributes
A key-value pair that you associate with a person or an object—like a person's name, the date they were created in your workspace, or a company's billing date etc. Use attributes to target people and personalize messages.
: the things you know about a person, like their name, interests, birthdate, etc. - The events
Something that a person in your workspace did. Events can trigger automations, add people to segments, etc, and you can use properties from events to personalize messages.
they perform: the things that people do on your website or in your app, like the pages they view, the buttons they click, and so on. You can use events to trigger automations in response to your audience’s activity in your system. - Their relationships: the things they’re related to (commonly known in Customer.io as objects
An object is a non-person entity that you can associate with one or more people—like a company, account, or online course.
)—like a company they work for or the online classes they take. - (For push notifications): their mobile devices.
Ways to add people
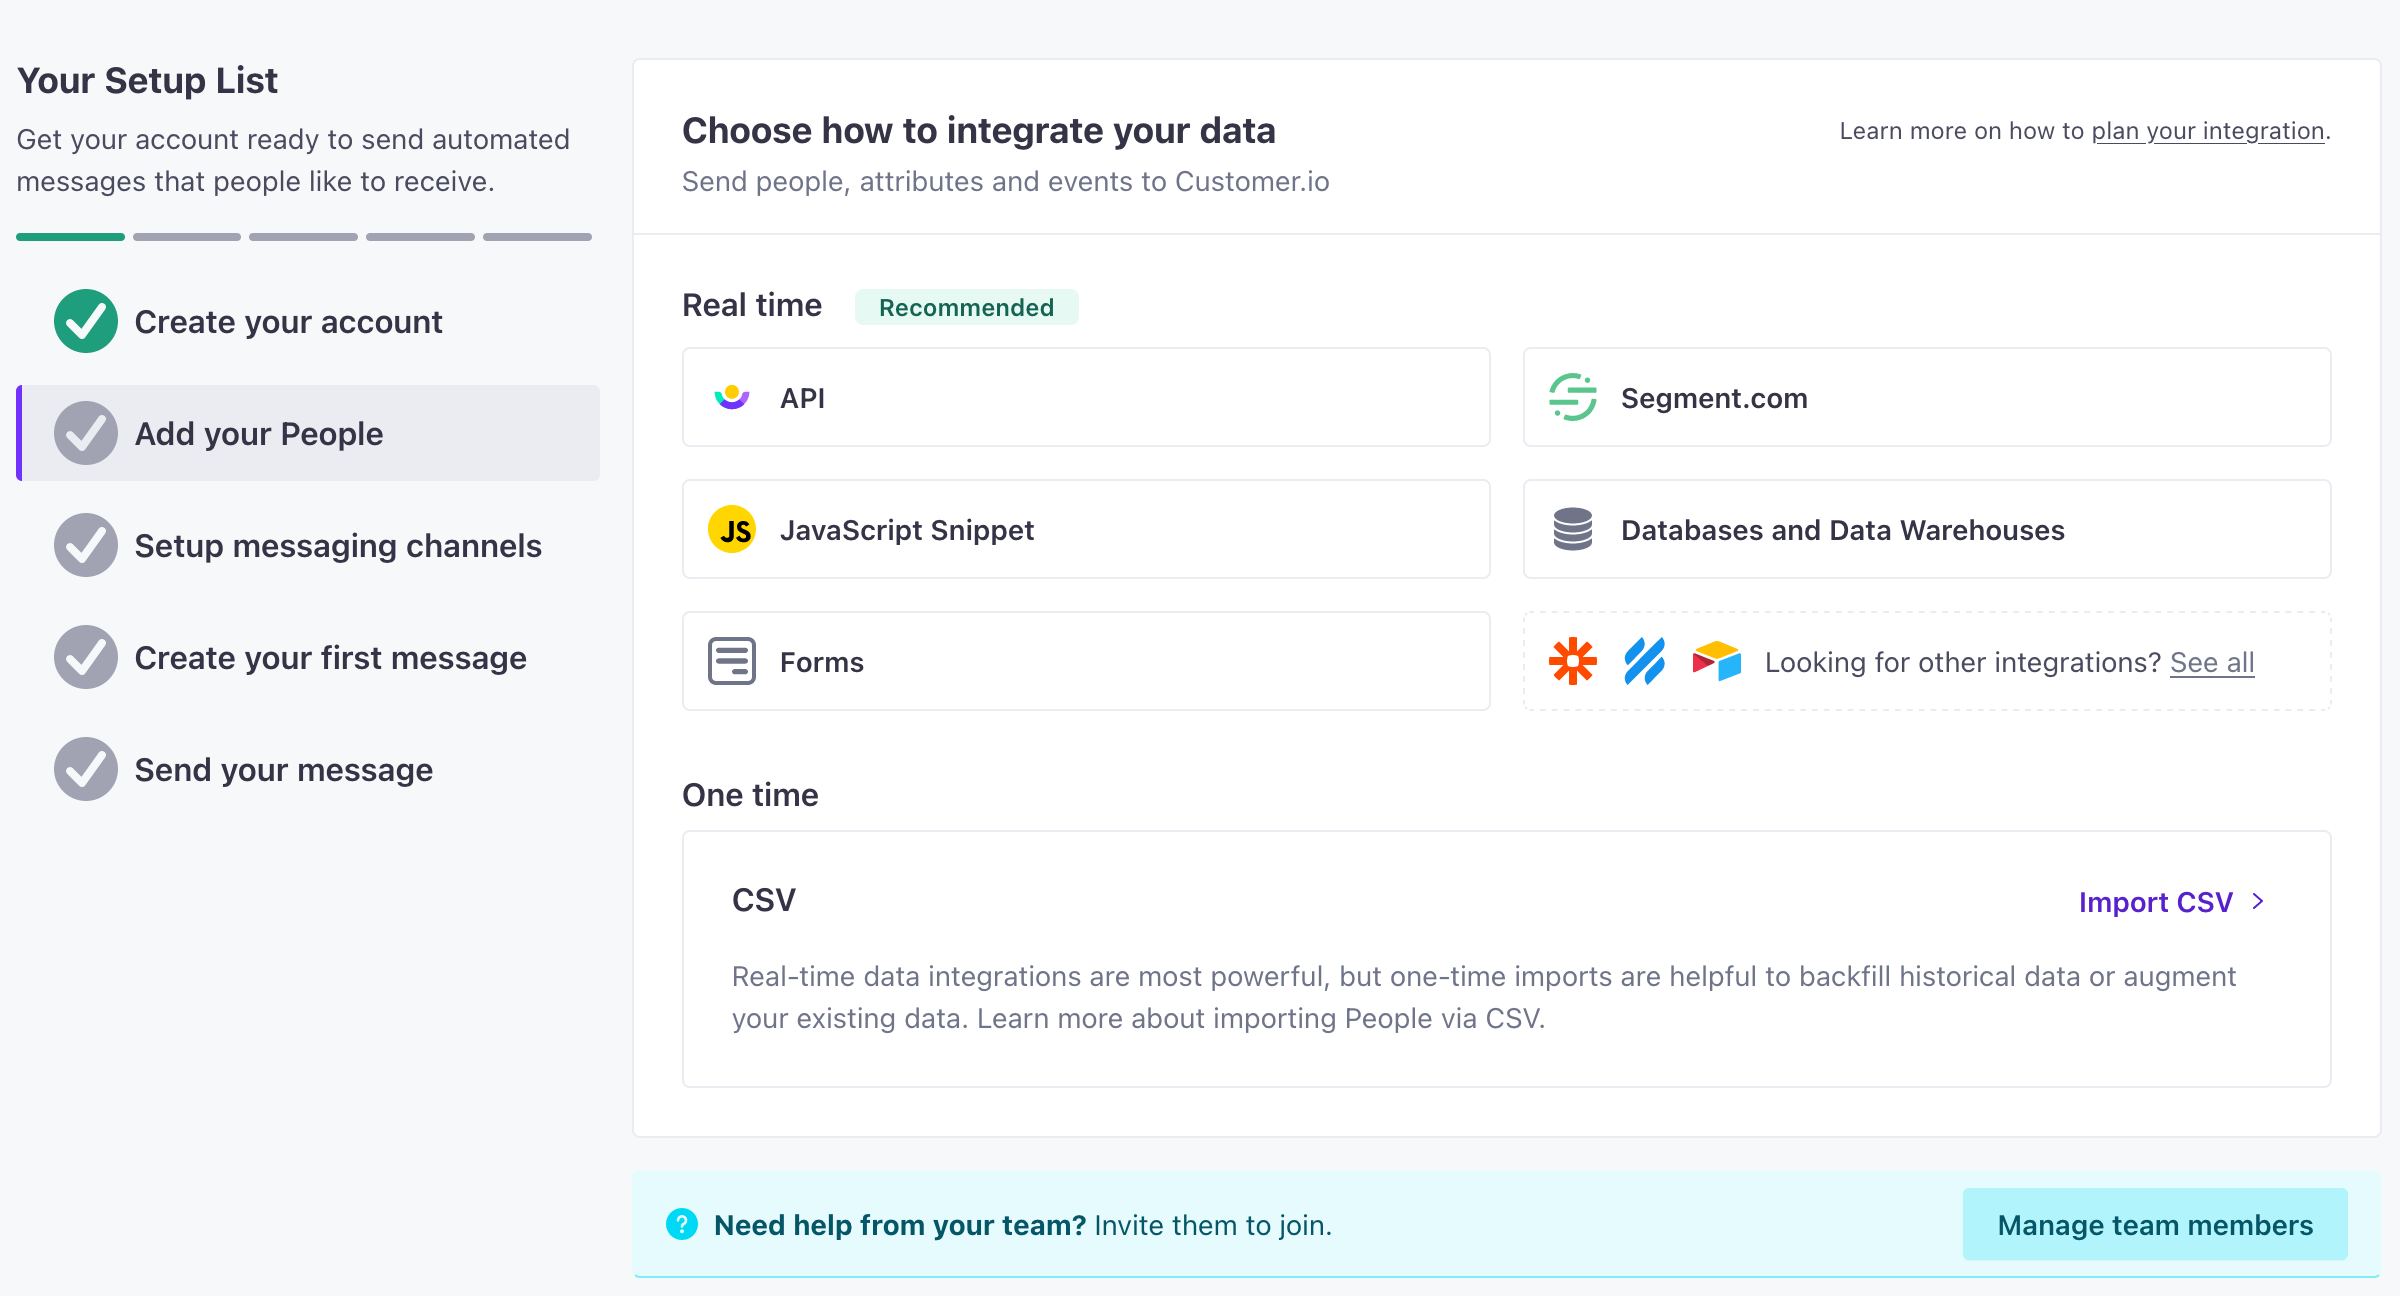
In general, you’ll get the most out of Customer.io when you integrate with us and send real-time data about your audience and their activities. This helps keep your audience up to date and automate your messaging—the closest you can get to “set it and forget it” in the Marketing Automation world.
You can also add people manually or upload a list. These kinds of operations represent people at a “point in time” rather than keeping information up to date, but can still be useful when you gather information outside your integration path—like when you gather sign-ups or business cards at a conference.
There are a few different ways to add people to Customer.io:
- Add a test person manually.
- Upload a CSV of people.
- Integrate with Customer.io. This lets you identify
The Customer.io operation that adds or updates a person. When you identify a person, Customer.io either adds a person if they don't exist in your workspace, or updates them if they do. Before you identify someone (by their email address or an ID), you can track them anonymously.
people in real time and keep up to date with their activities in your systems.
But however you add people, we recommend that you add a test user to your workspace. This lets you test your messages and automations before you send them to your audience. You can manipulate your test user in a number of ways to prove your integrations, automations, and so on.
Add a test user
If you want to demonstrate the capabilities of Customer.io—or you want a handy way to test your messages—you might want to add a test user. You can add a person manually with the qualities you want to test, making it easy to see how your automations, messages, and segments A segment is a group of people in your workspace. Use segments to trigger automations, track membership over time, or fine-tune your audience. There are two types of segments: data-driven and manual. Data-driven segments automatically update when people start or stop matching criteria. Manual segments are static.
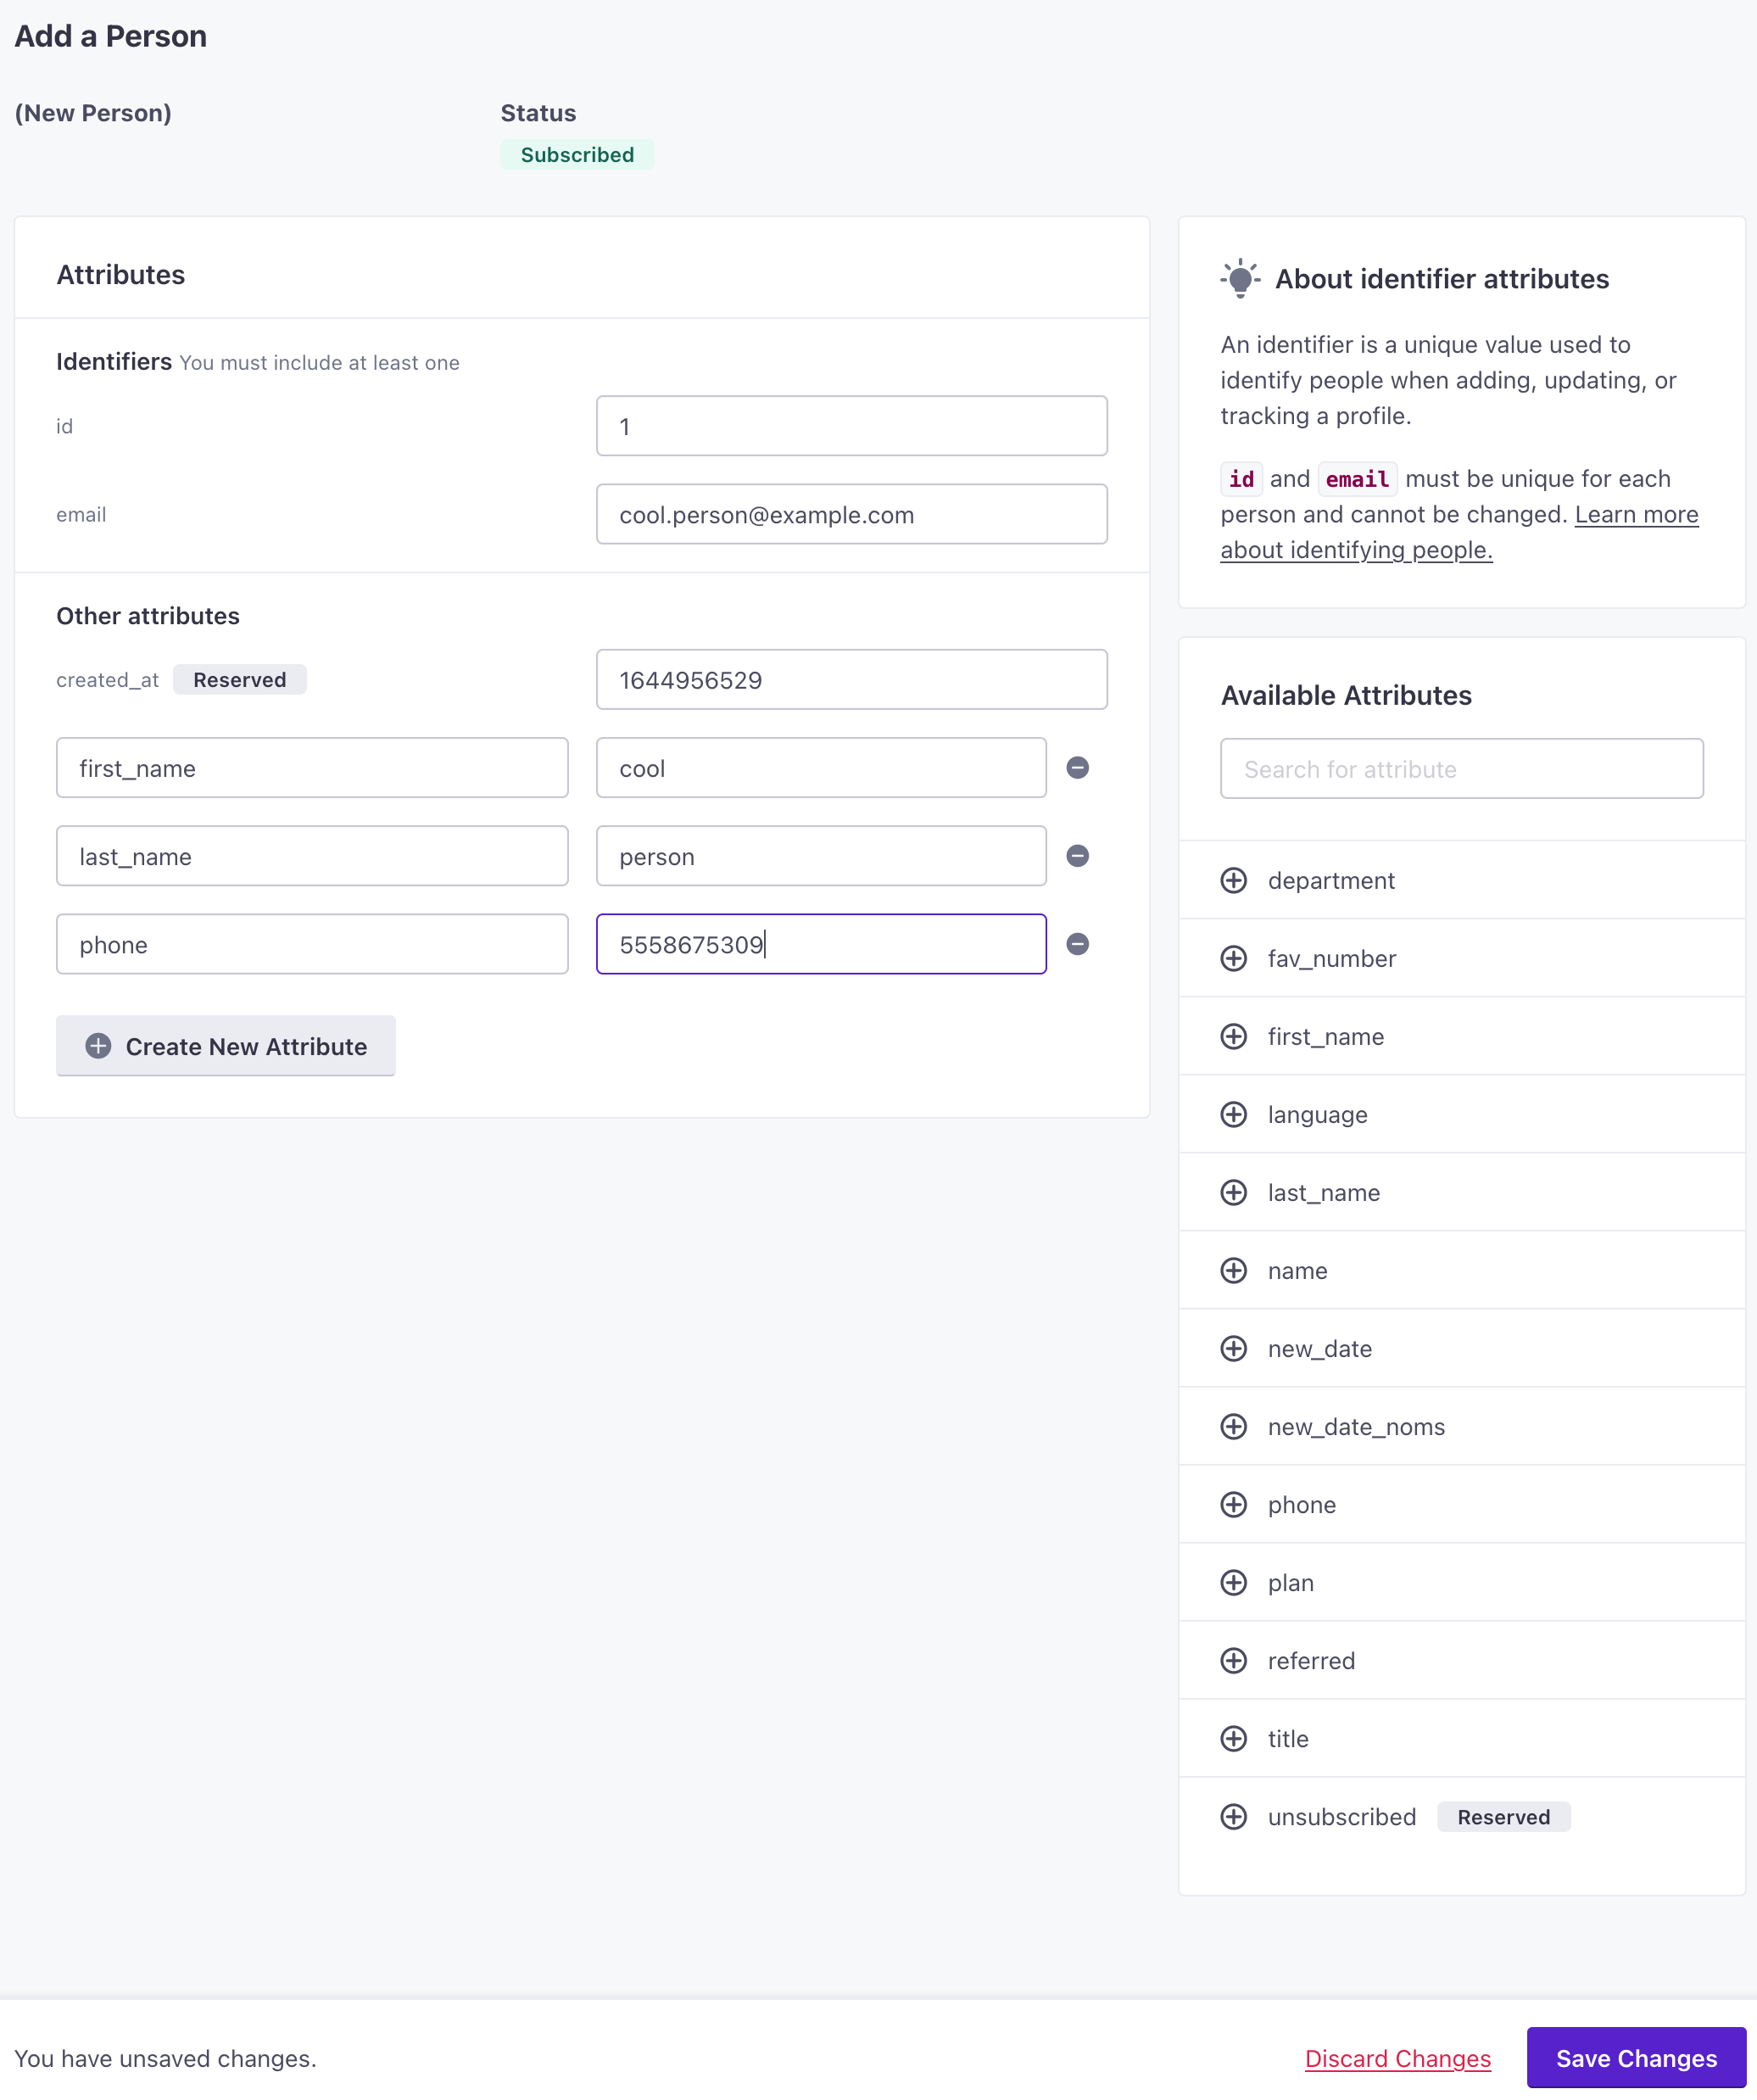
- Go to the People page, click Add people and select Add a single person.
- Set your ID and email address (and
phoneif your workspace identifies people by phone number). To make it easy, you might assign your test user an ID of1. - Add attributes to your person, like first_name and last_name. These are the values you’ll use to target yourself and personalize messages!
- Click Save Changes when you’re done.
Upload a CSV of People
If you want to add people to Customer.io but you’re not creating an integration—or you just want to get started before you set up an integration—you can upload a CSV of people to Customer.io.
To get started quickly, you can go to the People page in your workspace and add a person with a few attributes to test with, or upload a CSV of people.
Identify people via integrations
The way that you add people to Customer.io depends on how you integrate with us:
- Through client-side JavaScript
- Through a server-side library
- Through your mobile app
- Using a database.
But, in almost every case, the method to add people is called A key-value pair that you associate with a person or an object—like a person's name, the date they were created in your workspace, or a company's billing date etc. Use attributes to target people and personalize messages.identify. For example, if you’re using our JavaScript client library, you’ll invoke the identify method, passing an ID and an object containing a person’s attributes
cioanalytics.identify('example-person-id', {
  first_name: 'cool',
  last_name: 'person',
  favorite_foods: ['pizza', 'ice cream'],
  created_at: 1339438758, // strongly recommended when you first identify someone
});