Welcome to Customer.io! While the platform offers plenty of features and options, this guide provides a basic setup path to get you started quickly and demonstrate some of the things you can do with Customer.io. You'll create a workspace, import at least one person, and set up your messaging channels!
Get started
This guide is designed to walk you through the most common parts of the setup path and introduce you to the major parts of our platform. When you start setting up Customer.io, we provide you with a Setup List on your Workspace’s Dashboard. You don’t have to do everything on the list, but you must do the following things before you can really take advantage of Customer.io:
In this guide, you’ll add a test person and send it a message, demonstrating how you’ll use your data to automate and personalize messages.
AI can help you get started
You don’t have to click through every step in this guide yourself. AI can help you with nearly all of it, and we have some prompts below that you can copy into any of our agentic surfaces to help you get started.
In Customer.io: click Agent in the left-hand menu and start a conversation.
Use our CLI in your terminal or code editor: install the Customer.io CLI so a coding agent like Claude Code or Codex can work in Customer.io. This is the strongest option for the integration work, because the agent reads your codebase and can wire in our SDK for you.
In your AI chat tool: install the Customer.io plugin for Claude, ChatGPT, Cursor, or connect the MCP server to another tool.
While these prompts can help you get started, you might want to edit them to fit your specific needs.
1. Create your workspace
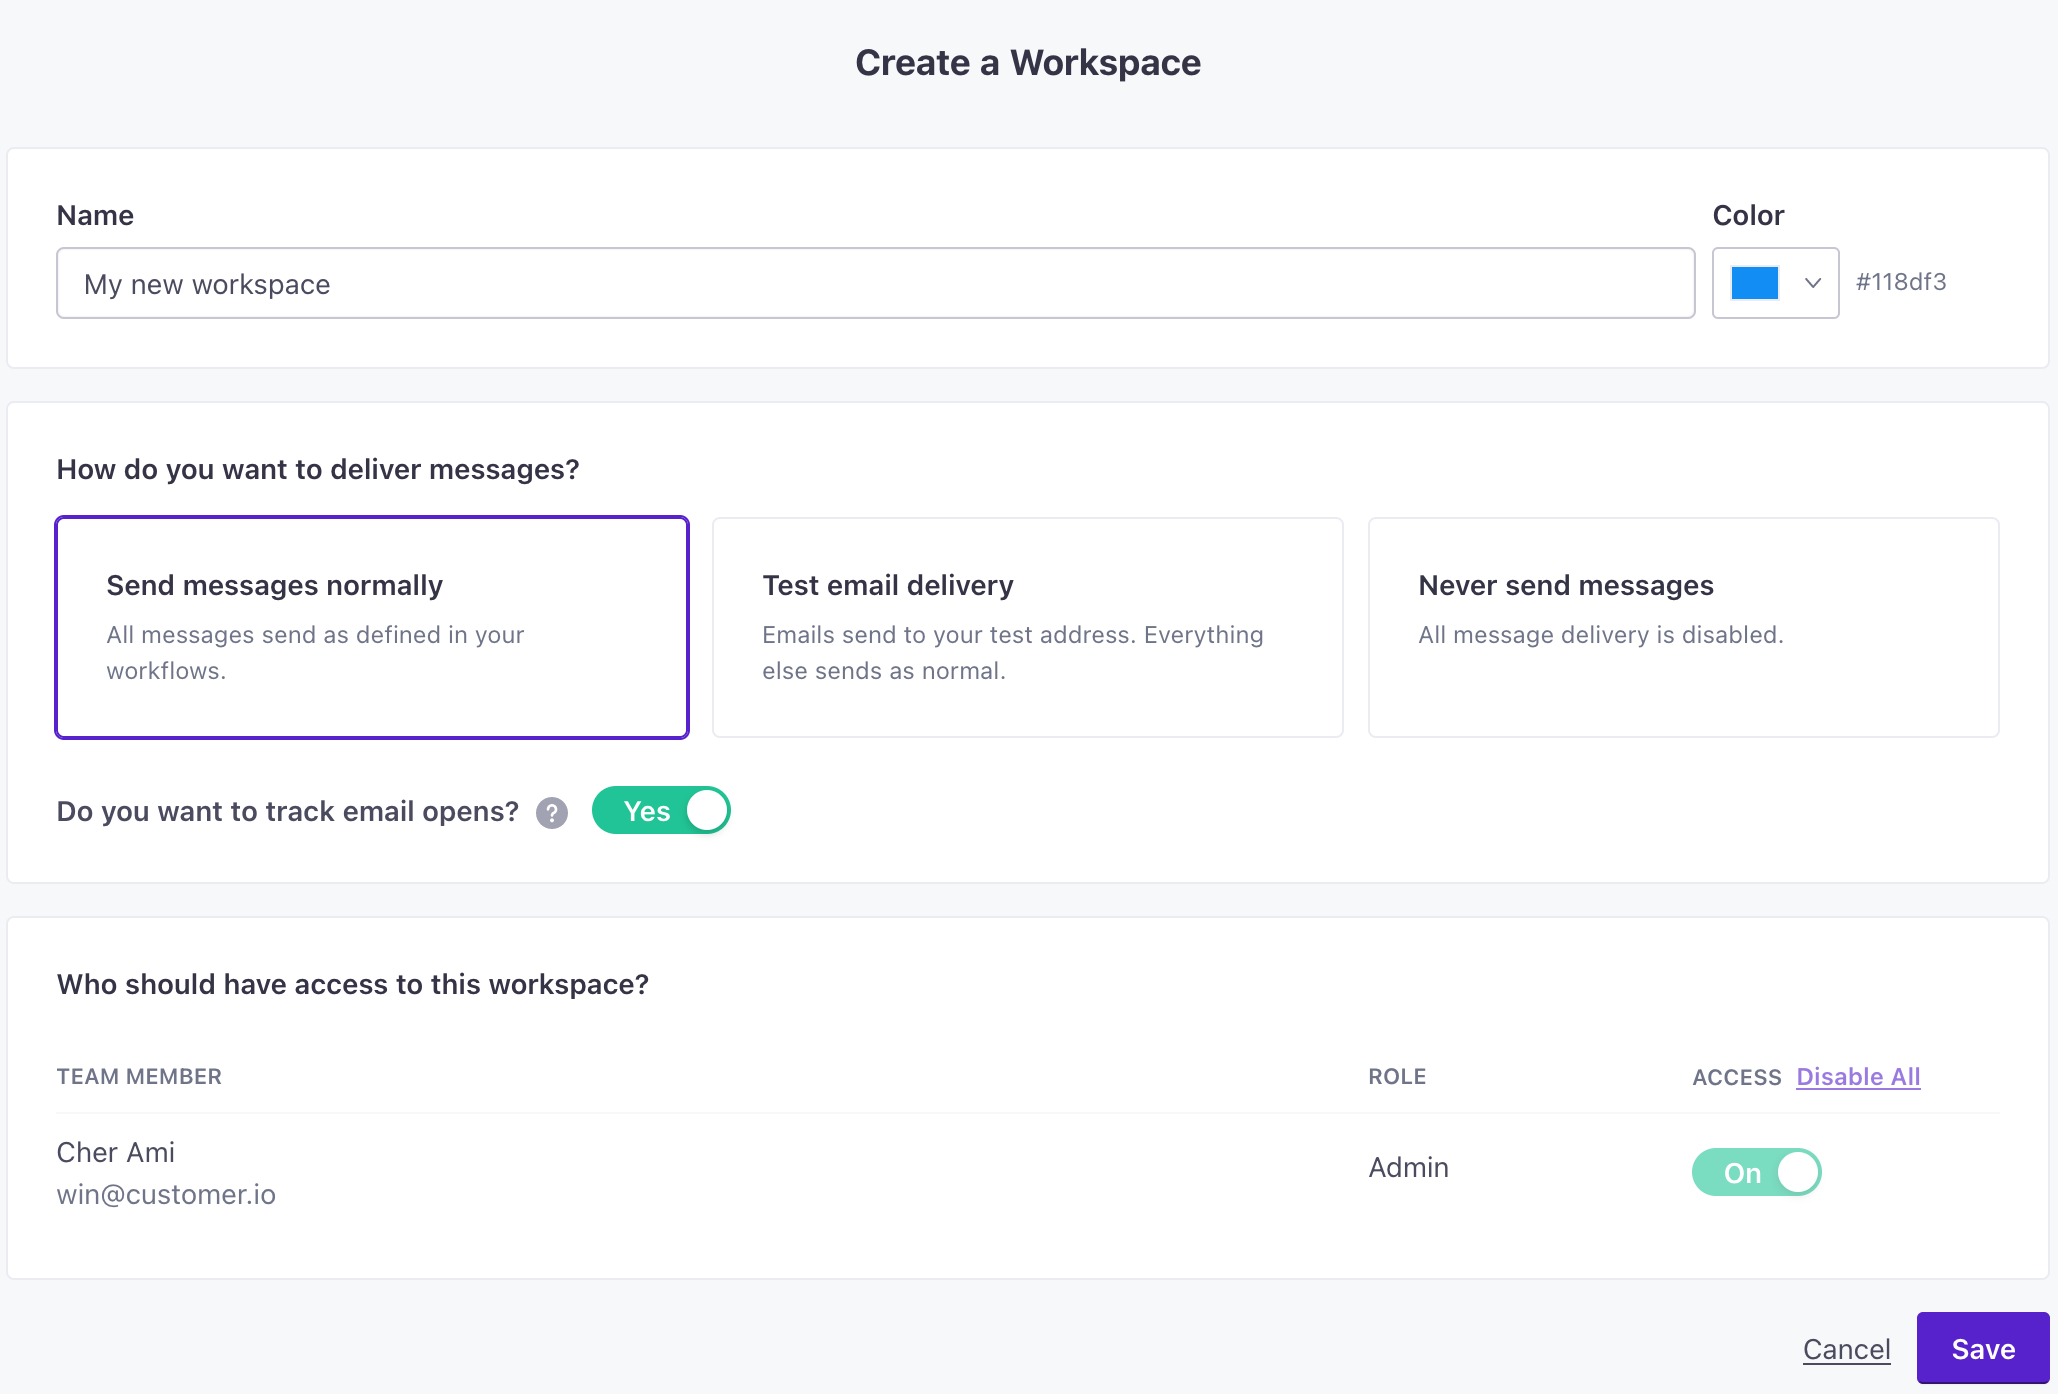
After you create your account, you’ll make a workspace. You can think of a workspace as a container for your people, data, messages, etc. You can have more than one workspace, but, in general, you won’t share information across workspaces.
We encourage you to use the default settings. They support most use cases and you can change them later!
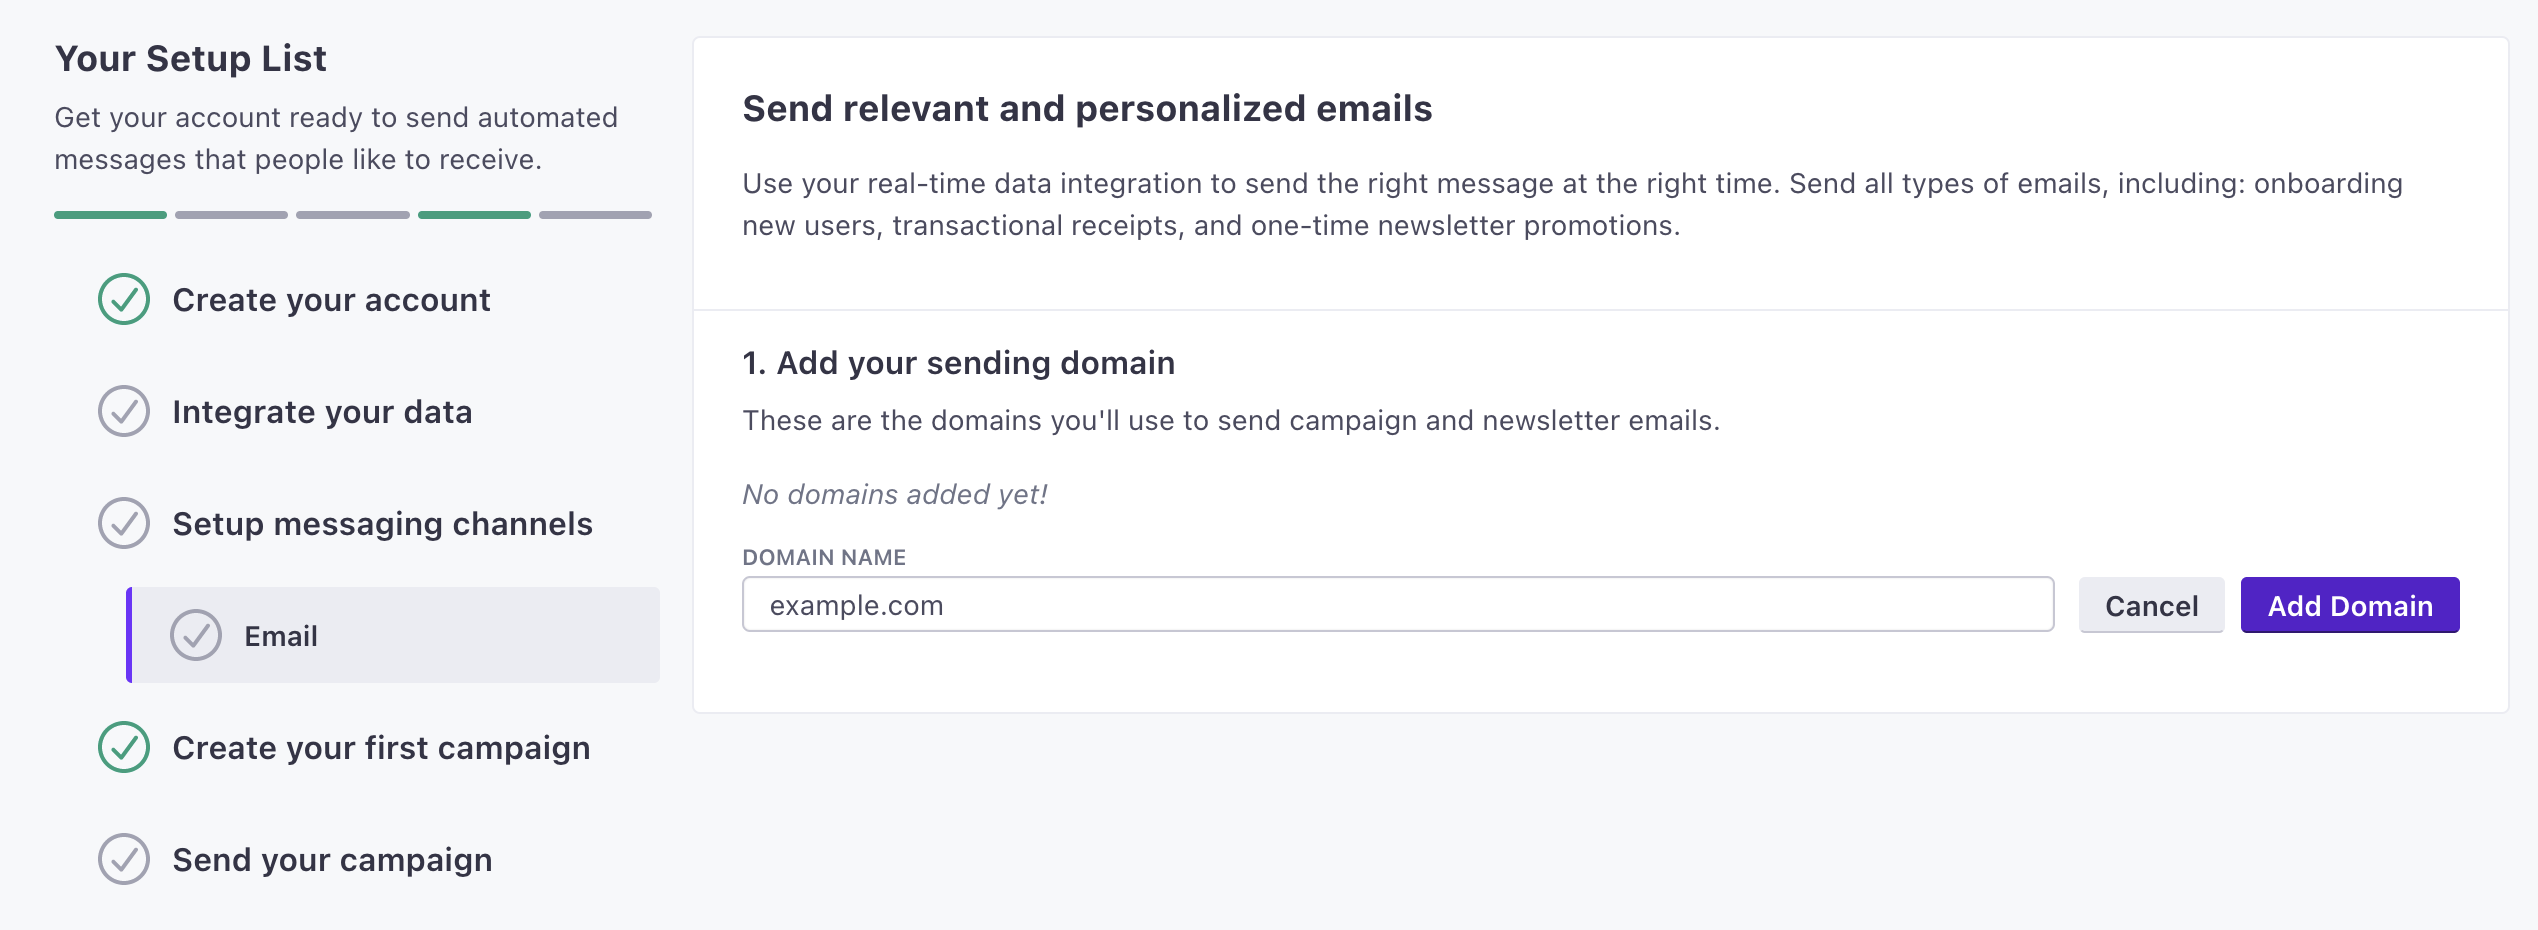
Before you can send messages, you need to configure the types of messages you want to send: email, push, in-app, SMS, or Slack. You can start with just one channel and add new ones later by going to Settings > Workspace Settings and clicking Get Started on the channel(s) you want to add.
In the UI
Enter your domain—like example.com.
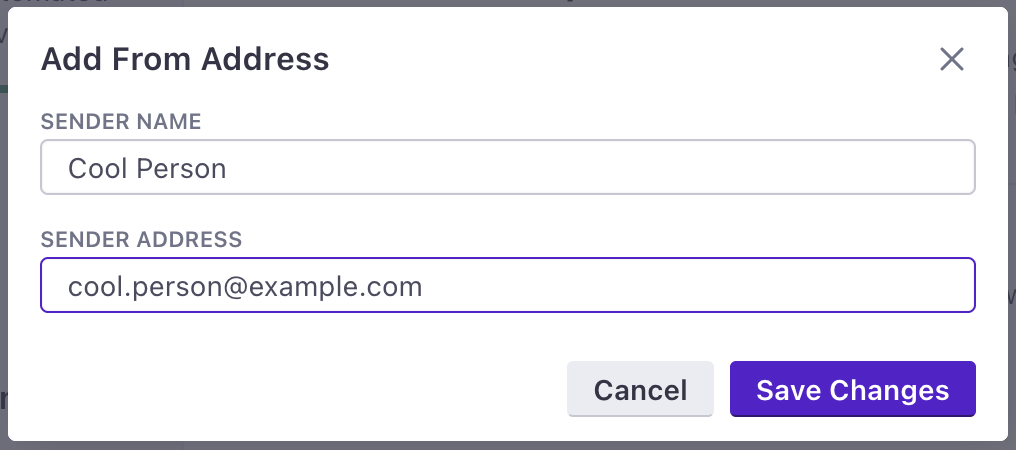
Enter your From address(es). These are the addresses that your messages will come from.
(Recommended) Set up link tracking so you can record the links that people click in your messages. This involves adding a CNAME record to your domain host(s).
Start sending emails slowly!
If you’re just getting started with Customer.io, you’ll need to start slowly. Sending a large number of emails right away can hurt your domain reputation and deliverability. See our guide to sending slowly for more information.
With AI
AI can add a sending domain and a from address for you. The DNS records still need you, because only you can sign in to your domain host. After AI adds the domain, you can add the records yourself. You can also go to Settings > Workspace Settings > Email, click Show Records for the domain, and use Automatic setup to sign in to your DNS provider and apply them.
Add a sending domain and a from address.
I want to set up email for this workspace. Ask me which domain I send email from and what name I want messages to come from. Then add that sending domain and a from address on it, and show me the DNS records I need to add at my domain host.
Once the records are in place, you can also use AI to check whether the domain is verified or not.
3. Invite a teammate
You don’t have to work with Customer.io alone. You can invite a teammate to help you set up your workspace, integrate your website or app, and help you write the messages you’ll use to engage your audience.
When you invite someone, you’ll set their role, which determines their permissions in the workspace. If you’re inviting a developer, you’ll want to give them the Workspace Admin role so they can manage integrations.
In the examples below, we assume you’re inviting a developer to help you set up your workspace and integrate your website or app.
Enter their first name, last name, and email address.
Under workspace-level permissions, give them the Workspace Admin role for the workspace you want them to integrate. It’s the only workspace role that can manage integrations.
Click Send invite.
With AI
Invite a developer who can set up your integration.
I want to invite a developer to this workspace so they can set up our integration. Ask me for their first name, last name, and email address. Then invite them with the Workspace Admin role and confirm when the invite goes out.
4. Add a test person to your workspace
To get started quickly, you can go to the People page in your workspace and add a person with a few attributes to test with.
In this case, you might want to add yourself to your workspace, so you can test an automation against yourself and get a feel for Customer.io without inadvertently messaging your customers or users. Later in this guide, we’ll use your test person in a live segment and automation.
In the UI
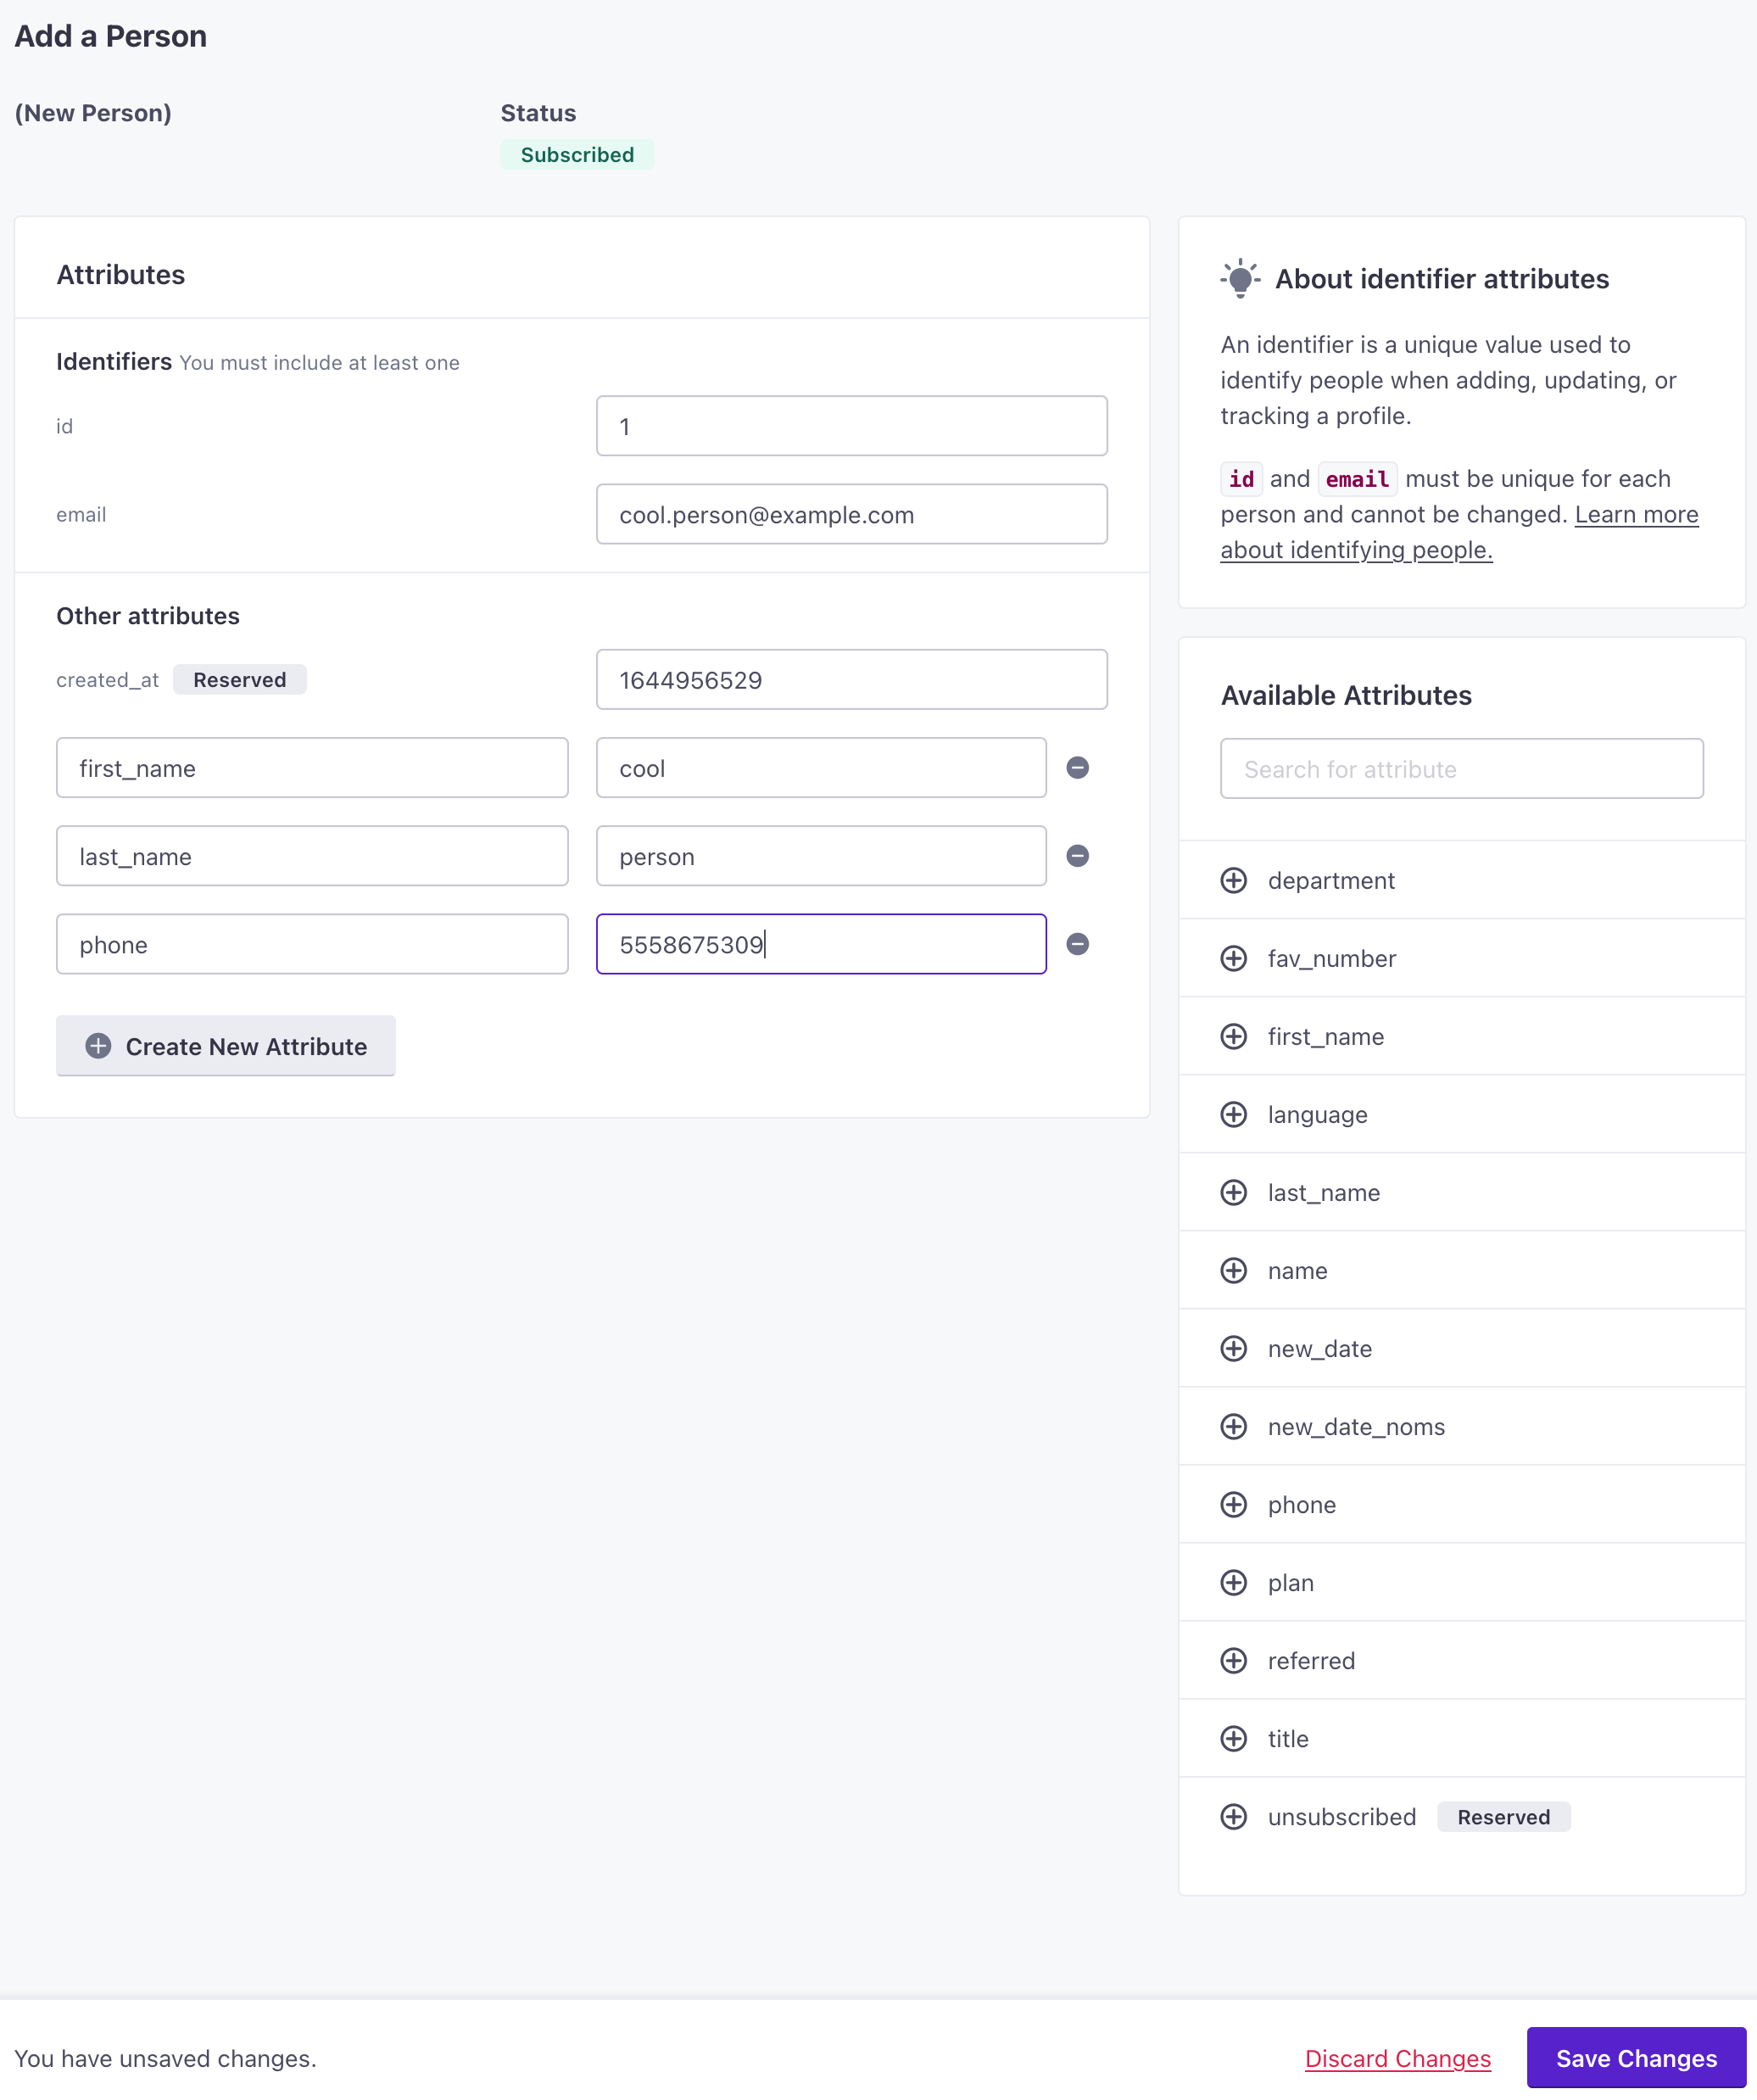
Go to the People page, click Add people and select Add a single person.
Set your ID and email address. To make it easy, you might assign your test user an ID of 1.
to your person. These are the values you’ll use to target your test person and personalize messages! You can add as many other attributes as you want, and we’ll show you how to take advantage of them later on this page.
Click Save Changes when you’re done.
With AI
In this prompt we set your first and last name, but you could add more attributes if you want. Attributes
are the things you know about people, like their names and interests. You’ll use them to target your audience and personalize messages.
Add yourself as a test person.
I want to add myself as a test person so I can send messages to myself while I learn Customer.io. Ask me for my email address and my first and last name. Then add a person with that email, the ID 1, and first_name and last_name attributes.
It might help to understand what we mean by a “person”. In Customer.io, you’ll represent people with data, the most important three data points being identifiers, attributes, and events. We represent the people who visit your website, your app, or otherwise interact with your service as people.
Identifiers
The attributes you use to add, modify, and target people. Each unique identifier value represents an individual person in your workspace.
: the values that make people unique in your system—like a database id, email address, or phone number.
and who you send messages to. Plan out your “groups” of people and the types of messages you want to send to make sure that you gather the right data in Customer.io!
5. Create an automation and send your person a message
Now that you’ve added a person and set up a message channel, you can set up an automation to send your test person a message.
You can do this whole section with one prompt
The rest of this section builds the segment, the email, and the automation by hand. You can ask for all three at once instead.
Build a segment-triggered automation and start it.
Create a segment called "My test person" that matches the test person I just added, using their first_name attribute, and tell me how many people match. Then build an automation triggered when someone joins that segment. Have it send an email from one of my verified senders that greets the person by first name. Set the email to send automatically and start the automation so current segment members enter it.
If more than one person matches the segment, ask for a different attribute so real members of your audience don’t enter your test automation.
Starting the automation is the one step in this guide that depends on a setting. The agent needs Edit live data and MCP needs Allow MCP to edit live data; an account admin controls both. When they’re off, your AI still builds the segment, the automation, and the email, then leaves the automation as a draft for you to review and start yourself. Neither setting affects the CLI.
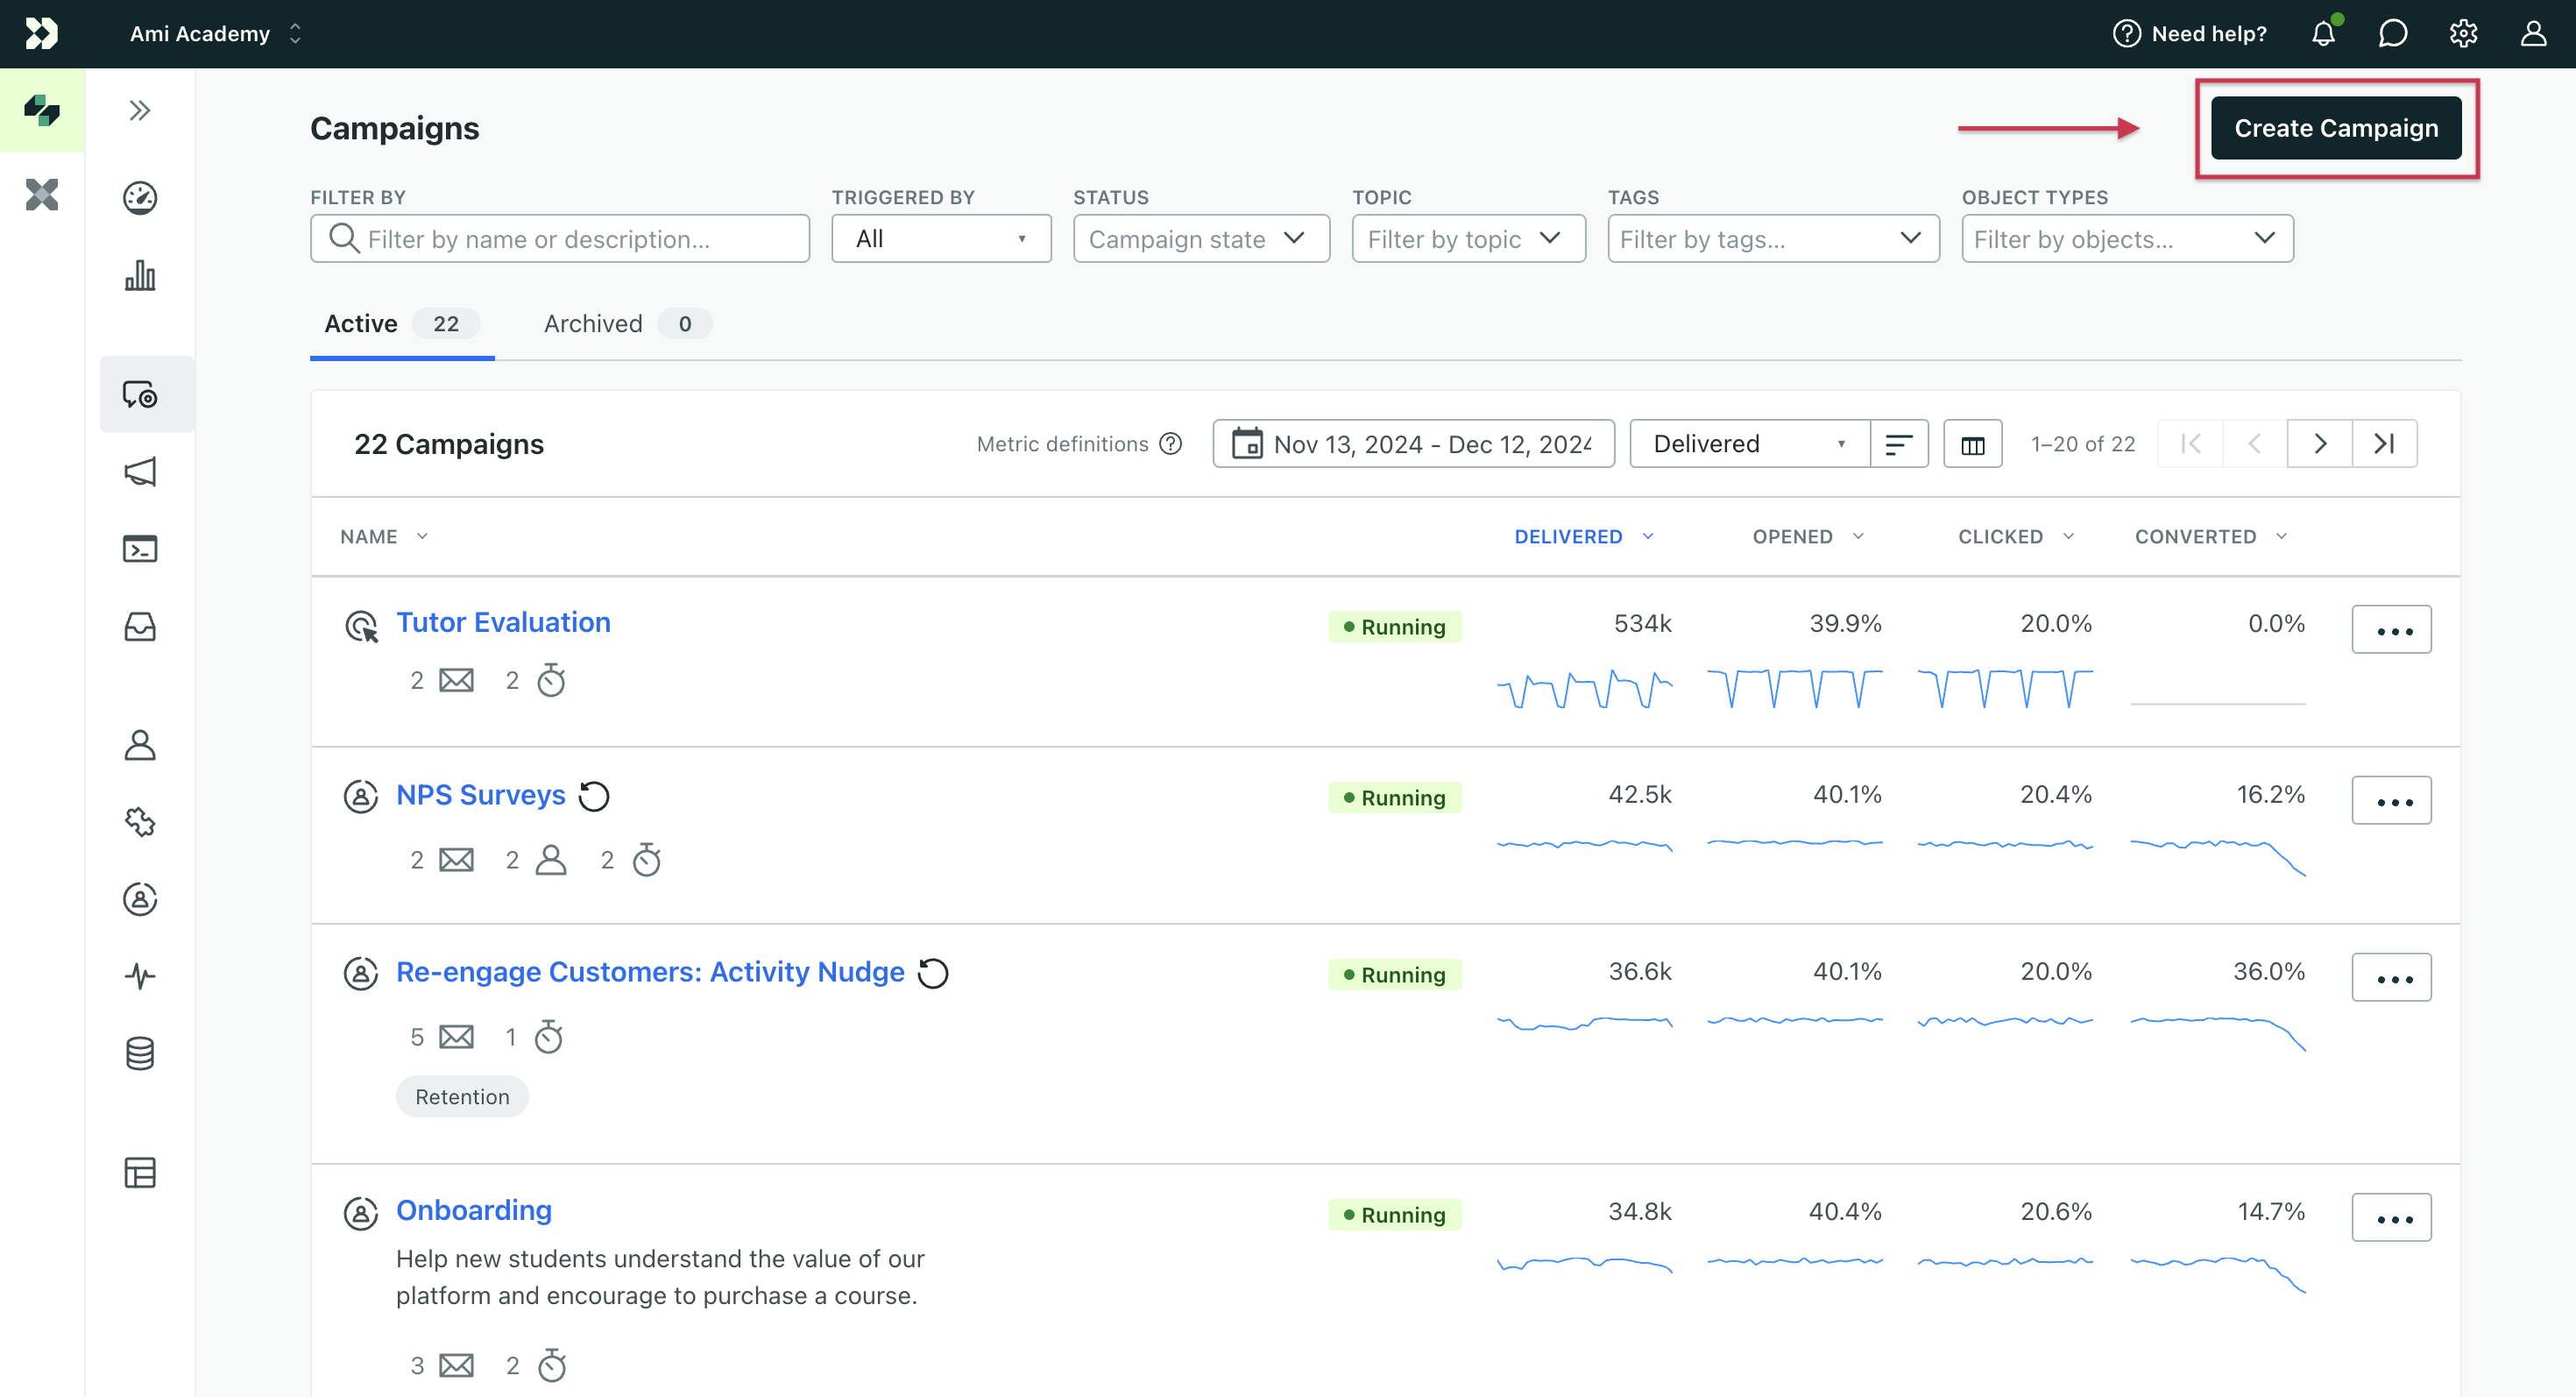
Go to Automations in the left-hand menu, then click Create Automation.
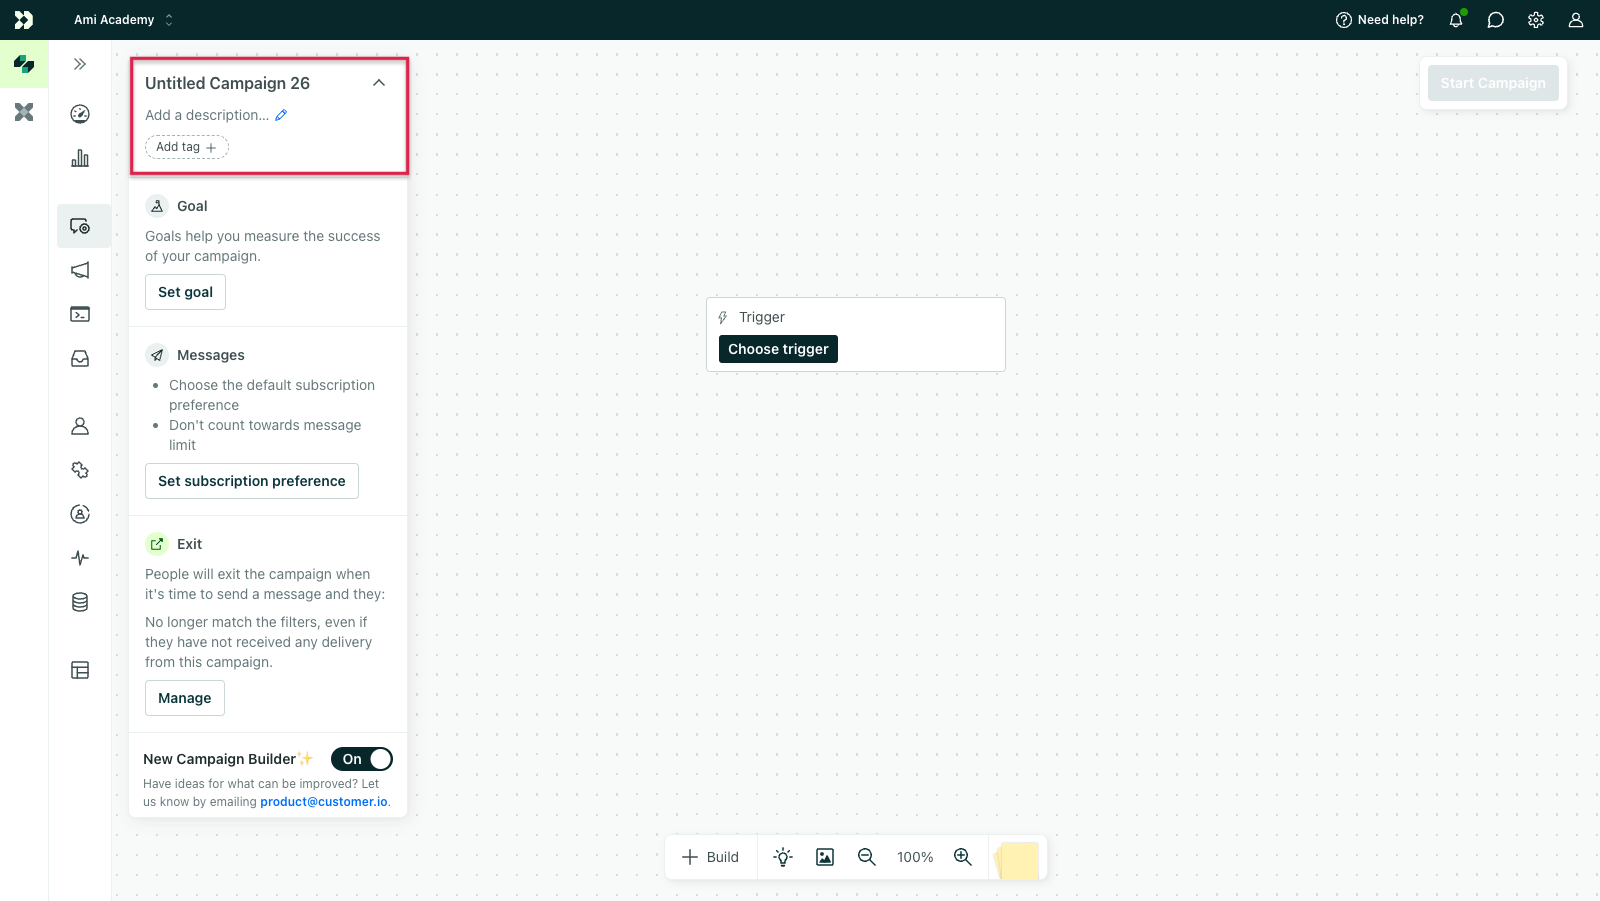
Click the pencil icon next to the automation name in the top left to change the name of the automation so your team members can easily find it on the automations page.
Set your trigger
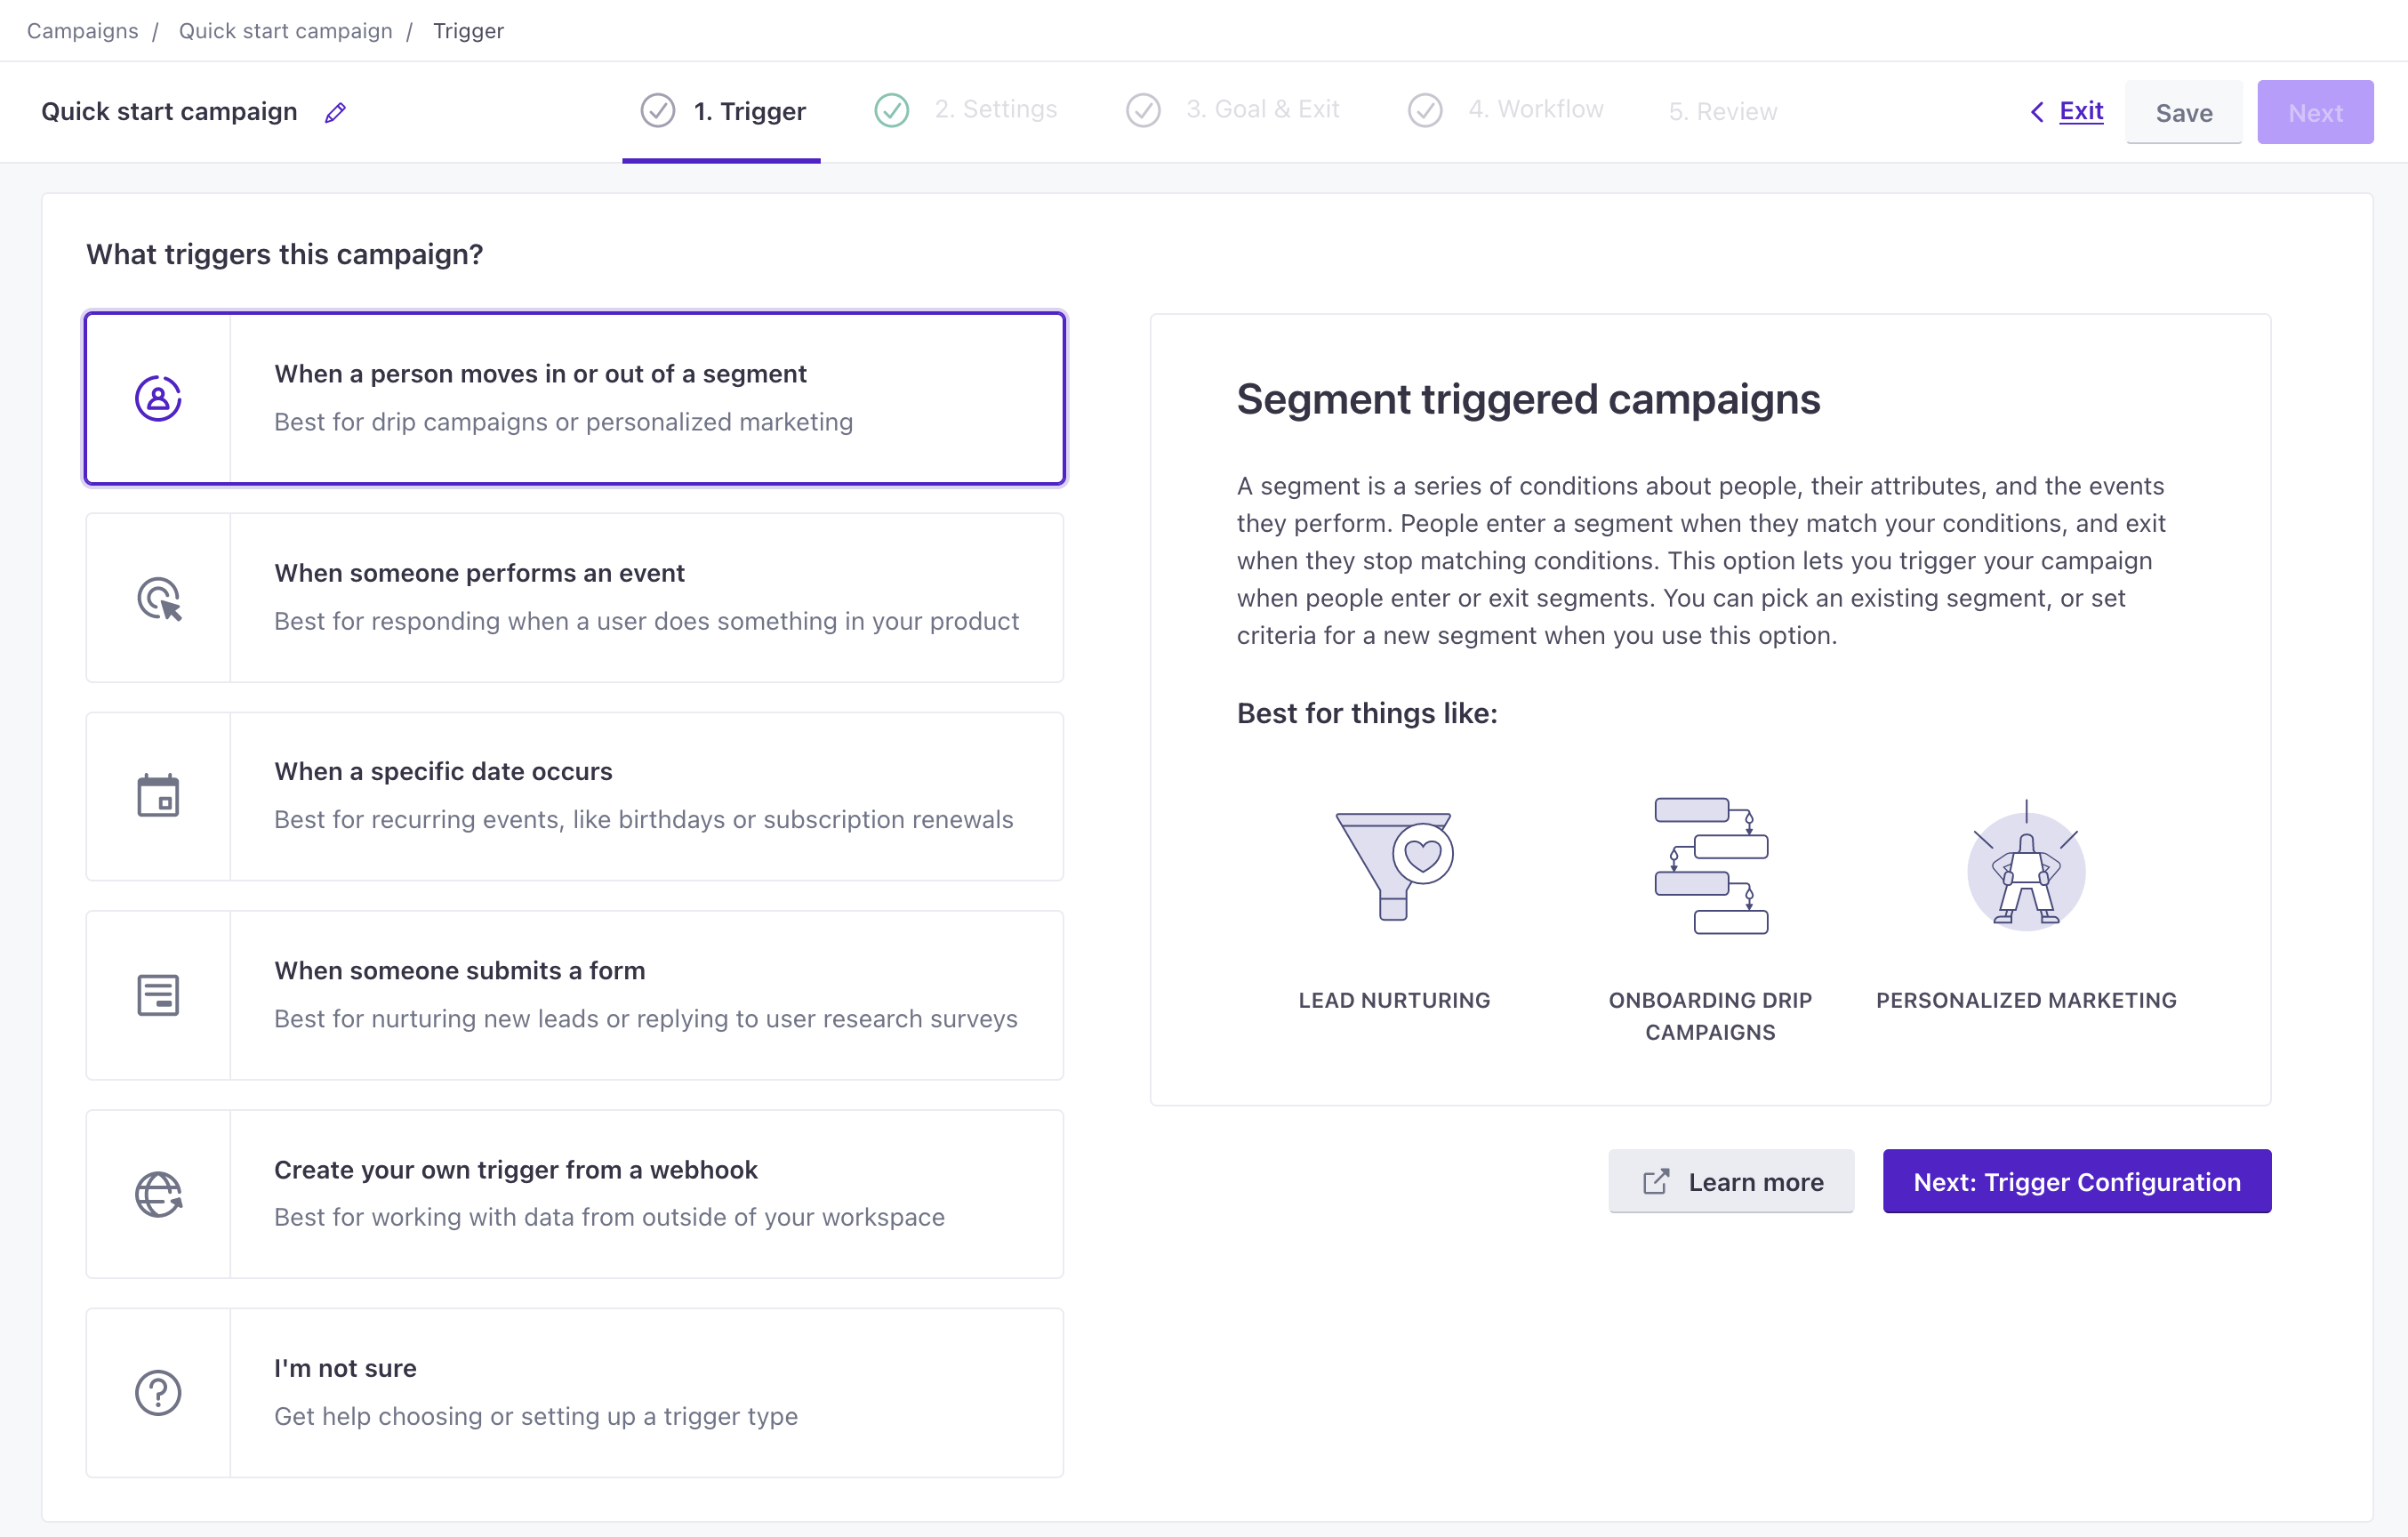
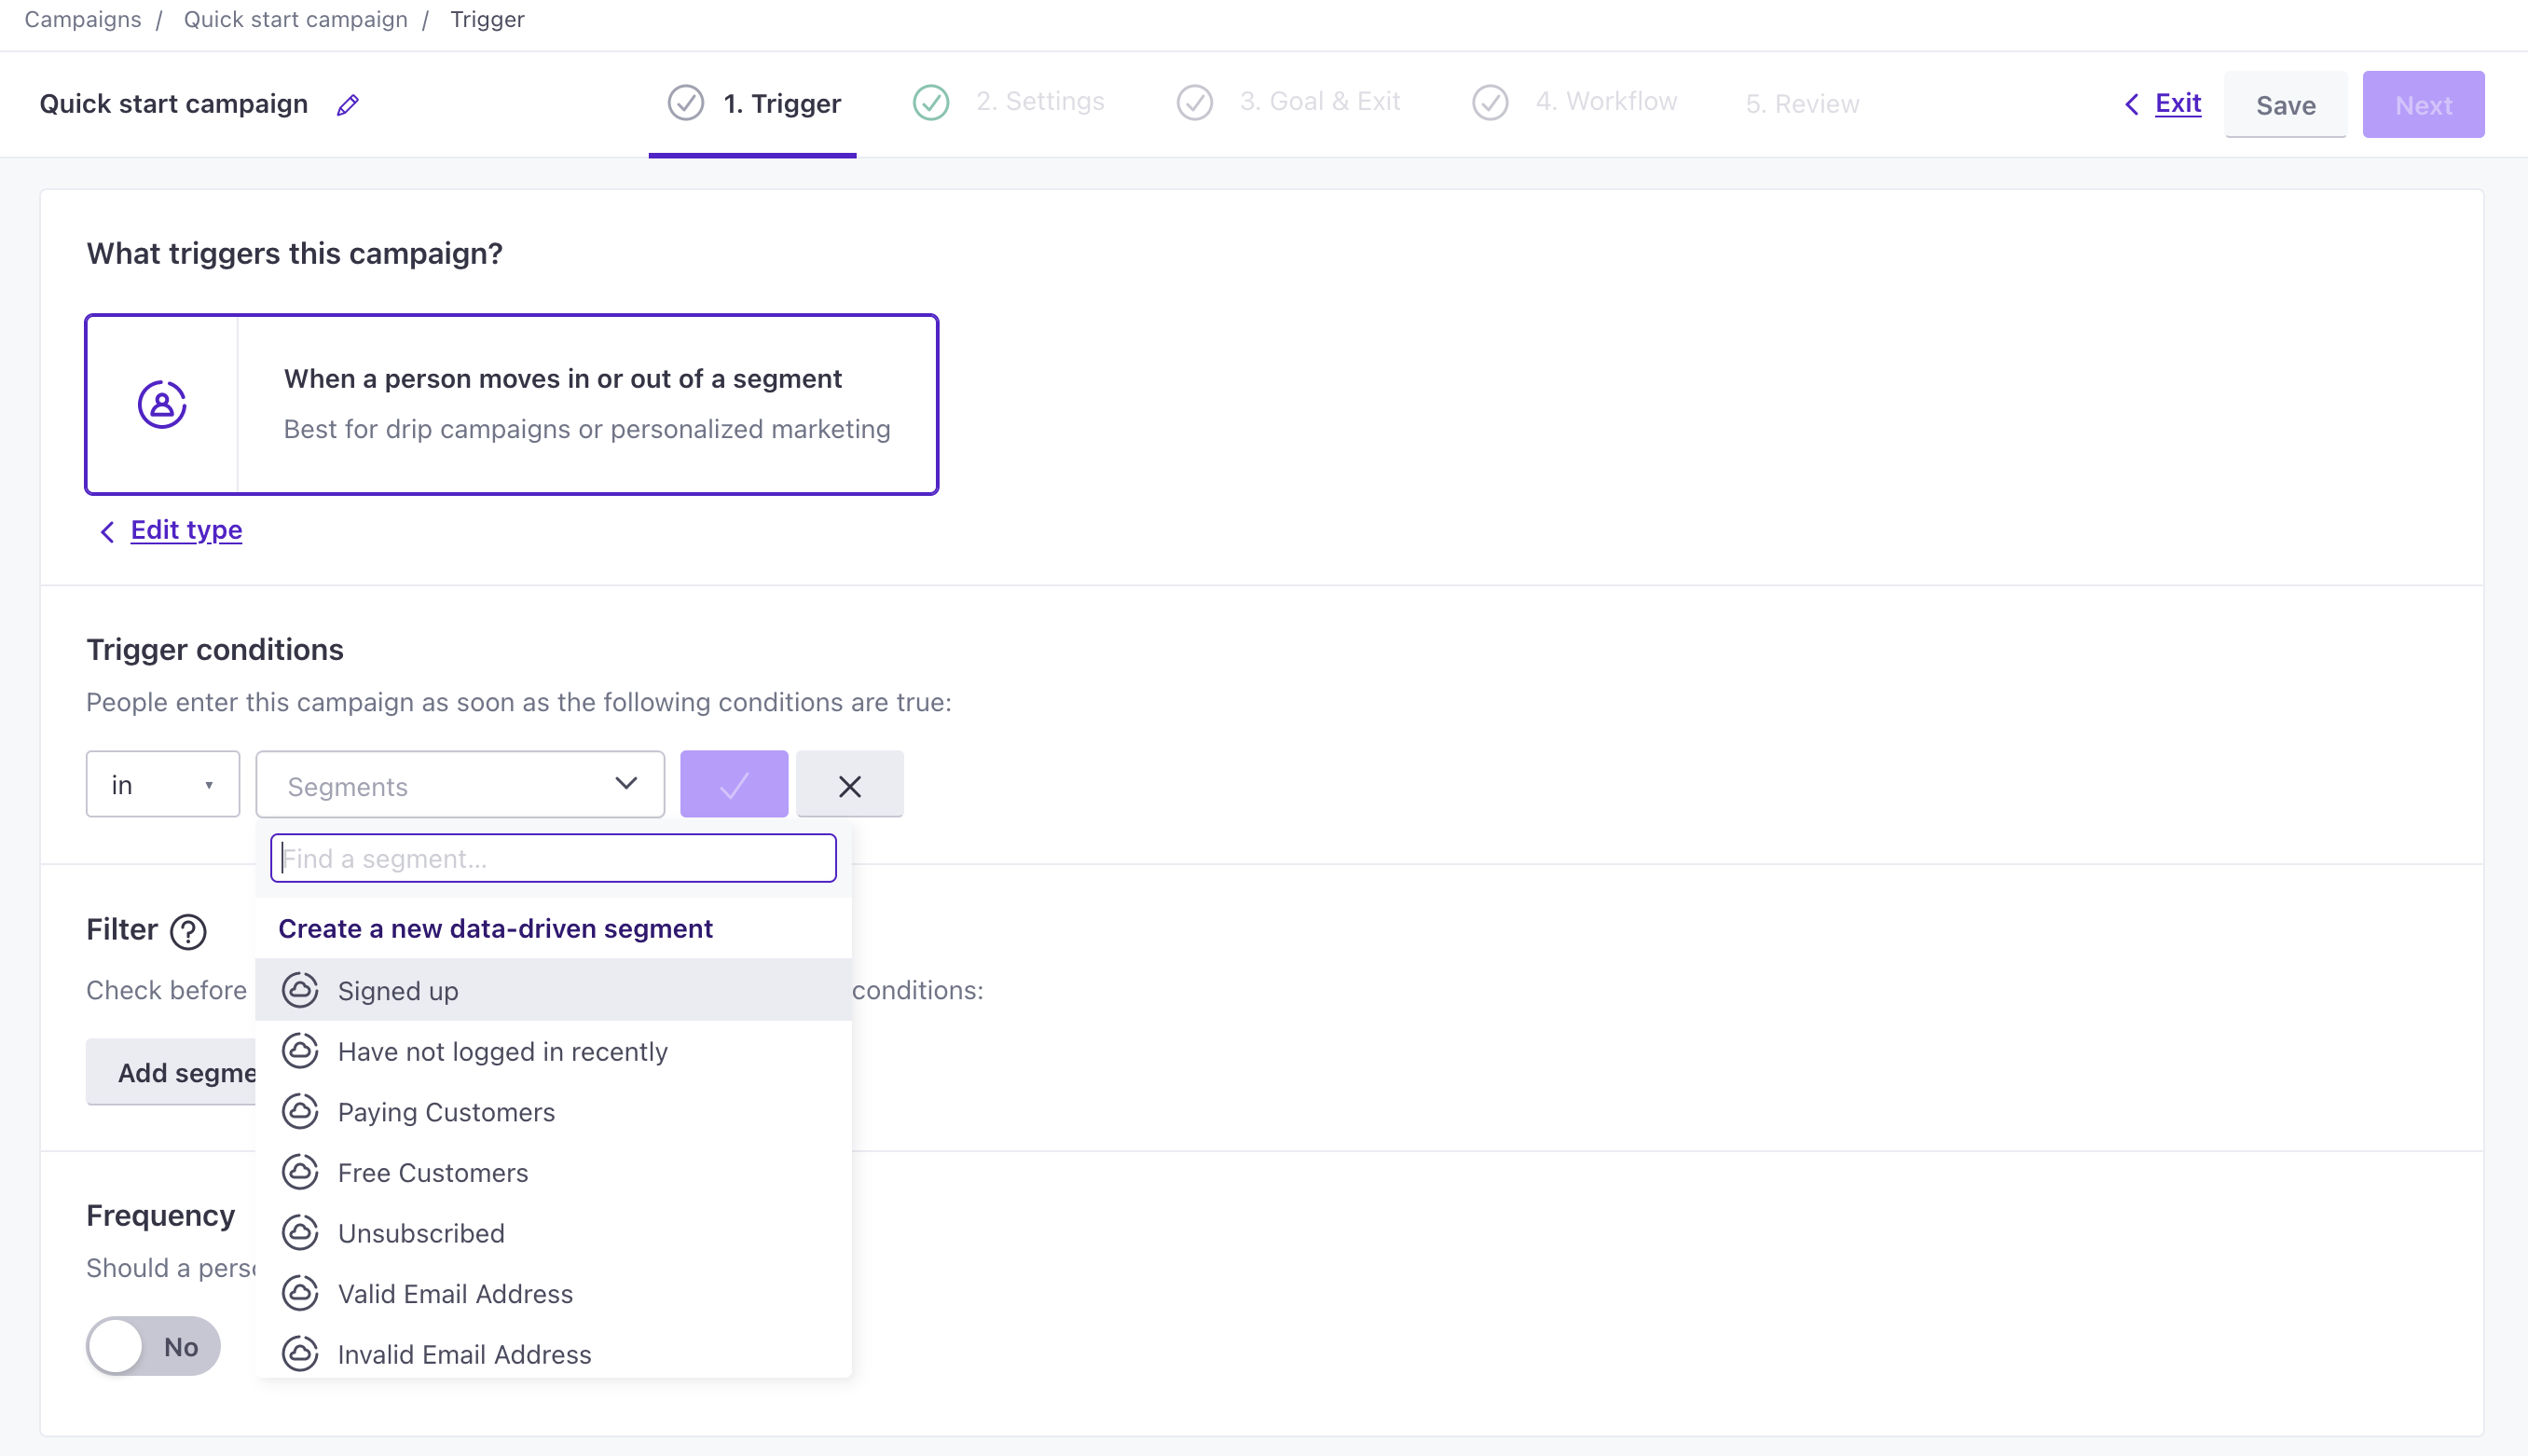
Click the trigger block on the canvas, and choose Segment change as your trigger type. Triggers determine who enters your automation and when. In this example, people will trigger your automation when they join a segment.
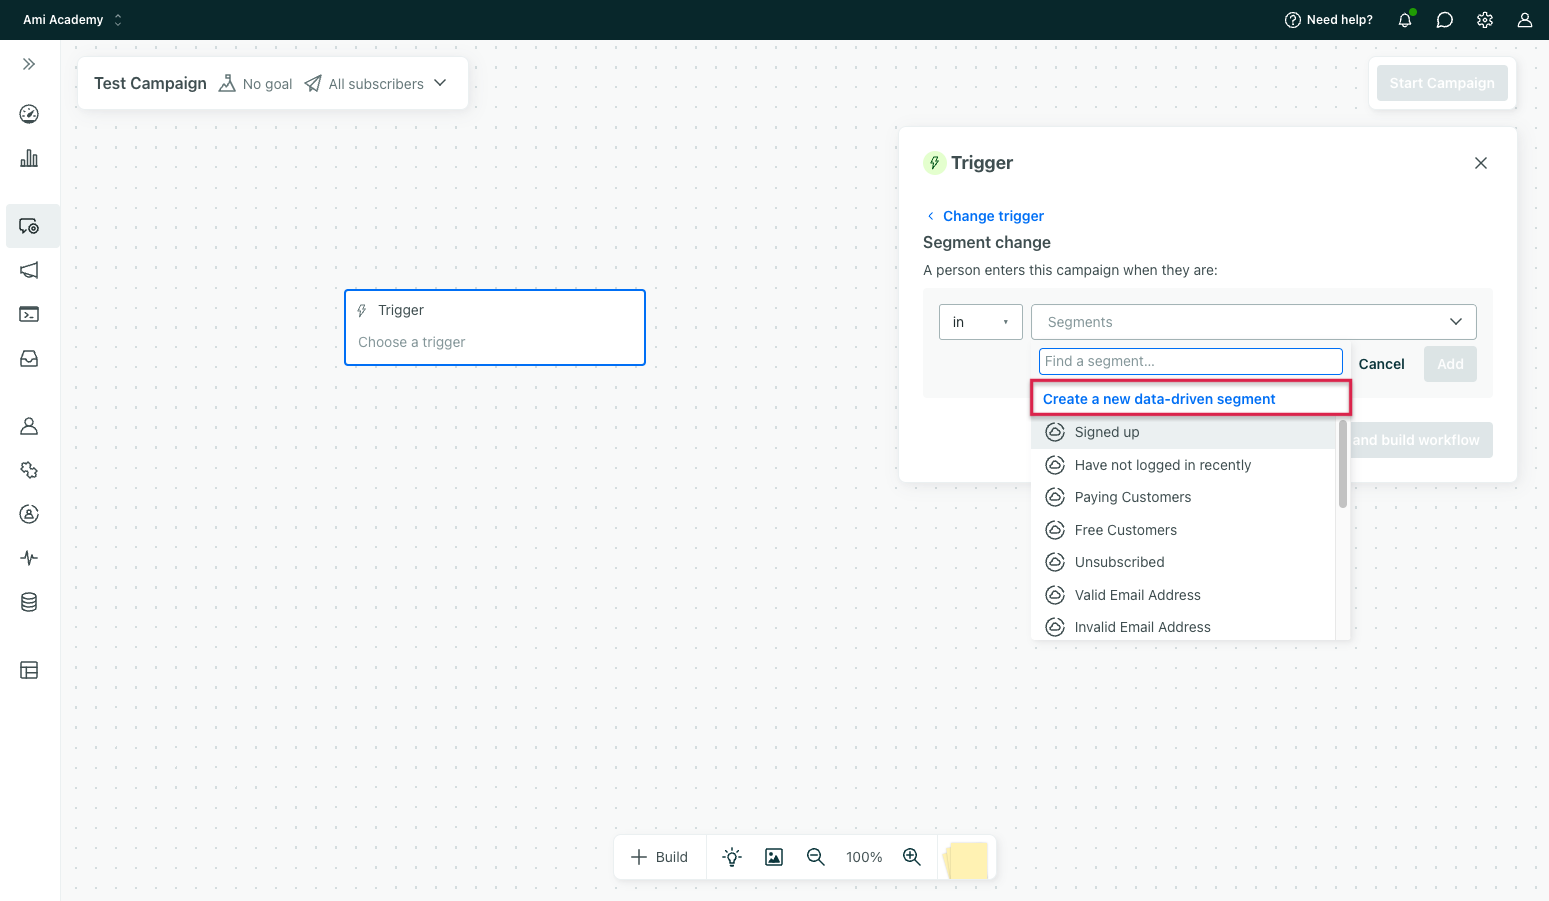
Click the segments dropdown then choose Create a new data-driven segment.
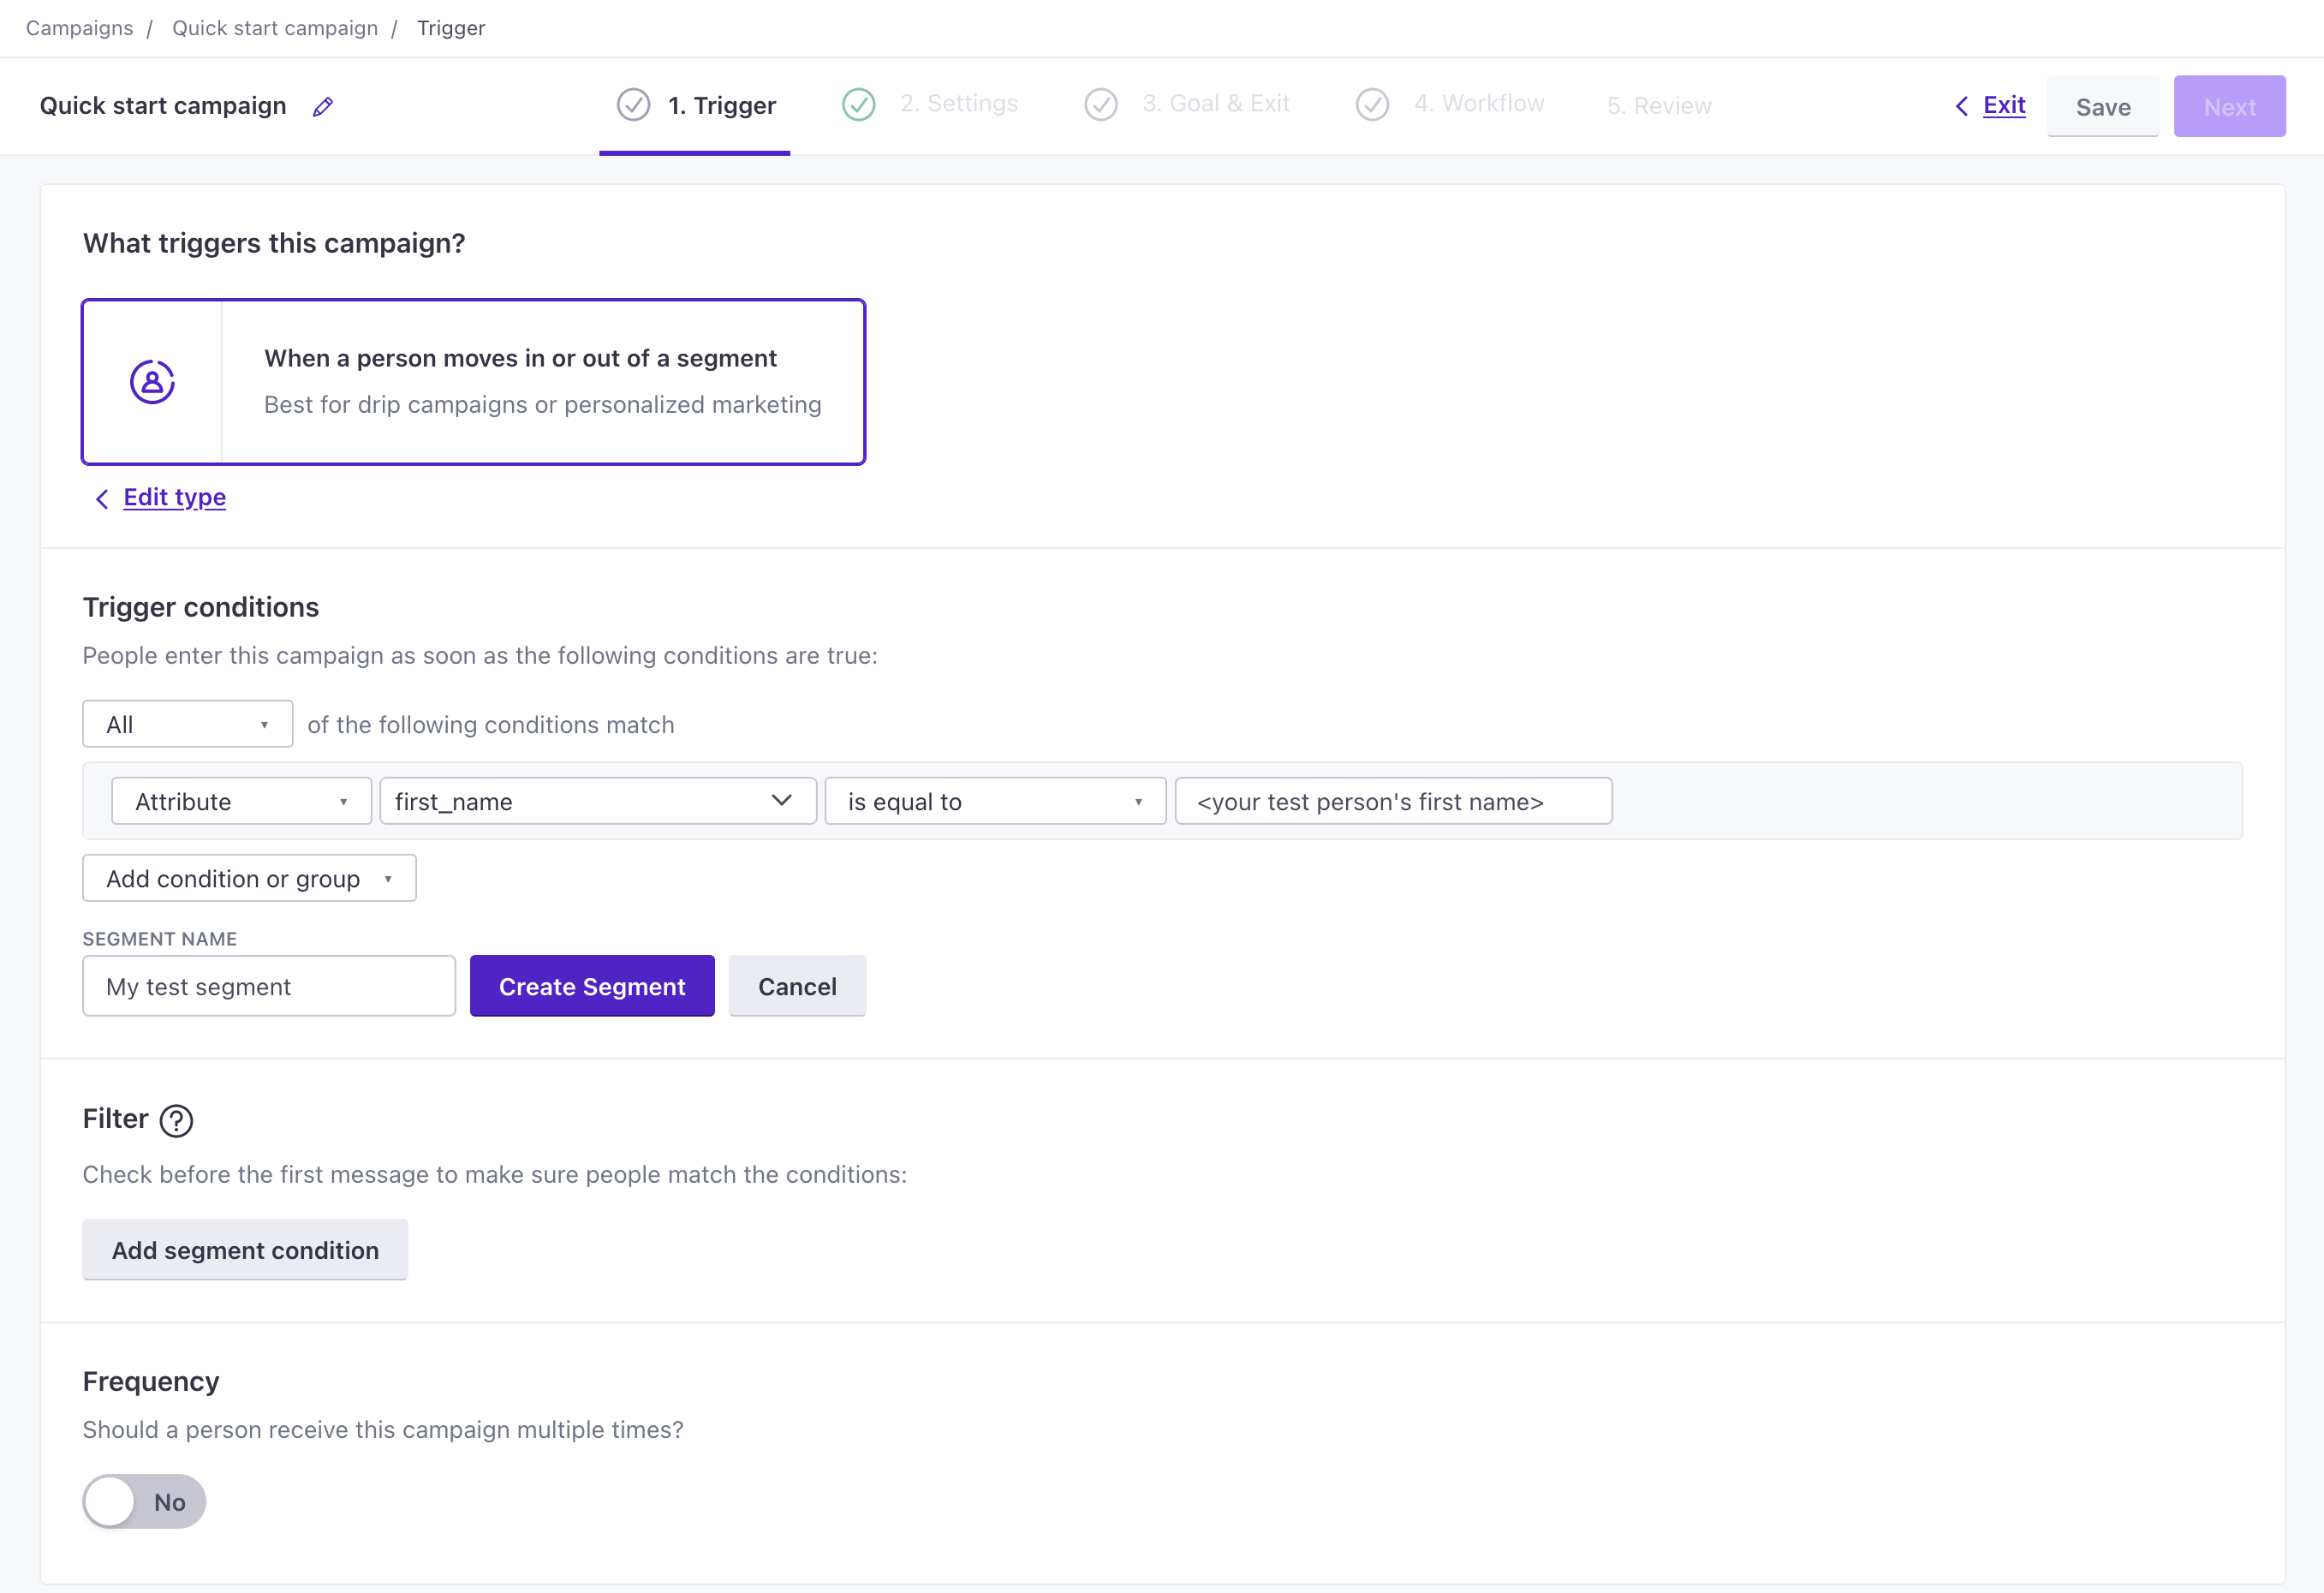
Click Add condition or group. Select Attribute, choose first_name from the profile attribute dropdown, and set your test person’s first name. If you have multiple people with this first_name, choose another attribute so real members of your audience don’t enter this test automation!
Add a Name for your segment. You can filter by this on the Segments page.
Click Create segment.
Click Save and build workflow.
Create your workflow
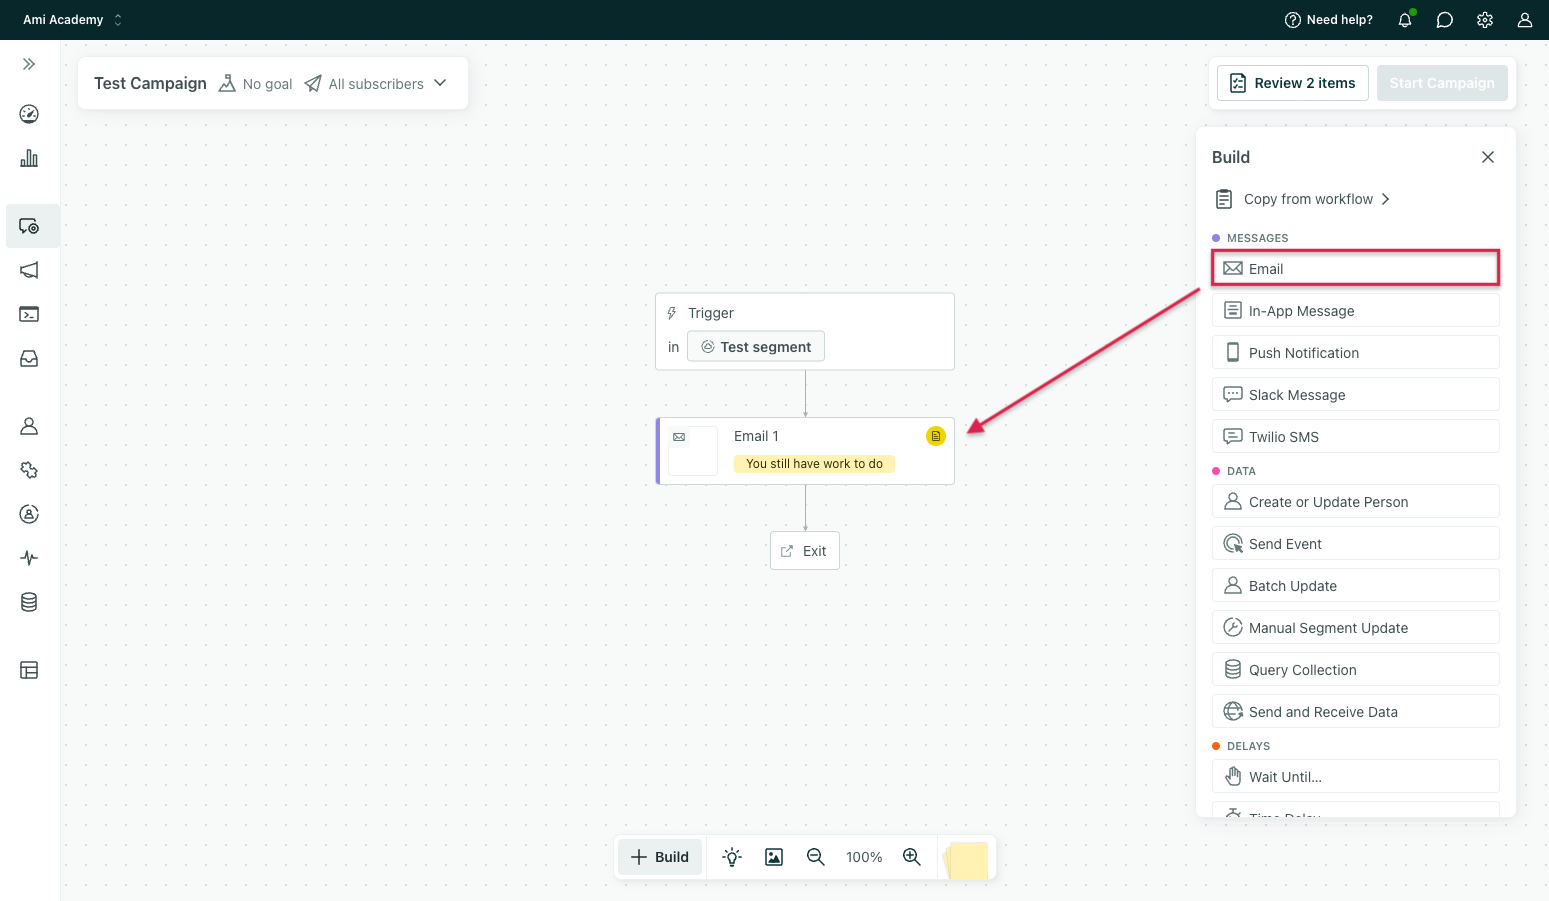
Click Add to see a menu of actions. Drag an Email onto the canvas.
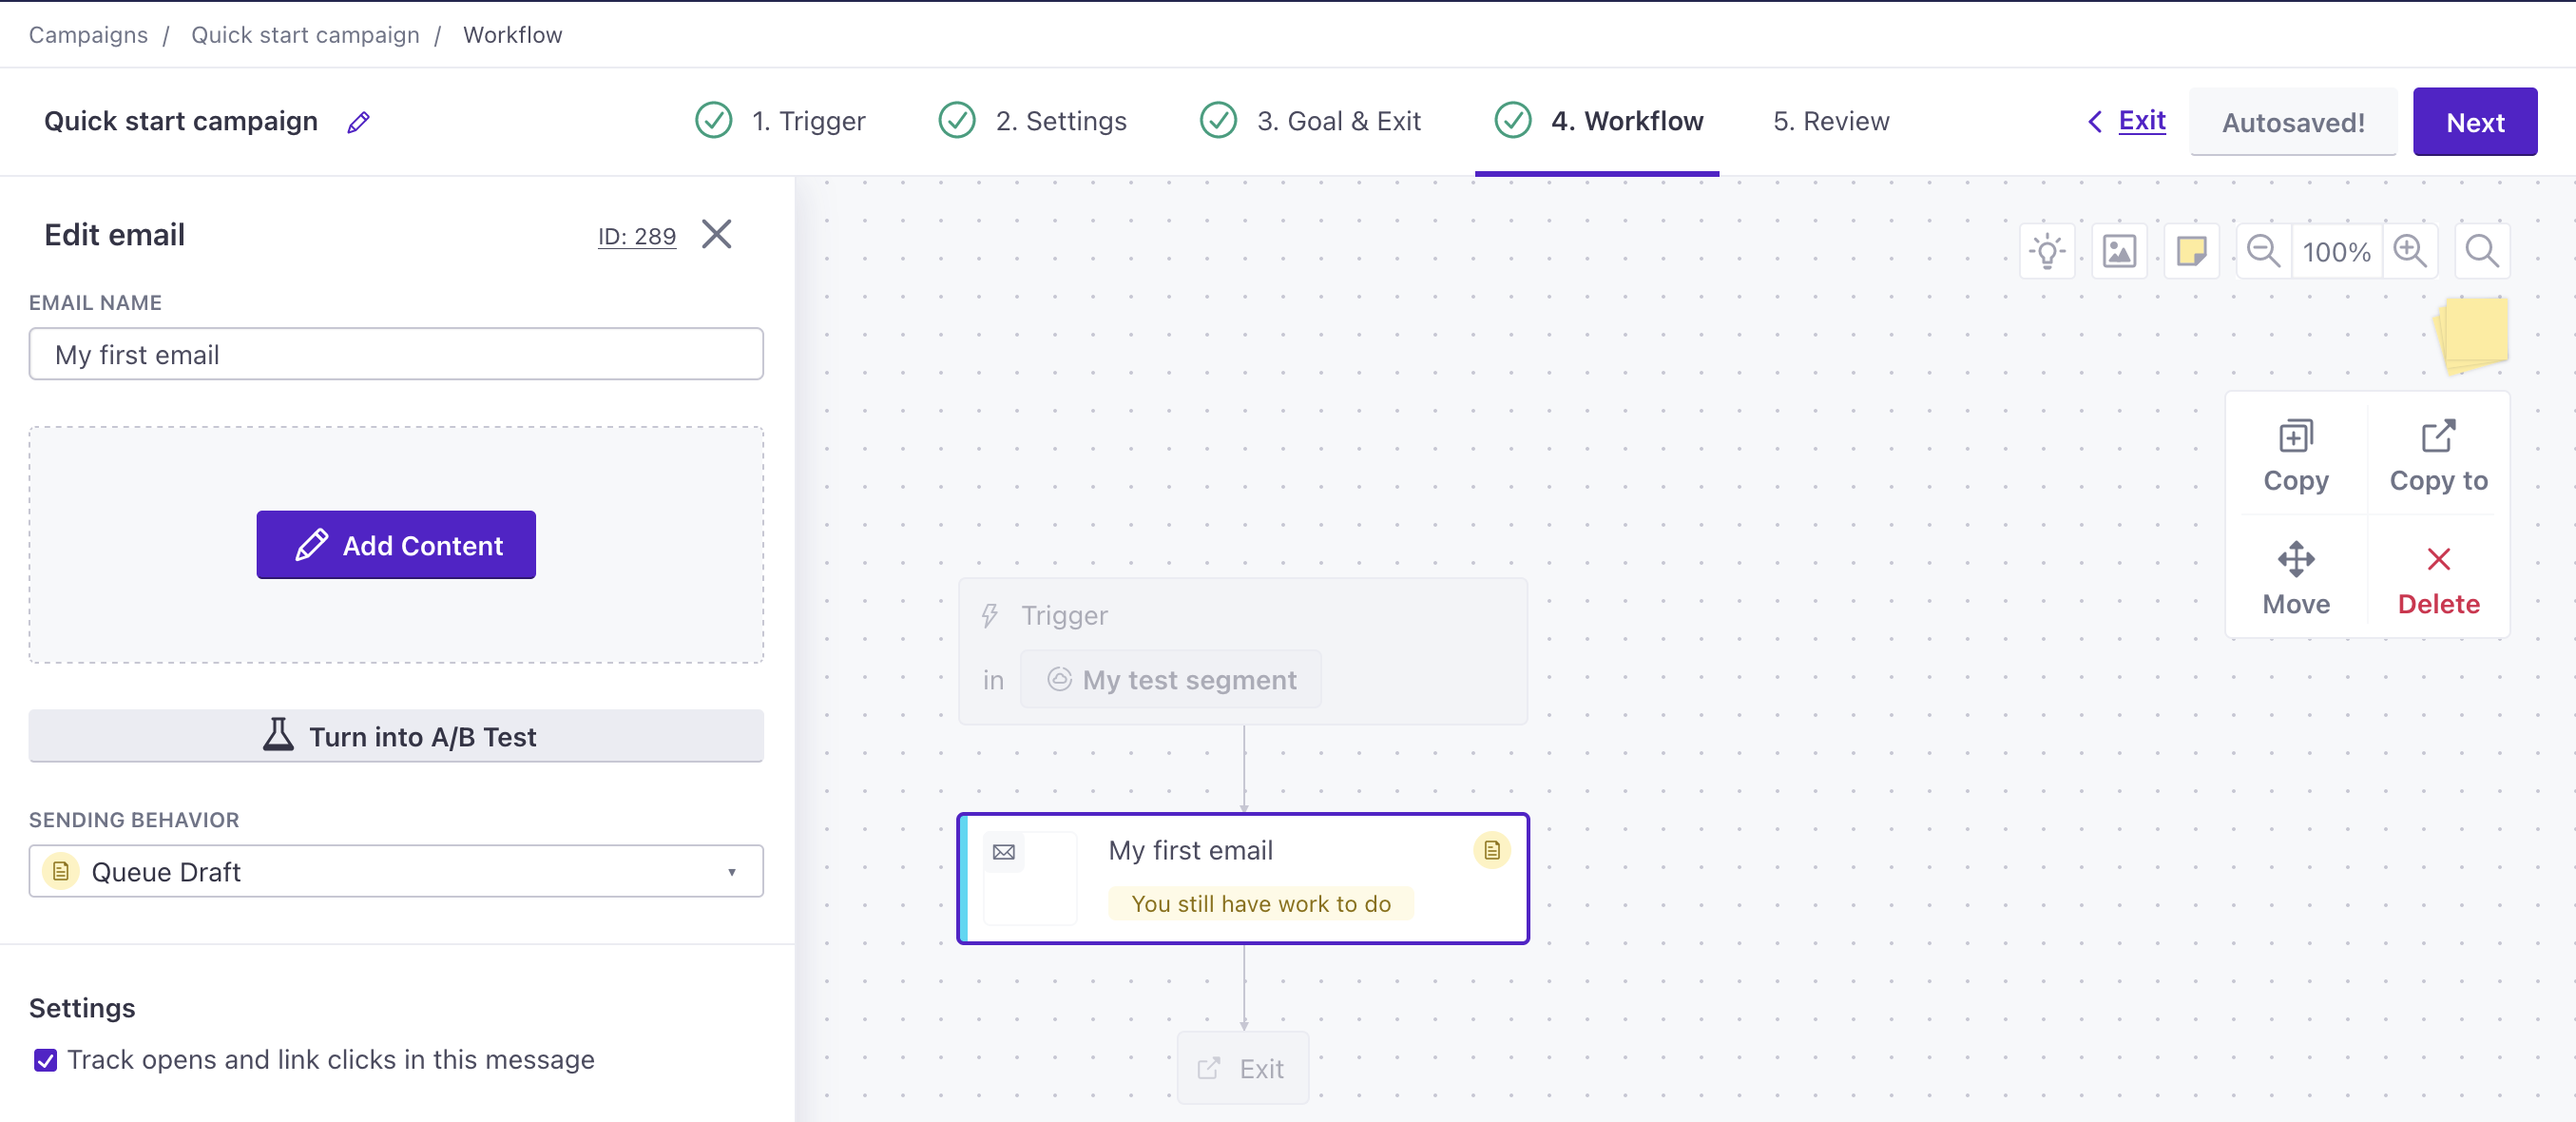
Click the email to edit the name then click Add Content.
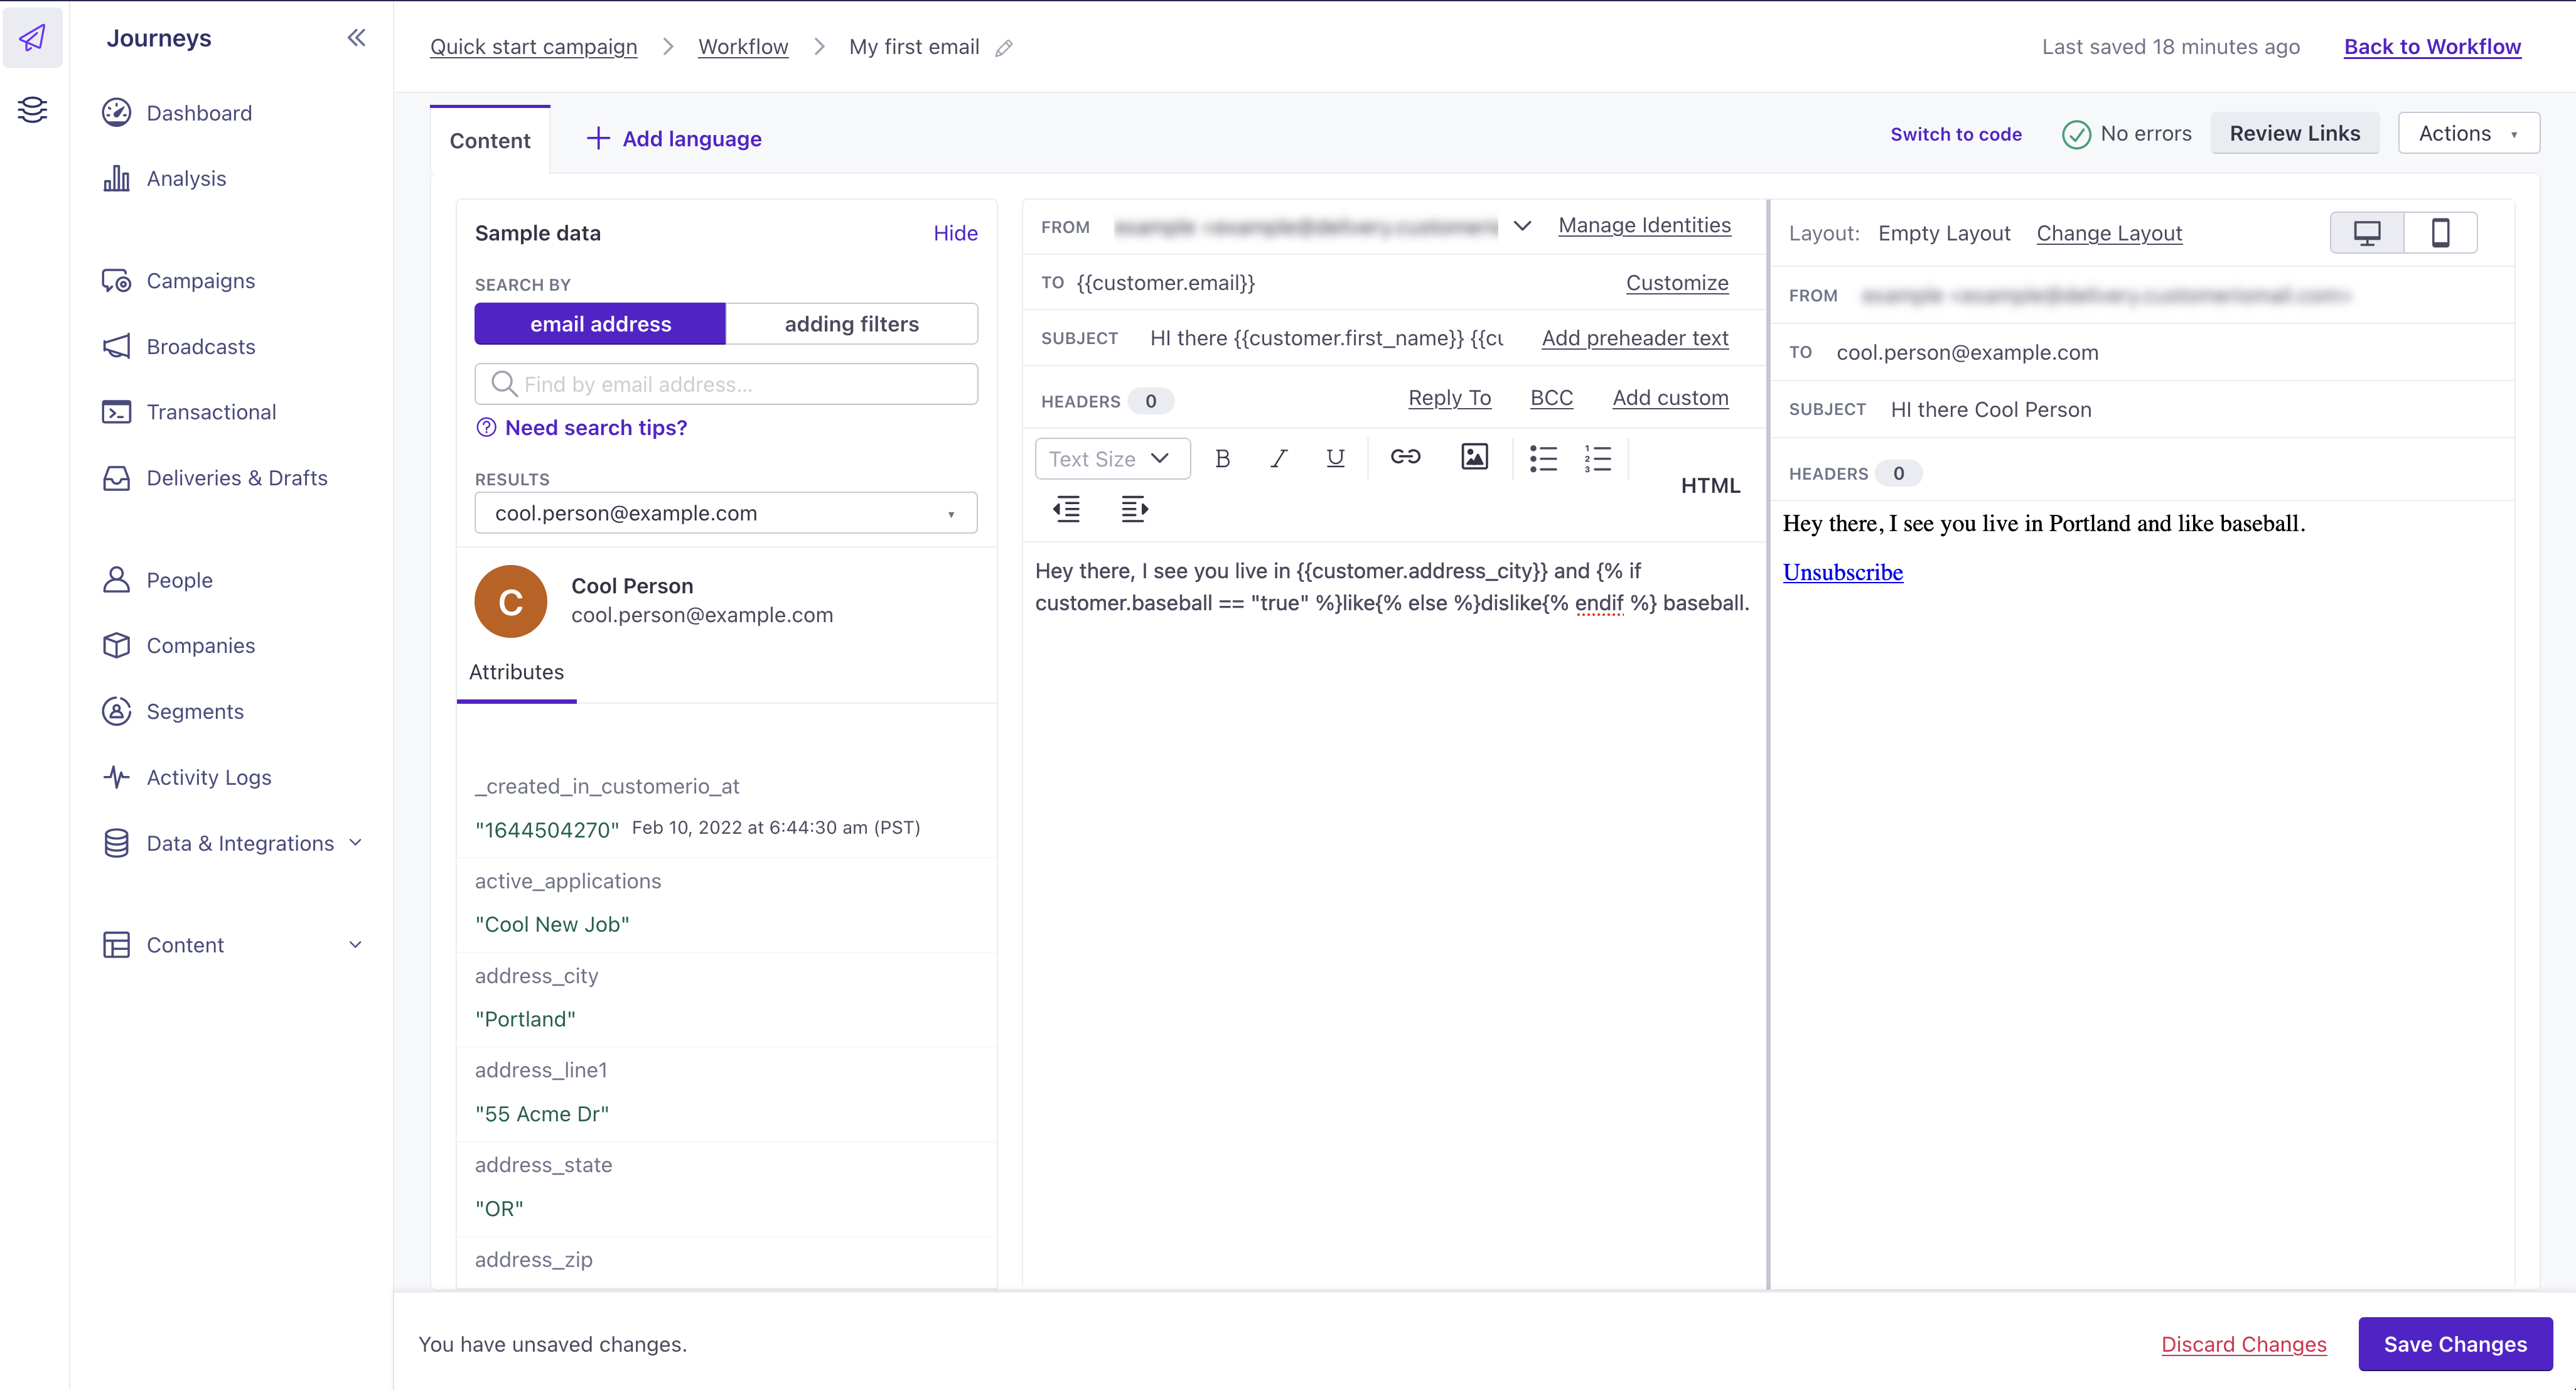
Pick one of the editors. In most demonstrations, we use the drag-and-drop editor to send stylized messages that resonate with your audience. But, for this example, we’re using the rich text editor because it’s easier to show off the personalization features of Customer.io.
In the From field, choose one of the Sender addresses you added when you set up email as a message channel.
to personalize the message with your test person’s first name. You can use {{customer.<attribute_name>}} to reference any attribute value associated with your audience. You can also create conditions and set fallbacks when attributes don’t exist.
Click Save at the bottom then Back to Workflow at the top.
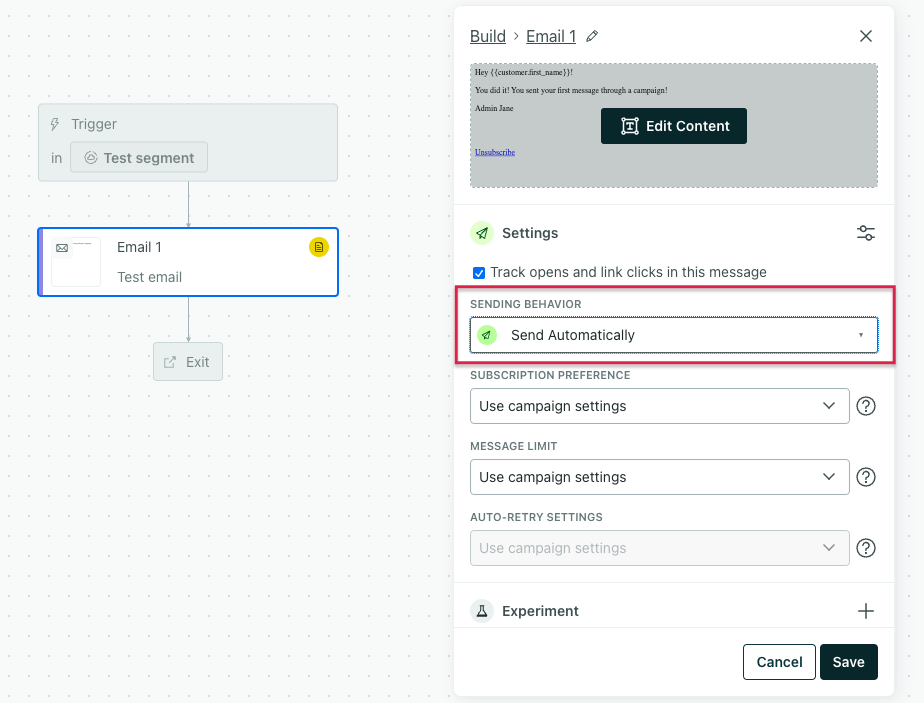
Click Settings. Under Sending Behavior, note that this message is set to “Queue Draft.” This means after the automation is live, we would draft this email, but not send it to your audience. Update this to “Send automatically” then save your changes.
Review your automation
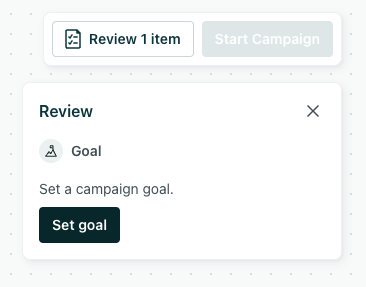
Click Review 1 item next to Start Automation. Notice you still have to set a goal.
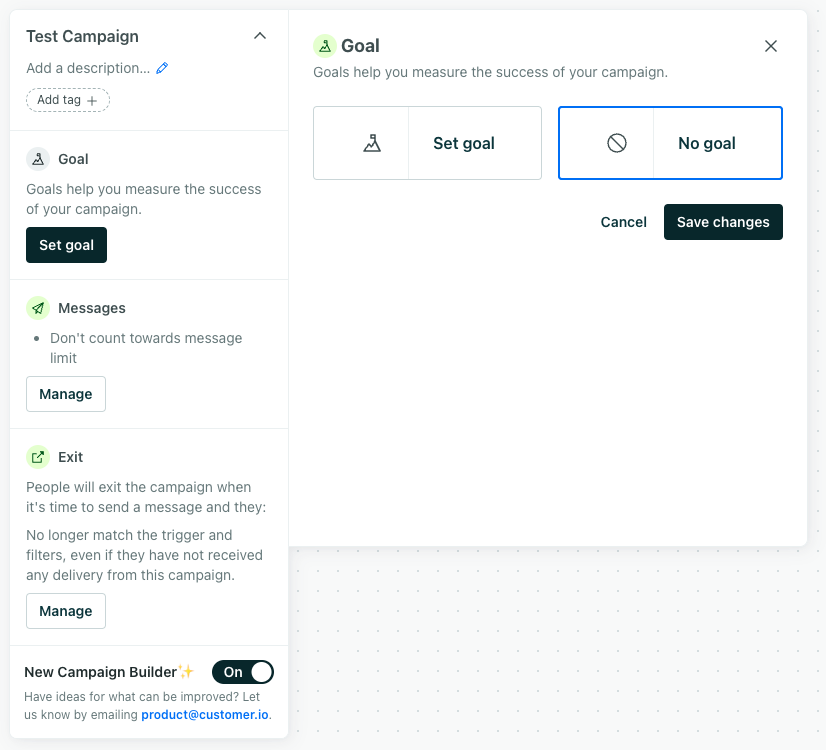
Click Set Goal. Since this is a test automation, we’ll choose “No goal.” Then click Save changes.
Notice you can also change message settings - like subscription preference and message limits - and exit conditions from this panel. By default with segment-triggered automations, people exit early when they don’t match your trigger or filter criteria - in this case, when their first name changes.
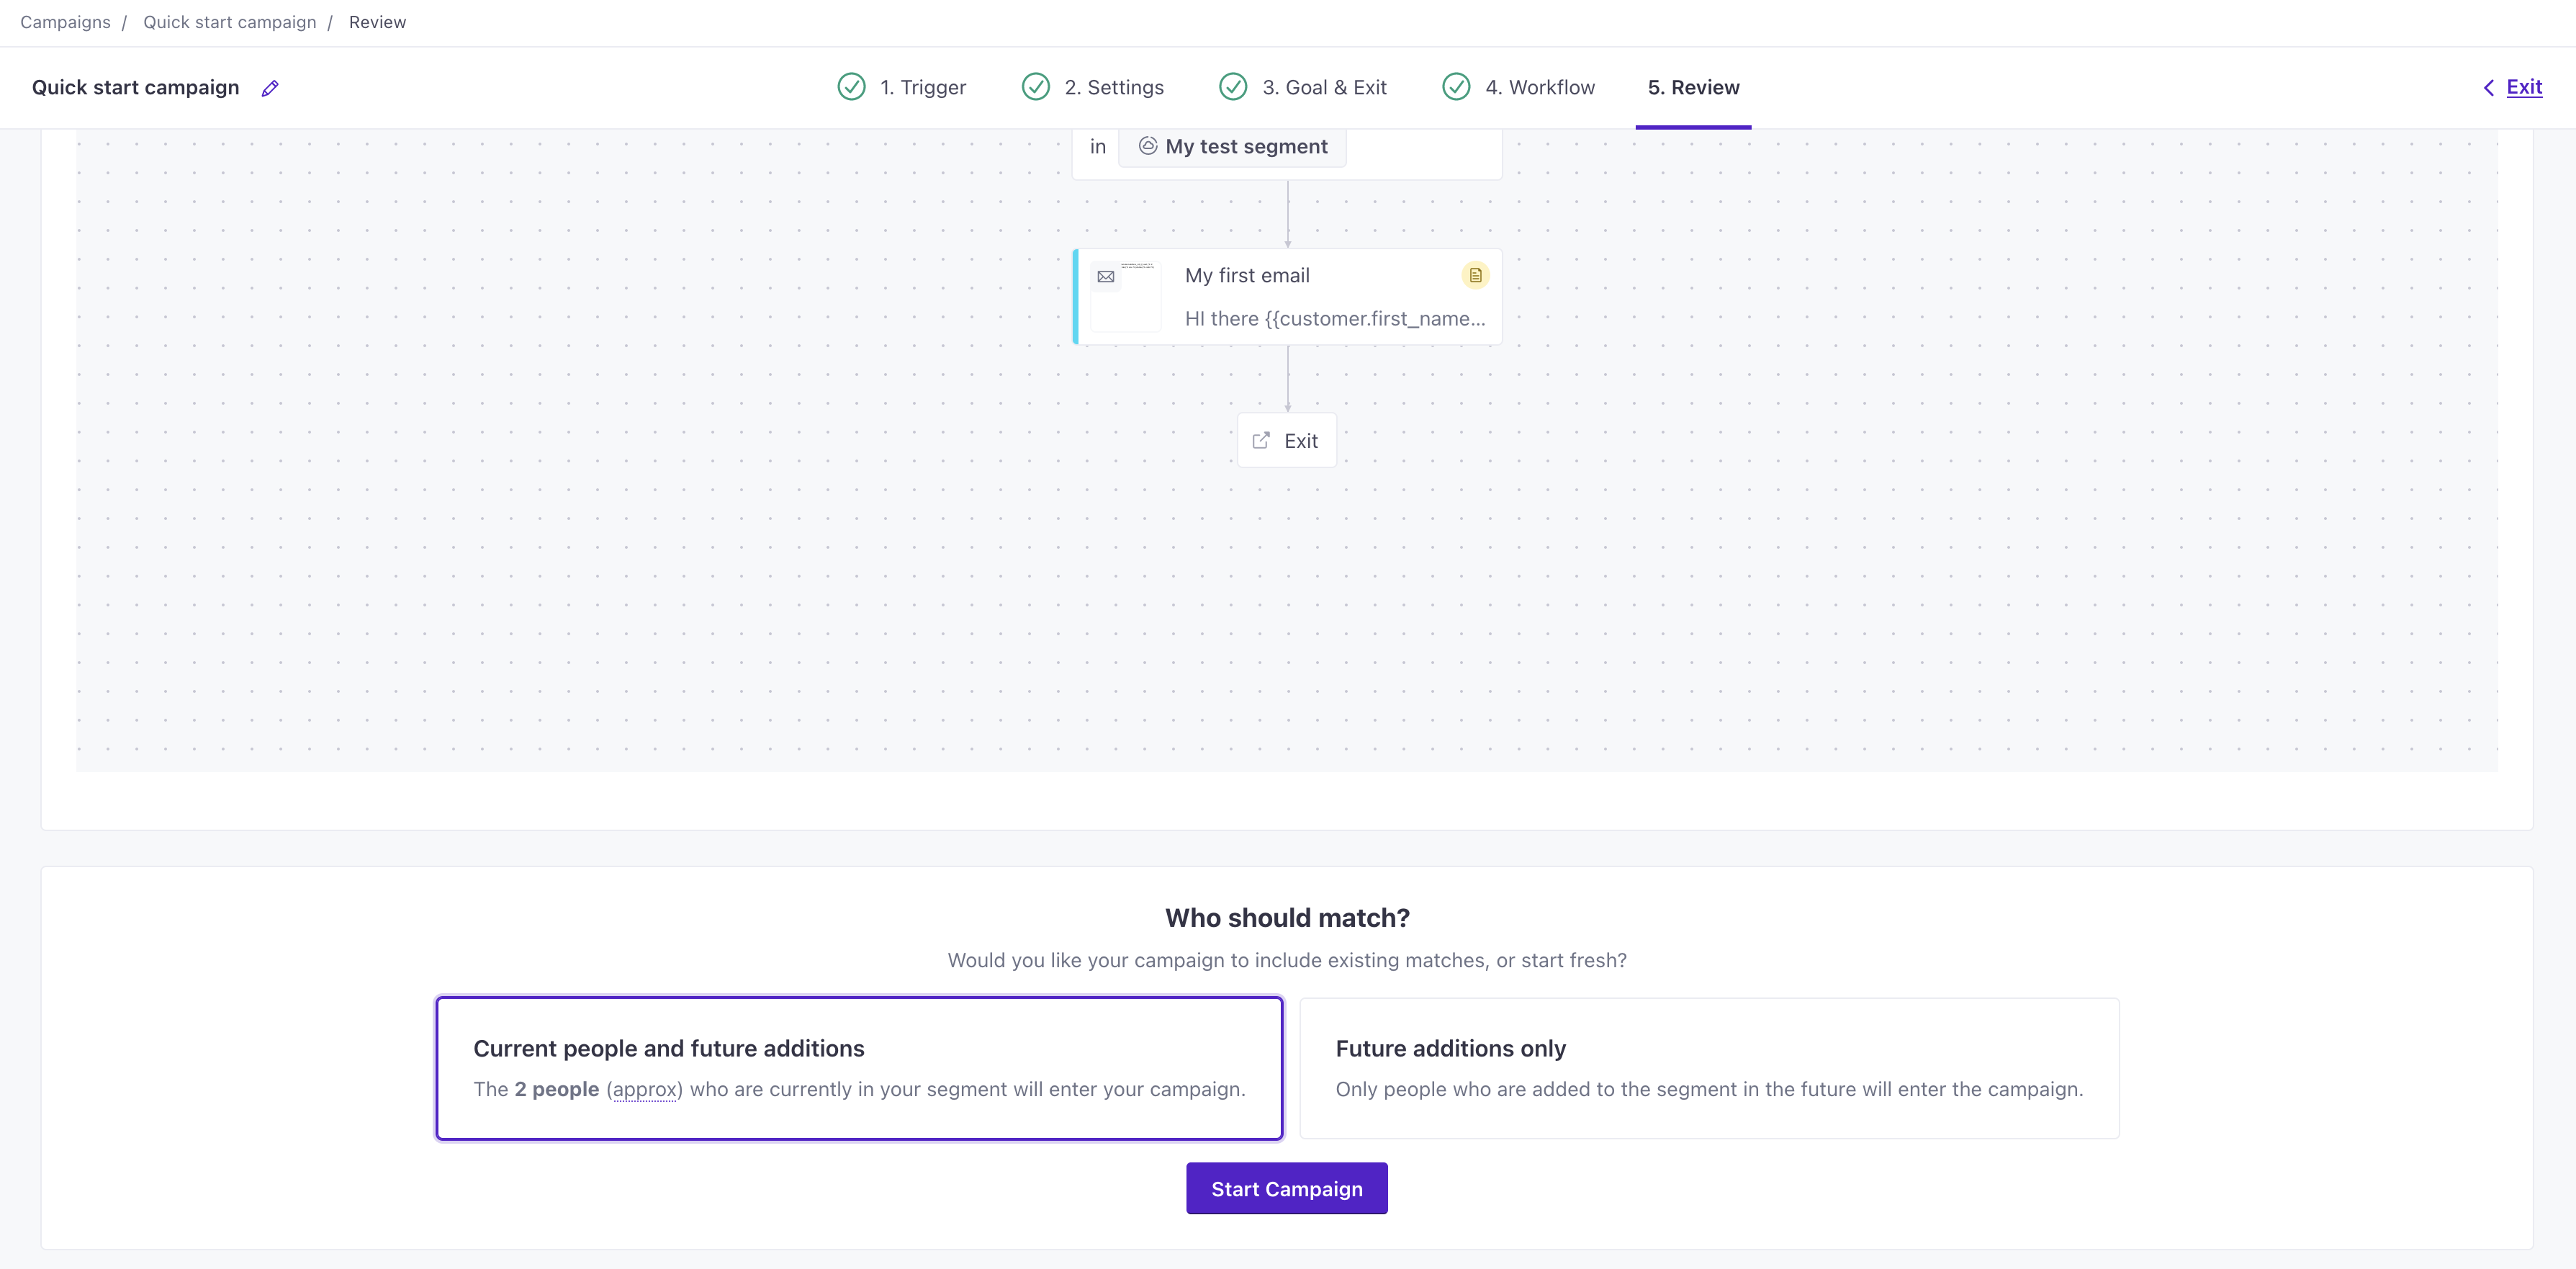
Click Start Automation to review your automation. Under Trigger, choose who you want your automation to include: existing matches (people already stored in your workspace) and/or future additions. We’re using Current people and future additions so our existing test person enters the automation.
Click Start Automation.
Within a minute, you should get your first email!
Reporting is another thing you can hand to AI. Ask about a send the same way you’d check delivery metrics for a real one.
Make sure your test worked.
Did my test email send? Show me the deliveries for the automation we just created, and flag anything that needs fixing.
This was quick. Is it really that easy?
This guide walks you through the most common parts of Customer.io so you can start sending messages as quickly as possible. But it’s not comprehensive. You’ll get the most out of Customer.io when you carefully plan your implementation, capture the right data, and automate your messaging strategy.
That all takes time.
So, while we can get you started in just a few minutes, and demonstrate some common features of Customer.io, it’ll take more than this quick start to get you over the finish line!
Setup is also only part of what you can ask AI to do. It can analyze how your automations perform, find the people who match a question you’re trying to answer, and draft message copy. Use Customer.io with AI covers what each surface can do.