

Use the Customer.io agent in Slack
You can add the Customer.io agent to Slack, and ask it questions or give it work without leaving a thread. It runs with each person's own Customer.io permissions and guardrails.
How it works
The Customer.io app for Slack is the same agent that you use in Customer.io—same reasoning, same tools, same guardrails. The only difference is that you reach it from a Slack thread rather than through fly.customer.io.
An account admin installs the Customer.io Slack app once, and then anybody on your team with a Customer.io login can @Customer.io in a channel or send it a direct message. The agent replies in a thread, and each thread is its own conversation. You can reply in the thread to keep your context, or invoke @Customer.io outside the thread to start a new conversation.
The agent acts as you. It matches your Slack account to your Customer.io login and runs with your permissions, so it can never see or change anything you couldn’t see or change yourself. Every action it takes shows up in your audit logs, tied to you.
Install the Customer.io Slack app
To install the Customer.io Slack app, you need to be an account admin in Customer.io and you need permission to add apps to your Slack workspace. If you can’t add apps yourself, you can do the setup together with a Slack admin.
The connection is one-to-one: a Customer.io account connects to one Slack workspace, and a Slack workspace connects to one Customer.io account. If you run separate Customer.io accounts (for example, per brand or region), each one needs its own Slack workspace.
- Go to Settings > Slack Agent.
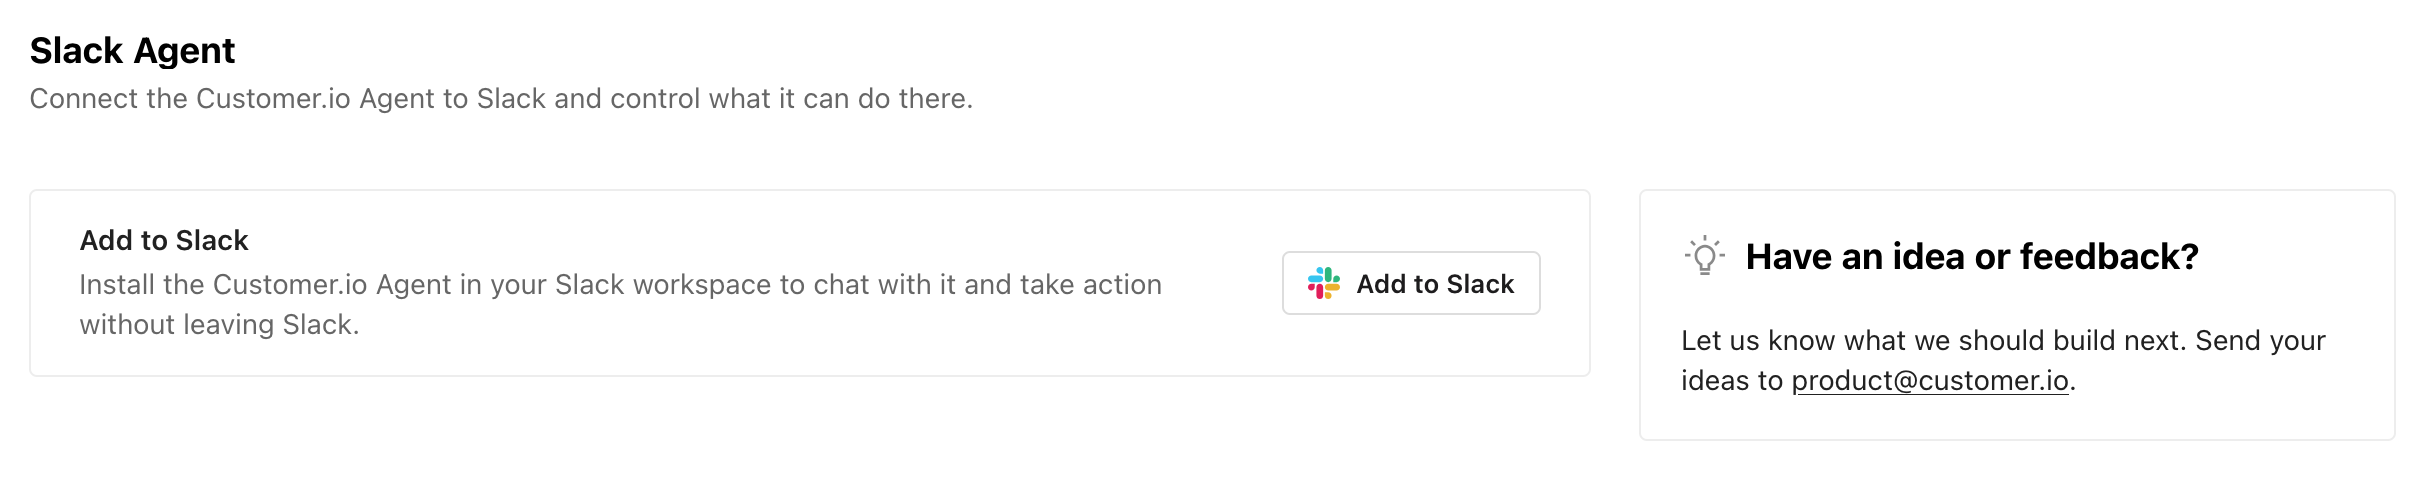
- Click Add Customer.io to Slack.
- Pick the Slack workspace you want to connect to Customer.io.
- Review the permissions the Customer.io app asks for and click Allow.
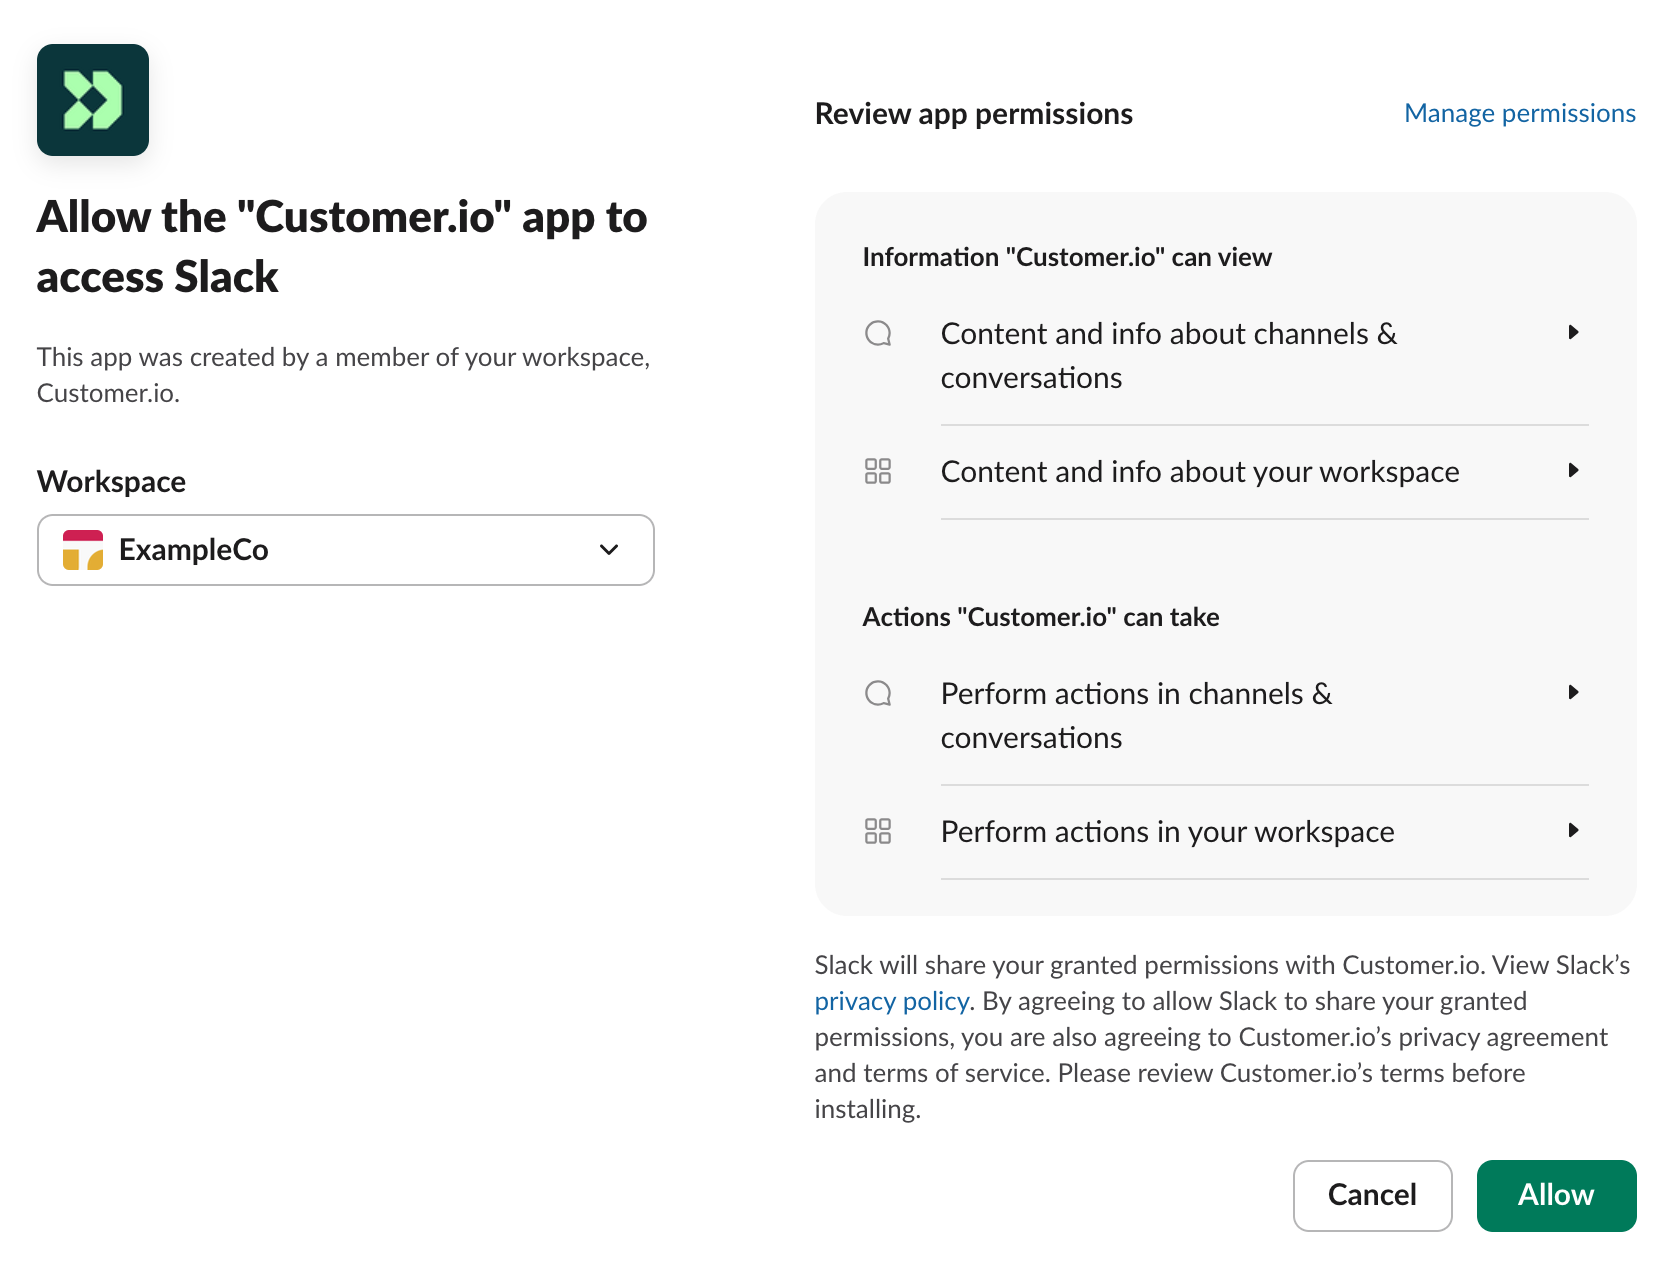
- Configure the Slack app in Customer.io:
- Read-only in Slack: Turn this on to prevent the agent from creating or editing anything in your account.
- Allow live-data edits in Slack: Turn this on to allow the agent to change live data in your account. (Note that this setting won’t do anything until you turn on Edit live data in your AI settings.)
- Workspaces: Check the workspaces you want the agent be able to access in Slack.
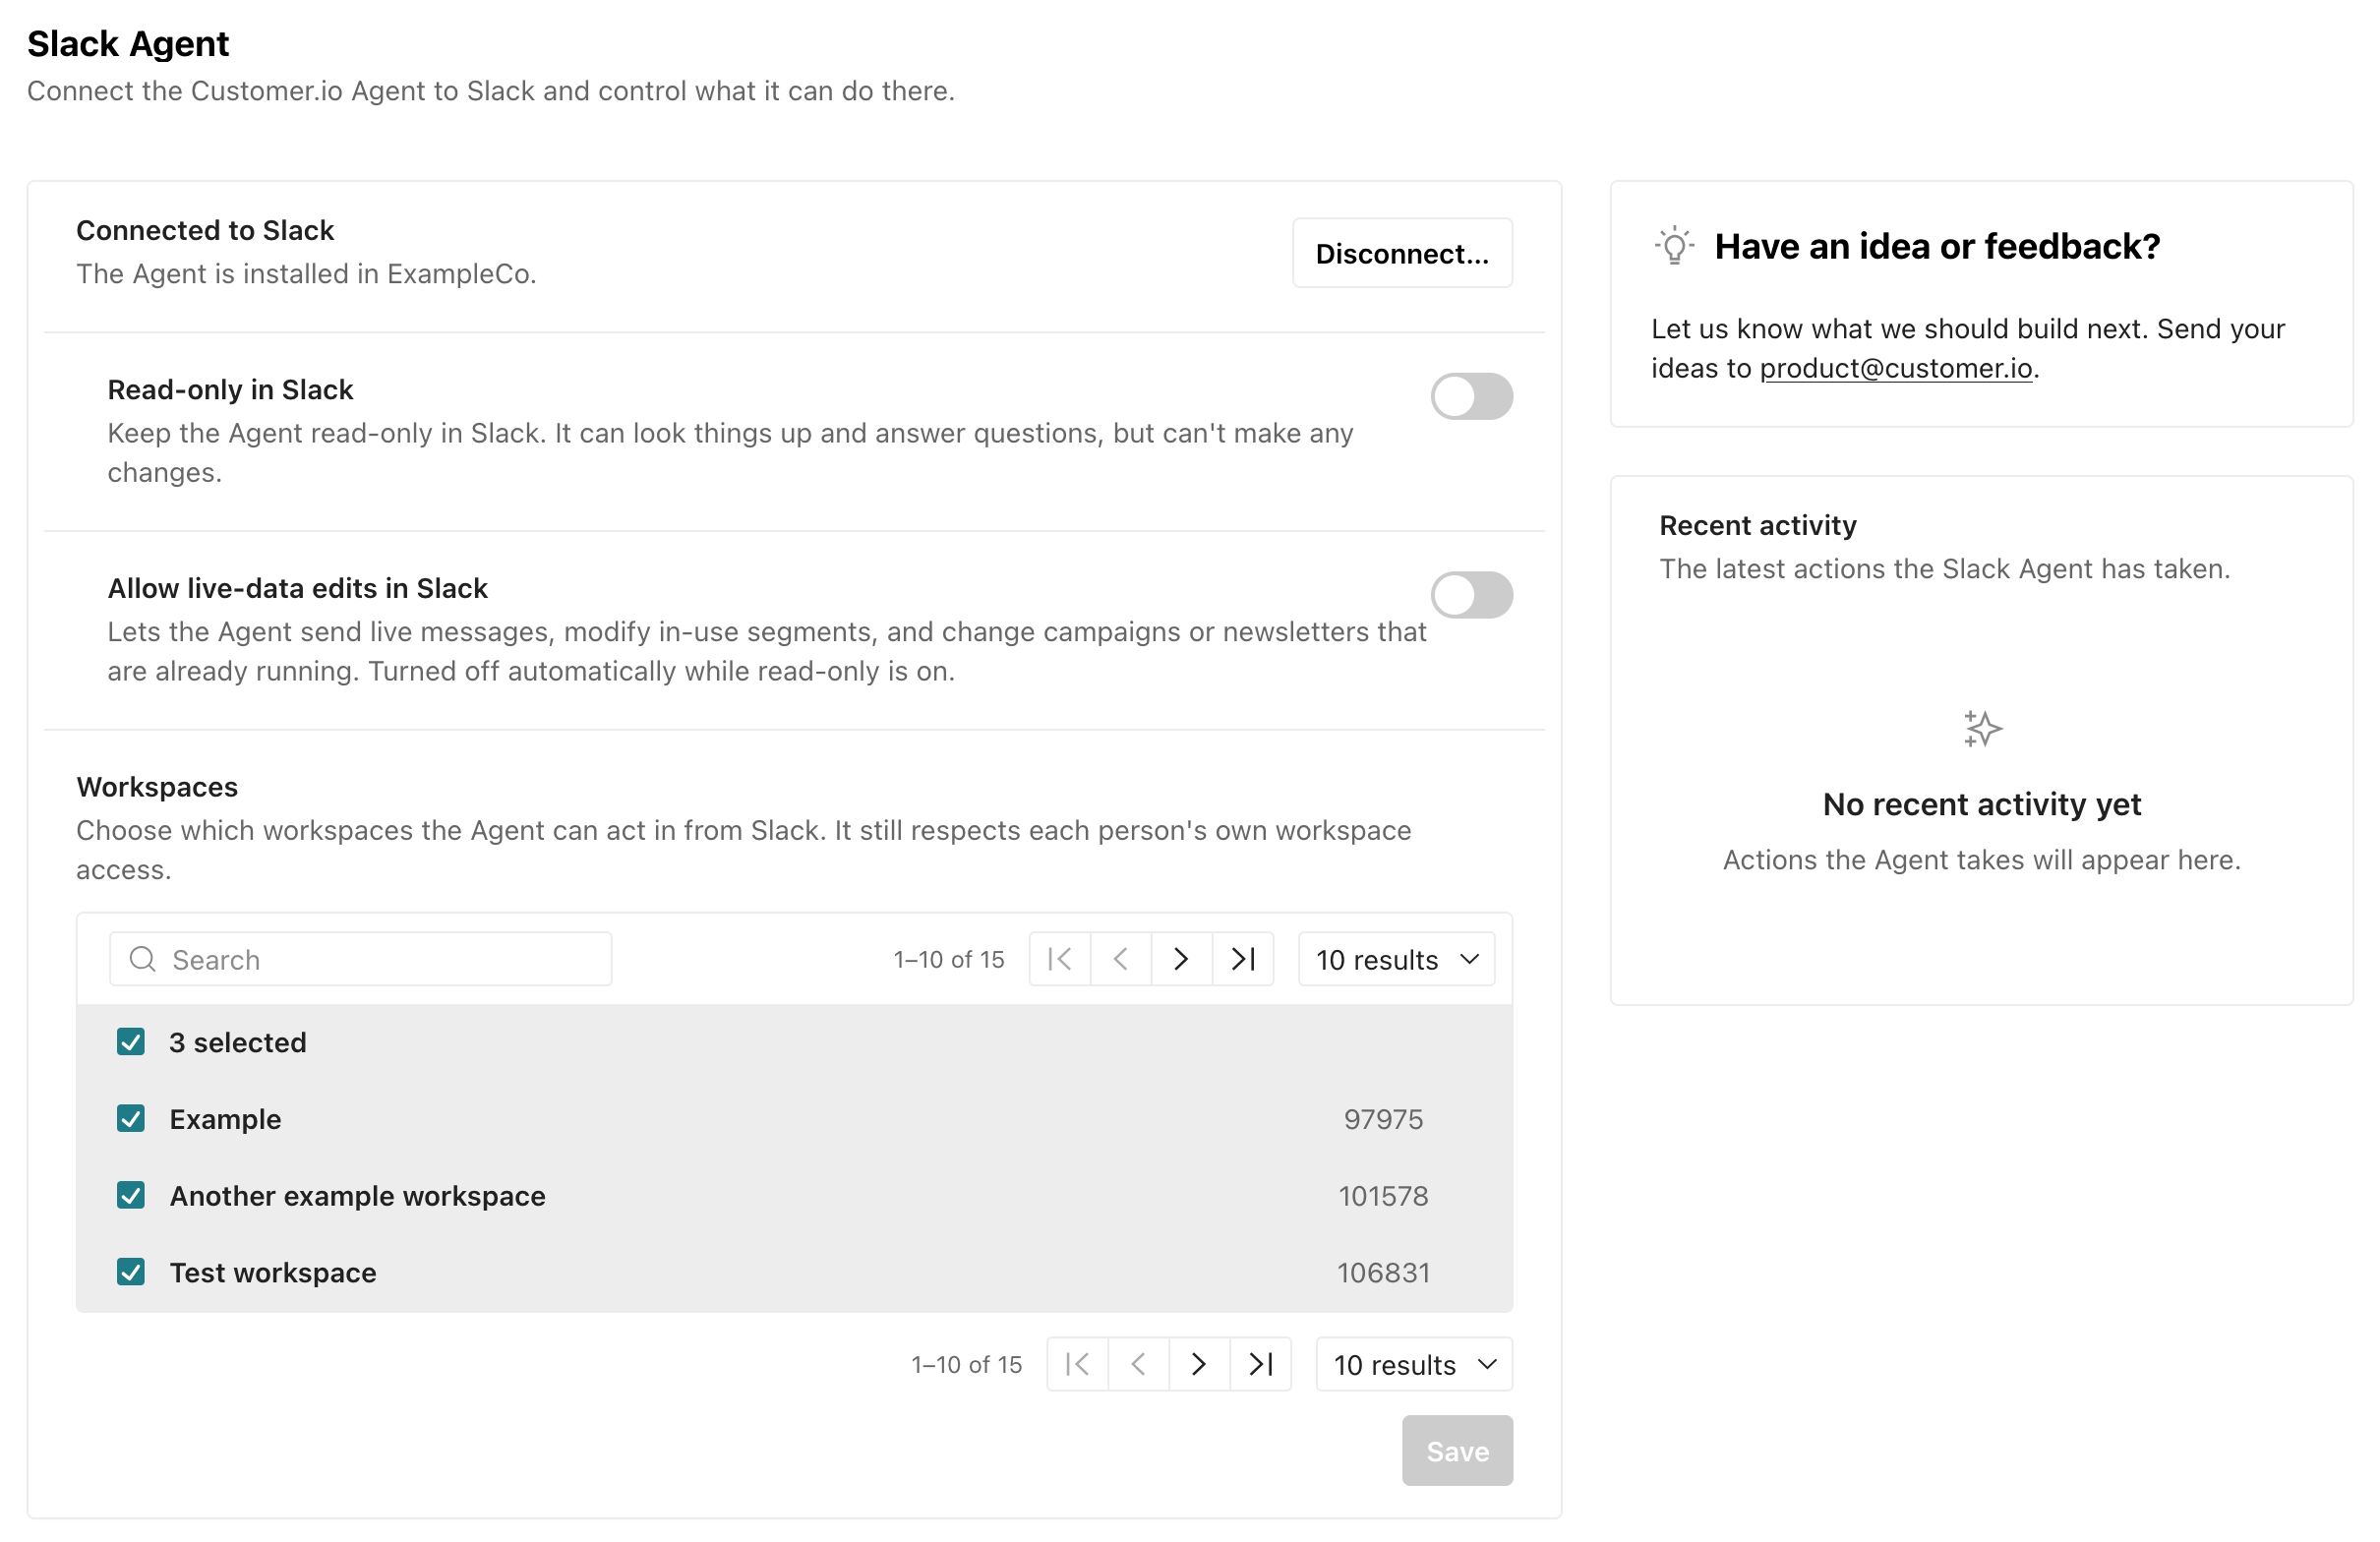
- Click Save.
Limit the Slack agent to read-only
The Read-only in Slack setting prevents the Slack agent from editing any data in your account.
It can still look things up and answer questions in Slack, which can help if you want to use your Slack agent as a reporting tool to tell you about your automations, segments, people, and so on. But when this setting is turned on, the Slack app can’t create or change anything in Customer.io—not even drafts. This setting doesn’t affect the agent in the Customer.io interface.
Note that this setting only prevents the agent from making changes in your Customer.io workspaces. The agent can still send you things if you ask it to. For example, you could have the slack agent email you a report or post a summary to a channel—because sending a message to your team doesn’t affect your workspaces.
Allow edits to live data
By default, the Slack agent can create drafts in Slack but can’t touch “live data”—things like live automations, segments that are in use, and so on.
The Allow live-data edits in Slack setting allows the Slack agent to make changes to live data in your account, but only when a team member approves the change.
For this setting to take effect, you must also turn on Edit live data in your AI settings.
Choose the workspaces the Slack agent can access
By default, all your workspaces are selected to work with the Slack agent. You can uncheck the ones you don’t want the Customer.io Slack app to be able to access when you set up the app or late
Under Workspaces, check the workspaces you want the agent to work in and click Save. By default, all your workspaces are selected, so you’ll need to clear the ones you don’t want the Customer.io Slack app to access.
Regardless of the Customer.io Slack app’s settings, team members can only access the workspaces their permissions allow. The Slack app’s settings narrow which workspaces it can access, but your team member’s permissions still apply. For example, if a team member asks the agent about people in a workspace they don’t have access to, the agent will refuse the request.
Talk to the Slack agent
You can invoke the Slack agent two ways:
- Use
@Customer.ioin a channel it’s been invited to. - Send the app a direct message.
No matter how you call the Customer.io Slack app, it replies in a thread, and each thread is its own conversation. Reply in the thread to iterate on a request with full context; mention the agent somewhere new to start fresh.
How the Slack agent works in a channel
Channels are shared spaces, so two extra rules apply whenever you use @Customer.io in a channel:
- Each person gets their own conversation. If two team members prompt the agent in the same thread, each request runs separately, under that person’s own permissions.
- It reads the thread, but only takes instructions from you. The agent can see other people’s messages in the thread and use them as reference. But it treats them as untrusted—someone else can’t redirect your request by posting instructions at the agent.
Give the agent feedback
Agent responses include and buttons. Click these reactions to tell the agent how it did. Removing the reaction retracts the feedback.
Approve live changes
When the agent wants to change live data, it pauses and posts an Approval needed card. The card explains what it wants to do, lists the specific permissions it’s asking for, and names the workspace it wants to work in.
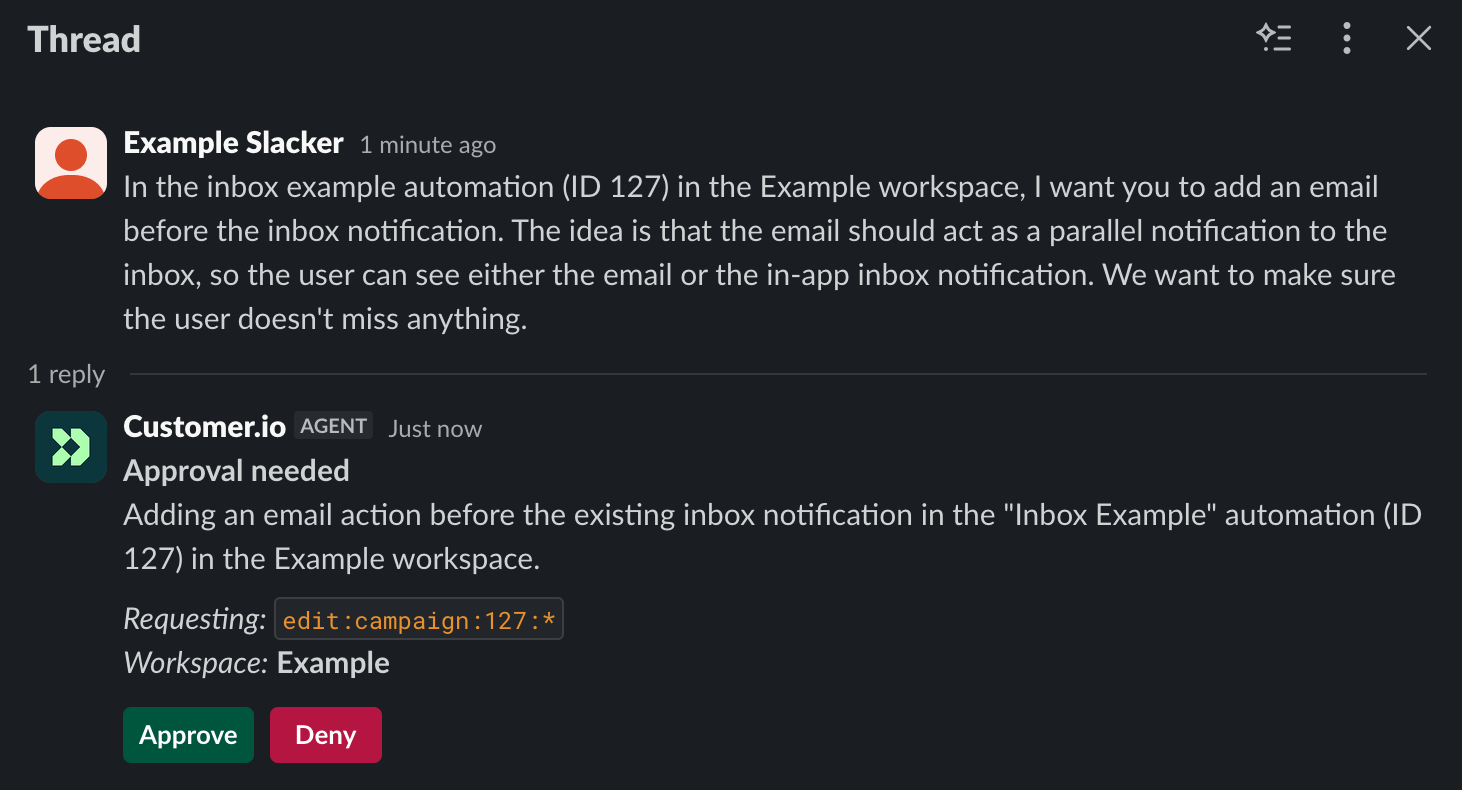
- Click Approve and the agent makes the change, then carries on. The card is replaced with a note showing who approved it.
- Click Deny and the agent skips the change and responds without it.
In a channel, the card is visible to everybody. Anyone with a linked Slack account and access to the target workspace can approve or deny—not just the person who asked.
Approval grants the agent about five minutes to make the specified change. It isn’t a blanket approval allowing other changes.
Link your Slack account
Before you can talk to the agent, it has to know which Customer.io user you are.
If your Slack email matches your Customer.io login, you’re already set—the agent matches you automatically and there’s nothing to do. Plus addresses count as a match: dana@example.com in Slack and dana+work@example.com in Customer.io link up on their own.
If your Slack email is different from your Customer.io login, you’ll link your accounts:
- In Slack, run
/cio linkor send a message to@Customer.io. - The agent replies with a personal link. Click Open Customer.io.
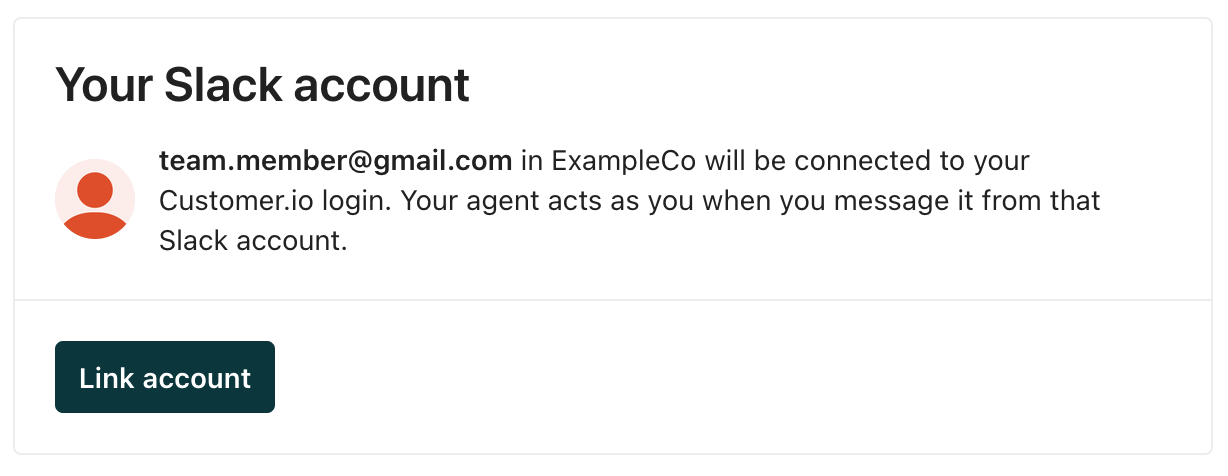
- Make sure you’re logged in to the Customer.io account that you want to use in your Slack workspace, and click Link account.
- Go back to your Slack conversation and send your message again.
The link is personal and expires after 15 minutes. If it expires, run /cio link again to get a new one. Nobody else in the channel can see it.
If you want to unlink your Slack account from Customer.io, you can:
- Run
/cio unlinkin Slack - Go to Slack Agent settings and click Unlink account under Your Slack account
Slack agent activity and history
The Slack Agent settings page shows the agent’s most recent actions under Recent activity, with the person who asked for each one. For a complete history of changes in Customer.io, go to audit logs.
In your audit logs, the agent’s changes are attributed to Slack Agent on behalf of the person who asked—for example, Slack Agent (on behalf of you@company.com). That separates them from changes people made in the app, and from the agent’s work inside Customer.io, which is attributed to AI Agent.
You can’t filter for agent activity directly. Filtering by Team member returns everything that person did, whether they did it themselves or asked the agent to. To see only what the agent did in Slack, go to Settings > Slack Agent and look at Recent activity.
Differences between the Slack agent and the agent in the UI
The Slack agent is effectively the same agent as the one in the Customer.io interface, with a few restrictions that make it more Slack-friendly.
- It can’t read sensitive profile attributes. We don’t want to inadvertently expose sensitive data to Slack or team members who shouldn’t see it.
- You don’t watch it work. In Customer.io you can see the agent’s work in real time. In Slack you get messages as it hits milestones, plus the final answer.
- It can message your team. Ask it to post a finding to a channel or send a teammate the numbers, and it will—but only when you ask.
- Slack conversations stay in Slack. They don’t show up in your conversation history in Customer.io.
Remove the Customer.io Slack app
To remove the Customer.io app from Slack, go to Settings > Slack Agent, click Remove Customer.io from Slack, and confirm.
Removing the app from Slack clears your team’s account links and Slack conversations. It does not affect messages, automations, segments, audit logs, or anything else the Slack agent previously worked on.