Cursor and other IDEs
UpdatedConnect your IDE to Customer.io MCP. We have a one-click setup for Cursor, plus instructions for any IDE that supports MCP (Windsurf, VS Code, Gemini CLI, and more).
Cursor (one-click setup)
Cursor has a one-click installer in your Customer.io personal settings.

- Go to Settings > Personal Settings.
- Click the Cursor tab and click Add to Cursor.
- In Cursor, click Needs Login to authenticate with Customer.io.
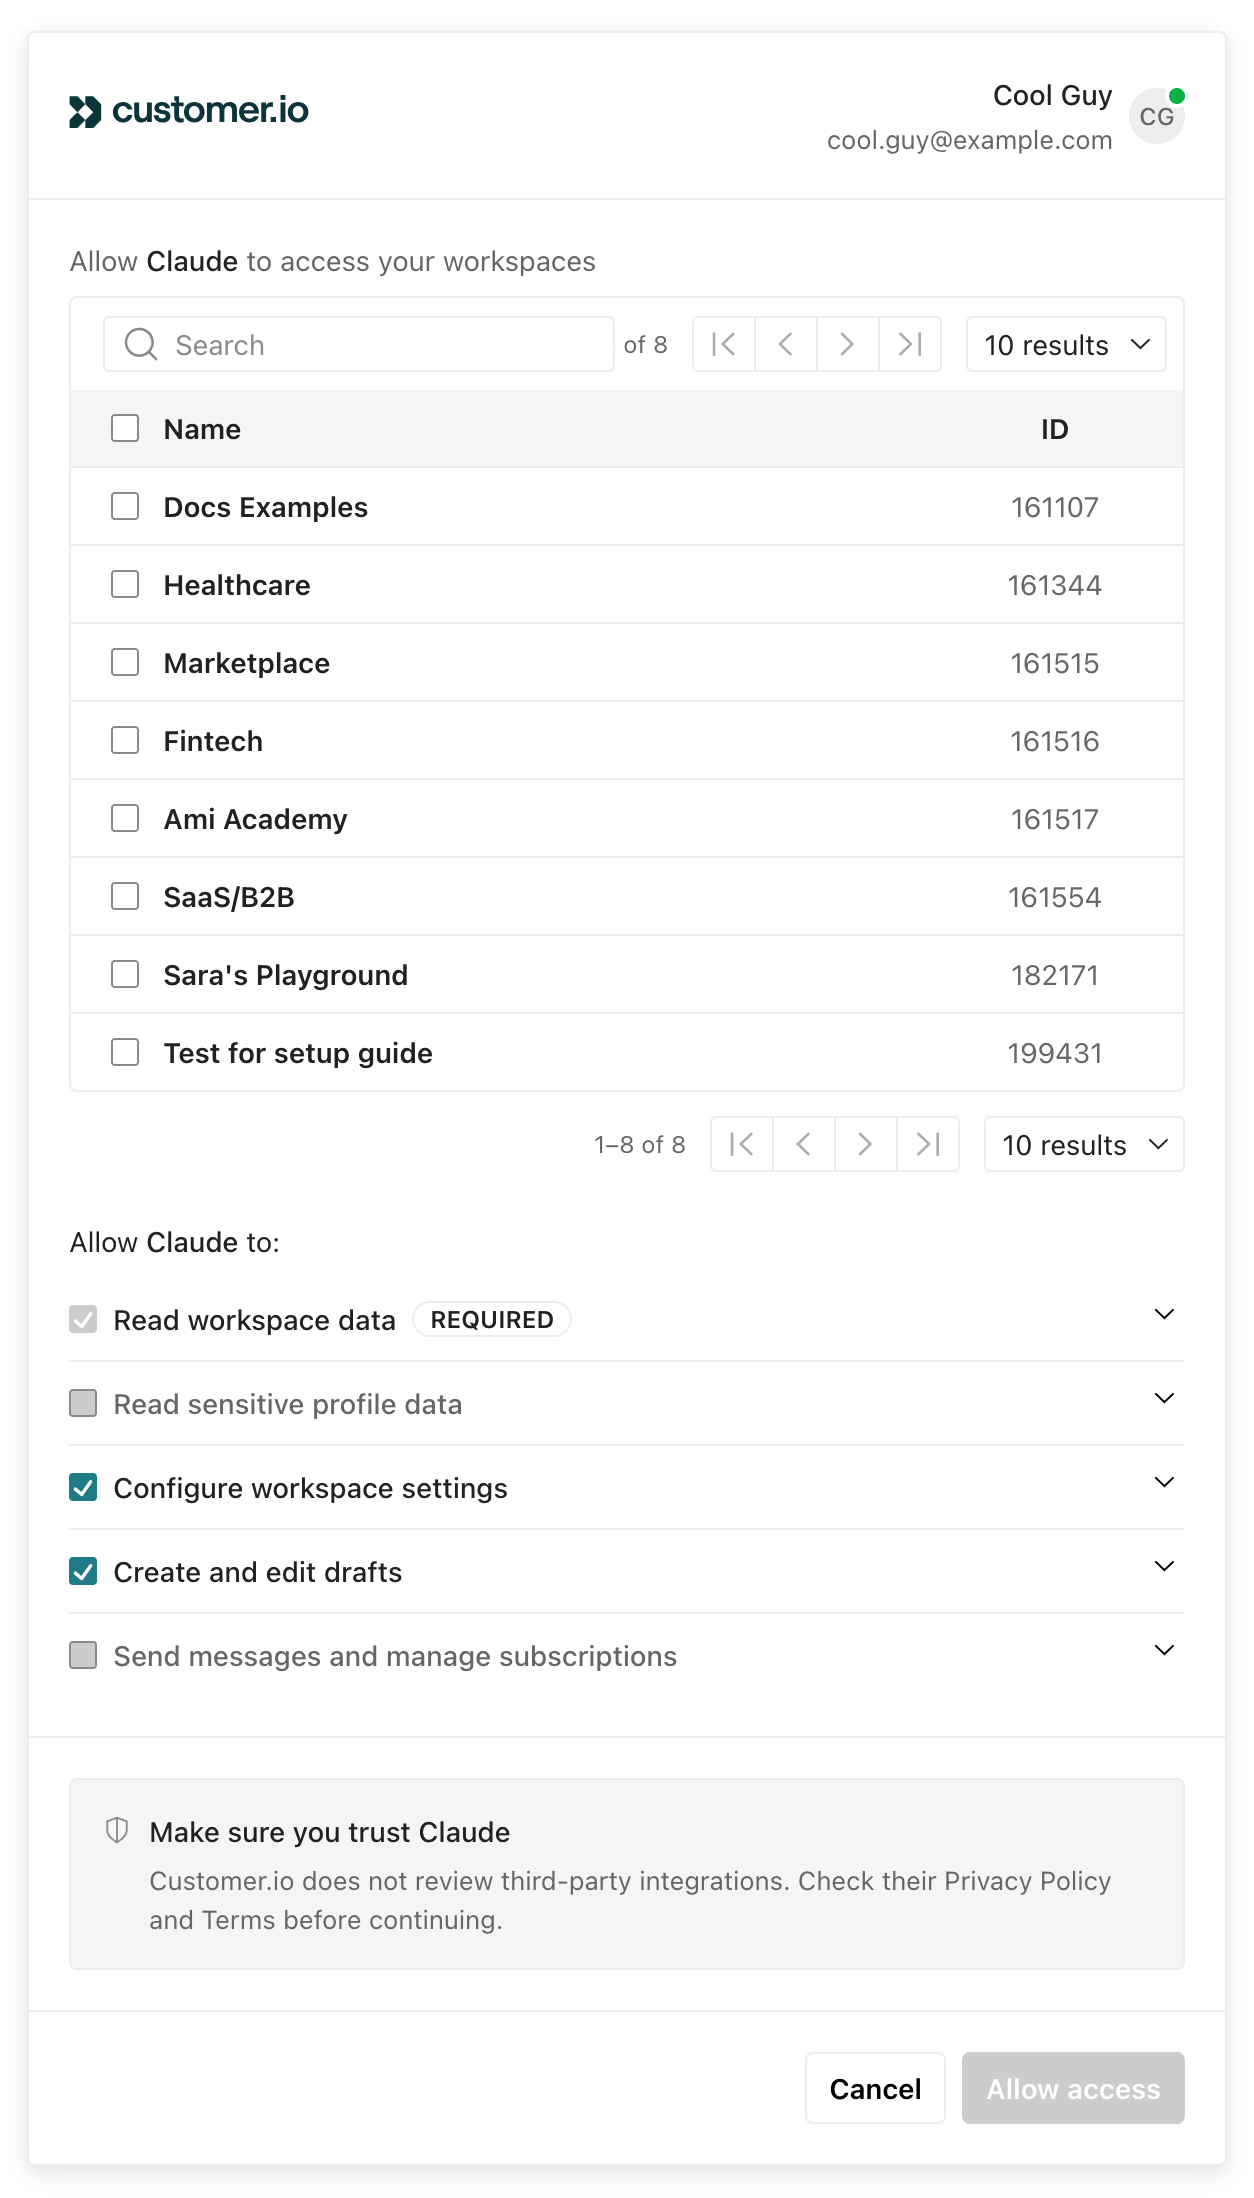
- Select the workspaces and permissions you want to grant access to and click Allow access. See permission scopes for details on permissions.
Windsurf, VS Code, and other MCP-capable IDEs
For any IDE that supports MCP, you can add Customer.io as a custom MCP server by editing your tool’s MCP configuration.
You’ll need our MCP server URL:
- US region:
https://mcp.customer.io/mcp - EU region:
https://mcp-eu.customer.io/mcp
If your application requires you to set a type or transport method, set it to http. We don’t support the server-sent events (sse) transport type.
Add an entry like this to your MCP config (the example uses the US URL—swap for the EU URL if your account is in the EU):
{
  "mcpServers": {
    "CustomerIO": {
      "type": "http",
      "url": "https://mcp.customer.io/mcp"
    }
  }
}
After you save the config, your IDE will prompt you to authenticate with Customer.io. Select the workspaces and permissions you want to grant access to and click Allow access. See permission scopes for details on permissions.
Gemini CLI
The Gemini CLI connects to Customer.io MCP through its ~/.gemini/settings.json file.
You’ll need our MCP server URL:
- US region:
https://mcp.customer.io/mcp - EU region:
https://mcp-eu.customer.io/mcp
If your application requires you to set a type or transport method, set it to http. We don’t support the server-sent events (sse) transport type.
Add an entry like this, using the URL for your region:
{
  "mcpServers": {
    "customerio": {
      "url": "https://mcp.customer.io/mcp"
    }
  }
}
After saving the config, start the Gemini CLI and run /mcp auth customerio to authenticate with Customer.io. See permission scopes for details on permissions.
For more details, see the Gemini CLI docs on OAuth support for remote MCP servers.
Find your workspace
When you use Customer.io MCP, you’ll need to tell your AI tool which workspace to work in. You can select a workspace by name or by ID.

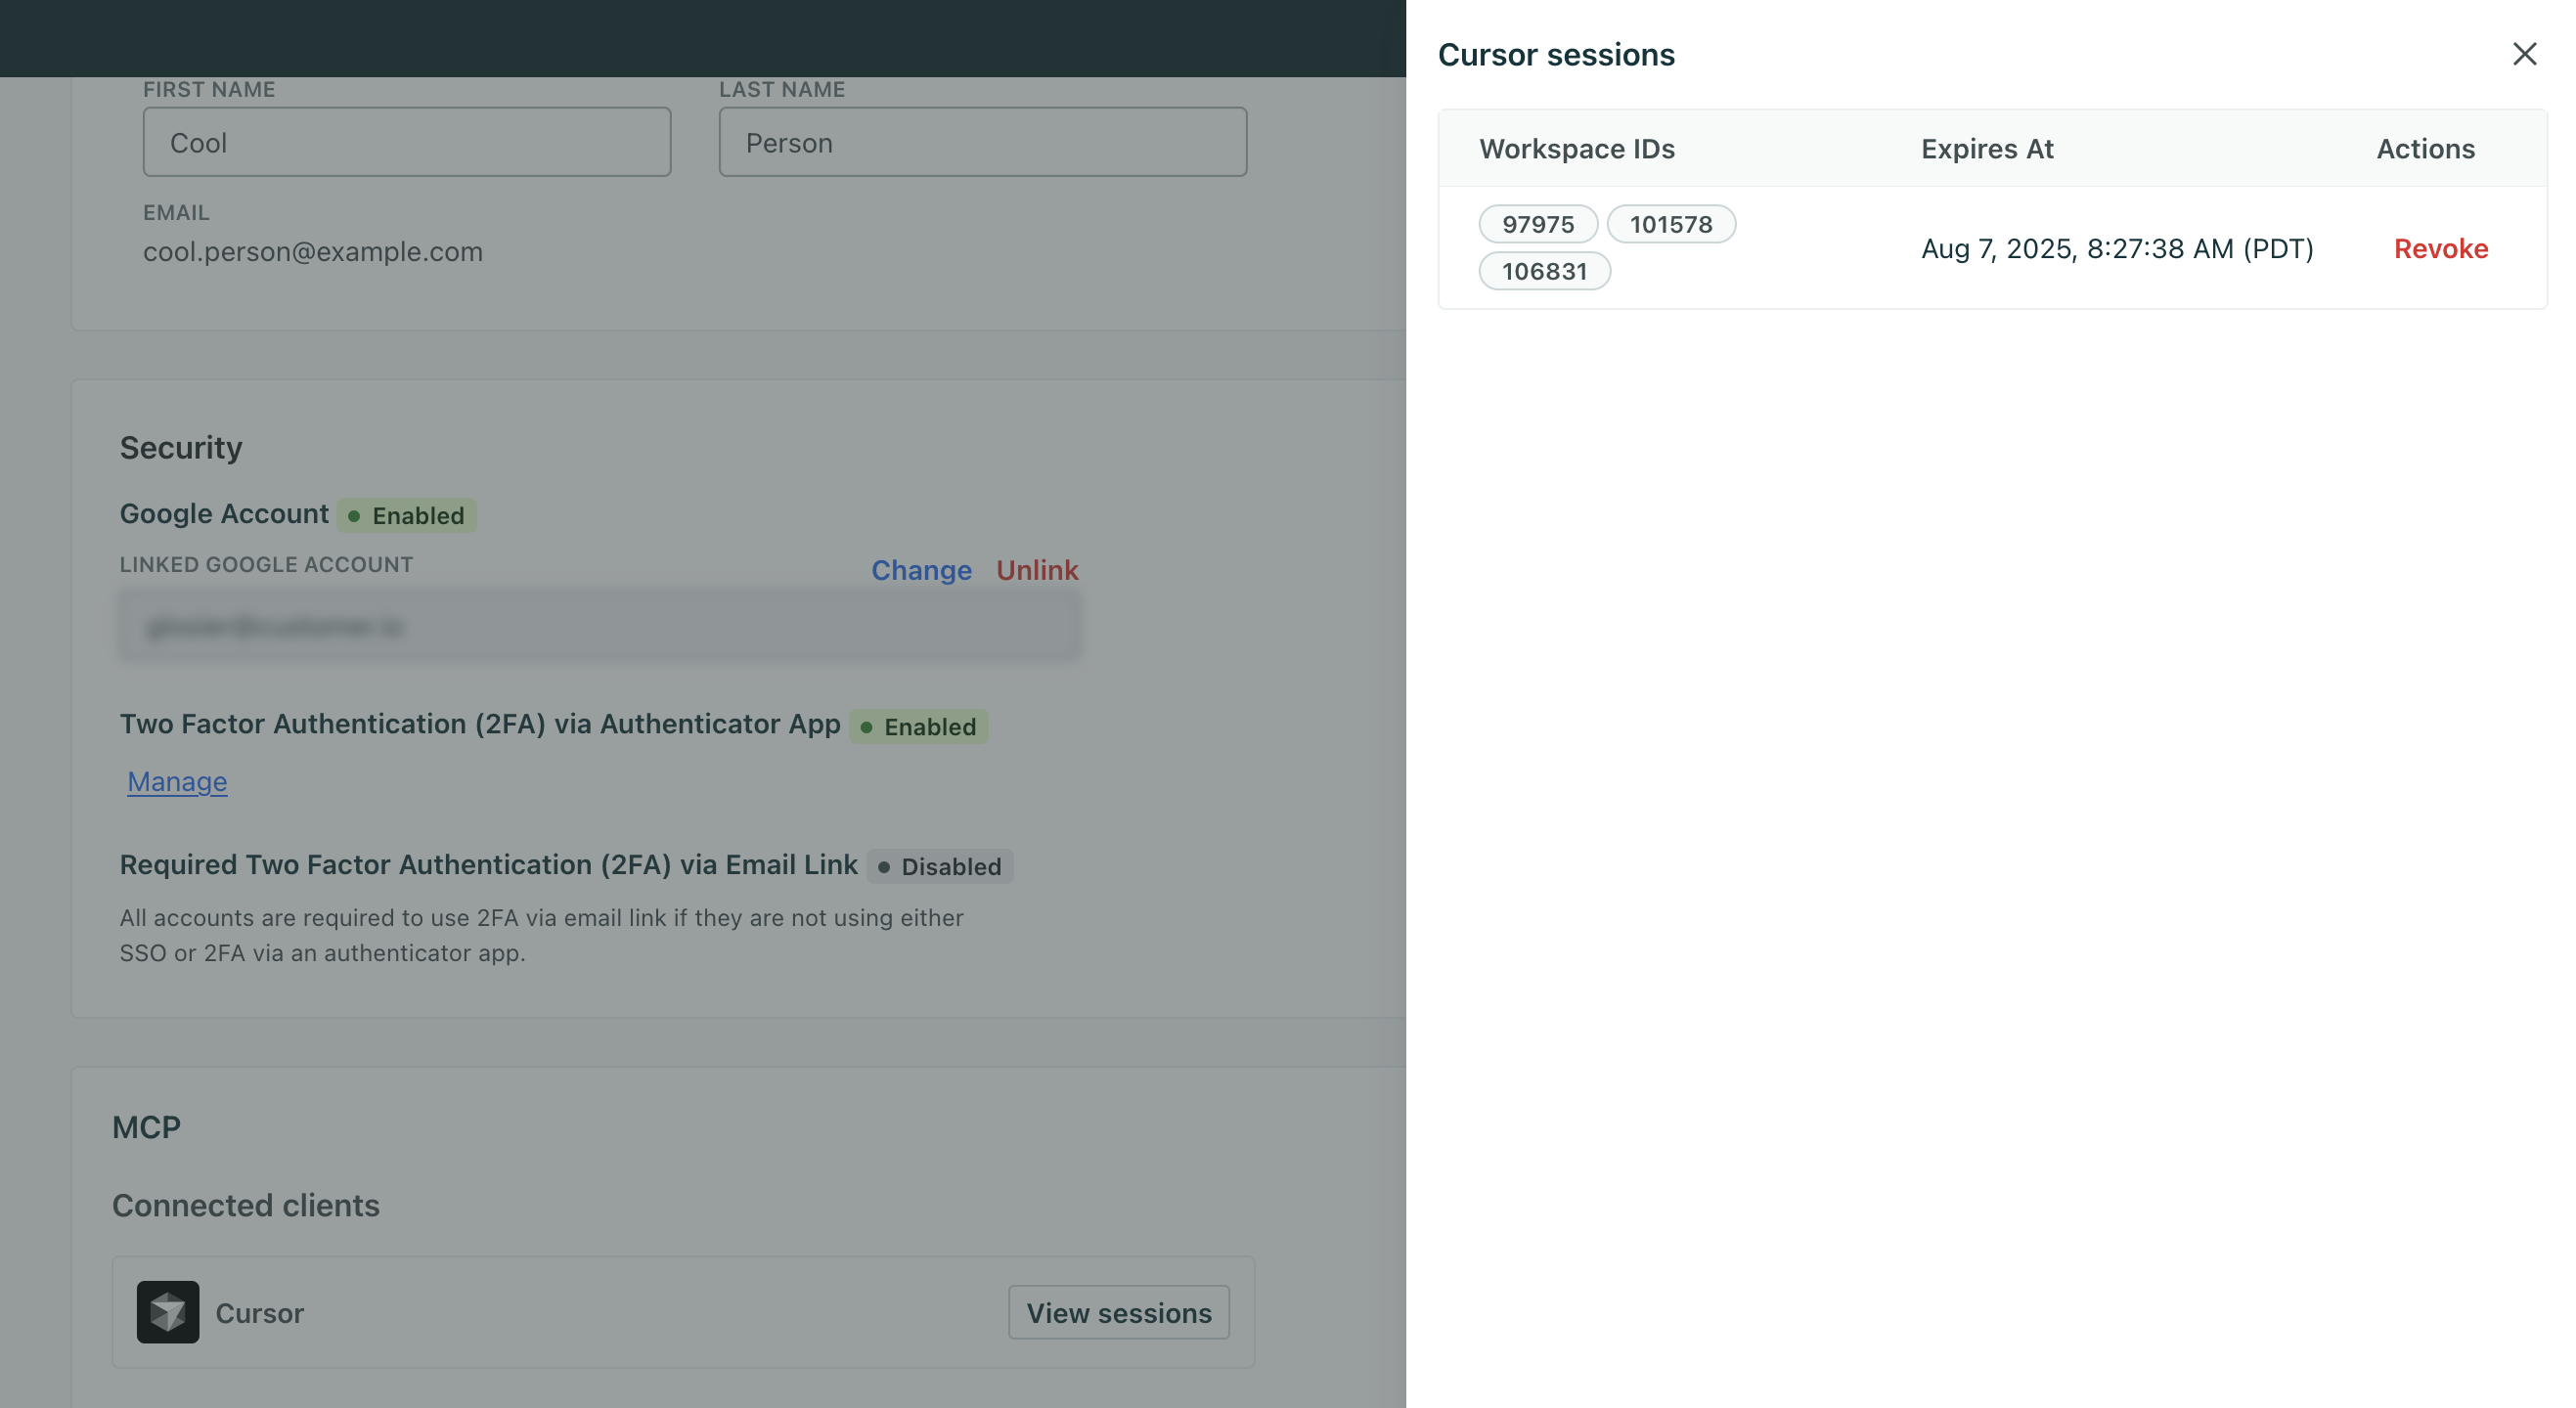
Manage your MCP sessions
To see active sessions or revoke a connection, go to Settings > Personal Settings and click View sessions under Connected clients. Revoking a session ends it immediately and forces the client to re-authenticate.