

Manage your API credentials
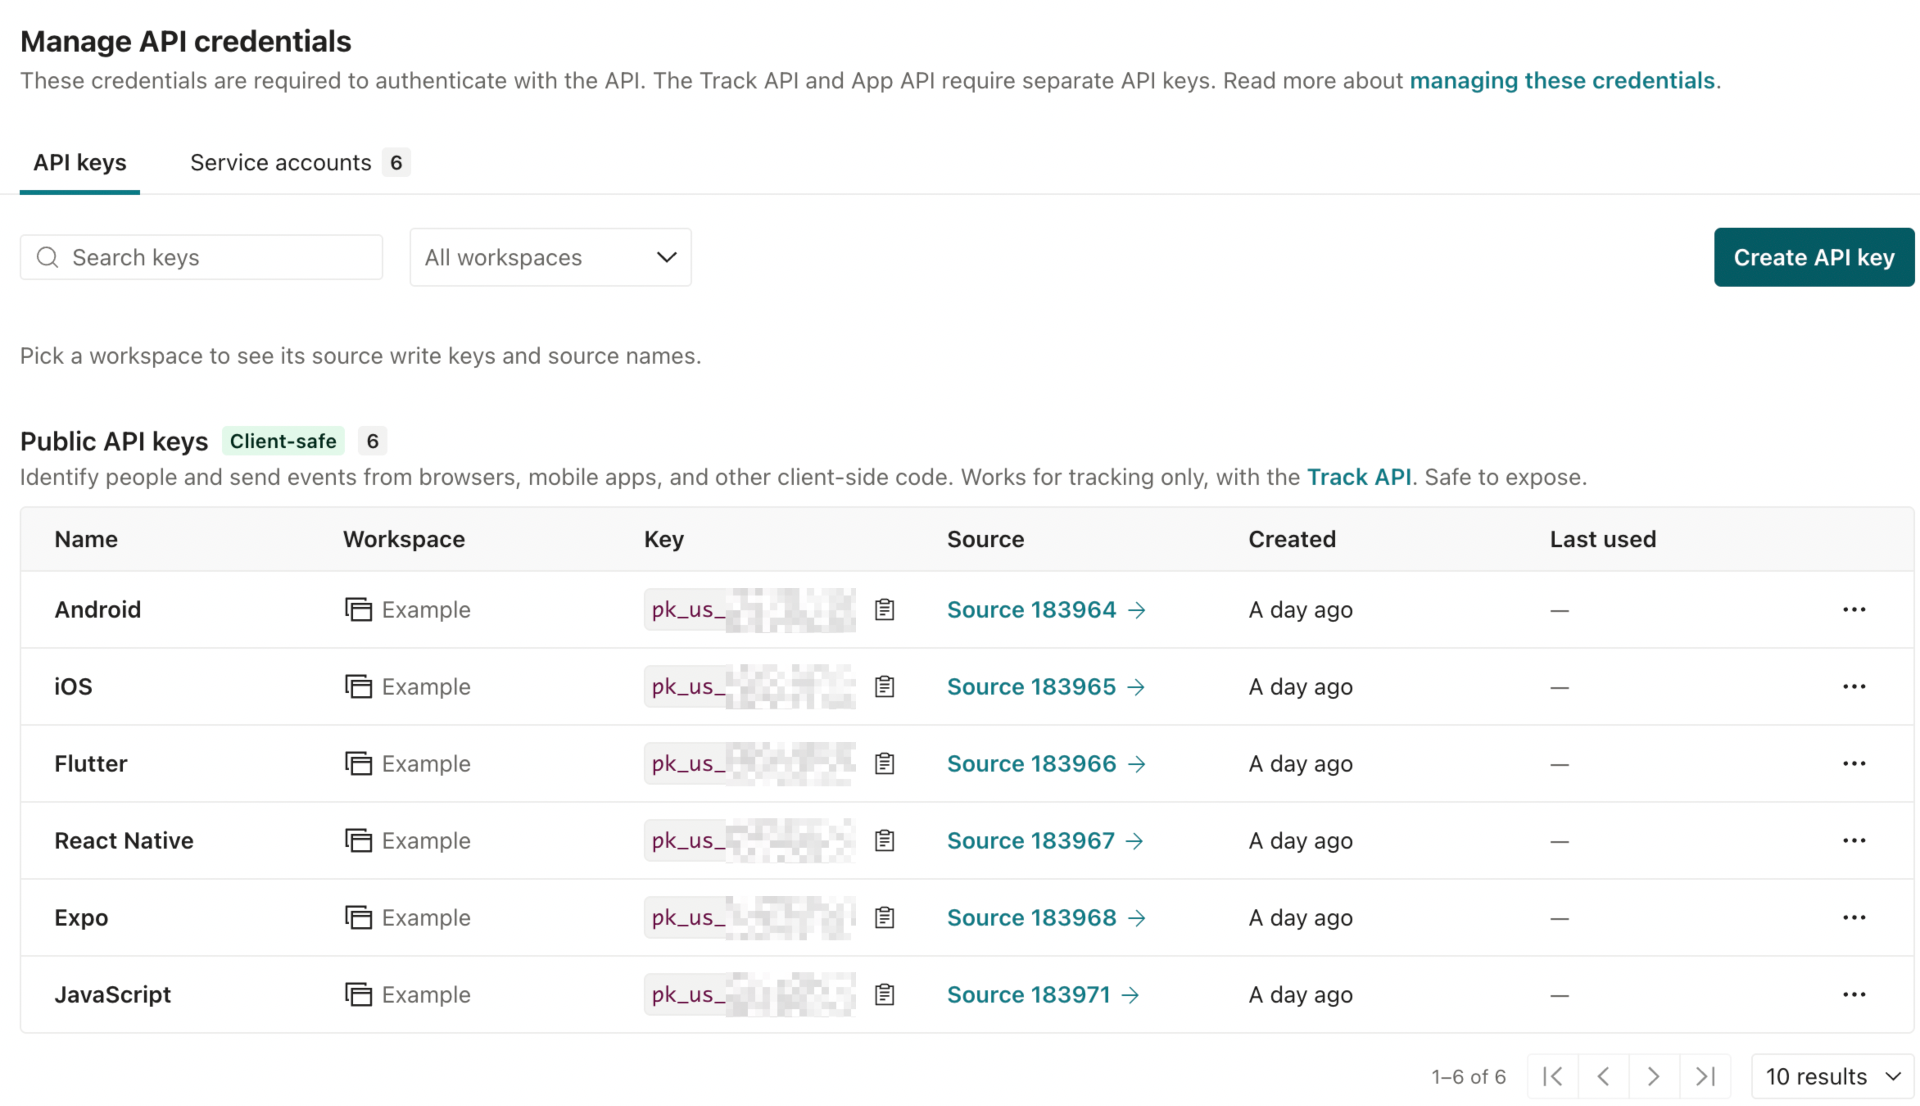
You can find your API credentials under Account Settings > API Credentials. Create a public key for code that ships to your users and a private key for code that runs on your server. You can rotate a key by creating a new one and deleting the old one.
Public and private keys
You create keys on the API Credentials page. There are two kinds of keys:
- Code that runs on your server uses a private key.
- Code that runs in a browser, mobile app, or client-side code uses a public key.
| Public key | Private key | |
|---|---|---|
| Starts with | pk_ | sk_ |
| Belongs in | Browsers and mobile apps. Public keys are safe to include in your app. | Your servers. Keep it secret, like a password. |
| Can do | Identify people, send events, and handle in-app messaging. | Everything a public key can, plus send transactional messages, trigger broadcasts, delete and suppress people, and change segments. |
| Shown | Any time, on the API Credentials page. | One time, when you create the key. Customer.io stores a hash of the key. |
| Works with | Ingress APIs: Track and Pipelines. | All APIs: App, Track, and Pipelines. |
The second part of a key is its region, like pk_us_ or sk_eu_, so you can tell which data center it belongs to.
The Last used column on the API Credentials page shows the last time Customer.io received a request with a key. Customer.io records usage in batches, so the time can trail the request by about a minute.
Use your key
If you call our APIs directly, you’ll use the key as a bearer token in the Authorization header.
Authorization: Bearer sk_us_your_private_keyHowever, in most cases, we recommend that you use one of our SDKs or integration libraries. In these cases, you’ll pass the key wherever you initialize the SDK or library.
To route Track API data to destinations outside Customer.io, associate your public or private key with an integration source. Customer.io uses the integration source to determine where to send traffic from the key. If your workspace is configured to route Track API data to destinations outside Customer.io, the Track API rejects requests made with a key that has no integration source (403 Forbidden).
When to use a private key
A private key grants access to all of our APIs. You should only use it in backend or server-side integrations where it won’t be exposed to your users.
You’ll get a private key when you set up a server-side integration, like our Node.js, Python, or GoLang integrations.
While private keys work with all of our APIs, that comes with some limitations:
- Customer.io rejects a private key sent with Basic authentication.
- The Pipelines API rejects a private key that arrives from a browser.
When to use a public key
A public key is designed to be safe to include in your app. It can identify people and track events, which can trigger automations. It cannot call the APIs that trigger messages or lookup data, preventing unauthorized access to your users’ data.
You’ll get a public key when you set up a client-side integration, like our JavaScript integration for your website or an SDK for your mobile app.
Customer.io rejects a public key in calls that otherwise require a private key. These are typically calls to the App API, and include requests that:
- Send transactional messages (
/v1/send/*). - Call the App API, including triggering broadcasts.
- Delete, suppress, unsuppress, or merge people.
- Add people to or remove people from a manual segment.
- Submit a form or look up your account region.
Create a key
When you set up an integration source, Customer.io creates a key for it: a public key for a website or mobile integration, and a private key for a server integration. In general, you only need to create a key on the API Credentials page when you want to integrate with the App API or want to call the API without one of our SDKs or integration libraries.
-
Click Create API key.
-
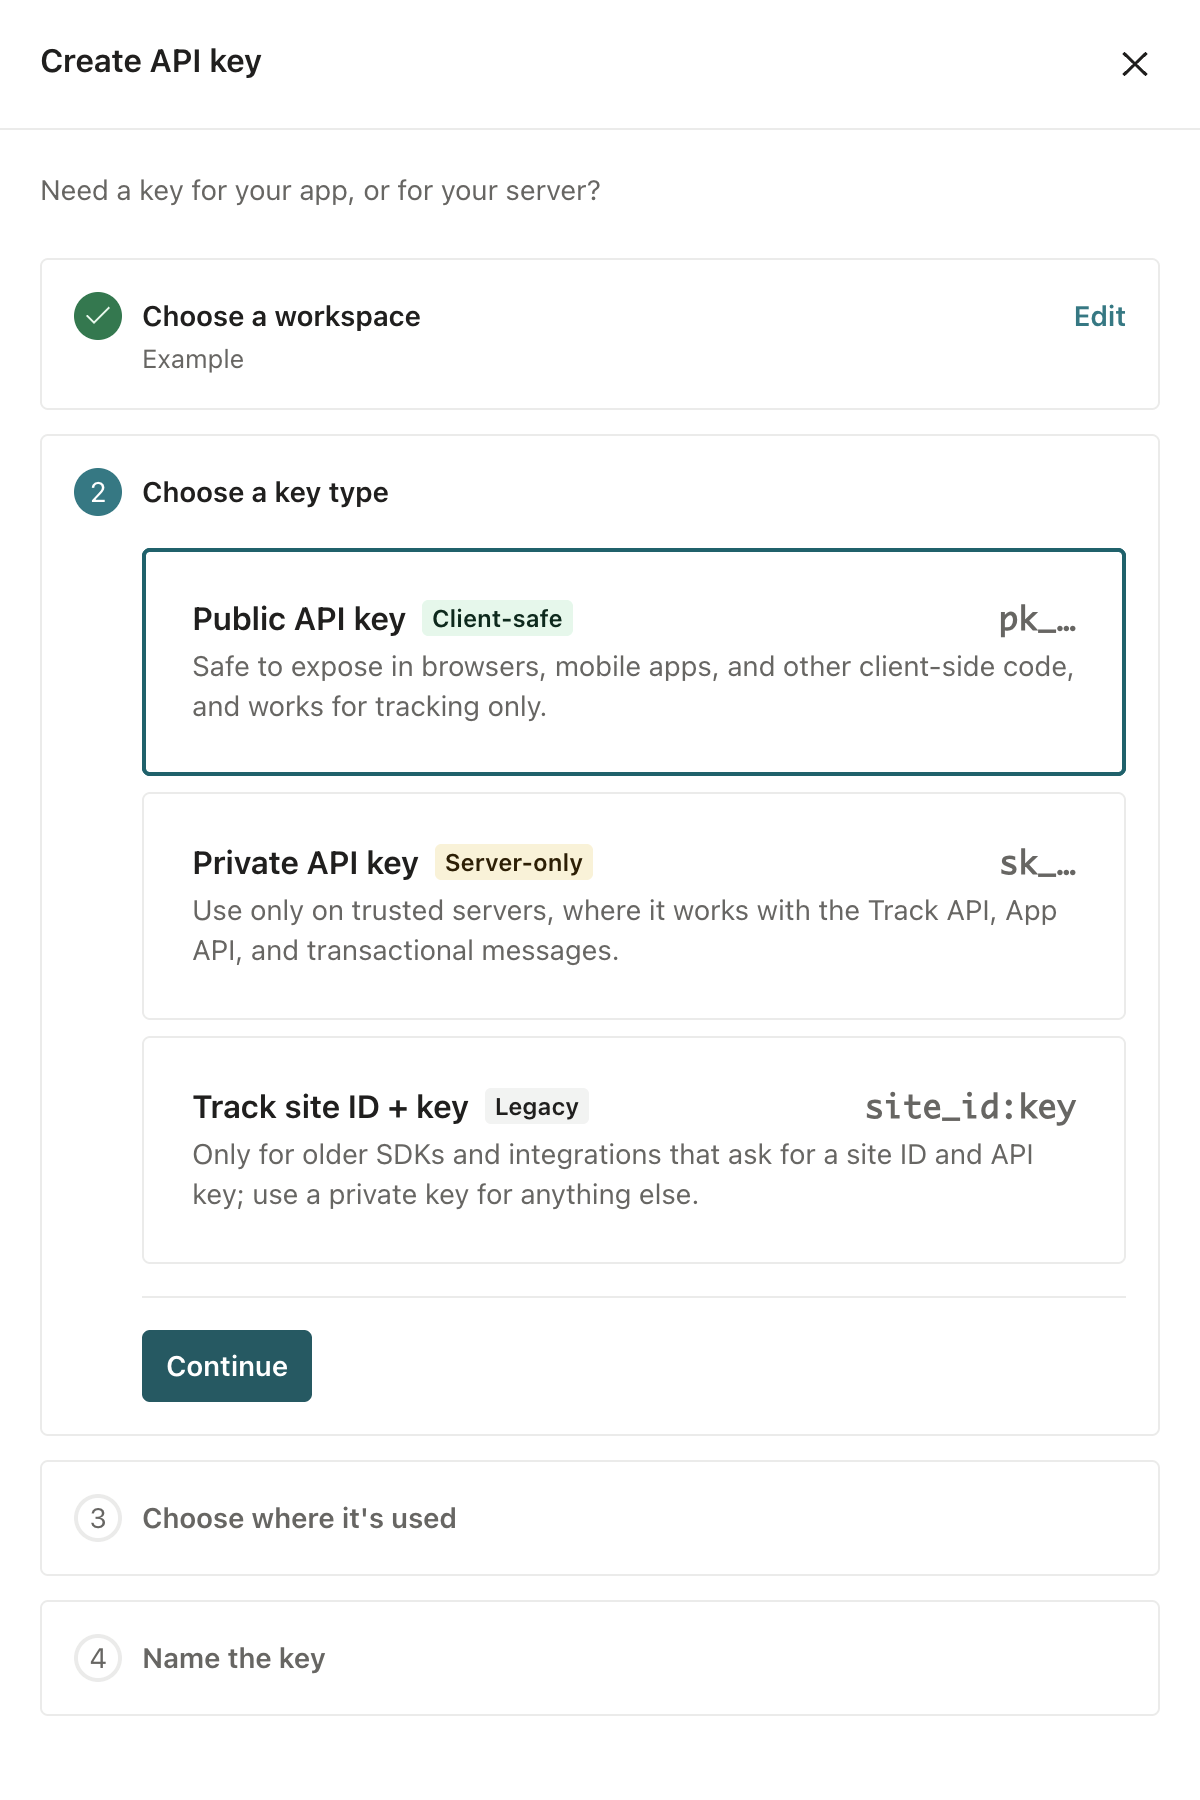
Choose the workspace the key sends data to.
-
Choose Public API key or Private API key. Choose Track site ID + key only for an older SDK or integration that asks for a site ID and API key; this creates a set of legacy Track API credentials.
-
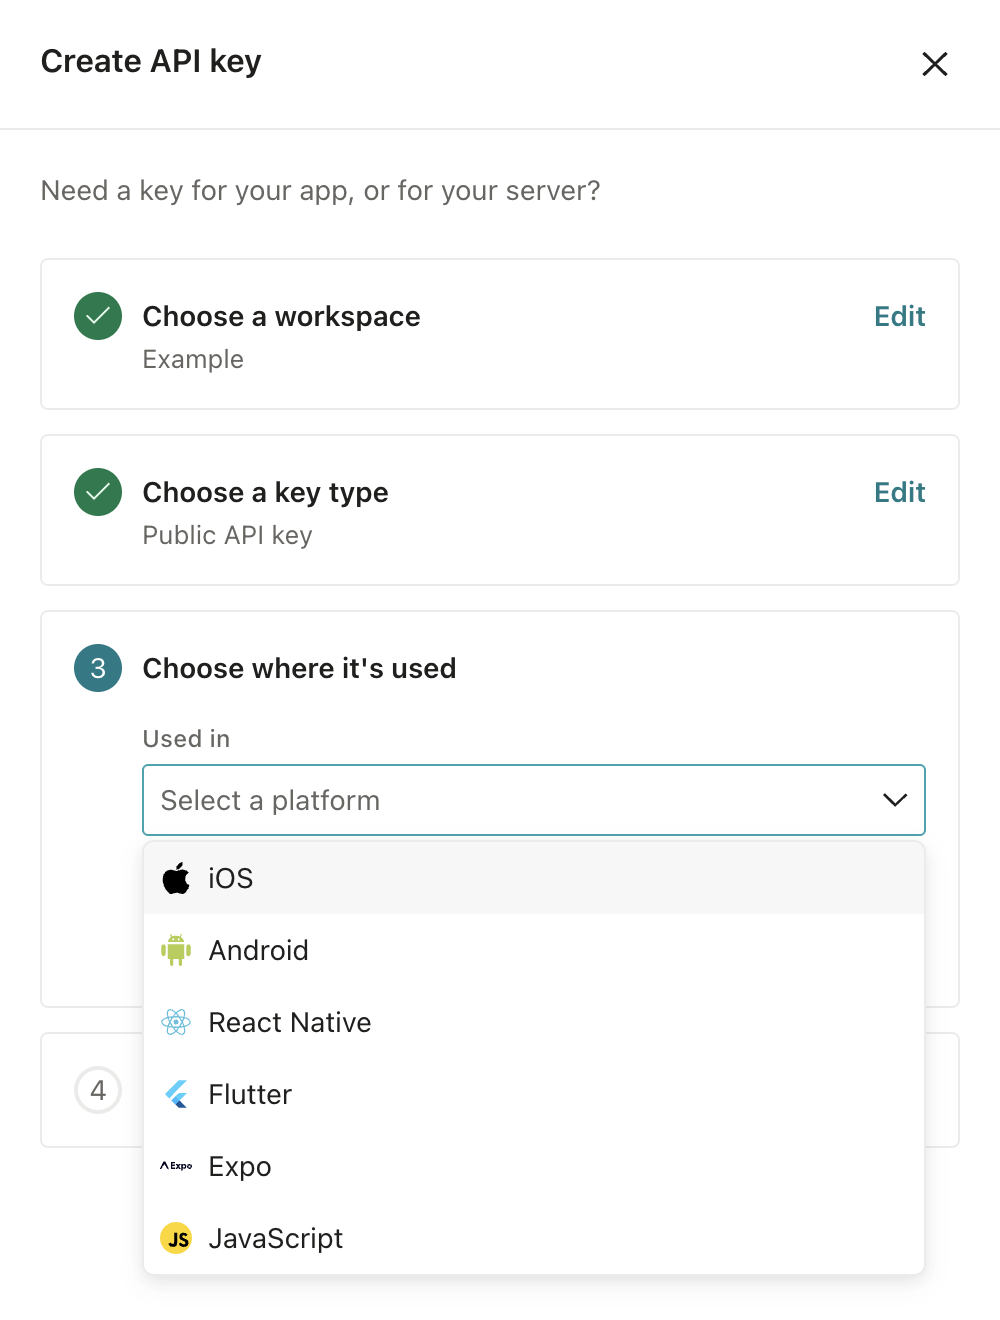
Under Used in, choose where the key runs.
- For a public key, choose a platform, like a mobile app or website.
- For a private key, choose a server integration type or leave this empty if you only use the key to call the App API directly.
-
Give the key a name that tells you where you use it, like “iOS app” or “Node.js server”, and click Create public key or Create private key.
-
Copy the key.
Associate an existing key with an integration source
To route data to destinations outside Customer.io, your key needs an integration source. Customer.io uses the source to determine where to send traffic from the key and how to map it to destinations. If your workspace is configured to route Track API data to destinations outside Customer.io, the Track API rejects requests made with a key that has no integration source (403 Forbidden).
If you have a private key without a source, including a key whose integration source you deleted, you can attach it to a new or existing server integration source. For a public key whose source you deleted, create a new public key for an integration source and update your app to use it.
To attach a source to an existing private key:
- Go to Account Settings > API Credentials.
- On the API keys tab, find the key in the Private API keys table. Open its actions menu and choose Attach source.
- Choose New source and select a Source type, or choose Existing source and select a Source in the same workspace. If the workspace has no existing server sources, select a Source type to create one.
- Click Attach source.
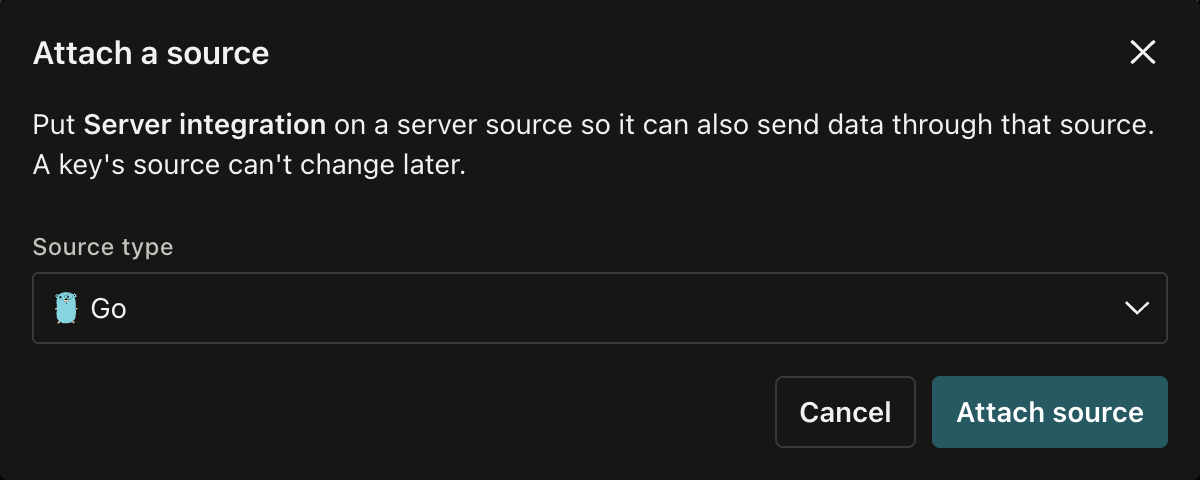
You can’t change a key’s source while it has one, and you can’t attach a source to an existing public key. If you need a public key for another integration, create a new key and update your app to use it.
Rotate a key
To rotate a key, add a new key and switch your integration to it before you revoke the old one. When you add the new key first, your integration keeps sending data while you switch over.
If you rotate the public key in a mobile app, people who haven’t updated your app still use the old key. You need to wait until everybody’s migrated to a version of your app that uses the new key before you revoke the old one.
- Go to your integration’s Settings tab. In the API keys section, click Create API key. If the old key is a private key without an integration source, create the new key on the API Credentials page instead.
- Copy the new key.
- Update your code to use the new key, and deploy the change.
- When you’re sure that no code or apps use the old key, revoke it.
Revoke a key
When you revoke a key, Customer.io rejects requests that use it right away, so any integration that still uses the key stops sending data. If an integration is still valid, you should rotate your key and deploy the new key before you revoke the old one.
To revoke a key, delete it on the API Credentials page; this operation cannot be undone.
When you delete an integration, Customer.io doesn’t delete its keys. They stay on the API Credentials page without an integration source. If you don’t plan to use the key again, you should revoke it. If your workspace is configured to route Track API data to destinations outside Customer.io, the Track API rejects requests made with a key that has no integration source (403 Forbidden). To restore data-out routing after you delete an integration:
- Private keys (from server-side integrations) keep working on the App API. To use one with the Pipelines API or route Track API data to destinations outside Customer.io, associate it with another integration source.
- Public keys (from client-side integrations) need an integration source to route Track API data to destinations outside Customer.io. Create a new public key for an integration source and update your app to use it to keep sending data to those destinations.
Legacy credentials
If you have legacy credentials—App API keys and Track API keys—you can continue to use them. On the API keys tab, they’re in the Legacy keys table. The Origin column tells you what kind of credential each row is:
- Track: a site ID and API key pair for the Track API.
- App: an App API key.
- Source: an integration source’s write key. You can view and copy it here, but you can’t delete it from this page.
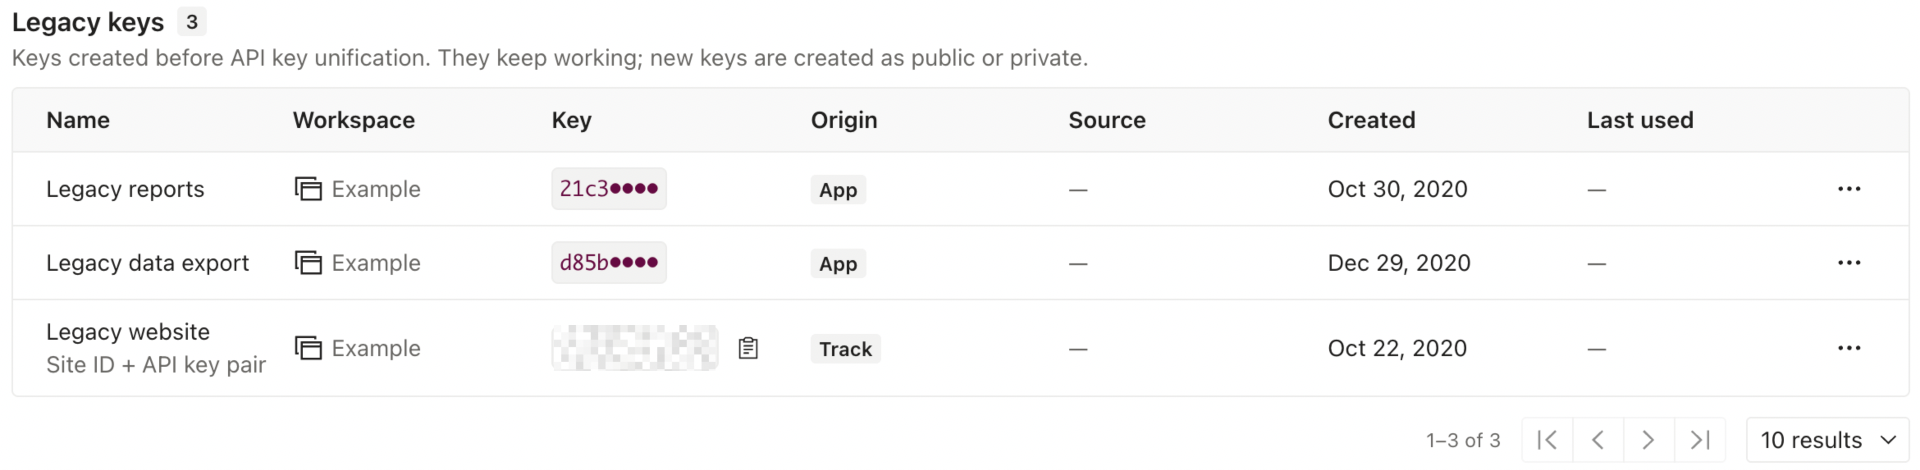
Track API Keys
You use a Track API key pair to send people, events, and attribute updates to your workspace through the Track API. Send your Site ID and API Key as Basic authentication. The pair works with both the v1 endpoints (https://track.customer.io/api/v1/) and the v2 endpoints (https://track.customer.io/api/v2/). The Legacy keys table shows and copies the pair as site_id:key.
To create a pair, follow the steps in Create a key and choose Track site ID + key. A Track key pair doesn’t belong to an integration source, so Customer.io skips the Used in step.
Each workspace needs at least one Track key pair, so you can’t delete a workspace’s last pair.
App API Keys
App API keys are a legacy credential type replaced by private keys. You cannot create new App API keys, but if you’ve created some in the past, you can continue to use them.
Like private keys, App API keys are bearer tokens for the App API (https://api.customer.io/v1/). You use the App API to trigger messages and broadcasts, and to retrieve data from your workspace for reports or troubleshooting.
Restrict API access by IP address
By default, any IP address can call the App API with a valid key. To limit access, add IP addresses to a workspace’s allowlist. When a workspace has an allowlist, Customer.io only accepts App API requests for that workspace from the addresses on the list, even if a request from another address has a valid key.
-
Under IP address allowlist, click Add IP address.
-
Enter the IP address and choose the workspace you want to grant access to.
-
Click Add IP address.

Repeat these steps for each address and workspace you want to allow.
Need help?
If you have any questions about API credentials in Customer.io, please let us know!