HubSpot forms
Our HubSpot integration doesn't currently make it easy to sync form submissions. We're working on that while we're in beta. But, if you're a HubSpot premium or enterprise user, you can send form submissions using a HubSpot workflow to support form submissions in the meantime.
How it works
You’ll set up a workflow in HubSpot that sends a webhook to Customer.io when someone submits your form. Then, in Customer.io, you can:
- Convert that webhook to an event that triggers downstream automations
- Store attributes on your audience in Customer.io. These attributes can add people to segments, trigger automations, or personalize messages.
1. Create your HubSpot workflow
If you’re unfamiliar with HubSpot workflows, check out HubSpot’s documentation. In this case, we’ll create a workflow where the trigger is a form submission and the action is to send a webhook to Customer.io.
- In HubSpot, go to Automation > Workflows.
- In the upper right, click Create workflow and select From scratch.
- Select the Websites & media option and continue setting up your form submission trigger.
- Add the Send a webhook action to your workflow but don’t configure it yet. You’ll need to get your webhook address from Customer.io first.
2. Create your Customer.io webhook
In Customer.io, you’ll create a new automation. This will generate a webhook address that HubSpot will call when people submit your form.
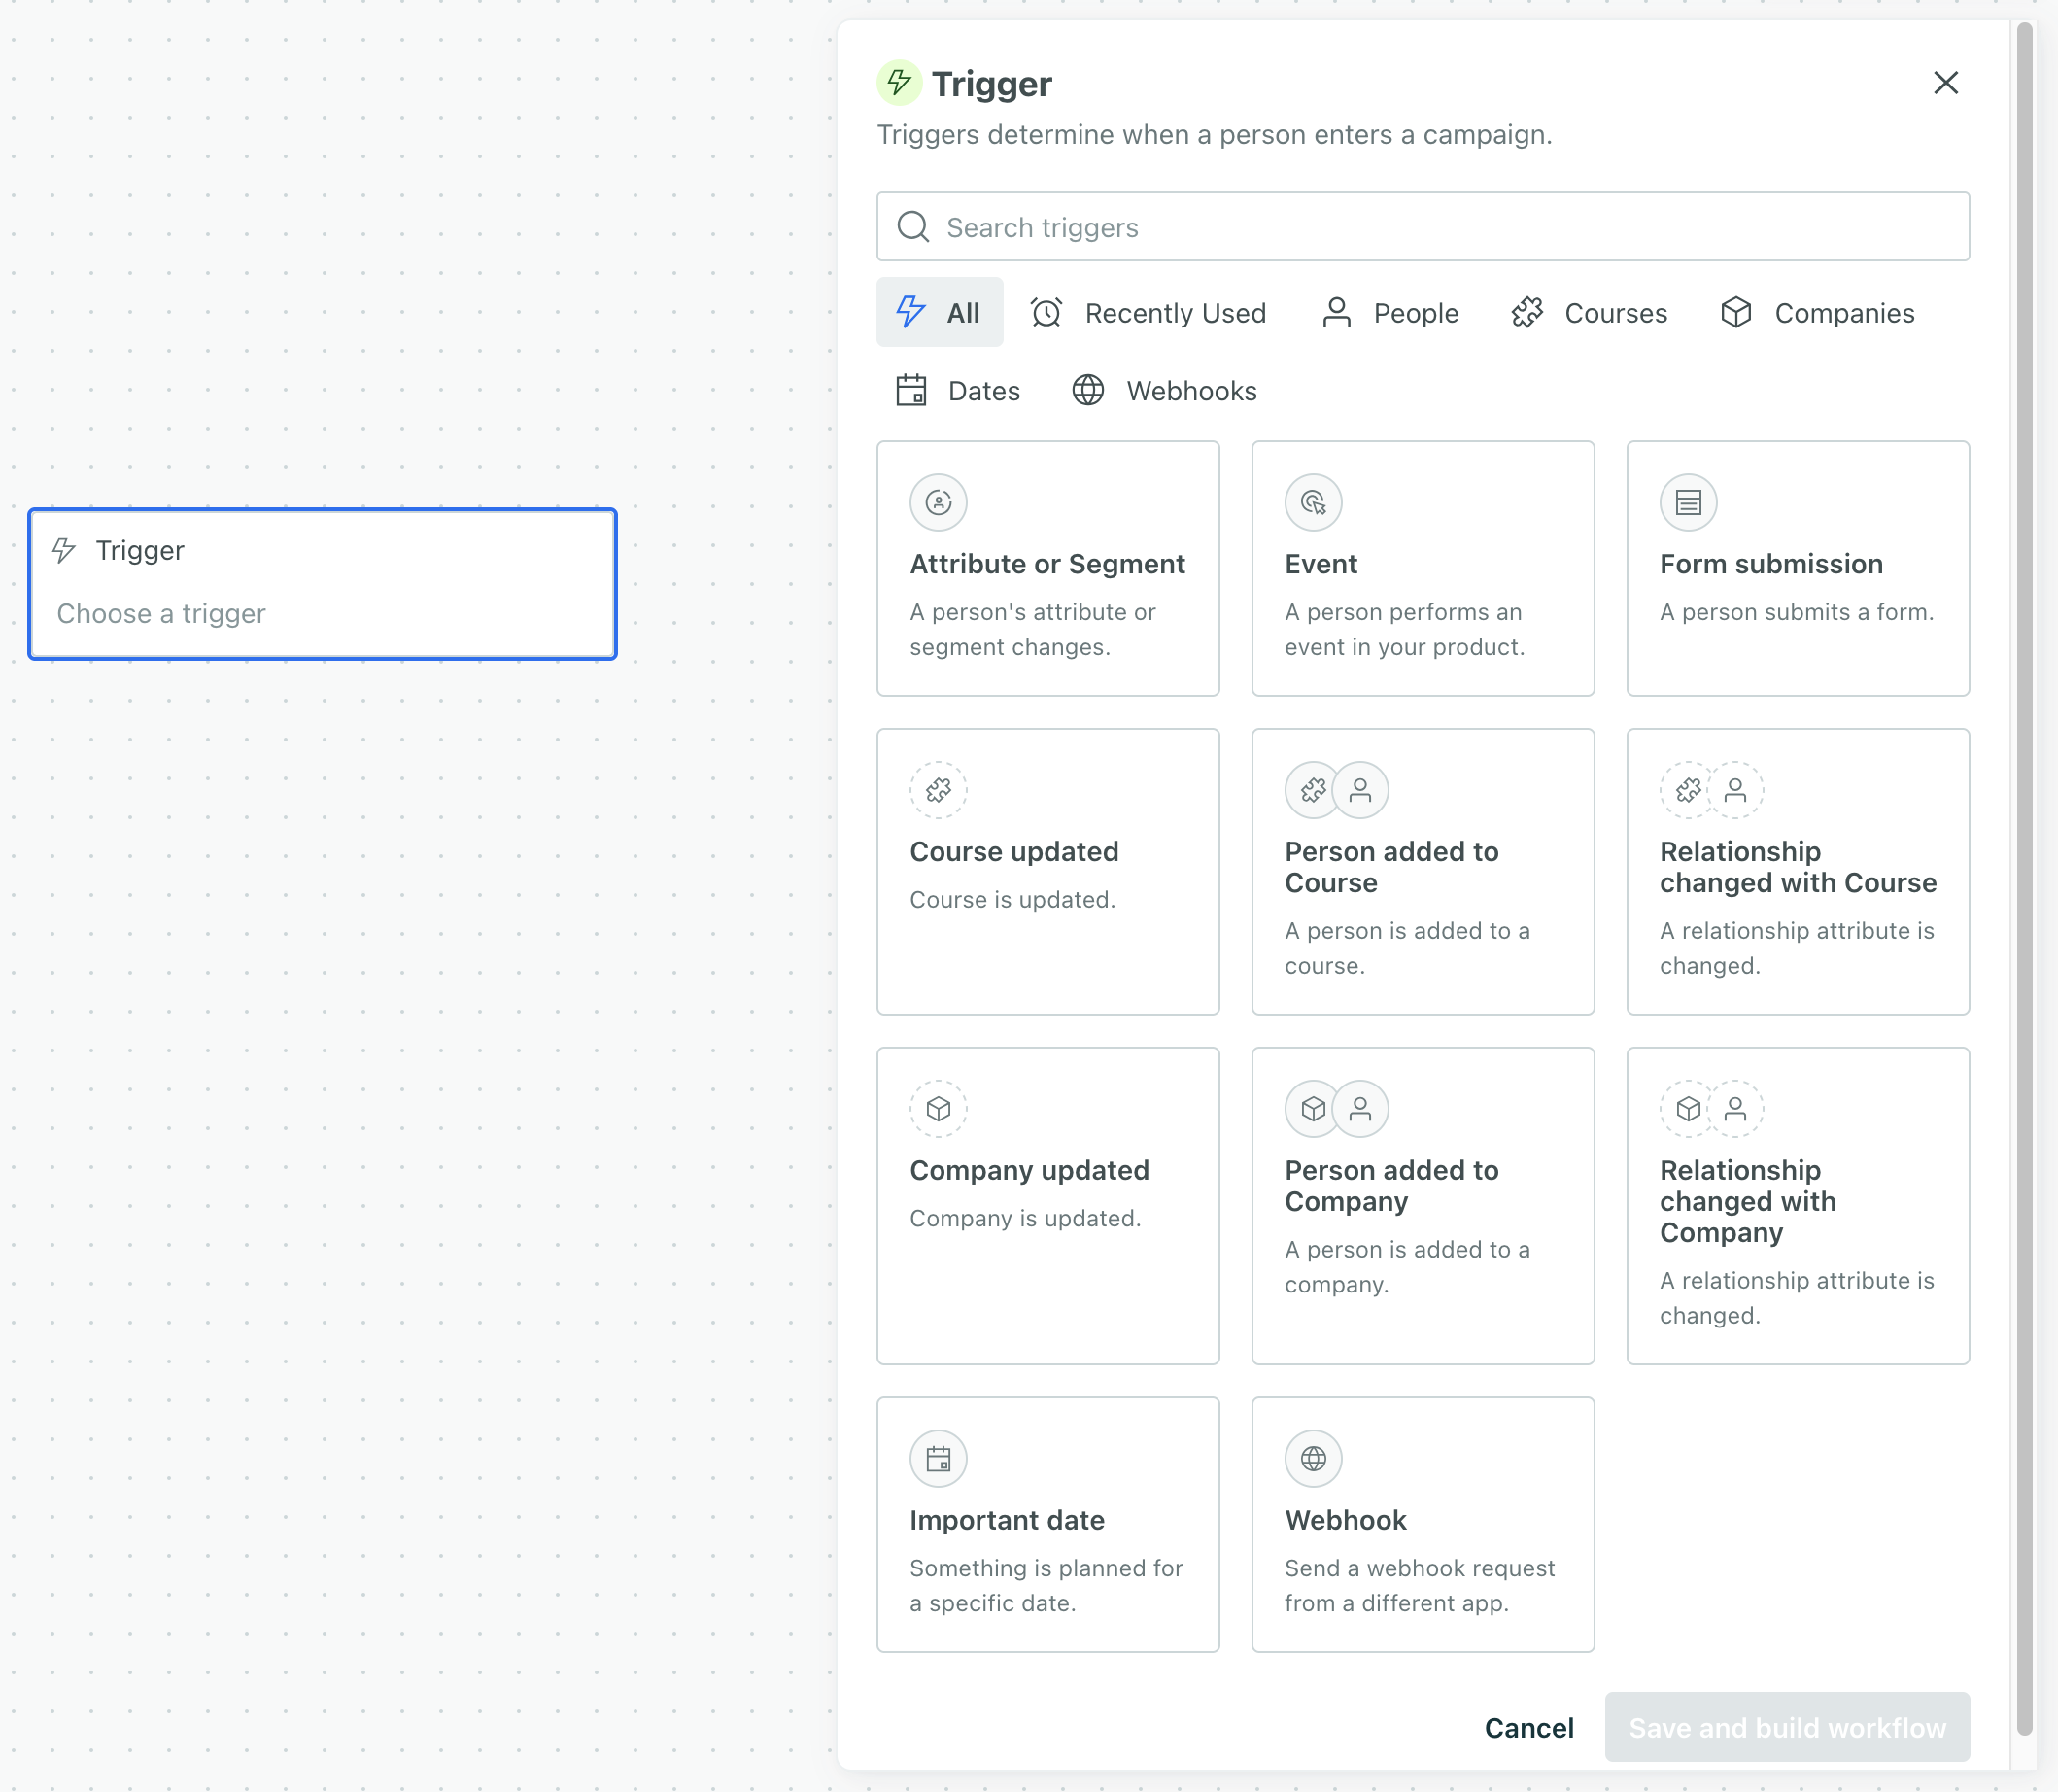
- Go to Automations and click Create Automation.
- Click Choose Trigger and select Webhook.
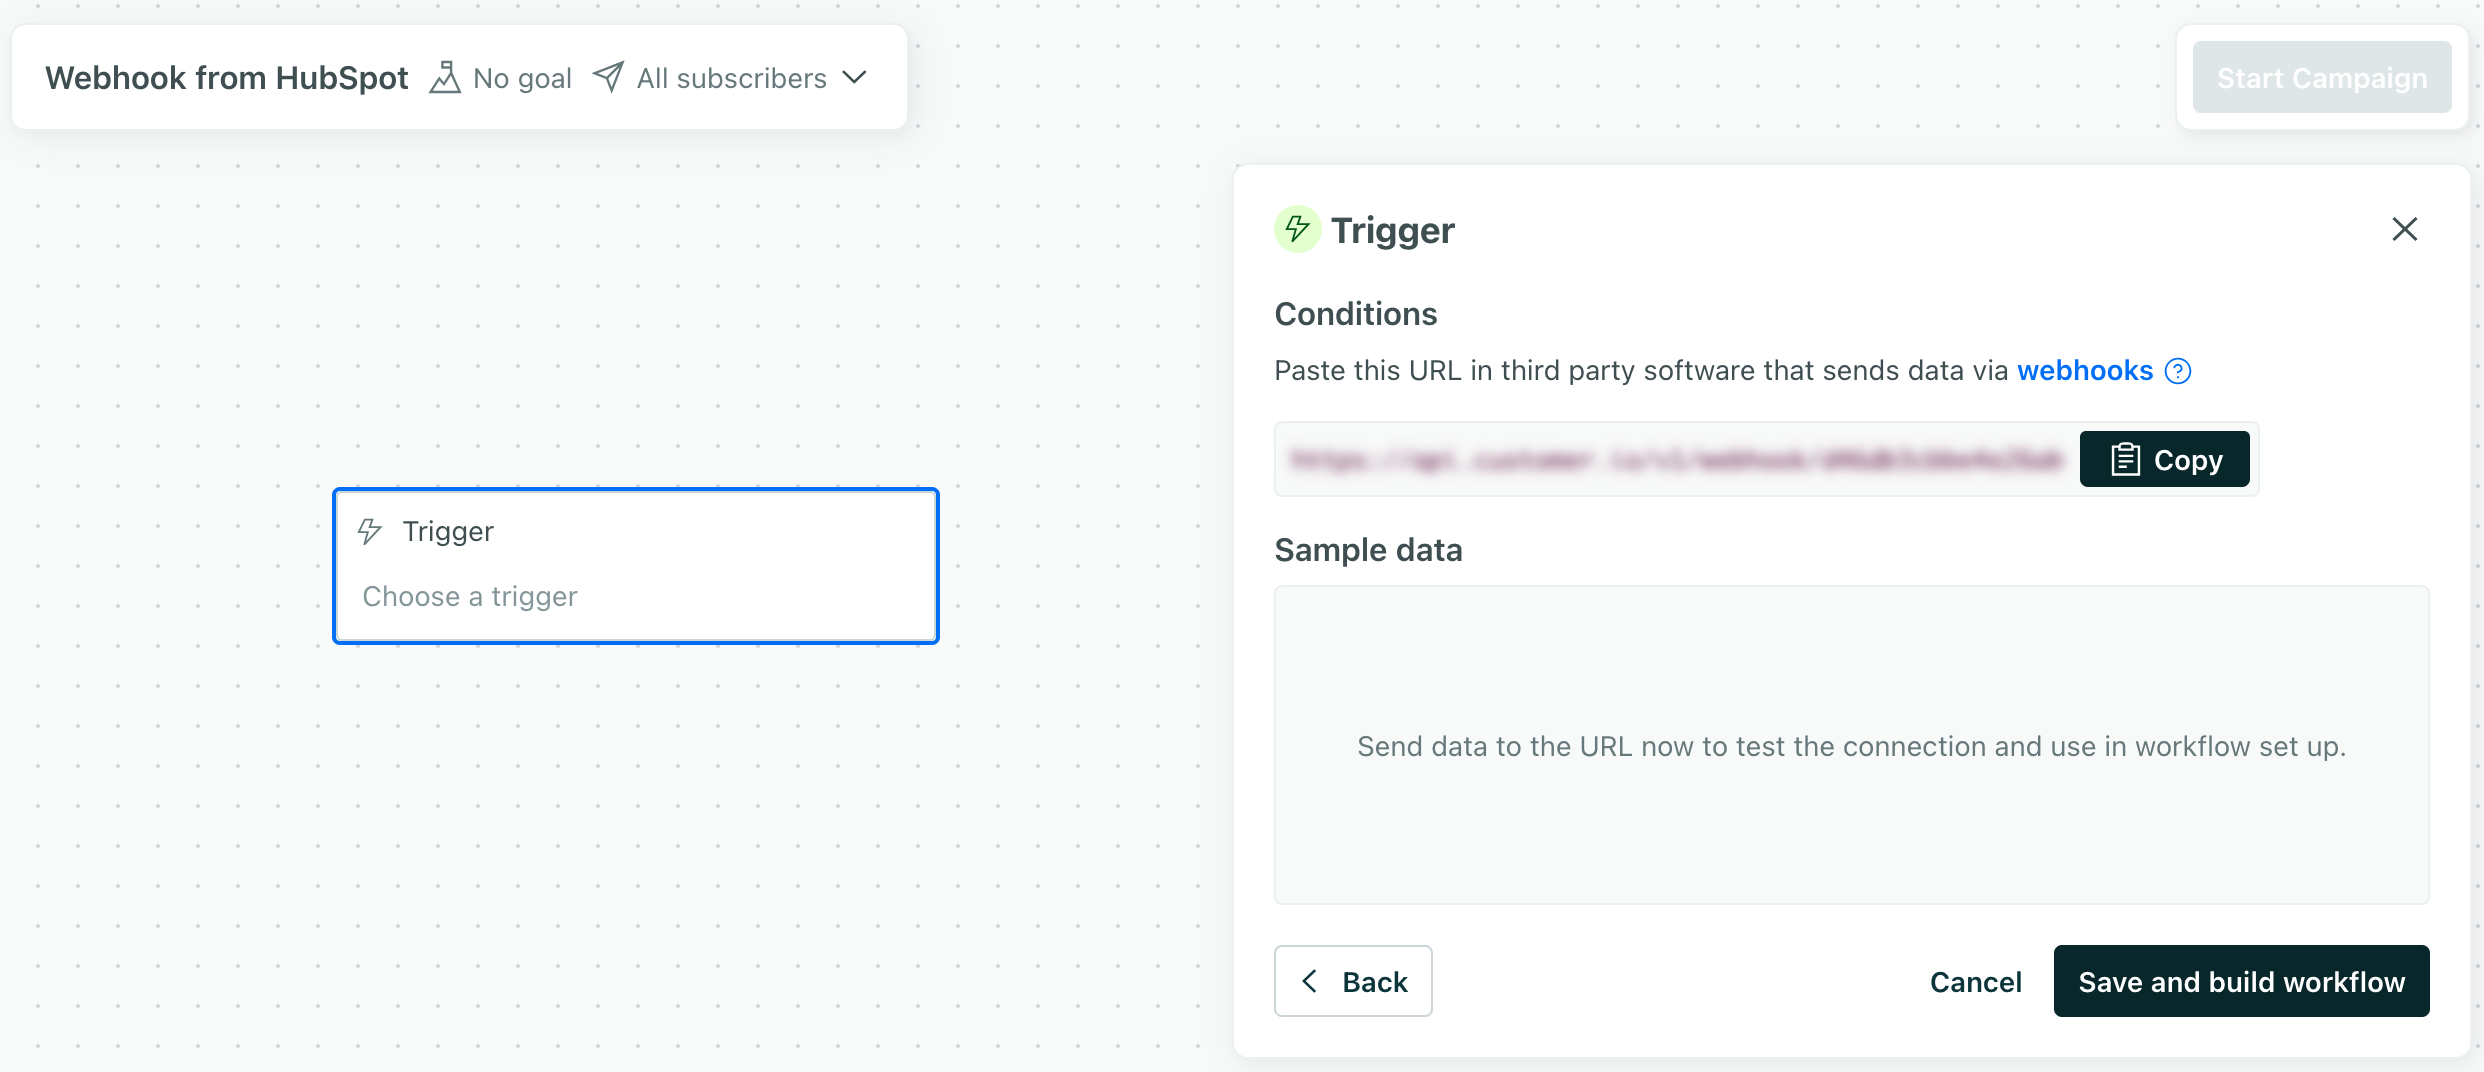
- Copy the webhook address and click Save and build workflow.
3. Finish setting up your HubSpot workflow
Go back to your HubSpot workflow. In your Send a webhook action:
- Set the method to POST.
- Set the Webhook URL to the webhook URL you previously copied.
- Include the form field properties you want to send to Customer.io, or select Include all [object] properties to send all of the properties from the form submission.
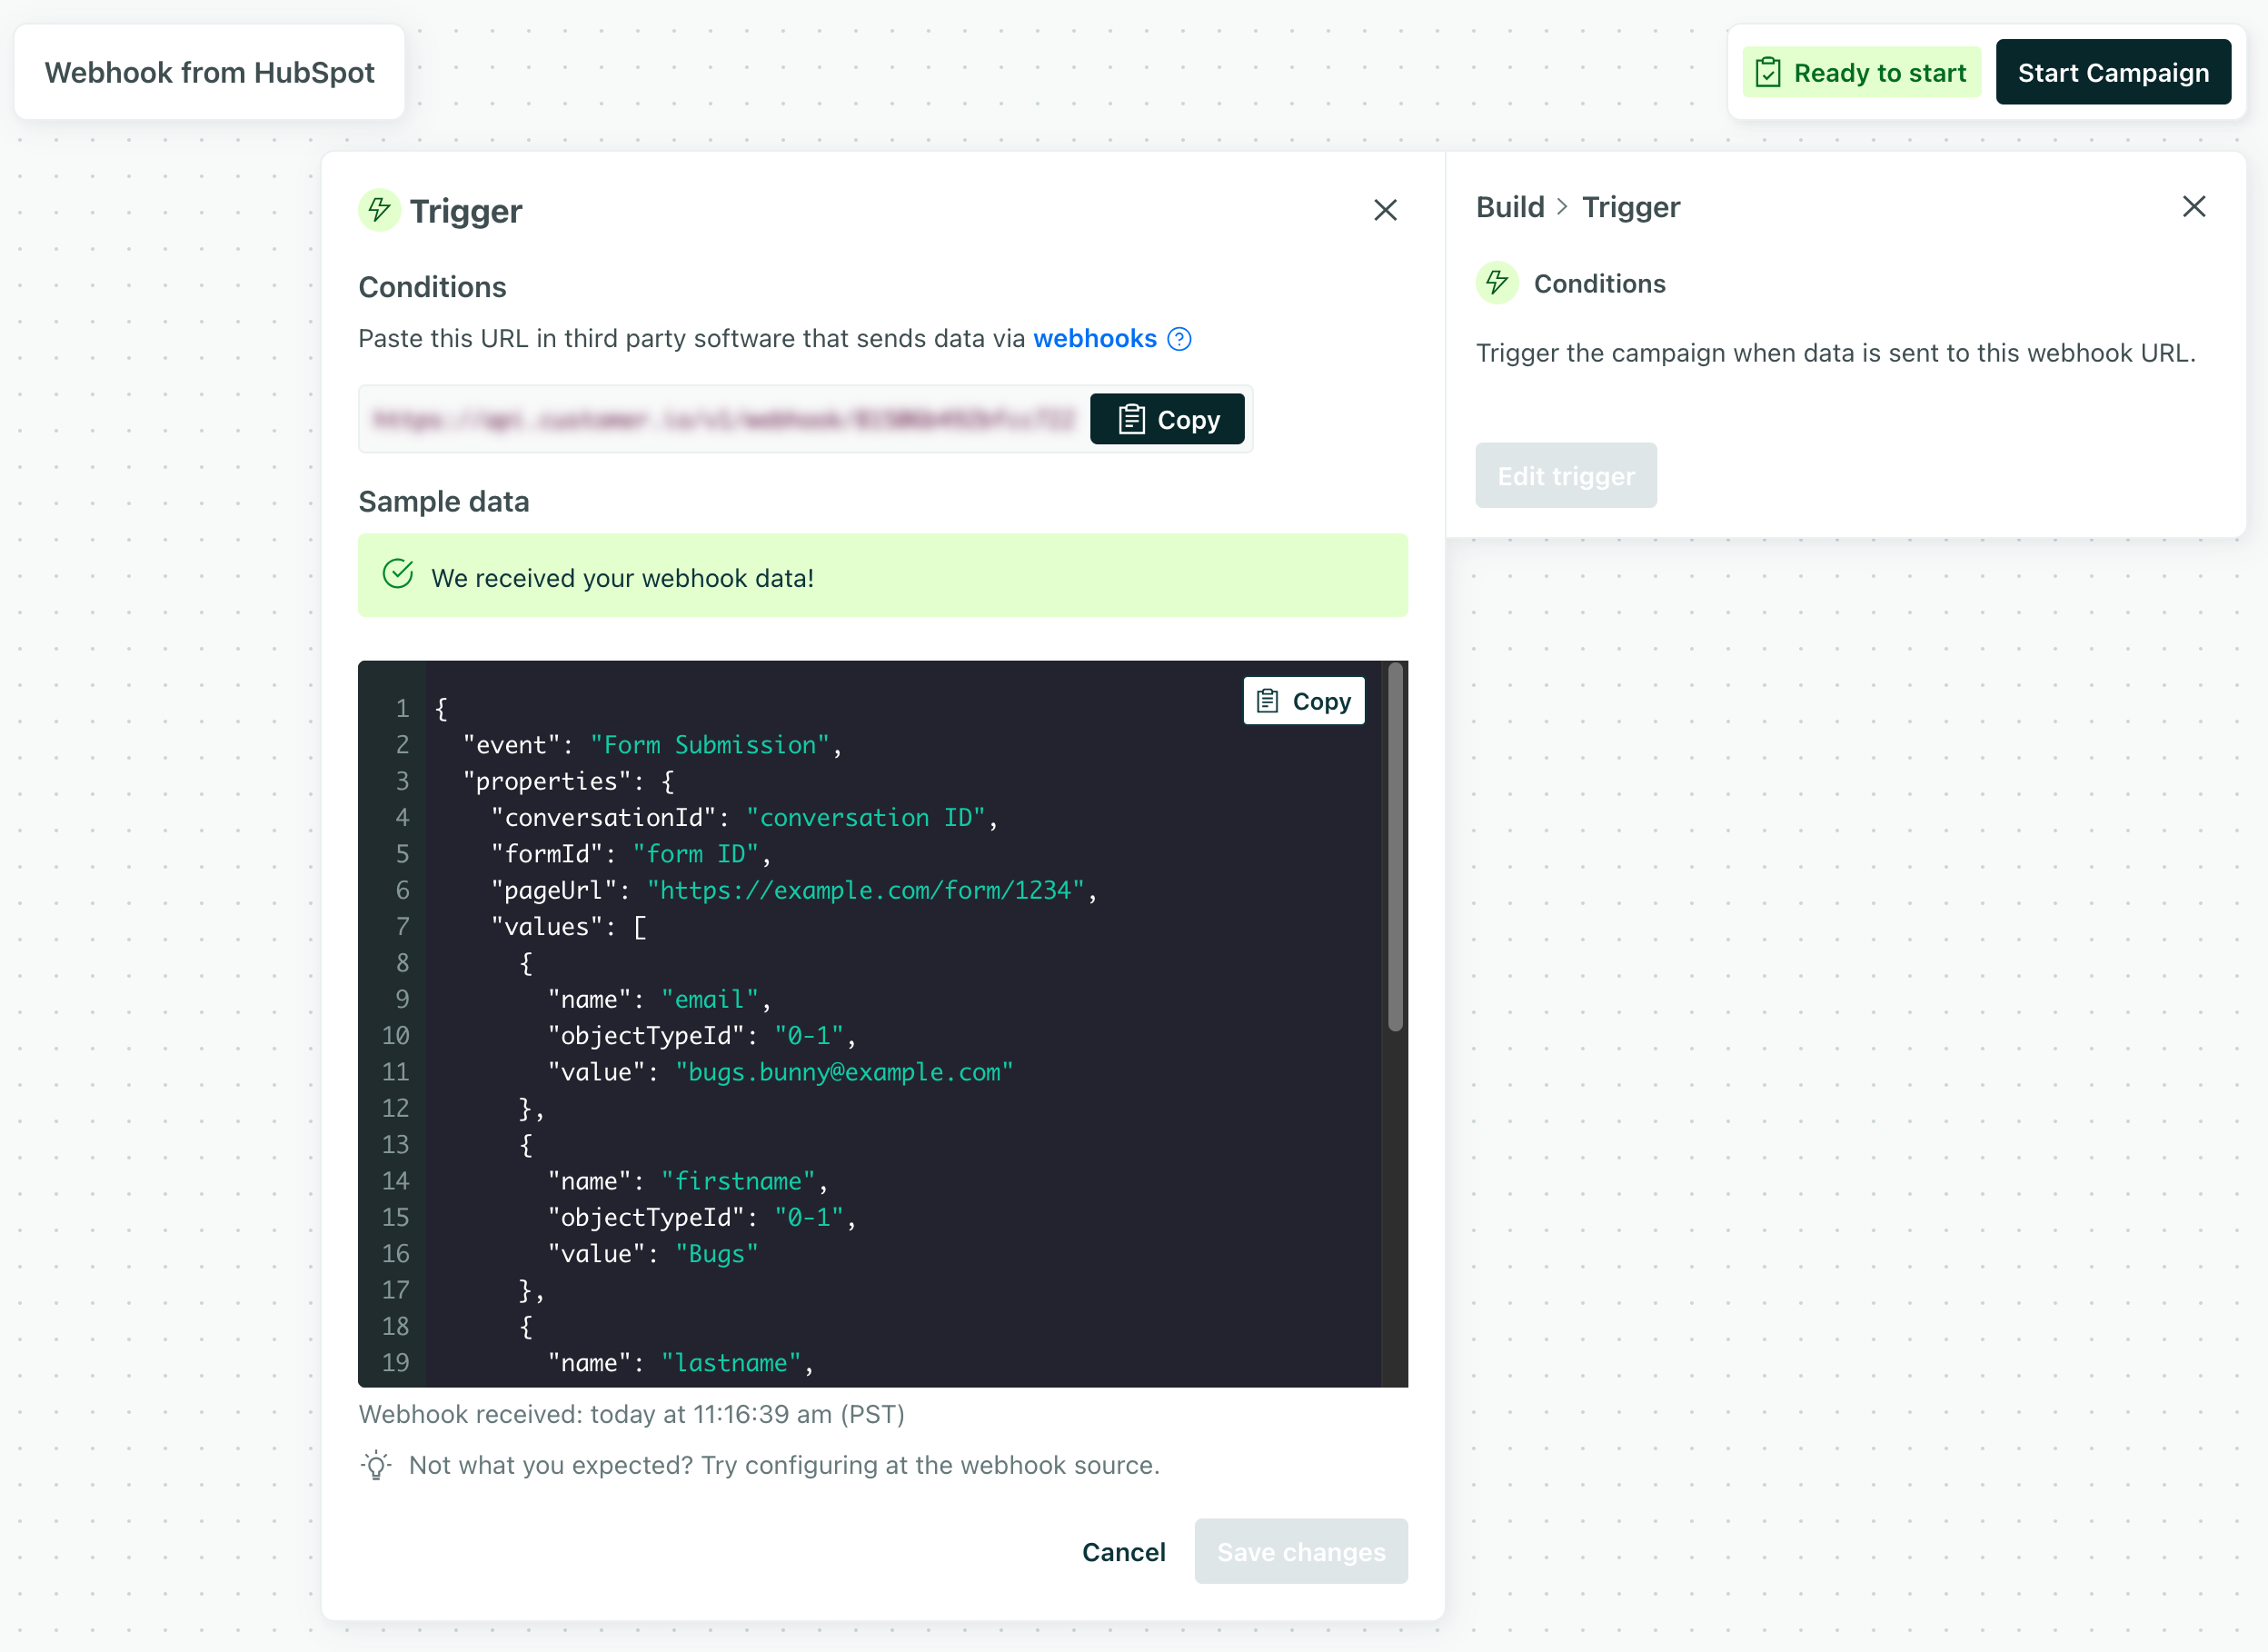
Now that you’ve set up your workflow in HubSpot, send a test form submission. This provides your Customer.io automation with sample data that’ll help you map form data to attributes or event properties in Customer.io.
When you send a test, you’ll see your sample data in your Customer.io automation.
4. Finish setting up your Customer.io automation
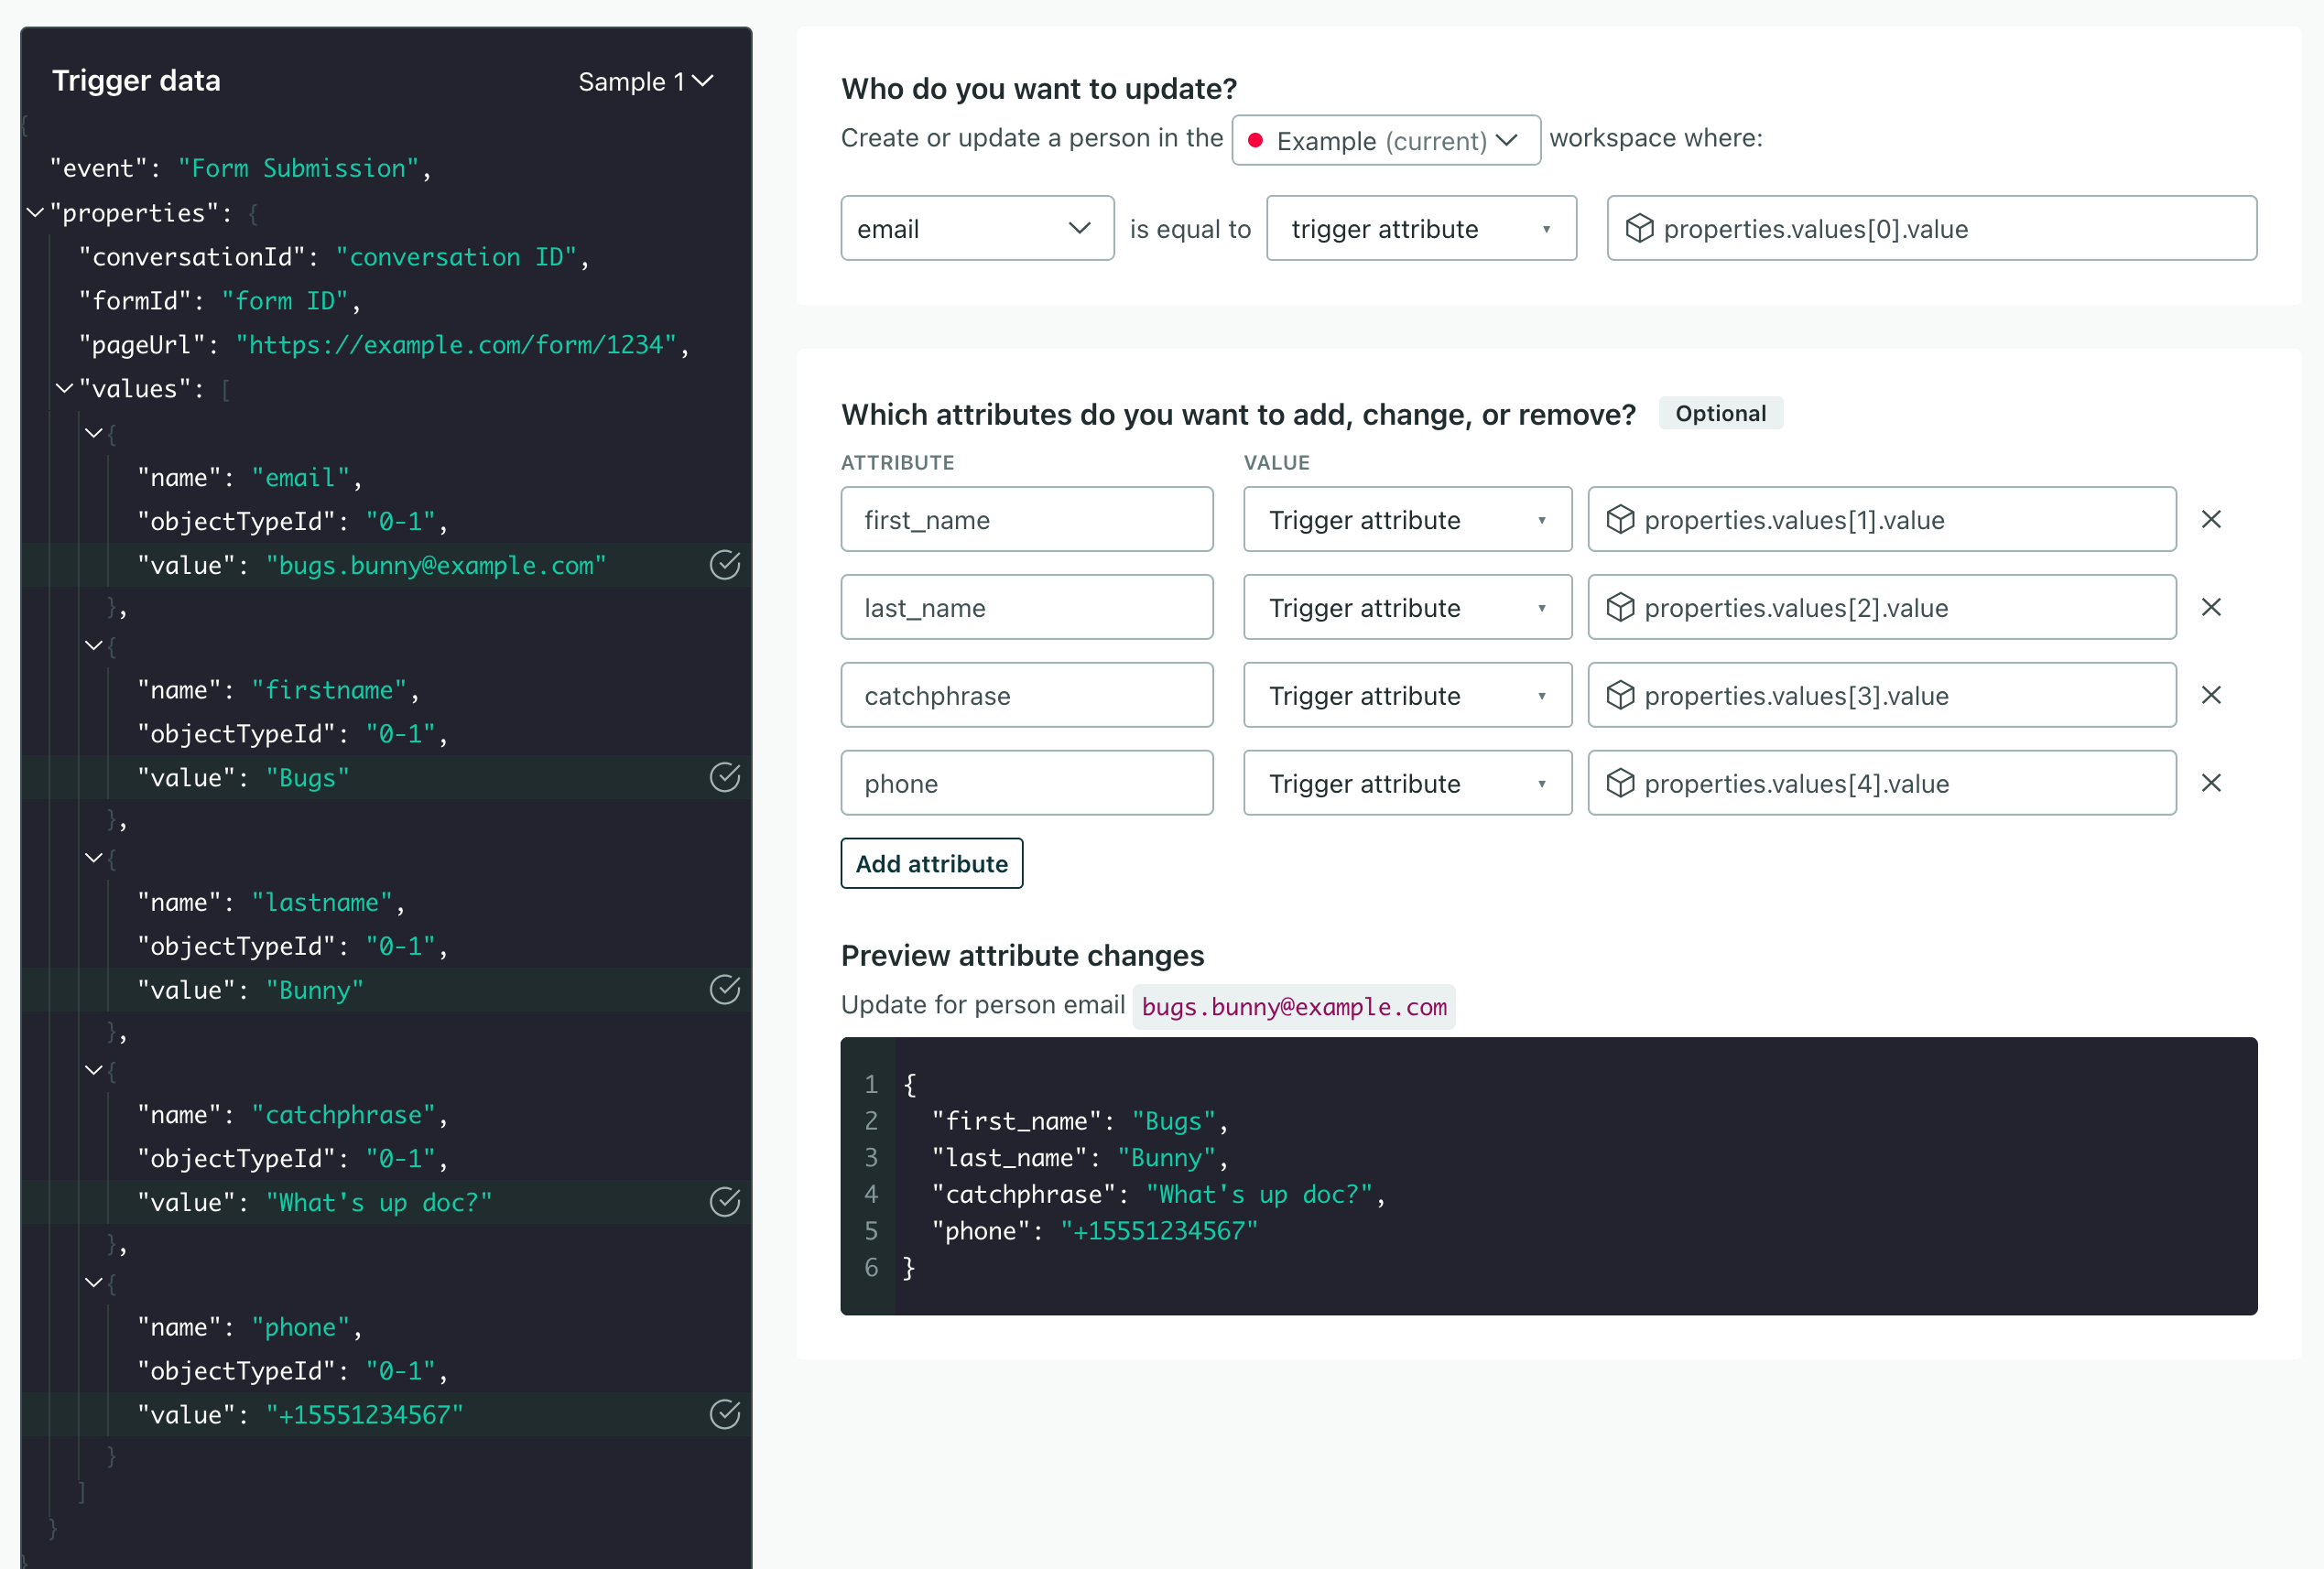
Now return to your Customer.io automation. Here, you can map the incoming form submission to an event that can trigger downstream automations, attributes that you store on your audience’s people in Customer.io—or both.
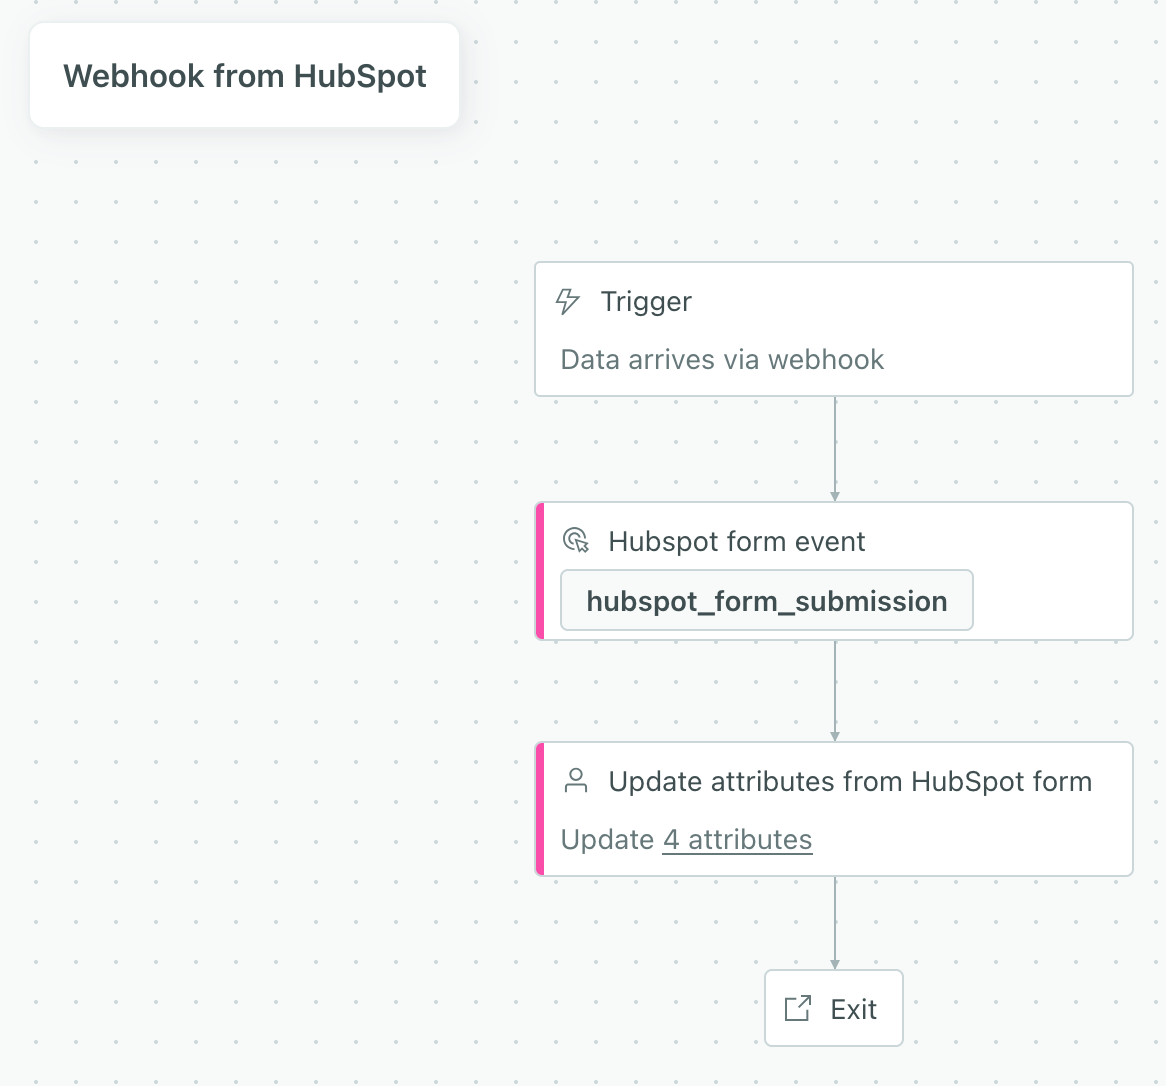
Send an event:
- Add a Send Event action to your workflow. This converts the incoming webhook to an event that can trigger automations in Customer.io.
- Set the Event Name to a name that you want to use to trigger downstream automations or use in segments.
- Set Event Attribute names to the values you want to use to personalize downstream automations.
- Set the Value to the field values from the event.
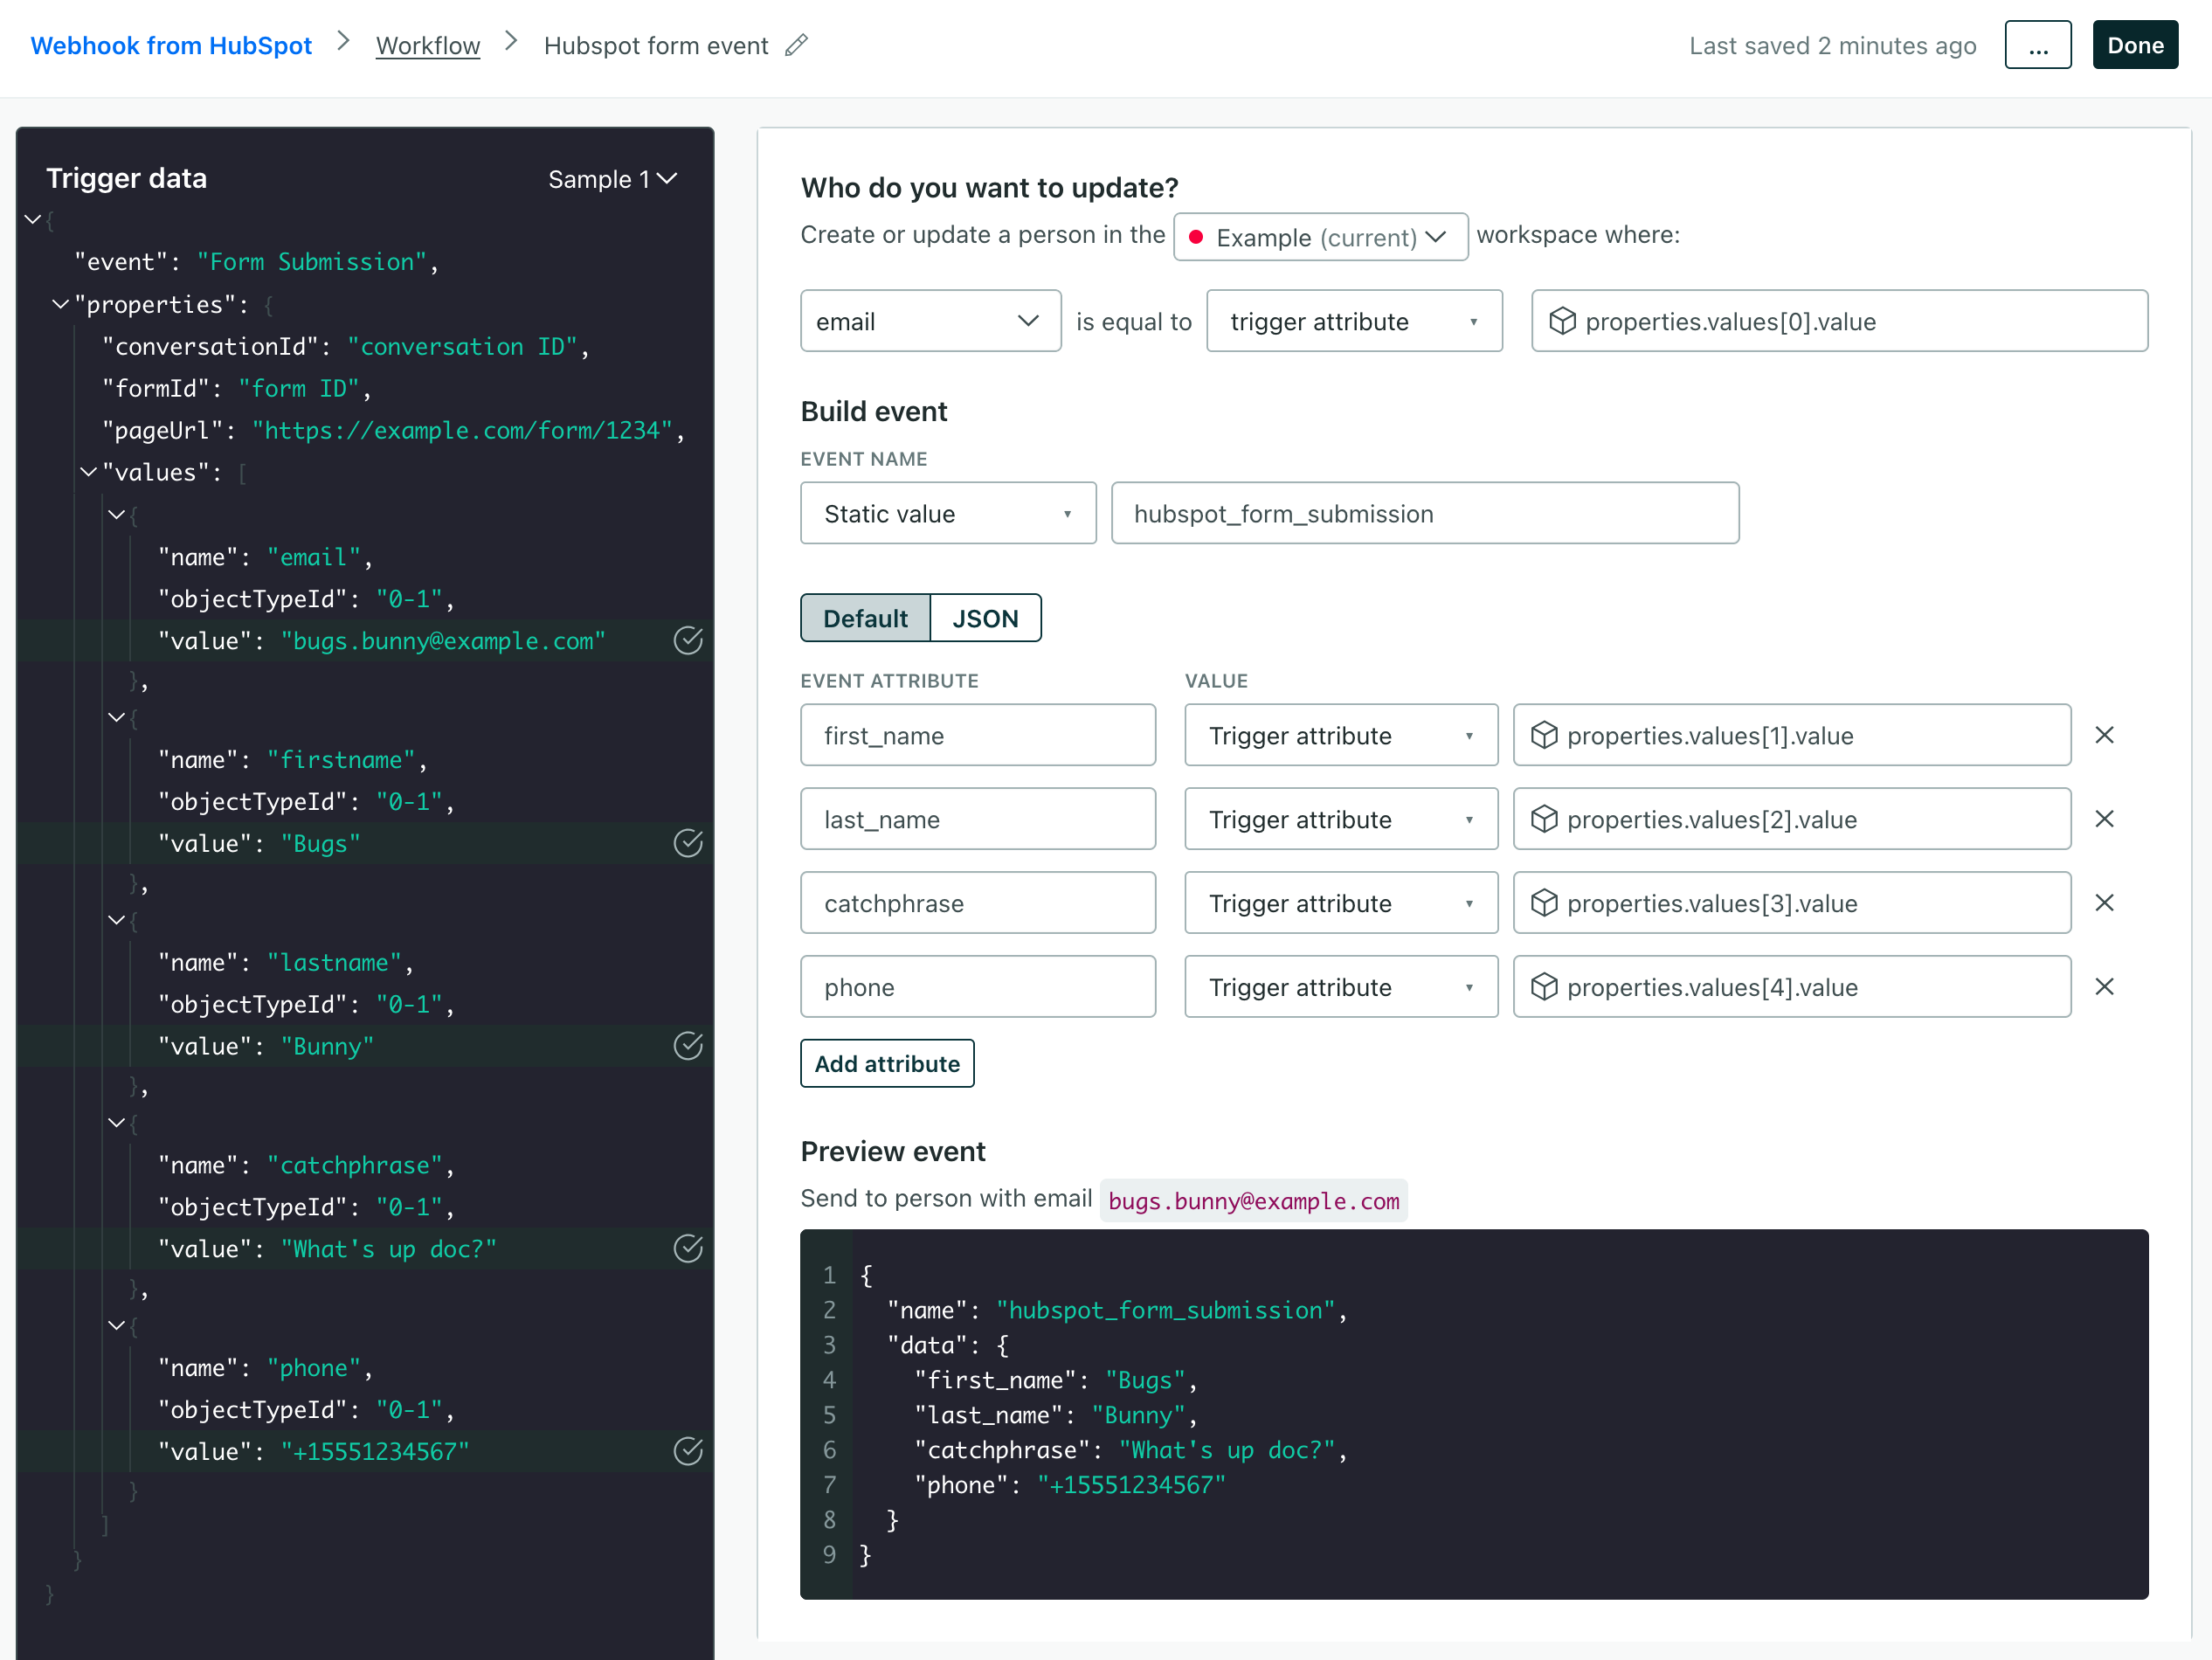
Set attributes:
- Add a Create or update person action to your workflow.
- Set the Identifier for the person you want to add or update based on your HubSpot form—a person’s email or their canonical ID.
- Click Add attribute and set the values you want to store on the person from the incoming form submission.