

HubSpot data-in integration
How it works
Customer.io gets data from HubSpot through syncs. You’ll connect Customer.io to HubSpot, and then set up syncs for the kinds of HubSpot records you want to bring into Customer.io. Each sync brings in a type of HubSpot record on a regular interval and maps that data to Customer.io.
When a sync first runs, it brings in the complete set of HubSpot records that match your sync settings. Subsequent syncs bring in records that changed since the previous sync interval. This keeps your HubSpot data up to date in Customer.io without importing the complete data set every time.
Prerequisites
To connect HubSpot to Customer.io, you need:
- A HubSpot account with API access enabled.
- A HubSpot user who can authorize Customer.io through OAuth and access the data you want to sync.
Set up your HubSpot integration
When you connect HubSpot, we provide sync templates for common data types: contacts and companies. We recommend that you start with these templates to get up and running. For other HubSpot record types, see Mapping HubSpot data to Customer.io.
- Go to Integrations. In the Directory tab, pick the HubSpot Data In integration.
- Give the integration a friendly Name so you’ll recognize it in Customer.io, and click Connect HubSpot.
- Choose the HubSpot account you want to connect to Customer.io and click Choose Account.
- Review the permissions you’ll grant to Customer.io. If you accept, click Connect app.
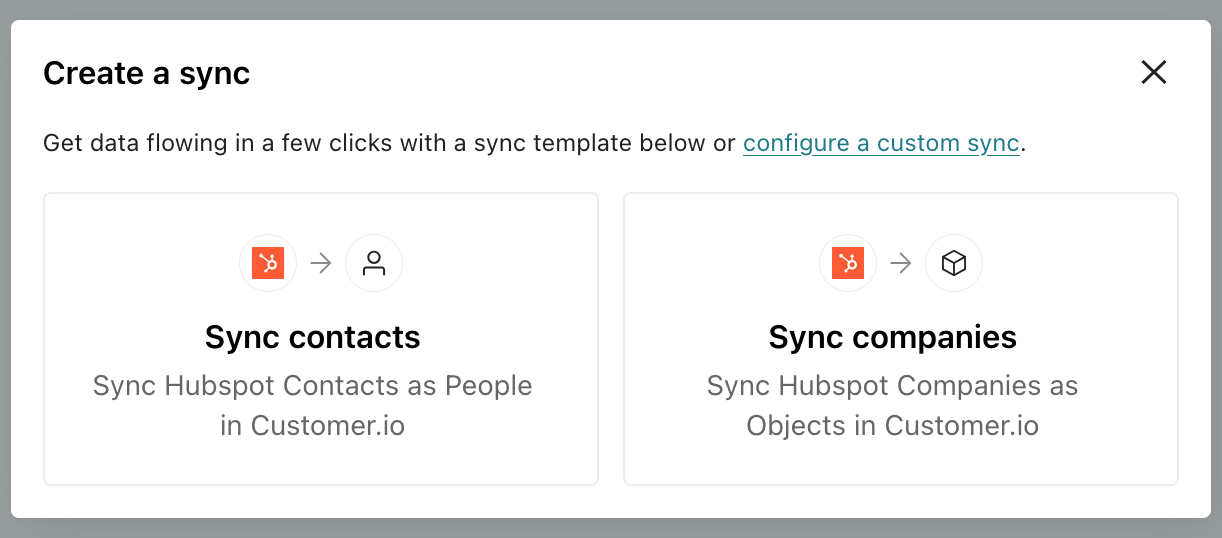
- Choose the kind of HubSpot data you want to sync to Customer.io. In general, we recommend starting with Sync contacts because contacts map to people.
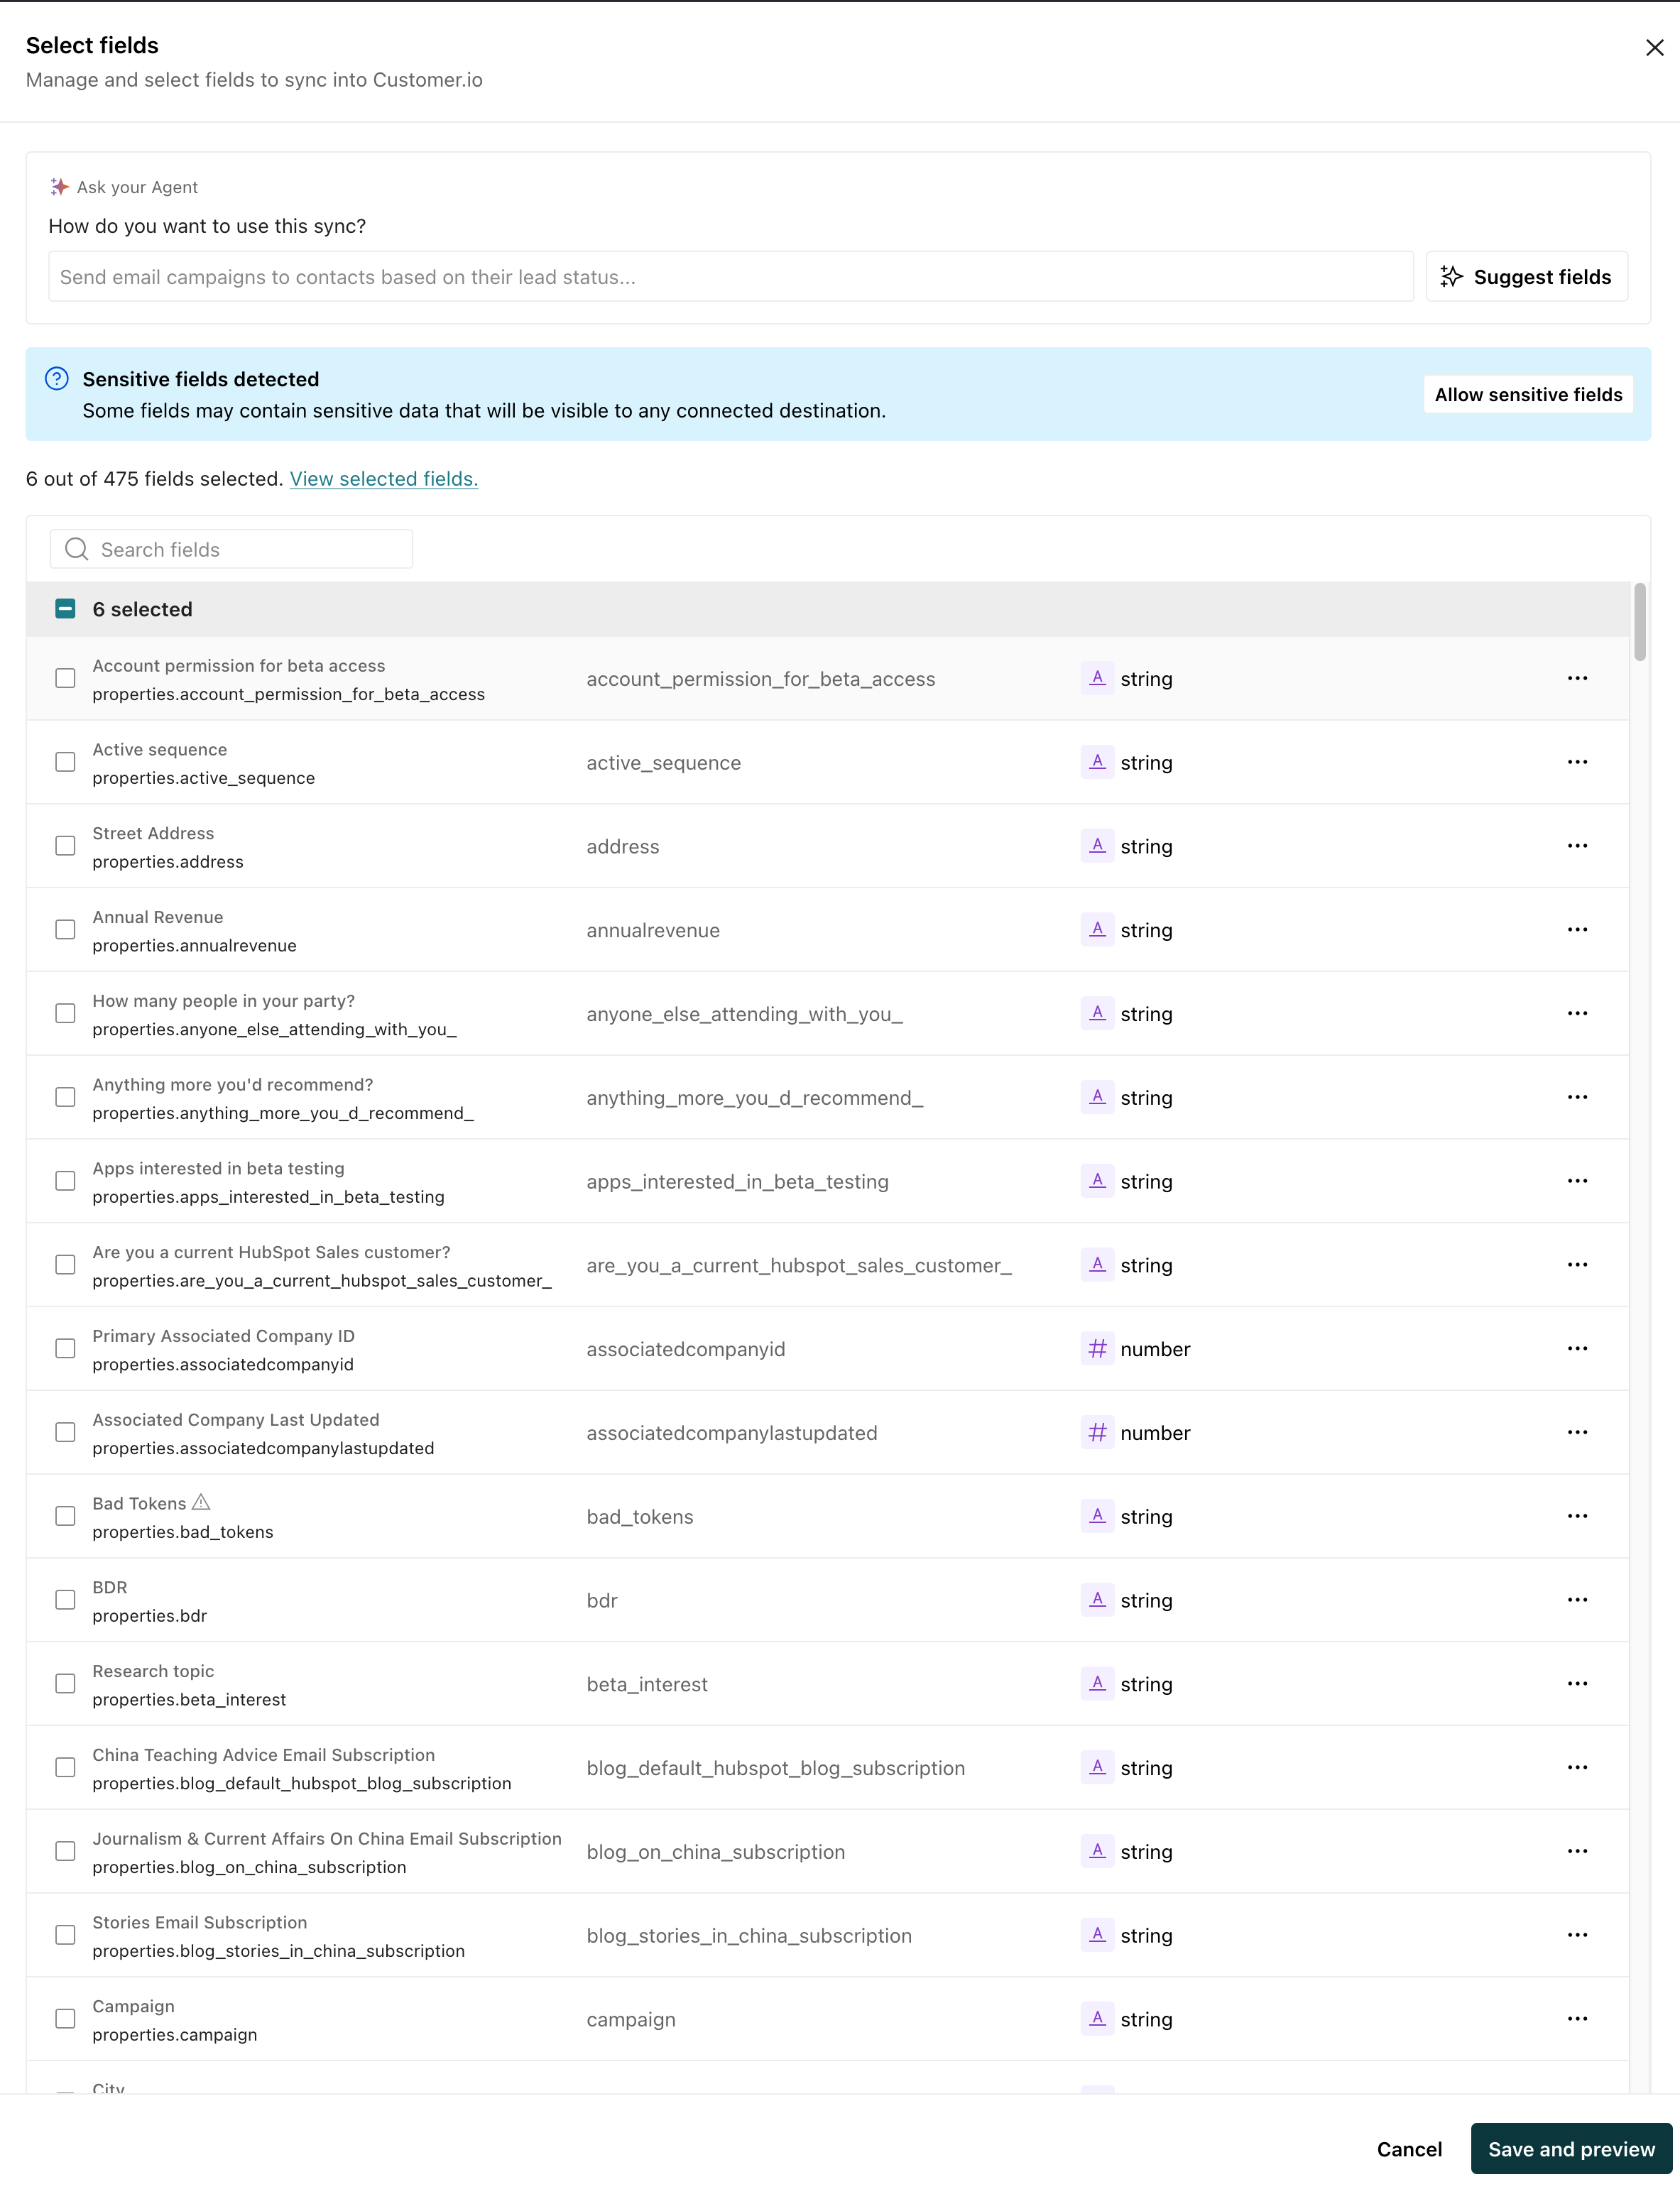
- Click Add fields to determine the data you want to bring in for each HubSpot record. When you’re done, click Save and preview. From here you can:
- Manually select the fields you want to add.
- Enter a prompt under How do you want to use this sync? (if AI is enabled) and Customer.io will suggest fields based on your goals. For example, you might want to “send onboarding messages based on lead source” or “segment companies by industry.” We try to exclude fields that aren’t typically useful for segmentation, automation targeting, or personalization. Fields added by AI show a sparkle badge in the field list.
- Review your sync. We’ll show you which fields you’re going to sync and the total number of records your sync will add. Make sure you’re syncing the right data and that the total number of records looks right to you.
- Click Enable sync and choose a sync interval: 1 hour, 6 hours, 24 hours, or a custom interval.
The Syncs tab shows the status of your sync. If you go into , you should begin seeing your HubSpot data, though it may take a few minutes to populate all your people and objects.
Add syncs
After initial setup, you can add more syncs to import other kinds of data from HubSpot.
Go to your HubSpot integration’s Syncs tab and click Add Sync. From here you can choose a template if one fits, or configure the fields and identifiers yourself in the full sync editor. To learn more about whether your data types are people, objects, or events, see Mapping HubSpot data to Customer.io.
Configure a sync with a template
Today we offer simple templates to bring in contacts and companies from HubSpot. To bring in other types of HubSpot data, you’ll need to configure a custom sync.
- Go to your HubSpot integration’s Syncs tab and click Add Sync.
- Select your sync template—Sync contacts or Sync companies.
- Click Add fields to determine the data you want to bring in for each HubSpot record. From here you can manually select the fields you want to add or enter a prompt we can use to suggest fields based on your goals. When you’re done, click Save and preview.
- Review your sync. We’ll show you which fields you’re going to sync and the total number of records your sync will add. Make sure you’re syncing the right data and that the total number of records looks right to you.
- Click Enable sync and choose a sync interval: 1 hour, 6 hours, 24 hours, or a custom interval.
Configure a custom sync
When you’re configuring a sync manually:
-
Go to your HubSpot integration’s Syncs tab and click Add Sync.
-
Click Configure a custom sync.
-
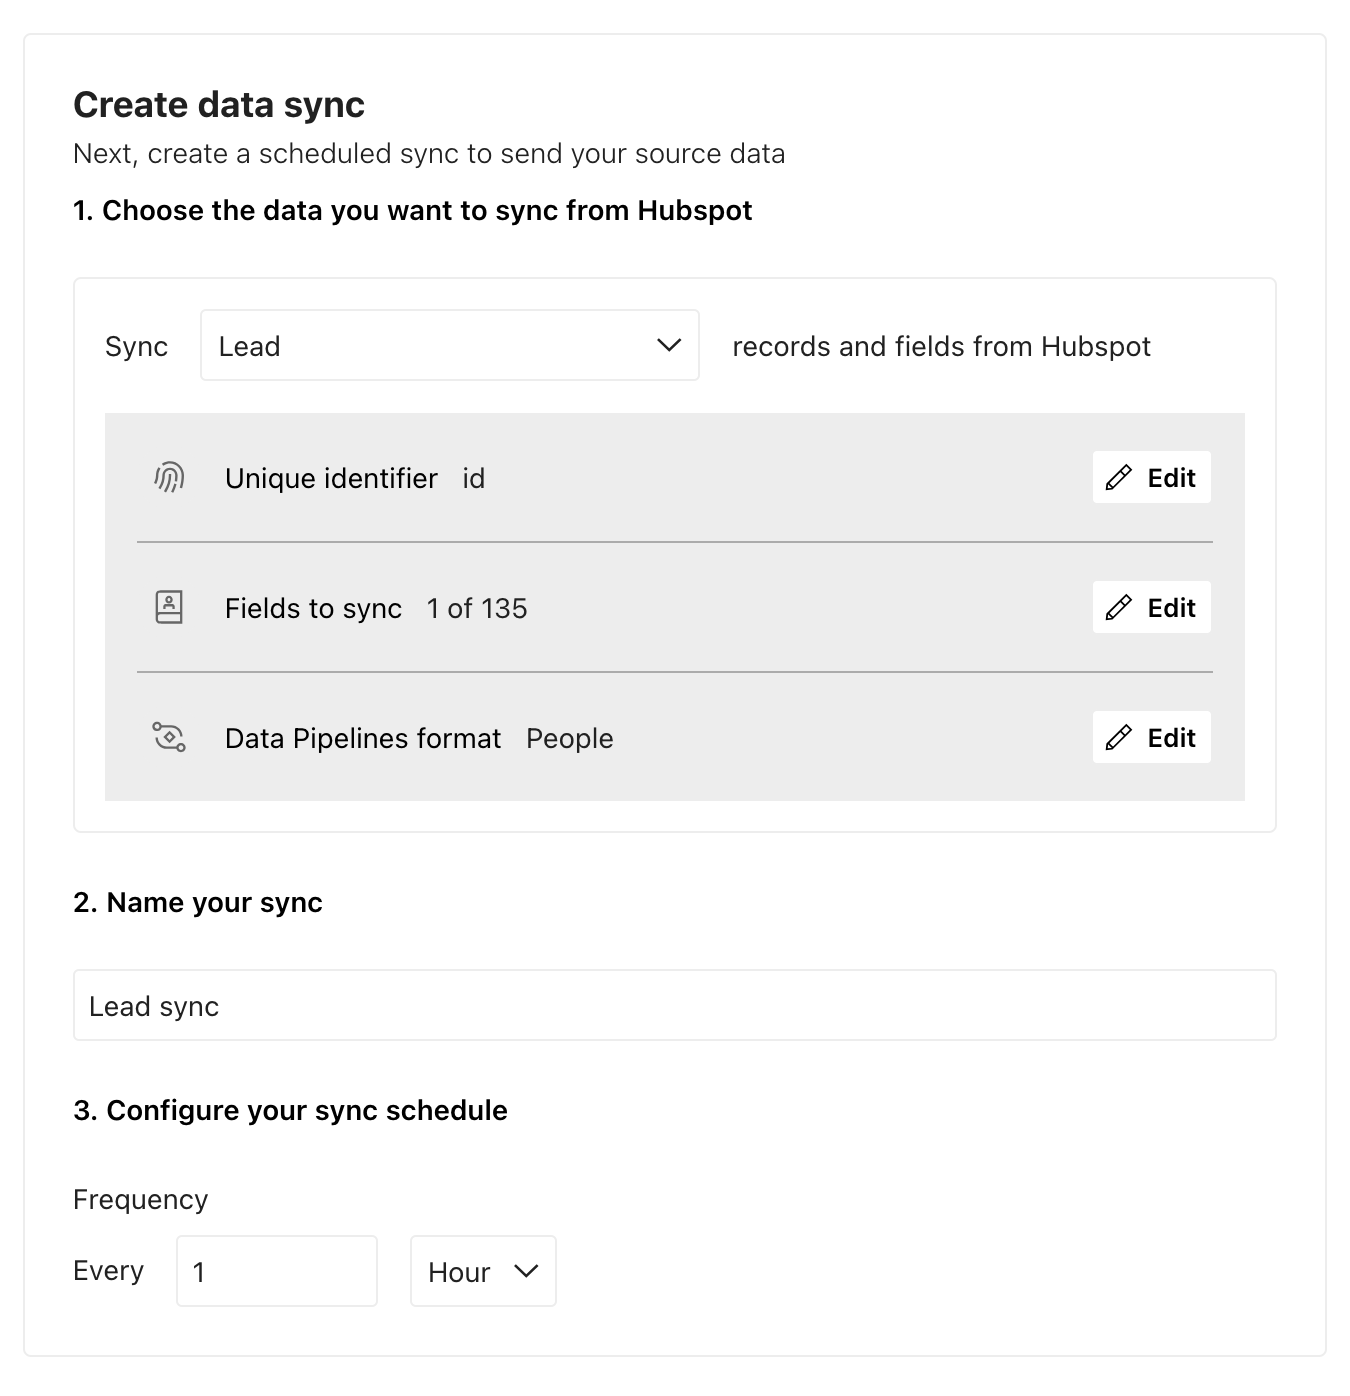
Pick the kind of HubSpot record you want to send to Customer.io in the Sync dropdown. See Mapping HubSpot data to Customer.io for more information about the kinds of data you can sync and how best to map it to Customer.io.
-
Give your sync a Name, something that describes the data you’re importing and what you’re mapping it to.
-
Click Edit next to Unique identifiers to map your identifier, the field that uniquely identifies each person or object. See Setting identifiers for more information.
-
Go to the Fields tab and pick the fields you want to capture in Customer.io. HubSpot contains a lot of data, not all of which is useful in Customer.io.
-
Go to the Pipelines format tab and tell us what kind of data you’re sending. For popular HubSpot data types, we set these fields for you. For example, contacts are people and companies are custom objects.
If your Data Pipelines format is set to Custom Object, you need to map the data to a custom object
An object is a non-person entity that you can associate with one or more people—like a company, account, or online course.
in Customer.io. In most cases, this is the same name as the HubSpot object you want to sync. If the object doesn’t exist yet, click New Object Type and set the singular and plural forms, like Company and Companies. See Mapping HubSpot data to Customer.io for more information.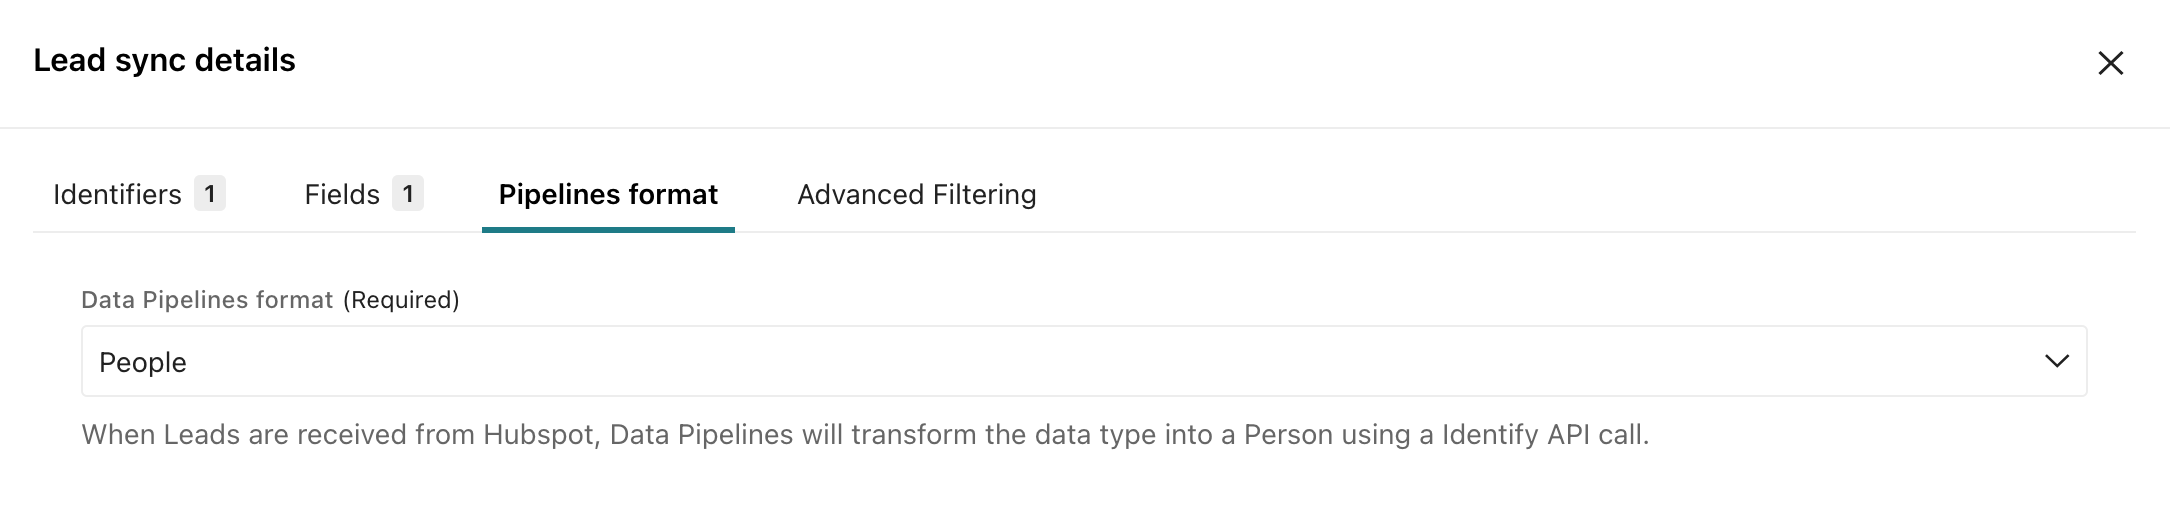
-
(Optional) Go to the Advanced filtering tab if you need to filter HubSpot data before it reaches your workspace. HubSpot filtering works through Actions on a Customer.io Workspaces integration. See Filter incoming data for more information.
-
Go to the Preview tab to see a preview of the data you’ll be syncing. If everything looks good, click Save changes.
-
Configure your sync schedule. This is how often you want to sync data from HubSpot to Customer.io.
-
When you’re done, click Configure destinations and select the places you want to connect your HubSpot data to. The destinations you connect to might depend on how you model your data.
-
Click Enable sync.
The Syncs tab shows the status of your new sync. It may take a few minutes to populate all your data, especially if you have many HubSpot records.
Filter incoming data
HubSpot filtering works through Actions on a Customer.io Workspaces integration. If you only want to bring in contacts, companies, deals, or other HubSpot records that match certain criteria, you need to set up action conditions to filter your data. That process happens in a separate Customer.io (Workspace) integration.
See Filter incoming data for the full setup process.
Deleted records
When you delete records in HubSpot, we send events to record the deleted items. Customer.io handles these events automatically. But if you send HubSpot data outside Customer.io, you may need to set up actions The source event and data that triggers an API call to your destination. For example, an incoming identify event from your sources adds or updates a person in our Customer.io Journeys destination.
Updating syncs
When you update a sync to add or remove fields, your updates take effect at the next sync interval. This means that your changes don’t affect data that you’ve already sent from HubSpot, or any syncs in progress.
To update all data you’ve passed from HubSpot to Customer.io and other places you send your HubSpot data to, you can Resync all data. This sends all of your corresponding HubSpot data through Customer.io again, updating all of your records with the changes you made to your sync.
On the Syncs tab, click next to the sync you updated and click Resync all data.