

Set up push notifications
The Expo plugin supports push notifications over APN for iOS and FCM for Android. Use this page to get started with push notification services.
This page is part of a setup flow for the SDK. Before you continue, make sure you've implemented previous features—i.e. you can't receive push notifications before you identify people!
Before you begin
This page explains how to receive push notifications using our SDK. However, before you can send push notifications to your audience, you need to enable Customer.io to send push notifications through your preferred service: Apple Push Notification Service (APNs) and/or Firebase Cloud Messaging (FCM).
This process lets you receive both basic push notifications in your app—a title and a message body—and rich push notifications with images and deep links.
How it works
When you use our Expo plugin, you’re already set up to support push.
Before a device can receive a push notification, you must:
- Identify a person. This associates a token with the person; you can’t send push notifications to a device until you identify the recipient.
- (Optional) Set up your app to report push metrics back to Customer.io.
Set up push on iOS
For the most part, we’ll set up push notifications for you when you run expo prebuild. But before you do, you’ll need to add some additional code to support push notifications for iOS.
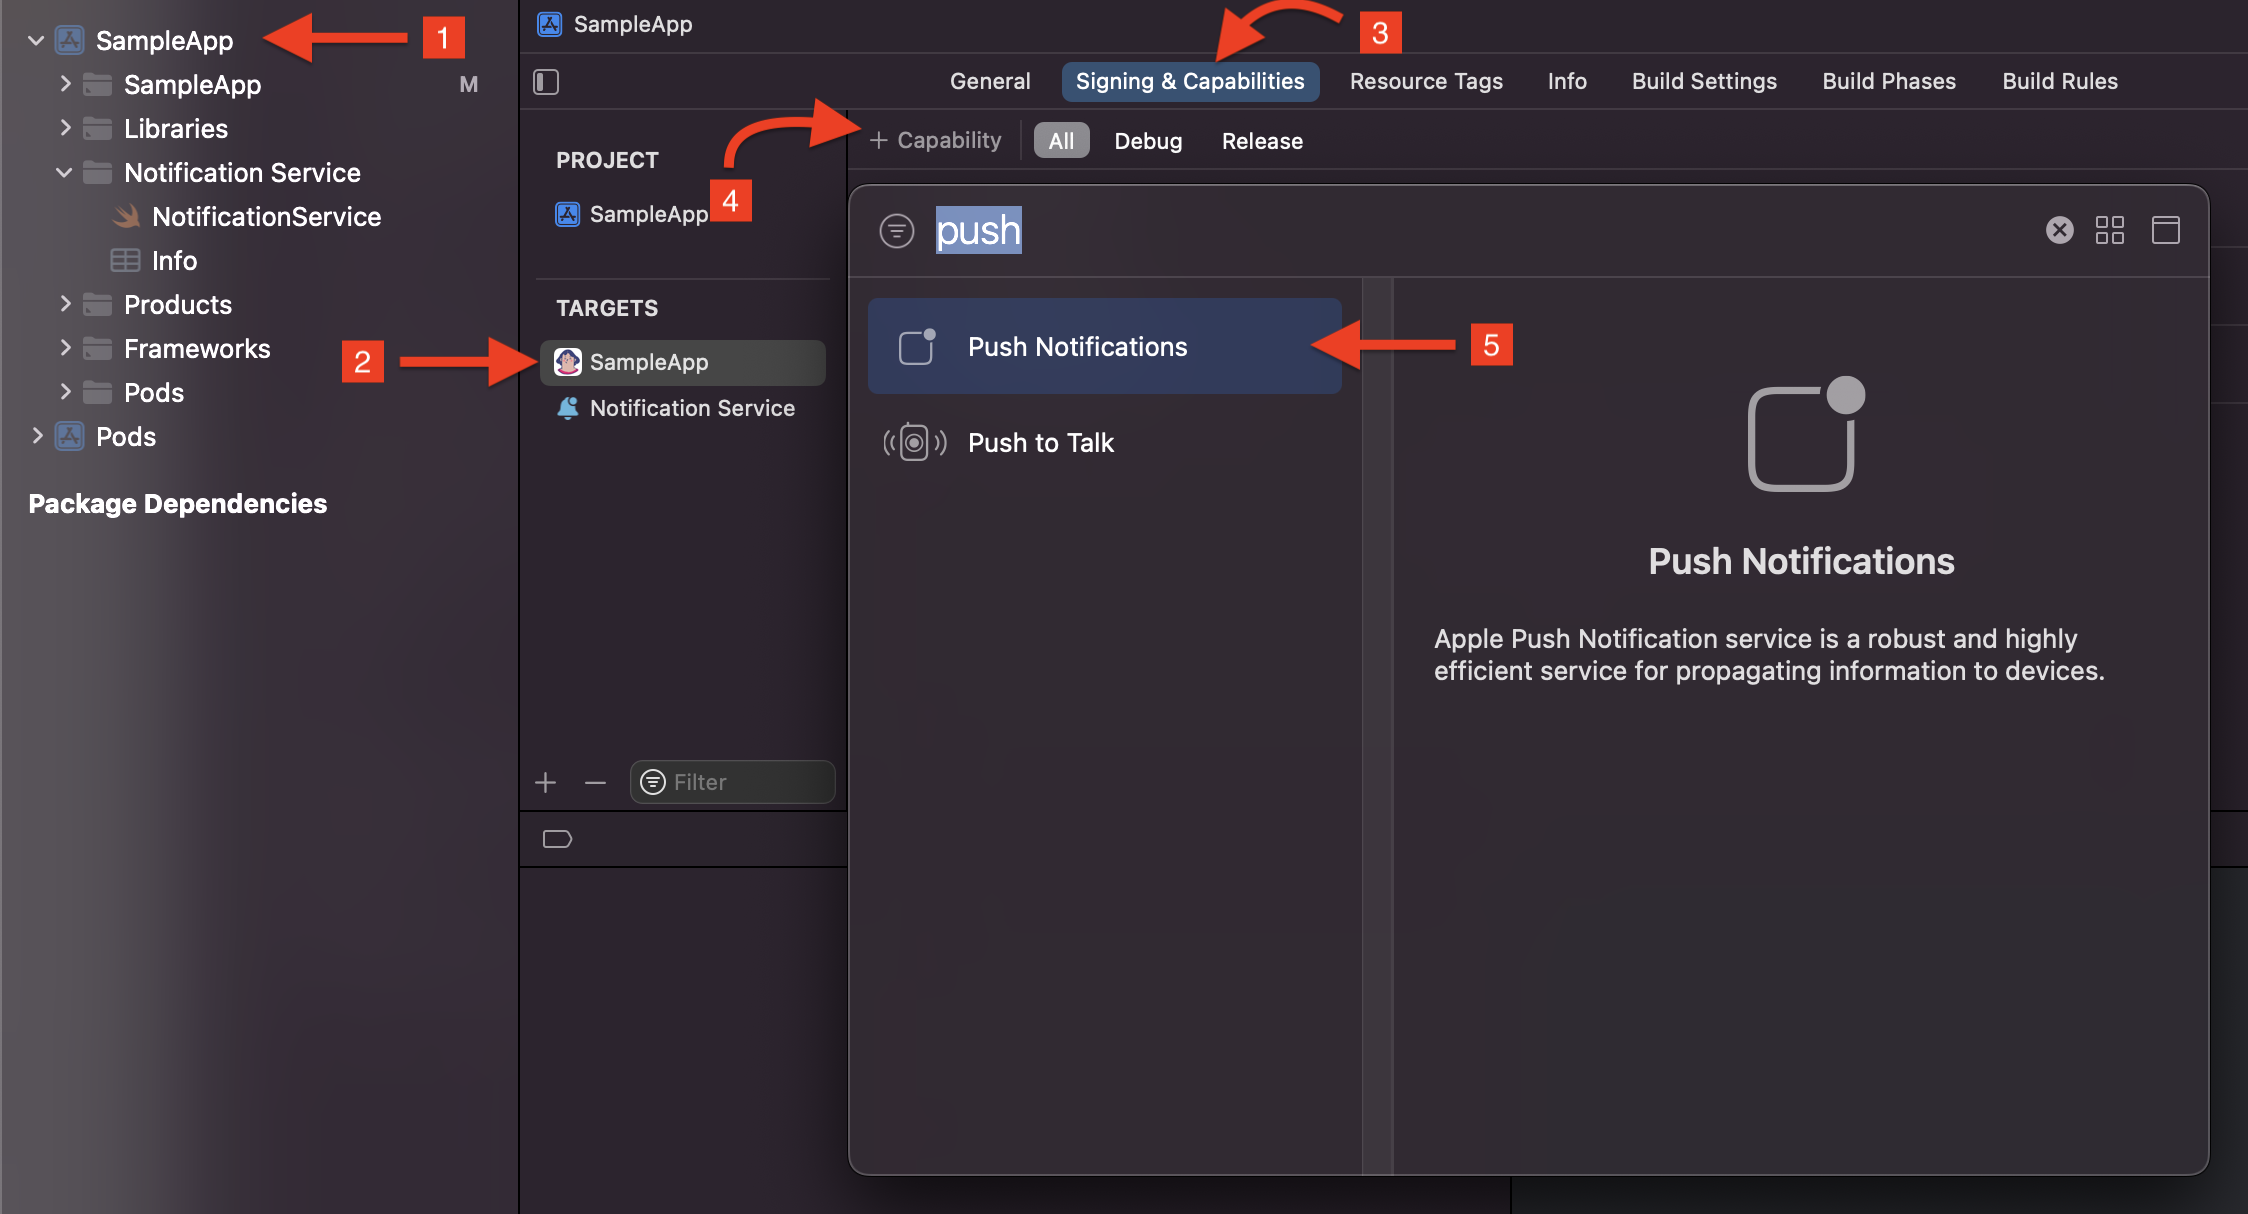
Add push capabilities in Xcode
Before you can work with push notifications, you need to add Push Notification capabilities to your project in XCode.
- In your React Native project, go to the
iossubfolder and open<yourAppName>.xcworkspace. - Select your project, and then under Targets, select your main app.
- Click the Signing & Capabilities tab
- Click Capability.
- Add Push Notifications to your app.
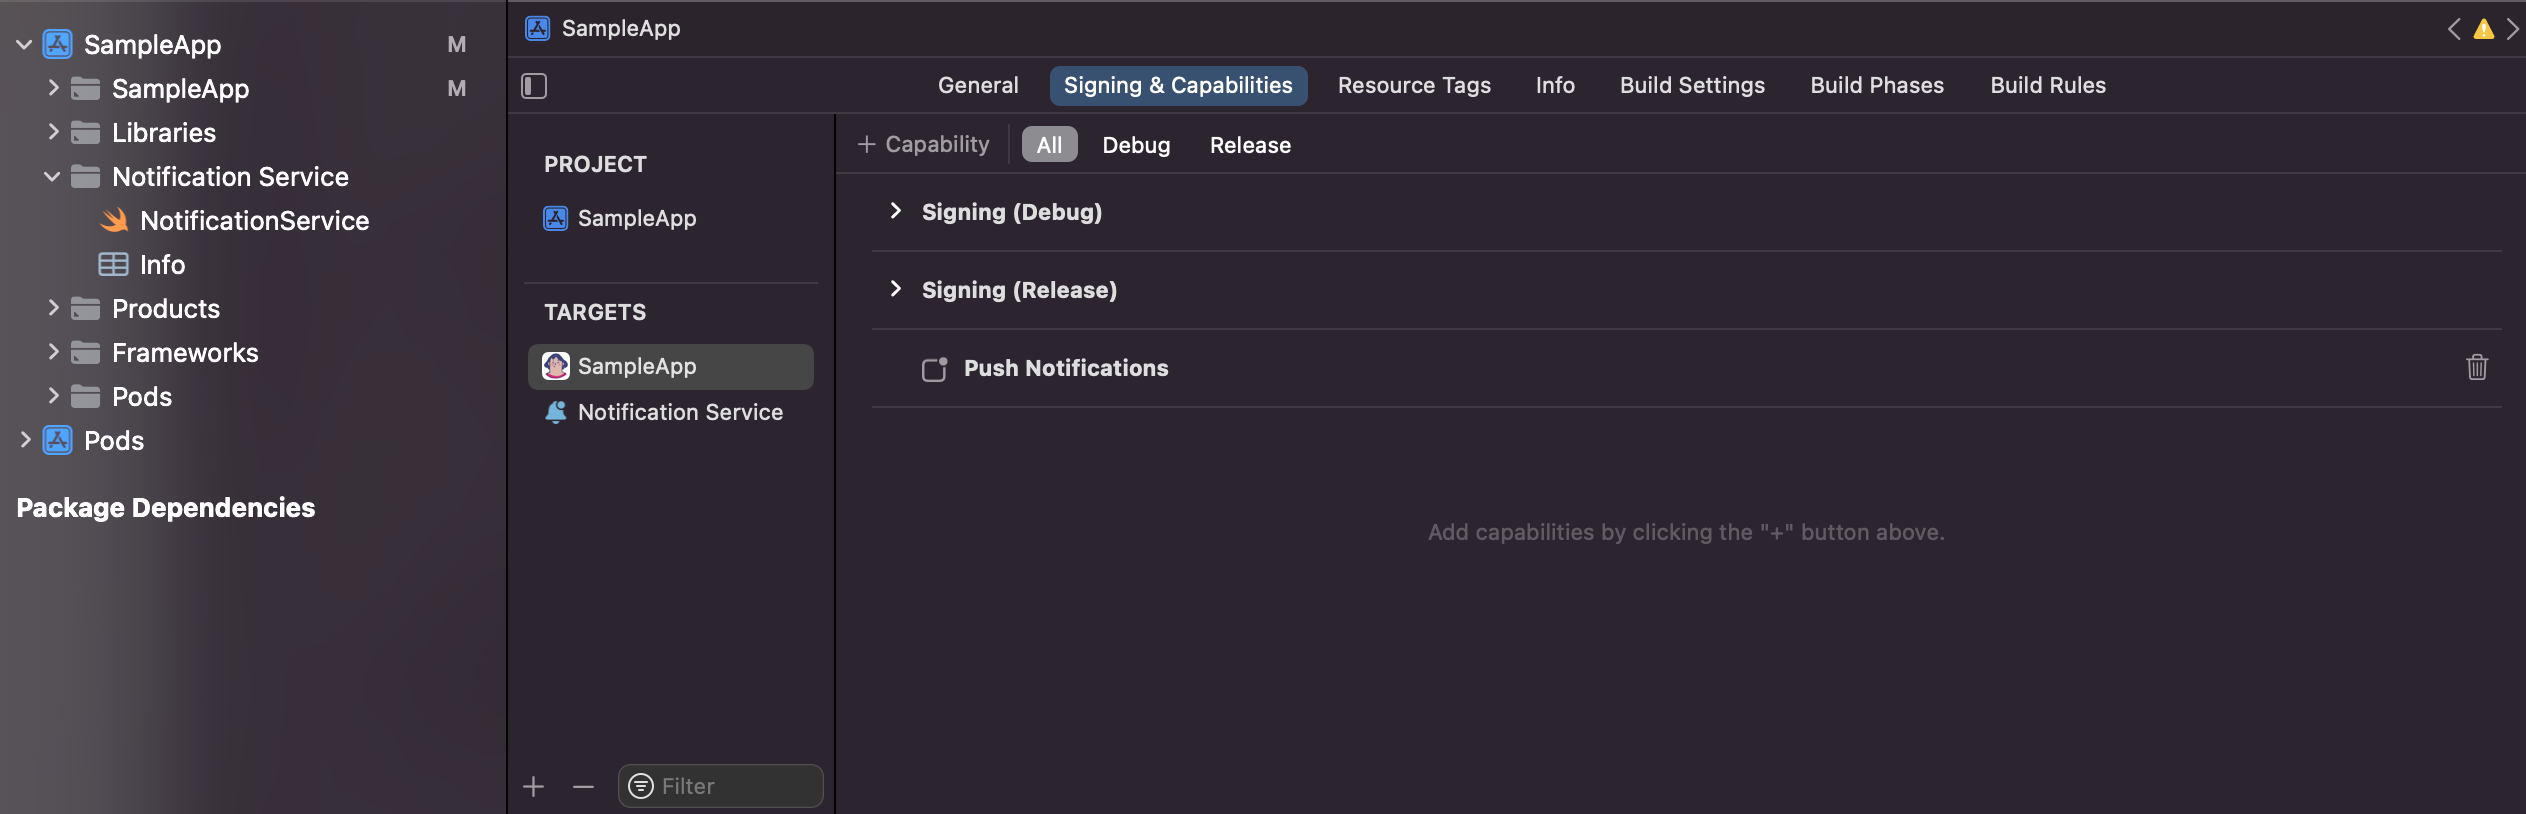
When you’re done, you’ll see Push Notifications added to your app’s capabilities. Now you’re ready to run the expo prebuild.
Update iOS dependencies
In some cases, we may make fixes in our iOS push packages that fix downstream issues in the Expo plugin. The command to update these packages depends on whether your Expo project uses a managed or bare workflow. For managed workflows, you can simply re-run the prebuild.
Managed workflow
expo prebuild --clean
# the --clean option is optional
Bare workflow
pod update --repo-update --project-directory=iosRich push payloads
When you send a push notification, your app will expect the payload below; you can use the Custom Payload option in the push editor. In the editor, you’ll select the type of device you want to send your message to: you can have separate payloads for Android and iOS.
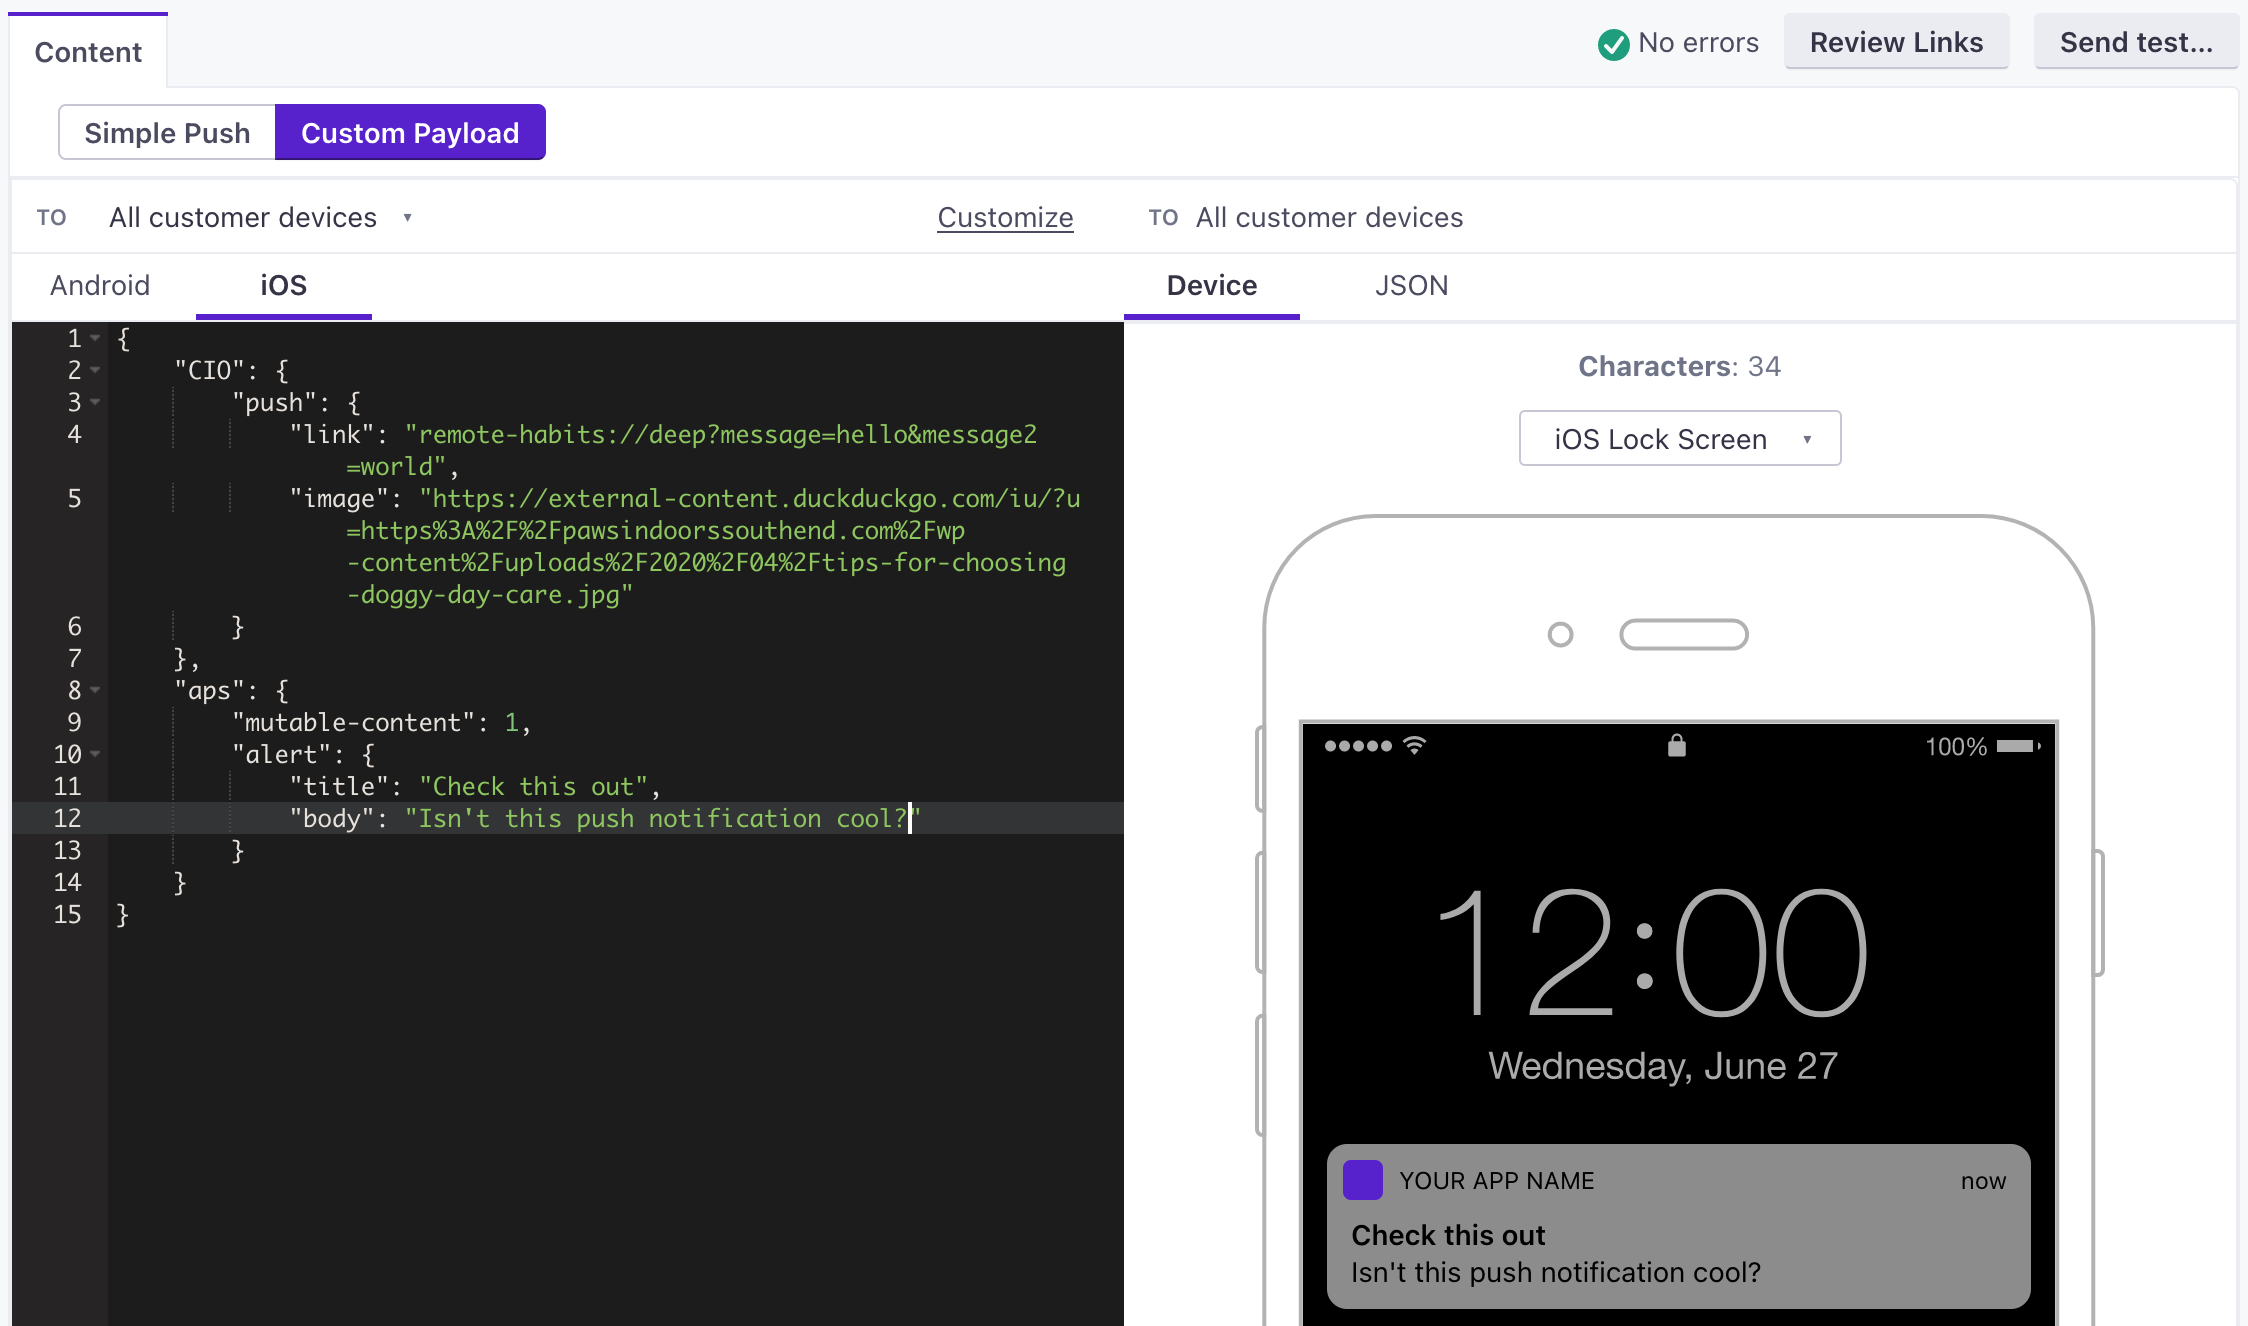
The top level of the payload changes slightly depending on your push provider, APNS or FCM. Otherwise, your JSON is split into two major objects:
- an
apsobject, which contains the standard aspects of a push—thealert.titleandalert.bodyof your message—and Apple’s push options. - a
CIOobject containing the rich aspects of your message that the SDK will interpret. At present, it containslinkandimagestrings.
iOS APNs
{
    "aps": {
        // basic iOS message and options go here
        "mutable-content": 1,
        "alert": {
            "title": "string", //(optional) The title of the notification.
            "body": "string" //(optional) The message you want to send.
        }
    },
    "CIO": {
        "push": {
            "link": "string", //generally a deep link, i.e. my-app:://...
            "image": "string" //HTTPS URL of your image, including file extension
        }
    }
}- A push payload intended for an iOS device.
- Contains options supported by the Customer.io SDK.
iOS FCM
{
  "message": {
    "apns": {
      "payload": {
        "aps": {
          // basic iOS message and options go here
          "mutable-content": 1,
          "alert": {
            "title": "string", //(optional) The title of the notification.
            "body": "string" //(optional) The message you want to send.
           }
        },
        "CIO": {
          "push": {
            "link": "string", //generally a deep link, i.e. my-app://... or https://yourwebsite.com/...
            "image": "string" //HTTPS URL of your image, including file extension
          }
        }
      },
      "headers": {
        // (optional) headers to send to the Apple Push Notification Service.
        "apns-priority": 10
      }
    }
  }
}- The base object for all FCM payloads.
- Defines a payload for iOS devices sent through Firebase Cloud Messaging (FCM).
- Contains a push payload.
- headersobjectHeaders defined by Apple's payload reference that you want to pass through FCM.
Sound in push notifications (iOS Only)
When you send a push notification to iOS devices that uses our SDK, you can opt to send the Default system sound or no sound at all. If your audience’s phone is set to vibrate, or they’ve disabled sound permissions for your app, the Default setting will cause the device to vibrate rather than playing a sound.
In most cases, you should use the Default sound setting to make sure your audience hears (or feels) your message. But, before you send sound, you should understand:
- Your app needs permission from your users to play sounds. This is done by your app, not our SDKs. Here’s an example from our iOS sample app showing how to request sound permissions.
- iOS users can go into System Settings and disable sound permissions for your app. Enabling the Default setting doesn’t guarantee that your audience hears a sound when your message is delivered!
Prompt users to opt-into push notifications
Your audience has to opt into push notifications. To display the native iOS and Android push notification permission prompt, you’ll use the CustomerIO.showPromptForPushNotifications method (available only in customerio-reactnative version >=2.2.0).
You can configure push notifications to request authorization for sounds and badges as well (only on iOS). If a user opts into push notifications, the CustomerIO.showPromptForPushNotifications method will return Granted, otherwise it returns Denied as a string. If the user already responded to the push authorization prompt, the current authorization status is returned as a string.
var options = {"ios" : {"sound" : true, "badge" : true}}
CustomerIO.showPromptForPushNotifications(options).then(status => {
  switch(status) {
    case "Granted":
     // Push permission is granted, your app can now receive push notifications
      break;
    case "Denied":
      // App is not authorized to receive push notifications
      // You might need to explain users why your app needs permission to receive push notifications
      break;
    case "NotDetermined":
      // Push permission status is not determined (Only for iOS)
      break;
  }
}).catch(error => {
  // Failed to show push permission prompt
  console.log(error)
})
Get a user’s permission status
To get a user’s current permission status, call the CustomerIO.getPushPermissionStatus() method. This returns a promise with the current status as a string.
CustomerIO.getPushPermissionStatus().then(status => {
  console.log("Push permission status is - " + status)
})
Test your implementation
Before you release your app, you should test your implementation. Use the payloads below to send a push in the Customer.io web app with a Custom Payload.
In both of the test payloads below, you should:
- Set the
linkto the deep link URL that you want to open when your tester taps your notification. - Set the
imageto the URL of an image you want to show in your notification. It’s important that the image URL starts withhttps://and nothttp://or the image might not show up.
APNs test payload
{
    "CIO": {
        "push": {
            "link": "remote-habits://deep?message=hello&message2=world",
            "image": "https://thumbs.dreamstime.com/b/bee-flower-27533578.jpg"
        }
    },
    "aps": {
        "mutable-content": 1,
        "alert": {
            "title": "Title of your push goes here!",
            "body": "Body of your push goes here!"
        }
    }
}
FCM test payload
{
    "message": {
        "apns": {
            "payload": {
                "CIO": {
                    "push": {
                        "link": "remote-habits://deep?message=hello&message2=world",
                        "image": "https://thumbs.dreamstime.com/b/bee-flower-27533578.jpg"
                    }
                },
                "aps": {
                    "mutable-content": 1,
                    "alert": {
                        "title": "Title of your push goes here!",
                        "body": "Body of your push goes here!"
                    }
                }
            }
        }
    }
}