

Node.js source
How it works
Our Node.js library helps you record source events from your node-side code. Requests from your Node.js server go to our servers, and we route your data to your destinations.
This library uses an internal queue so that your identify and track calls are fast and non-blocking. It also batches requests and flushes asynchronously to Customer.io’s servers.
Like our other libraries, you can log anonymous activity—track and page events—with an anonymousId. When you identify a person, you can pass the anonymousId and we’ll associate the anonymous activity with the identified person.
Getting Started
-
Go to Integrations. In the Directory tab, pick the Node.js Data In integration.
-
Give the source a Name and click Complete Setup. The name is simply a friendly name to help you find and recognize your source in Customer.io.
-
On your Node server, install the source:
JAVASCRIPT# npm npm install @customerio/cdp-analytics-node # yarn yarn add @customerio/cdp-analytics-node # pnpm pnpm install @customerio/cdp-analytics-node -
Use the
Analyticsconstructor and initialize Customer.io with your API Key. If you’re in our EU region, make sure you set thehostparameter tohttps://cdp-eu.customer.io.JAVASCRIPTimport { Analytics } from '@customerio/cdp-analytics-node' // or, if you use require: const { Analytics } = require('@customerio/cdp-analytics-node') // instantiation const cioanalytics = new Analytics({ writeKey: '<YOUR_API_KEY>' // if you're in our EU region // host: 'https://cdp-eu.customer.io', })This creates an instance of
Analyticsthat you can use to send data to Customer.io. The default initialization settings are production-ready and queue 20 messages before sending requests.
Now you’re ready to send requests to Customer.io. Check out our Pipelines API reference, or read further to see example requests and understand the types of requests you can make using our Node.js library.
As you work on your integration, you might want to use development settings.
If you’re in our EU data center
You’ll need to set the endpoint parameter to set our EU URL (https://cdp-eu.customer.io). Note that our EU regional endpoints account for the location of your data in Customer.io; they don’t account for the locations of your sources and destinations.
import { Analytics } from '@customerio/cdp-analytics-node'

const cioanalytics = new Analytics({
  writeKey: '<YOUR_API_KEY>'
  host: 'https://cdp-eu.customer.io',
})
Identify
You should call A key-value pair that you associate with a person or an object—like a person's name, the date they were created in your workspace, or a company's billing date etc. Use attributes to target people and personalize messages.identify when your customers create an account, log in, or otherwise identify themselves. The identify method tells you who the current website or app visitor is and lets you set or update unique traits
You can send an identify call with an anonymous ID and/or user ID. To associate anonymous activity with an identified person, send both IDs in a single call.
- Anonymous ID only: This assigns traits to a person before you know who they are.
- User ID only: Identifies a user and sets traits.
- Both user ID and anonymous ID: Associates the data sent in previous anonymous
page,track, andidentifycalls with the person you identify by user ID.
cioanalytics.identify({
  userId: '019mr8mf4r',
  traits: {
    name: 'Sid Singh',
    email: 'sid@example.com',
    plan: 'Enterprise',
    friends: 42
  }
});- userIdstringrequiredThe unique identifier for a person. This value should be unique across systems, so you recognize the same person in your sources _and_ destinations.
- anonymousIdstringA unique substitute for a User ID in cases when you don’t have an absolutely unique identifier. Our libraries generate this value automatically to help you track people before they sign up, log in, provide their email, etc.
- A dictionary of context about a source call/event, like the user’s IP address or locale. Context is automatically collected by our source libraries.
- Contains a list of booleans indicating the integrations that are enabled (true) or disabled (false). By default, all integrations are enabled (returning an empty object). Set
"All": falseto reverse this behavior. - messageIdstringA unique identifier for a Data Pipelines call, ensuring that each individual event is unique. This is set by Customer.io
- originalTimestampstring(date-time)In general, you can use
timestamprather than this field if you want to back-date events. This is the timestamp on the client device you invoke a call or the timestamp value you manually passed in a server-side library call. - sentAtstring(date-time)The ISO-8601 timestamp when a library sends an event to Data Pipelines.
- timestampstring(date-time)The ISO-8601 timestamp when the event originally took place. This is mostly useful when you backfill past events. If you're not backfilling data, you can leave this field empty and we'll use the current time or server time.
- Additional properties that you know about a person. We've listed some common/reserved traits below, but you can add any traits that you might use in another system.
Merge anonymous activity into a person
Unlike our client-side JavaScript library, server-side libraries and the API don’t assign an anonymous ID automatically. You assign an anonymous ID to track a person’s anonymous track and page calls. Then when you identify the user, you pass the anonymous ID with their user ID and Customer.io will merge the last 30 days of anonymous activity with the identified person.
You can’t reuse an anonymous ID after it’s merged into a person. Once an identify call links an anonymous ID to a user ID, Customer.io merges that ID’s anonymous activity into the person and marks the anonymous ID as used—any events sent under the same anonymous ID afterward stay anonymous and won’t link to the person.
If a person generates new anonymous activity after you’ve identified them—for example, they log out and keep browsing before logging back in—assign a new anonymous ID for that activity, then send another identify call with their user ID and the new anonymous ID to merge it into the same profile.
However, there is a 5 minute window after you merge anonymous activity into a person where you can still merge anonymous activity using the same anonymous ID. This allows you to merge anonymous activity in a batch or in rapid succession without worrying about the order of your calls.
// merge anonymous activity with an identified profile
cioanalytics.identify({
  userId: '019mr8mf4r',
  anonymousId: '4567-oxcf-1234',
});
Track
The track method tells us about actions people take—the events people perform—on your site. Every track call represents an event.
You should track your audience’s activities with events both as performance indicators and so you can respond to your audience’s activities with automations An automated process people enter when they meet your criteria. An automation has a trigger (who enters, and when), a workflow of messages and actions, and exit criteria (when they leave). A person's path through the workflow is their journey.
You can send events with an anonymousId or a userId. Calls that you make with an anonymousId are associated with a userId when you identify someone by their userId.
Track calls require an event name describing what a person did. And they generally include a series of properties, providing additional information about the event. Beyond that, we’ve provided a complete schema for writable event fields below, and you can find more information in our API documentation.
track with userId
cioanalytics.track({
  userId: '019mr8mf4r',
  event: 'added_to_cart',
  properties: {
    product: "shoes",
    revenue: 39.95,
    qty: 1,
    size: 9
  }
});
track with anonymousId
cioanalytics.track({
  anonymousId: '48d213bb-95c3-4f8d-af97-86b2b404dcfe',
  event: 'added_to_cart',
  properties: {
    product: "shoes",
    revenue: 39.95,
    qty: 1,
    size: 9
  }
});- eventstringrequiredThe name of the event
- userIdstringrequiredThe unique identifier for a person. This value should be unique across systems, so you recognize the same person in your sources _and_ destinations.
- A dictionary of context about a source call/event, like the user’s IP address or locale. Context is automatically collected by our source libraries.A dictionary of context about a source call/event, like the user’s IP address or locale. Context is automatically collected by our source libraries.
- activebooleanWhether a user is active.
This is usually used when you send an .identify() call to update the traits independently of when you've “last seen” a user.
- Contains information about the campaign that resulted in the API call, gathered from, or mapping to, UTM parameters (e.g.
utm_source). - channelstringThe channel the event originated from.Accepted values:
browser,server,mobile - ipstringThe user's IP address. This isn't captured by our libraries, but by our servers when we receive client-side events (like from our JavaScript source).
- localestringThe locale string for the current user, e.g.
en-US. - Contains information about the current page in the browser. This is automatically collected by our JavaScript source.
- userAgentstringThe user agent of the device making the request
- Contains a list of booleans indicating the integrations that are enabled (true) or disabled (false). By default, all integrations are enabled (returning an empty object). Set
"All": falseto reverse this behavior.- Enabled/Disabled integrations *boolean
- messageIdstringA unique identifier for a Data Pipelines call, ensuring that each individual event is unique. This is set by Customer.io
- originalTimestampstring(date-time)In general, you can use
timestamprather than this field if you want to back-date events. This is the timestamp on the client device you invoke a call or the timestamp value you manually passed in a server-side library call. - Additional properties for your event.
- Event Properties *any typeAdditional properties that you want to capture in the event. These can take any JSON shape.
- sentAtstring(date-time)The ISO-8601 timestamp when a library sends an event to Data Pipelines.
- timestampstring(date-time)The ISO-8601 timestamp when the event originally took place. This is mostly useful when you backfill past events. If you're not backfilling data, you can leave this field empty and we'll use the current time or server time.
Enable automatic geolocation support
You can automatically geolocate people when you identify them and pass their IP addresses in the context.ip field in your identify requests. This helps you gather information about your audience’s location and time zone so you can schedule messages at the right times or send messages relevant to their communities.
If you’ve already set up your integration to capture IP addresses, and you’ve enabled the workspace-level Automatic Geolocation Data Collection setting, you can enable geolocation for your integration.
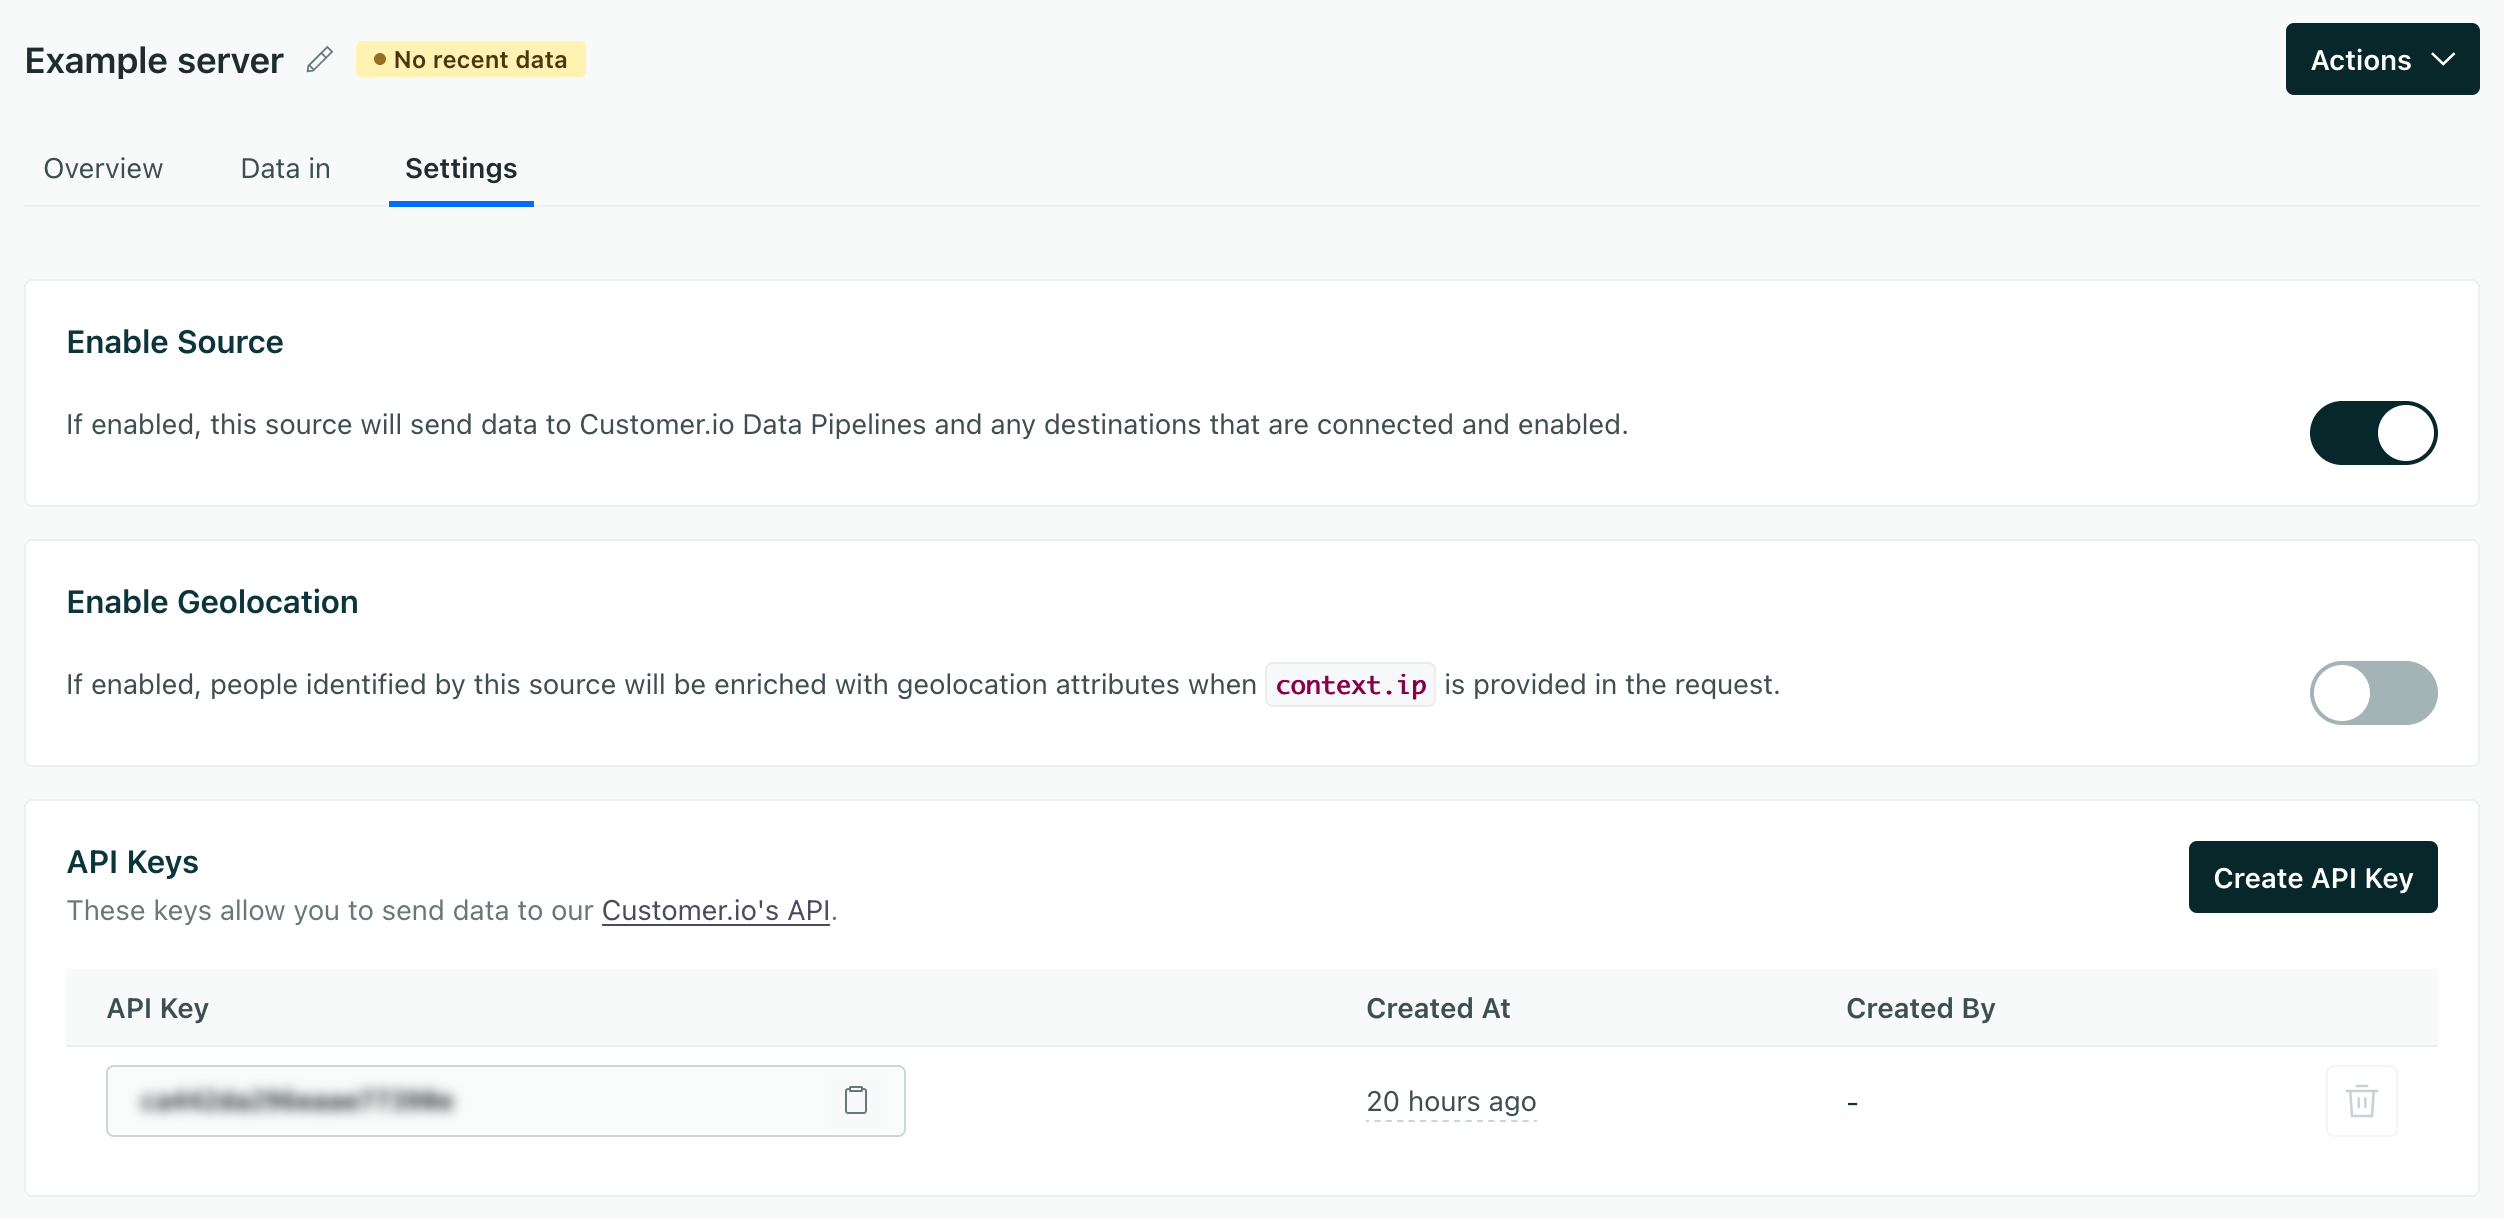
After you set up your integration, go to your integration’s Settings tab and turn on the Enable Geolocation setting.
Page
The Page method records page views on your website, along with optional extra information about the page a person visited.
If you’re using Customer.io’s client-side set up in combination with the Node.js library, page calls are already tracked for you by default on any page that loads the client-side script.
But, if you have a single page app or you don’t use our JavaScript client library on your website, you’ll need to send your own page calls.
cioanalytics.page({
  userId: '019mr8mf4r',
  category: 'Docs',
  name: 'Customer.io CDP',
  properties: {
    url: 'https://customer.io/cdp/',
    path: '/cdp/',
    title: 'Customer.io CDP',
    referrer: 'https://customer.io'
  }
});- userIdstringrequiredThe unique identifier for a person. This value should be unique across systems, so you recognize the same person in your sources _and_ destinations.
- A dictionary of context about a source call/event, like the user’s IP address or locale. Context is automatically collected by our source libraries.
- activebooleanWhether a user is active.
This is usually used when you send an .identify() call to update the traits independently of when you've “last seen” a user.
- Contains information about the campaign that resulted in the API call, gathered from, or mapping to, UTM parameters (e.g.
utm_source). - channelstringThe channel the event originated from.Accepted values:
browser,server,mobile - ipstringThe user's IP address. This isn't captured by our libraries, but by our servers when we receive client-side events (like from our JavaScript source).
- localestringThe locale string for the current user, e.g.
en-US. - Contains information about the current page in the browser. This is automatically collected by our JavaScript source.
- userAgentstringThe user agent of the device making the request
- Contains a list of booleans indicating the integrations that are enabled (true) or disabled (false). By default, all integrations are enabled (returning an empty object). Set
"All": falseto reverse this behavior.- Enabled/Disabled integrations *boolean
- messageIdstringA unique identifier for a Data Pipelines call, ensuring that each individual event is unique. This is set by Customer.io
- namestringThe name of the page.
- originalTimestampstring(date-time)In general, you can use
timestamprather than this field if you want to back-date events. This is the timestamp on the client device you invoke a call or the timestamp value you manually passed in a server-side library call. - Additional
pageproperties. Analytics.js automatically collectsurl,title,referrer,path, andsearchproperties. But, if you use our other sources or you write your own integration, you should consider sending these properties yourself. Destination actions that takepageevents often rely on theurlandtitleproperties.- categorystringThe category of the page. This might be useful if you have a single page routes or have a flattened URL structure.
- pathstringThe path of the page. This defaults to
location.pathname, but can be overridden. - referrerstringThe referrer of the page, if applicable. This defaults to
document.referrer, but can be overridden. - searchstringThe search query in the URL, if present. This defaults to
location.search, but can be overridden. - titlestringThe title of the page. This defaults to
document.title, but can be overridden. - urlstringThe URL of the page. This defaults to a canonical url if available, and falls back to
document.location.href. - Page Properties *any type
- sentAtstring(date-time)The ISO-8601 timestamp when a library sends an event to Data Pipelines.
- timestampstring(date-time)The ISO-8601 timestamp when the event originally took place. This is mostly useful when you backfill past events. If you're not backfilling data, you can leave this field empty and we'll use the current time or server time.
Group
The Group method associates an identified person with a group—like a company, organization, project, online class or any other collective noun you come up with for the same concept. In Customer.io Journeys, we call groups objects An object is a non-person entity that you can associate with one or more people—like a company, account, or online course.
Group calls are useful for integrations where you maintain relationships between people and larger organizations, like in Customer.io! In Customer.io Journeys, you can store groups as objects An object is a non-person entity that you can associate with one or more people—like a company, account, or online course.
Find more details about group, including the group payload, in our API spec.
cioanalytics.group({
  userId: '019mr8mf4r',
  groupId: '56',
  traits: {
    name: 'Initech',
    description: 'Accounting Software'
  }
});- groupIdstringrequiredID of the group
- A dictionary of context about a source call/event, like the user’s IP address or locale. Context is automatically collected by our source libraries.A dictionary of context about a source call/event, like the user’s IP address or locale. Context is automatically collected by our source libraries.
- activebooleanWhether a user is active.
This is usually used when you send an .identify() call to update the traits independently of when you've “last seen” a user.
- Contains information about the campaign that resulted in the API call, gathered from, or mapping to, UTM parameters (e.g.
utm_source). - channelstringThe channel the event originated from.Accepted values:
browser,server,mobile - ipstringThe user's IP address. This isn't captured by our libraries, but by our servers when we receive client-side events (like from our JavaScript source).
- localestringThe locale string for the current user, e.g.
en-US. - Contains information about the current page in the browser. This is automatically collected by our JavaScript source.
- userAgentstringThe user agent of the device making the request
- Contains a list of booleans indicating the integrations that are enabled (true) or disabled (false). By default, all integrations are enabled (returning an empty object). Set
"All": falseto reverse this behavior.- Enabled/Disabled integrations *boolean
- messageIdstringA unique identifier for a Data Pipelines call, ensuring that each individual event is unique. This is set by Customer.io
- originalTimestampstring(date-time)In general, you can use
timestamprather than this field if you want to back-date events. This is the timestamp on the client device you invoke a call or the timestamp value you manually passed in a server-side library call. - sentAtstring(date-time)The ISO-8601 timestamp when a library sends an event to Data Pipelines.
- timestampstring(date-time)The ISO-8601 timestamp when the event originally took place. This is mostly useful when you backfill past events. If you're not backfilling data, you can leave this field empty and we'll use the current time or server time.
- Additional information about the group.
- objectTypeIdstringIf you use Customer.io Journeys as a destination, this value is the type of group/object your group belongs to; object type IDs are stringified integers. If you don't include this value, we assume the object type ID is
1. See objects in Customer.io Journeys for more information. - relationshipAttributesobjectAttributes that you want to set for the relationship between the person and the group.
- Group Traits *any type
- userIdstringThe unique identifier for a person. This value should be unique across systems, so you recognize the same person in your sources _and_ destinations.
Alias
The Alias method combines two previously unassociated user identities. Some integrations automatically reconcile people with different identifiers based on whether you send anonymousId, userId, or another trait that the integration expects to be unique. But for integrations that don’t, you may need to send alias requests to do this.
In general, you won’t need to use the alias call; we try to handle user identification gracefully so you don’t need to merge people. But you may need to send alias calls to manage user identities in some data-out integrations.
For example, in Mixpanel it’s used to associate an anonymous user with an identified user once they sign up.
Here’s how you might use the alias call. In this case, we start with an anonymous_user and switch to an email address when a person provides their userId.
// the anonymous user does actions ...
cioanalytics.track({ userId: 'anonymous_user', event: 'Anonymous Event' })
// the anonymous user signs up and is aliased
cioanalytics.alias({ previousId: 'anonymous_user', userId: 'identified@example.com' })
// the identified user is identified
cioanalytics.identify({ userId: 'identified@example.com', traits: { plan: 'Free' } })
// the identified user does actions ...
cioanalytics.track({ userId: 'identified@example.com', event: 'Identified Action' })- previousIdstringrequiredThe anonymousId or userId value that you want to merge into the canonical profile.
- userIdstringrequiredThe userId that you want to keep. This is required if you haven't already identified someone with one of our web or server-side libraries.
Configuration
The first argument for the Analytics constructor is a dictionary of configuration settings, including your API key and optional settings.
var cioanalytics = new Analytics({
  writeKey: 'YOUR_API_KEY',
  maxEventsInBatch: 20,
  flushInterval: 10000,
});| Setting | Details |
|---|---|
maxEventsInBatch | (Number) The number of messages to enqueue before flushing. |
flushInterval | (Number) The number of milliseconds to wait before flushing the queue automatically. |
Error Handling
You can listen for error events on the Analytics instance. Errors contain the following properties:
code: The code of the error.reason: The error, like an HTTP error, network error, etc.ctx: The context object (for delivery failures).
const { Analytics } = require('@customerio/cdp-analytics-node');

const client = new Analytics({ writeKey: 'api key' });

// Listen to the 'error' event
client.on('error', (err) => {
  console.error('cdp-analytics-node error occurred:');
  console.error('Code:', err.code);
  console.error('Reason:', err.reason);
  if (err.ctx) {
    console.error('Context:', err.ctx);
  }
});

// Now you can make analytics calls
client.track({
  userId: '123',
  event: 'Test Event'
});
Development
While integrating with Customer.io, you might want to make our library flush after every event or call. This can help you test your implementation and make sure that all of your calls work properly before you start making calls from your production environment.
var cioanalytics = new Analytics({ writeKey: 'YOUR_API_KEY', maxEventsInBatch: 1 });Selecting Destinations
You can pass an integrations object to outgoing calls to turn certain destinations on or off. By default all destinations are enabled. Passing false for an integration disables the call to that destination.
You might want to do this for things like alias calls, which aren’t supported by all destinations. All: false disables all destinations except the ones you explicitly specify.
cioanalytics.track({
  event: 'Membership Upgraded',
  userId: '97234974',
  integrations: {
    'All': false,
    'Mixpanel': true,
    'Google Analytics': false
  }
})
Destination flags are case sensitive. You’ll find each integration’s name at the top of each integration’s page in our documentation.
Backfilling historical data
You can backfill data by adding a timestamp to your calls. This can be helpful if you’ve just switched to Customer.io or you’re getting started with Customer.io and want to send historical data.
You can only do this for destinations that accept timestamped data (most analytics tools like Mixpanel and Amplitude do). The notable destination that doesn’t support timestamped data is Google Analytics.
Batching
Our libraries are built to support high performance environments. It’s safe to use this library on a web server that serves hundreds of requests per second.
But every method you invoke does not result in an HTTP request. Instead, we queue requests in memory and then flush them in batches, which allows for more efficient operation.
By default, our Node.js source library flushes:
- The very first call.
- Every 20 messages (controlled by
options.maxEventsInBatch). - If 10 seconds pass after the previous flush (controlled by
options.flushInterval)
There is a maximum of 500KB per batch request and 32KB per call. If you don’t want to batch messages, you can turn batching off by setting the maxEventsInBatch option to 1.
Batching means that your message might not get sent right away. Every method call takes an optional callback, which you can use to know when a particular message is flushed from the queue.
cioanalytics.track({
  userId: '019mr8mf4r',
  event: 'Ultimate Played'
}, function(err, batch){
  if (err) // There was an error flushing your message...
  // Your message was successfully flushed!
});
Serverless applications
When using the library from serverless applications such as AWS Lambda, Cloudflare Workers or Vercel Functions, you should invoke the closeAndFlush method to process all data before your lambda exits or is suspended.
Make sure you create the cioanalytics object and call the closeAndFlush method from the handler. When you call closeAndFlush, you’ll no longer be able to use the cioanalytics object to send messages.
export default async function handler(req, res) {
  var cioanalytics = new Analytics({ writeKey: 'YOUR_API_KEY' });

  await cioanalytics.track({
    userId: '019mr8mf4r',
    event: 'Ultimate Played'
  });

  await cioanalytics.closeAndFlush();
  console.log('Flushed, and now this program can exit!');
}
Flush long running processes
Because we queue messages, you’ll want to capture interruptions (for example, a server restart) and call closeAndFlush so that you don’t inadvertently drop requests when you need to perform maintenance on your server.
import { randomUUID } from 'crypto';
import Analytics from 'cdp-analytics-node'

const API_KEY = '...';

const cioanalytics = new Analytics({ writeKey: API_KEY, maxEventsInBatch: 10 });

cioanalytics.track({
  anonymousId: randomUUID(),
  event: 'Test event',
  properties: {
    name: 'Test event',
    timestamp: new Date()
  }
});

const exitGracefully = async (code) => {
  console.log('Flushing events');
  await cioanalytics.closeAndFlush(function(err, batch) {
    console.log('Flushed, and now this program can exit!');
    process.exit(code);
  });
};

[
  'beforeExit', 'uncaughtException', 'unhandledRejection',
  'SIGHUP', 'SIGINT', 'SIGQUIT', 'SIGILL', 'SIGTRAP',
  'SIGABRT','SIGBUS', 'SIGFPE', 'SIGUSR1', 'SIGSEGV',
  'SIGUSR2', 'SIGTERM',
].forEach(evt => process.on(evt, exitGracefully));

function logEvery2Seconds(i) {
    setTimeout(() => {
        console.log('Infinite Loop Test n:', i);
        logEvery2Seconds(++i);
    }, 2000);
}

logEvery2Seconds(0);
Multiple Clients
Different parts of your application may require different types of batching, or even sending to multiple Customer.io sources. In these cases, you can initialize multiple instances of Analytics with different settings!
var Analytics = require('cdp-analytics-node');
var marketingAnalytics = new Analytics({ writeKey: 'MARKETING_API_KEY' });
var appAnalytics = new Analytics({ writeKey: 'APP_API_KEY' });