

Object types
An object type defines the kind of one-to-many relationship you want to set, like Accounts, Employers, or Job Postings. The first three types appear in the side nav under People. If you have more than three, we’ll nest all of your object types under Custom Objects. In our API, we identify object types as integers starting at 1.
The number of object types you can use per workspace depends on your plan. Essentials plans include 2 object types per workspace; premium and enterprise plans include 10 per workspace. Disabled object types do not count toward the limit. If you create an object type after a workspace reaches its limit, it is automatically disabled. You can enable and disable object types in Settings > Workspace Settings > Custom Objects.
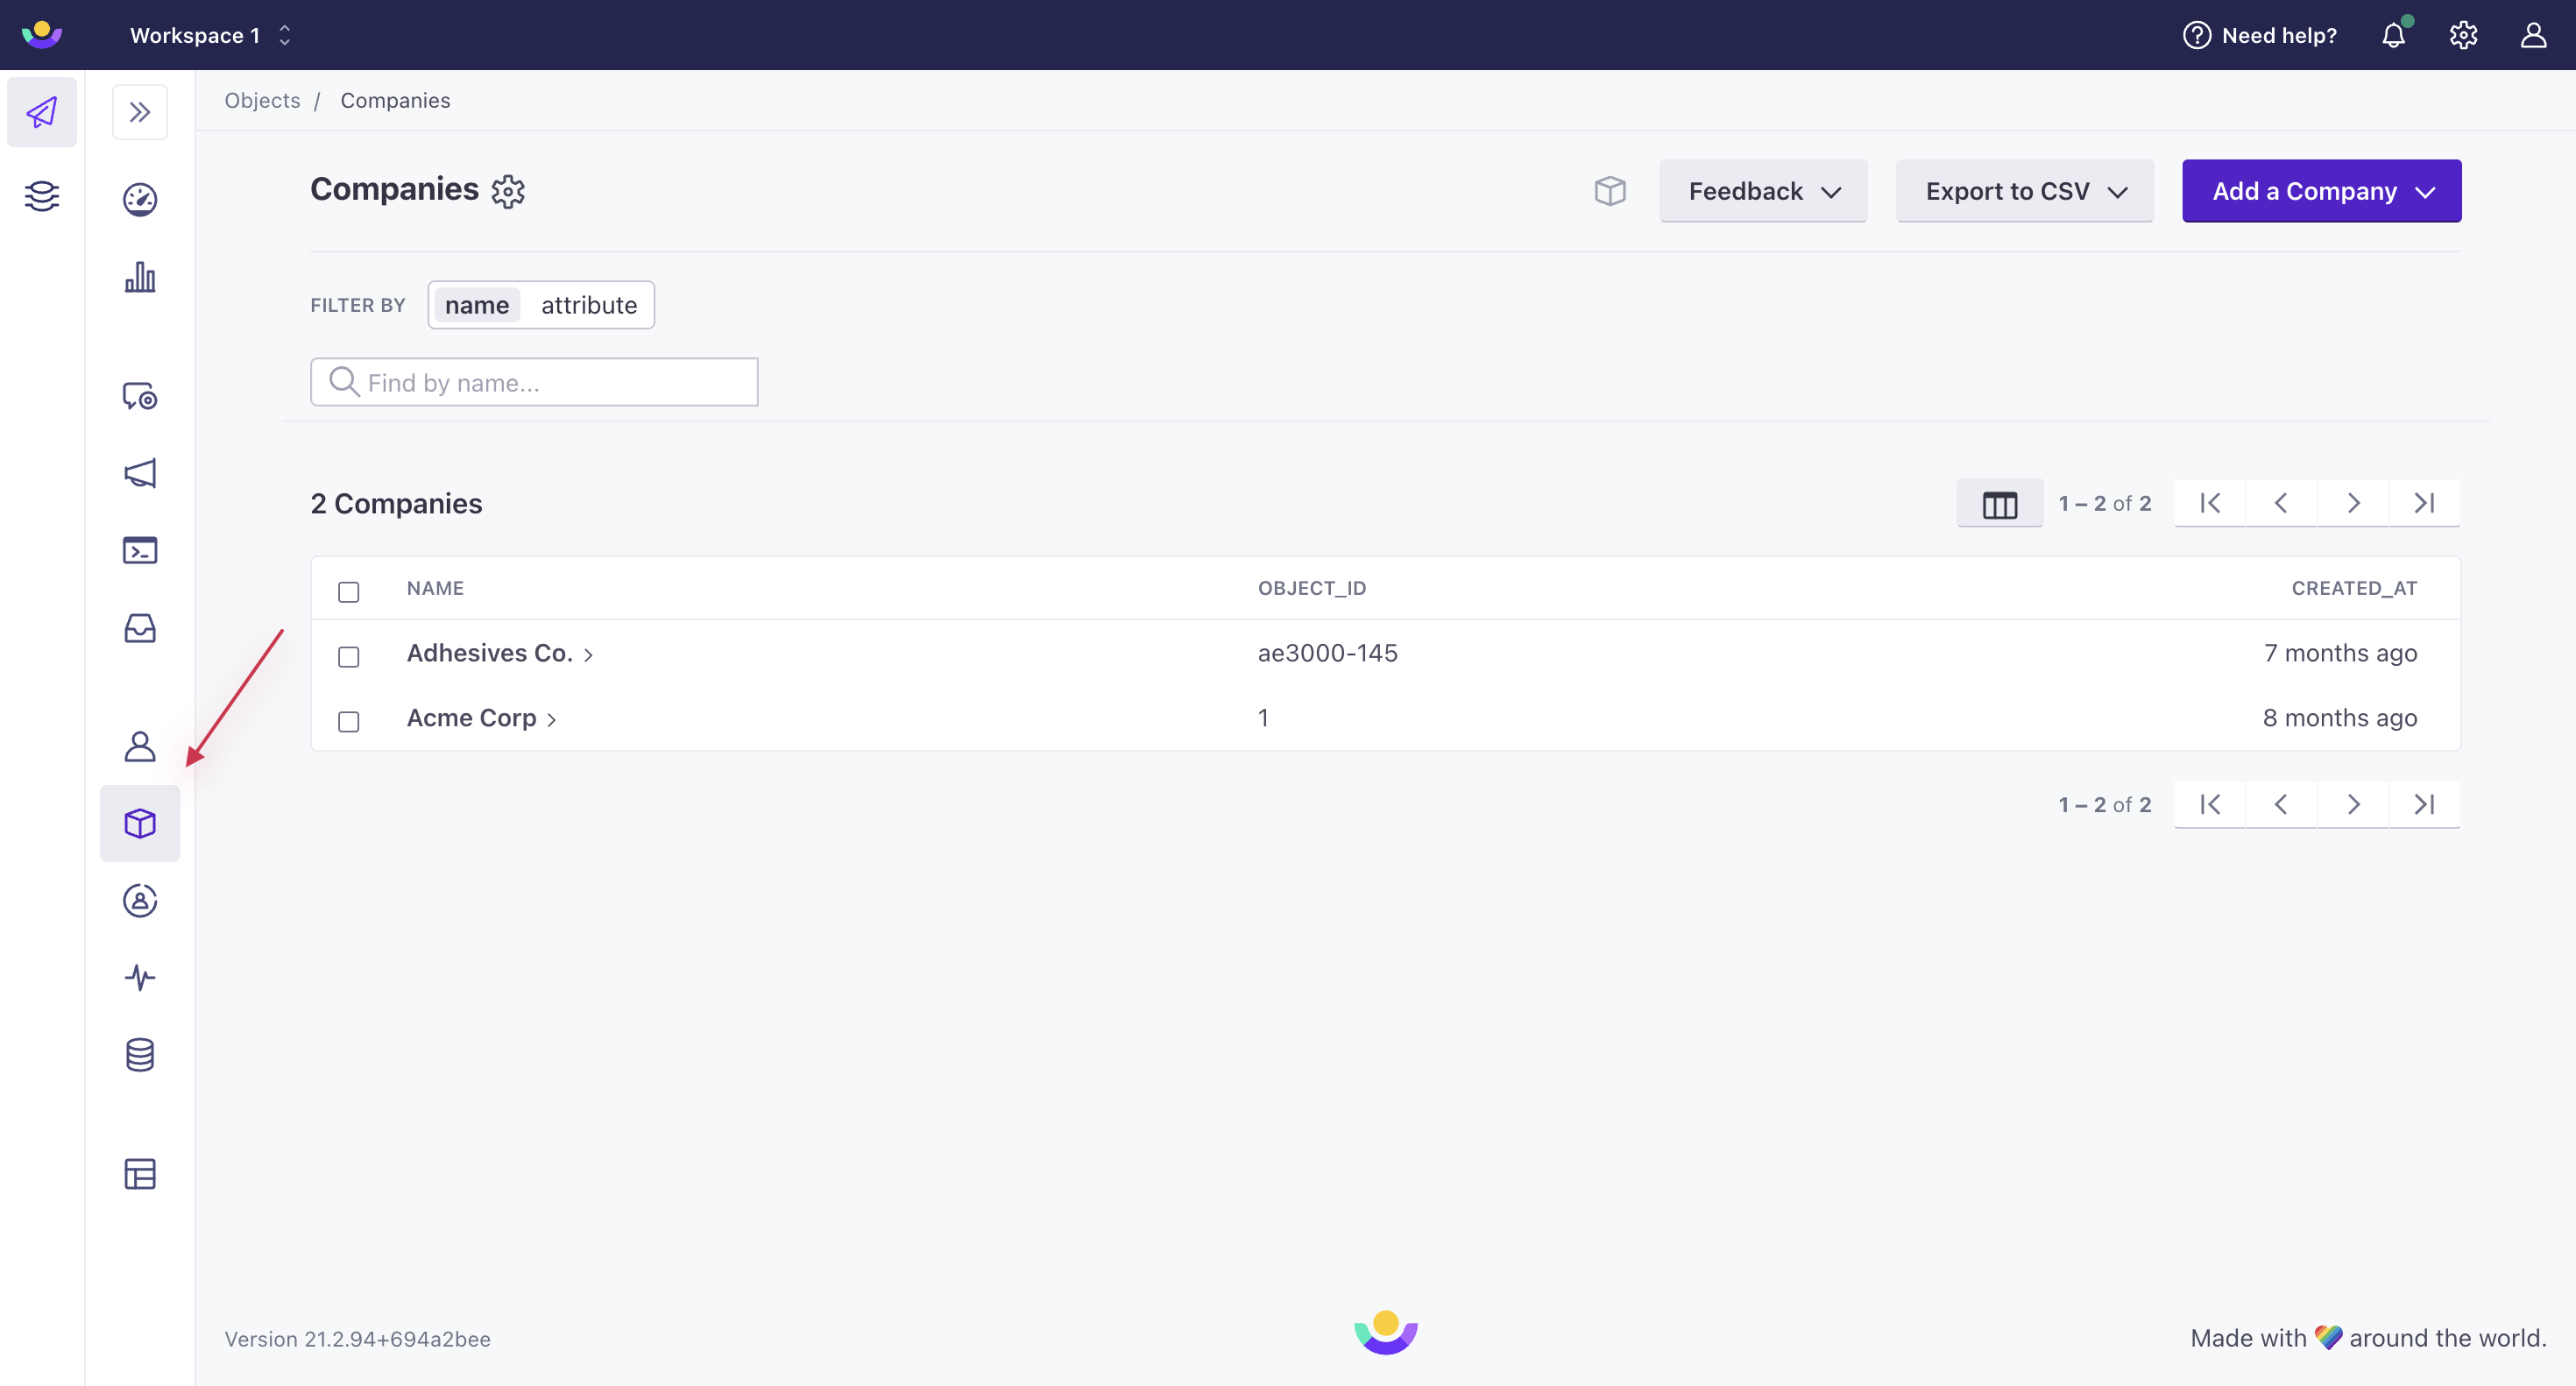
In the example above, the object type is Companies, which has 6 objects/individual companies.
Each object type gets its own object_type_id, and you’ll set an object_id for each object. An object_id must be unique within a type, not across types. For example, object types 1 and 2 could each have an object identifier of a.
Define a custom object type
Remember, an object type helps you differentiate groups of objects. Customer.io generates a unique, immutable object_type_id. You can find this value on the Custom objects page in Workspace Settings. While we define the object_type_id, you define the object_id. You’ll use this value to reference objects belonging to your new type.
-
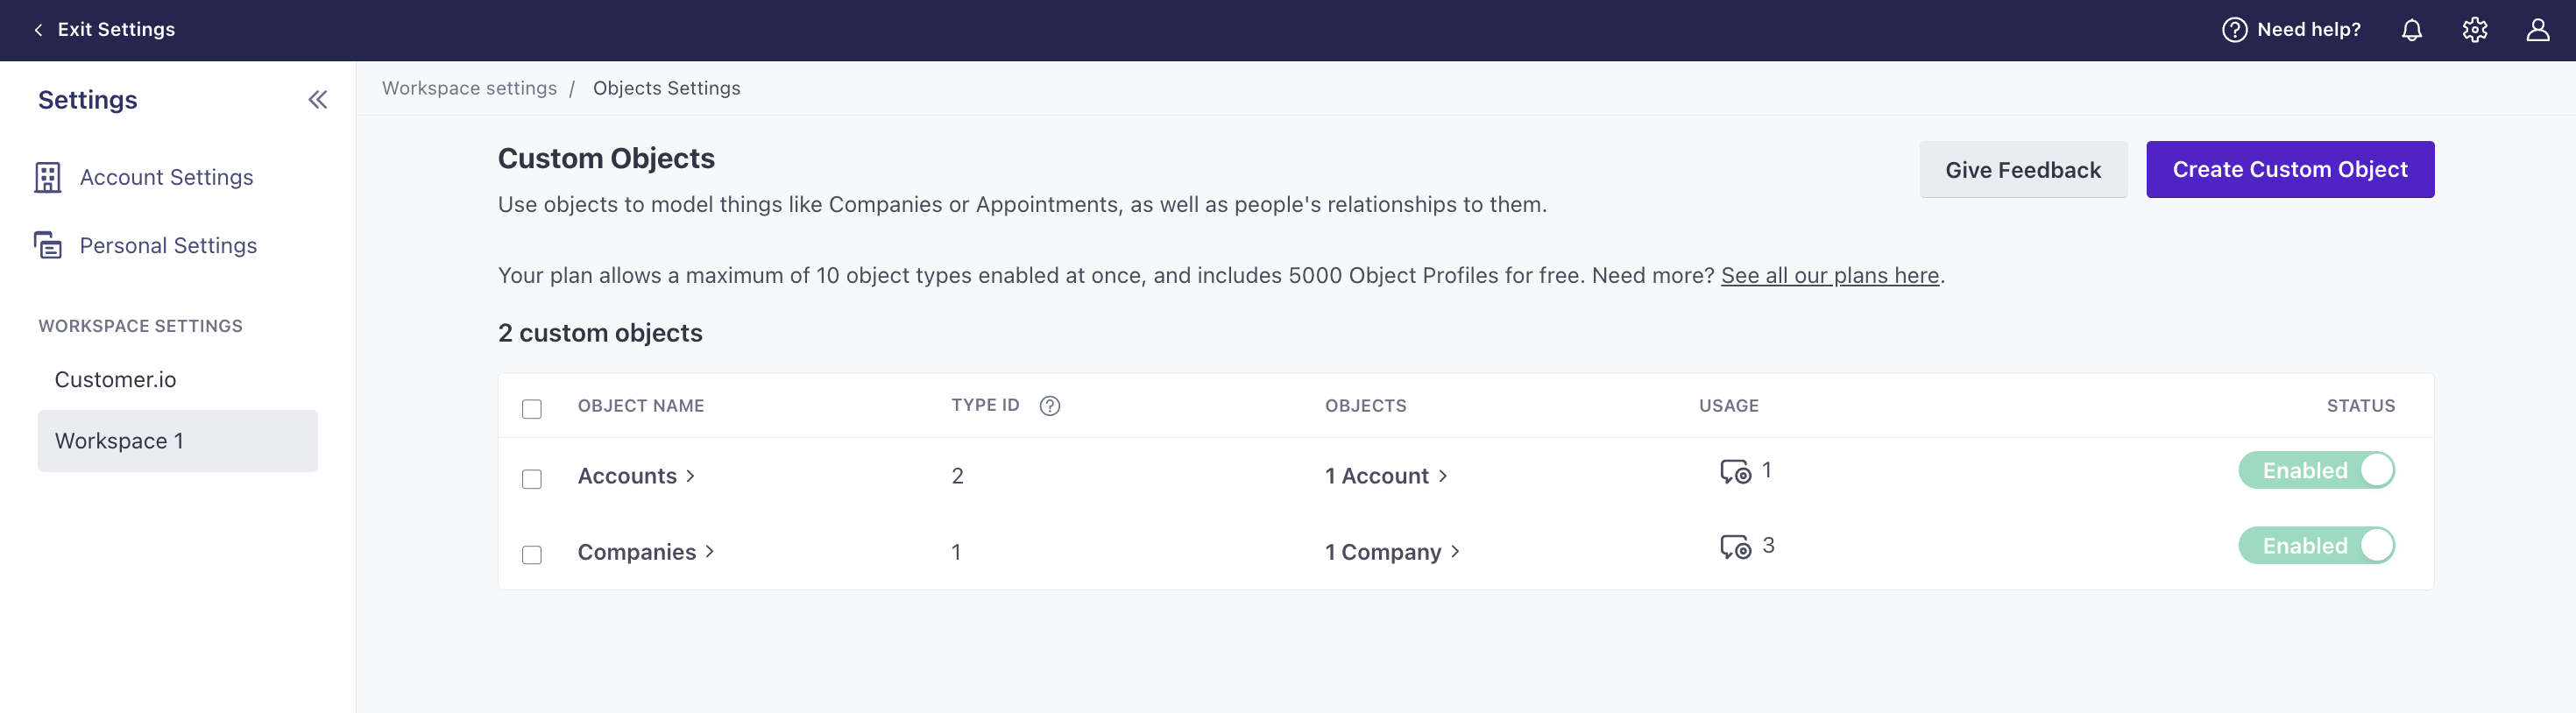
Go to Settings > Workspace Settings, and select Custom Objects.
-
Click Create Custom Object.
-
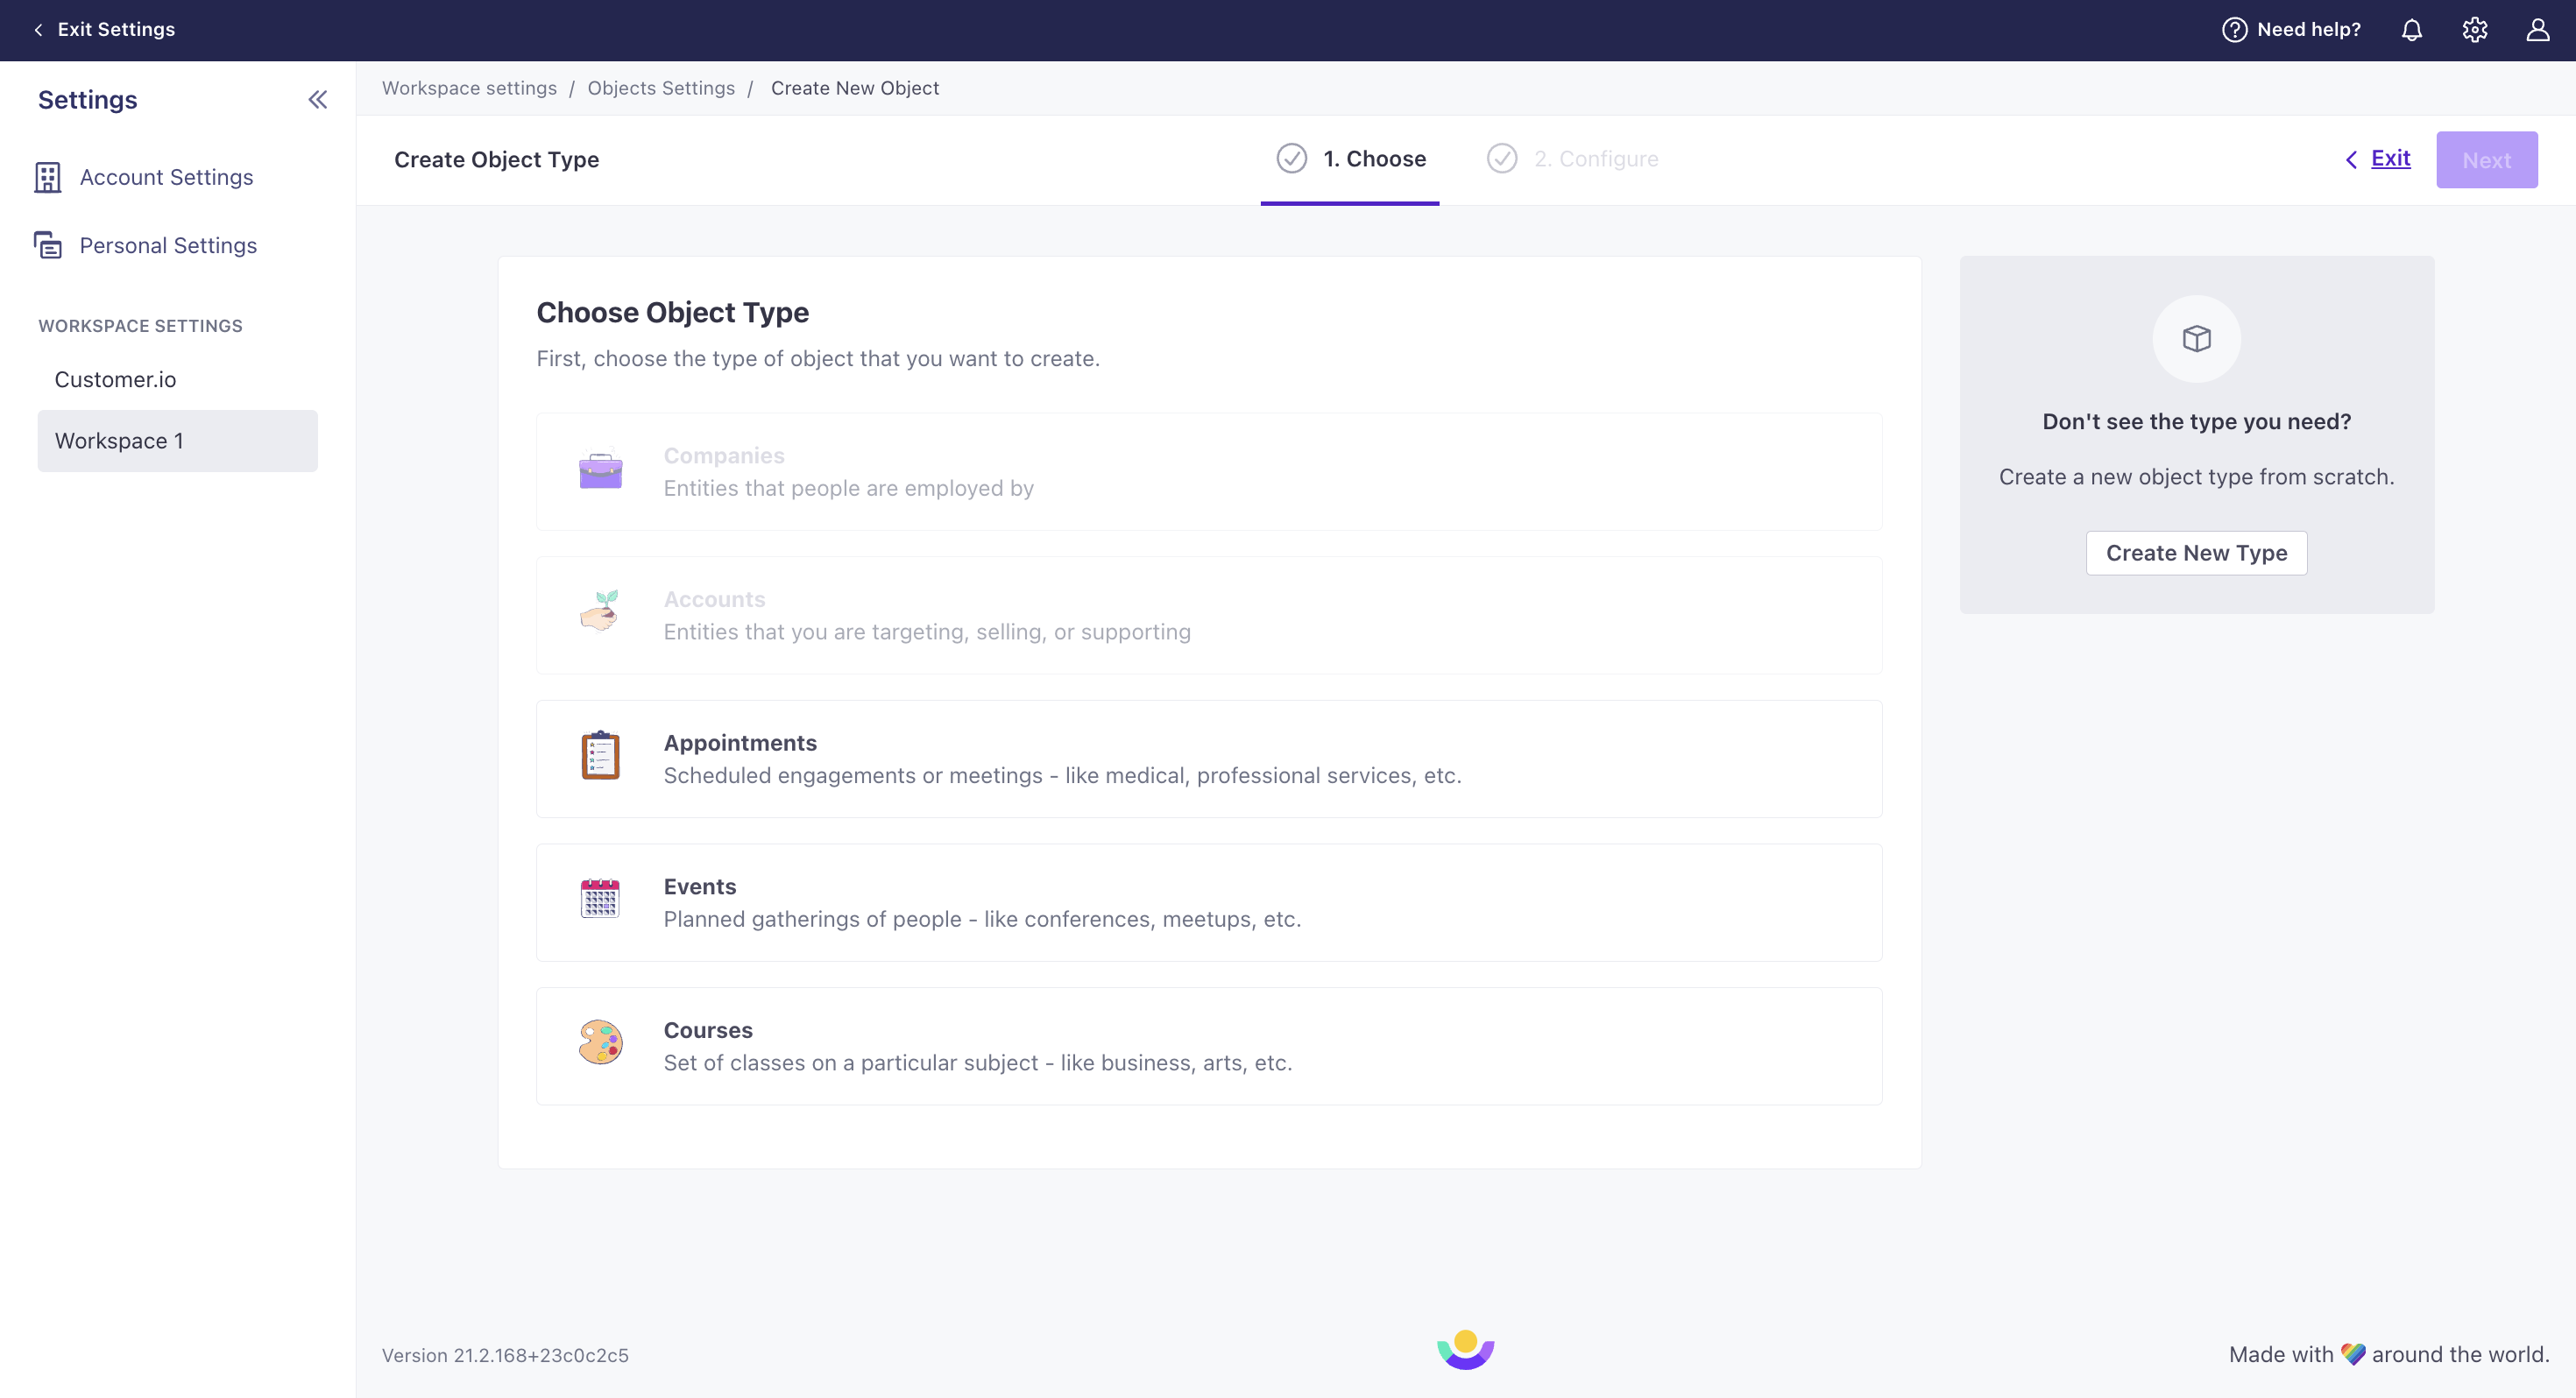
Choose your object type on the left or create your own on the right.
-
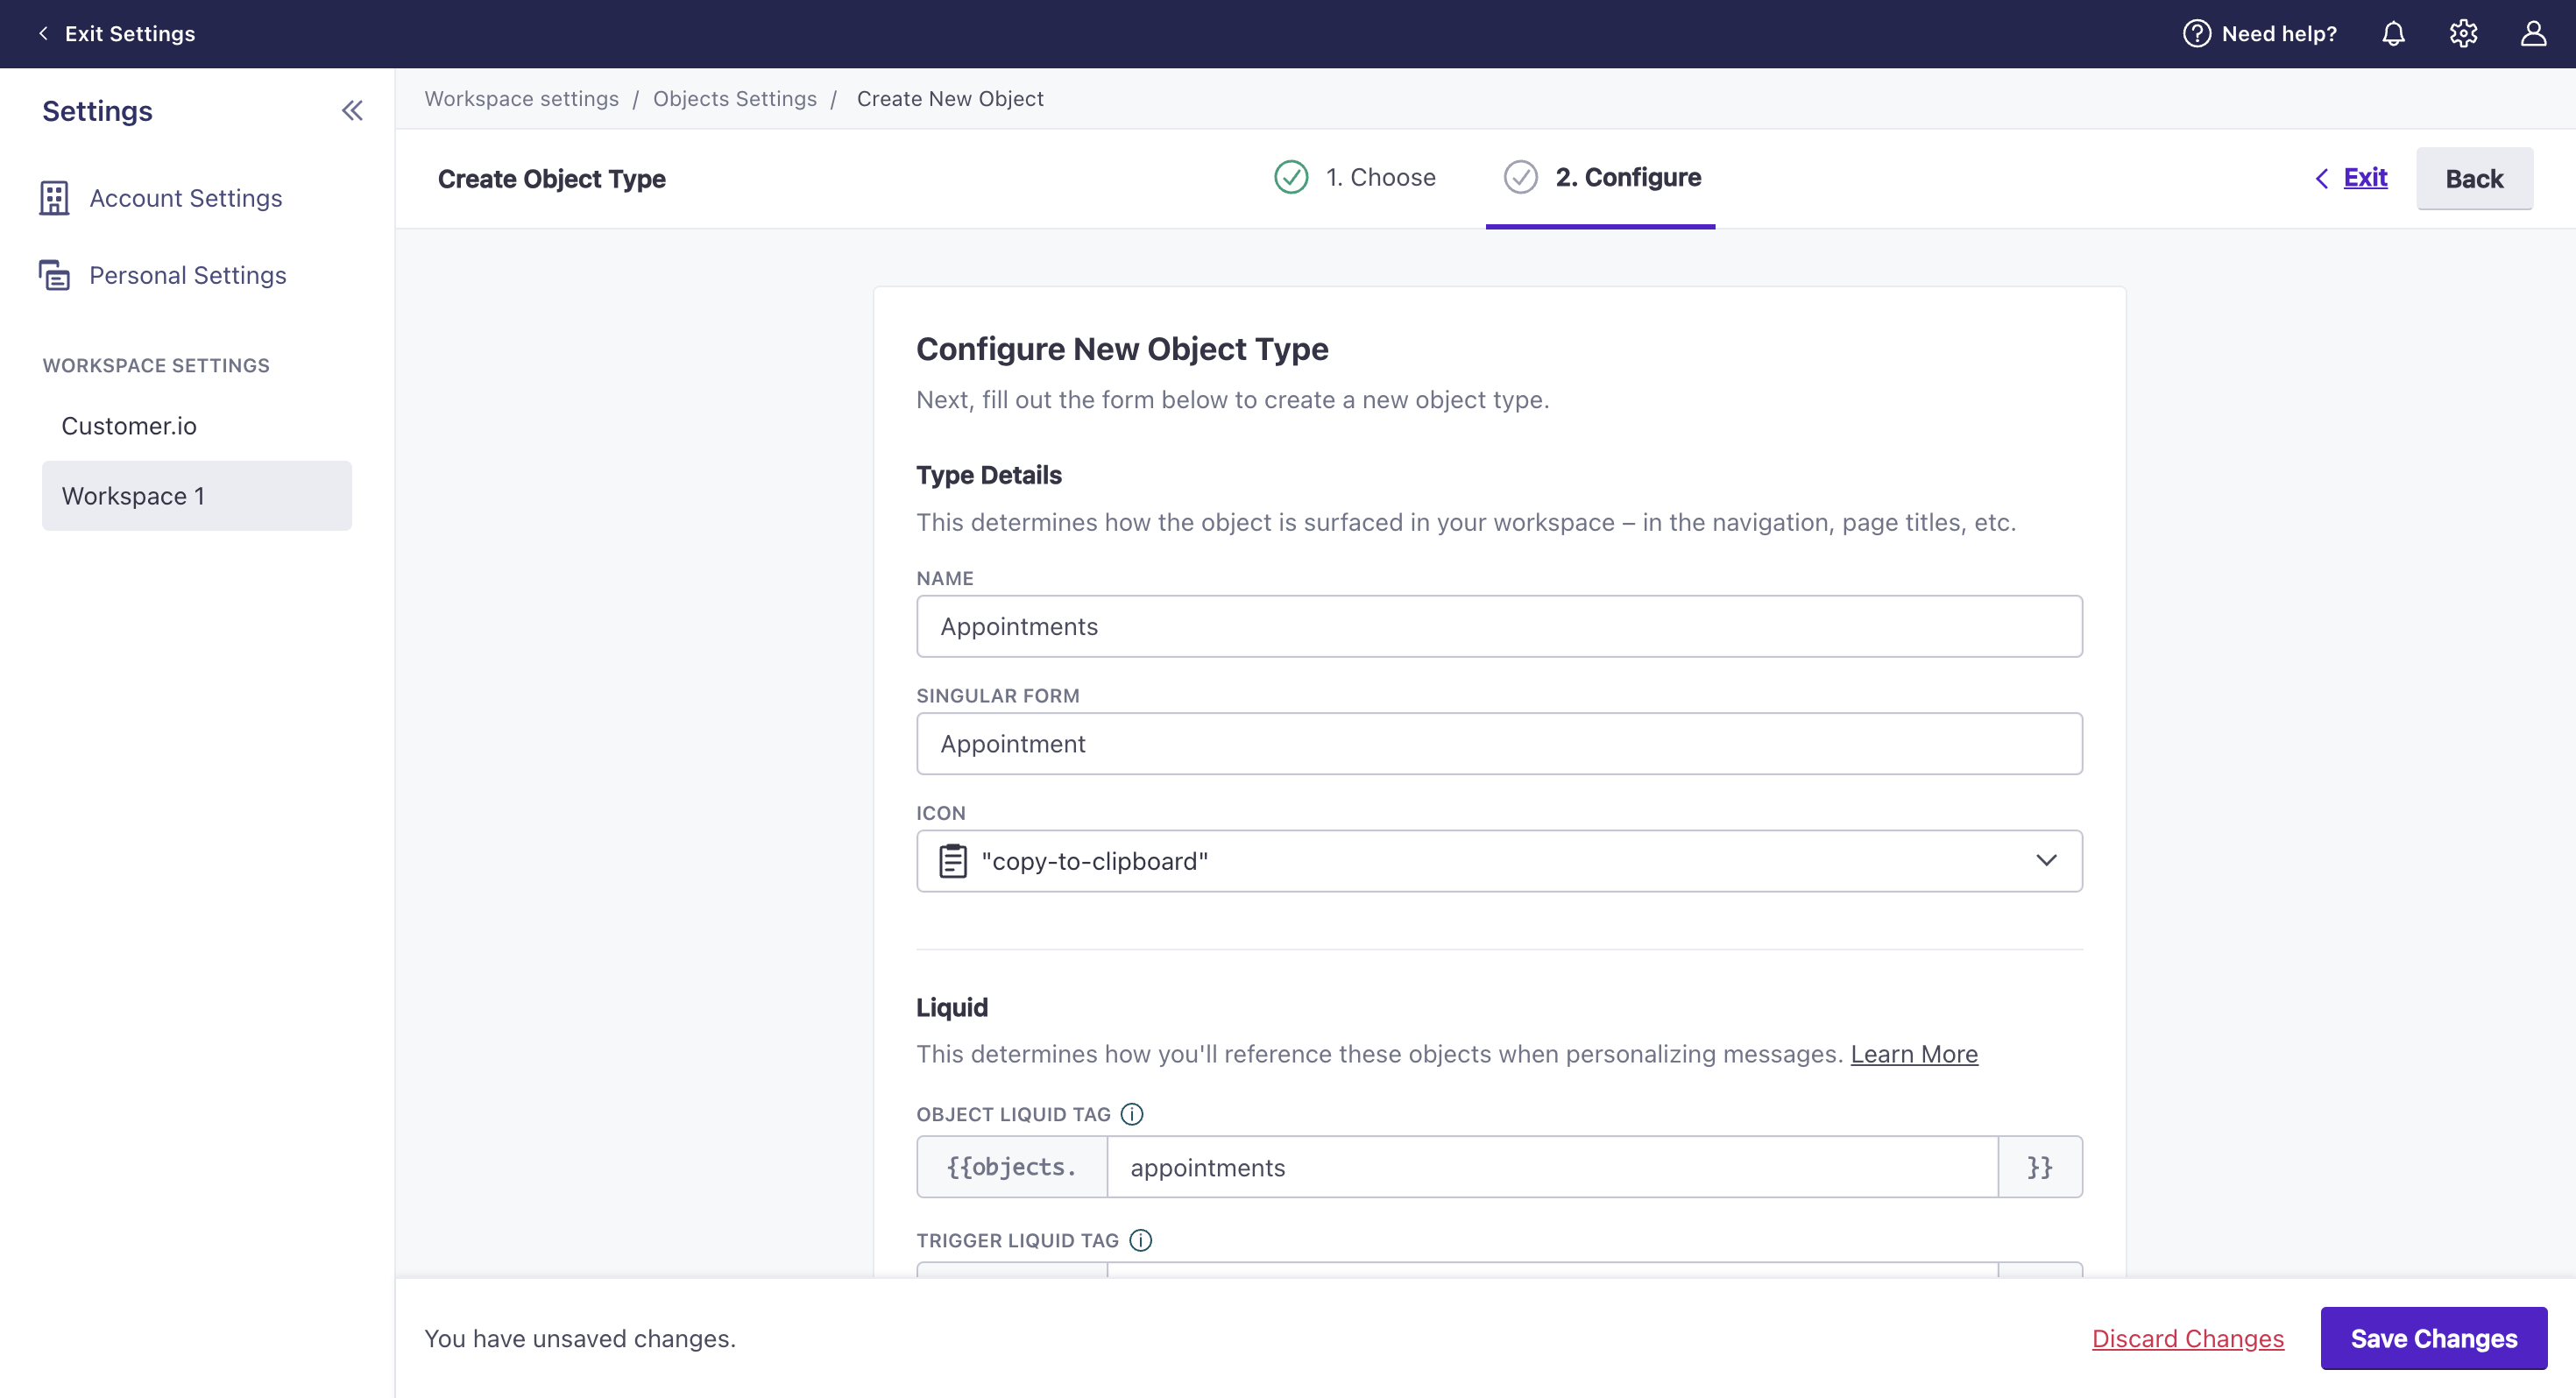
Give your object a Name and set the Singular form. In general, we expect that you’ll give objects a plural name (like “Accounts”); we simply use the Singular form to make better sense of your object name in prompts.
-
Click Save.
API calls create objects and types if they don’t exist
If you send an API request that includes an object_type_id or object_id that doesn’t already exist, we’ll automatically create it for you.
Object types auto-created through our API are disabled by default, but you can enable them if you’re within your plan’s allotment.
If you add an object_type_id or don’t provide one via API, we name it a type of animal. You can set a new Name and liquid tag under Settings > Workspace Settings > Custom Objects.
Edit or rename an object type
You can change the name and liquid tag for object types. Changes to the Name and Singular Form affect what you see in Customer.io. Changing the liquid tag could affect your messages.
- Go to Settings > Workspace Settings > Custom Objects.
- Click Object Name.
- Update the Object Type Name, Singular Form and/or Liquid Identifier. Then click Save.
Delete an object type
You can delete an object type through the UI, but not the API at this time.
-
Check the Usage of the object type.
- You can delete a type when it is no longer in use in segments, automations, broadcasts, snippets, and email layouts.
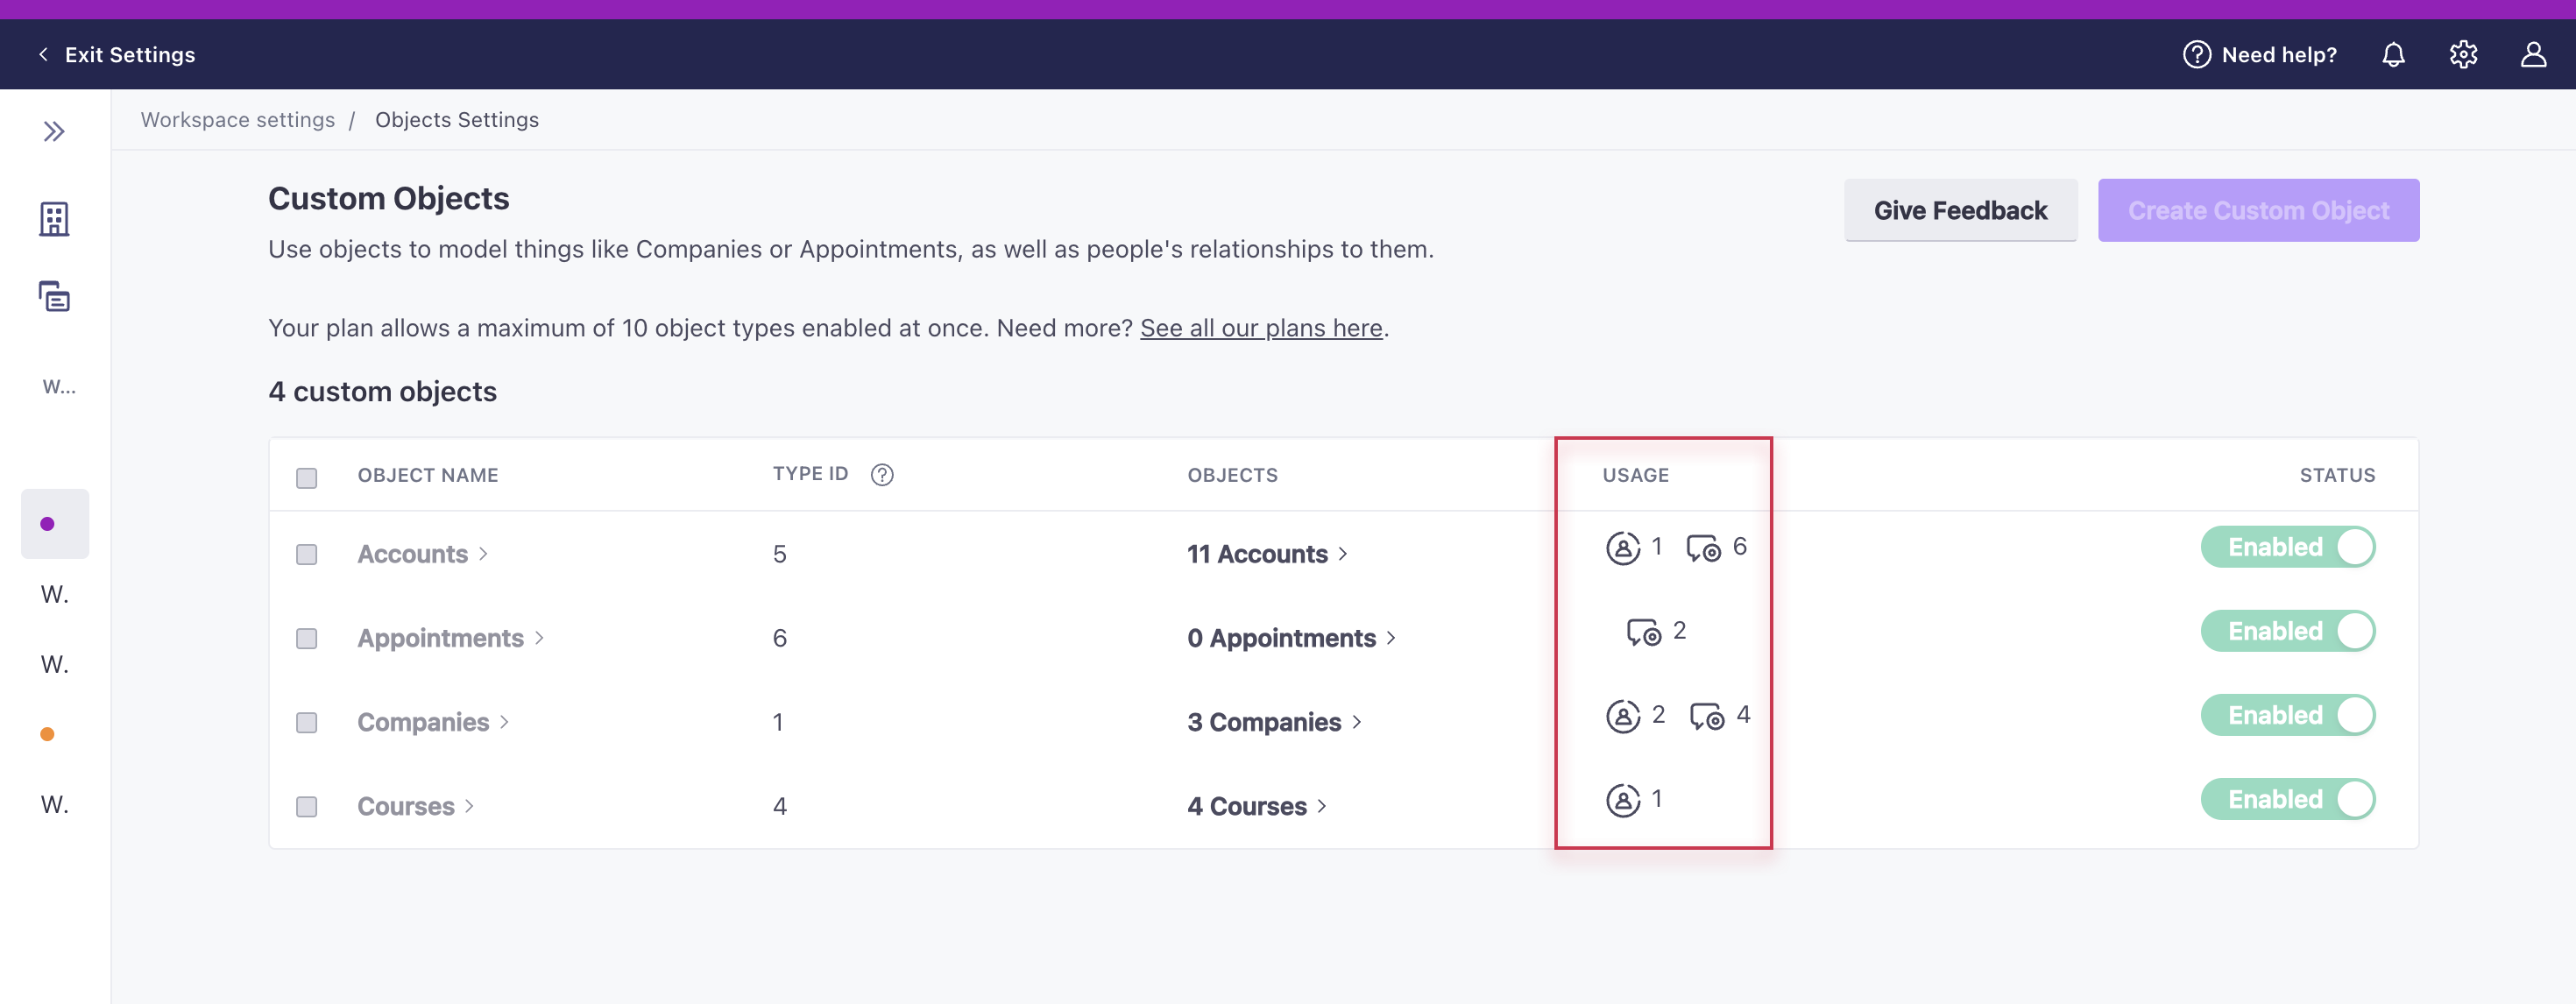
-
If needed, adjust usage of your object type.
-
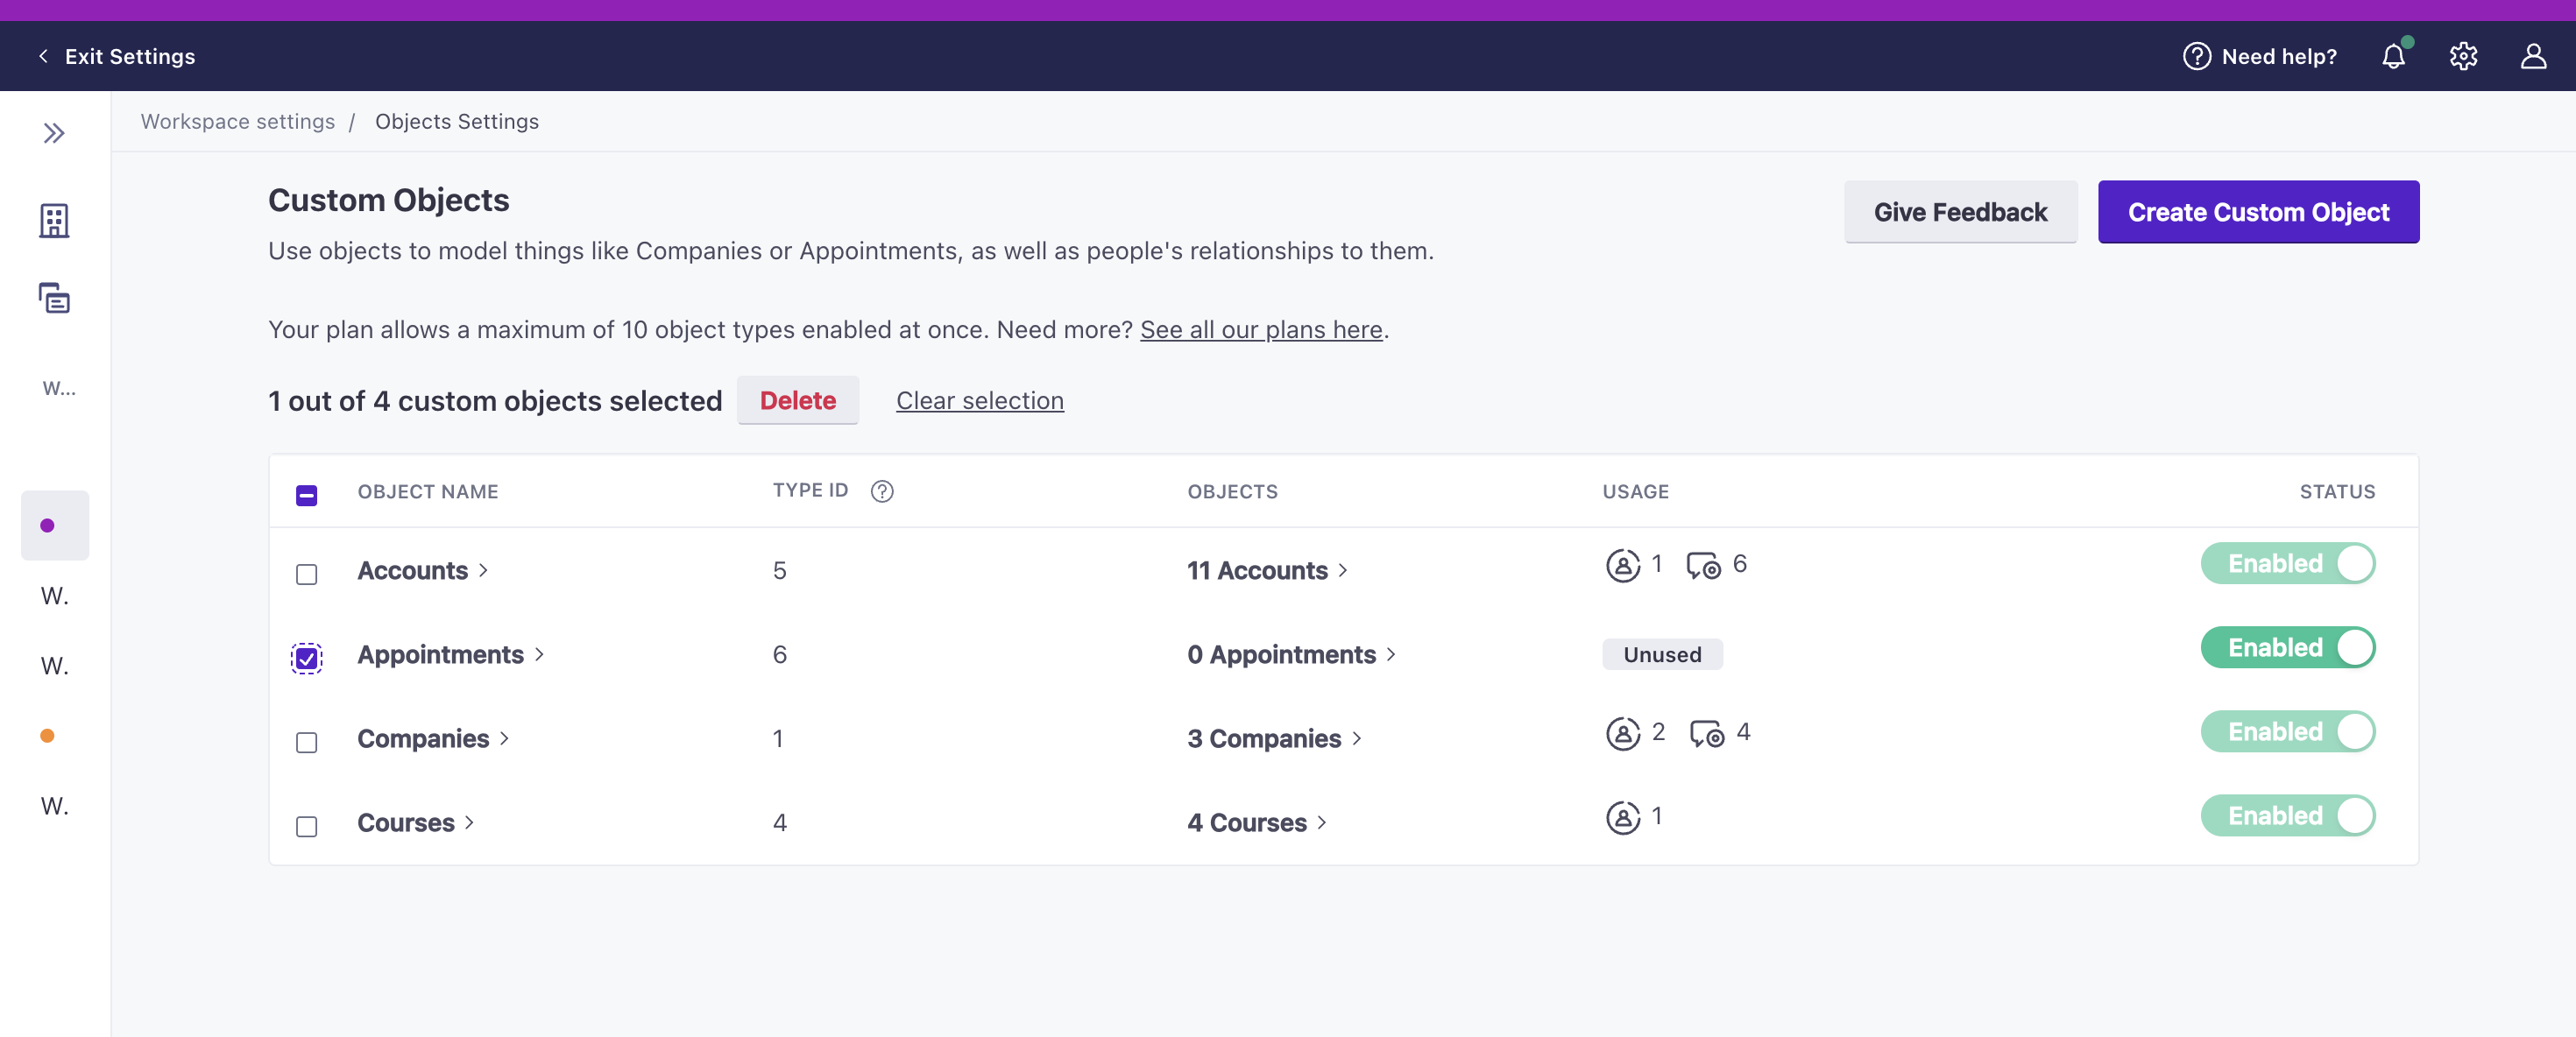
Check the box beside each object type you want to delete.
-
Select
Deleteat the top of the table. -
Confirm your selection.
Enable/disable an object type
Your plan determines the number of enabled object types you can have. An enabled object type is one you can successfully reference in messaging and segments. You can view all enabled and disabled object types in the side menu.
You can create more than the number of object types allotted by your plan, but you can only enable the count that your plan allows. This grants you the flexibility to create objects and relationships while the object type is disabled so you can enable it shortly after disabling one you no longer need. Object types created over your plan allotment are disabled by default.
-
Check the Usage of the object type.
- You can disable a type when it is no longer in use in segments, automations, broadcasts, snippets, and email layouts.
- You can enable a type as long as you have not surpassed the number of object types allowed in your plan.
-
If needed, adjust usage of your object type in segments and messages.
-
Toggle Enable/Disable for the object type.
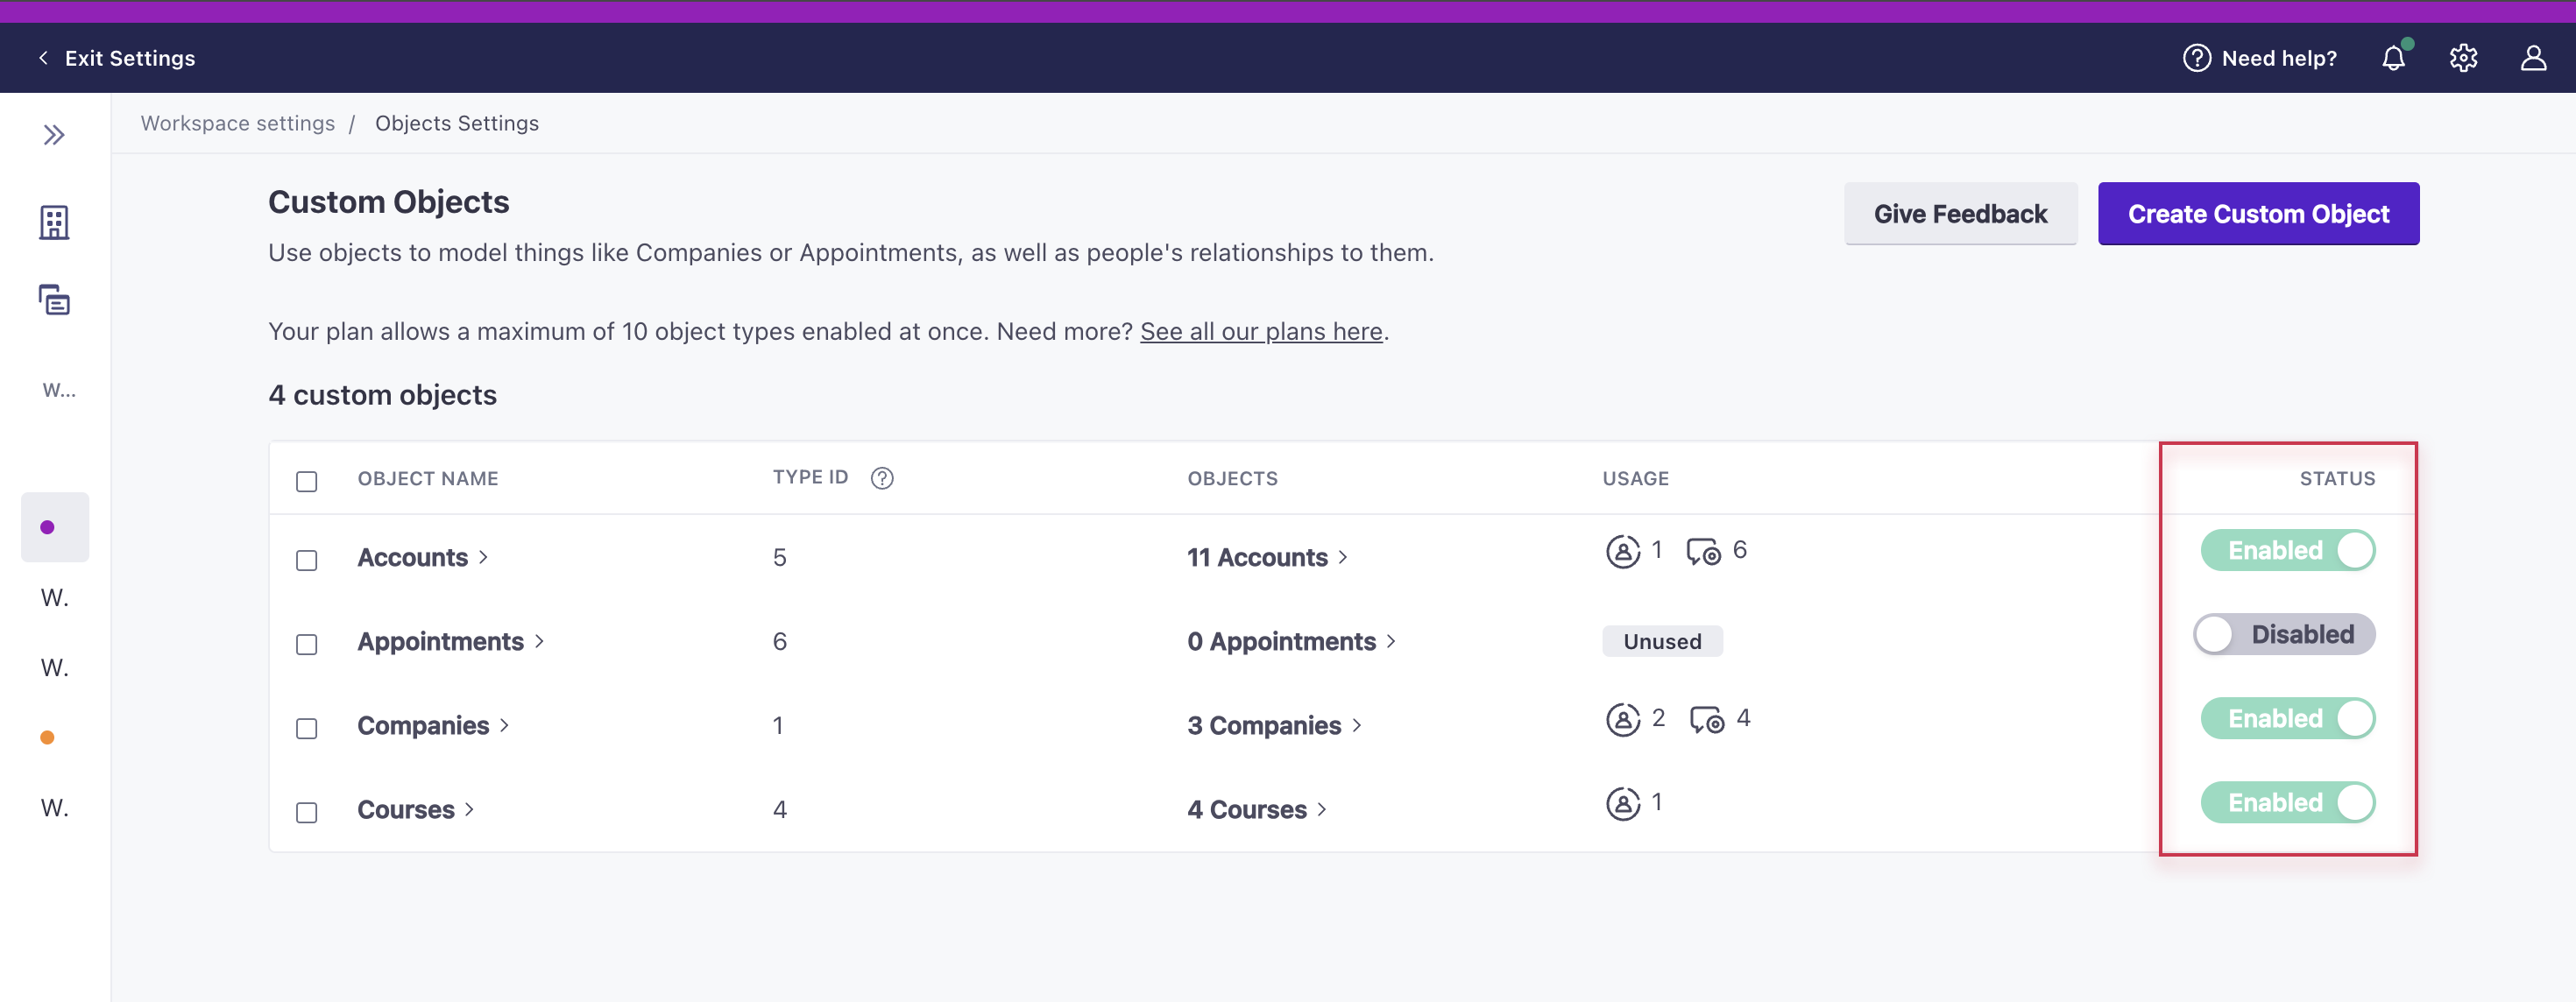
Object types auto-created through our API - those without an id or with an id that doesn’t exist yet - are disabled by default, but you can enable them if you’re within your plan’s allotment.