

Multi-split branches
A multi-split branch sends people down different paths based on one or more conditions. People go down the first path they match.
How it works
A multi-split branch sends people down different paths based on one or more conditions:
- Profile attributes
- Segment membership
- Events
- object
An object is a non-person entity that you can associate with one or more people—like a company, account, or online course.
attributes - relationship
The connection between an object and a person in your workspace. For instance, if you have Account objects, people could have relationships to an Account if they're admins.
attributes
In this video, we show an automation to convert people from free to paid plans, and we’ll add a multi-split branch to nudge people to download the company’s mobile app.
What if a person could match multiple paths?
A person flows down the first path they match moving from left to right (or, looking at your conditions, from top to bottom). If they do not match any path, they will flow down the default “All others” path on the right.
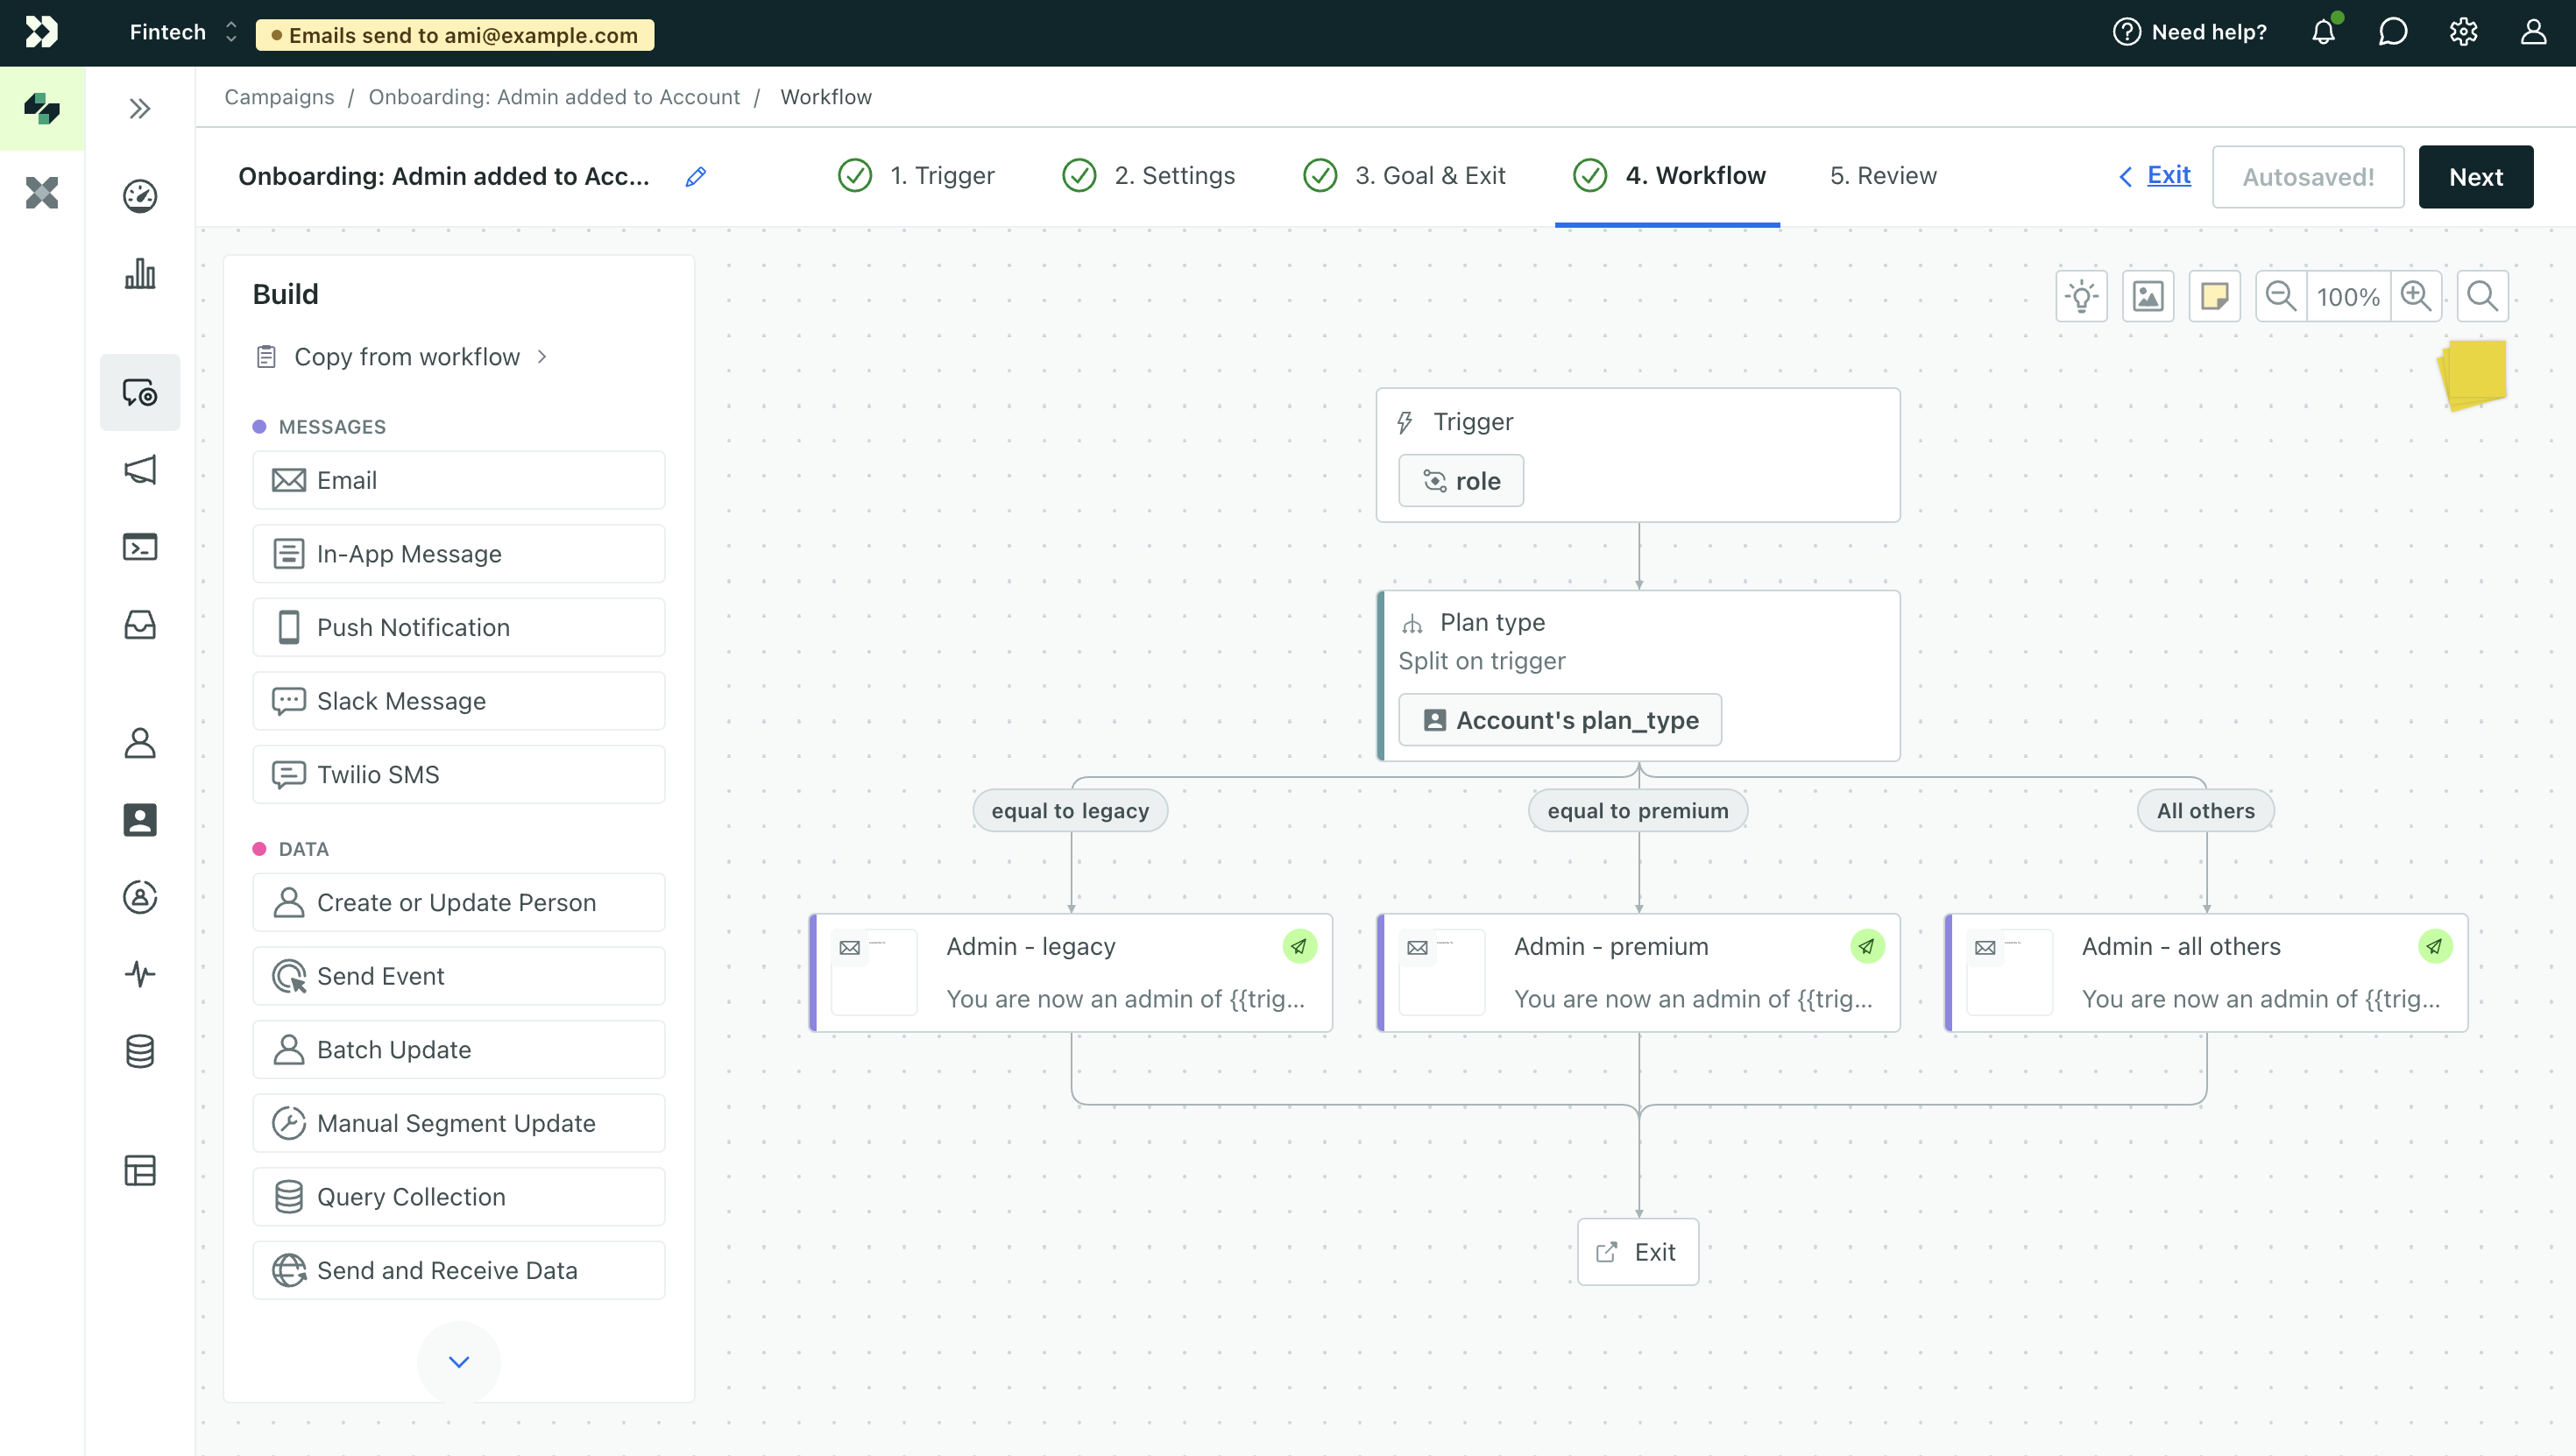
Set up a multi-split branch
By default, the multi-split branch has two, empty paths and a third “All others” path. These paths have no conditions, so they default to false and customers will skip them until you add conditions.
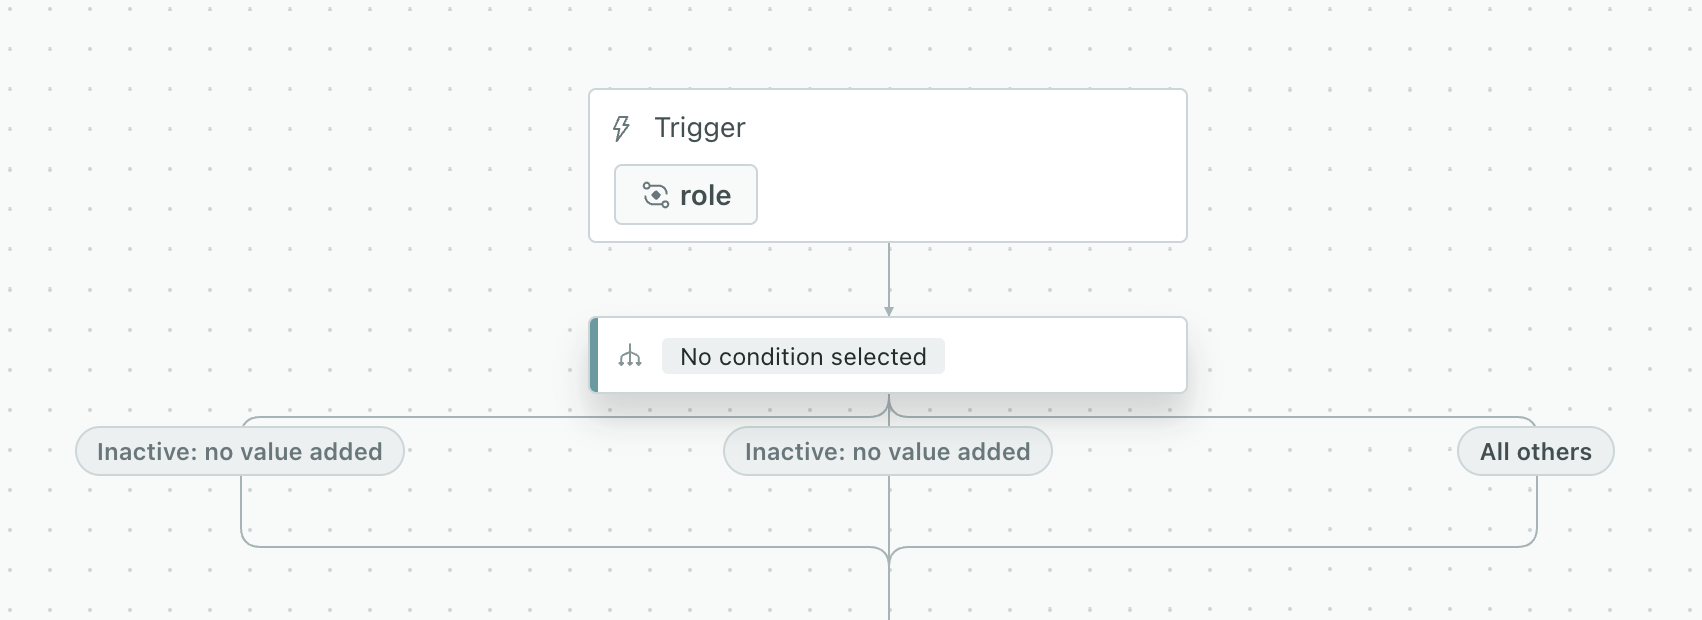
- Drag a Multi-Split Branch into your workflow and select it to edit its conditions.
- Give your branch a Name.
- Choose the Data Type you want to use to split your audience. The options change depending on the trigger for your automation. For example, you can only use event attributes for event-triggered automations, and you can only use object trigger attributes in automations triggered by an object, a relationship, or an important date stored on a custom object.
- Define your paths. Add more paths if you need.
- Click Save and you’ll see the paths on your canvas update to match.
Split based on people’s attributes
To split based on the value of a single attribute, click Attribute in the Data type dropdown. Select the attribute you’d like to split on in the Attribute name dropdown that just appeared. And finally, enter the values of the attribute that you’d like to split on in each of the Path text fields. To add another path, click Add. Click is equal to if you’d like to split based on a range of values.
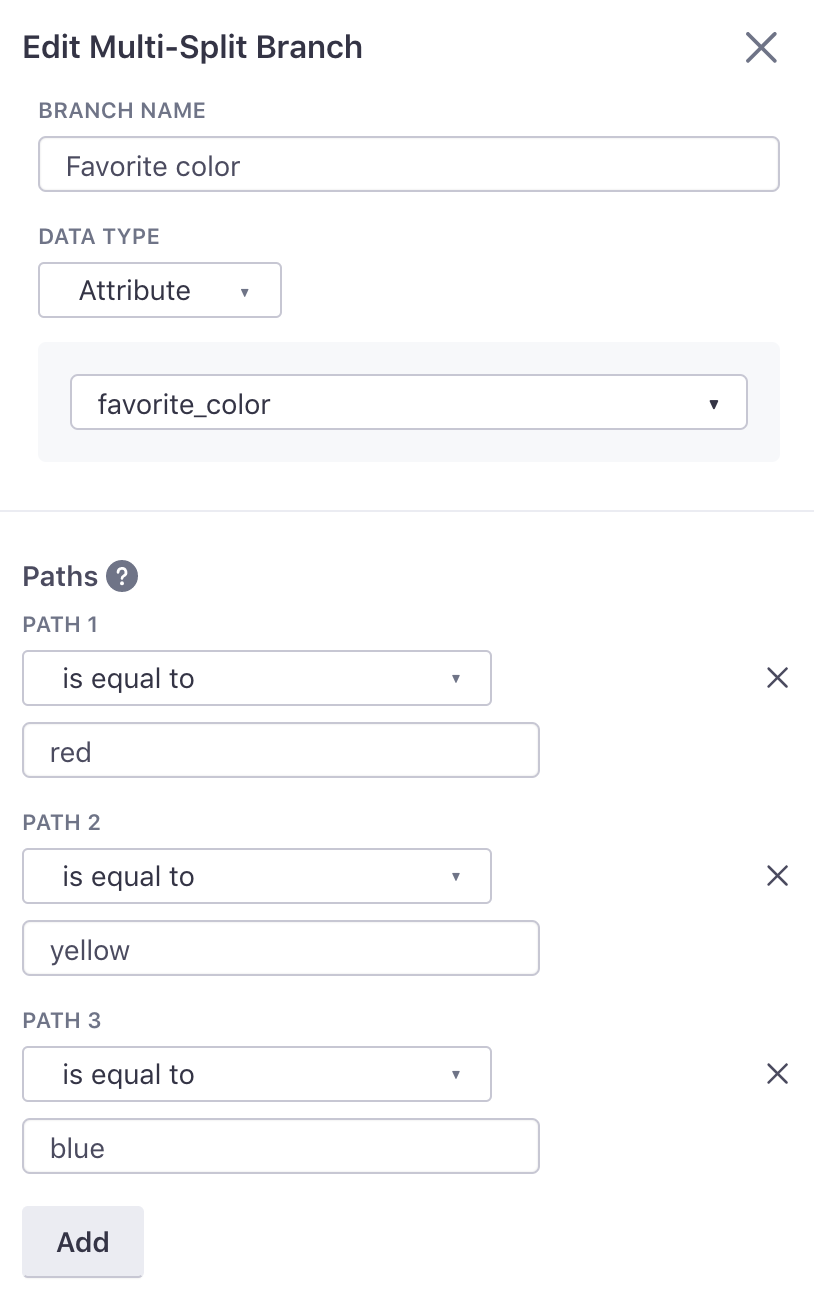
Add up to 20 paths, and click Save to save the paths and collapse the sidebar.
Split based on event attributes
To split based on the value of an event attribute, click Event attribute in the Data type dropdown. The event that triggered the automation will appear in the group box along with a text field to specify which event attribute you would like to split on. Enter the event attribute name in the text field. Finally, enter the values of the event attribute that you’d like to split on in each of the Path text fields. To add another path, click Add. Click is equal to if you’d like to split based on a range of values.
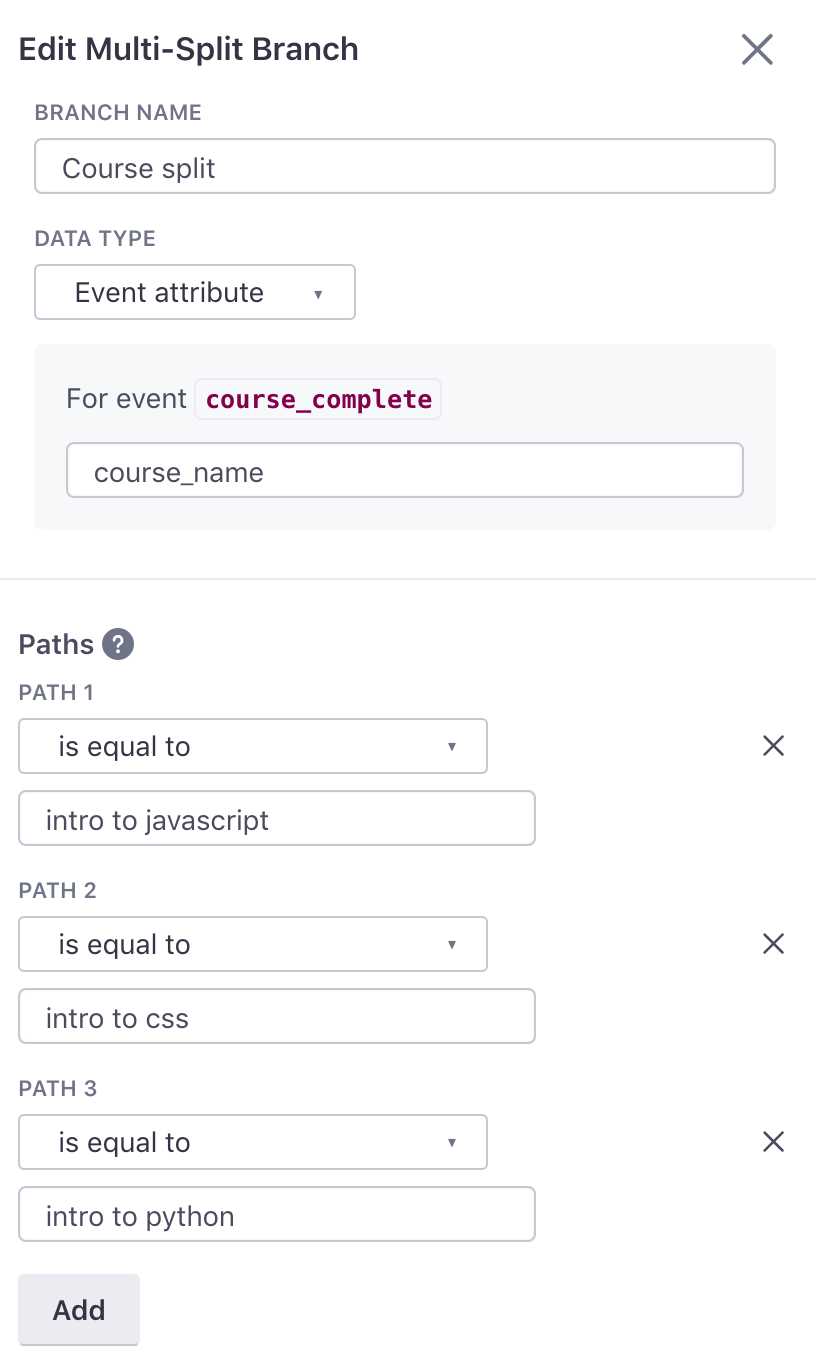
Add up to 20 paths, and click Save to save the paths and collapse the sidebar.
Split based on object or relationship attributes
To split based on the value of a relationship attribute, click Relationship from the Data Type dropdown. Select the object type and attribute type. Then enter the value for each pathway. To create another path, click Add.
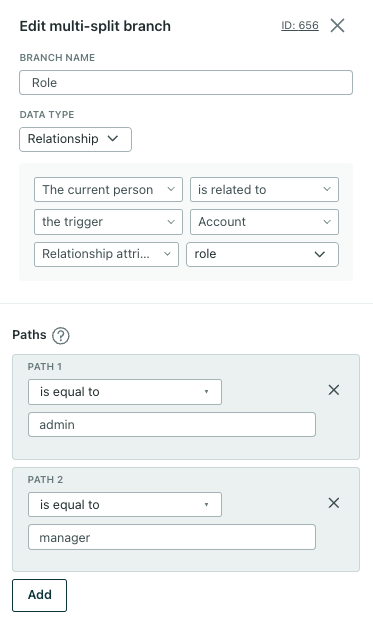
If your automation is triggered by an object, a relationship, or an important date stored on a custom object, you can also split based on object trigger attributes. Click Object-type-name (Trigger) from the Data Type dropdown.
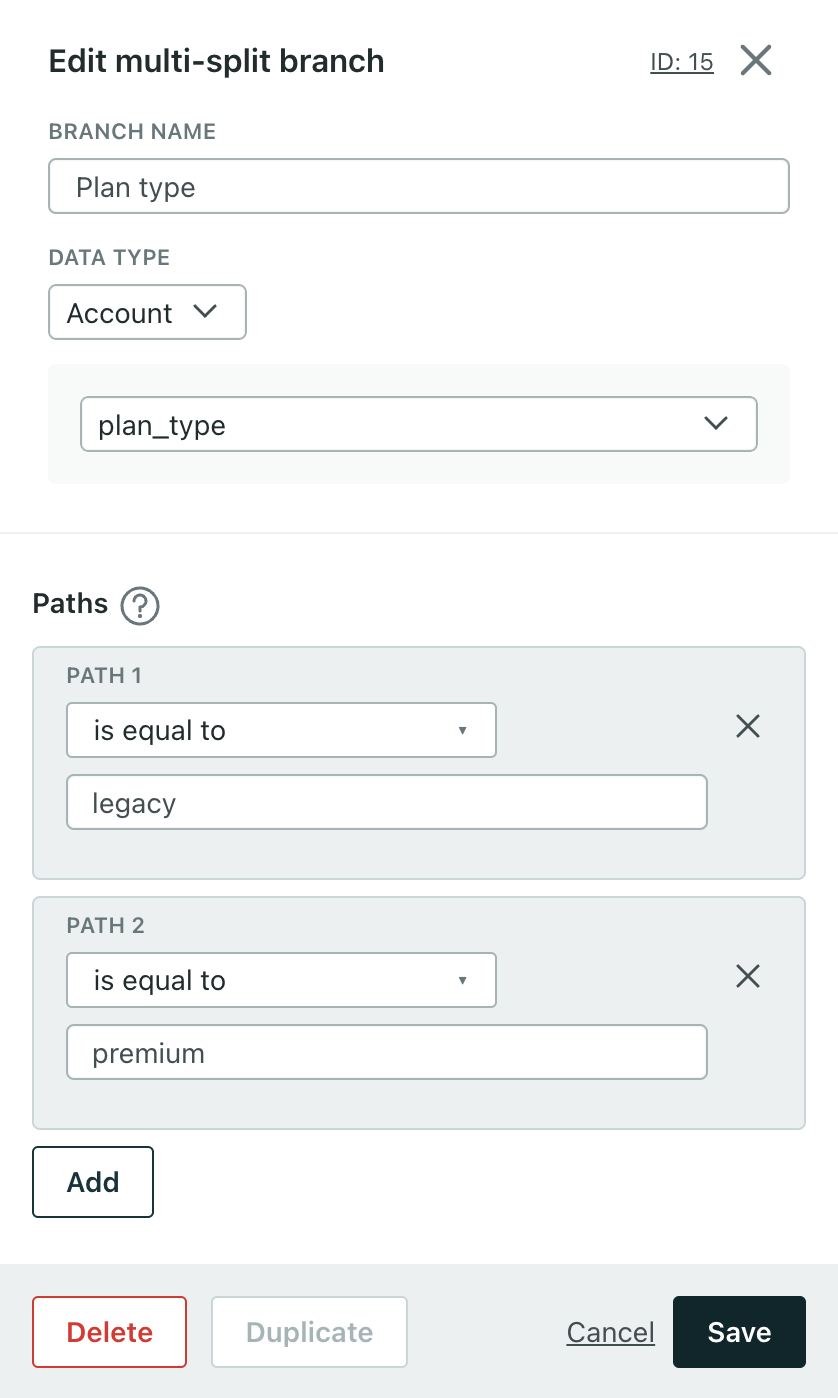
You can add up to 20 paths. Click Save when you’re done.
Split based on segment membership
To split based on a segment match, click Segment in the Data type dropdown. Select the segment that you’d like to split on in each Path. To add another path, click Add.
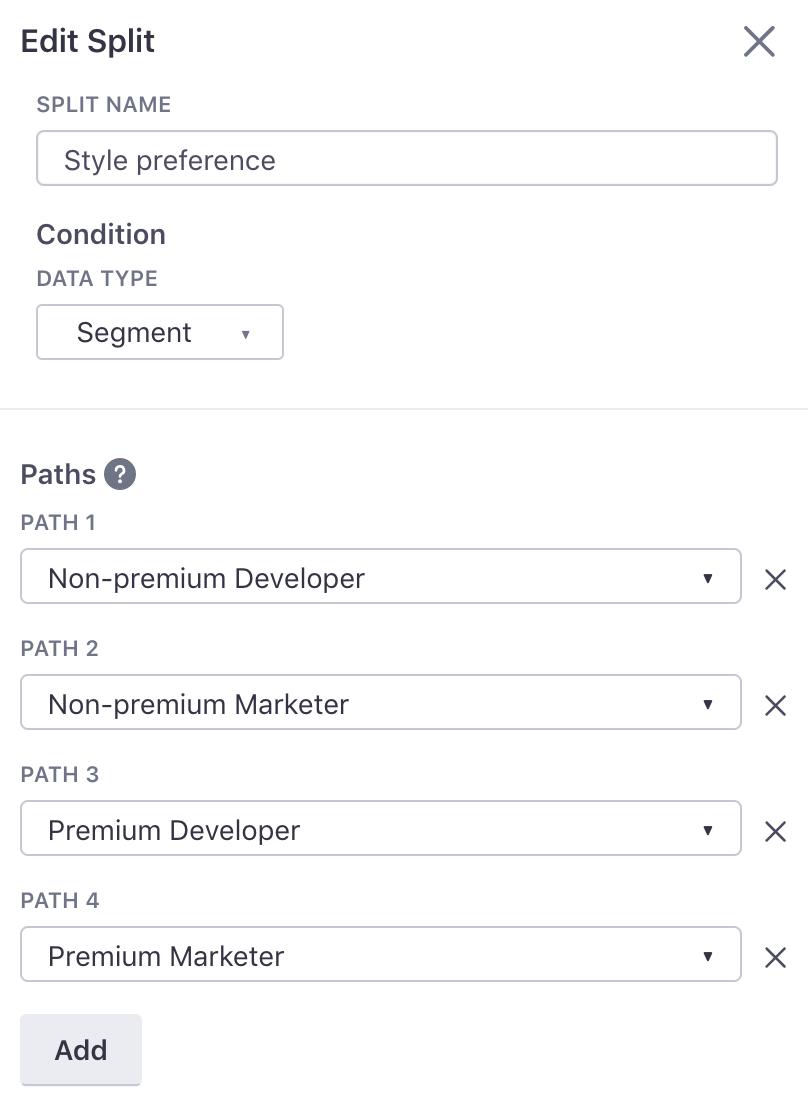
Add up to 20 paths, and click Save to save the paths and collapse the sidebar.