

Set up a transactional SMS message
Transactional SMS messages are text messages that your audience implicitly opts-into, like order confirmations, password reset codes, or account verification messages. You can send transactional SMS messages programmatically through Customer.io.
Before you begin
Before you can send transactional SMS messages, you need to:
- Connect an SMS provider and enable SMS in your workspace.
- Get your app API key. This is the bearer token that you’ll use when you call the transactional API to trigger a message.
We also recommend that you use different phone numbers for transactional and marketing SMS messages. This helps maintain deliverability and ensures your critical transactional messages aren’t affected by marketing message reputation.
Create a transactional SMS
Unlike transactional emails and push notifications, you cannot send a transactional SMS message without a template. You must use a transactional_message_id when you send an SMS, and you cannot override the body or image URL of your message at send time.
-
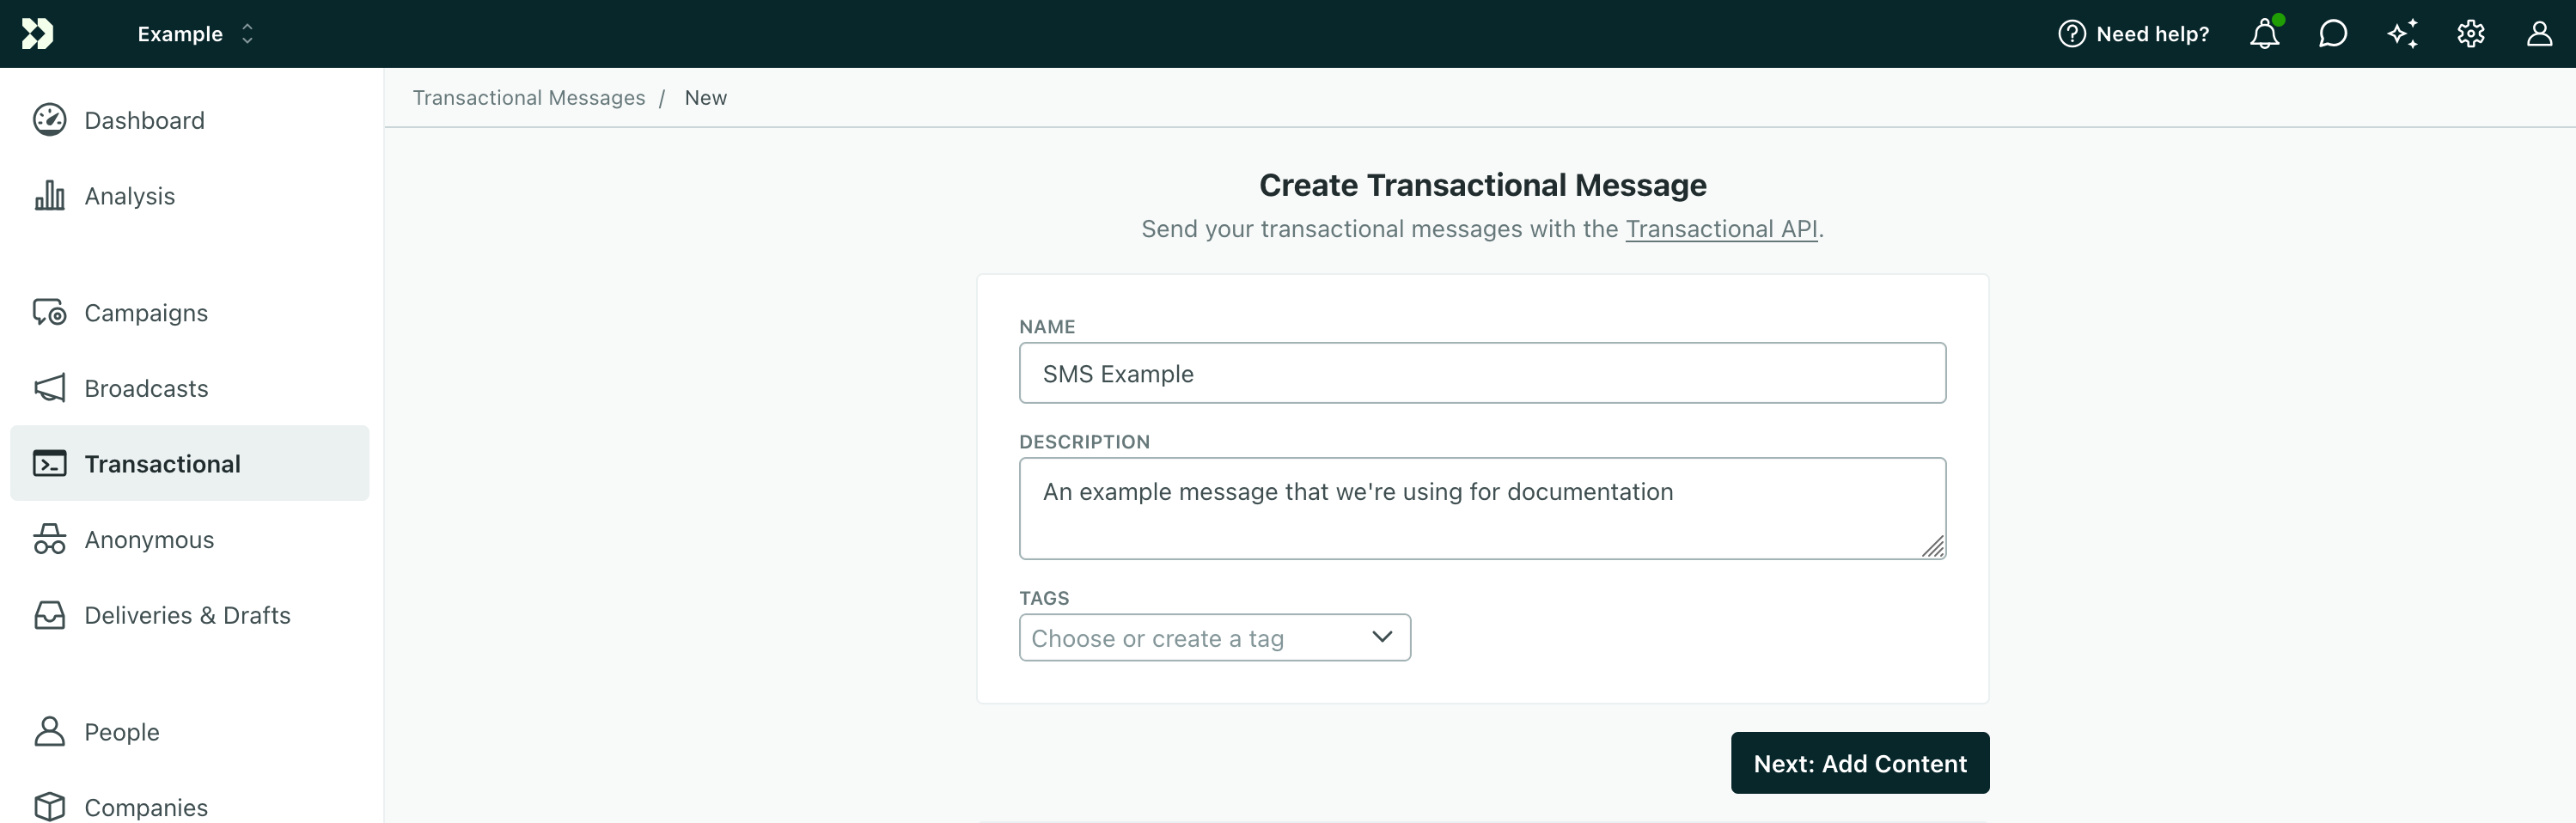
Go to the Transactional page and click Send your first message or Create message—depending on whether there are already transactional messages in your workspace.
-
Give your message a Name and a Description and then click Next: Add Content. The name and description help your team members understand what kind of message this is (like “Two-Factor Authentication” or “Password Reset Code”).
-
Select SMS and click Add Content.
-
Draft your message. If you see an error in the upper-right when you try to write your message, it’s likely that you need to select a person in your Sample data who has a
phoneattributeA key-value pair that you associate with a person or an object—like a person's name, the date they were created in your workspace, or a company's billing date etc. Use attributes to target people and personalize messages.
.Selecting a representative sample person also helps you personalize your message. You can personalize messages using attributes (
{{customer.<attribute>}}) or data from your transactional message’smessage_datakey ( in the format{{trigger.<data-object-property>}}).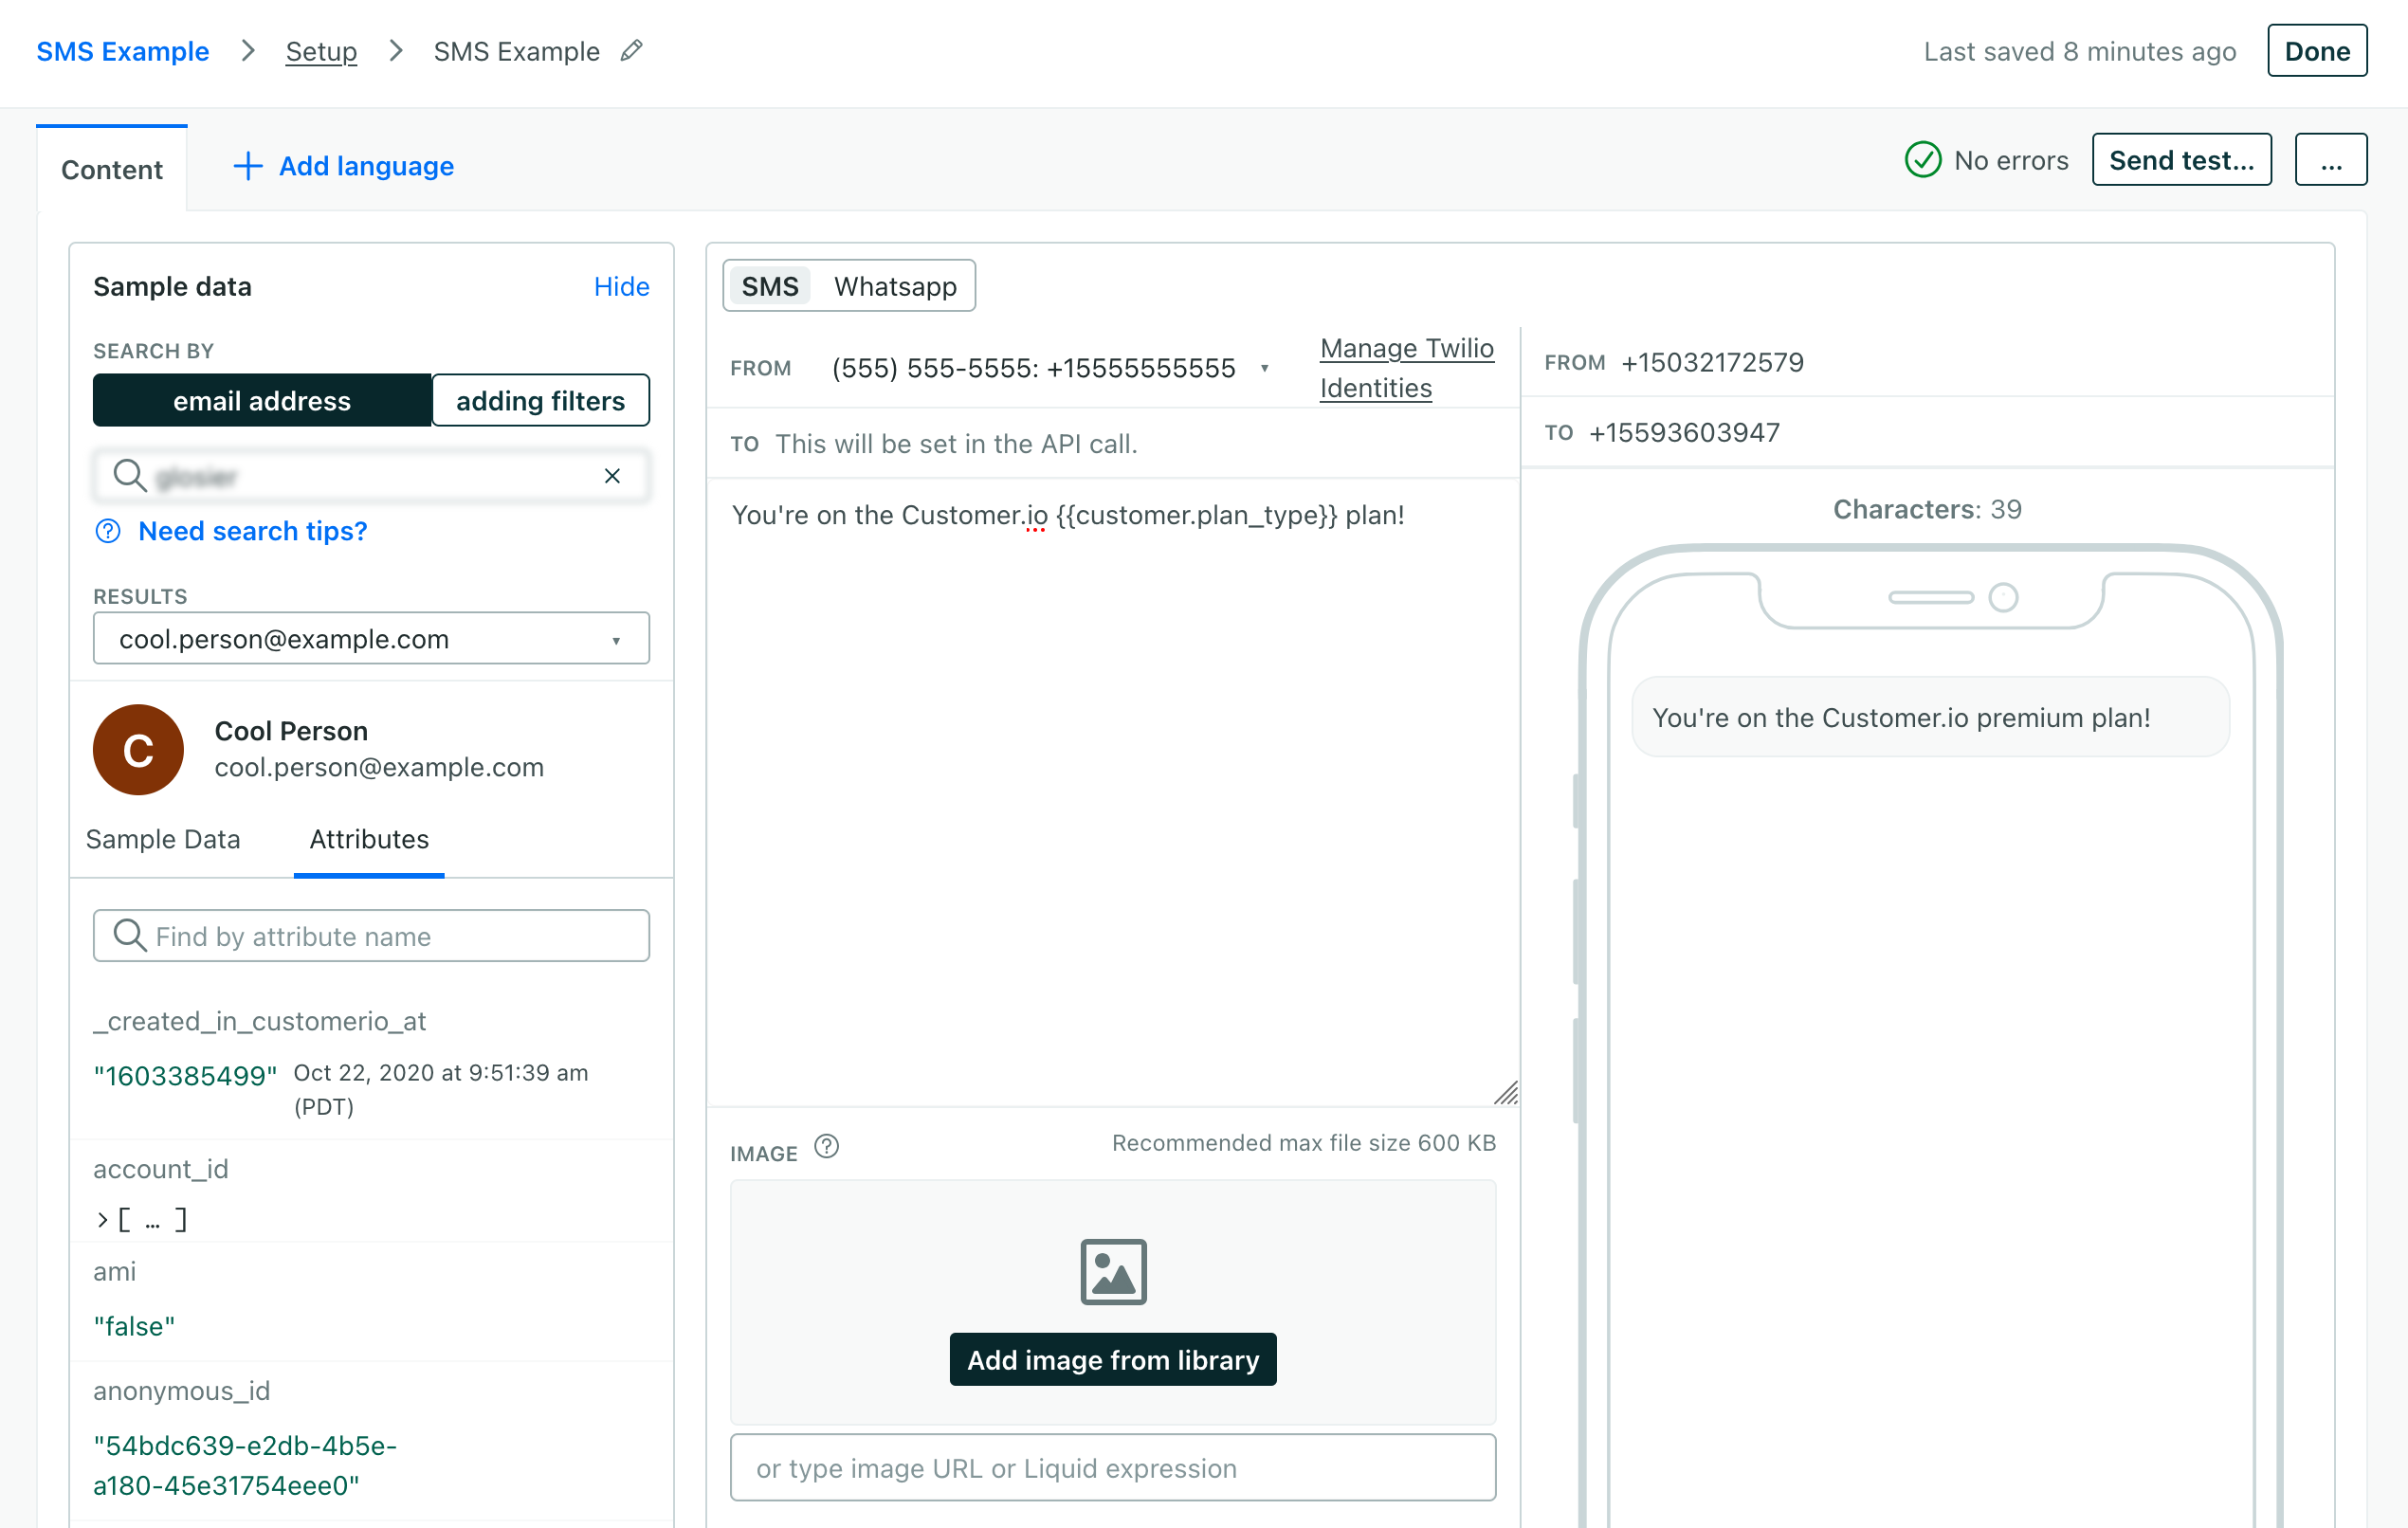
-
When you’re done writing your message, click Save Changes and then click Next: Configure Settings.
-
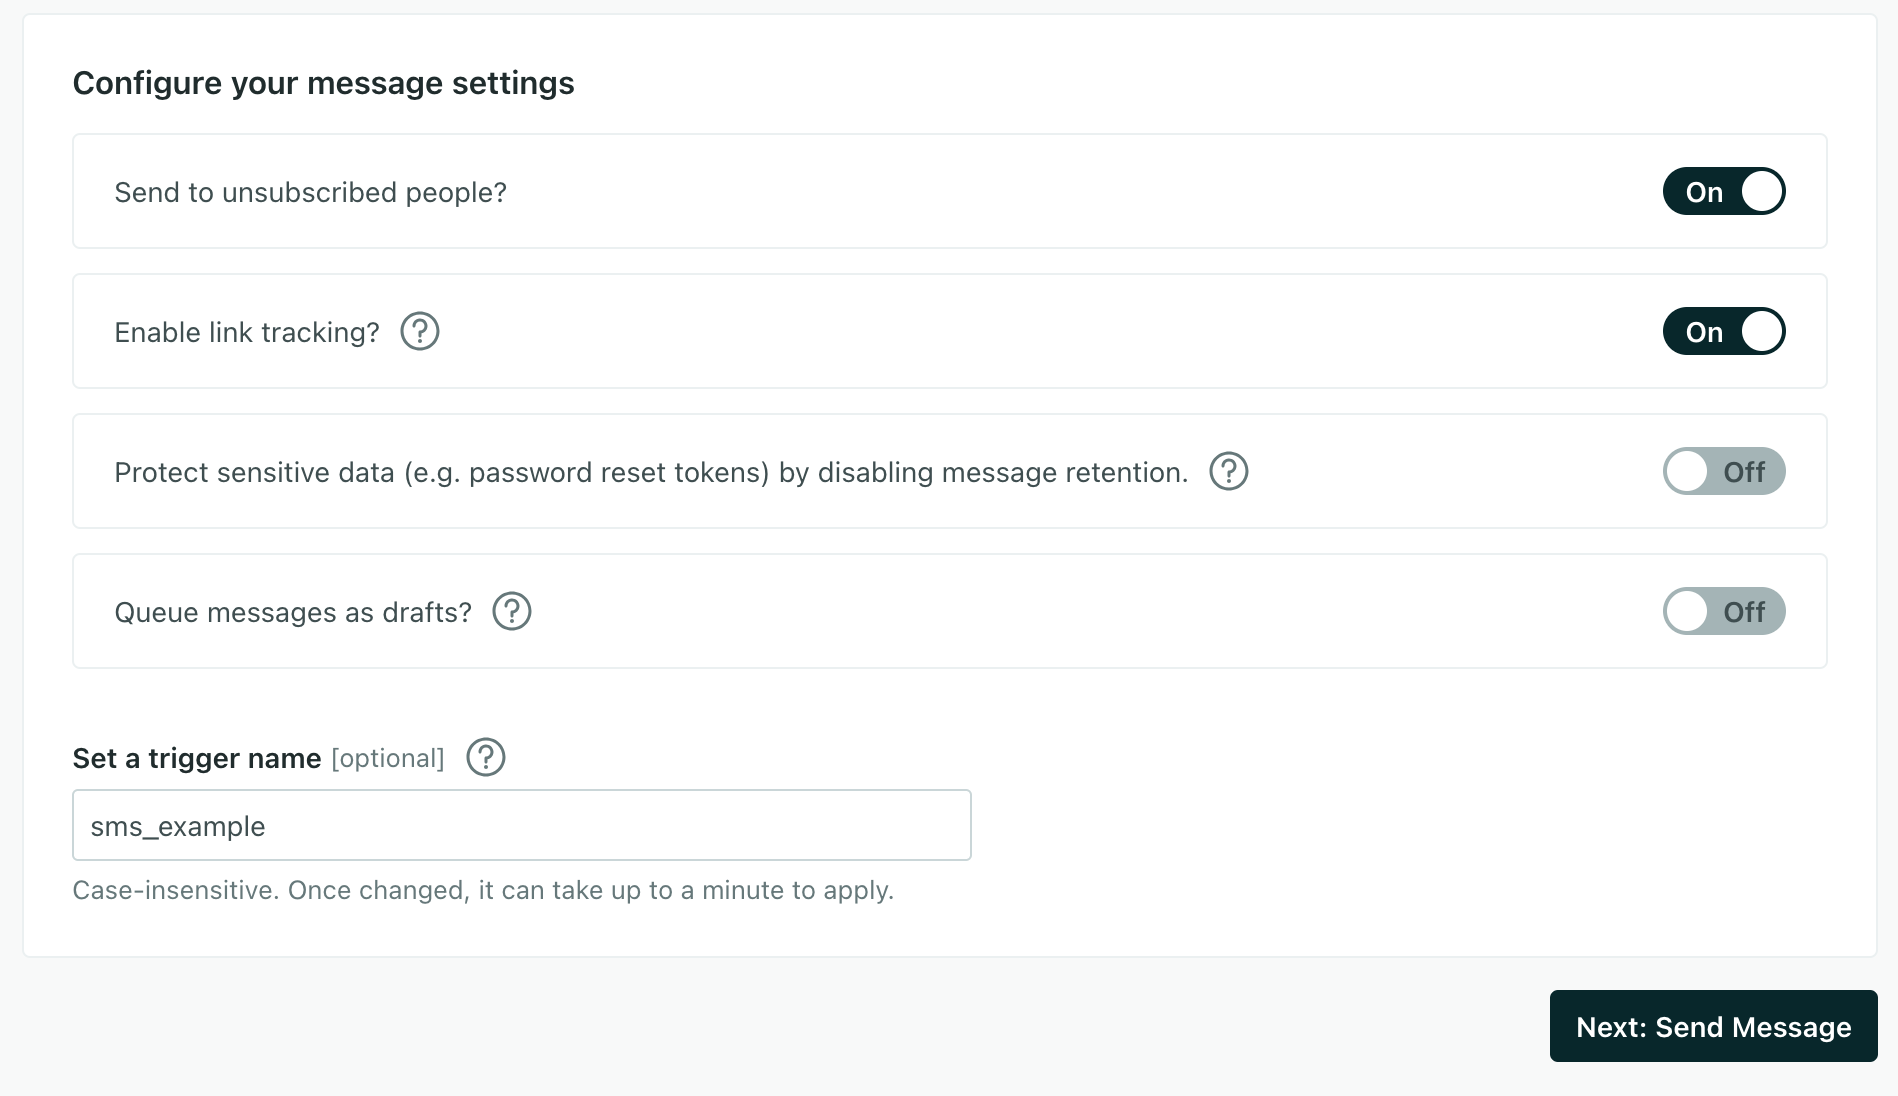
Configure your message settings. In general, we recommend that you use our defaults and that you Set a trigger name so that it’s easier to send your message later.
-
Send to unsubscribed people? Unsubscribed people probably still want to receive your important transactional messages like order confirmations and password resets.
-
Enable link tracking? By default, we’ll track clicks on links in your transactional SMS messages. Disable this setting if you don’t use our link shortening feature or tracked links (which are longer than normal links) will likely exceed the 160 character limit for SMS messages.
-
Protect sensitive data by disabling message retention? This setting prevents Customer.io from retaining your message content. You might want to do this to conceal sensitive messages, like password reset codes or verification tokens.
-
Queue messages as drafts? This setting generates a draft for every message you trigger rather than sending them automatically. You can review these messages under the Drafts tab and decide whether to send or delete them.
-
Set a Trigger Name: This is a friendly name for your message that you can use instead of the
transactional_message_idwhen you send your message. It may help make your integration more human-readable if you use triggers that represent the kinds of messages you send—likepassword_resetororder_confirmation.
-
-
Now you’re ready to send your message. You can adapt the code sample on the Send Message screen to your code—wherever you intend to trigger transactional messages—or use our API directly.
(Optional) Even if you don’t want to wire up your integration completely, we recommend that you call our API and send a test message to make sure that your message works the way you expect. You can even use an HTTP client like Postman or send a cURL request from your terminal to test your message and complete the setup process.
Send a transactional SMS message
You’ll send your message using our API. To send a transactional SMS message, you need:
transactional_message_id: the numeric ID or trigger name for the SMS message you created.identifiers: an object containing a unique identifier for the recipient. This tells us who to send the message to.message_data(optional): values you want to populate in the message using liquidA syntax that supports variables, letting you personalize messages for your audience. For example, if you want to reference a person's first name, you might use the variable
using{{customer.first_name}}.{{trigger.<property_name>}}.
curl -X POST https://api.customer.io/v1/send/sms \
-H 'Content-Type: application/json' \
-H 'Authorization: Bearer APP-API-TOKEN' \
-d '
{
  "transactional_message_id": "confirmation_code",
  "identifiers": {
    "id": "123456"
  },
  "message_data": {
    "confirmation_code": "123456"
  }
}
'
Identify your recipient
When you send a transactional message, you need to give us a phone number to send the message to and the identifiers The attributes you use to add, modify, and target people. Each unique identifier value represents an individual person in your workspace.
You can set your audience’s phone number (typically using liquid A syntax that supports variables, letting you personalize messages for your audience. For example, if you want to reference a person's first name, you might use the variable A key-value pair that you associate with a person or an object—like a person's name, the date they were created in your workspace, or a company's billing date etc. Use attributes to target people and personalize messages. A syntax that supports variables, letting you personalize messages for your audience. For example, if you want to reference a person's first name, you might use the variable {{customer.first_name}}.to parameter. This parameter can be either a phone number in E.164 format (e.g. +15551234567) or a customer attribute{{customer.first_name}}.{{customer.phone}}.
You’ll also include an identifiers object in your request to specify the person you want to attribute the message to. The identifiers object accepts one of id, email, or cio_id.
{
  "transactional_message_id": "confirmation_code",
  "to": "+15551234567",
  "identifiers": {
    "id": "123456"
  },
  "message_data": {
    "confirmation_code": "123456"
  }
}
Examples and API parameters
Below is a basic transactional SMS payload, followed by the full list of parameters. Your payload changes based on whether you reference a transactional_message_id (a template) or not. See our REST API documentation for the full reference, including code samples in cURL and several languages.
{
  "transactional_message_id": "confirmation_code",
  "identifiers": {
    "id": "123456"
  },
  "message_data": {
    "confirmation_code": "123456",
    "account_name": "Jane Doe"
  }
}- Identifies the person represented by your transactional message by one of, and only one of,
id,email, orcio_id.- idstringrequiredThe identifier for the person represented by the transactional message. NOTE: If your workspace identifies people by email, use the
emailidentifier instead.
- tostringrequiredThe phone number you want to send your SMS to. Use E.164 format, like
+15551234567, or Liquid if you store phone numbers as attributes. - The transactional message template that you want to use for your message. You can call the template by its numerical ID or by the Trigger Name that you assigned to the template in the UI (case insensitive).The ID of the transactional message you want to send.integer
- auto_createbooleanDefault:
falseIftrueand yourtransactional_message_iddoesn't match a record, Customer.io creates an empty record using that value as the Trigger Name. The ID must be a string. If the name already belongs to another channel, the request fails with400, and numeric IDs ignore this setting. See details. - disable_message_retentionbooleanDefault:
falseIf true, the message body is not retained in delivery history. Setting this value overrides the value set in the settings of yourtransactional_message_id. - fromstringThe phone number or sender ID your SMS is from. It must be verified in your Twilio account. This overrides the template's sender. Use E.164 format for a phone number.
- languagestringOverrides language preferences for the person you want to send your transactional message to. Use one of our supported two- or four-letter language codes.
- An object containing the key-value pairs referenced using liquid in your message.
- Liquid Data *any typeInsert key-values that you want to reference in your message here.
- queue_draftbooleanDefault:
falseIf true, your transactional message is held as a draft in Customer.io and not sent directly to your audience. You must go to the Deliveries and Drafts page to send your message. - send_atintegerA unix timestamp (seconds since epoch) determining when the message will be sent. The timestamp can be up to 90 days in the future. If this value is in the past, your message is sent immediately.
- send_to_unsubscribedbooleanDefault:
trueIf false, your message is not sent to unsubscribed recipients. Setting this value overrides the value set in the settings of yourtransactional_message_id. - trackedbooleanDefault:
trueWhether to track link clicks for this SMS. Defaults to the transactional message's own tracking setting.