

Cart abandonment
Whether you’re an e-commerce company or a product company, the techniques used for cart abandonment can help you increase completion rates in any flow where you have drop off. One of the most powerful concepts you’ll learn is how to store context on a person for easy recall and personalization later.
How it works
For this recipe, we’ll send emails to customers who have abandoned their carts after a certain amount of time. We offer two methods through event-triggered or segment-triggered automations An automated process people enter when they meet your criteria. An automation has a trigger (who enters, and when), a workflow of messages and actions, and exit criteria (when they leave). A person's path through the workflow is their journey.
Method (Recommended): Event-Triggered Automation
For this recipe, we’ll walk through how to send cart event Something that a person in your workspace did. Events can trigger automations, add people to segments, etc, and you can use properties from events to personalize messages.
Ingredients
- Your Track API credentials from your Customer.io workspace.
- The ability to send event data when items are added and removed from a person’s cart.
Send Event Data for Cart Updates
To remind people about their abandoned carts, you’ll create an event that captures updates to cart items including adding, removing, and changing the attributes of an item, like quantity. We’ll record this data in an event like cart_updated so it’s easy to find within your workspace.
You can either:
- Send the contents of the cart with each event (shown in this recipe) or
- Set up a webhook in your automation to retrieve the complete contents of the cart
Your cart event might look something like this:
{
    "name": "cart_updated",
    "timestamp": 1677700459,
    "data": {
        "currency": "usd",
        "added": {
            "product": "something-else",
            "qty": 2,
            "price": 19.99
        },
        "already_in_cart": [
            {
                "product": "socks",
                "qty": 2,
                "price": 23.45
            },
            {
                "product": "sneakers",
                "qty": 1,
                "price": 99.99
            }
        ]
    }
}
For this recipe to work, you’ll send the entire cart with the event. This should include all items currently in the cart as well as the timestamp of the event. Include any other information that you want to query with liquid A syntax that supports variables, letting you personalize messages for your audience. For example, if you want to reference a person's first name, you might use the variable {{customer.first_name}}.
Set the Trigger for Your Automation
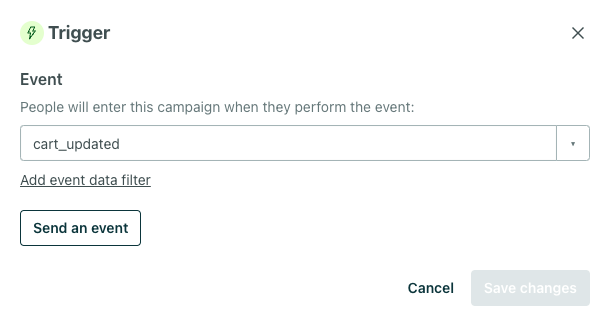
After sending your event, you’ll create an event-triggered automation. Set the trigger as the event you just made: cart_updated.
Create a Workflow Using Wait Until
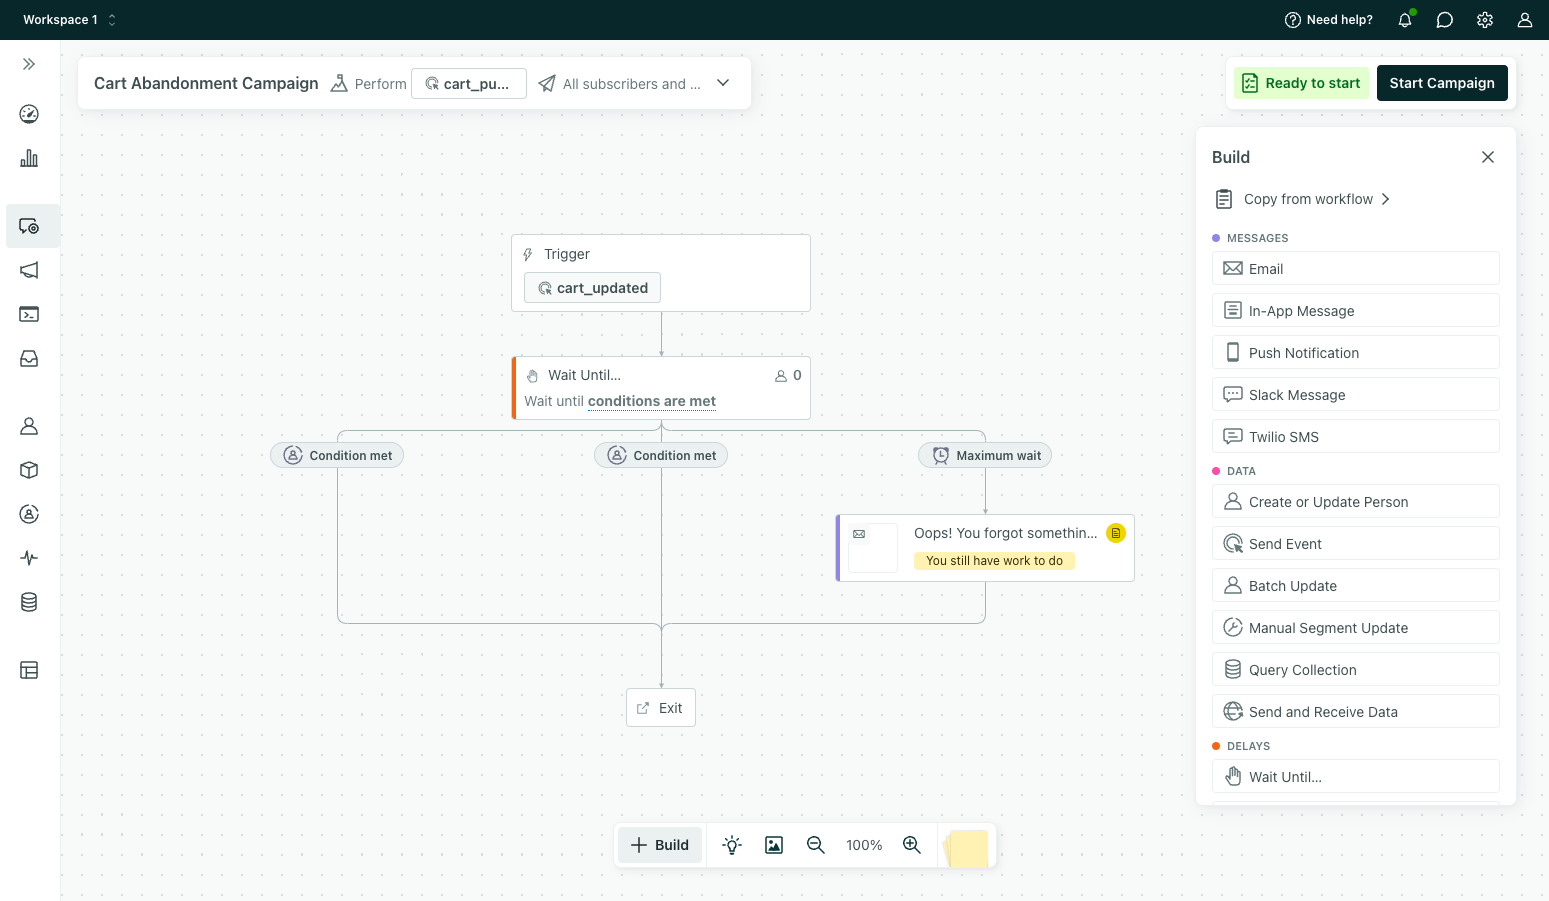
Now you’re ready to create an event-based workflow for cart abandonment. While the goal of the workflow is to remind a person to purchase the items in their cart, you’ll also need to make sure a person does not receive too many reminder emails nor receive them too soon. To make sure you’re targeting the right users at the right time, let’s use Wait Until to create 3 different pathways for people who just updated their cart (that is, just entered the automation).
-
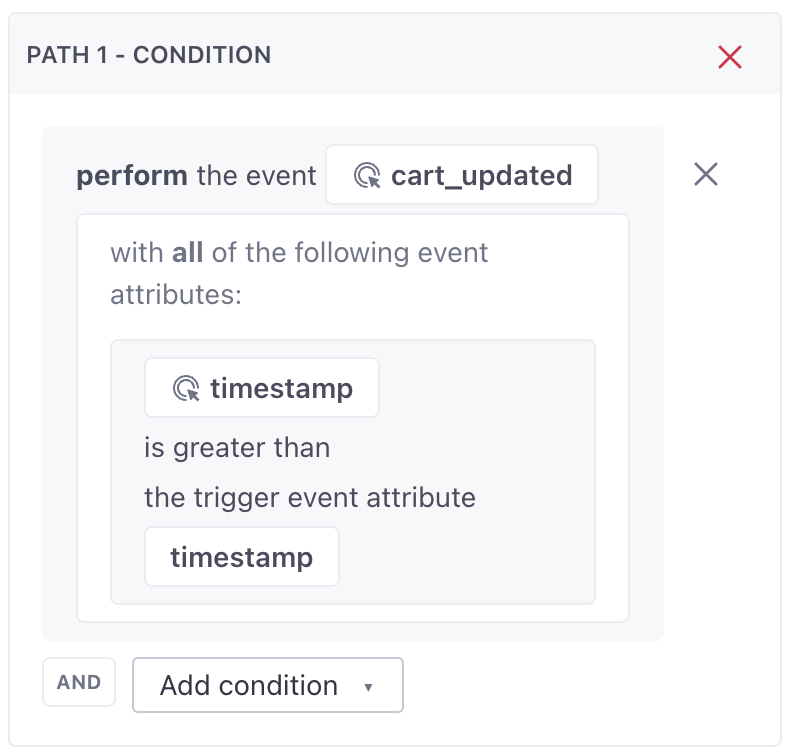
Set a Condition where the cart has updated since the trigger event.
-
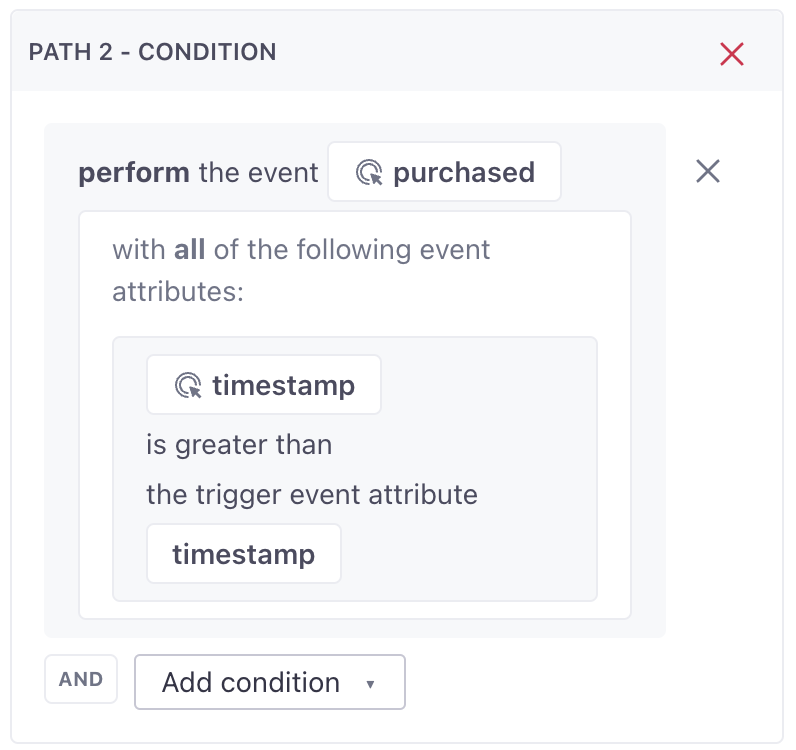
Next, set another Condition where a purchase has occurred since the cart was updated.
-
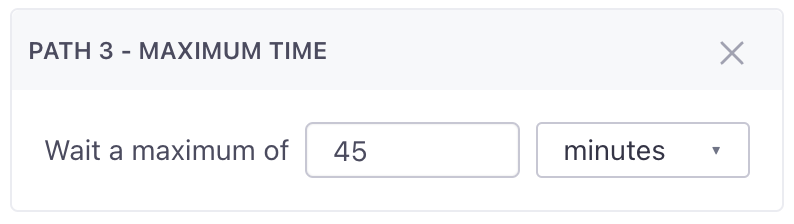
Finally, select Max Time and enter a time period that the workflow should wait to send a reminder email. In this example, we use 45 minutes.
Create Your Reminder Email
Finally, under the Max Time path, add your reminder email. Use liquid to customize the email with each customer’s cart information.
When a person enters the workflow, the clock starts counting to 45 minutes. If shoppers update their carts or purchase items after the event trigger, they exit the automation. Otherwise, when the counter reaches 45 minutes, they’ll receive an email reminding them to purchase the items in their cart.
Method: Segment-Triggered Automation
For this recipe, we’ll walk through storing and updating cart data on your customers so you can send messaging around cart abandonment.
At a high-level, you’ll set the following logic:
- When a person has an item in their cart, you’ll populate their
cartattribute. - When a person updates their cart, you’ll update their
cartattribute. - When a person completes a purchase, you’ll clear their
cartattribute.
Then you’ll create a segment A segment is a group of people in your workspace. Use segments to trigger automations, track membership over time, or fine-tune your audience. There are two types of segments: data-driven and manual. Data-driven segments automatically update when people start or stop matching criteria. Manual segments are static.cart attribute which will trigger an automation reminding them to checkout.
Ingredients
- Your Track API credentials from your Customer.io workspace.
- The ability to update person data programmatically when items are added and removed from a person’s cart.
Set Up Your Cart
Store Cart Data on People
To get started, store cart data as an attribute A key-value pair that you associate with a person or an object—like a person's name, the date they were created in your workspace, or a company's billing date etc. Use attributes to target people and personalize messages.cart using the following JSON:
{
    "cart": [
        {
            "item_name": "Hat",
            "item_price": "22"
        },
        {
            "item_name": "Scarf",
            "item_price": "11"
        }
    ]
}
Update Cart Data When a Person Adds or Removes Items
Next, you’ll set the “cart” attribute on a shopper whenever they add items to or remove items from their cart using an identify call. You can use your language of choice to update a person’s “cart” attribute, but we’ve added examples using our JavaScript source integration and our Classic JavaScript SDK below:
JavaScript Source (recommended)
cioanalytics.identify('1234', {
    cart: [
        {
            item_name: "hat",
            item_price: 22
        },
        {
            item_name: "scarf",
            item_price: 11
        }
    ]
});
Classic JS SDK
_cio.identify(1234, {
    cart: [
        {
            item_name: "hat",
            item_price: 22
        },
        {
            item_name: "scarf",
            item_price: 11
        }
    ]
});
By storing the A syntax that supports variables, letting you personalize messages for your audience. For example, if you want to reference a person's first name, you might use the variable cart attribute on a person, you’ll be able to use liquid{{customer.first_name}}.
Clear Cart Data When a Person Completes a Purchase
If there’s nothing in a shopper’s cart, i.e. they purchased, or otherwise emptied their cart, then you don’t want to send them an email reminding them to purchase. This step removes the cart attribute from a person to ensure you notify the correct shoppers.
When you set the cart attribute to an empty string, you’ll remove it from a person.
JavaScript Source (recommended)
cioanalytics.identify('1234', {
    cart: ""
});
Classic JS SDK
_cio.identify(1234, {
    cart: ""
});
Create Your Segment
Now that you’re sending and storing cart data on people, create a segment for people who have a cart attribute using the exists condition.

Create Your Automation
Set the Trigger for Your Automation
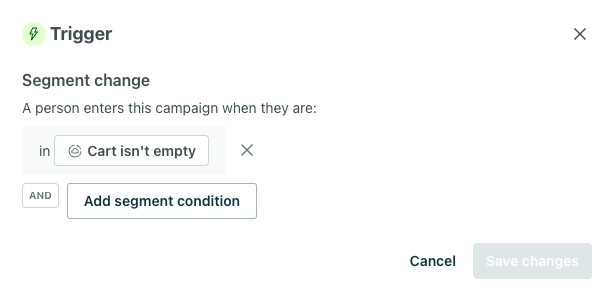
Create an automation that targets the segment you just made — people whose cart attribute exists.
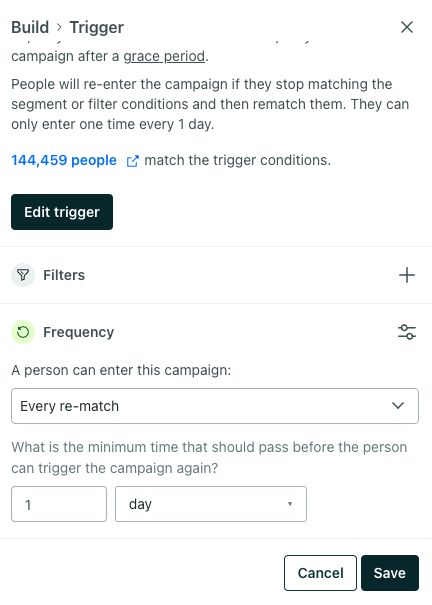
Below the trigger segment, allow people to re-enter the automation at a Frequency you specify. This ensures they enter the Cart Abandonment automation for all future carts.
Set Your Exit Conditions
By default, people will exit when they stop meeting the trigger condition. If a person’s cart is empty or does not exist, they will exit the automation and will not receive a reminder email. This prevents your automation from sending messages to your customers if they complete their purchase before the delay ends.
Create Your Workflow Using a Delay
You’ll add a delay before your first email as well as between your first email and future messages related to cart abandonment. This prevents customers who intend to purchase from immediately receiving a reminder email anytime they change their carts.
.png)
Create Your Reminder Email
Finally, drag an email into your workflow under your delay. This is the email you’ll send to anyone who continutes to meet the automation trigger condition (cart exists) after 45 minutes.
Craft the email content with any relevant information. Use liquid to reference the items in your customers’ carts, their prices, and more:
Hi {{customer.first_name}}!

Your cart contains:
{% for item in customer.cart %}{{ item.item_name }} - {{ item.item_price }}{% endfor %}
In our simple example, this will render like the email below:
.png)
You can use this basic structure to store lots of data as customer attributes and merge in a picture of the item in the cart, a link to the item, and more.