

Birthday and anniversary automations
Introduction
Sending messages on birthdays, anniversaries, and other recurring dates is a great way of keeping customers engaged with your company throughout the year. Customer.io makes this simple. Let’s get started sending your customers a birthday discount, celebrating their time as a customer, or reminding them of something that reccurs on a long time scale.
This recipe documents a yearly anniversary automation, but the same steps work for any type of date.
Ingredients
- A date of each person’s anniversary stored in an attribute
Method
Storing the attribute
If you already have the date attribute stored on the people in your account, then you can skip this step.
When you create a new person in Customer.io, you can store their anniversary or birthday date as one of their attributes. This is an example of how you might do that with the _cio.identify() function in the JavaScript snippet:
<script type="text/javascript">
    _cio.identify({
        id: '1899', // must be unique per customer
        email:      'john@example.com',
        created_at: 1743259962,

        // Custom user attributes
        first_name:  'John',
        plan_name:  'free',
        anniversary_date: 1481067323
    });
</script>
Here, I’ve used anniversary_date but you can name this date attribute however you like. Note, we are using UNIX timestamps in this recipe.
Once the anniversary_date attribute has been added, when you check out this person in Customer.io, their attributes look like this:
.png)
Create the automation
You will use this anniversary_date attribute as the trigger for your automation. Customer.io will use the month and day from this attribute to trigger the automation once per year.
- From Automations, click Create Automation.
- Click Choose trigger.
- Select Important date as the trigger type.
- Pick
anniversary_datefrom the date attribute dropdown. - Set the desired time of day to trigger the automation. Click Save.
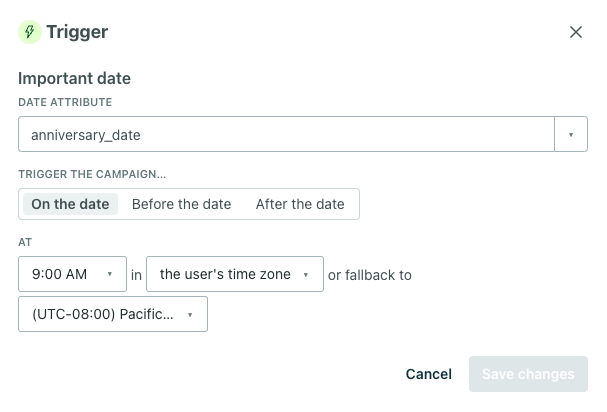
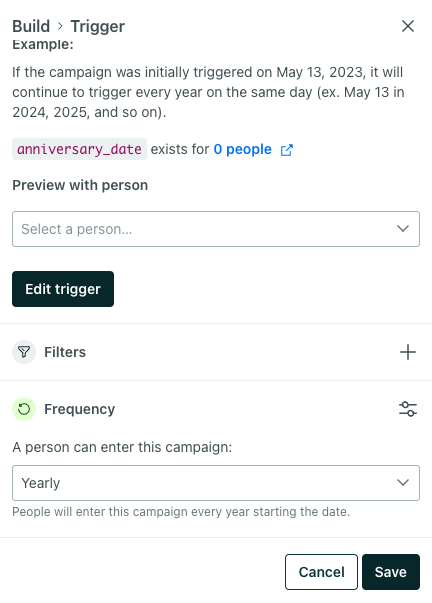
- Scroll down to Frequency on the trigger panel. Choose Yearly from the dropdown so this automation sends yearly on your customer’s anniversary date. Click Save.
- If you set the trigger to midnight in a user’s time zone, then drag a Time Window onto your workflow. Set this to the time of day you want to reach your audience.
- Drag a message block into your workflow and add your content. Remember to update the sending behavior to Send automatically so you don’t have to manually send drafts.
- Review and start your automation.
Wrap Up
This recipe covered the basics, but you can also:
- Choose to send the automation a certain number of days before or after the anniverary date. For instance, if you want to give 3 days of notice for a promotion they can use on their anniversary.
- Build a countdown workflow leading up to a date. Follow this same recipe, but use Delays in your workflow to create a drip of messages.
- Send messages for events that occur monthly rather then yearly. In this case, Customer.io will use only the day of the month as the recurrence criteria.
If you need any additional help setting up your automation, please get in touch and we’ll be happy to help!