Webhook automations
Webhook-triggered automations let you use your JSON data in Customer.io, without having to reshape it using Zapier or another product first. Where our traditional workflows trigger based on a person, a webhook trigger lets you start an automation when you receive JSON data (in any shape) from a specific source.
How it works
Normally, you trigger automations when a person performs an event or meets some criteria you set. This type of automation lets you use webhooks to trigger workflows when you receive data from an external source. This video helps explain how it works:
When you set up a webhook-triggered automation, Customer.io generates a Webhook URL. You’ll provide this URL to the service or platform that you capture data from and set up rules determining when that service or platform will call your webhook, sending data to Customer.io. The data that your service or platform sends to Customer.io can take any JSON shape—arrays, objects, etc. As a part of your workflow, you’ll transform the incoming data to fit your needs.
You might use a webhook to capture data from an external service and convert it to:
- An event that triggers an automation to send messages in Customer.io. This is the most common use case.
- An attribute
A key-value pair that you associate with a person or an object—like a person's name, the date they were created in your workspace, or a company's billing date etc. Use attributes to target people and personalize messages.
update for a person. - Another service—using Customer.io as a bridge between data platforms, like what Zapier and Segment do!
Reference customer attributes
You cannot reference existing customer attributes in webhook-triggered automations because people aren’t the subject of the automation: the webhook is. The automation acts on the incoming webhook data, so there’s no person/customer to reference. Any attempt to reference customer data will return "" (or undefined when using JavaScript) within a Create/Update Person action.
For example, the following Liquid is written to return the customer.custom_attribute value and append trigger.custom_attribute, or simply use the trigger.custom_attribute value if there is no value stored at customer.custom_attribute.
{% if customer.custom_attribute == blank %}{{ trigger.custom_attribute }}
{% else %}
{{ customer.custom_attribute | append: trigger.custom_attribute }}
{% endif %}
However, within a webhook-triggered automation, this Liquid will only return trigger.custom_attribute, regardless of the customer’s custom_attribute value.
You can use a Create/Update Person action within the webhook-triggered automation to set attributes for people based on a match with the incoming webhook. You just won’t be able to retrieve the current attribute values.
Why can’t I send an email or message in my automation?
In most automations, a person is the subject of the journey through your workflow. But in a webhook-triggered automation, the incoming webhook is the subject of the automation. We don’t know who (if anybody) your data is meant to represent. This means that you can’t send a message from a webhook-triggered automation because there’s no person to send a message to.
But you can associate data from your webhook with a person in your workspace and trigger a secondary automation that sends messages to a person—as long as there’s a value in your webhook that represents a person like an ID, email address, phone number, etc.
If your incoming webhook has this kind of data, you can use the Send Event action. This lets you transform your incoming webhook data into an event Something that a person in your workspace did. Events can trigger automations, add people to segments, etc, and you can use properties from events to personalize messages.
Create a webhook-triggered automation
As a part of automation setup, you’ll receive a webhook URL that you need to provide to the external service that you want to capture data from. Before you begin, make sure that you have access to the service you want to capture data from, and that that service can send webhooks.
-
Go to Automations and click Create Automation.
-
Click Webhook.
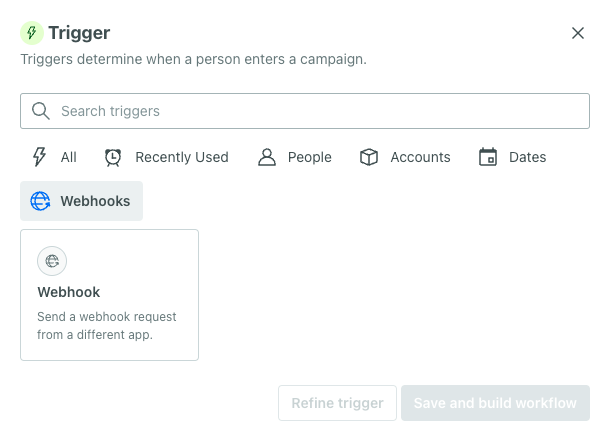
-
Copy the Webhook URL and provide it to your external service. If possible, trigger the webhook; this sends representative data that you can use when setting up your automation.
-
Click Save & Next.
-
Set up your workflow. From here you can:
- Create Events to trigger another automation or add people to segments.
- Create or Update People in your workspace.
- Send a Batch Update to update attributes or send events for multiple people.
- Use the Send data action to send a webhook. This forwards data to another service outside Customer.io:
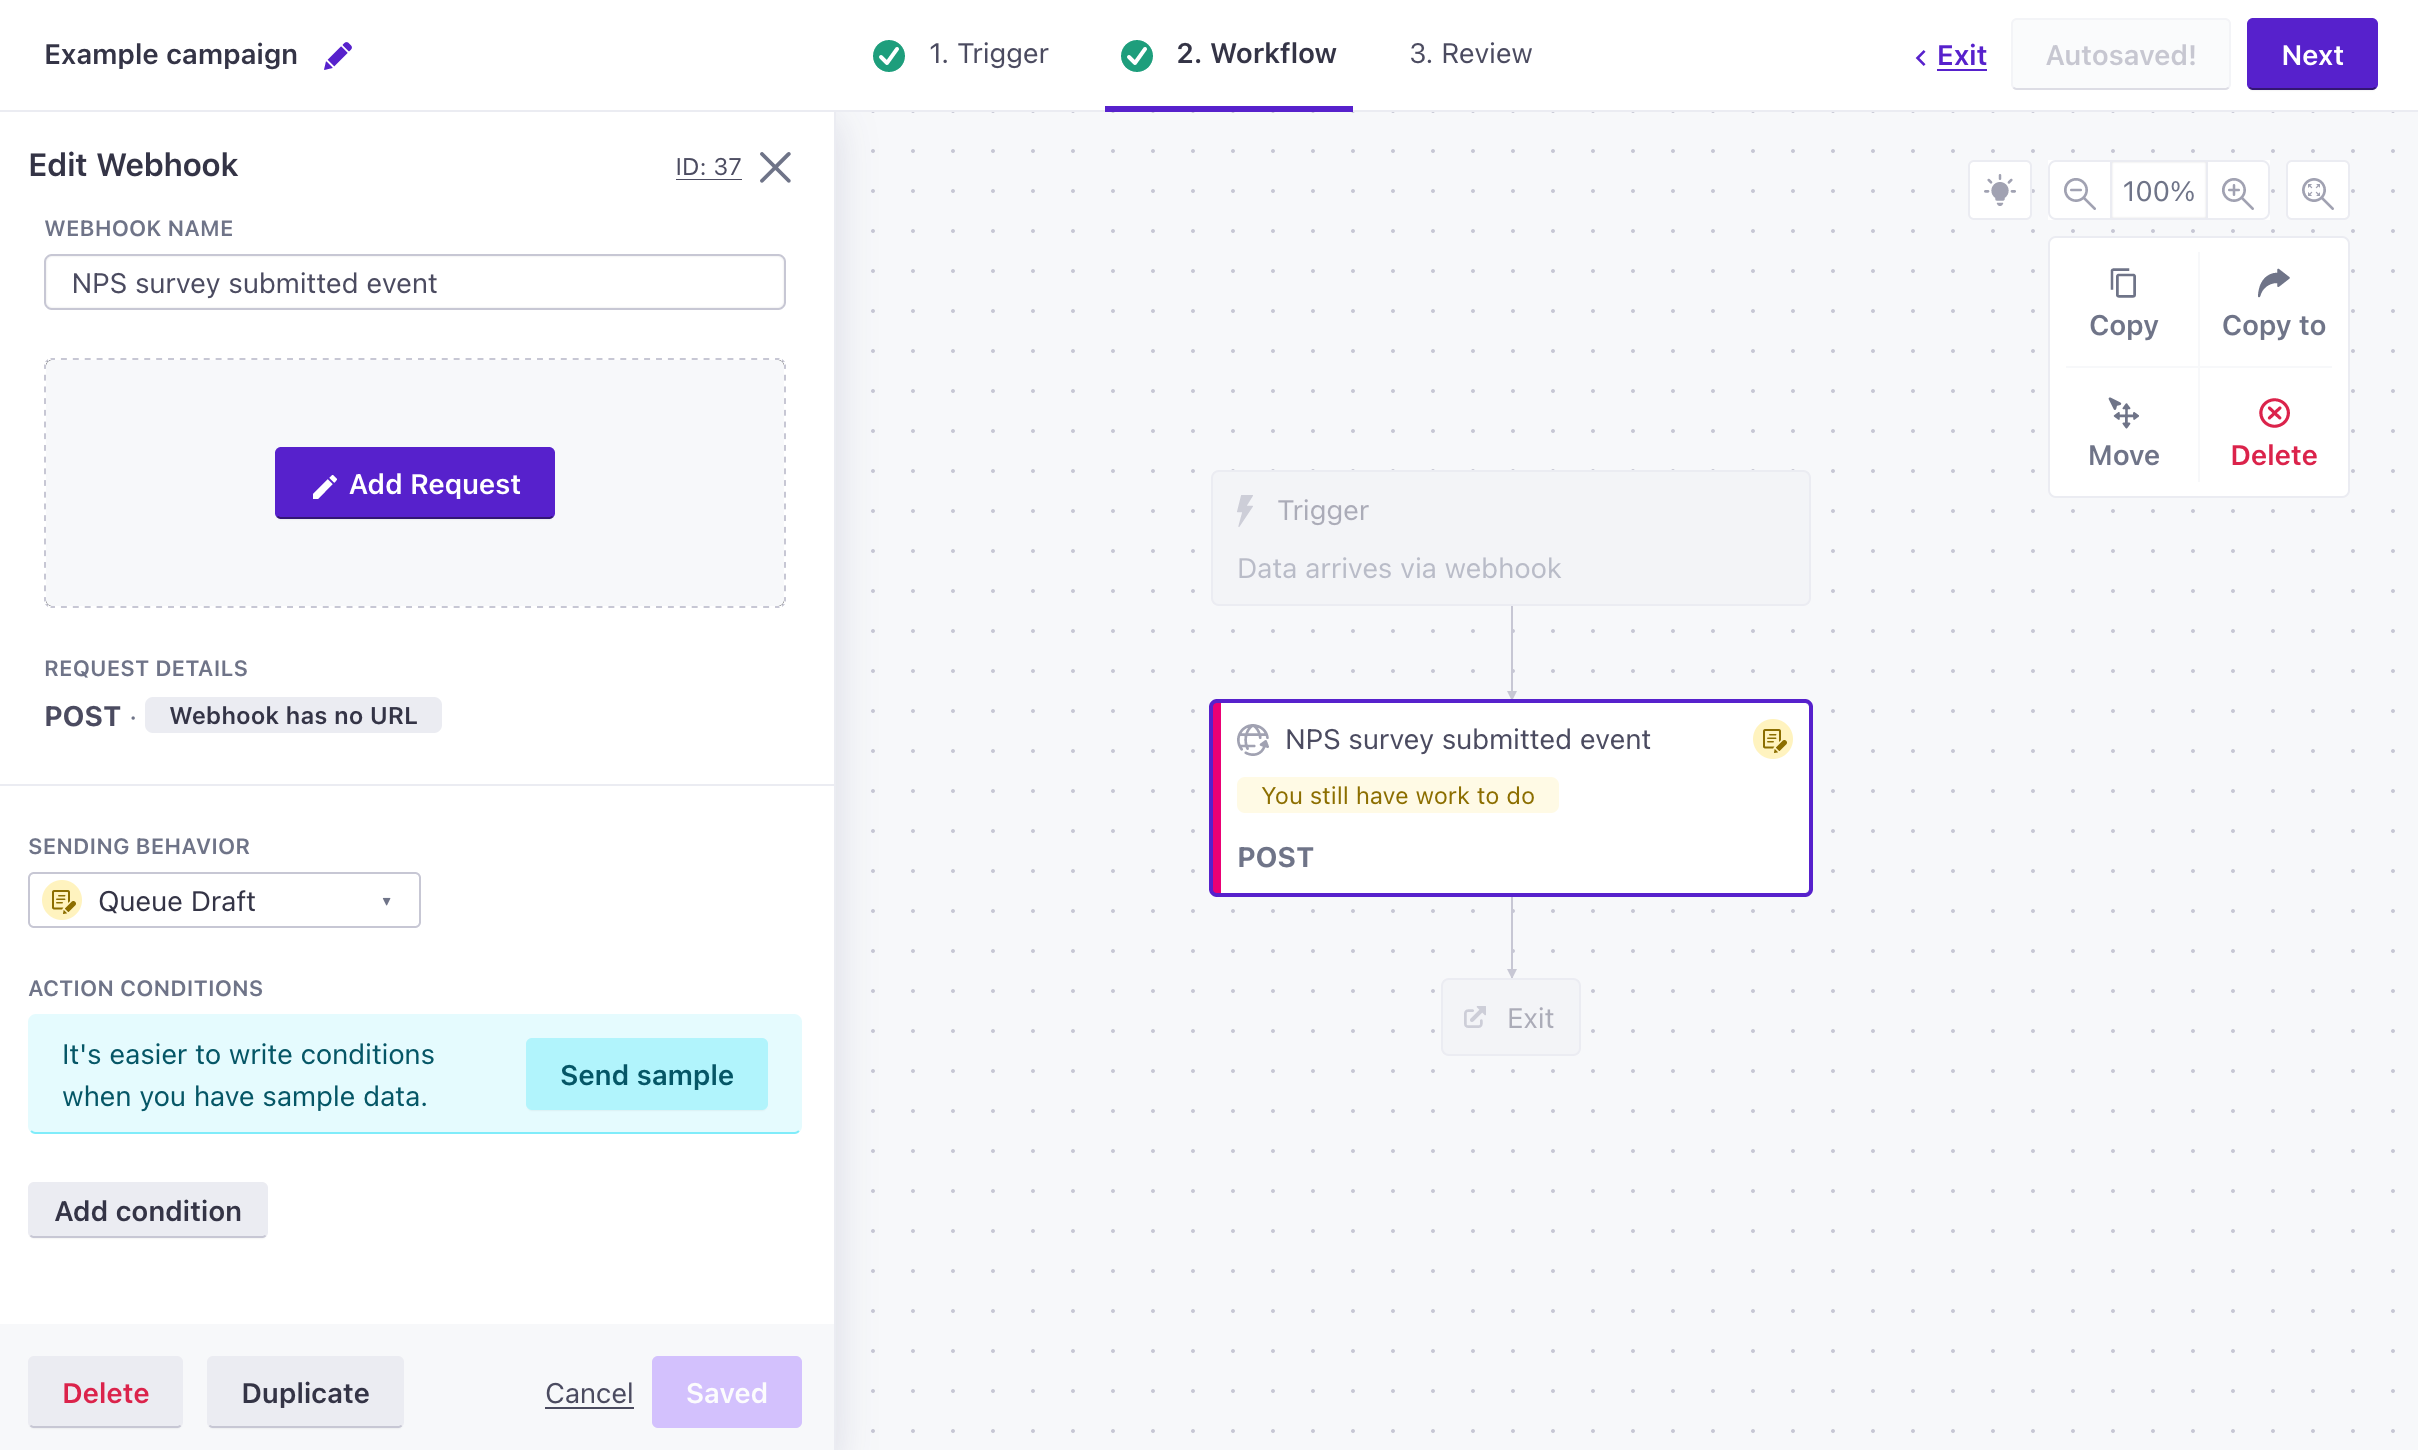
-
Click Next at the top right.
-
Review your workflow, then click Start automation at the bottom of the page.
Send event
The Send Event action lets you transform your incoming Trigger data to an event so you can trigger messaging automations or add people to segments. In general, the webhook that triggers your automation should contain an identifier The attributes you use to add, modify, and target people. Each unique identifier value represents an individual person in your workspace.
When you create an event, you must specify an Event Name (the name key) and Event Attributes (contained by the data object). Each of these fields can be one of four types:
- Static value: A value that is the same in every event.
- Trigger attribute: A property from your Trigger data. You can start typing to find a key in the incoming data or click the value in the Trigger data.
- Liquid
A syntax that supports variables, letting you personalize messages for your audience. For example, if you want to reference a person's first name, you might use the variable
: Use liquid to modify trigger attributes to fit your event—like reformatting a date value or appending a string to your event’s name.{{customer.first_name}}. - JavaScript: Use JavaScript to modify trigger attributes to fit your event—like reformatting a date value or appending a string to your event’s name. Use JavaScript over liquid if you want to modify incoming JSON.
To create an event in your webhook-triggered automation:
- Drag Send Event into your workflow and click it.
- Set the Event Name. The event name helps you identify this action in your workflow; it’s not the
namevalue for the event. - Click Add event to set up your event.
- Under Who do you want to update?, select the Workspace containing the people you want to attach events to.
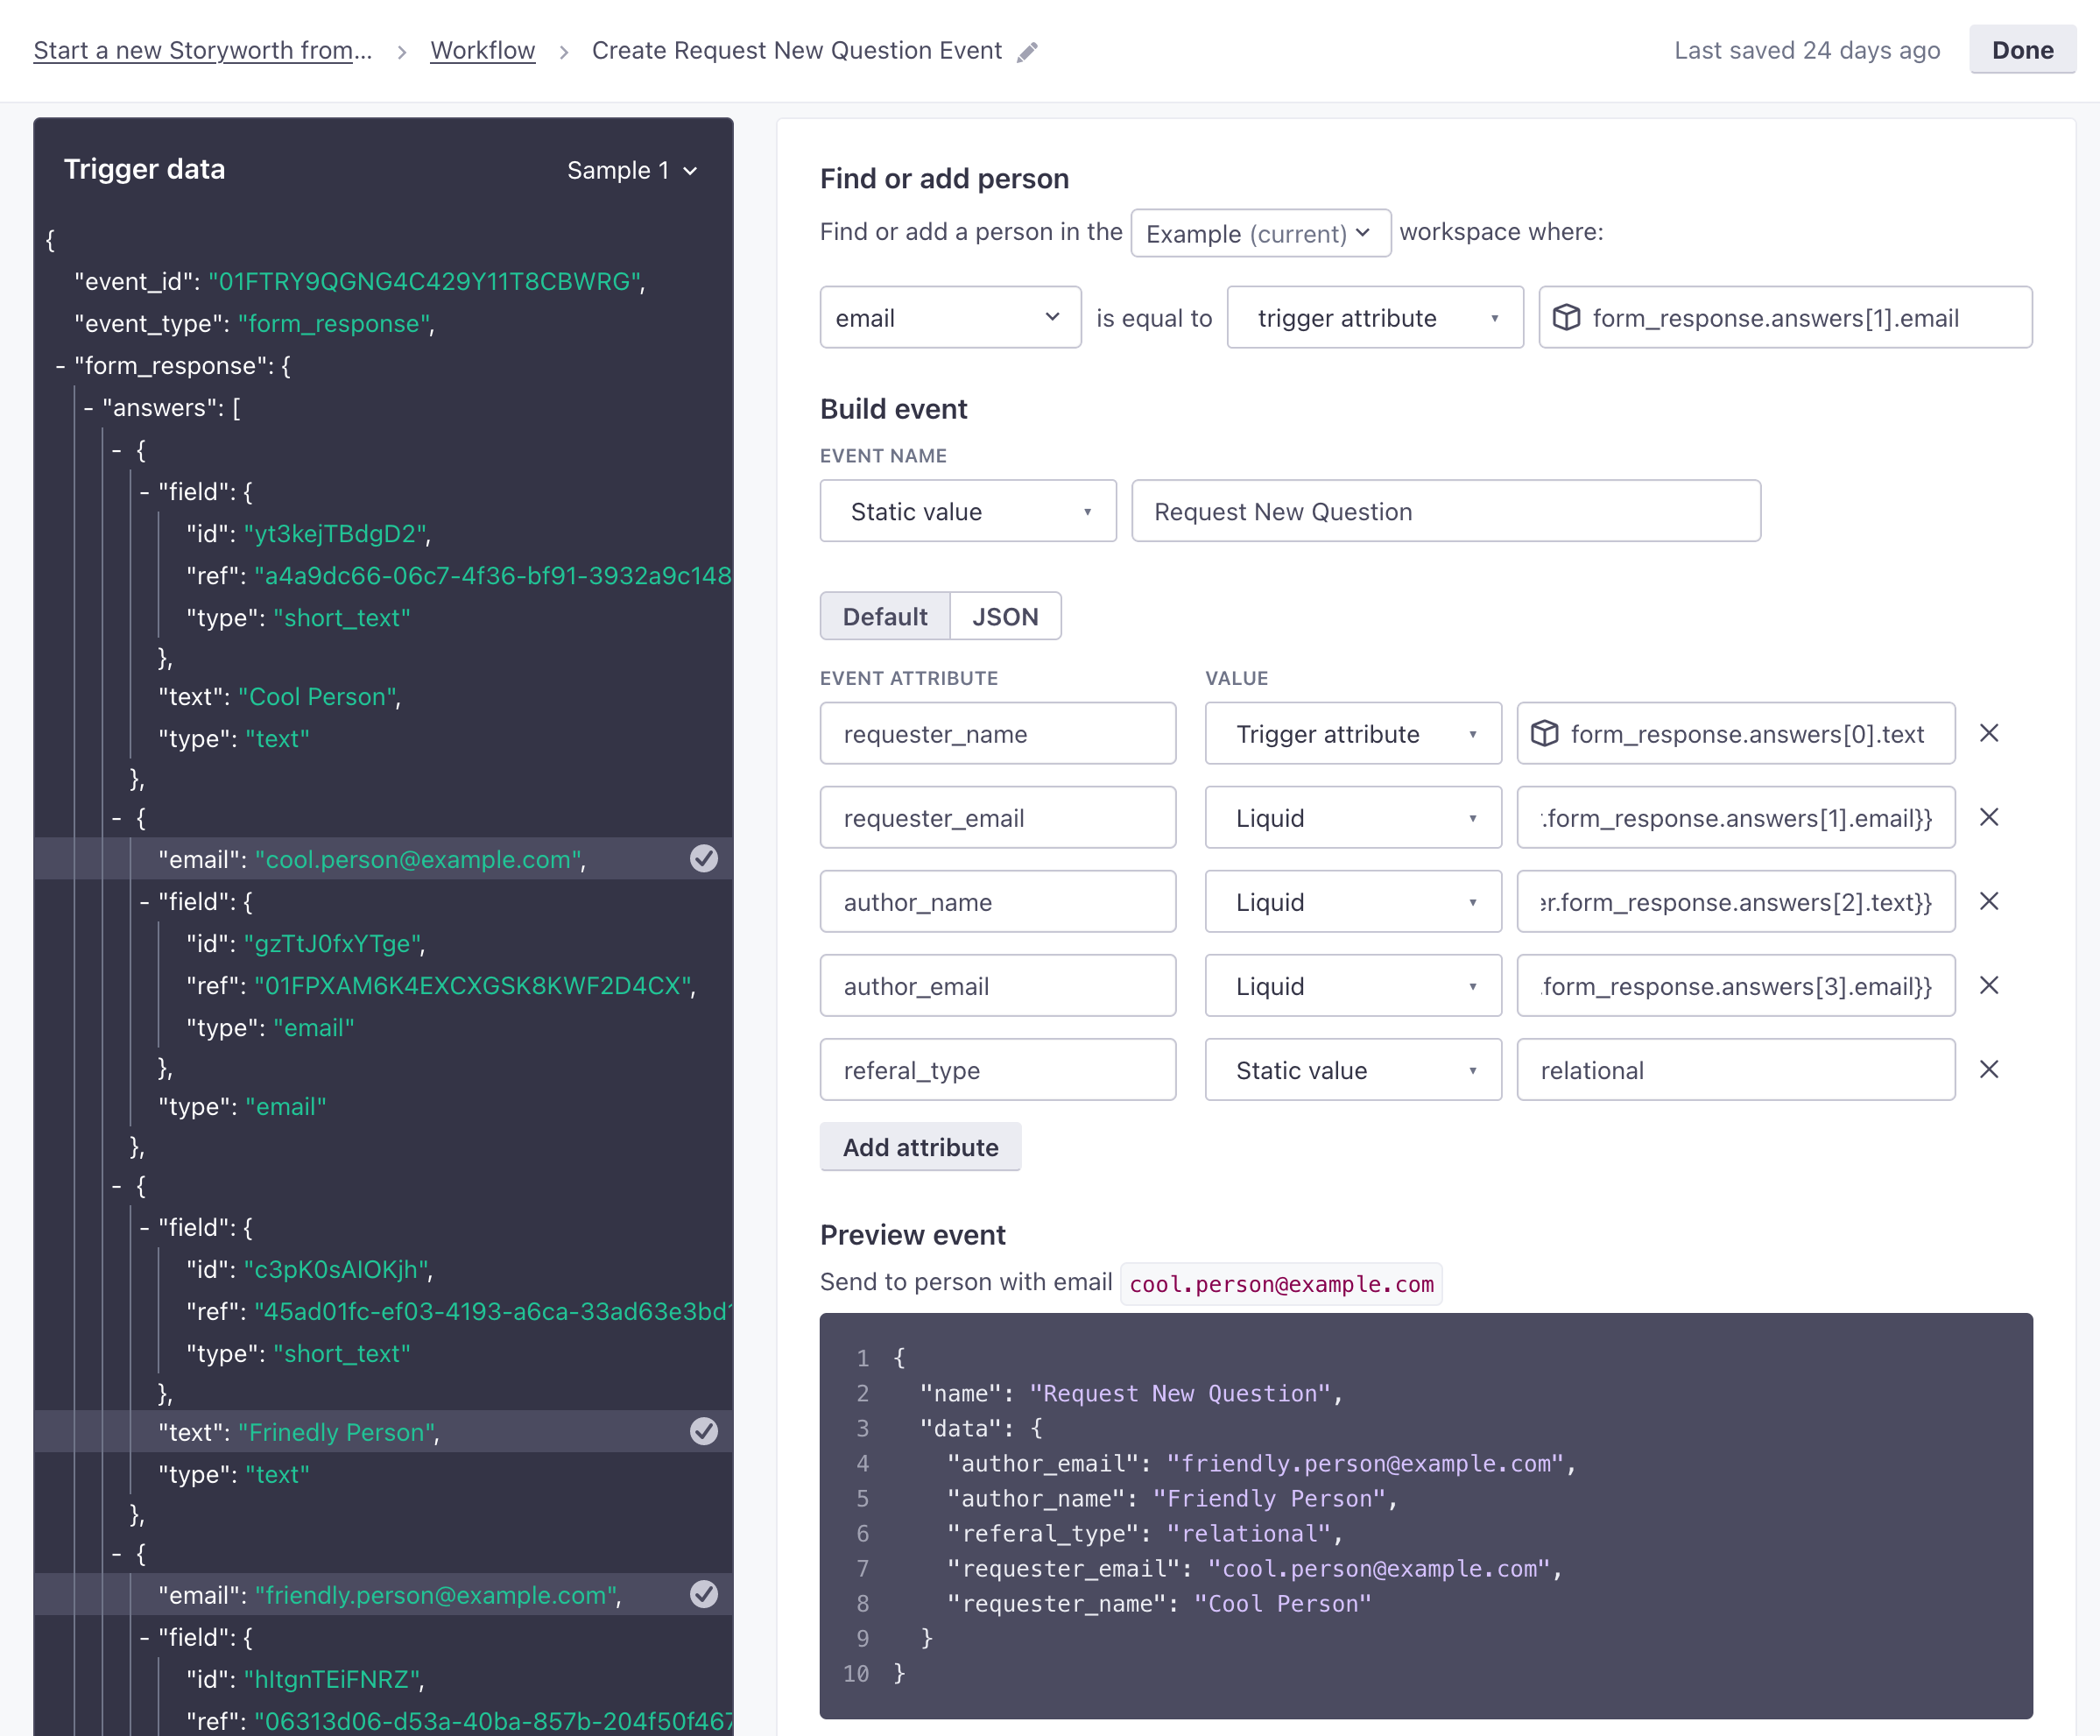
- Select the type of Identifier and set the identifier’s value for people in that workspace. You can identify someone from a trigger attribute, liquid, or JavaScript. Set a static value to always send events for the same person.
- Set the Event Name. This is the
namevalue for the event that you’ll reference outside of this automation in other automation triggers, segments, etc. - Add Event Attributes. These are values that appear in the
dataobject of your event. You can use these properties to filter people into different automations or reference them in messages using liquidA syntax that supports variables, letting you personalize messages for your audience. For example, if you want to reference a person's first name, you might use the variable
.{{customer.first_name}}. - Save your changes and click Done. Now you can finish building your webhook-triggered automation.
Create or update a person
If your incoming webhook contains an identifier The attributes you use to add, modify, and target people. Each unique identifier value represents an individual person in your workspace.
- Drag Create or Update Person into your workflow.
- Give the action a Name and click Add Details. You can also set Action Conditions if you want to limit when you create or update people based on an attribute in your incoming webhook.
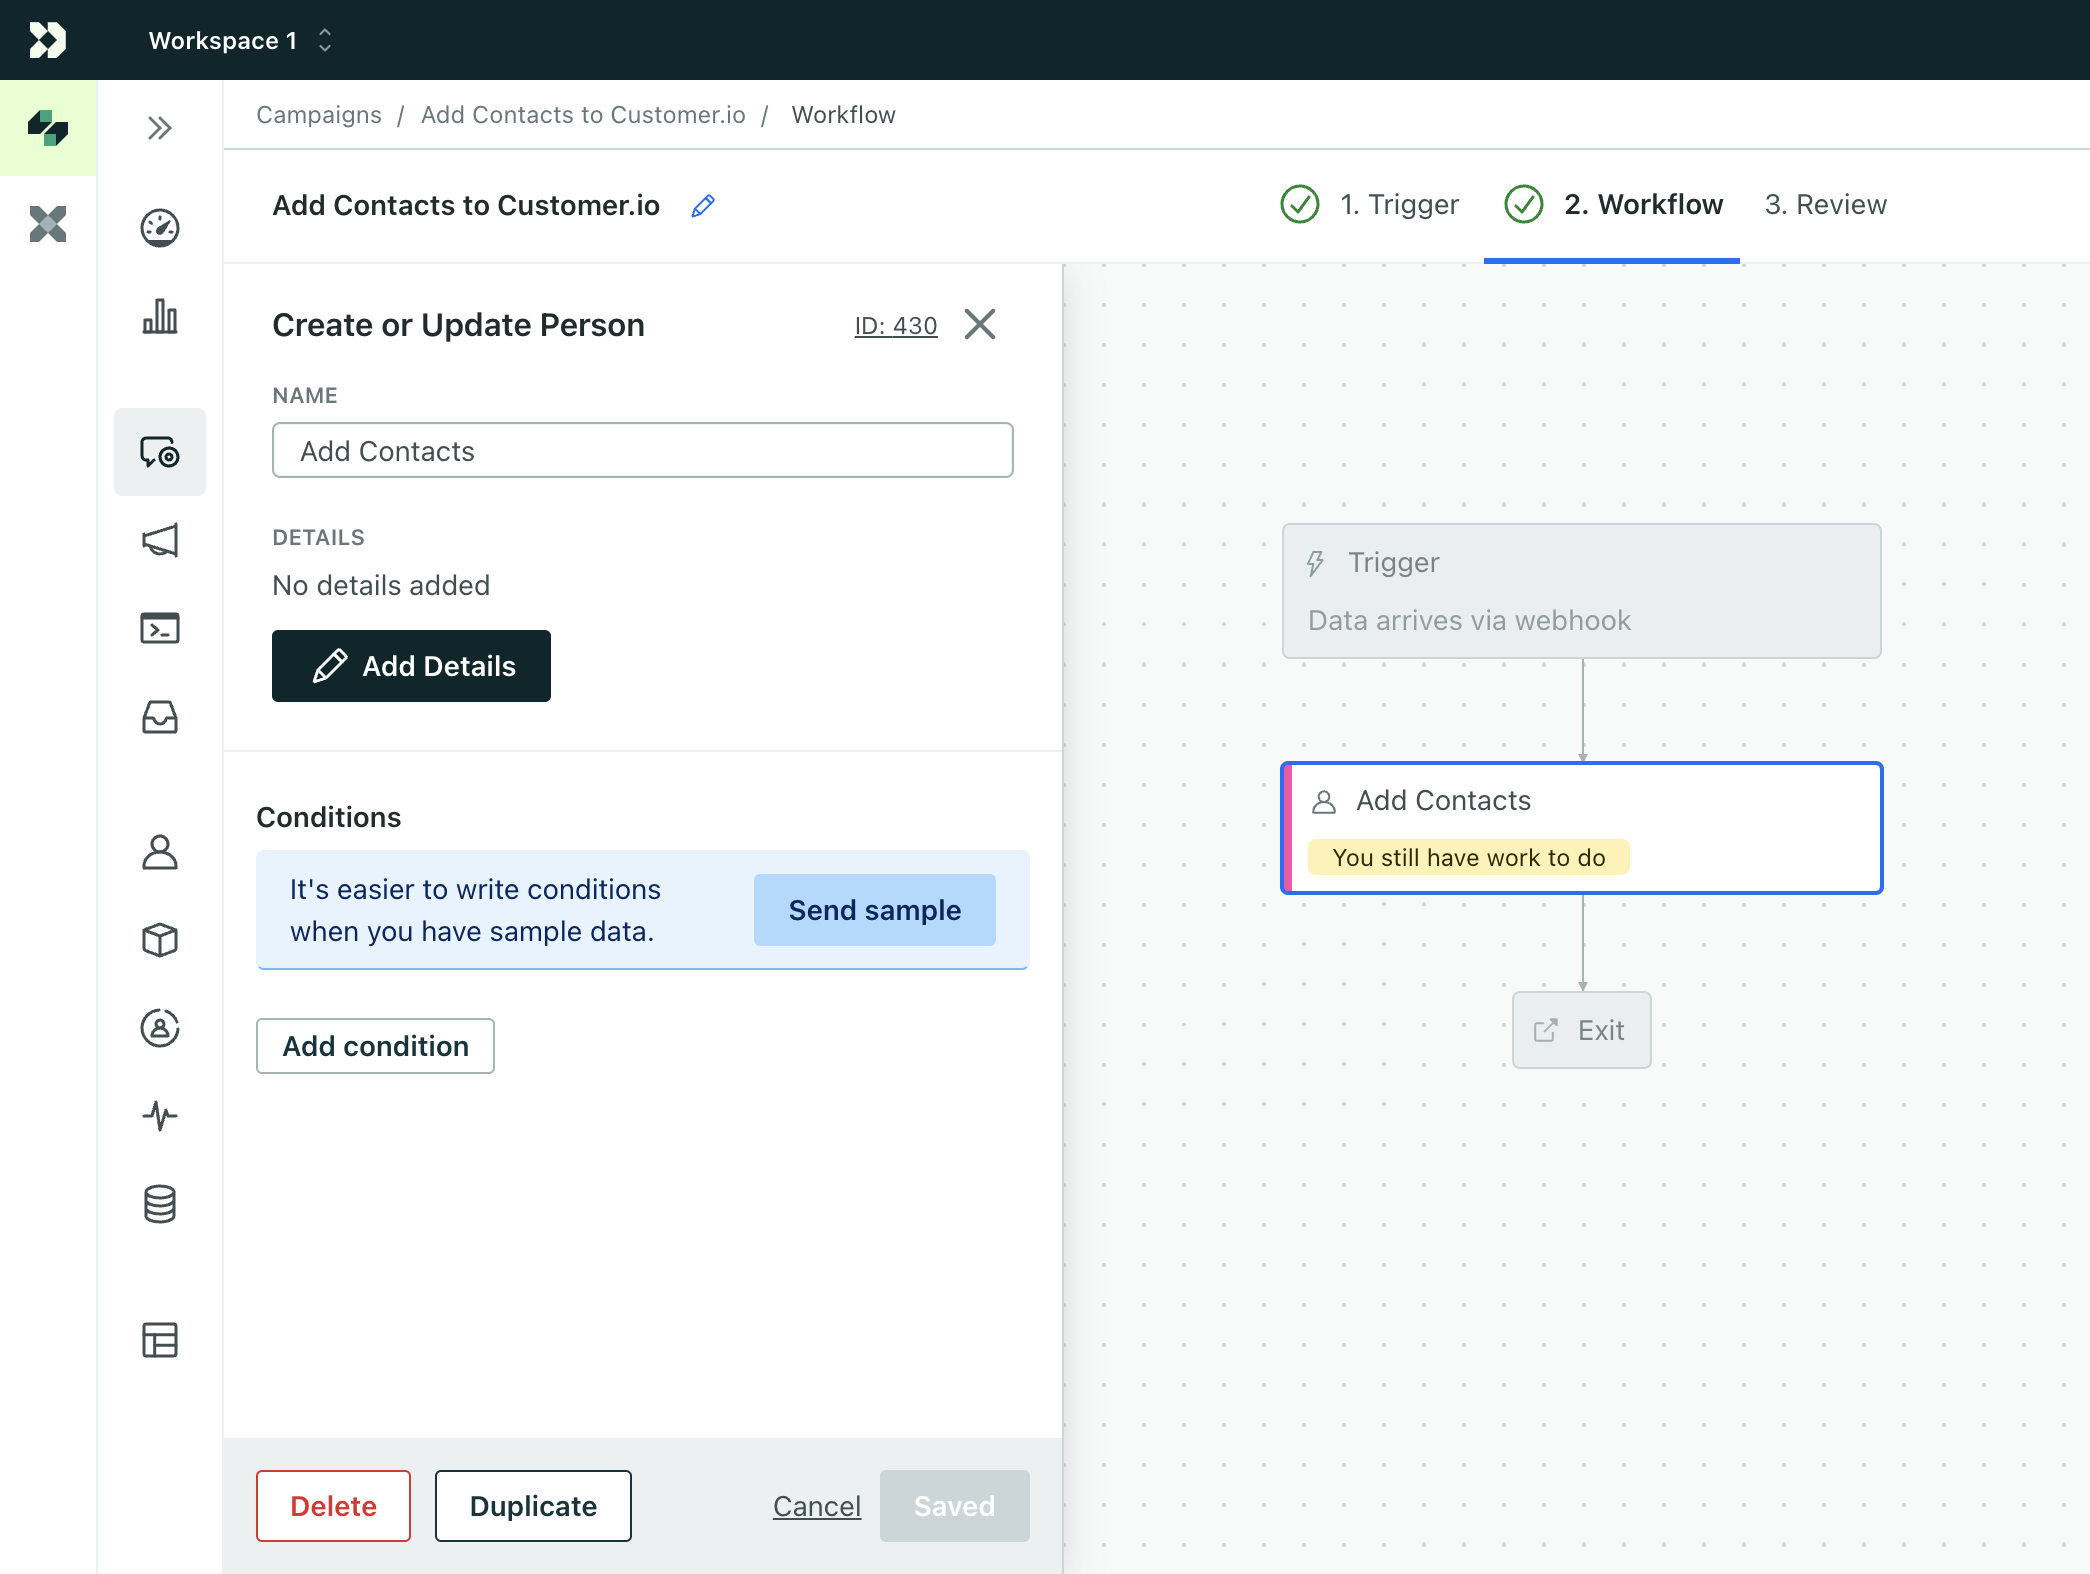
- Select the workspace you want to add or update people in.
- Select the type of identifier
The attributes you use to add, modify, and target people. Each unique identifier value represents an individual person in your workspace.
for the person you want to find or create then pick a value from your incoming webhook data. - Click Add attribute and set attribute values for the new person.
- Attribute represents the name for the new attribute.
- Value lets you select where your value comes from and the value itself. For example, if you want to use an event property as a new attribute value, you’ll select event attribute and then the specific attribute in the event that you want to set as a person’s attribute.
- Keep in mind, you cannot reference customer attributes in webhook-triggered automations.
- Click Save changes when you’re done, and finish your webhook-triggered automation.
Batch update
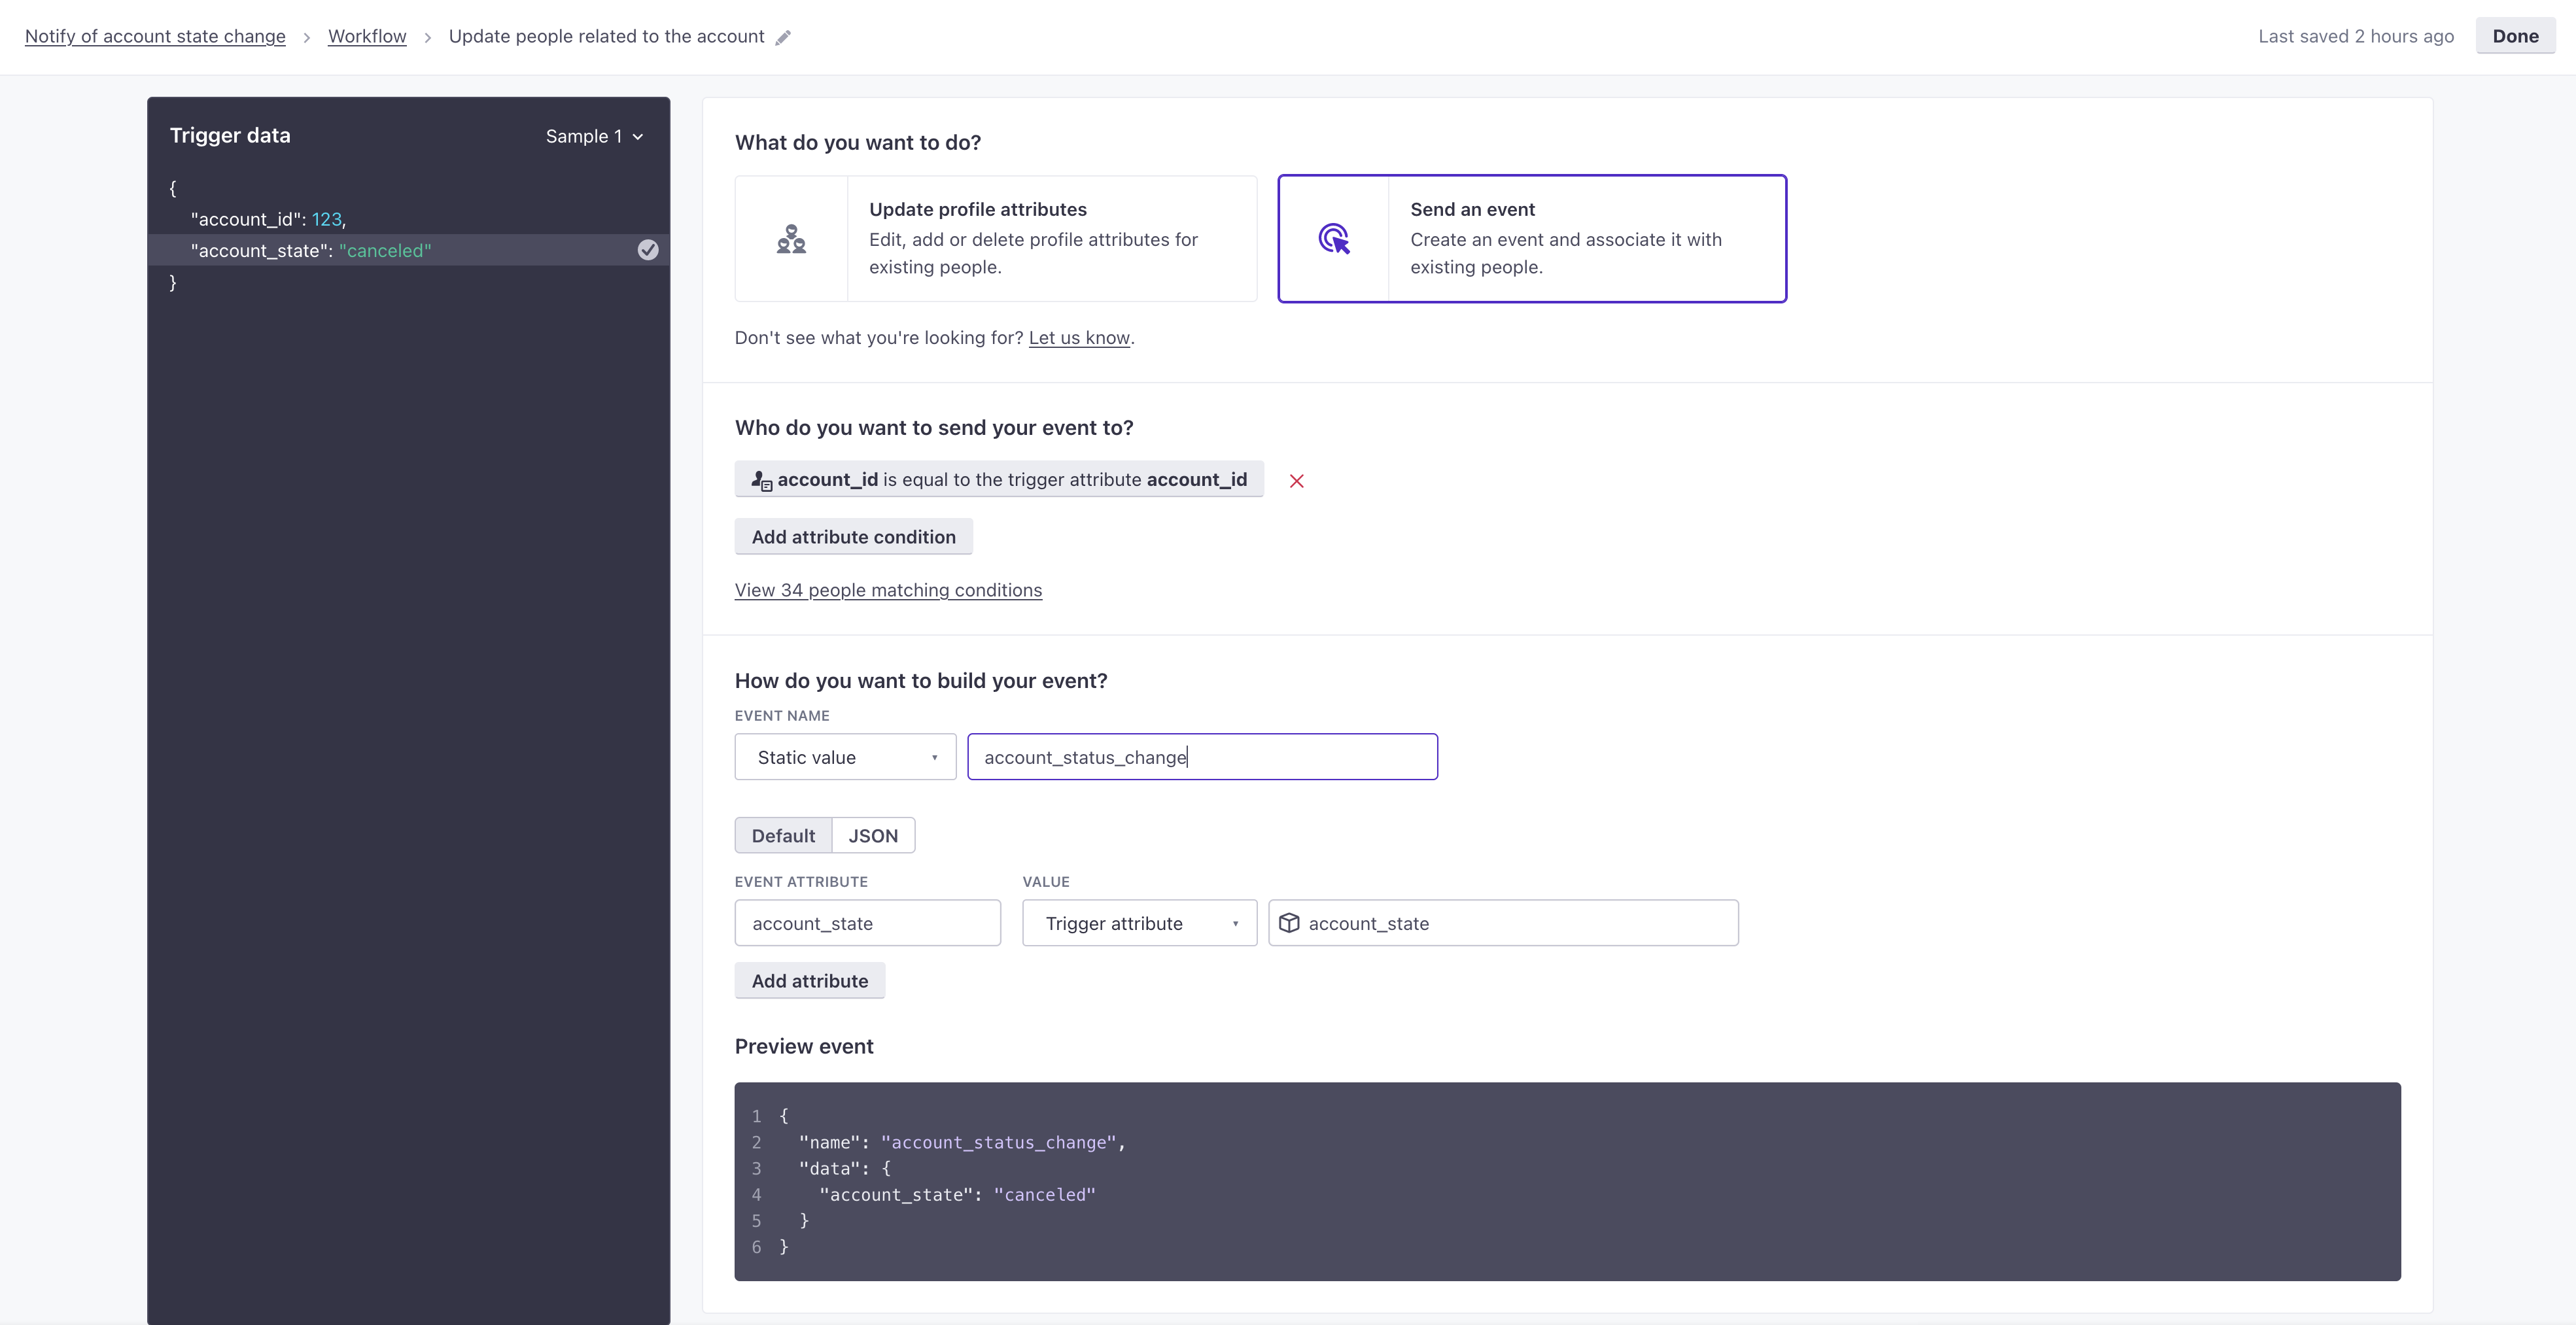
Other actions in a webhook-triggered automation assume a one-to-one relationship between your data and a person. A batch update lets you associate your incoming data with a group of up to 1000 people. For example, if multiple people can belong to an account and you trigger your webhook-based automation when the account status changes, you can use a batch update to associate the new account status with all the people in your workspace belonging to that account.
The batch update action works much like a Send event or Create or update person action, except that you’ll set criteria determining the group of people you want to set attributes for, or send events to. See the batch update page for help setting up a batch update.
Liquid variables
When you create an event or set a person’s attributes, you can manipulate values from your Trigger data with liquid A syntax that supports variables, letting you personalize messages for your audience. For example, if you want to reference a person's first name, you might use the variable {{customer.first_name}}.trigger object. For example, you would access the id from the trigger data below using {{trigger.identifiers.id}}.
You can also use liquid to modify the trigger data. You might want to do this if you need to convert timestamps, append values, or access a specific set of values from an array. See the liquid tag list for a list of ways you can transform data.
| Trigger Data | Outgoing Webhook (identify) |
|---|---|
JSON | JSON |
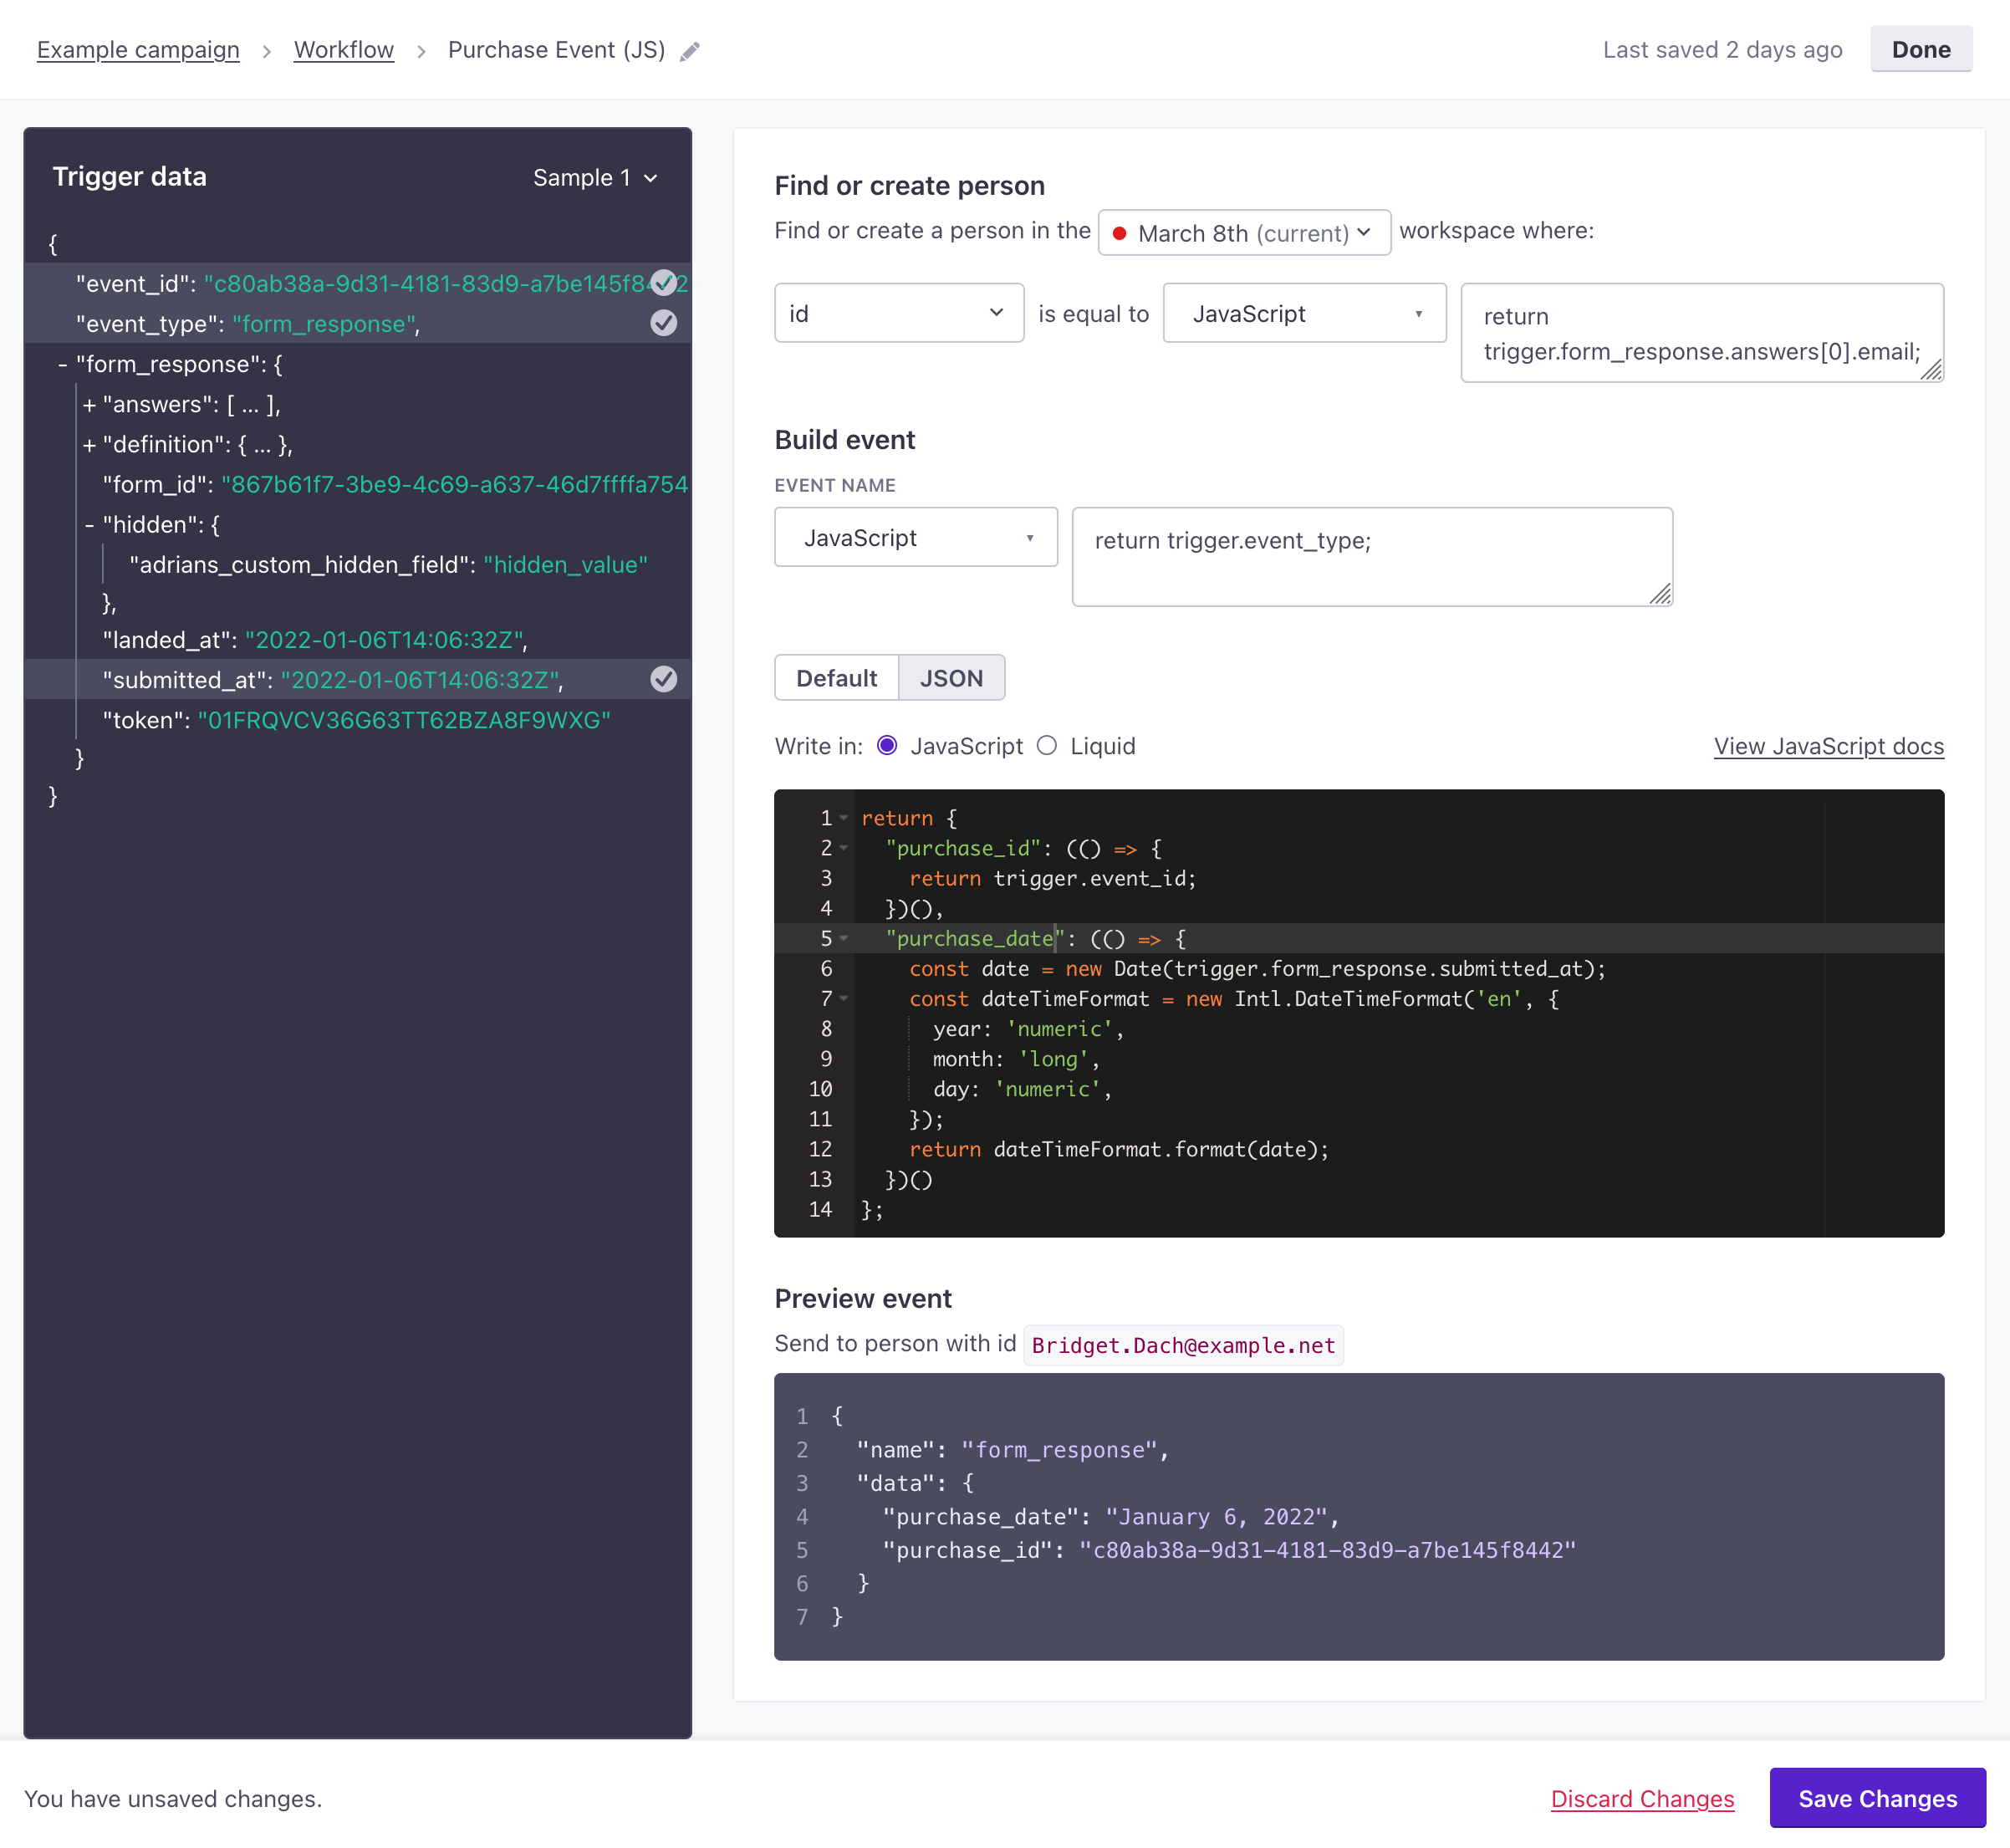
Use JavaScript in your webhook-triggered automation
When you use the Create Event or Create or Update Person actions, you can also manipulate values from your Trigger data (or snippets Reusable content, like a company address, that you can reference with a liquid key across your messages.return statements for your attribute or event data.
For example, if you wanted to access a person’s id using the example above, you would use return triggers.identifiers.id;.
See our JavaScript quick reference guide for more examples to help you take advantage of JavaScript in your workflow.