Automations are automated workflows that send messages and perform other actions when people meet certain criteria. This page takes you step-by-step through creating an automation from scratch.
Here’s a brief video showing the main components of our automation builder.
And here’s a walkthrough on creating an onboarding automation!
Before you begin
Before you begin, determine the purpose of your automation. This will help you define the trigger and goal of your automation. Are you trying to reach people who have just signed up? Are you interested in notifying people about changes to accounts they manage? Or maybe you want to promote a new feature in your product?
Check out our recipes to see if we’ve covered your use case!
Create an automation & set a trigger
To create an automation from scratch:
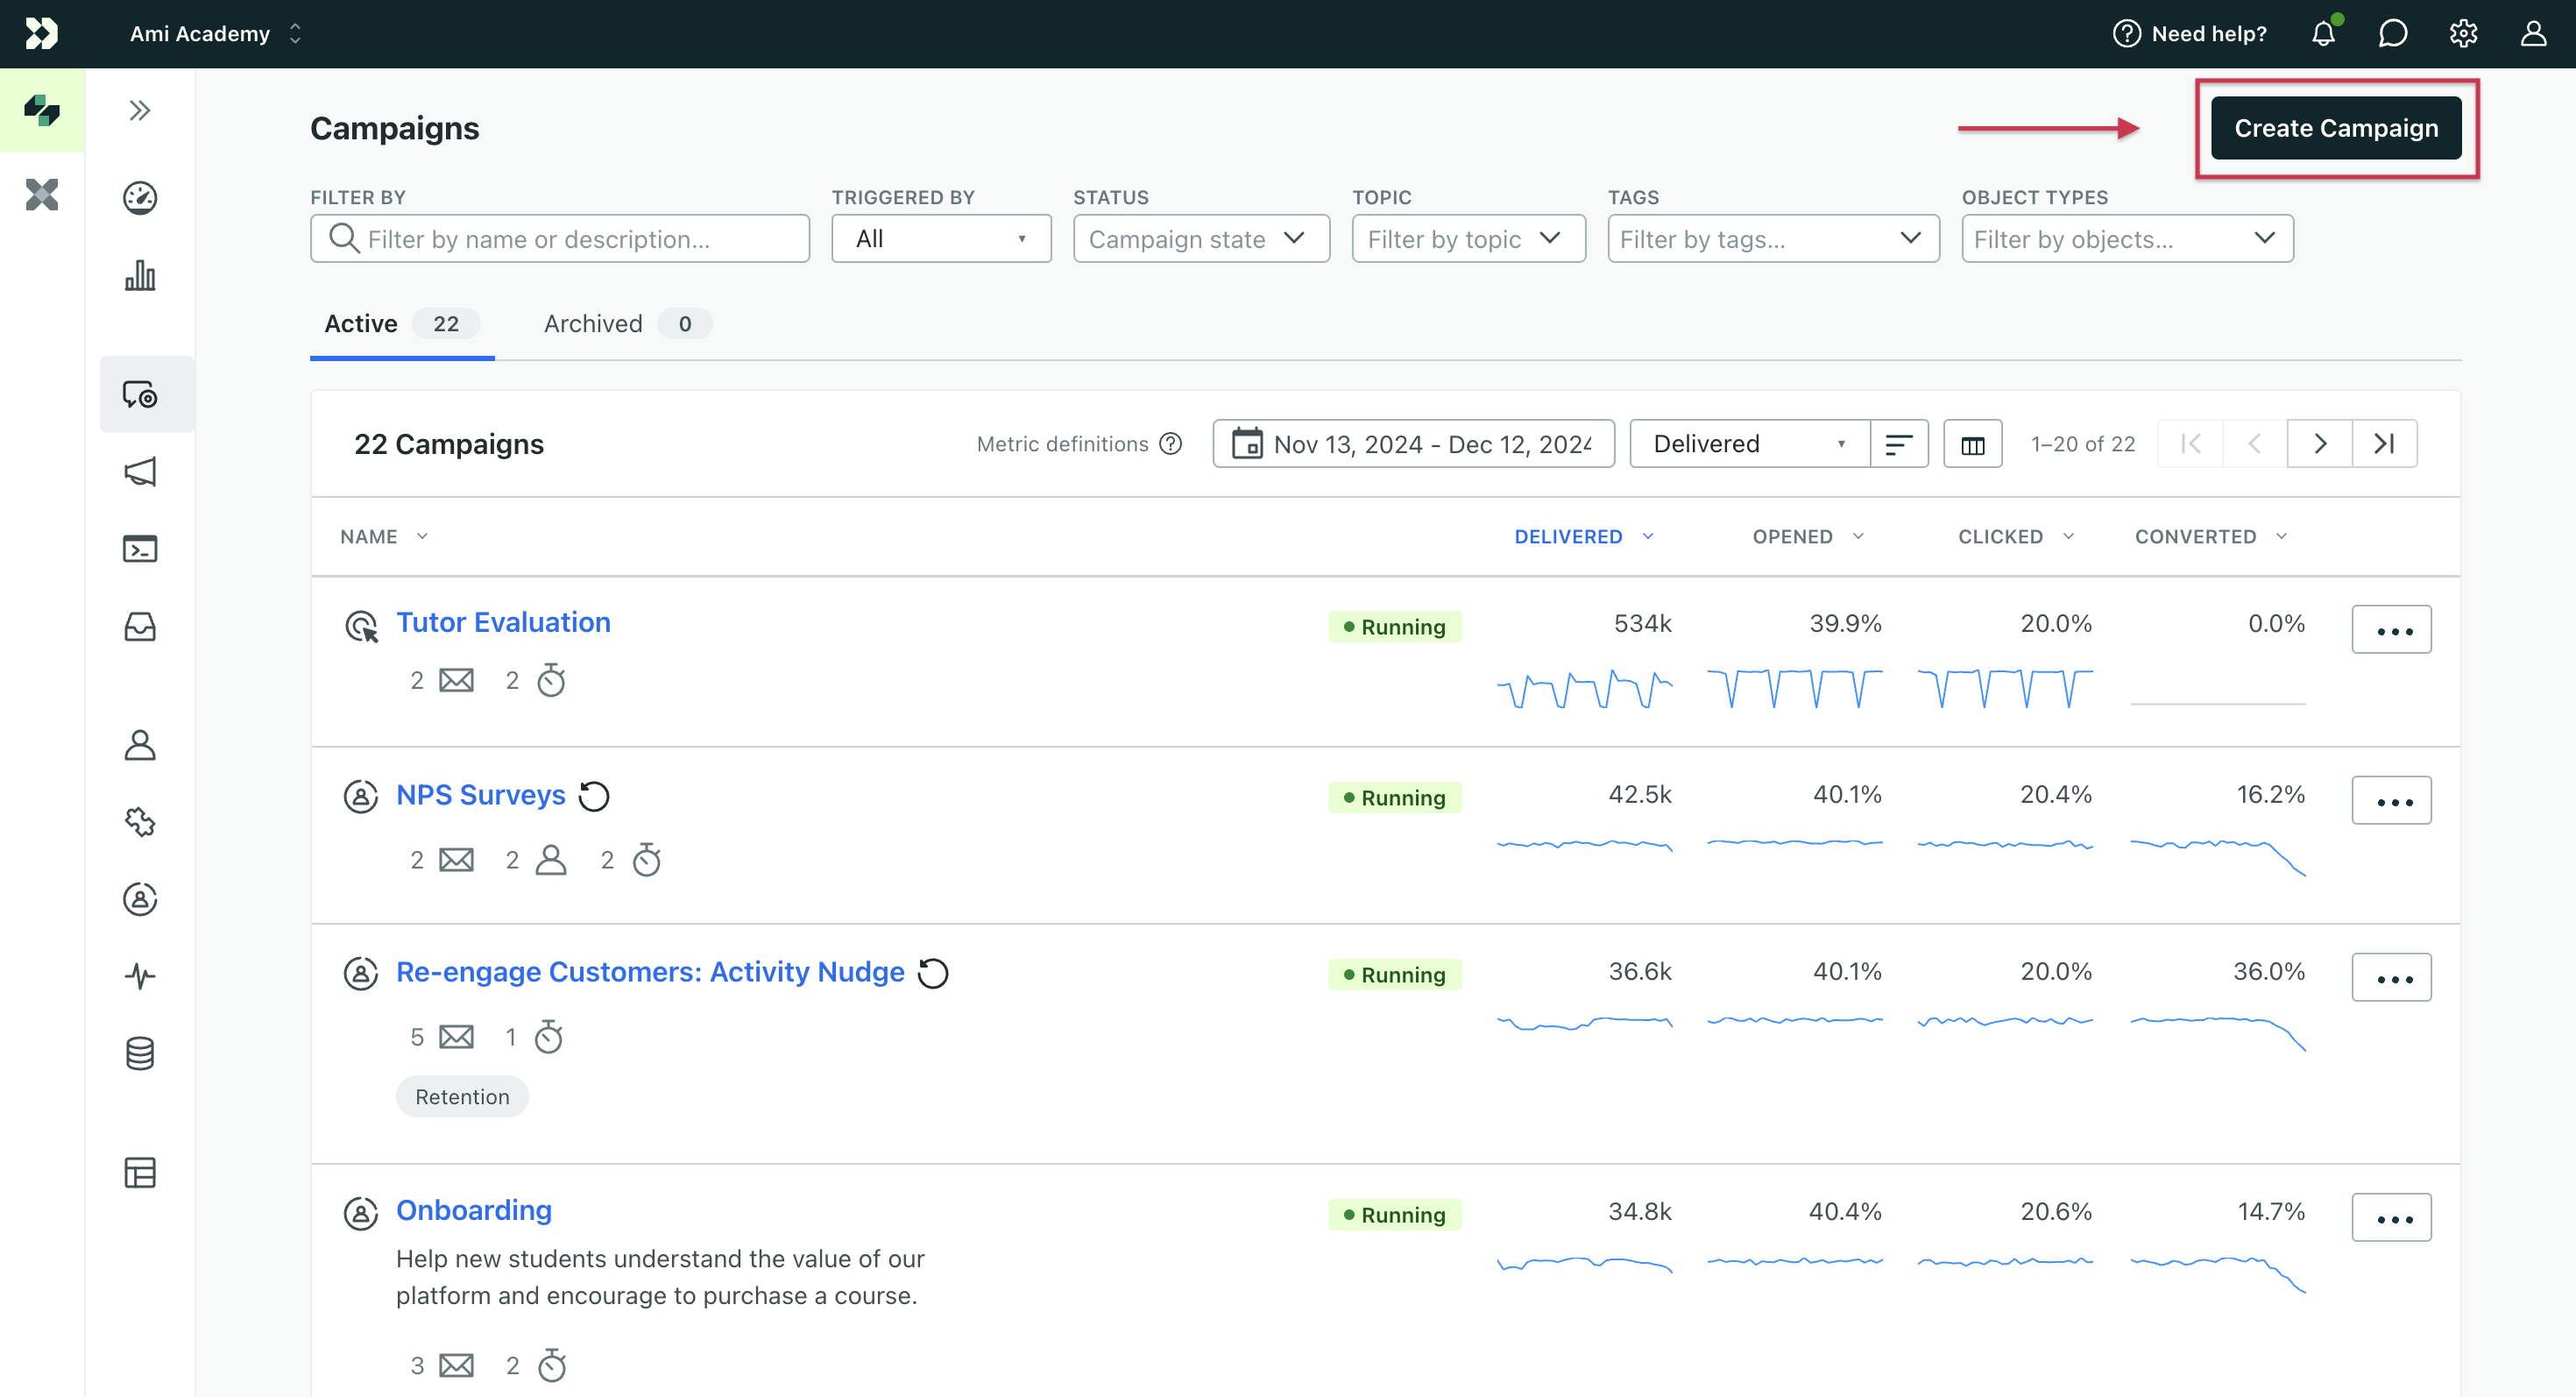
Go to Automations. Then click Create Automation.
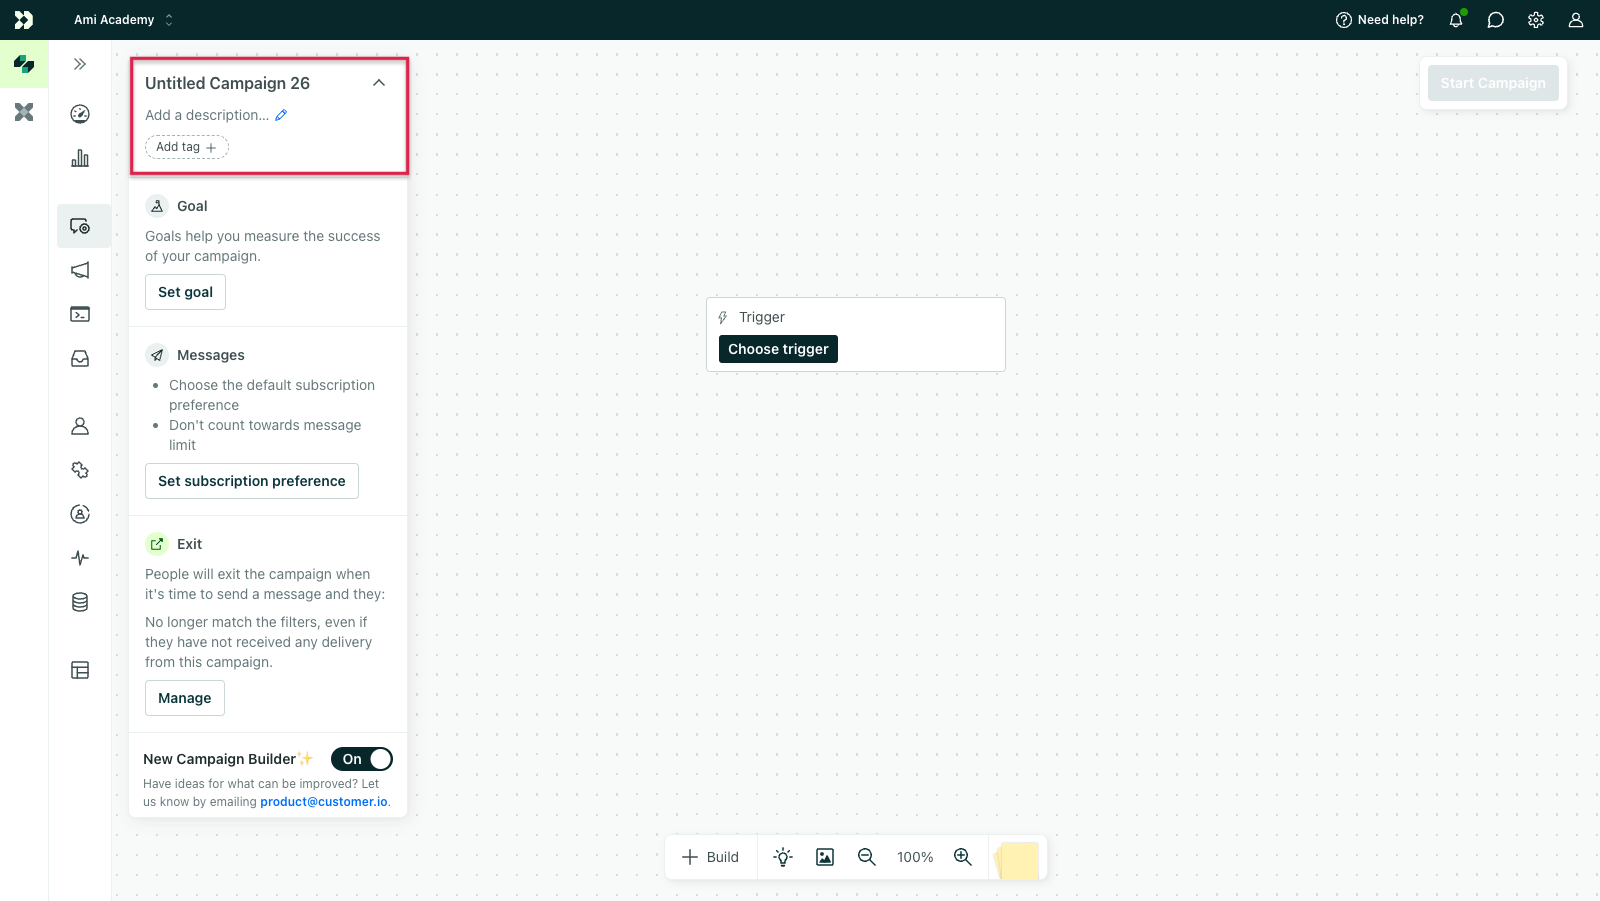
Click Choose trigger on the canvas.
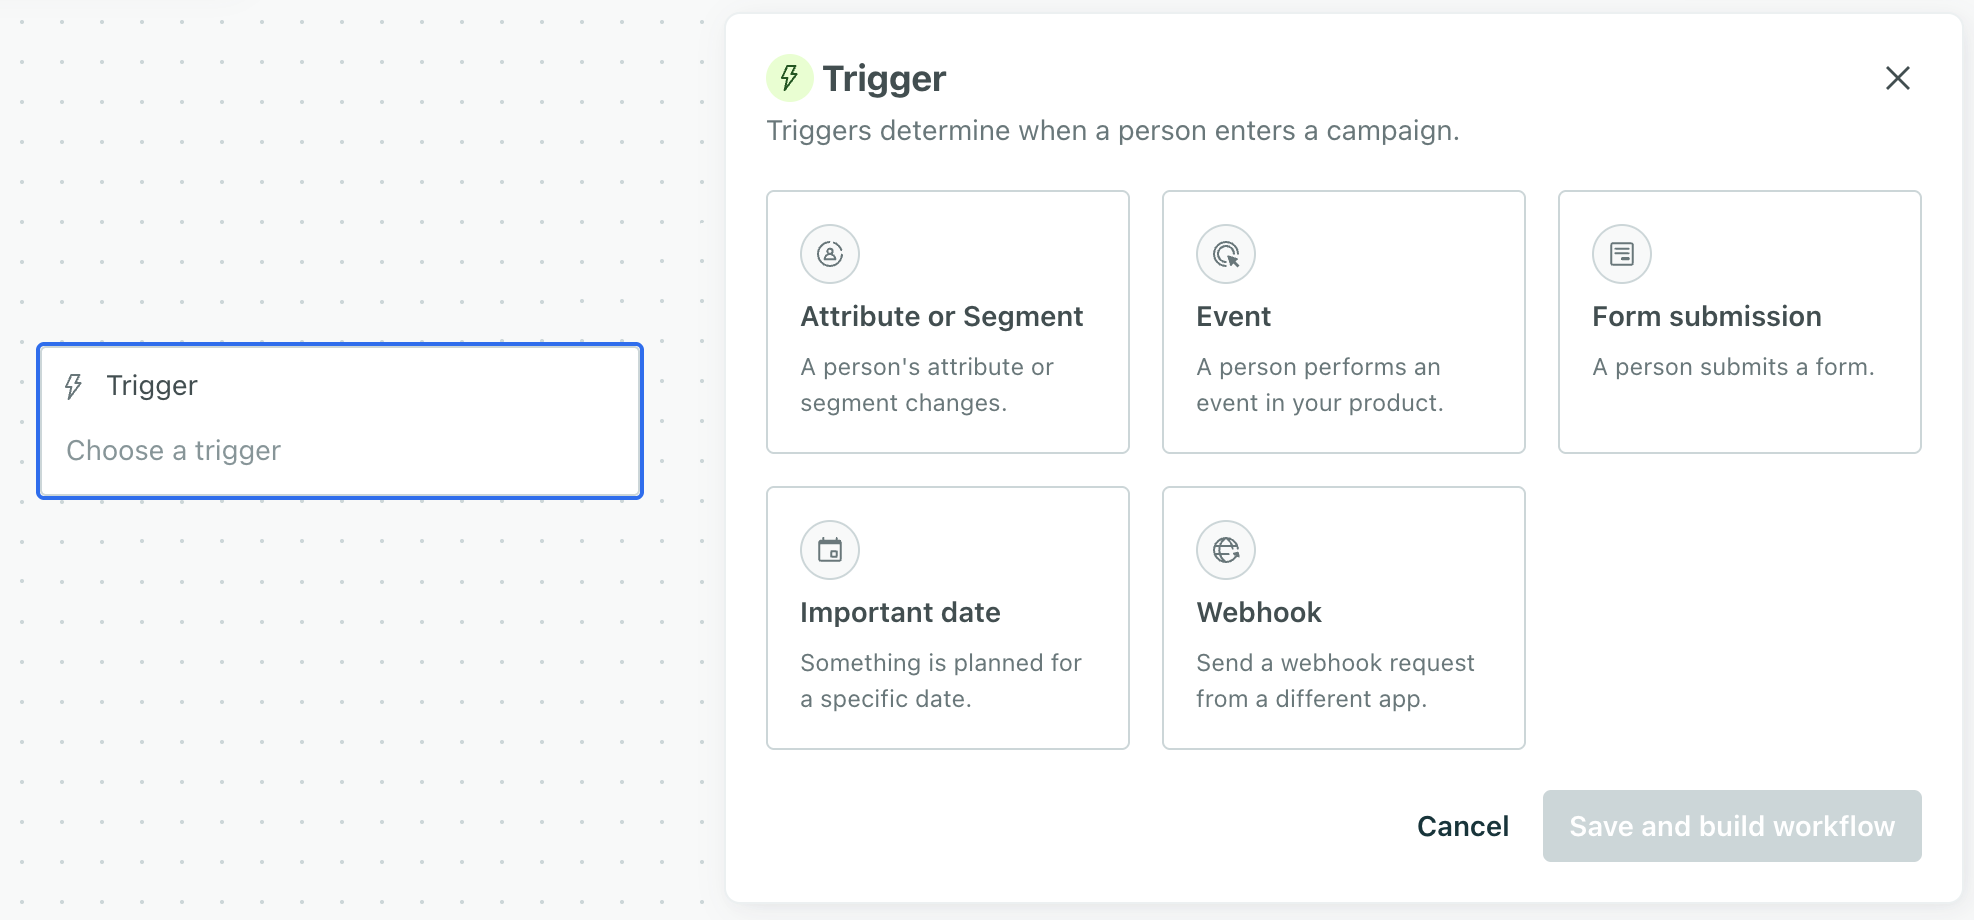
Select a trigger type.
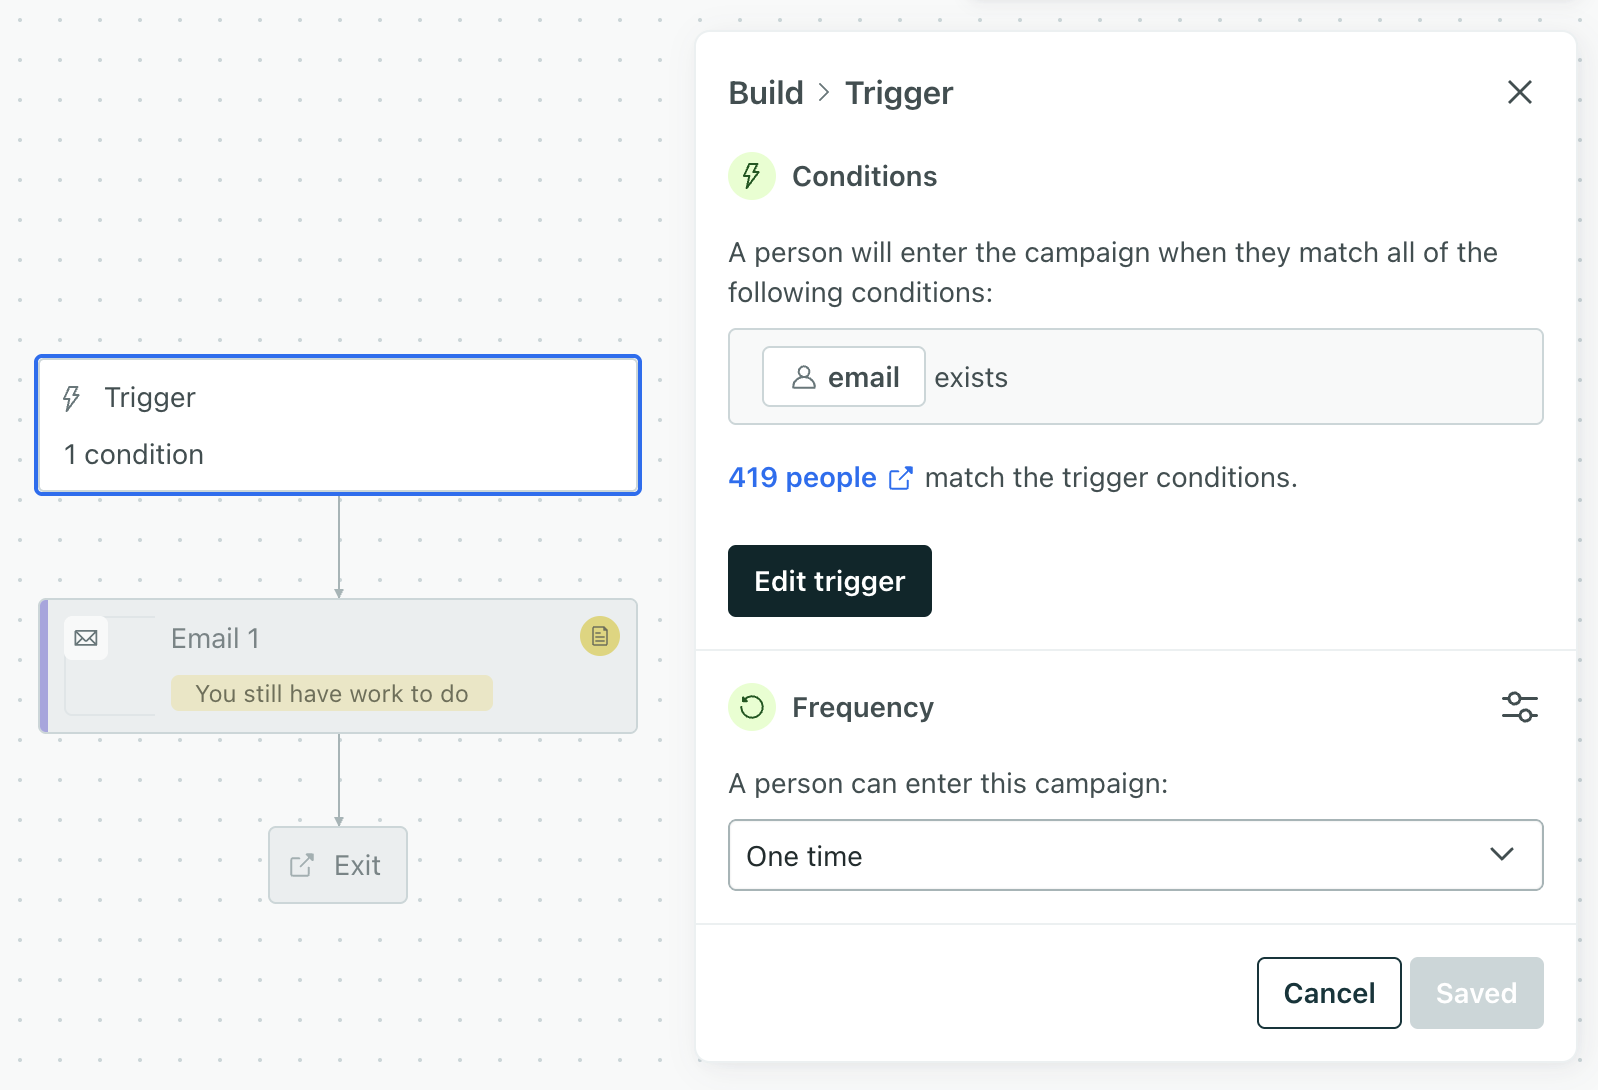
Our most popular trigger is Attribute or Segment; it’s how you trigger automations based on a change to a person. After you save this trigger, you can change how often your audience enters the automation through the frequency setting.
Configure automation settings
Configure the automation’s settings so you can:
Easily identify the purpose of the automation through the name, description, and tags
Track the success of the automation through a goal
Limit who receives messages through subscription preferences
Determine whether people exit early through exit conditions
Check out this walkthrough on configuring these settings:
Add a name, description, or tags
Click the pencil icon next to the automation name in the top left to change the name so your team members can easily find the automation on the landing page.
(Optional) Add a description so your team members can tell what the purpose of the automation is.
(Optional) Add one or more tags to help you organize and filter your automations on the landing page.
Set a goal, message settings, and exit criteria
Click to manage these automation settings:
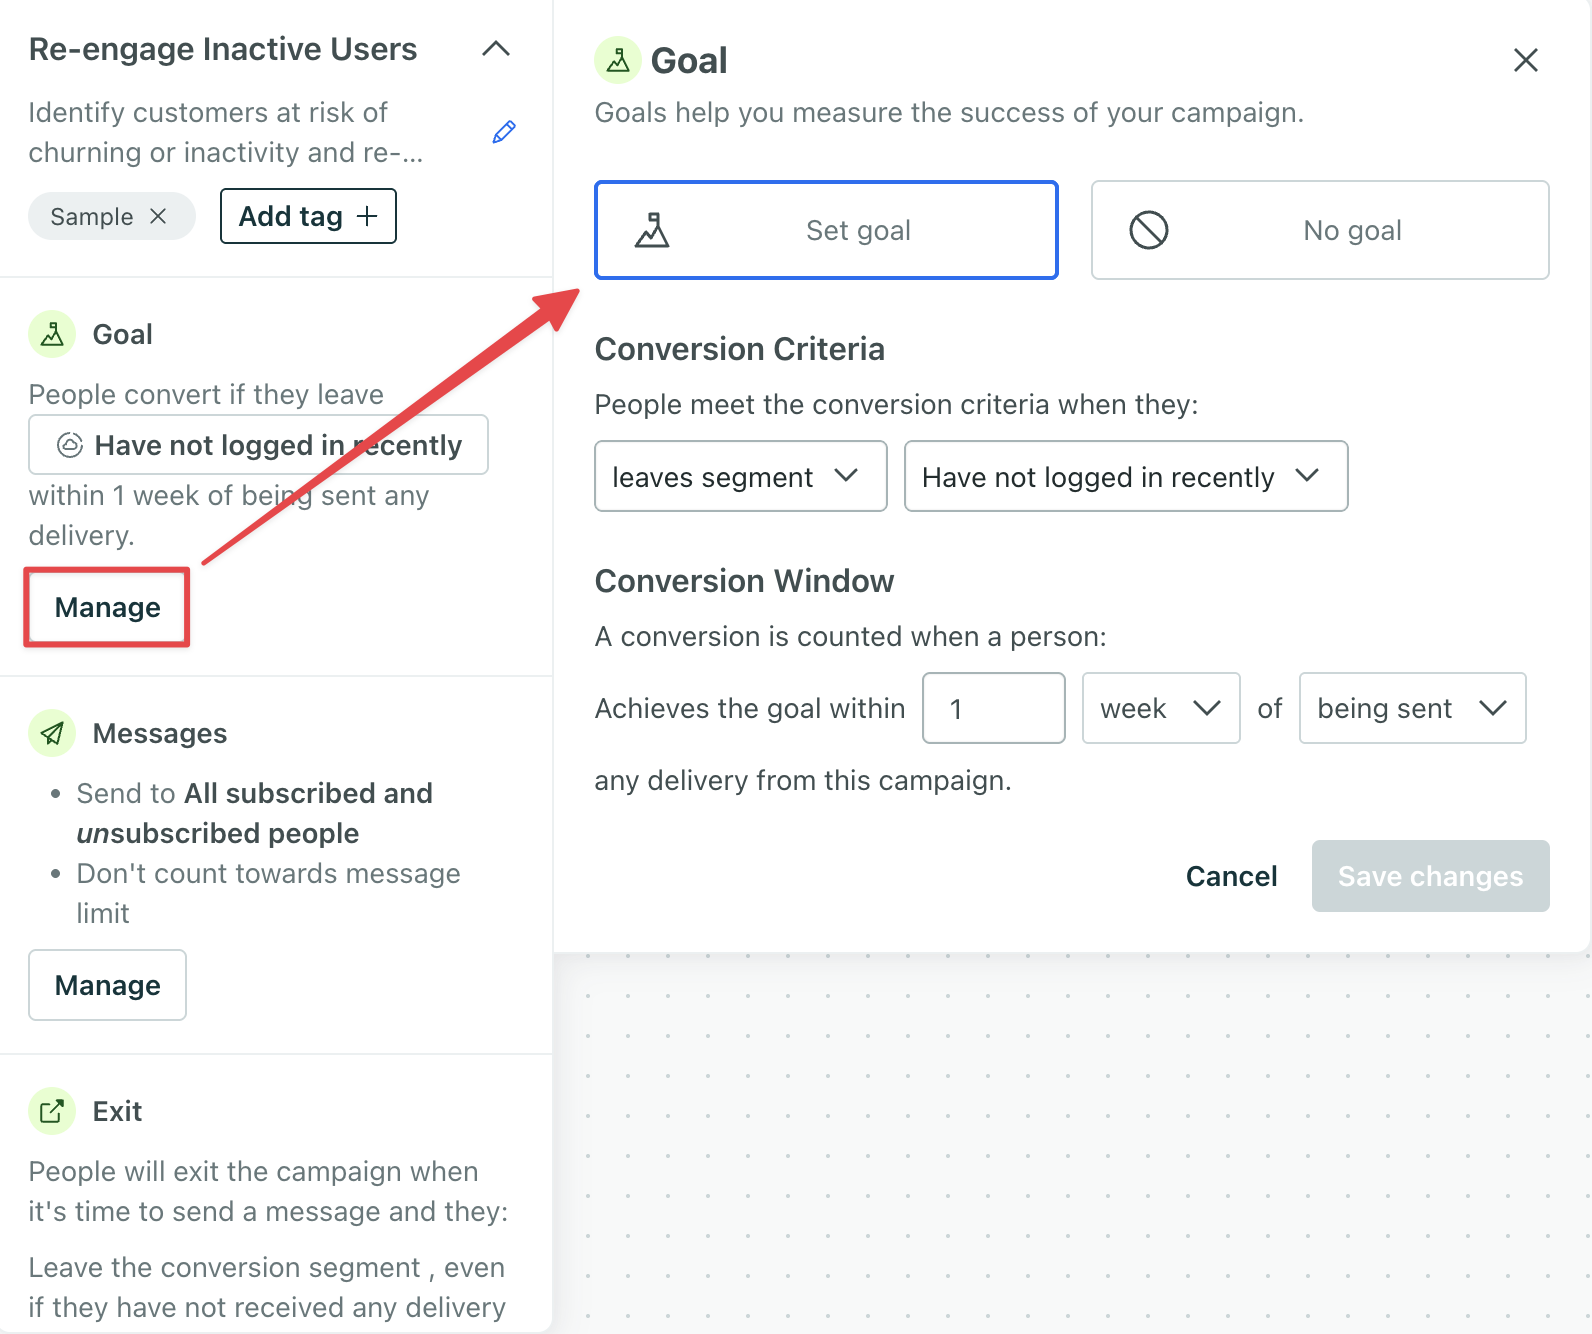
Choose a goal. Click Set goal and fill in the details, or you can choose “No goal” if you don’t want to measure the success of an automation against specific conversion criteria.
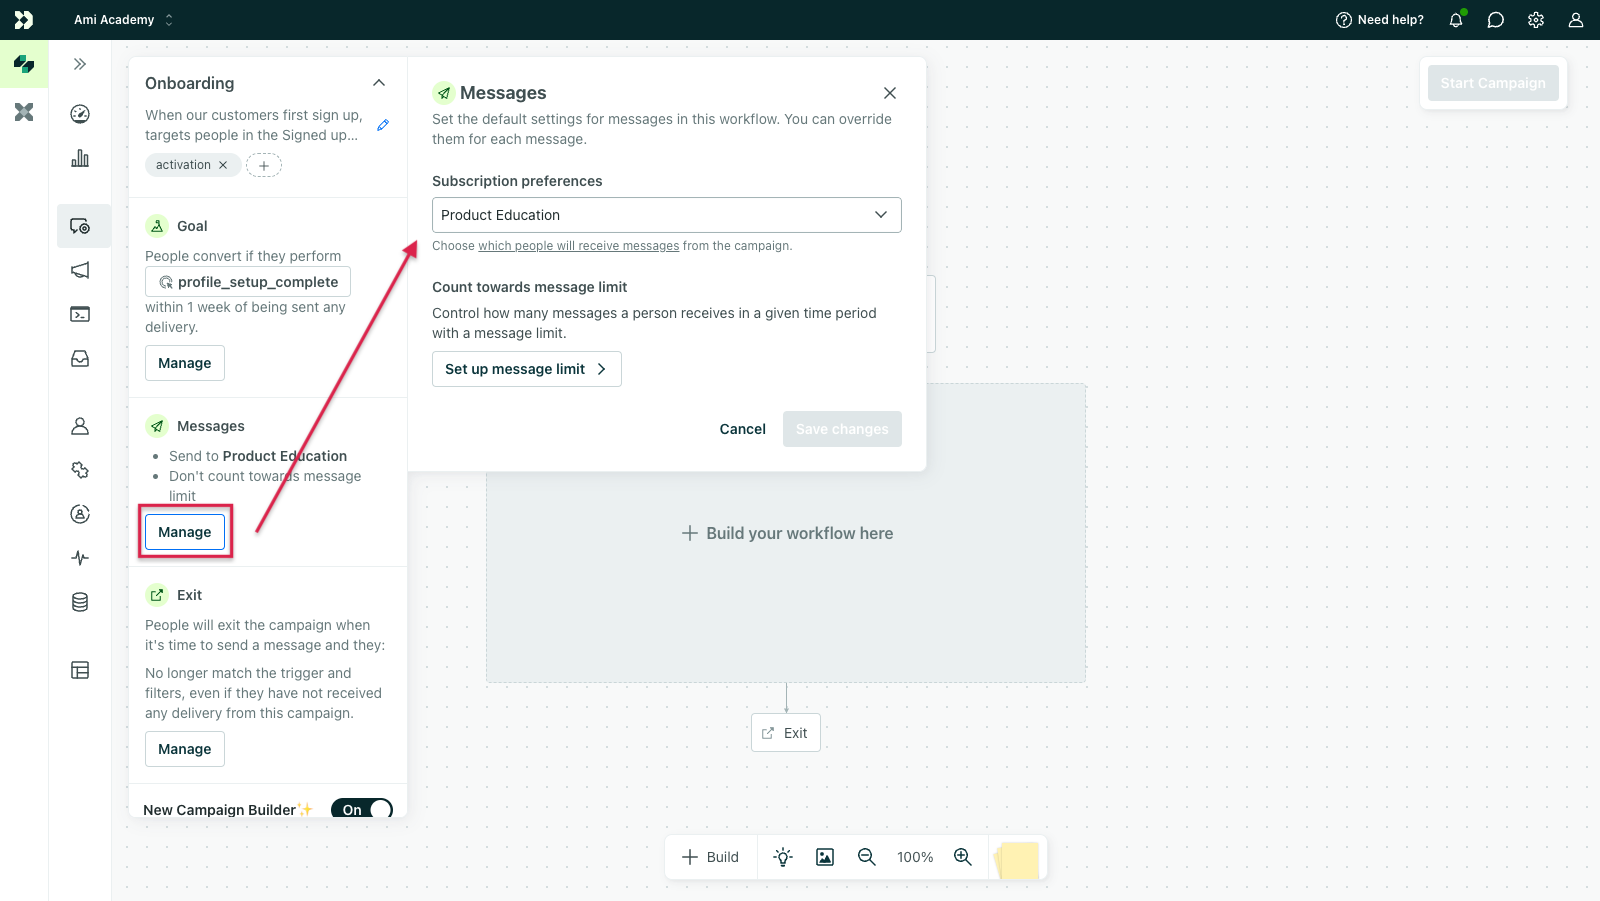
Modify your Message settings: which subscribers receive messages and whether messages count towards your message limit.
Set which subscription center topic people must be subscribed to to receive messages. If you don’t have the subscription center enabled, your automation sends to people who are globally subscribed.
Set a message limit if you want people to only receive a certain number of messages from you over a period of time.
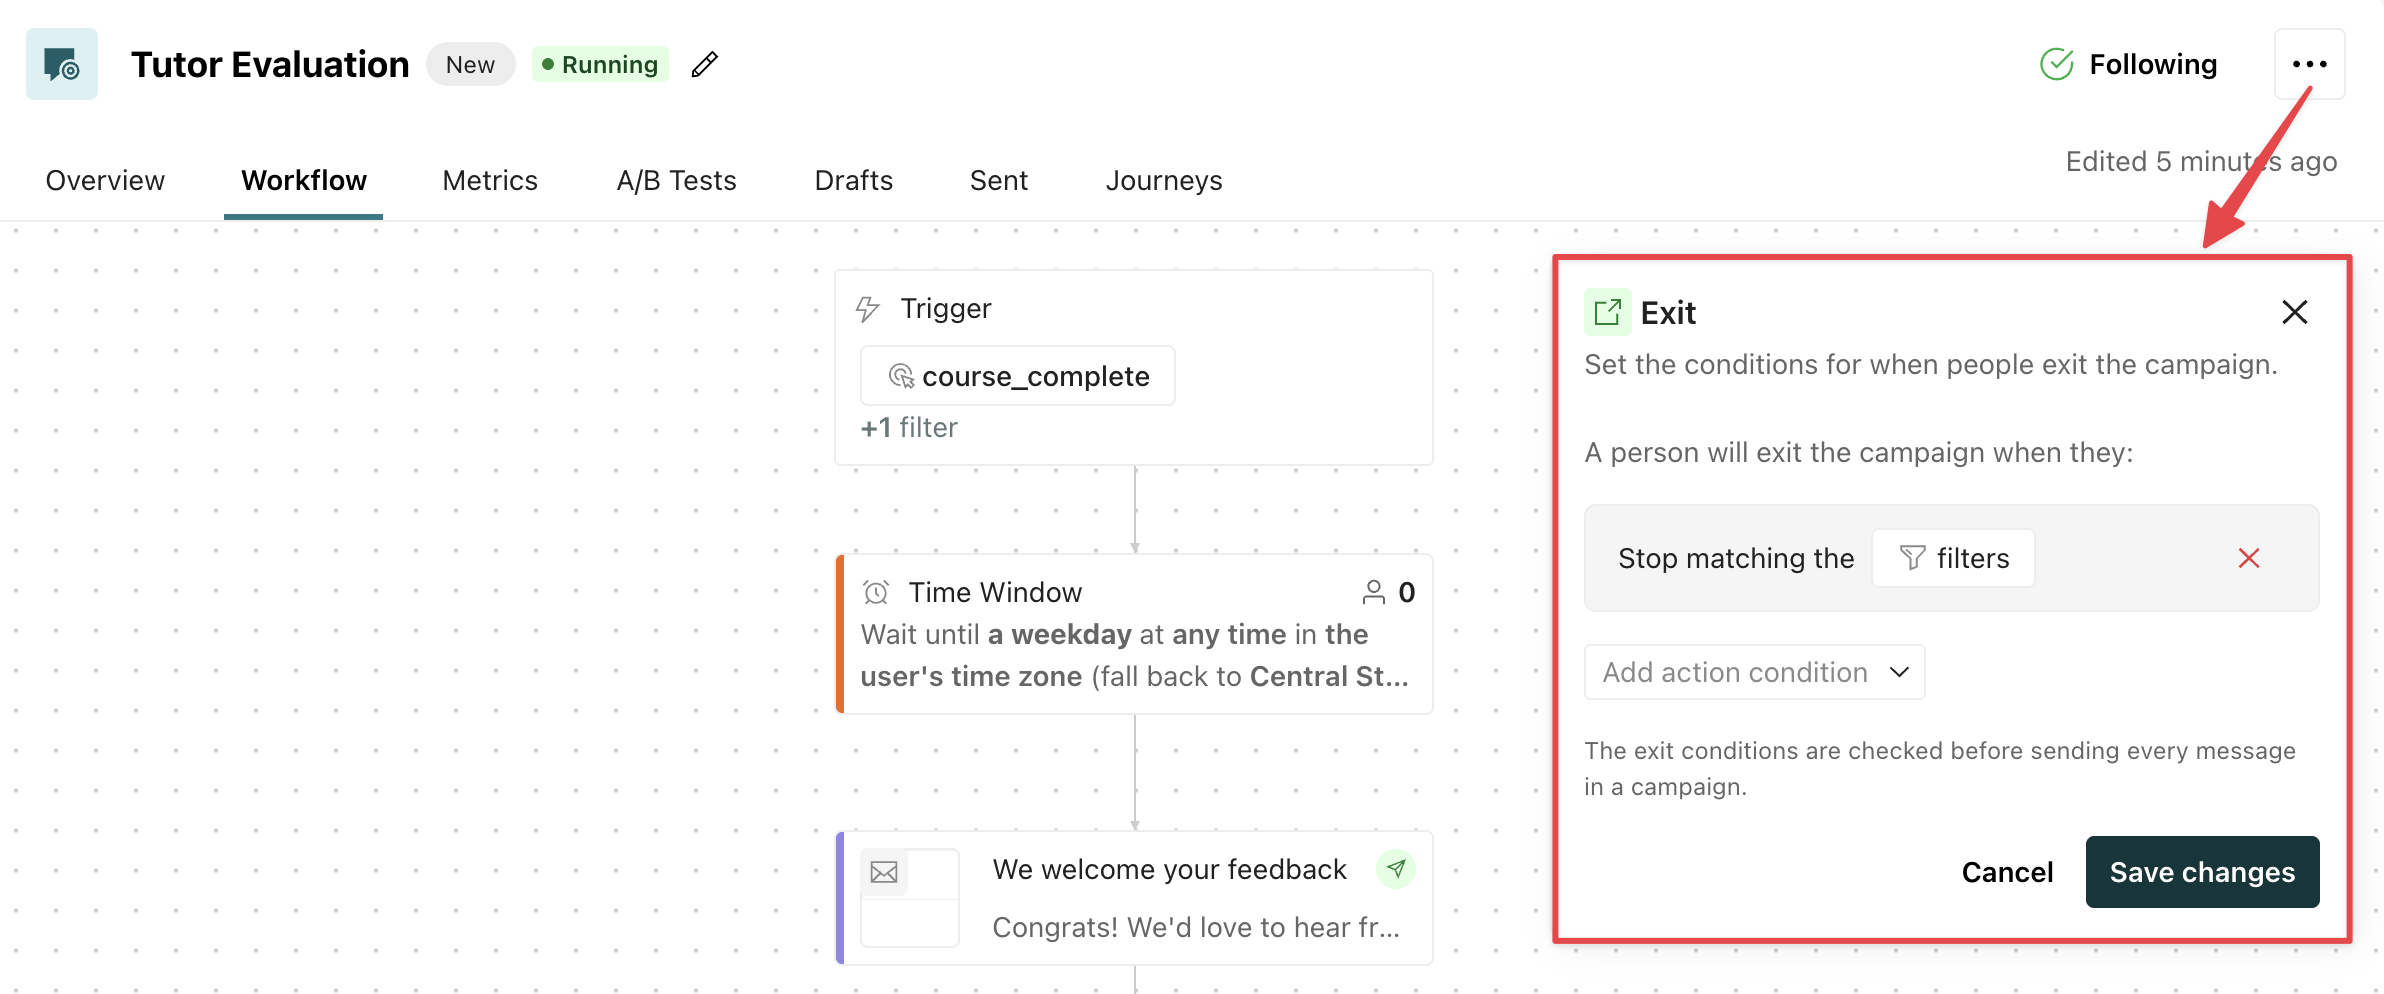
Click Exit conditions to specify if or when a person can exit your automation early.
Build your workflow
Build the workflow that people will follow after triggering the automation. When a person moves through an automation, we call that a journey.
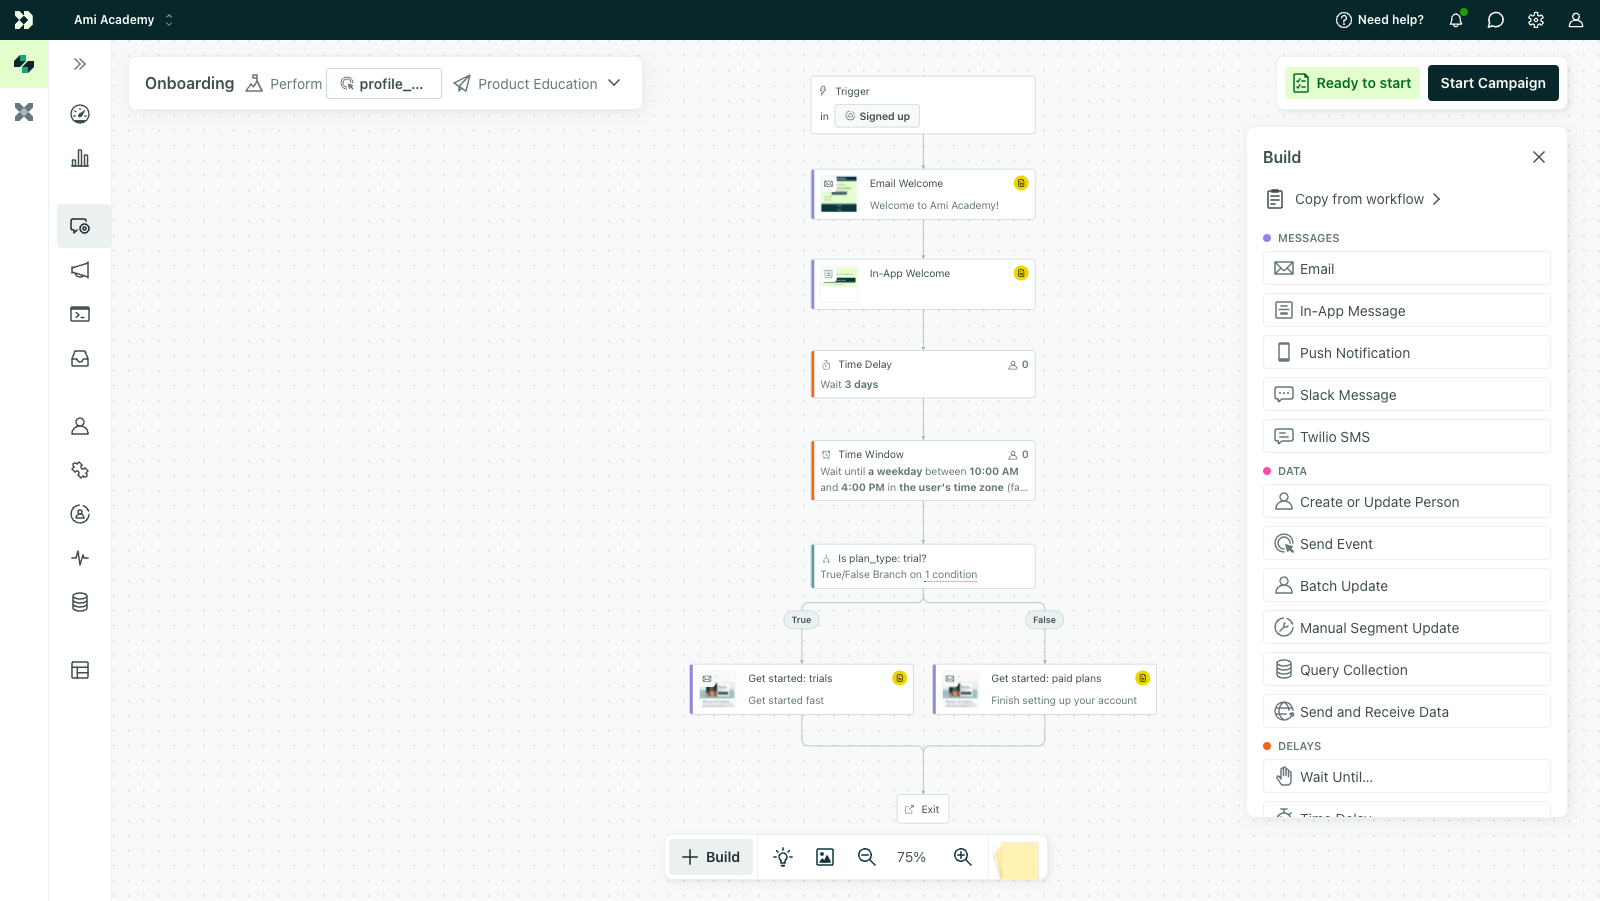
Click Add at the bottom of the workflow. Click and drag a message, data, delay, or flow control block from the panel onto your canvas. After you add your first block, you can drop subsequent blocks over any plus sign.
Here’s a walkthrough of setting up an email in an automation:
Shortcuts & useful features
Click keyboard shortcuts (?) in the automation settings menu for a full list, use Screenshot workflow to export a picture of your workflow, zoom in and out, or add sticky notes to inform team members of important details.
Review & start your automation
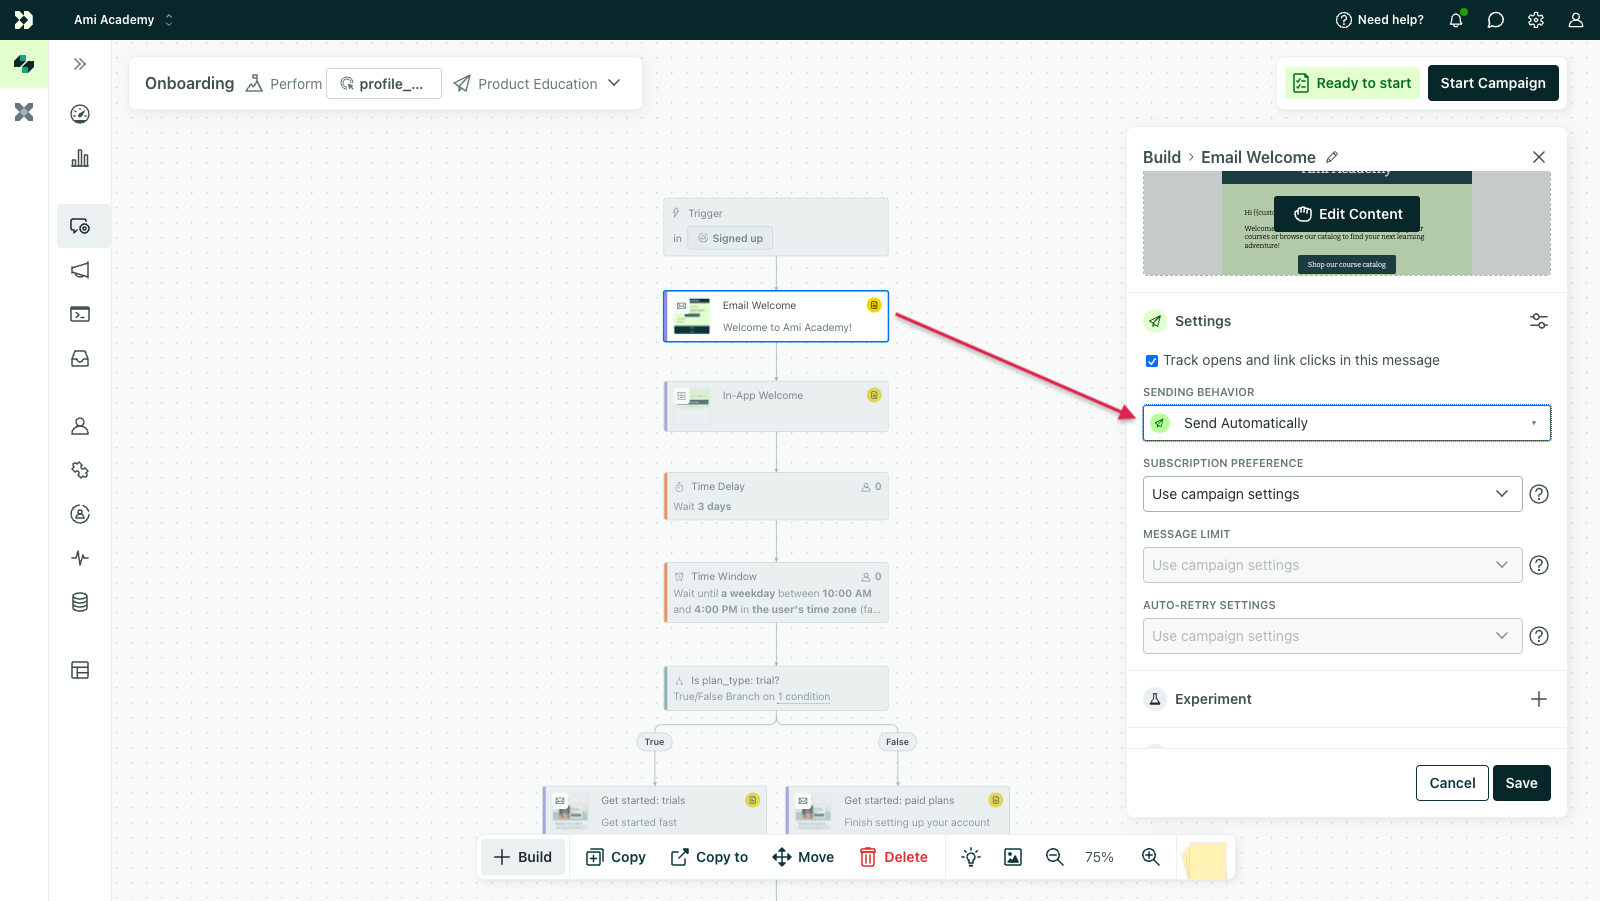
Before you start your automation, you likely want to change the Sending Behavior for all your messages from Queue Draft to Send Automatically.
By default, all messages are set to “Queue draft.” This means you have to manually send them after people reach your message block in the workflow. If you want messages to send automatically, click into each message and adjust the dropdown:
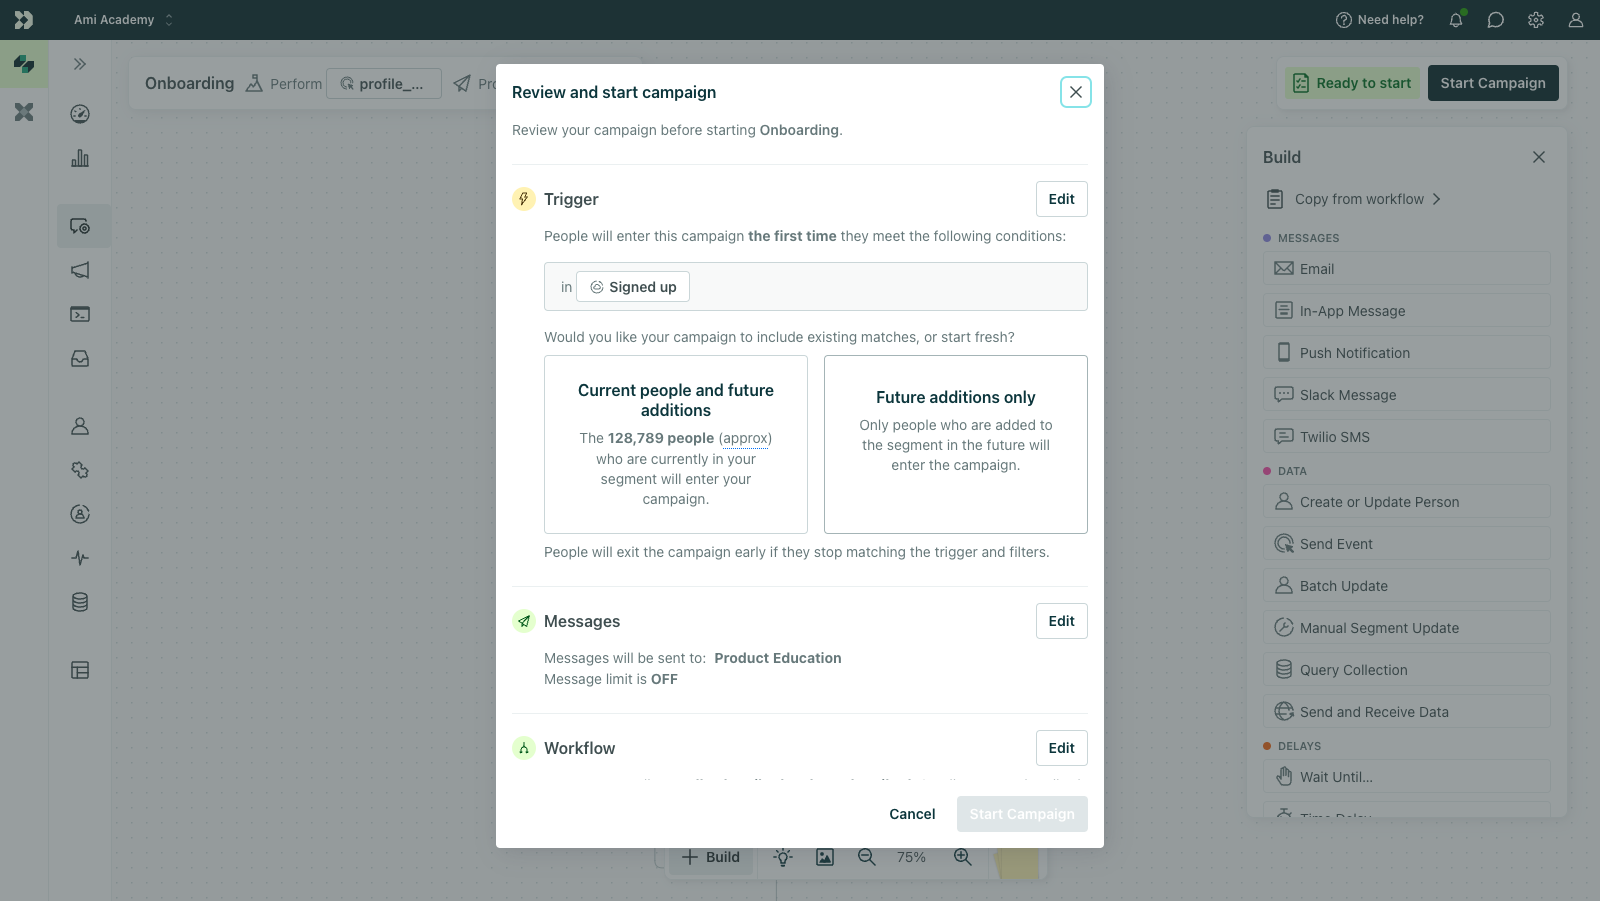
After you’re finished building your workflow, click Start automation. If you haven’t fully set up your automation, click Review items and complete setup.
Depending on the type of automation you’re making, you may need to specify whether you send to all people who meet your conditions or just people added to your workspace after you start the automation.
Click Start automation.
Congrats! You created an automation from scratch! You’ll land on your automation’s overview page where you’ll see a breakdown of metrics, drafted messages, sent messages, and all of your customers’ journeys through the automation.