

Conversion: activate people on your event waitlist
Business-to-business (B2B) companies often need to track and drive growth across both individual users of their product and non-people entities like the company they work for or webinars they want to attend. In Customer.io, objects An object is a non-person entity that you can associate with one or more people—like a company, account, or online course.
For this recipe, imagine you work at a design platform, Sketcher.io, which offers graphic design and product design tools. Users can sign up for events so that they’re notified when registration opens. Specifically, they can sign up for Webinars, which will be a type of object in the workspace. You want to drive registration for webinars by capturing a waitlist of people interested in the event and letting them know when registration opens.
To accomplish this, we’ll create an automation triggered by a webinar becoming available for registration. And the audience will be people who acquired a relationship The connection between an object and a person in your workspace. For instance, if you have Account objects, people could have relationships to an Account if they're admins.
Prerequisites
- Access to create automations
An automated process people enter when they meet your criteria. An automation has a trigger (who enters, and when), a workflow of messages and actions, and exit criteria (when they leave). A person's path through the workflow is their journey.
- Integrate non-people data as objects and relationships in your workspace
Set up objects and relationships
In this example, the workspace includes Webinar objects and we track people’ registration status on their relationships The connection between an object and a person in your workspace. For instance, if you have Account objects, people could have relationships to an Account if they're admins.
If you’re not yet integrated but want to test this out, you can import objects and relationships via CSV.
Create an automation to announce registration for events
- Go to Automations and click Create Automation.
- Enter a name, like “Webinar is Ready for Registration.” If helpful, add a description so other team members can understand the automation at a glance.
- Click Manage under Messages. Set the Subscription preference to determine the audience of your messages.
- Click Choose trigger, select the Webinars filter, then choose Webinar updated.
- On our webinar objects, we saved several attributes, including
allow_registration. This indicates whether people will be able to sign up for the webinar. Set this equal totruefor the trigger. Save your changes. - Click the trigger block then click Audience settings. Select Certain people in the webinar. Then specify that you want people with the relationship attribute
waiting_listequal totrue. This is a relationship attribute we imported with our CSVs too. - Next, drag an Email into your Workflow. Click the email then Add Content.
- You can create an email from scratch or from an existing email. Here’s an example of one you could make! It encourages people to register for the webinar they wanted to be notified about and reminds them of other webinars.
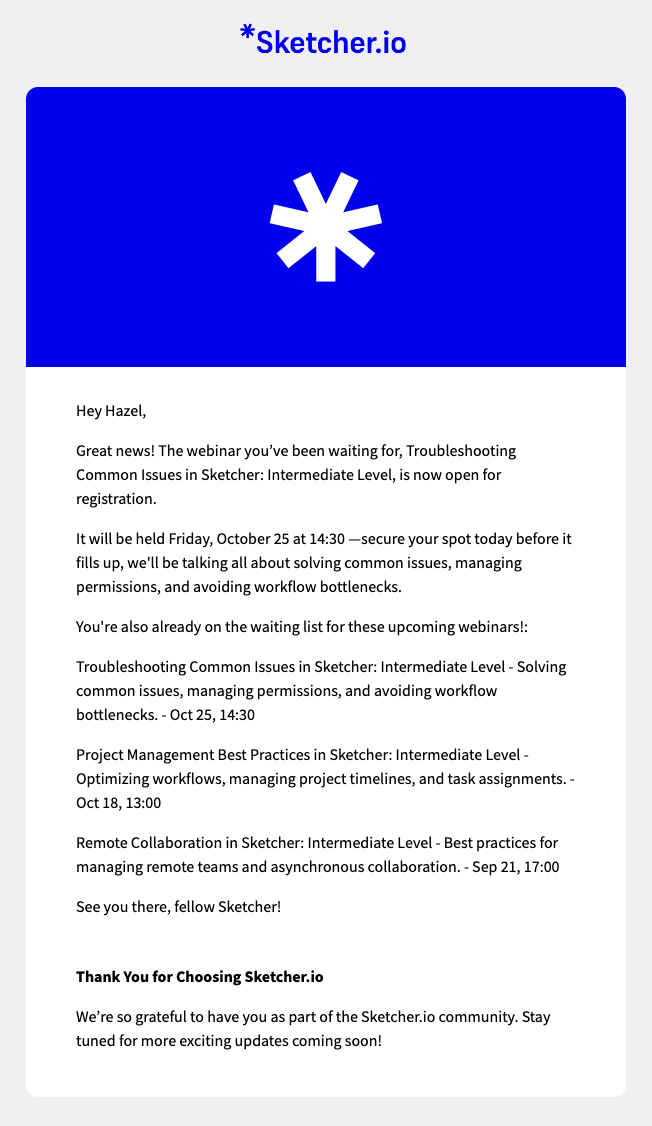
And here’s the liquid that powers this!
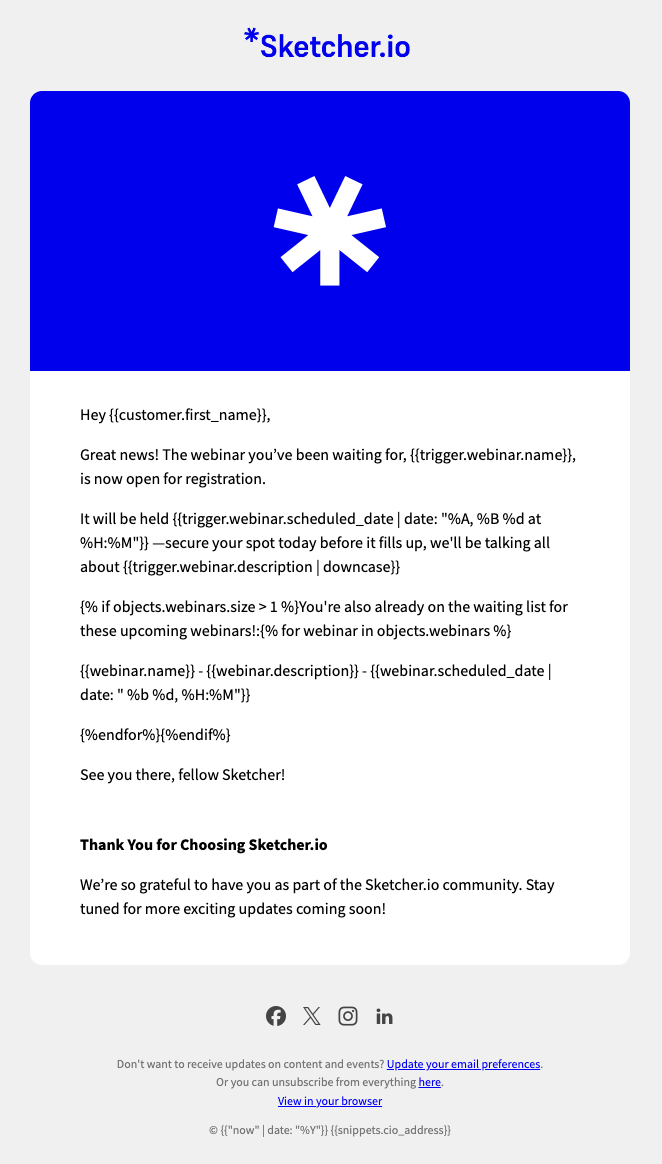
You can copy the text and liquid below!
Hey {{customer.first_name}},

Great news! The webinar you’ve been waiting for, {{trigger.webinar.name}}, is now open for registration.

It will be held {{trigger.webinar.scheduled_date | date: "%A, %B %d at %H:%M"}} —secure your spot today before it fills up, we'll be talking all about {{trigger.webinar.description | downcase}}

{% if objects.webinars.size > 1 %}You're also already on the waiting list for these upcoming webinars!:{% for webinar in objects.webinars %}

{{webinar.name}} - {{webinar.description}} - {{webinar.scheduled_date | date: " %b %d, %H:%M"}}

{%endfor%}{%endif%}

See you there, fellow Sketcher!

Thank You for Choosing Sketcher.io

We’re so grateful to have you as part of the Sketcher.io community. Stay tuned for more exciting updates coming soon!
You could also create an in-app message to promote the same event on your website!
- Click Save then Back to Workflow.
- Click the email again and set the email to Send automatically.
- Next, define what should cause people to convert. Click the title menu in the top left, and click Set goal. In this example, we’ll say people convert when they perform the event
Something that a person in your workspace did. Events can trigger automations, add people to segments, etc, and you can use properties from events to personalize messages.
webinar_registrationwithin 1 week of being sent any delivery from this automation. - Click Start Automation to review your workflow and activate your automation!