

Sync customers from Stripe to Customer.io
Use Customer events from Stripe to trigger an automation syncing customers from Stripe with leads in Customer.io. Then you can send them messages in Customer.io!
Customer.io is great for tracking leads and sending people messages. Stripe is great for managing customer and purchase data. With this process, you’ll capture Stripe’s customer.created event in Customer.io to represent people who have become customers. From here you might do things like thank people for making their first purchase or offer them coupons!
Why would I sync Stripe customers to people in Customer.io?
Imagine that you manage leads in Customer.io. People give you their email addresses indicating that they’re interested in your service, and you might send them promotional messages to get them to make their first purchase, subscribe to your service, and so on. When they become customers, as marked by a purchase in Stripe, you’ll probably want to sync their data to Customer.io—because you’ll send them different automations depending on whether they’re leads or customers.
When someone becomes a customer, you’ll send a Stripe webhook called customer.created to Customer.io. This event includes the customer’s Stripe ID and their email! We’ll use the email from the event to find and update the right person in Customer.io—or create a new person if we can’t find a person matching the email from the incoming event. This effectively syncs our Stripe audience with our Customer.io audience so we can differentiate between leads and customers.
We can also send follow-up events from Stripe that trigger automations in Customer.io. For example, you might send your customers messages through Customer.io when a customer’s subscription is about to renew or when a payment fails in Stripe!
Before you begin
You’ll need access to your Stripe account and your Customer.io Site ID and API Key credentials. You can find your Customer.io Site ID and API Key credentials under Integrations > Customer.io API.
This process assumes that you track leads in customer.io by email address and use their Stripe customer ID as their ID in Customer.io. People who have an ID are customers who’ve made a purchase; people without an ID are leads who you want to convert.
As a part of this guide, you’ll set up a webhook-triggered automation using Stripe’s Connect Webhook feature to send customer.created events to Customer.io. We’ll use these events to find a person in Customer.io by their email address and set their ID to the Stripe customer ID.
{
  "id": "cus_NffrFeUfNV2Hib",
  "object": "customer",
  "address": null,
  "balance": 0,
  "created": 1680893993,
  "currency": null,
  "default_source": null,
  "delinquent": false,
  "description": null,
  "discount": null,
  "email": "wile.e.coyote@example.com",
  "invoice_prefix": "0759376C",
  "invoice_settings": {
    "custom_fields": null,
    "default_payment_method": null,
    "footer": null,
    "rendering_options": null
  },
  "livemode": false,
  "metadata": {},
  "name": "Wile E Coyote",
  "next_invoice_sequence": 1,
  "phone": null,
  "preferred_locales": [],
  "shipping": null,
  "tax_exempt": "none",
  "test_clock": null
}
Set up your webhook-triggered automation
This workflow will identify The Customer.io operation that adds or updates a person. When you identify a person, Customer.io either adds a person if they don't exist in your workspace, or updates them if they do. Before you identify someone (by their email address or an ID), you can track them anonymously.
- Go to Automations and click Create Automation.
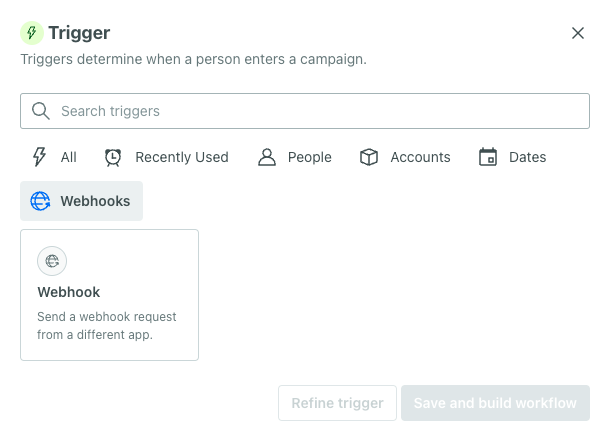
- Click the trigger block then choose Webhook.
-
Copy the Webhook URL.
-
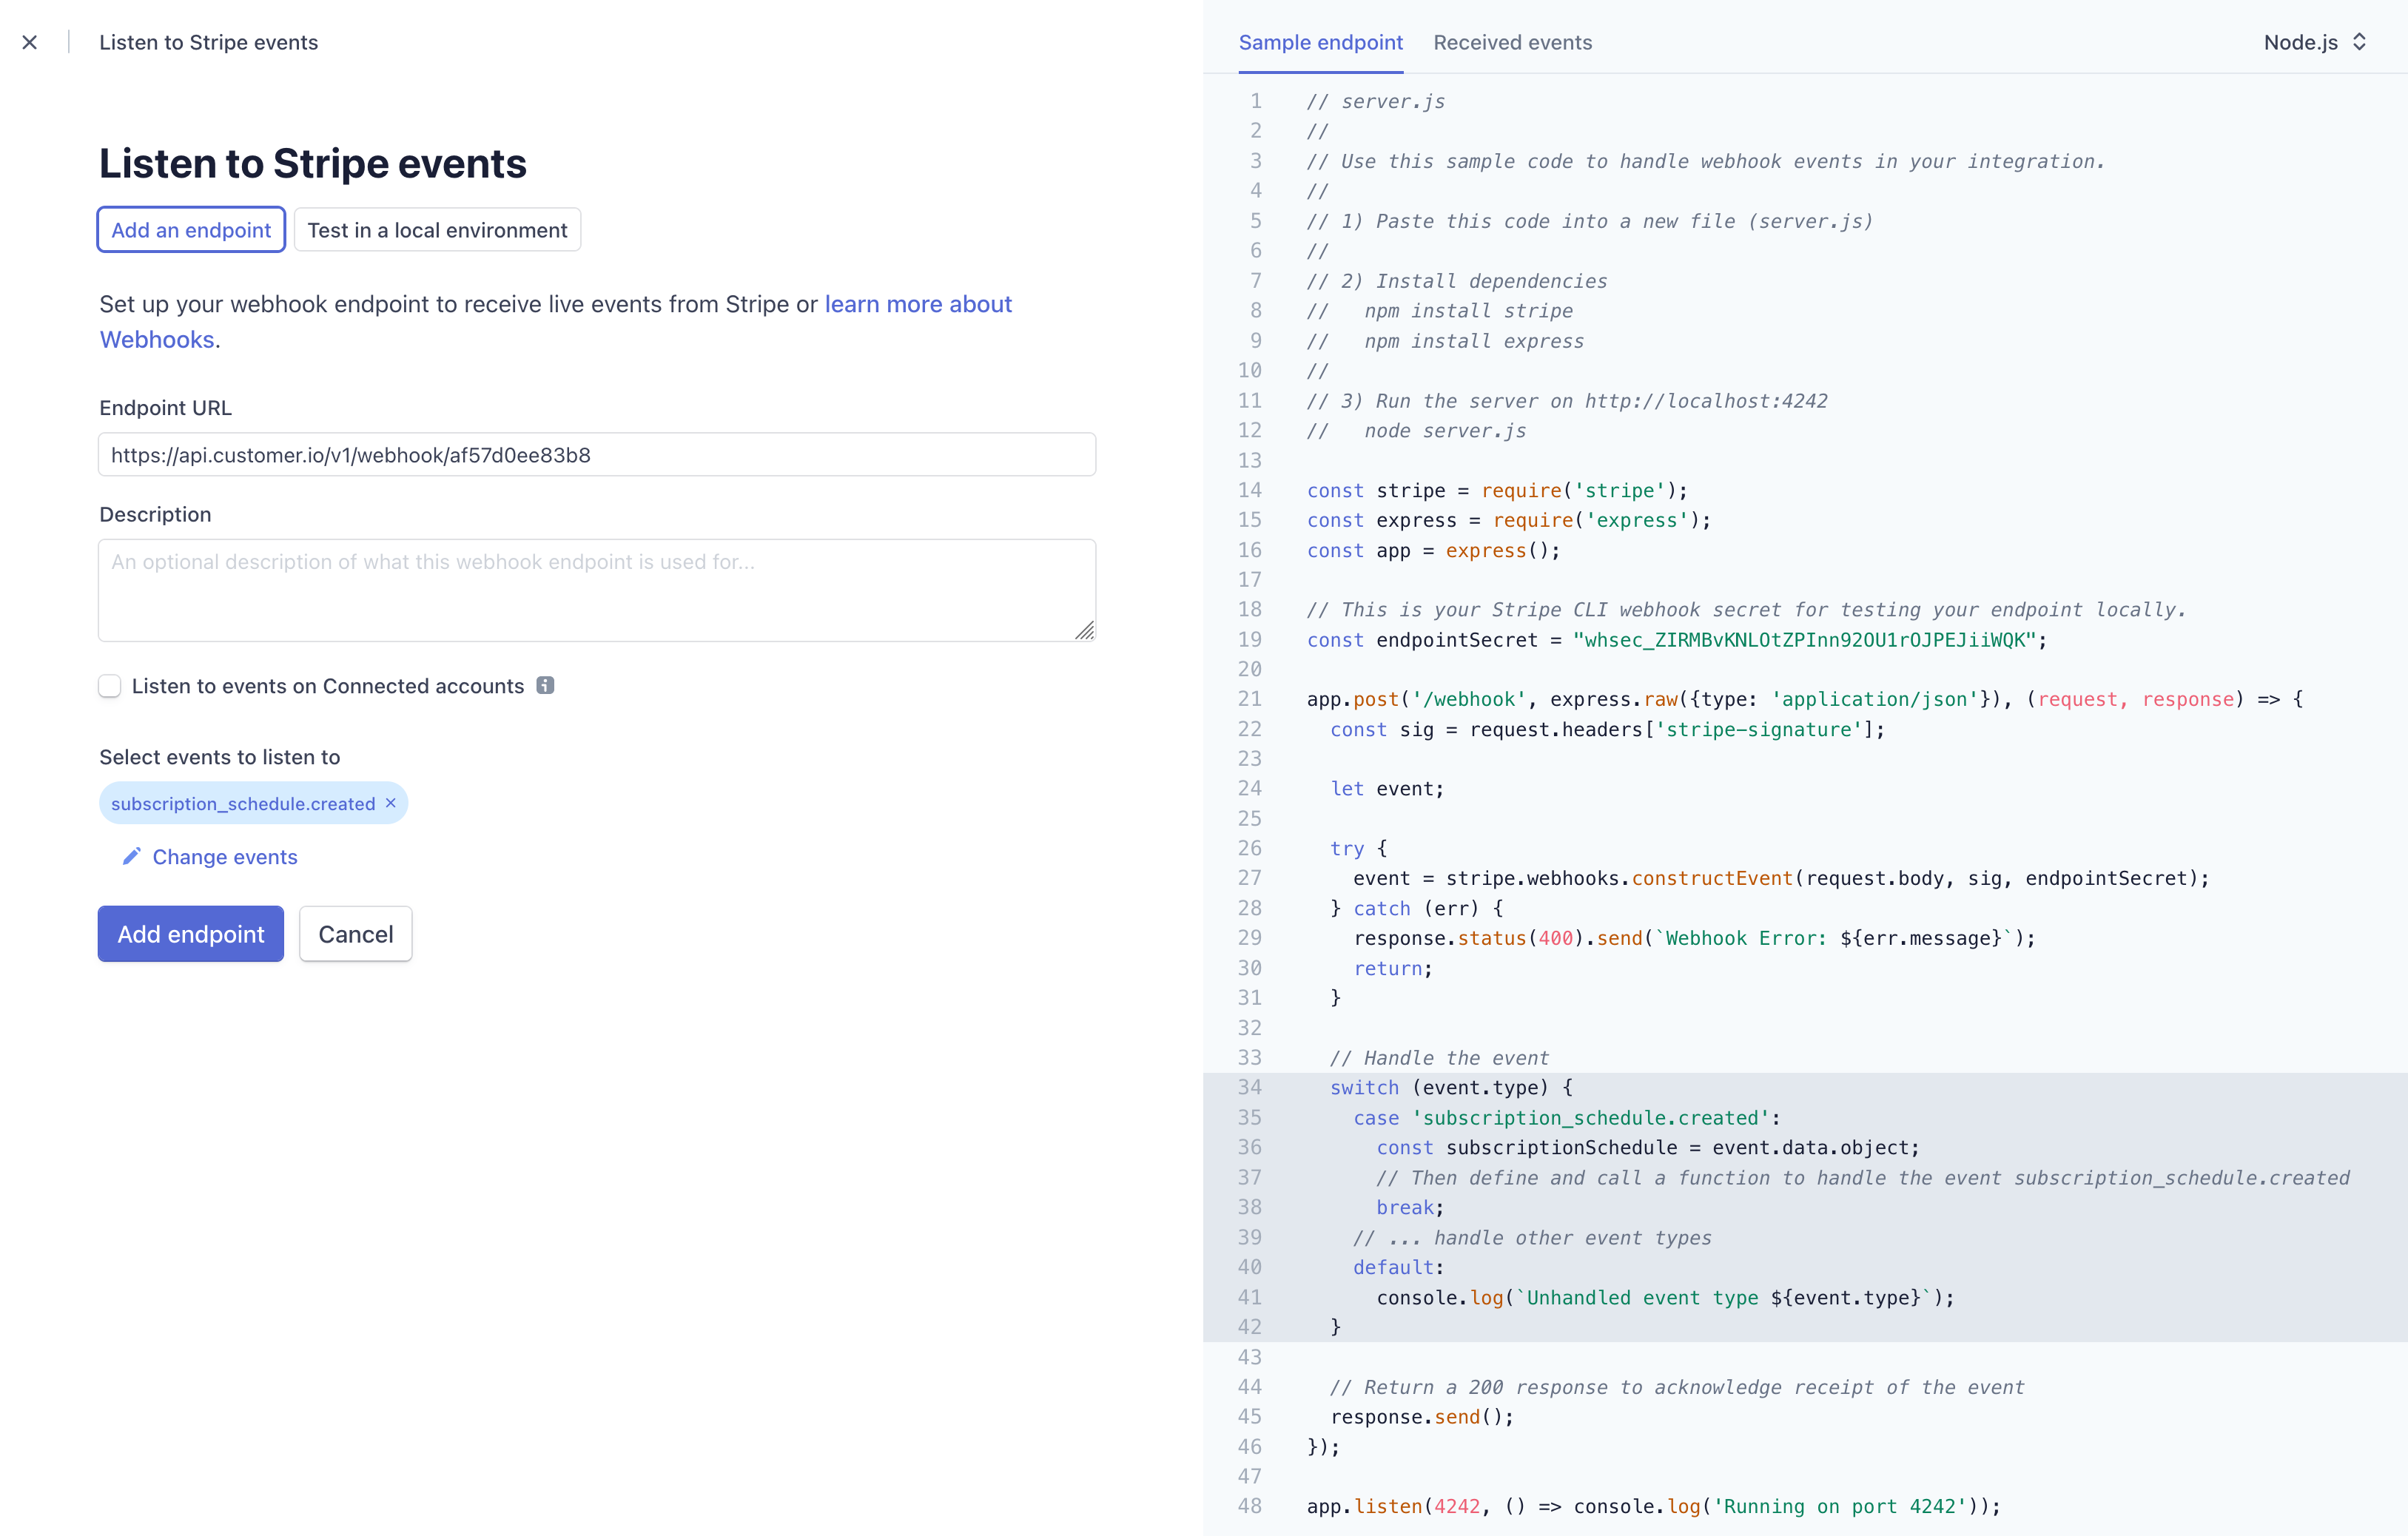
In Stripe, go to Developers > Webhooks and click Add endpoint.
- Paste your Webhook URL into the Endpoint URL field.
- Click Select events, select Customer > customer.created, and then click Add events. This tells Stripe to trigger your webhook when someone creates a new subscription.
- Click Add endpoint.
- Turn Test mode on, if it isn’t already, and then Send a test event. This provides Customer.io with some test values that you can reference when creating your automation.
-
Return to Customer.io and make sure that you received test data. If so, click Save and build workflow.
-
Drag a Create or update person block into your workflow and click it. Set the Name of the action to Identify customer.
-
Click Add Details.
-
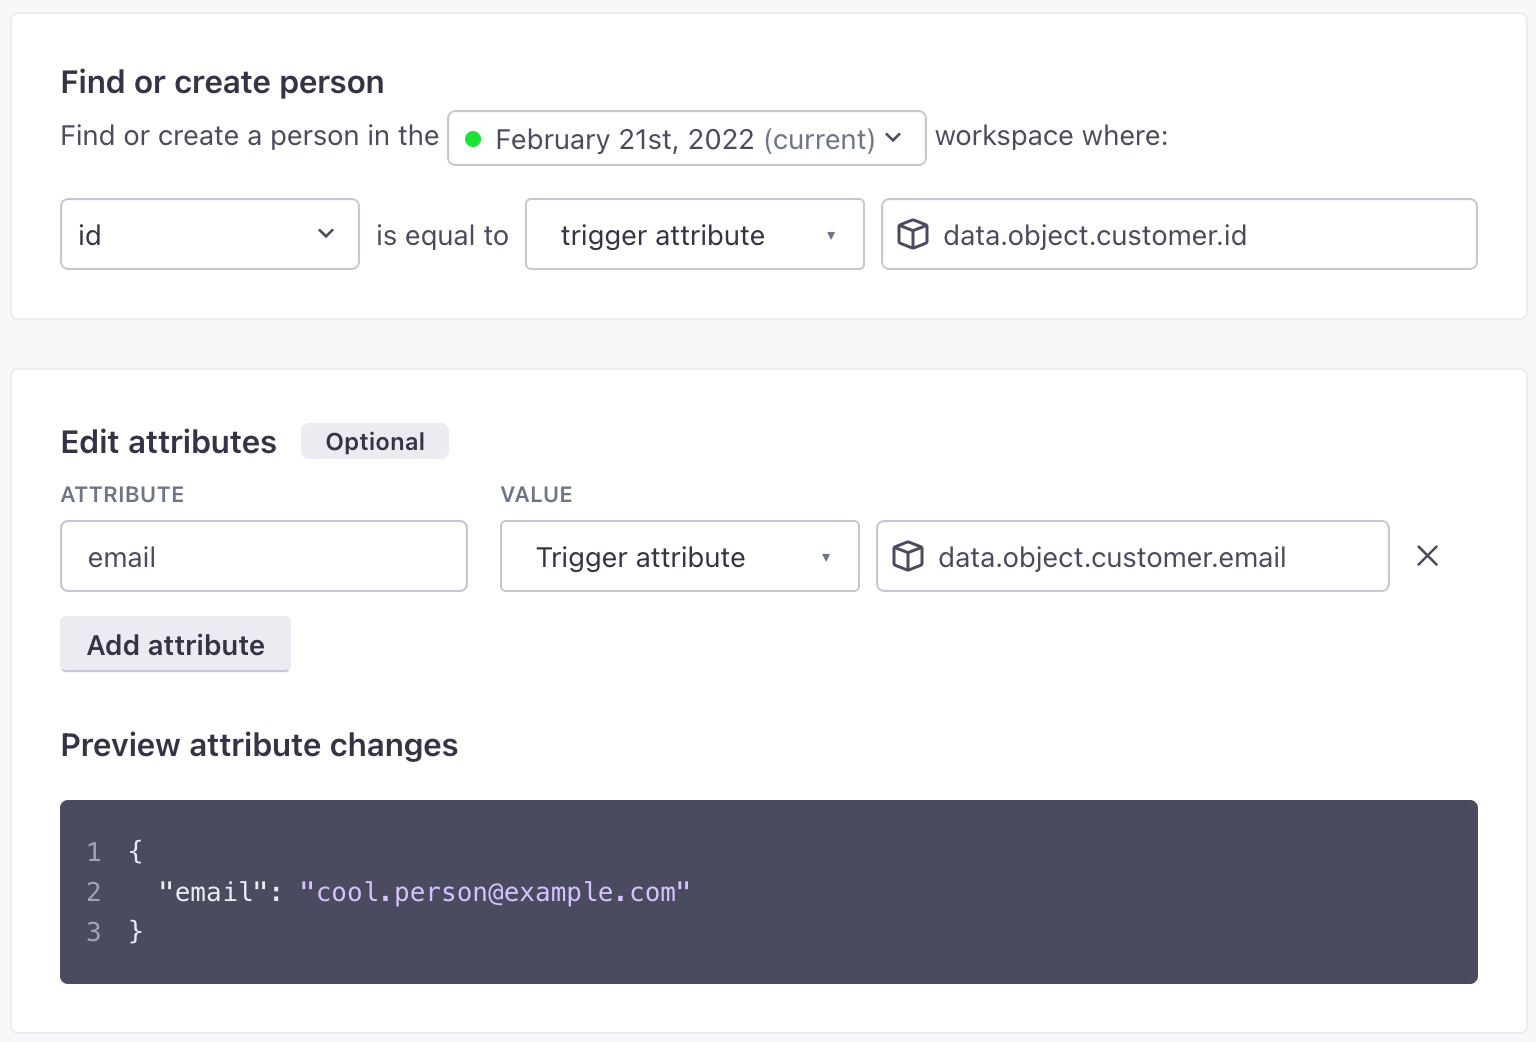
Under Find or create person, make sure that email is selected and then click the
data.emailproperty in the Trigger data. This identifies your new person by their Stripeemail. -
Under Edit attributes set an attribute called
idwhere theTrigger attributeisdata.id. -
Click Save Changes.
-
Click Save Changes and finish setting up your webhook-triggered automation.
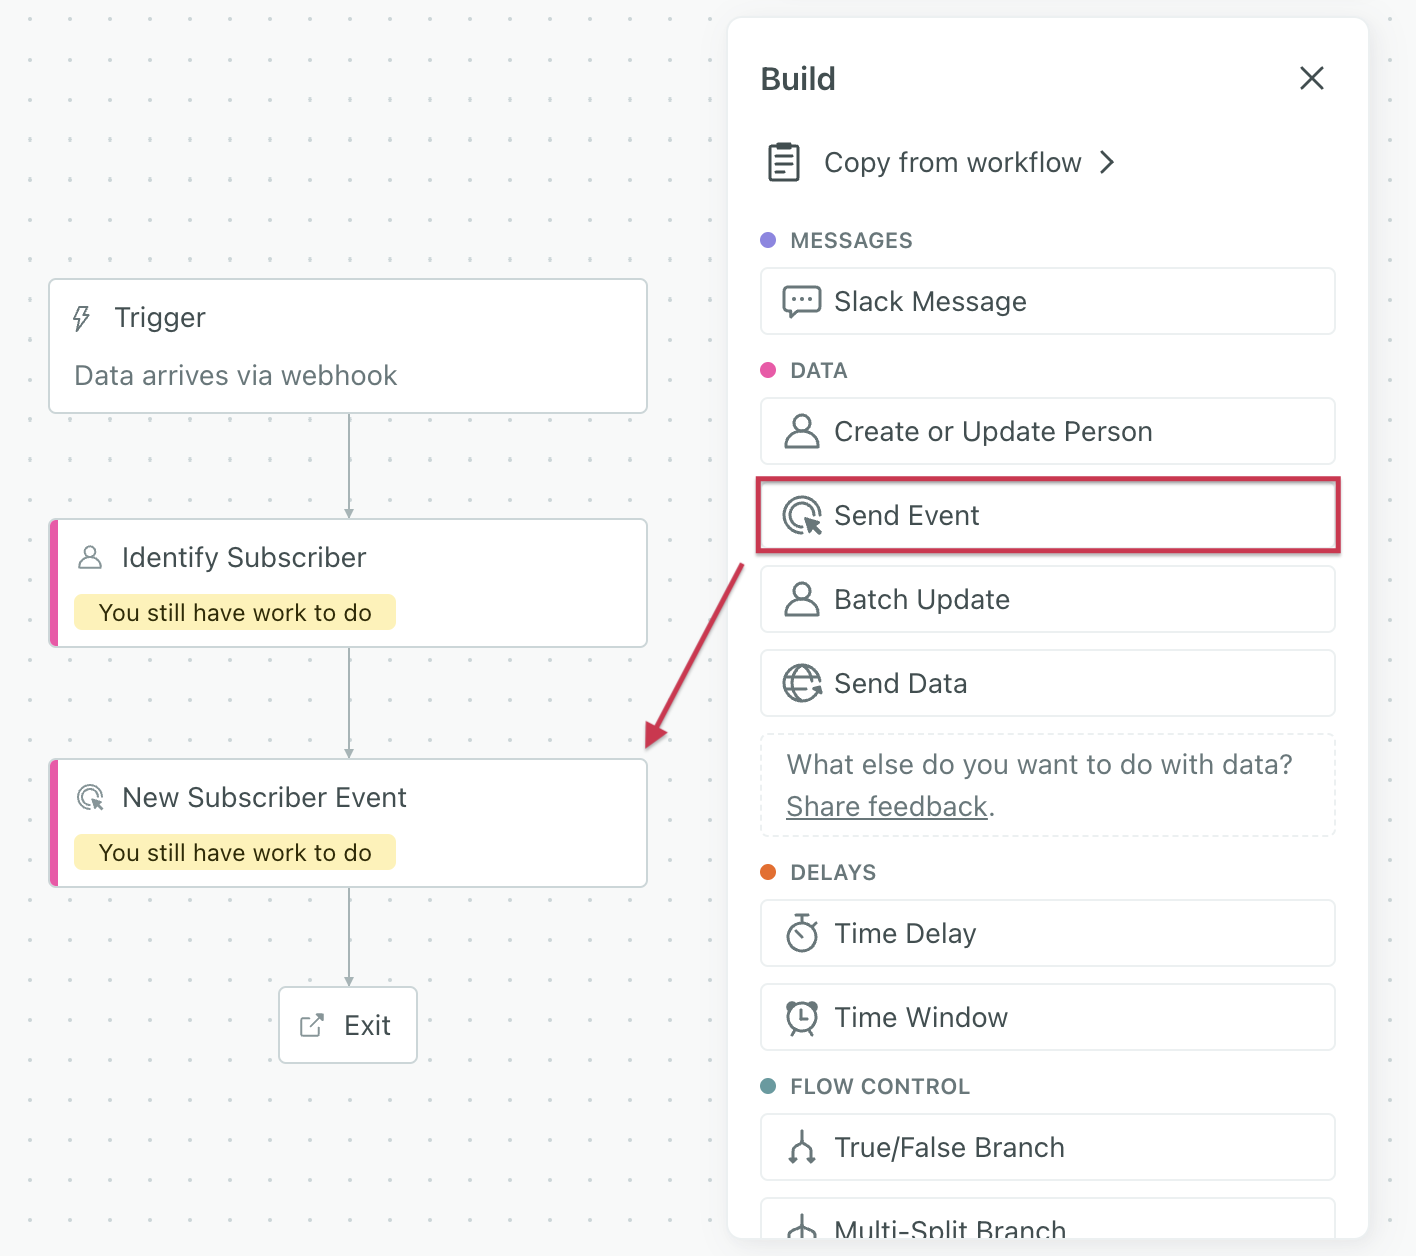
Remember, this is just one way you can use Stripe data in Customer.io. Now that people in Customer.io have a Stripe ID, you can pull in other events from Stripe and use them to trigger automations in Customer.io.
What else can I do with Stripe events?
Most Stripe webhooks identify people by their Stripe Customer ID. Now that you’ve synced that ID to Customer.io, you can use other Stripe events to trigger automations in Customer.io.
For example, you can capture subscription information, payment schedules, and more. You can use people’s Stripe activity to send messages to your customers based on their purchases, subscription statuses, payment histories, and more!