

Configure reusable webhooks
In Workspace Settings, create webhook configurations to reuse across automations and broadcasts and secure your credentials.
Overview
In Workspace Settings, you can configure webhooks to reuse them across your automations and API-triggered broadcasts. Use them to reduce friction across your workflows:
- Less repetitive work & fewer errors. Define your webhook URL, headers, and auth details once, and reference them in any automation.
- Updates at scale. When an API endpoint or auth header changes, update the configuration in one place and all referencing automations pick up the change automatically.
- Tighter security. Team members can select pre-configured webhooks without ever seeing sensitive data like API keys, auth tokens, or headers.
Account admins and Workspace managers have full access to creating and choosing webhooks in your automations, while Authors can only select which webhooks to use.
Currently, team members with custom roles cannot create or configure reusable webhooks.
Create webhooks
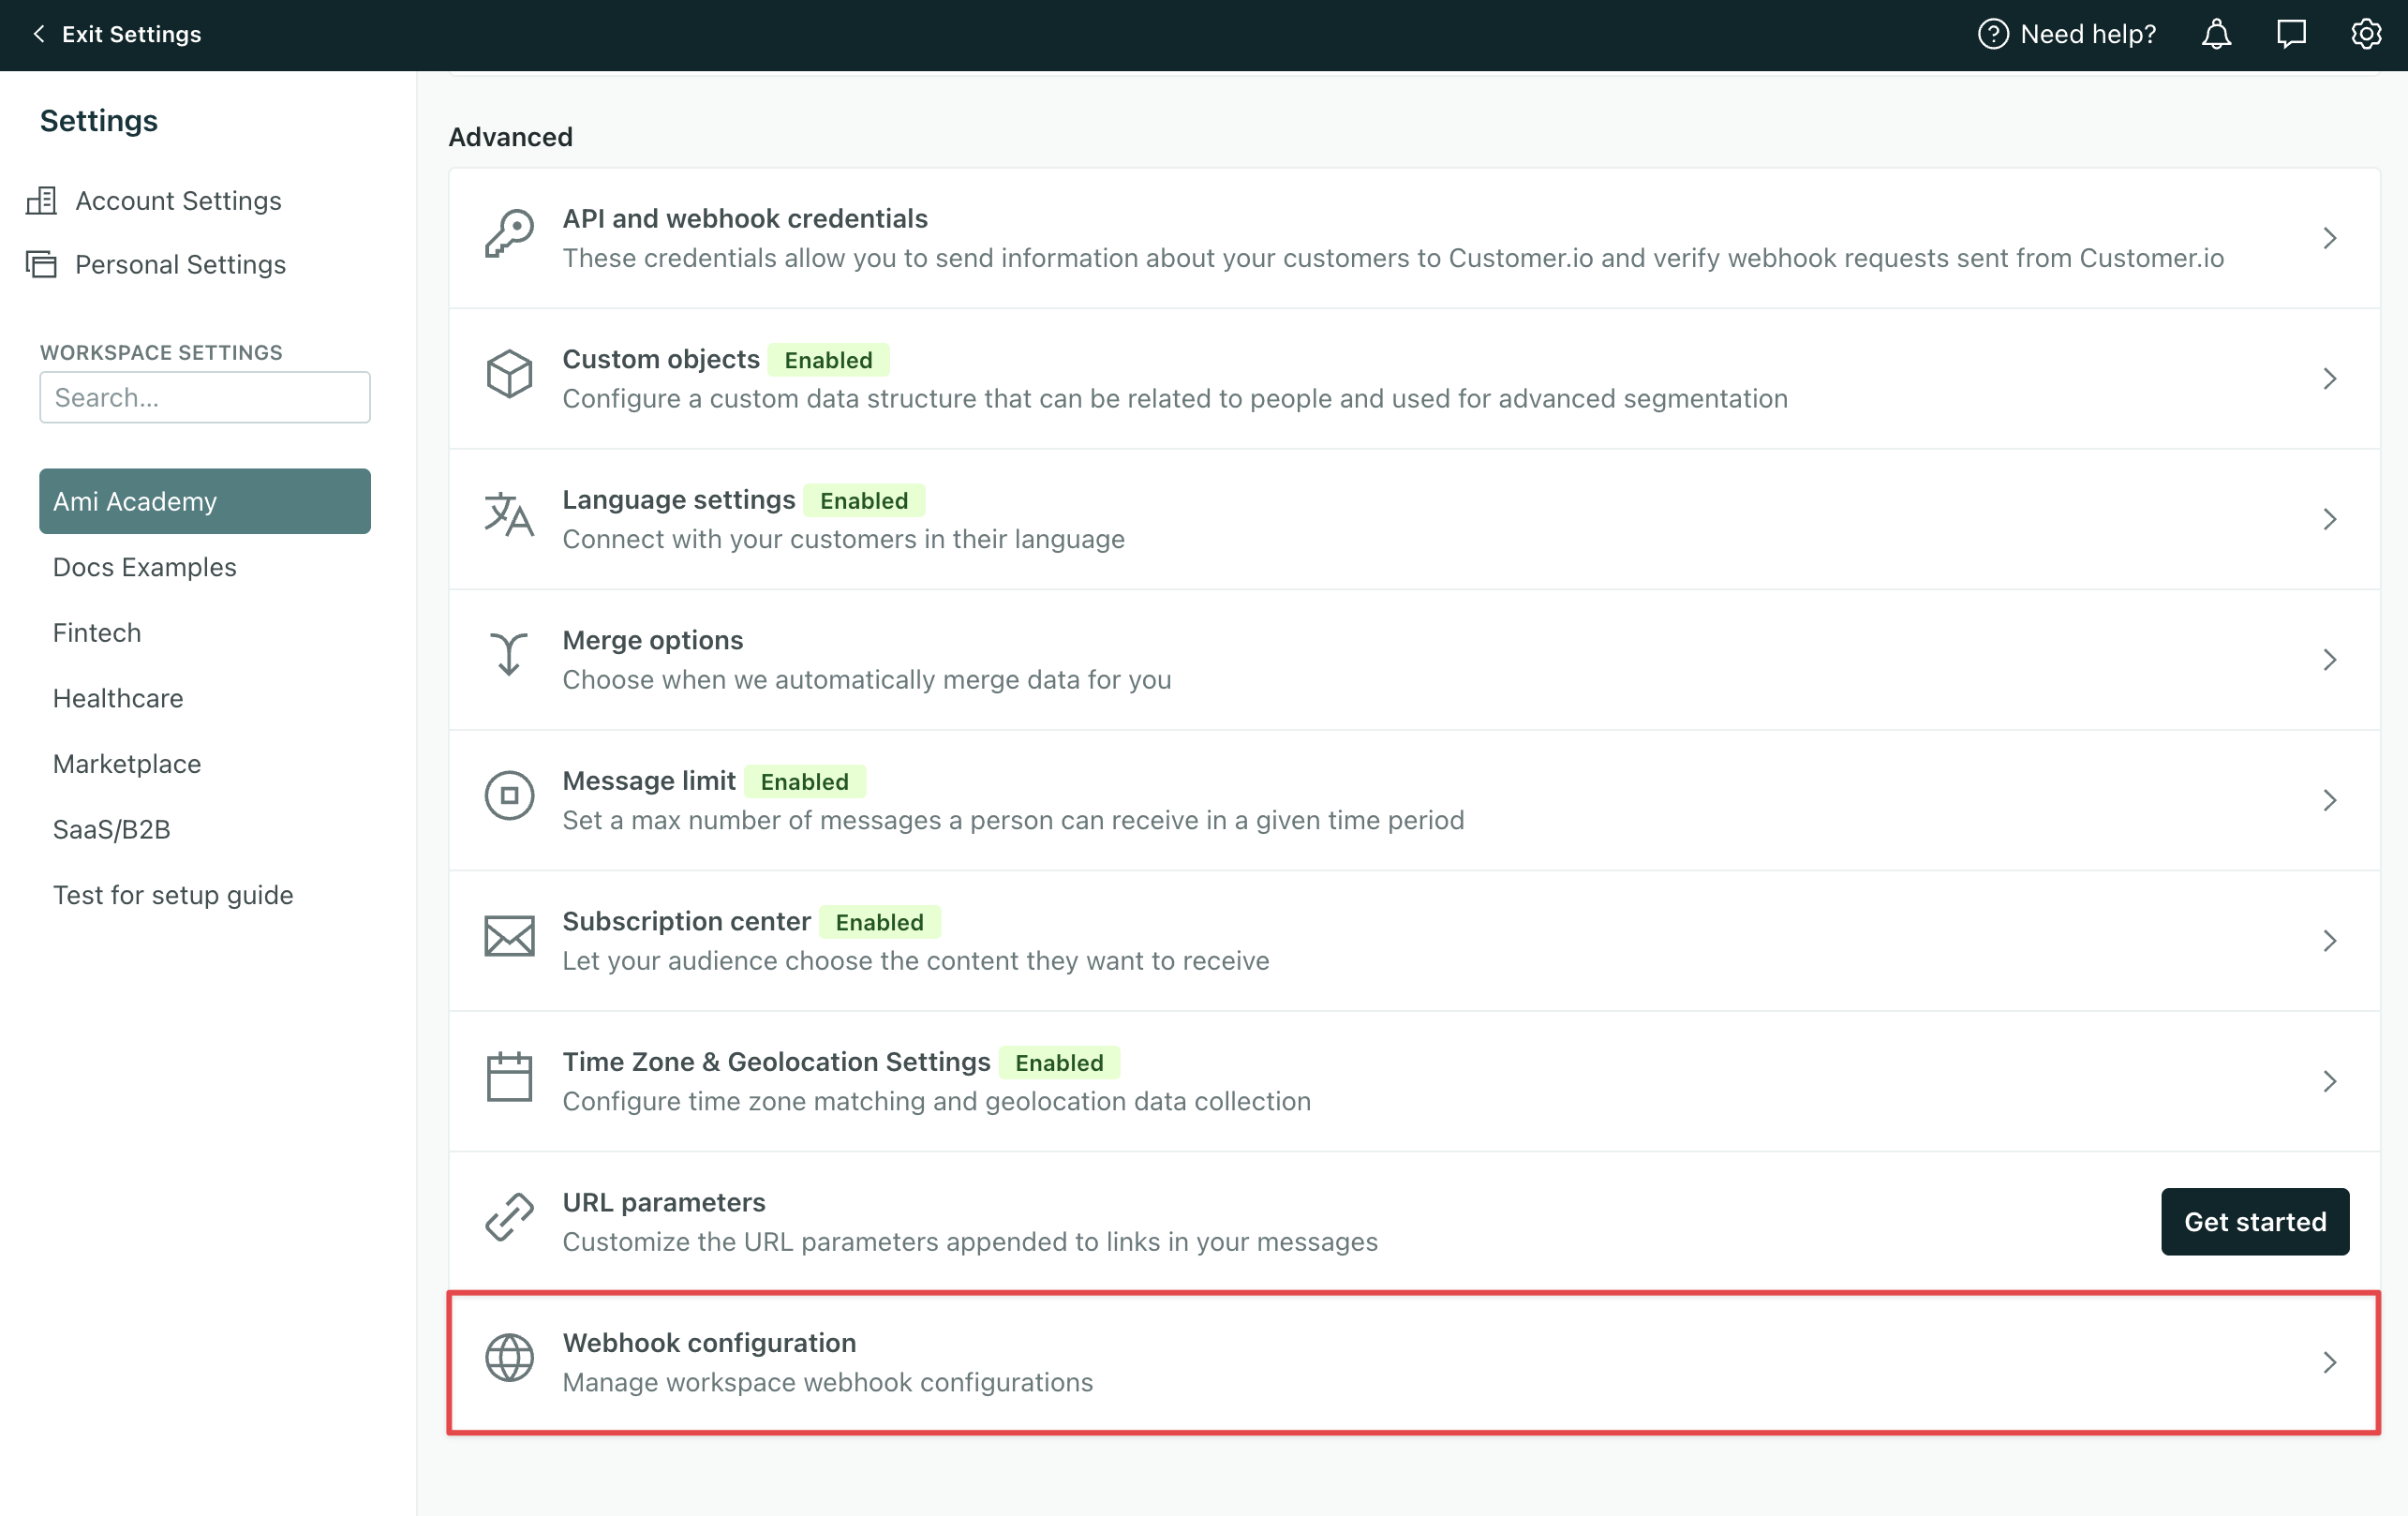
- Go to Workspace Settings > Webhook configuration.
- Click Create webhook.
- Add a Name for your webhook.
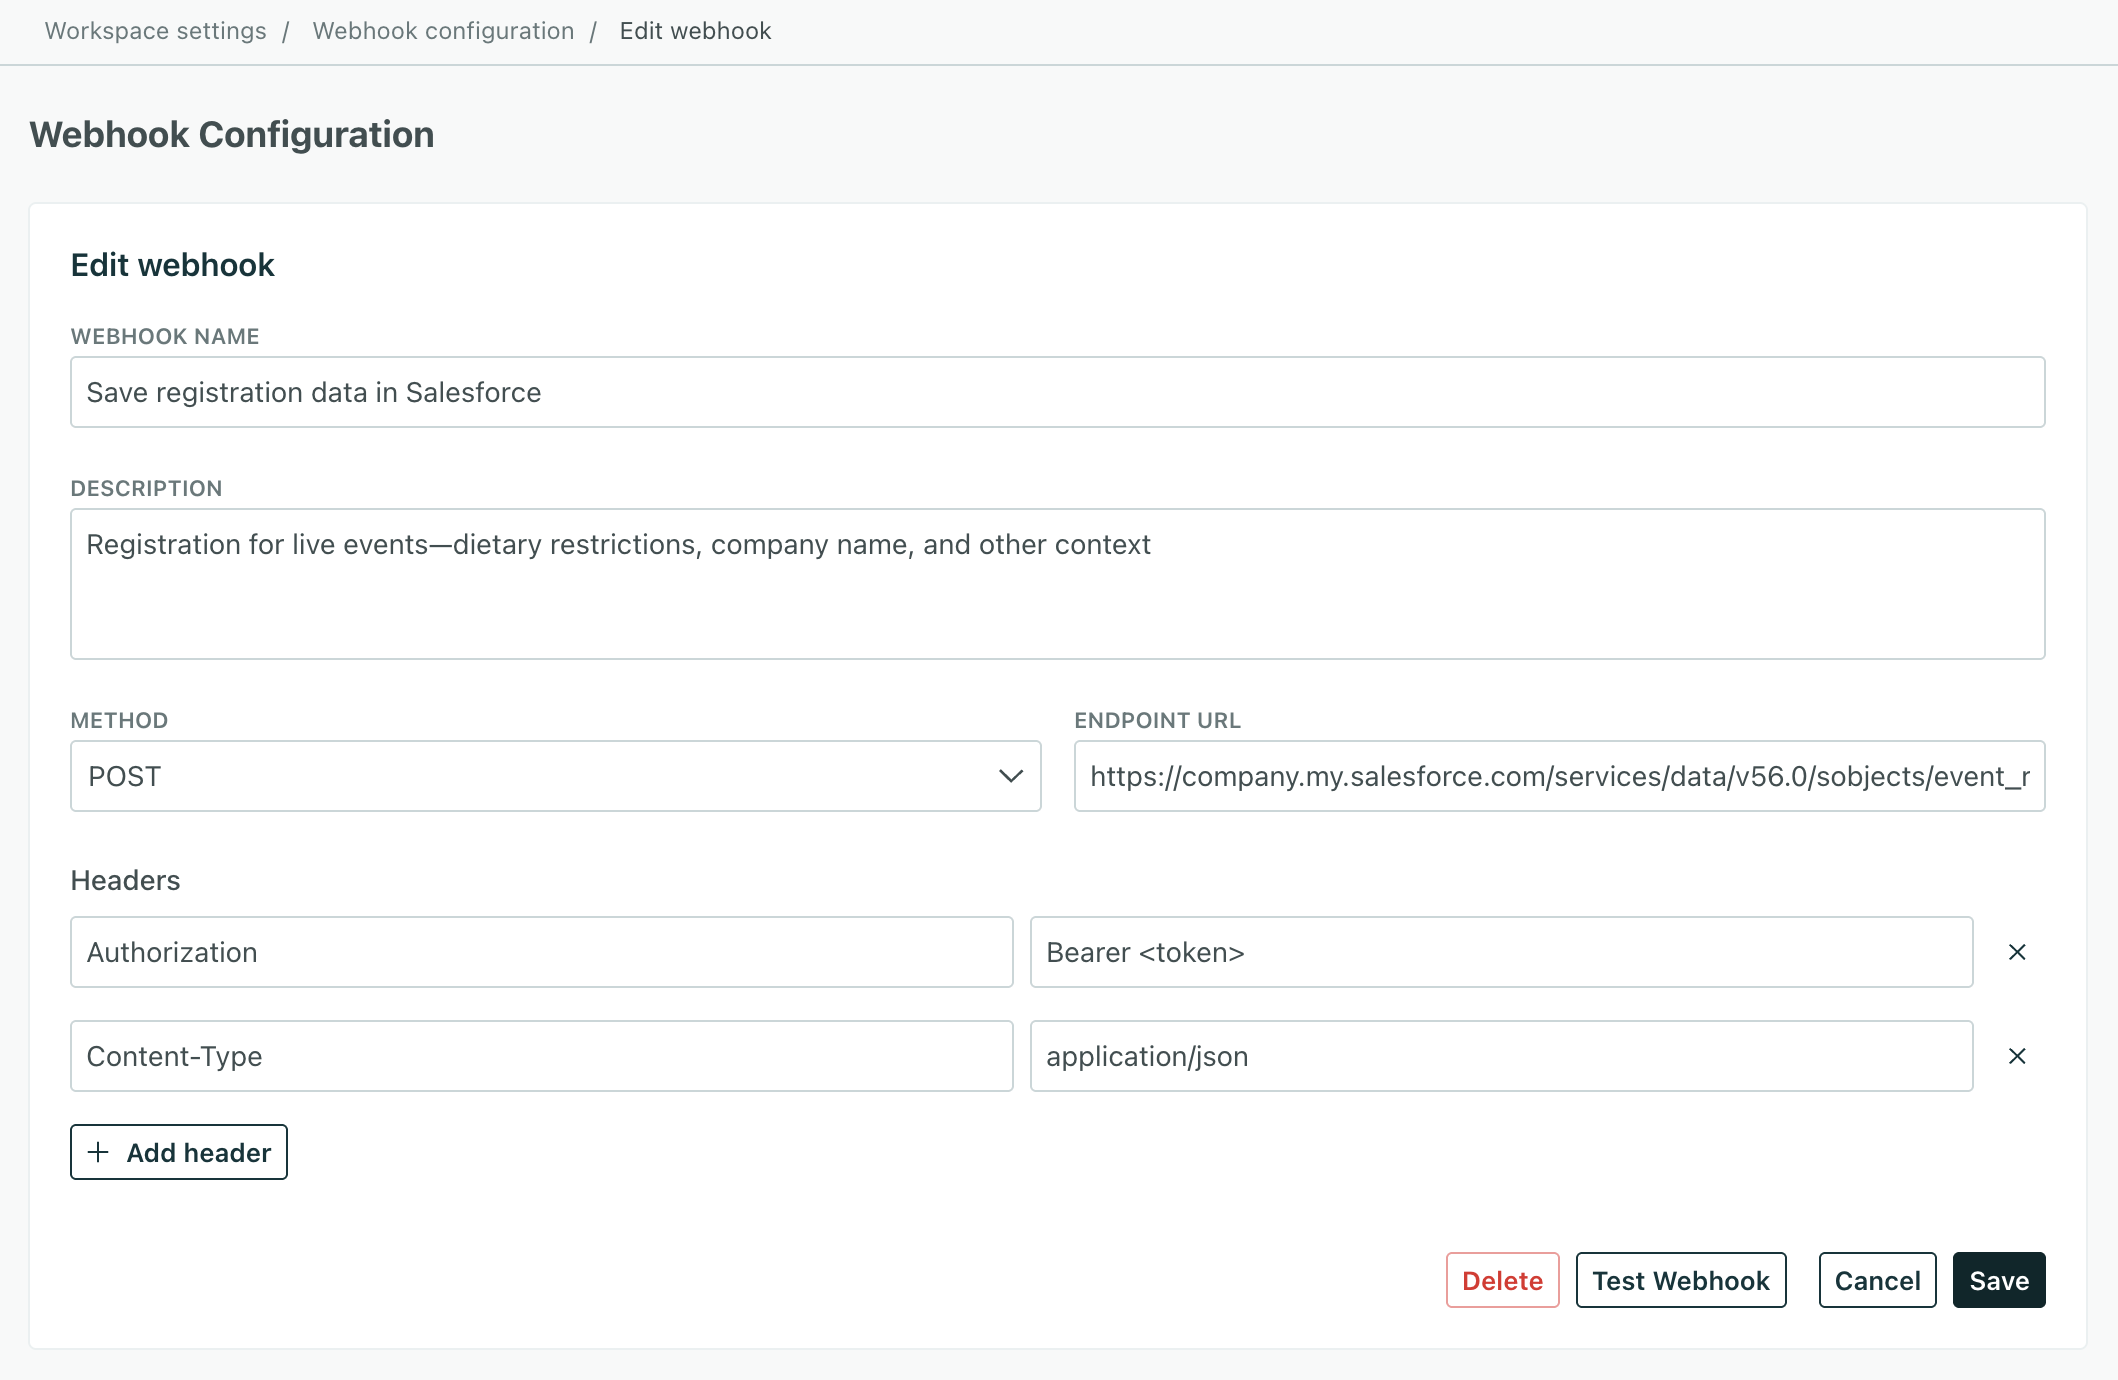
- (Optional) Add a Description to help you distinguish your webhooks.
- Specify the right Method and Endpoint URL.
- Add any other Headers you need. You can use liquid
A syntax that supports variables, letting you personalize messages for your audience. For example, if you want to reference a person's first name, you might use the variable
in header names and values.{{customer.first_name}}. - (Optional) Send a Test Webhook to ensure your webhook is functional.
Now you can add the webhook to your automations and API-triggered broadcasts, which is where you’ll specify the Body or store data on attributes for use later on.
Template headers with liquid
Header names and values in a webhook configuration support liquid A syntax that supports variables, letting you personalize messages for your audience. For example, if you want to reference a person's first name, you might use the variable {{customer.first_name}}.customer and event attributes.
When you send a webhook from an automation or broadcast, your headers can also include the message and campaign objects. See our liquid reference guide for more information about the context available at render time.
For example, you can pass {{message.id}} or {{campaign.id}} in a header value to help the receiving system correlate the request with the message or automation that triggered it:
X-CIO-Message-Id: {{message.id}}
X-CIO-Campaign-Id: {{campaign.id}}
Edit webhooks
To edit a webhook, click Edit from the Webhook configuration page. Make sure you test the webhook before you save; changes take effect immediately across your automations and broadcasts.
Delete webhooks
To delete a webhook, click Edit and choose Delete from the webhook’s page. You can’t delete a webhook in use; you must remove it from all automations and broadcasts first.
Use saved webhooks
You can use saved webhooks in automations or API-triggered broadcasts.
To assign a configured webhook to an automation or broadcast, follow these steps:
- Drag a Send and receive data action into your workflow.
- Click the action and then choose Edit Request.
- Click the dropdown at the top and select a pre-configured webhook. You’ll see the name and description set in the configuration manager.
Then you can finish setting up the webhook:
- Add a request body.
- Set journey attributes to temporarily store and use data in an active journey.
- Set customer attributes to use the data outside of the automation.
- Preview the webhook with sample customer data.
- Send a test.